The post The Best Soils for Raised Beds in Your Garden appeared first on Bob Vila.
]]>For plants, soil provides another vital element. It doesn’t just deliver nutrients to hungry fruits, vegetables, and flowers; good garden bed soil increases the airflow around plant roots to avoid compaction and improve drainage as it retains moisture for basic hydration.
Gardening with raised beds provides more control over the soil. However, the best soil for raised beds depends on the plants you want to grow. Many soil types are suitable for a variety of uses, while others are more specific in their purpose. To bolster our own research, we interviewed Elizabeth Jones, the seed librarian at the Jefferson Public Library in Jefferson, Georgia, and owner of Excel at Gardening, who gave us her expert advice on soil.
Our favorite was FoxFarm’s Happy Frog potting soil for its organic mix of pH-balanced ingredients. Read on for more of the top soils for raised beds and some things to keep in mind as you shop.
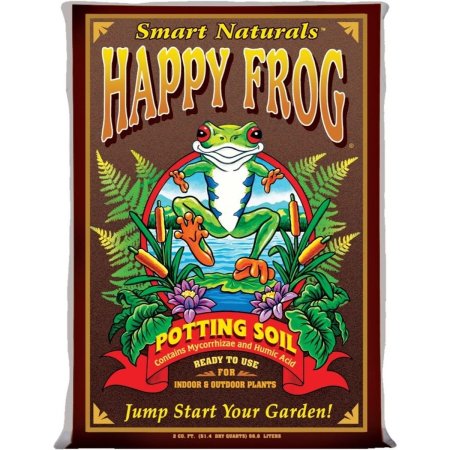
- BEST OVERALL: FoxFarm Happy Frog Potting Soil
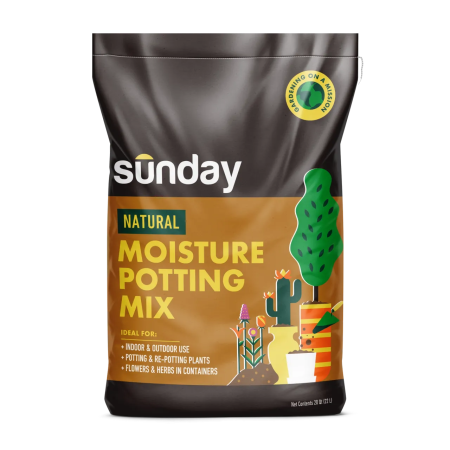
- RUNNER-UP: Sunday Natural Moisture Potting Soil Mix
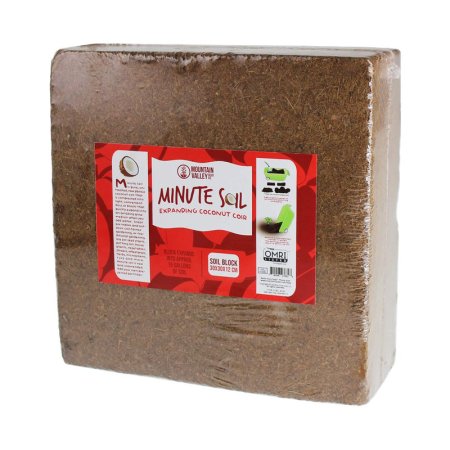
- BEST BANG FOR THE BUCK: Mountain Valley Minute Soil Compressed Coco Coir
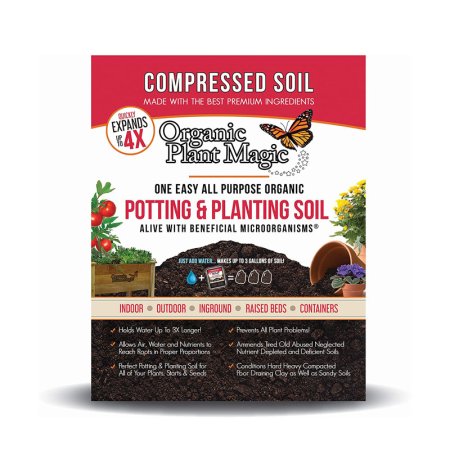
- BEST ORGANIC: Organic Plant Magic Compressed Potting Soil
- BEST TOPSOIL: Michigan Peat Garden Magic Top Soil
- BEST COMPOST: Charlie’s 10-Pound Compost
- BEST PEAT MOSS: Hoffman Canadian Sphagnum Peat Moss
- BEST VERMICULITE: Ferry Morse Professional Grade Vermiculite
- BEST FOR VEGETABLES: Coast of Maine Castine Organic Raised Bed Mix
- BEST FOR HERBS AND FLOWERS: Miracle-Gro Raised Bed Soil

Product Comparison
| Ingredients | Quantity | Organic? | |
| FoxFarm Happy Frog Potting Soil | Earthworm castings, bat guano, and aged forest products | 2 cubic feet |  |
| Sunday Natural Moisture Potting Soil Mix | Sphagnum peat moss, peat humus, coir, perlite, ground limestone | 20 quarts |  |
| Mountain Valley Minute Soil Compressed Coco Coir | Compressed coco coir | 15 gallons (from 1 block); other sizes available | |
| Organic Plant Magic Compressed Potting Soil | Coco coir, worm castings, and fertilizer | 12 cups (expands to 3 gallons) | |
| Michigan Peat Garden Magic Top Soil | Reed sedge peat and sand | 4.5 cubic feet | |
| Charlie’s 10-Pound Compost | Chicken manure, biochar, organic grasses and organic crop production residue | 0.4 cubic feet | |
| Hoffman Canadian Sphagnum Peat Moss | Peat moss | 10 quarts | |
| Ferry Morse Professional Grade Vermiculite | Vermiculite grades | 8 quarts | |
| Coast of Maine Castine Organic Raised Bed Mix | Fully cured compost, sphagnum peat moss, dehydrated poultry manure, lobster and crab shell meal, greensand, biochar, worm castings and mycorrhizae | 1 cubic foot | |
| Miracle-Gro Raised Bed Soil | Sphagnum peat moss, compost, worm castings, alfalfa and kelp meal | 1.5 cubic feet | |
Our Top Picks
Here are some of our top soil recommendations to help fill raised garden beds. There are specialized soils as well as general mixes to help plants thrive, including soils from brands long trusted in the gardening world. All you’ll need to do is slip on your gardening gloves, open up the bags, fill up your beds, refill your watering can, and get growing.
BEST OVERALL
FoxFarm Happy Frog Potting Soil
Product Specs
- Ingredients: Earthworm castings, bat guano, and aged forest products
- Quantity: 2 cubic feet
- Organic: Yes
What We Like
- Mycorrhizal fungi content promotes root development
- Excels at starting seeds
- Great for winter sowing
- pH-balanced product ideal for fruits, vegetables, and flowers
What We Don’t Like
- Comes at a premium price
The FoxFarm Happy Frog organic garden soil contains a mix of microbes with mycorrhizal fungi and sediment. The fungi content enhances the nutrient uptake of the root system by creating a symbiotic relationship with the root mass. Essentially, it expands the root’s reach, promoting their development.
That fungi content gets balanced with sediment that maintains the light texture and aeration needed to let plant roots expand as they consume nutrients. The mix contains a pH balance for optimal growth that’s supportive of fruit, vegetables, or flowers. Keep in mind that the soil has been inoculated with mycorrhizal fungi, so there is a possibility to see white growth in the mix, which is normal.
Get the FoxFarm soil for raised beds at Amazon, Target, or Walmart.
RUNNER-UP
Sunday Natural Moisture Potting Soil Mix
Product Specs
- Ingredients: Sphagnum peat moss, peat humus, coir, perlite, ground limestone
- Quantity: 20 quarts
- Organic: No
What We Like
- Ideal for repotting plants into containers and raised beds
- Also includes ground limestone for added nutrients
- Helps drain and aerate roots for better plant growth
What We Don’t Like
- Users will want to pair it with a fertilizer for best results
With ingredients like peat humus for nutrients, perlite for aeration, and peat moss for moisture retention, Sunday’s soil mix provides the right growing conditions for healthy plant growth and proper drainage. This is especially useful when used in a raised bed setting, where aeration and drainage are vital to plant success.
This 20-quart bag of soil is suitable for both indoor and outdoor use and is especially great for repotting plants and herbs in containers. A final special ingredient in this product is ground limestone, which adds essential calcium and magnesium nutrients to the soil for optimal plant growth. Sunday does note to consumers, however, that this is not a substitute for fertilizer.
Get the Sunday soil for raised beds at Sunday.
BEST BANG FOR THE BUCK
Mountain Valley Minute Soil Compressed Coco Coir
Product Specs
- Ingredients: Compressed coco coir
- Quantity: 15 gallons (from 1 block); other sizes available
- Organic: Yes
What We Like
- Compact, lightweight, and easy to store until needed
- Available in multiple sizes, either as large bricks or smaller pucks
- Suitable for a range of flowers, plants, and herbs
What We Don’t Like
- Coco coir is nutrient-poor, requiring supplements for better plant growth
- Retains moisture extremely well; not suitable for all plants
Mountain Valley Minute Soil compressed coco coir fiber grow medium squeezes the growing medium down to a compact brick full of goodness. Made of raw coconut coir, this fibrous block expands to a light texture designed to aerate and it retains moisture. At the same time, it provides a nutritious boost for topsoil.
Gardeners can rehydrate the entire block to create 15 gallons of growing medium or hydrate only the amount needed for a specific project. The compressed packaging stores easily and provides options for a wide range of gardening needs and uses. These compressed blocks come in several sizes to suit most gardener’s available storage space.
Get the Mountain Valley soil for raised beds at Amazon or True Leaf Market.
BEST ORGANIC
Organic Plant Magic Compressed Potting Soil
Product Specs
- Ingredients: Coco coir, worm castings, and fertilizer
- Quantity: 12 cups (expands to 3 gallons)
- Organic: Yes
What We Like
- Holds 50 percent more water than regular soil
- Can be used on existing soil as a nutrient boost
- Can be rehydrated as needed
What We Don’t Like
- Not available in multiple size options
Organic Plant Magic compressed organic potting soil for gardens and plants contains natural, organic fertilizer ingredients to feed and nourish plants. This compressed soil can be rehydrated and used as the nutrient layer or applied directly to existing soil without rehydrating. This dry, organic mix alone holds 50 percent more water than regular soil, which is one reason it works so well for raised beds.
The soil contains natural coconut coir, worm castings, mycorrhizae, helpful bacteria, amino acids, and humic acids. These ingredients work together for a slow release of nutrients so that plants don’t get overwhelmed. This package requires 12 cups of water to create 2 pounds of compressed soil. The mixture then expands to create 3 gallons of usable healthy soil.
Get the Organic Plant Magic soil for raised beds at Amazon or Organic Plant Magic.
BEST TOPSOIL
Michigan Peat Garden Magic Top Soil

Product Specs
- Ingredients: Reed sedge peat and sand
- Quantity: 4.5 cubic feet
- Organic: Yes
What We Like
- Works well with heavy clay soils to help loosen the mixture
- Helps increase water retention in lighter soils
- Can be used as a top dressing and to fill holes in lawns and gardens
What We Don’t Like
- Must be mixed with other soil
Topsoil fills a raised bed rather than nourishing the plants in it. The Michigan Peat Garden Magic top soil does that with a mix of reed sedge peat and sand. For gardeners who are using dirt from the natural landscape, this garden soil mix can loosen heavy clay soils and improve the water retention of light, airy soils.
Sometimes topsoils can arrive with twigs and debris that aren’t harmful but don’t help your garden. The Michigan Peat topsoil (usually) arrives without clumps or these surprise additions, sticking with pure ingredients. However, the topsoil is designed to be used as conditioner for heavy soil or mixed with other growing mediums, but not used on its own.
Get the Michigan Peat soil for raised beds at Amazon.
BEST COMPOST
Charlie’s 10-Pound Compost

Product Specs
- Ingredients: Chicken manure, biochar, organic grasses and organic crop production residue
- Quantity: 0.4 cubic feet
- Organic: Yes
What We Like
- Composted for 8 to 12 weeks
- Powerful formula, yet it’s still safe to use in direct contact with plants
- Affordable compared to other big name brands
What We Don’t Like
- Made to be used as an amendment/natural fertilizer only
Charlie’s Compost has natural ingredients composted and ready for plants to soak up nutrients. It contains a garden soil mix of chicken manure, cornstalks, forest products, hay, straw, clay, and microbe inoculants. Before being bagged, the ingredients are composted for 8 to 12 weeks, at which time they’re ready for application to the garden.
The blend is designed to be mixed with other soils or as an additive around plants. If used in direct contact with plants, be sure to use it sparingly: It’s powerful enough to burn delicate plants. There have also been (rare) instances of bags arriving with ingredients that aren’t completely broken down.
Get the Charlie’s Compost soil for raised beds at Amazon.
BEST PEAT MOSS
Hoffman Canadian Sphagnum Peat Moss
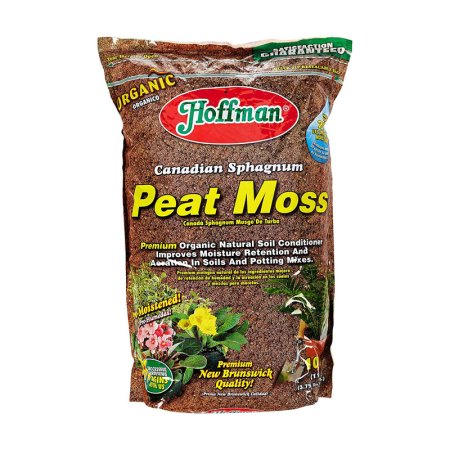
Product Specs
- Ingredients: Peat moss
- Quantity: 10 quarts
- Organic: Yes
What We Like
- Provides ample drainage and aeration
- Also adds great moisture retention
- Relatively affordable bag
What We Don’t Like
- Designed to be mixed with heavy soil
Hoffman Canadian sphagnum peat moss contains 99.8 percent natural ingredients, consisting almost entirely of natural peat. This mix helps break up compacted soils, aerate roots, and improve drainage. However, the peat also holds water for better moisture retention in a raised bed setting.
This bag provides a big bang for the buck. It’s meant to mix with other soils, so even in a large raised bed, it can go a long way. Keep in mind that heavily compacted soils will require more peat to loosen the soil than light, airy soils.
Get the Hoffman peat moss at Amazon.
BEST VERMICULITE
Ferry Morse Professional Grade Vermiculite

Product Specs
- Ingredients: Vermiculite grades
- Quantity: 8 quarts
- Organic: No
What We Like
- Can be added to other soils for a potent mix
- Suitable for seedlings and plants that prefer a high moisture content
- Can help promote aeration in more compacted soils
What We Don’t Like
- May provide too much moisture for some plants
- Not meant to be the primary growing medium
The professional-grade vermiculite by Ferry Morse contains a mix of vermiculite grades, fine to coarse, in one mix. However, it tends to contain more fine-grade particles, which makes a difference in the plants for which it works best—mostly plants that prefer a high moisture content. With the right soils, it can be used to improve aeration and keep plants well hydrated.
This vermiculite provides adequate moisture levels for seedlings, too. However, the fine grade doesn’t take much moisture to keep plants healthy. Gardeners need to know their plants and soil mixes well when using this vermiculite. In some cases, it can retain too much moisture for plants that are easily overwatered.
Get the Ferry Morse vermiculite at Amazon, Ace Hardware, or Ferry Morse.
BEST FOR VEGETABLES
Coast of Maine Castine Organic Raised Bed Mix
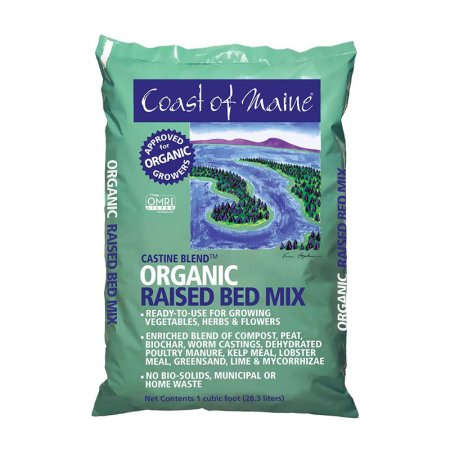
Product Specs
- Ingredients: Fully cured compost, sphagnum peat moss, dehydrated poultry manure, lobster and crab shell meal, greensand, biochar, worm castings and mycorrhizae
- Quantity: 1 cubic foot
- Organic: Yes
What We Like
- Specially designed for outdoor raised garden beds
- Balanced pH is safe to use for vegetables, fruits, plants, and flowers
- OMRI listed for guaranteed natural and organic materials
- Website has a handy calculator for how much users need for their space
What We Don’t Like
- Moisture retention and nutrients not suitable for indoor use or potted plants
Coast of Maine Organic & Natural Mix nourishes plants with natural ingredients designed for plants meant for human consumption. That doesn’t mean it can’t work well for flowers and inedibles, but when it comes to vegetables, organic ingredients ensure top nutrients. It’s OMRI listed, providing an extra layer of assurance that ingredients meet requirements to qualify as natural and organic.
This raised bed mix contains fully cured compost, dehydrated poultry manure, sphagnum peat moss, biochar, worm castings, lobster and crab shell meal, greensand, and mycorrhizae.
A wide and varied mix of ingredients balances pH and provides nutrients for an equally diverse range of plants. Keep in mind that this soil is designed specifically for outdoor raised beds. It’s not one to use with indoor potted plants because it won’t provide the right moisture retention or nutrients.
Get the Coast of Maine soil for raised beds at Amazon, The Home Depot, Target, or Coast of Maine.
BEST FOR HERBS AND FLOWERS
Miracle-Gro Raised Bed Soil
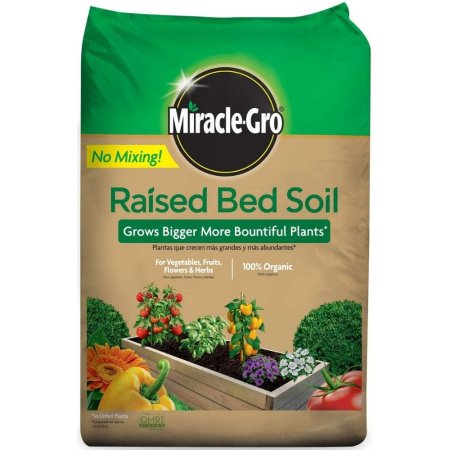
Product Specs
- Ingredients: Sphagnum peat moss, compost, worm castings, alfalfa and kelp meal
- Quantity: 1.5 cubic feet
- Organic: Yes
What We Like
- Premixed bag is specially formulated for raised bed gardens
- Mixture can help control weeds and pests
- Certified by the Organic Materials Review Institute
What We Don’t Like
- Does not control moisture as well as other options
The OMRI-certified Miracle-Gro raised bed soil mix provides organic matter needed for good drainage while growing flowers, herbs, vegetables, and fruits. The raised bed soil requires no mixing. Designed specifically for raised beds, this mixture helps keep pests and weeds under control.
The premixed blend comes in 1.5 cubic foot bags. It takes about three bags to fill a 2-foot by 2-foot bed that is 1 foot high.
Get the Miracle-Gro soil for raised beds at Ace Hardware, Lowe’s, or Tractor Supply Co.
Jump to Our Top Picks
How We Chose the Best Soil for Raised Beds
We researched the most sought-after soil for raised beds in their respective categories and discovered that the best options are determined by their ingredients, quantity, versatility, and other special features included by top brands.
While searching for the best garden bed soil, we reached out to Teri Valenzuela, the natural science manager at Sunday, a nationwide lawn and garden care company. Her advice? “Look for ingredients like fresh compost or peat humus for good nutrient levels, vermiculite or perlite for aeration, and peat moss or coconut coir for moisture retention. These ingredients provide the right growing conditions for healthy plant growth and proper drainage.”
She adds that shoppers will want to “avoid mixes with heavier in-ground garden soil mixes, bio-solids containing contaminants, and excessive wood products. They may hinder plant growth by impacting drainage and nutrient availability.”
With these expert tips in mind, we made sure to include a wide range of soil recipes on our list of recommendations that meet these standards, avoiding poorer quality mixes. As such, many of our chosen mixes are formulated to provide drainage and aeration and select options can be used for indoor and outdoor plants, vegetables, fruits, flowers, and herbs.
Whether you need 1 cubic foot or over 15 gallons of soil, the above list includes options that resist compacting, are pH-balanced, and can be used on existing soil with grown plants as well as seedlings. Many of our picks can be mixed with other soils to create a custom blend that works perfectly for your own plants.
What to Consider When Choosing Soil for Raised Beds
Growing flowers and food in a raised garden bed differs from growing them directly in the ground. Consider these key points before dumping dirt into your raised beds.
Raised Bed Height
Knowing the size of your raised bed garden will help you determine how much soil you will need to fill it. Thankfully, there are plenty of useful calculators that can help with this task, taking into account shape and dimensions. In general, the taller the raised bed, the more raised bed soil you’ll need.
Taller raised beds or tabletop designs can eliminate back strain and make gardening more comfortable. Alternatively, you can fill the bottom of a tall ground level bed with filler like dead leaves or cardboard to minimize the amount of raised bed soil mix you’ll need.
Plant Type and Root Depth
The plants grown in the garden will determine the best raised bed soil depth needed for optimum growth. Generally, a good rule of thumb is to build a raised bed that’s at least 6 inches deep. This depth allows for drainage and retains moisture at levels needed for many common crops. However, some plants have deeper roots than others. For example, if you plan to grow root vegetables like carrots, a depth of 12 inches is preferable.
Raised beds are great for any kind of plant but work particularly well for growing vegetables. Elevating the growing space keeps weeds at bay and the soil warm and prevents compaction. Gardeners also get to start with pristine, neutral-pH soil. However, if you’re using previously used soil, do a soil test to determine whether you need any amendments or fertilizer to renew the nutrients.
Soil Components
Many gardeners have tried-and-true soil mix recipes, but in general, it’s best to avoid settling for uber-cheap bags of raised bed soil. A good soil mix contains topsoil, a small amount of substrate, and a significant amount of compost, which contains nutrients that improve soil conditions.
The least expensive bags of soil are usually low quality and full of weed seed, debris, and other nasty contaminants. They’re also unlikely to contain many valuable nutrients.
Topsoil is basically filler soil needed for everything from raised bed gardening to indoor potted plants. It makes up the bulk of most raised bed soil mixes. It’s not very rich in nutrients but is a necessary component that contains organic matter.
The substrate makes up a small percentage of the raised bed soil mix but is extremely important. It helps control moisture content, which is key in a raised bed. Some of the substrates that might appear in soil mixes include peat moss, rock phosphate, vermiculite, perlite, and coco coir. Again, the type of plants you choose to grow will help determine the appropriate substrate to support them.
Be careful to avoid adding too much peat moss, which can increase the acidity of the soil and throw off the pH balance. Some gardeners prefer to fill raised garden beds with a topsoil-free mix, using equal parts compost, perlite, and coco coir. It makes for a fluffy, moisture-retaining growing medium.
Compost from multiple sources is best because it provides a wide variety of nutrients. It can even come from your own backyard pile that consists of leaves, grass clippings, and other yard waste.
In the world of soil, the term “organic” refers to organic materials such as compost and mulch. “Nonorganic” materials aren’t necessarily harmful. They’re just inert and include things like pebbles, rock phosphate, and perlite. Nonorganic soil that contains no organic matter lacks nutrients but is also free of contaminants. When the terms are used in this way, the term “nonorganic” doesn’t mean synthetic fillers or chemicals; it means that the substances are not nor have they ever been alive.
However, the term “organic” can also mean free of synthetic chemicals and pesticides. The USDA’s National Organic Program (NOP) covers farm practices, including soils and other substances applied to crops like organic fertilizer. In addition, the Organic Materials Review Institute (OMRI), a volunteer organization, lists products that organic farmers can use to produce food. Both the NOP or OMRI list possible soils, amendments, and fertilizers that can be used and still maintain an “organic” garden.
Topsoil
Topsoil isn’t the same as garden soil. As the name suggests, it’s the top layer of soil. This general-purpose soil is ideal for filling in garden beds or preparing a bare lawn for growth.
It’s not very nutrient-rich, but it contains important organic matter, so it’s not entirely useless. If you buy topsoil bags and plan to use them to fill your raised beds, pour the topsoil in first since this soil makes a great base layer and filler. Then cover the topsoil with a more nutrient-rich mix of compost, peat moss, and substrates that will nourish the plants.
Fertilizer
The best raised bed soils contain nutrients that fuel growth. Organic, natural fertilizers include various types of compost, sea kelp, and worm castings. These fertilizers enhance the quality and condition of the soil without you having to worry about contamination. The slow-release properties of organic fertilizers prevent potentially harmful buildup and ensure that your plants aren’t harmed by a flood of nutrients all at once.
According to Jones, “You want to check what type of fertilizer is in the soil and how long it takes for it to break down so you don’t overfertilize and burn your plants. You’ll also know how often you need to fertilize again. I prefer getting premixed soil to minimize how much work (physical labor) I’ll have to do. Hand mixing and moving dirt is hard work.”
It’s also important to note that some raised bed soil mixes may contain synthetic fertilizers. They provide a quick nutrient boost but don’t improve soil condition and texture like organic options. This is why it is best to choose or make a soil mix with organic nutrient sources.
FAQs
It depends entirely on the size and shape of the raised bed. If you know your garden bed’s dimensions, you can plug them into a soil calculator to find out how much you need.
If you’re buying potting soil in bags, it’s typically premixed, so there’s not much to do other than water it before planting. Topsoils that act as fillers require you to layer substrate and/or compost on top. Once you’ve done that, it’s all about water. Watering the soil prior to planting, using either a watering can or a garden hose, ensures your plants have enough moisture to start growing.
A topsoil product is a great filler, but it’s not designed to be the main nutritive soil in a raised bed. The plants need nutrients, and topsoil is not rich in organic matter like compost or potting soils.
Yes. In fact, the Square Foot Gardening Foundation recommends a compost-only option for gardeners on a budget or those who don’t have access to other mix-ins. However, while this can be cheaper (if you have access to free compost), the soil in a compost-only bed can become compacted.
Jones shares her insights on this topic: “Signs that you need more soil nutrients: The plants aren’t thriving as they did in years past. Could be stunted, low fruit/vegetable production, or generally unhealthy.”
She adds, “All beds are going to lose soil. It’s the nature of raised beds. I add more soil to mine a minimum of every 2 years, more if needed. I will side-dress with compost and manure every year. Plus, I add things like egg shells, coffee grounds, and wood ash.”
The post The Best Soils for Raised Beds in Your Garden appeared first on Bob Vila.
]]>The post The Best Soil Test Kits, Tested appeared first on Bob Vila.
]]>Testing garden soil is the best way to determine what it needs—if anything—and how much. A variety of soil testing kits are available, but how reliable are they? Home gardeners rely on these kits when deciding whether to amend their soil, so to narrow down the best soil test kits, we tested for accuracy, dependability, and ease of use.
Soil testers range from simple pH strips to complex kits that pinpoint deficiencies. Serious gardeners will want to reach for comprehensive tests. As Jon Traunfeld, director of the Home & Garden Information Center at University of Maryland, explains, “We recommend that gardeners have their soil tested by accredited soil testing labs, public or private. A basic test that measures soil pH, important soil nutrients, and organic matter costs $20 to $25. The labs also provide recommendations for lime and fertilizer if needed.” These tests are available directly from labs or through your county extension office.
For the average home gardener though, it can be easier to buy a soil test kit online, so that’s what we tested. To ensure accuracy, we compared product results to test results acquired from the Kansas State University soil testing lab. Our favorite product ended up being the MySoil Test Kit—it was easy to use and the results were simple to interpret, and most importantly of all, they were accurate. Ahead, learn what to look for when shopping for a soil test kit, and find out why the following products are well suited for helping determine soil deficiencies.
- BEST OVERALL: MySoil Test Kit
↓ Jump to Review - RUNNER-UP: Soil Savvy Soil Test Kit
↓ Jump to Review - BEST BANG FOR THE BUCK: Atree 3-in-1 Soil pH Meter Tester Kits
↓ Jump to Review - BEST PH STRIPS: Garden Tutor Soil pH Test Strips Kit
↓ Jump to Review - BEST CHEMICAL TEST: Luster Leaf 1662 Soil Test Kit
↓ Jump to Review - BEST DIGITAL TEST: Luster Leaf 1605 Digital Soil Test Kit
↓ Jump to Review - BEST FOR CROPS: Whitetail Institute Laboratory Soil-Test Kit
↓ Jump to Review - BEST PRECISION PH: Bluelab Soil pH Pen
↓ Jump to Review
Product Comparison
| Type of Test | Tests For | Result Time | |
| MySoil Test Kit | Professional, mail-in | 13 nutrients plus pH level | Results by email within 6 to 8 days of mailing the sample |
| Soil Savvy Soil Test Kit | Professional, mail-in | 14 nutrients plus pH level | 11 days from when the sample was mailed |
| Atree 3-in-1 Soil pH Meter Tester Kits | Analog probe | Moisture, pH, light | Immediate for moisture and pH, 10 minutes for light |
| Garden Tutor Soil pH Test Strips Kit | Strips | pH levels | Within 20 seconds of testing |
| Luster Leaf 1662 Soil Test Kit | Chemical (at home) | pH, nitrogen, phosphorus, potassium | Varies by the test but all within a few minutes |
| Luster Leaf 1605 Digital Soil Test Kit | Chemical (digital results) | Nitrogen, phosphorus, potassium, and pH | Within a few seconds |
| Whitetail Institute Laboratory Soil-Test Kit | Professional, mail-in | Calcium, magnesium, phosphorus, potassium | Results available by email in one week |
| Bluelab Soil pH Pen | Digital probe | pH and temperature | Immediate |
Our Top Picks
The kits we tested had to be accurate and relatively simple to use to earn a spot on this lineup. Test kits and equipment vary by the type of test being performed, so some are better suited to home gardeners, while others appeal to commercial and agricultural growers. We tested a range of kits—some required mailing off a soil sample for professional analysis, some involved chemical testing at home, and others required nothing more than sticking a probe in the soil.
Best Overall
MySoil Test Kit
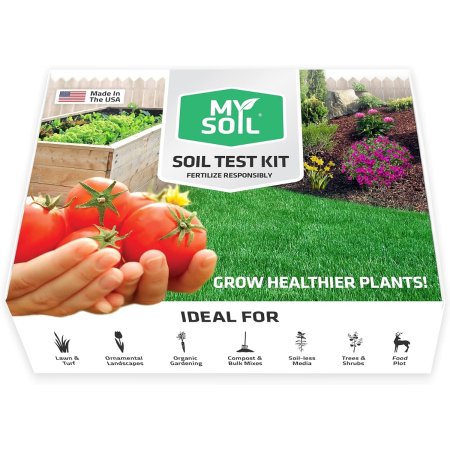
Our Ratings: Ease of Use 5/5; Accuracy 5/5; Value 5/5
Product Specs
- Type of test: Professional, mail-in
- Tests for: 13 nutrients plus pH level
- Result time: Results by email within 6 to 8 days of mailing the sample
What We Like
- Professional test for pH and a range of soil nutrients and minerals
- Process is clear and straightforward
- Results are detailed and easy to understand
What We Don’t Like
- No print option available on the website
For professional results, check out the MySoil test kit, which allows gardeners to gather soil samples and have them professionally tested. The MySoil kit offers an in-depth analysis, revealing the amounts of micronutrients, NPK, and macronutrients in the tested soil.
With the MySoil kit, we registered online and followed detailed instructions, gathering a large amount of soil from various areas of the property, mixing it together well, and filling the provided testing cup with the soil blend. Then we sent my soil sample to MySoil as well as an additional soil sample to Kansas State University’s agricultural department so we would have a quality comparison.
We received an email 6 days later with the results of the soil tests. We were impressed with the comprehensive results. The lab listed the levels of existing nutrients, including nitrogen, potassium, sulfur, calcium, iron, and more, and then compared our soil’s levels with optimal levels, which were also listed for each nutrient. We also received a bar chart that allowed us to visually compare the results, making them simple to understand.
Best of all, when the soil results from K-State came back, they were very close to the MySoil results, making us feel very comfortable with the quality of the MySoil lab results.
Get the MySoil soil test kit at Amazon or MySoil.
Runner-up
Soil Savvy Soil Test Kit
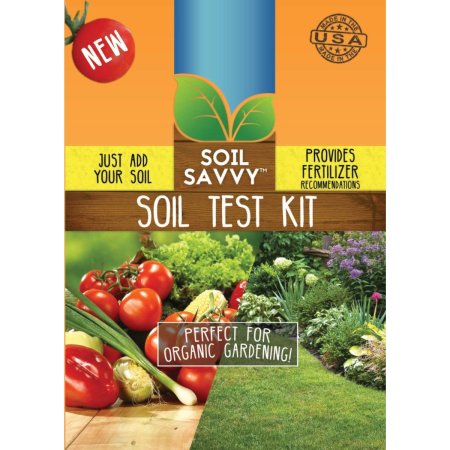
Our Ratings: Ease of Use 4/5; Accuracy 5/5; Value 5/5
Product Specs
- Type of test: Professional, mail-in
- Tests for: 14 nutrients plus pH level
- Result time: 11 days from when the sample was mailed
What We Like
- Soil-collection instructions are easy to follow
- Results provide detailed recommendations for both synthetic and organic amendments
- Tests for aluminum, which our top pick does not test for
What We Don’t Like
- Could provide a better explanation of the results
- It took the longest of all labs to get results
The Soil Savvy soil test kit offers professional soil analysis and custom fertilizer recommendations. It comes with a scoop, a collection cup containing liquid and a plastic ball, a prepaid postage envelope, and complete instructions for collecting and submitting a soil sample.
As with the other soil samples we sent in the mail for professional testing, used the same soil gathered from various spots and then blended well. We spooned the soil into the cup, sealed it, and then went online and registered the barcode that came with the kit.
The lab took a little longer than we’d anticipated to get back to us, but in 11 days, we got an email directing us to log on for my results. We were impressed by the accuracy of the test results—they were right in line with the K-State results, and we also received customized recommendations for amending my soil to make it healthier. The Soil Savvy recommendations were broken down by synthetic and organic fertilizers—telling me exactly how much of each to apply per 1,000 square feet to amend the soil.
Soil Savvy could have provided a better explanation of the results, however. We understand what nutrient ratios are, but a newbie gardener might benefit from further explanation of what the numbers mean. The lab tested for the 14 most common nutrients plus pH level.
Get the Soil Savvy soil test kit at Amazon or Soil Savvy.
Best Bang For The Buck
Atree 3-in-1 Soil pH Meter Tester Kits
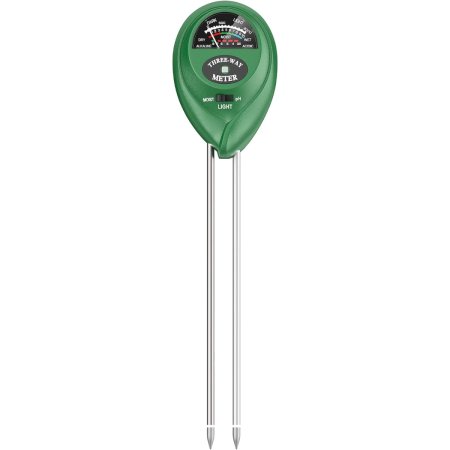
Our Ratings: Ease of Use 5/5; Accuracy 5/5; Value 5/5
Product Specs
- Type of test: Analog probe
- Tests for: Moisture, pH, light
- Result time: Immediate for moisture and pH, 10 minutes for light
What We Like
- Very simple to use and provides immediate or near-immediate results
- Doesn’t need batteries
- Low-effort option
What We Don’t Like
- Only measures moisture, pH, and light
Not all gardeners need or want a nutritional analysis of their soil. Some just want to know the pH level or how much light a plant would receive in a specific location. The Atree soil pH meter provides those answers accurately and at an affordable price.
We tested the Atree meter by inserting it in various spots in our flower garden. Over the years, we’ve added amendments, such as sulfur, to specific areas where acid-loving plants are growing, and we were curious whether this simple tester would pick up on that. It did—the soil around our hydrangeas, which we’ve amended heavily, tested at 6 on the pH scale, while the soil around our daisies registered at 6.8. Both seemed accurate based on our historical knowledge of our soil and the amendments we’ve made.
We then tested both moisture and light levels in various garden spots, and the Atree again seemed accurate. While this tester didn’t determine things like specific nutrient levels, we found that it would be great for gardeners who are happy with the health of their soil but would like to know if the light is adequate or whether the soil is draining well. The Atree did a good job measuring both.
Get the Atree soil test kit at Amazon.
Best Ph Strips
Garden Tutor Soil pH Test Strips Kit
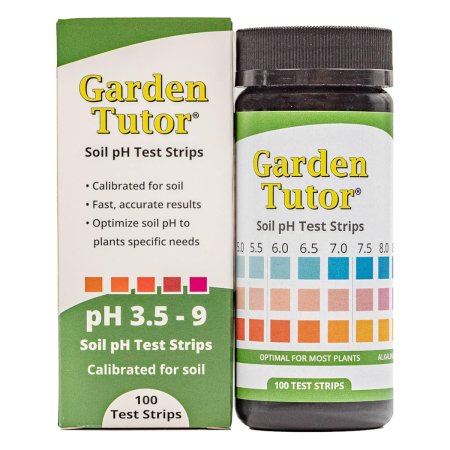
Our Ratings: Ease of Use 5/5; Accuracy 5/5; Value 4/5
Product Specs
- Type of test: Strips
- Tests for: pH levels
- Result time: Within 20 seconds of testing
What We Like
- Quick and accurate pH test results
- Simple to use and read
- Includes 100 test strips for lots of testing at an affordable cost
What We Don’t Like
- Poor packaging likely led to short shelf life
Garden Tutor’s test strips offer quick results in determining indoor or outdoor soil’s acid/alkaline content. The kit contains 100 test strips and also includes a 16-page handbook that lists optimal pH levels for growing various plants.
We found the Garden Tutor soil pH test strips to accurately determine the pH levels in various parts of our flower garden. The simplest of all the kits we tested required mixing soil from a specific garden area with water and then dipping it in a pH test strip. In a few seconds, sensitive tabs on the test strip turned color, and we visually matched them to the color-coded chart on the outside of the bottle to determine the amount of acid or alkalinity of the soil.
We tested the soil in an area we knew had a lower pH, as we’ve added pH-lowering amendments for years. The Garden Tutor test strips determined that level to be 6.1, which sounded close and aligned with other pH tests we performed. We then tested the soil in a spot we knew was more alkaline and got a higher pH reading.
One thing we wish the manufacturer would have included, however, was a moisture-absorbent pack with the strips. We used about 20 strips in our initial tests, and all were fine. Three weeks later, however, the pH pads had all turned brownish, which we suspected was due to moist air getting into the bottle.
Get the Garden Tutor soil test kit at Amazon or Garden Tutor.
Best Chemical Test
Luster Leaf 1662 Soil Test Kit
Our Ratings: Ease of Use 4/5; Accuracy 5/5; Value 4/5
Product Specs
- Type of test: Chemical (at home)
- Tests for: pH, nitrogen, phosphorus, potassium
- Result time: Varies by the test but all within a few minutes
What We Like
- Provided accurate results
- Looks intimidating but it’s relatively easy to use
- No need to send off a sample and wait days for results
- All the components fit into a small kit that’s easy to store
What We Don’t Like
- Did not have enough solution to complete 40 tests
In addition to determining soil’s pH level, the Luster Leaf soil test kit pinpoints the amount of the three most common soil macronutrients: nitrogen, phosphorus, and potassium. There’s no need for the user to send a sample to a laboratory with this chemical test.
When we first opened the Luster Leaf test kit case, we were surprised by the number of vials and bottles of solutions. It didn’t look very easy. After reading the instructions, we found it was actually pretty simple. Testing involved gathering soil, putting a tiny bit in a glass vial, adding a specific liquid and/or powder (depending on the test), and shaking the vial. We were then able to compare the color of the liquid in the vial to an included chart to get the results.
To determine the accuracy of the Luster Leaf tests, we compared the results we got from the mail-in soil tests. The NPK results were close to the lab results. For an at-home test, we were pretty impressed. (The pH, on the other hand, tested lower than the lab tests, but the soil where we took the sample for this test had been previously amended to lower pH.)
The downside? The manufacturer says the kit will perform 40 tests. We found that to be inaccurate. We followed the instructions carefully and had only enough solution to do about 15 tests.
Get the Luster Leaf 1662 soil test kit at Amazon.
Best Digital Test
Luster Leaf 1605 Digital Soil Test Kit
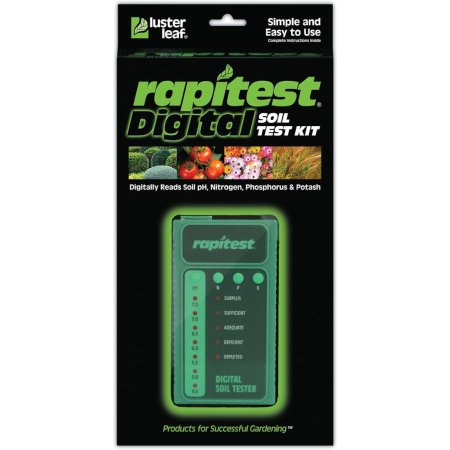
Our Ratings: Ease of Use 4/5; Accuracy 5/5; Value 4/5
Product Specs
- Type of test: Chemical (digital results)
- Tests for: Nitrogen, phosphorus, potassium, and pH
- Result time: Within a few seconds
What We Like
- Digital results are straightforward and very easy to interpret
- Testing just requires inserting the sample and pressing a test button
- Includes a booklet that has pH preferences for over 450 plants
What We Don’t Like
- Only 5 capsules per test for nitrogen, phosphorus, and potash
The second Luster Leaf kit in the lineup tests for nitrogen, phosphorus, and potassium, but it takes some of the complexity out of testing using color-coded capsules. It also takes the guesswork out of matching the results with its easy-to-read digital display. Everything is color-coded: N, P, and K correspond with purple, blue, and orange, respectively, while green is for pH.
We collected a soil sample, filled one of the four test tubes, and then added filtered water to the tube. We shook the soil and water solution, inserted a color-coded capsule in the vial, and shook again. Once the contents were well mixed, we inserted the vial into the hole at the top of the digital reader and pressed the button corresponding to the test.
This was the same test as the first Luster Leaf kit, but it was more user-friendly, and the color-coding made everything understandable. The digital reader gave me the results via a lit-up button. If the soil had too much of a nutrient, it registered as “surplus,” and lower amounts registered as “sufficient,” “adequate,” “deficient,” or “depleted.”
Unfortunately, the digital tester did not show how low or high a nutrient might have been, but we were able to look in the booklet and see optimal NPK levels for different plants, grasses, and flowers. The booklet also offered suggestions on how to amend the soil to raise or lower specific nutrient levels.
Get the Luster Leaf 1605 soil test kit at Amazon or Earth Easy.
Best For Crops
Whitetail Institute Laboratory Soil-Test Kit
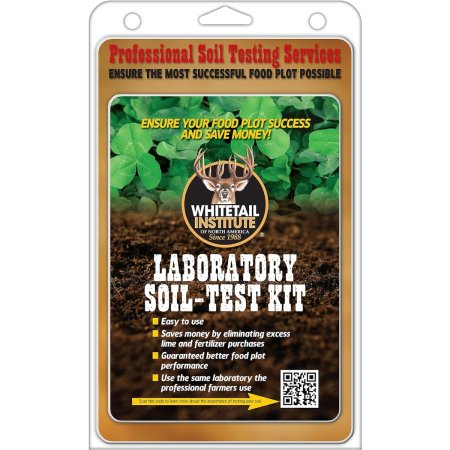
Our Ratings: Ease of Use 5/5; Accuracy 5/5; Value 4/5
Product Specs
- Type of test: Professional, mail-in
- Tests for: Calcium, magnesium, phosphorus, potassium
- Result time: Results available by email in one week
What We Like
- Ideal for food plots
- Customizable—write down the intended crop for personalized results
- Detailed results arrive quickly and are tailored to the chosen crop
What We Don’t Like
- Less comprehensive than some other tests
Hobby farmers and crop growers can receive an expert soil analysis with the Whitetail Institute’s Laboratory soil test kit. Growers also receive a custom consultation and recommendations for improving their soil based on the type of crop that will be grown.
For testing, we once again used the same soil gathered from various spots, blended well, and sent the sample to Whitetail. Of the three mail-in soil kits we tested, Whitetail offered the highest level of customization. When we filled out the form, they asked what we planned to grow in the soil. We chose alfalfa and Whitetail sent specific instructions for amending the soil to make it suitable for growing alfalfa.
The nutrient test results were very close to those we obtained from the other labs and Kansas State University, but Whitetail only tested for four nutrients: phosphorus, potassium, calcium, and magnesium. We called the local extension agent and asked why. He said those are the most critical four nutrients for most agricultural crops.
We could access the test results in just one week, and a few days later, a paper copy arrived via snail mail. We found that the Whitetail test kit results would be a boon for farmers or hobby farmers who want to create optimal soil conditions for a specific crop.
Get the Whitetail Institute soil test kit at Amazon, Cabela’s, or Whitetail Institute.
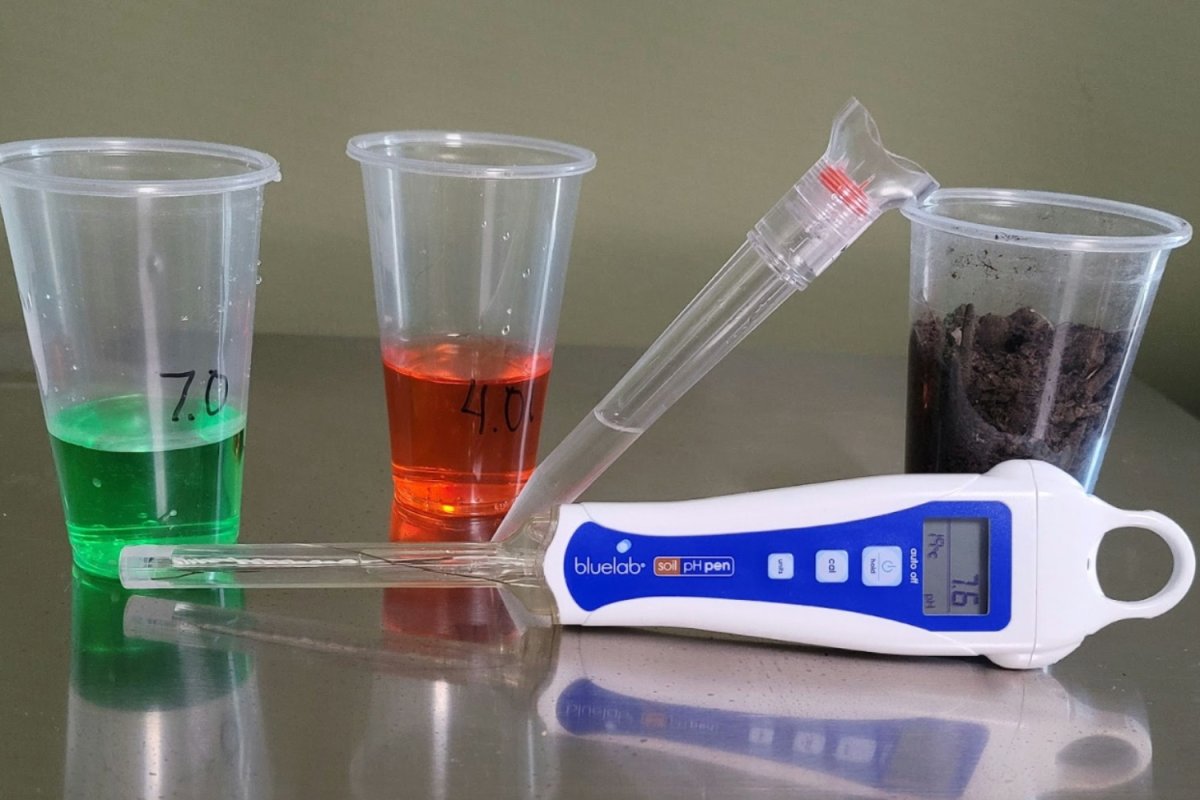
Best Precision pH
Bluelab Soil pH Pen
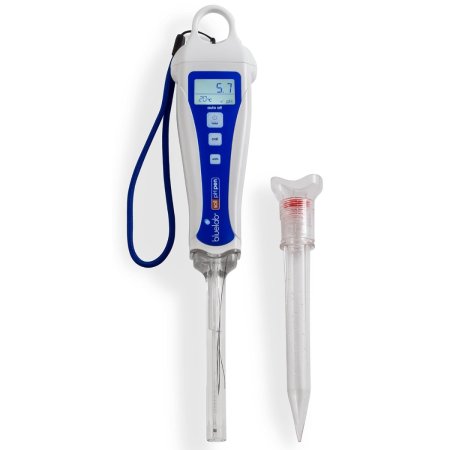
Our Ratings: Ease of Use 3/5; Accuracy 5/5; Value 4/5
Product Specs
- Type of test: Digital probe
- Tests for: pH and temperature
- Result time: Immediate
What We Like
- Provides very precise pH testing, measuring to 0.1 degree
- Easy-to-see digital readout on a backlit LCD display
- Developed for commercial growing needs
What We Don’t Like
- Must be calibrated before use
For commercial-scale growers, hydroponic growers, or gardeners who want the ultimate in precision pH testing, consider the Bluelab pH pen that provides highly accurate acid/alkaline results. The pen comes with a backlit LCD display and requires a AAA battery for operation. It also features two-point calibration for ensuring accurate pH readings, but the calibration solution is not included.
We had to locate 7.0 and 4.01 pH solutions, and we were able to borrow some of both from the local high school chemistry class, but be aware that if you want to use this pen, you’ll need to buy some of your own.
After calibrating the Bluelab pen, which involves putting it first in one solution and then the other and pushing the calibration button each time, we were able to test the pH and the temperature of the soil of our potted plants. We were surprised at the accuracy of this pen tester as it measured pH to a tenth of a degree and clearly displayed the number on the LED screen. The pH was close to what we had gotten in other tests, but this seemed to be the most accurate of all the tests. The temperature reading was also handy, and it would be vital for hydroponic growers or commercial growers who needed to maintain a specific growing temperature.
Get the Bluelab soil test pen at Amazon or Bluelab.
Jump to Our Top Picks
How We Tested the Best Soil Test Kits
| Testing Stats | |
| Products tested | 9 |
| Time spent testing | 1 hour per kit |
| Tests performed | 9 |
| Price range | $10 to $200 |
Our goal in testing the soil test kits was to determine how accurate each was, how easy they were to use, and how beneficial the results would be for our readers. The types of soil tests varied widely—from professional tests that required sending a soil sample to a lab to simple pH meters that determined a soil’s acid or alkaline level via a probe. We extensively researched dozens of soil test kits and products before choosing which ones to test, and we intentionally chose different types of kits because growers have very different needs.
Misti Mathis, co-owner of Harvest Gold Organics, which sells plant care products out of McKinney, Texas, offers some advice on how shoppers can decide between kits: “Ultimately, the best choice depends on your specific needs and budget. While home test kits won’t be as precise as professional labs, they’re a good option for many gardeners.” She adds that “a professional lab test might be a better choice if you’re facing severe plant growth issues or have unique soil characteristics.”
To help determine the effectiveness of individual lab tests, we also sent a soil sample to the agricultural department at Kansas State University, where they do high-end soil and plant testing. The results from Kansas State were used as a starting point for comparing the other lab tests and the at-home chemical testing kits.
We awarded points for each kit or product, and at the end of testing, we added the points and used them to help determine the best uses and specific awards for each of the kits that earned a spot in this lineup.
What to Consider When Choosing a Soil Test Kit
Many gardeners and home landscapers buy fertilizer and soil amendment products that promise to produce robust plant growth, improve soil structure, or result in abundant blooms. Still, unless the products provide what the soil lacks, the results may not be what the gardener expected. In some cases—such as adding fertilizer to nutrient-dense soil—plants may even suffer from fertilizer burn. Soil testing takes the guesswork out of gardening and landscaping, and that’s why I tested the top soil test products on the market today.
Soil
Soil quality varies from location to location. The soil in some regions might be perfect for growing vegetables and flowers, while the soil someplace else must be heavily amended with organic matter to grow anything. The following four common types of soil have different properties:
- Silt: Fine and soft, silt grains are smaller than grains of sand. Silty soil is associated with prior flooding that washed topsoil downstream. Silty soils are suitable for growing most types of plants but will benefit from adding organic matter to help increase drainage. Depending on its nutrient content, silt may also require a fertilizer.
- Loamy: An optimal blend of silt, sand, clay, and organic matter, loamy soil is a gardener’s best friend. It drains well, yet resists compaction as it dries out. It’s suitable for growing fruits, vegetables, and most types of flowers and shrubs.
- Clay: While clay soil is full of nutrients, it’s composed of ultra-fine particles that stick together when wet and become rock-hard when dry. Plants don’t grow well in clay soil because their roots can’t push as easily through thick clay as they can with other soil types. Clay soil must be amended with organic matter, such as compost, to help aerate the soil and make it suitable for growing plants.
- Sandy: Better than clay because it offers spaces between the grains for roots to grow, but not as nutrient-dense as loam, sandy soil drains well. It is suitable for growing bulbs, such as tulips, and root crops, including potatoes and carrots. When preparing soil for the upcoming growing season, adding organic matter will help it retain moisture when growing other types of plants.
Test Types
Several soil-testing products are available to determine the amounts of various nutrients and macronutrients in the soil. Among the most comprehensive tests are those that involve taking soil samples and sending them to a lab for analysis. Still, at-home kits and instruments like these can be of help.
- Strips: A simple type of soil test, pH strips are coated bits of paper that determine the current acidity or alkalinity level of the soil. The gardener mixes soil with distilled water, using the recommended ratio on the package instructions. (Tap water can influence the pH readout.) After inserting the test strip in the solution, the resulting color of the strip lets the gardener know whether the soil in the garden is acidic or alkaline. A chart usually comes with pH test strips so users can compare the colors.
- Analog: These testers are commonly used to test soil for moisture content, pH levels, and some may even test the quantity of the light in specific locations. They feature aluminum probes to be inserted in the soil when taking readings. Some may use batteries, but many analog testers react to wetness in the ground and often don’t need batteries.
- Digital: Like analog soil testers, digital soil testers often come with probes to insert in the ground to determine moisture content and pH levels. They usually require batteries and may also be used in conjunction with chemical testing to help determine nutrient levels, such as the amount of nitrogen or potash in the soil.
- Chemical: At-home chemical soil tests require adding a drop or two of a specific chemical called a “reagent” to a soil sample. The reaction helps show the health of the soil. Chemical soil tests are suitable for testing one or more factors, including pH, and specific nutrients, such as nitrogen or calcium.
- Professional: The most reliable of all soil tests, professional tests require the gardener to collect a soil sample. The sample is mailed to a laboratory, where it’s analyzed for structure and a variety of nutrients. Then the lab sends the results and soil recommendations back to the gardener.
Testing
Testing kits and instruments commonly help pinpoint soil characteristics. Knowing the makeup of the soil helps you better maintain your garden. Keep in mind that various plants have specific nutrient requirements, so it’s essential to research the plant that will be grown before adding nutrients.
- Macronutrients: The three most common macronutrients needed for healthy plant growth are nitrogen (N), phosphorus (P), and potassium (K). Every bag of fertilizer will list an NPK number that identifies the amount of each of these three nutrients. The types of N, P, and K nutrients come in various forms, such as potassium carbonate for phosphorus, and urea or anhydrous ammonia for nitrogen. In general, all the NPK varieties perform similar functions. The key is knowing which specific nutrient that a plant needs and then using the soil test results to add a fertilizer formulation that helps balance nutrient levels.
- Micronutrients: Plants may require trace minerals as well as macronutrients, and a soil tester that pinpoints micronutrients, such as copper, iron, and manganese, tells the gardener if too much or not enough of these nutrients is in the soil.
- Acid or alkaline: The pH scale runs from 0 to 14, with 7 being neutral. Most garden plants prefer slightly acidic soil, between 6 and 7. However, some plants such as lilac and clematis prefer slightly alkaline soils, while azaleas prefer acidic (5.5) conditions.
- Temperature: Testing soil temperature is much like testing human temperature; the tester has a thermometer that indicates how warm or cool the soil is. This is helpful for commercial growers who want to start production as early in the spring as possible. It also can be helpful for hobby gardeners who want to make sure the soil is warm enough before they set out seedlings.
- Light: Because plants need various amounts of light, a light meter can help determine whether a location will be optimal for a specific plant variety. While plants have different light needs, all need some light for photosynthesis, which is how the plant synthesizes water and carbon dioxide into food. Most at-home light meters will display low, medium, and high lighting conditions. A gardener can use these readings to determine whether a plant is receiving enough light (or too much light) in a specific spot.
- Moisture: One of the most common soil tests is for moisture, and it’s used to determine whether the soil is draining well. Moisture meters usually have a gauge that allows the gardener to see if the soil, whether it’s in a garden bed or is a potting soil mix, is dry, moist, or wet.
Accuracy
Soil test kits vary in accuracy, with professional lab tests ranking as the most accurate. The quality and composition of the soil may also vary from one end of the garden to the other based on the amount of light that a specific spot gets, whether leaves fall and decompose in one spot, or what types of plants were grown there in the past. For example, plants in the legume family, such as soybeans or clover, can add nitrogen to the soil.
Choosing the most accurate test or tester can prove challenging, but look for features such as large, easy-to-read gauges on analog testers and probes that are solidly attached. Chemical kits should offer multiple testing processes for double-checking results, and pH test strips will be most accurate before their expiration date. No matter the individual test kit, gardeners can help avoid mistakes by performing multiple tests in different spots.
Speed of Results
The quickest results come from tests that determine pH and moisture. At-home test kits and instruments can determine these two factors in mere seconds. Testing for other nutrients may take longer, especially if the soil has to be combined with water and then allowed to settle before performing a chemical test.Light and moisture meters can often determine results in a few minutes. Retesting can be done as often as desired to get an idea of light quality during different times of the day and to see whether moisture evaporates more quickly from soil during higher outdoor temps.
The longest wait period comes when seeking professional laboratory results. The gardener must gather the soil samples, place them in a package, and mail the package to the laboratory. Depending on the speed of the lab, it may take a few days to test the sample and then a few extra days to get the results. Some labs can send results by email, which speeds up the process by a couple of days.
Ease of Use
Test kits that feature pH strips and meters with probes are simple to use and self-explanatory for the most part, but the best soil test kits come with directions on how to handle the strips and the probes, in addition to offering information for understanding the relevance of the test results. Chemical test kits can be more complex, but they come with instructions on gathering soil samples, mixing them, and choosing the chemicals to use when conducting specific nutrient tests. Chemical kits often come with charts that explain what the different results mean, such as various color changes that occur when testing for particular macronutrients and micronutrients.
FAQs
The best soil test kit can help a gardener figure out the most beneficial fertilizers or amendments to add to a garden. Below are answers to some common questions about soil testing kits.
If plants are thriving, there’s no need to test the soil. However, if plants seem to wilt, die, or just do poorly, testing the soil could help determine if the problem is due to a structure or nutrient deficiency in the soil.
Absolutely. Many DIY-type soil testers are available for testing everything from moisture and pH to the amount and type of nutrients in the soil. Some involve sending the soil sample to a professional lab—these can yield the most accurate results.
Digital soil testers are usually reasonably accurate. Gardeners can increase accuracy by performing multiple tests in different spots of the garden and comparing the results.
There are several soil testing methods. Soil test kits you can buy for at-home use feature pH strips, analog or digital meters, and chemical testing. They will include directions for the testing method. Professional testing is available by sending soil samples to a lab—you mail in a soil sample and they’ll provide results within a few days or weeks.
A pH test measures the acidity and alkalinity levels of the soil. The acidity of the soil can affect plant health, including how well it absorbs nutrients, so aiming for the ideal pH level for your plant types is one important step toward a flourishing garden.
Soil treatments are available that will either raise or lower the soil’s pH level, depending on what the gardener is growing. These are often called pH-UP and pH-DOWN products. You can also use amendments like garden lime and bone meal (which increase soil pH) and peat moss or sulfur (which lower soil pH) to naturally adjust pH levels in your garden.
Kits with pH strips may expire in a few months, especially if they’re not kept in an airtight container. Meters and monitors will not expire. However, if they’re battery operated, they will require new batteries when the old ones run down. Chemical kits are often good for 2 to 5 years.
Meet the Tester
Glenda Taylor is a product tester and writer specializing in the construction, remodeling, and real estate industries. She and her husband own a general contracting company, and Taylor is experienced in both residential and commercial building applications. She tests a wide range of power tools as well as other home improvement, household, and lawn-and-garden products.
The post The Best Soil Test Kits, Tested appeared first on Bob Vila.
]]>The post The Best Rooting Hormones appeared first on Bob Vila.
]]>Gardeners use multiple methods for growing new plants, including starting them from seeds, bulbs, and rhizomes. However, when the goal is to produce a plant identical to an existing plant, taking a cutting is usually the simplest way. A cutting is a 4- to 8-inch section of stem taken from a healthy plant and then put in water or a growing medium to root. Using cuttings to propagate plants is suitable for many types of plants, including some species of trees and bushes, but it’s especially well suited to the indoor gardening plants that tend to grow well from cuttings. Even those who aren’t familiar with advanced gardening concepts and are just trying to clone a favorite plant from a planter can often be successful with cuttings.
Cuttings from some plants, such as ivy and Dieffenbachia, root easily in plain water. Others need a little encouragement, and that’s where rooting hormone comes in. Rooting hormones are chemicals that stimulate the growth of new roots on cuttings. For example, the odds of growing a plant from a cutting taken from a cascading plant in a hanging planter increase when a rooting hormone is used. Finding the best rooting hormone is somewhat a matter of personal preference because most rooting hormone products are very similar.
Ahead, learn what to look for in a rooting hormone product and find out why the following are among the top choices of home gardeners. Our favorite is Clonex’s HydroDynamic Rooting Gel thanks to its ready-to-use formula and suitability for different types of cuttings. Each of the top picks below was selected after an in-depth review of the market and thorough product vetting.
- BEST OVERALL: Clonex HydroDynamics Rooting Gel
- RUNNER UP: Hormex Rooting Hormone Powder #3
- BEST BANG FOR THE BUCK: Bonide Bontone II Rooting Powder
- BEST POWDER: Garden Safe TakeRoot Rooting Hormone
- BEST LIQUID: Bonide Root & Grow Concentrate
- BEST GEL: Midas Hydro IBA Rooting Hormone Gel
- BEST CONCENTRATE: Hormex Vitamin B1 Rooting Hormone Concentrate
- ALSO CONSIDER: Hormex Rooting Hormone Powder #8

Product Comparison
| Type | Active Ingredients | Quantity | |
| Clonex HydroDynamics Rooting Gel | Gel | IBA | 3.4 fluid ounces |
| Hormex Rooting Hormone Powder #3 | Powder | IBA | 0.75 ounces |
| Bonide Bontone II Rooting Powder | Powder | IBA | 1.25 ounces |
| Garden Safe TakeRoot Rooting Hormone | Powder | IBA | 2-ounce container |
| Bonide Root & Grow Concentrate | Liquid | IBA and fertilizer | 1 quart |
| Midas Hydro IBA Rooting Hormone Gel | Gel | IBA | 4 ounces |
| Hormex Vitamin B1 Rooting Hormone Concentrate | Liquid | NAA | 4 fluid ounces |
| Hormex Rooting Hormone Powder #8 | Powder | IBA | 0.75 ounces |
Our Top Picks
To qualify as a top pick, a rooting hormone should be simple to apply, the instructions should be easy to understand, and the product should contain either IBA or NAA (see the Ingredients section below for more information) to promote root growth. The following five products feature different types of rooting hormone—including liquid, powder, and gel—but all are top performers popular with experienced gardeners. Any one of the products in the lineup will be an asset for propagating plants from cuttings.
Best Overall
Clonex HydroDynamics Rooting Gel
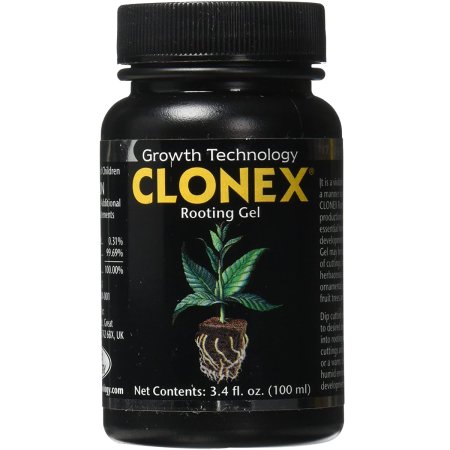
What We Like
- Gel formula seals cut tissue around stem
- Suitable for starting a variety of cuttings
- Requires no mixing, and there’s or mess
What We Don’t Like
- Gel can loosen and become watery if not stored correctly
Product Specs
- Type: Gel
- Active ingredients: IBA
- Quantity: 3.4 fluid ounces
Looking for the sticking power of an easy-to-use gel? Consider this option from Clonex that contains the active ingredient IBA for stimulating root growth. The gel seals the cut tissue around the stem, helping to protect it from rot while encouraging strong root development. The gel is suitable for use on different types of cuttings, including flowering species, woody plants, and fruit tree cuttings, among others.
The jar contains 3.4 fluid ounces, plenty for rooting dozens of cuttings. There’s no mixing or mess, just dip the stem in the gel and insert it into a moist growing medium.
Get the Clonex HydroDynamics rooting hormone at Amazon or Tractor Supply Co.
Runner Up
Hormex Rooting Hormone Powder #3

What We Like
- Comes in powder form that can bolster sagging cuttings
- Contains no added chemicals, dyes, or preservatives
- Can also boost root growth in transplants
What We Don’t Like
- Adheres better when dipping a cutting in water first
Product Specs
- Type: Powder
- Active ingredients: IBA
- Quantity: 0.75 ounces
To propagate new cuttings, consider this rooting powder from Hormex that helps prevent stem rot while stimulating new root development. The powder, which can also help strengthen and bolster sagging cuttings, is suitable for use on most plants that can be propagated from cuttings.
The active ingredient is IDA. The Hormex powder does not contain added chemicals, dyes, or preservatives, making it desirable for use on vegetables and fruit plants used in food production. In addition to treating cuttings, it is also beneficial for helping transplants adapt to a new location. Hormex #3 comes in a ¾-ounce jar.
Get the Hormex #3 rooting hormone at Amazon, Grow Generation, or Hormex.
Best Bang For The Buck
Bonide 925 Bontone Rooting Powder
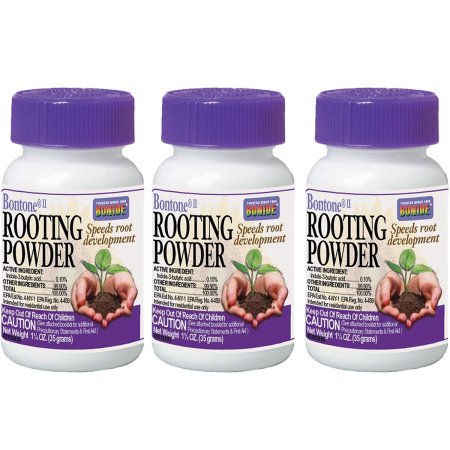
What We Like
- Can be used for many cutting types
- Also boosts growth of seeds and bulbs
- Can ease transplant shock
- Promotes healthy root production
What We Don’t Like
- Works best if cutting is dipped in water first
Product Specs
- Type: Powder
- Active ingredients: IBA
- Quantity: 1.25 ounces
Bonide’s rooting powder is well suited for helping establish healthy, robust roots on stem cuttings, but it’s also useful for encouraging strong growth when planting seeds and bulbs. The active ingredient, IBA, stimulates root growth on most cuttings, including softwoods, hardwoods, vegetables, and flowering varieties.
It comes in powder form and can also be used to coat seeds and bulbs by sprinkling it directly on them before planting. When transplanting a plant to a new location, users can also mix a teaspoon, or so, of the powder in the growing medium to reduce transplant shock and help the plant adapt. Each jar contains 1.25 ounces, enough for a few dozen cuttings or transplants.
Get the Bonide rooting hormone at Amazon,The Home Depot, or Walmart.
Best Powder
Garden Safe TakeRoot Rooting Hormone
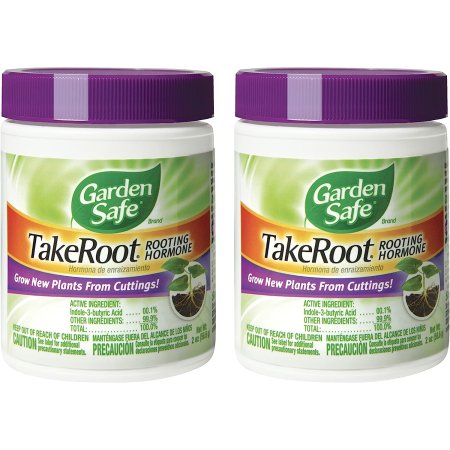
What We Like
- Suitable for use in gardens, greenhouses, and residential areas
- Stimulates at the root
- Easy to use and more affordable than other powders
What We Don’t Like
- Low concentration formula
Product Specs
- Type: Powder
- Active ingredients: IBA
- Quantity: 2-ounce container
For a concentrate that can help your plants grow strong, look no further than the Garden Safe TakeRoot Rooting Hormone. This pick comes in a low-concentrate, powdered form that stimulates plant cuttings at the root.
This easy-to-use powdered formula is made with indole-3-butyric acid, a compound that is naturally occurring in plants. This ingredient is safe to use on African violets, roses, and other plants that are grown in residential, greenhouse, and garden spaces. It should be noted that the roots should be moistened before applying the hormone.
Get the Garden Safe rooting hormone at Amazon (2 pack) or Lowe’s.
Best Liquid
Bonide Root & Grow Concentrate
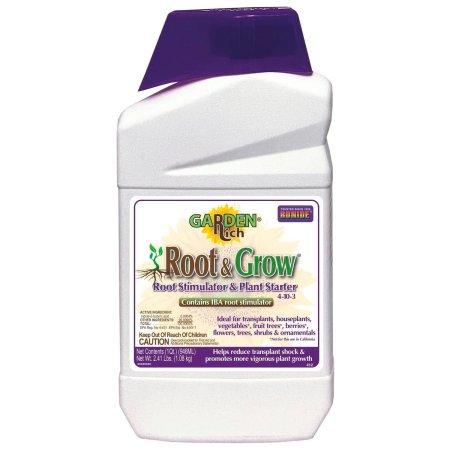
What We Like
- Helps promote root growth and boost plant growth
- Makes up to 9 gallons of fertilizer/growth hormone
- All-in-one fertilizer/rooting hormone
What We Don’t Like
- Contains a smaller amount of IBA
Product Specs
- Type: Liquid
- Active ingredients: IBA and fertilizer
- Quantity: 1 quart
Bonide Root & Grow concentrate is a 4-10-3 (4 percent nitrogen, 10 percent phosphate, and 3 percent potash) fertilizer with IBA growth hormone. It helps reduce transplant shock and promotes vigorous plant growth. The 1-quart concentrate will make up to 9 gallons of fertilizer/rooting stimulator. It instantly mixes with water, and the diluted solution is applied directly onto the soil and roots.
The rooting hormone fertilizer combo works on all types of plants, including vegetables, trees, shrubs, and houseplants. It’s designed to be used while seeding or on transplants to help stimulate early root formation. It also works well as a rooting hormone for plant cuttings due to the IBA growth hormone in the mix. It mixes at a ratio of 3½ tablespoons per gallon of water—so a quart can last an entire growing season. The Bonide Root & Grow concentrate is perfect for gardeners who want an all-in-one product that will give their plants a boost at planting time.
Get the Bonide Root & Grow rooting hormone at Amazon, Ace Hardware, or The Home Depot (128 ounces).
Best Gel
Midas Hydro IBA Rooting Hormone Gel

What We Like
- Concentrated formula can help reduce cloning time
- Gel is easier to use than powder products
- Large 4-ounce container
What We Don’t Like
- Used gel should not be poured back into the container for future use
Product Specs
- Type: Gel
- Active ingredients: IBA
- Quantity: 4 ounces
Packed in a convenient 4-ounce container, this cutting-edge rooting hormone gel from Midas Hydro is formulated with a high concentration of indole-3-butyric acid, the active ingredient known for its powerful rooting properties. The strong IBA formula gel can help reduce cloning time, enabling gardeners to achieve stronger and healthier roots in no time. Whether you prefer water propagation, general hydroponics, or other methods, Midas Hydro rooting gel is compatible with various techniques, providing versatility and ease of use.
For users who dislike the mess involved with rooting powder, a gel option may be a cleaner and more user-friendly choice. Note that used gel cannot be reused, though, so users may go through it quicker than they anticipate.
Get the Midas Hydro rooting hormone at Amazon, Walmart, Etsy, or Midas Hydro.
Best Concentrate
Hormex Vitamin B1 Rooting Hormone Concentrate
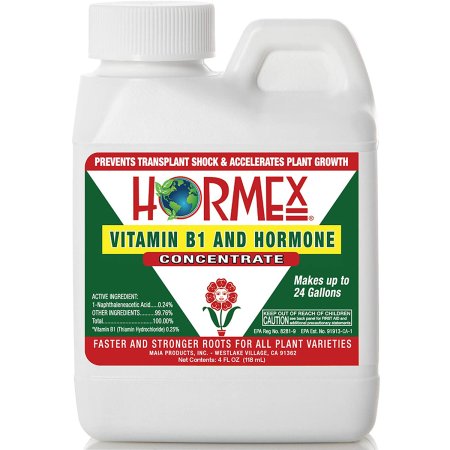
What We Like
- Affordable concentrated liquid
- Includes vitamin B1 to add nutrients
- Can also be diluted for use on transplants
What We Don’t Like
- Strong concentrate might require mixing with water
- NAA is a synthetic chemical
Product Specs
- Type: Liquid
- Active ingredients: NAA
- Quantity: 4 fluid ounces
Also from Hormex, this rooting hormone features the active ingredient NAA and comes in a concentrated liquid form that will treat dozens of cuttings. To use, dip a fresh cutting into the undiluted rooting hormone and insert the cutting in a moist growing medium. For an added root-boosting effect, mix 1 teaspoon of Hormex concentrate in 1 gallon of water and use the solution to saturate the soil around the new cutting.
When transplanting newly rooted plants, use the same liquid solution for watering to reduce transplant shock. The inclusion of Vitamin B in the Hormex product adds a vital nutrient to the soil for robust plant growth. Best of all, the rooting hormone is available at an attractive price point.
Get the Hormex Vitamin B1 rooting hormone at Amazon or Hormex.
Also Consider
Hormex Rooting Hormone Powder #8
What We Like
- Suitable for cuttings from most plants
- Package contains plenty of powder
- Free of dyes and preservatives
What We Don’t Like
- Requires dipping a cutting in water before dipping in powder
Product Specs
- Type: Powder
- Active ingredients: IBA
- Quantity: 0.75 ounces
For quick rooting of most cuttings, opt for a rooting hormone like this one that contains the active chemical IBA. Suitable for use in most plants, including greenwood and softwood cuttings, this Hormex option is formulated to promote the development of healthy roots. The product comes in powder form for easy application.
A single jar contains 0.75 ounces of powder—plenty for rooting dozens of cuttings. For best results, take cuttings only from the current season’s growth from a healthy mother plant. Dip the end of the cutting in water before dipping it in the powdered rooting hormone.
Get the Hormex #8 rooting hormone at Amazon or Hormex.
Jump to Our Top Picks
How We Chose the Best Rooting Hormones
Use of a rooting hormone can help gardeners duplicate favorite plants from cuttings. Although most rooting products are similar, we looked at types and some features of products to help buyers choose based on personal preference. This list includes liquid, gel, and powder formulas and a choice of the two most common active ingredients. We also considered application methods and ease of use.
What to Consider When Choosing a Rooting Hormone
Rooting hormone products are relatively inexpensive and range from around $13 for a bottle that will treat up to 50 cuttings to $25 (or more) for a large container that will treat more than 100 cuttings. The most significant difference is in the type of product and whether it contains added ingredients, such as nutrients or fertilizers intended to help the plant grow and thrive once the cutting develops roots.
Form
Rooting hormone products come in three main types: liquid, gel, and powder. No matter the type, all three are used in a similar manner: the gardener dips the end of the cutting in the hormone product and then puts the cutting in a moist, growing medium.
- Liquid: Bottles of liquid rooting hormone come in either ready-to-use formulations or concentrated formulations that require mixing with water. Some gardeners feel liquid offers the best coverage since it can seep into tiny pores in the cutting.
- Gel: This rooting hormone adheres well to cuttings and provides a slightly thicker coating of the hormone than liquid varieties, which may offer more root-boosting stimulus.
- Powder: One of the most common types of root hormone products available, powder is simple to use and offers a thick layer of root-stimulating chemical. Before dipping the cutting in the powder, many gardeners will dip the cutting in water, so the root hormone adheres better.
Ingredients
The majority of rooting hormone products on the market today contain one of two common chemicals, IBA or NAA, both of which are synthetic forms of natural plant hormones known to stimulate root growth.
- Indole-3-butyric acid (IBA): A chemical form of the plant hormone, auxin, IBA triggers root growth and is found in many commercial rooting hormone products of all types.
- Naphthaleneacetic acid (NAA): Similar to IBA, NAA is a synthetic chemical formulation that stimulates root growth and retards rotting. It is often found in all three types of rooting products.
- Added nutrients: While IBA and NAA are the active ingredients in rooting compounds, some products contain additional nutrients, such as nitrogen, to boost leafy green growth or have various vitamins to help bolster floral production. These added ingredients can be helpful, but some gardeners prefer to use only rooting compound, so they can add the exact nutrients they choose to the soil later.
Application
The information necessary for plant propagation in cuttings is available in gardening books, but, for the most part, the process is straightforward and simple enough for even newbie gardeners. The following offers an idea of the basic techniques used for taking cuttings and applying rooting hormone. Before proceeding, do a little research on the intended plant. While cuttings can successfully propagate many plants, others require different methods. Some cuttings should be from greenwood (new, supple growth), while others should be taken from the older, hardwood portions of a stem. Knowing the best method of propagation for a specific plant will increase the odds of success.
- Take a 4- to 8-inch stem cutting from a healthy plant.
- Strip all but one or two top leaves from the stem.
- Bruise the end of the stem by slightly crushing it or take a sharp knife and scrape away some of the stem’s outer covering. This step helps the rooting hormone penetrate more efficiently.
- Dip about 2 inches of the stem in the rooting compound. If you’re using a powdered mixture, dip the cutting in water first, so the powder adheres well.
- With a pencil or stick, make a hole about 2 inches deep in the growing medium and insert the treated end of the cutting.
- Press the growing medium around the cutting and cover the whole pot or tray with plastic to keep moisture in while the cutting takes root. By keeping the cutting in an enclosed container, the soil will stay moist, which is a requirement for roots to develop. Alternately, consider starting the cutting in a self-watering planter where it will receive a consistent amount of moisture.
FAQs
The application of rooting hormone increases the odds of success when propagating with cuttings. The product stimulates root growth and reduces the risk of stem rot. For gardeners new to the product, a few questions are to be expected.
Q. How does a rooting hormone work?
A rooting hormone stimulates root growth at the cut end of a stem.
Q. Is rooting hormone necessary for cuttings?
Not always, but it’s handy to have around. Some plants, especially indoor plants, can root in just plain water.
Q. How long will my rooting hormone take to work?
Depending on the plant, roots should start to develop within two to six weeks. Research the plant you’re trying to propagate for a specific timeline.
Q. Do rooting hormone solutions work for hydroponic plants?
Rooting hormones are often used in hydroponic systems to stimulate plant growth.
The post The Best Rooting Hormones appeared first on Bob Vila.
]]>The post The Best Fertilizers for Hydrangeas appeared first on Bob Vila.
]]>A perennial favorite in the landscape, hydrangea is hardy in a wide range of growing zones and is a relatively easy keeper. While hydrangeas vary in form, color, and bloom time, they are known for the large flower heads that cover the plants—so large, in fact, the blooms often weigh down the stems. Once established, the hydrangea is one of the summer season’s most impressive shrubs, but it needs fertilizer to reach its full potential.
The best fertilizer for hydrangea plants should contain a blend of nutrients to encourage healthy root and branch development while boosting the color, size, and quantity of flower heads. Don’t just grab a package of garden fertilizer off the shelf, though.
We recommend Espoma Organic Holly-Tone 4-3-4 as our top pick for its versatility, organic formulation, and availability. There are other common hydrangea fertilizer options on the market, including Miracle-Gro Acid-Loving Plant Food and JR Peters Jacks Classic Blossom Booster Fertilizer. However, they do not meet our sustainability guidelines and are not recommended in our top picks due to their potentially harmful ingredients and negative impact on the environment.
Learn what to look for when choosing a fertilizer for hydrangeas, and find out why the following products can help this impressive plant become a focal point in the landscape.
- BEST OVERALL: Espoma Organic Holly-Tone 4-3-4
- RUNNER-UP: Down to Earth All Natural Acid Mix Fertilizer
- BEST BANG FOR THE BUCK: Miracle-Gro Performance Organics Blooms Plant Nutrition
- BEST FOR BLUE: Dr. Earth Acid Lovers Organic Acid Fertilizer
- MOST VERSATILE: Dr. Earth GL61100518430 Fertilizer
- BEST ACIDIFIER: Espoma Organic Soil Acidifier
Before You Buy a Fertilizer for Hydrangeas
Before buying fertilizer for hydrangeas, it’s important to perform a soil test to determine the soil’s pH level and check for nutrient deficiencies. Hydrangea blooms will vary in color based on the acidity of the soil, and if the pH level is too high or too low, it can affect the plant’s ability to absorb essential nutrients from the soil. A soil test can also reveal if the soil lacks certain nutrients, such as nitrogen, phosphorus, or potassium, which can affect the plant’s growth and overall health. Knowing the soil’s pH level and nutrient content enables shoppers to choose the appropriate fertilizer and make any necessary amendments to ensure hydrangeas thrive.
Product Comparison
| Type | NPK Ratio | Quantity | |
| Espoma Organic Holly-Tone 4-3-4 | Granular fertilizer | 4-3-4 | Two 4-pound bags |
| Down to Earth All Natural Acid Mix Fertilizer | Liquid fertilizer | 4-3-6 | 5 pounds |
| Miracle-Gro Performance Organics Blooms Plant Nutrition | Water-soluble fertilizer | 8-8-8 | 1 pound |
| Dr. Earth Acid Lovers Organic Acid Fertilizer | Granular fertilizer | 3-4-3 | 4 pounds |
| Dr. Earth GL61100518430 Fertilizer | Granular | 3-9-4 | Two 4 pound bags |
| Espoma Organic Soil Acidifier | Soil acidifier | N/A | 6 pounds |
Our Top Picks
The best fertilizer for hydrangeas will vary depending on the gardener’s goals for this spectacular shrub. Any one of the following fertilizers is well suited for use on hydrangeas, but keep in mind that more is not necessarily better when it comes to fertilizing plants. Follow application instructions carefully. Do not overfeed hydrangeas; rather, err on the side of too little rather than too much and use fertilizer in combination with other soil amendments and an optimal growing location.
Best Overall
Espoma Organic Holly-Tone 4-3-4
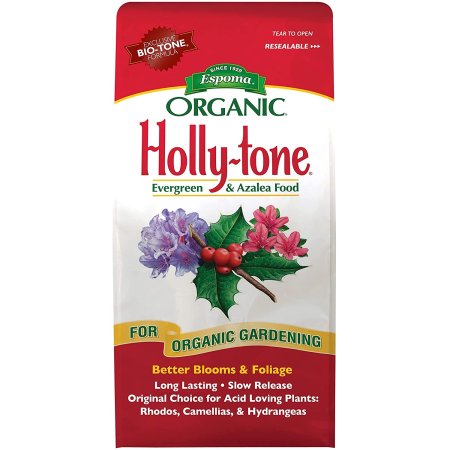
What We Like
- Suitable for a wide variety of acid-loving plants
- Plants only need to be fertilized twice a year
- Available from major retailers at an affordable price
What We Don’t Like
- Might need extra applications on alkaline soil
- Smaller box than expected
Product Specs
- Type: Granular fertilizer
- NPK Ratio: 4-3-4
- Quantity: Two 4-pound bags
The best overall pick is an acid-based fertilizer from a well-known and respected manufacturer in the gardening industry. A granular plant food designed for hydrangeas and other plants that prefer slightly acidic soil, this fertilizer comes in a 4-pound bag of granules. It features a 4-3-4 N-P-K ratio to help hydrangeas get off to a robust start in spring and grow vigorously throughout the summer.
The plant food’s acid formulation gently reduces the soil’s pH level, increasing the chance the hydrangea flowers will be a deep pink, purple, or blue tone. Along with hydrangeas, this fertilizer works well for holly, azaleas, rhododendrons, blueberries, evergreens, strawberries, camellias, and other plants that thrive in acidic soils.
Get the Espoma Organic Holly-Tone 4-3-4 at Amazon or The Home Depot.
Runner-Up
Down to Earth All Natural Acid Mix Fertilizer
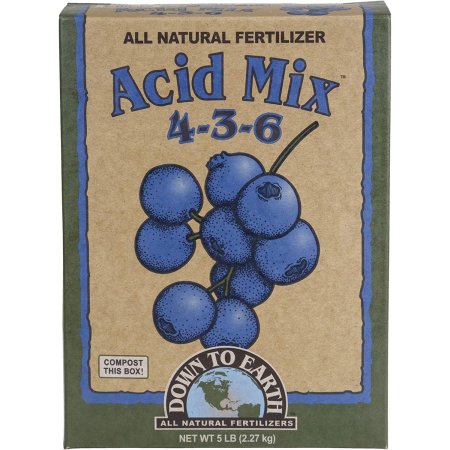
What We Like
- Suitable for a wide variety of acid-loving plants
- Contains macro-nutrients as well as magnesium and calcium
- Encourages colorful blooms
What We Don’t Like
- Must be applied monthly for the best results
Product Specs
- Type: Liquid fertilizer
- NPK Ratio: 4-3-6
- Quantity: 5 pounds
This acidic, granular fertilizer comes in a 5-pound bag and is suitable for use on many types of flowers and plants. One application will provide hydrangeas with a steady 4-3-6 N-P-K diet for about a month. In addition to the N-P-K nutrients, the fertilizer contains additional beneficial ingredients like calcium and magnesium as well as sulfur, which helps to make the soil more acidic.
Designed to encourage large, bountiful blooms, this fertilizer should be spread around the base of the plant at a ratio of 1 pound per 1 inch of trunk diameter. Along with hydrangeas, it’s a great pick for feeding rhododendrons, azaleas, camellias, evergreens, blueberries, raspberries, and strawberries.
Get the Down to Earth All Natural Acid Mix Fertilizer at Amazon.
Best Bang For The Buck
Miracle-Gro Performance Organics Blooms Nutrition

What We Like
- Includes both macro- and micro-nutrients
- Suitable for a variety of flowering plants
- Water-soluble fertilizers are easy to apply evenly
What We Don’t Like
- Must be applied weekly for the best results
Product Specs
- Type: Water-soluble fertilizer
- NPK Ratio: 8-8-8
- Quantity: 1 pound
There’s no need to spend a bundle on plant food. This affordable option features an 8-8-8 N-P-K formulation that promotes more blooms per shrub, along with vibrant flower heads. This is an all-purpose blossom booster that’s suitable for use on a wide variety of perennial and annual blooming plants, including hydrangeas.
It provides various minerals, including copper, calcium, and iron, to supplement common nutrient deficiencies. The water-soluble formulation should be applied every 7 days throughout the growing season for the biggest, brightest blooms and healthiest plants.
Get the Miracle-Gro Performance Organics Blooms Plant Nutrition at Amazon, Lowe’s, or The Home Depot (2.5 pounds).
Best For Blue
Dr. Earth Acid Lovers Organic Acid Fertilizer
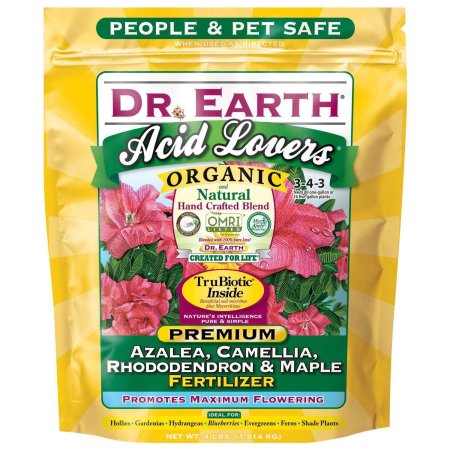
What We Like
- Continuously feeds acid-loving plants for months
- Contains macro-nutrients, probiotics, and microbes
- Encourages vibrant blue blooms
What We Don’t Like
- Strong smell; could attract dogs or insects
Product Specs
- Type: Granular fertilizer
- NPK Ratio: 3-4-3
- Quantity: 4 pounds
Dr. Earth’s acid fertilizer contains only natural ingredients, including alfalfa meal, bone meal, and kelp meal, in a 3-4-3 N-P-K formulation. In addition to nutrients, it contains select strains of probiotics that improve soil health and increase plant performance. Some of its ingredients are designed to reduce the soil’s pH level, too, making the product suitable for use on all acid-loving plants and increasing the chances that hydrangeas will produce blue flowers.
For the best results, apply in mid-to-early spring and then every 60 days afterward. The granules should be mixed with the soil and watered well.
Get the Dr. Earth Acid Lovers Organic Acid Fertilizer at Amazon or The Home Depot.
Most Versatile
Dr. Earth GL61100518430 Fertilizer
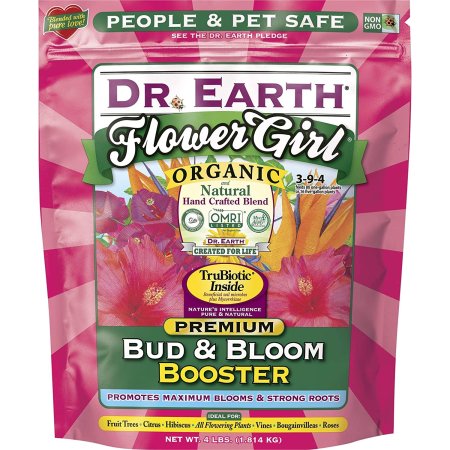
What We Like
- Suitable for use on a variety of plants, trees, and shrubs
- Supplemented with probiotics for optimal overall plant health
- GMO-free formula
What We Don’t Like
- May encourage gnat infestations
Product Specs
- Type: Granular
- NPK ratio: 3-9-4
- Quantity: Two 4 pound bags
Dr. Earth Flower Girl has a 3-9-4 NPK analysis and includes additional probiotics to boost overall plant health, making it a great option for feeding bulbs, tubers, corms, and rhizomes. It contains eight strains of ecto- and endomycorrhizae, which work together to increase drought tolerance and provide enhanced nutrient availability.
The 4-pound bag of granules is designed to provide slow-release nutrients for several months after the initial application. The formula includes ingredients like fish bone meal, alfalfa meal, feather meal, soft rock phosphate, and mined potassium sulfate, and is GMO-free. It’s free of chicken manure and sewage sludge.
Get the Dr. Earth GL61100518430 Fertilizer at Amazon or The Home Depot.
Best Acidifier
Espoma Organic Soil Acidifier
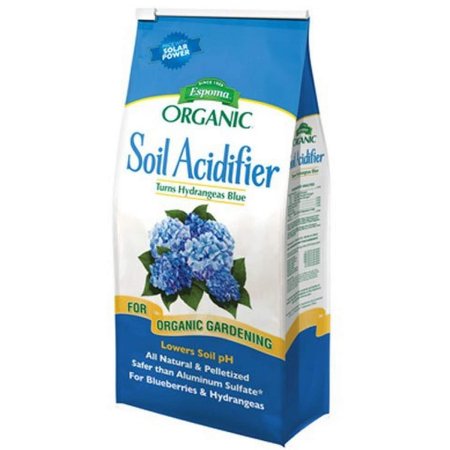
What We Like
- Amends soil for acid-loving plants; creates blue blooms
- Doesn’t conflict with other fertilizers
- Only needs to be applied every 60 days
What We Don’t Like
- Does not provide plant nutrients
Product Specs
- Type: Soil acidifier
- NPK Ratio: N/A
- Quantity: 6 pounds
Gardeners and landscapers looking to create highly desirable blue flower heads need look no further than this soil acidifier from Espoma Soil. While not a strict fertilizer in the common sense—Espoma does not come with an N-P-K ratio—the product does contain elemental sulfur and gypsum that act together to lower the soil’s pH level, encouraging blue hydrangea blooms. For the best results, apply Espoma granules around the plant’s base in early spring before flowerhead buds develop and reapply every 60 days.
It comes in a 6-pound bag and is suitable for use on hydrangeas and other acid-loving plants. Be aware that pH levels adjust gradually. Depending on the soil’s current pH level, two or more applications may be necessary before the acidity is low enough to produce blue flower heads. This product can be used in conjunction with an all-purpose fertilizer to encourage robust plant health as well as blue flower heads.
Get the Espoma Soil Acidifier at Amazon or The Home Depot.
Or, DIY Your Own Fertilizer for Hydrangeas
One of the most effective and sustainable ways to make fertilizer for hydrangeas is by making compost from household scraps. Composting is a process of breaking down organic materials, such as fruit and vegetable scraps, leaves, and grass clippings, into nutrient-rich soil amendments that can be used to fertilize plants.
Start by collecting organic materials that are rich in nutrients, such as banana peels, eggshells, coffee grounds, and fish emulsion. Add them to an outdoor compost bin and mix in leaves and grass clippings.
Once the compost bin includes a good mix of materials, add some water and turn the compost pile regularly to provide oxygen and ensure even decomposition. As the compost breaks down, it will transform into a nutrient-rich soil amendment that can be added to the soil around the hydrangeas.
Not only is making compost a great way to provide hydrangeas with natural and healthy fertilizers, but it also helps to reduce waste and minimize environmental impact.
Jump to our Top Picks
How We Chose the Best Fertilizers for Hydrangeas
To keep hydrangeas growing and blooming bountifully, you need a fertilizer or soil amender that’s made specifically for these acid-loving plants. Our recommendations include a variety of options to help improve the health and beauty of these plants. We’ve selected traditional water-soluble fertilizers that help stimulate root growth, granular fertilizers, and soil amenders that help increase the soil’s acidity to achieve blue flowers.
To qualify as a top pick, a fertilizer should provide the nutrients hydrangeas need for developing strong branches, healthy foliage, and beautiful blooms. Our favorite options effectively increase the bloom rate of hydrangeas, and gardeners can choose between organic and non-organic products.
What to Consider When Choosing a Fertilizer for Hydrangeas
Like all plants, hydrangeas draw nutrients from water, sunlight, air, and soil, but not all soil contains the nutrients necessary for robust growth and flower development. That’s where hydrangea fertilizer can help. The best fertilizer for any individual hydrangea plant will depend on the gardener’s preferred method of delivering the fertilizer to the soil, and the condition of the existing soil.
Type
Hydrangea fertilizers come in three primary forms: liquid, granule, and compressed spikes. All three offer slightly different benefits.
- Liquid: Available as either a concentrate for diluting with water or a ready-to-use product, liquid fertilizers are quickly absorbed by the plant’s roots and leaves for a fast boost of nutrients. Depending on the product, liquid fertilizers are either sprayed on the plant’s foliage or poured around the plant’s base.
- Granules: One of the most common forms of fertilizers, granule fertilizers can either be dissolved in water and poured on the soil or sprinkled around the plant’s base. Time-release granules, which have a polymer coating, should be worked into the soil around the hydrangeas’ base with gardening tools. They dissolve slowly and offer the plant a long-term supply of nutrients.
- Spike: Like time-release granules, gardeners often use spikes if they’re looking for a long-term plant food. This fertilizer is compressed and shaped into hardened spikes that the gardener pushes into the soil around the plant’s base. Over the course of 2 or 3 months, the spikes slowly dissolve and provide nutrients for the plants.
Organic vs. Inorganic Fertilizers
Fertilizers are made up of either organic or inorganic ingredients.
- Inorganic: This type of fertilizer contains chemical and synthetic nutrients. It has been formulated in a laboratory to produce specific growing results, such as larger or more abundant blooms or an increased acidity level, which is desirable when growing hydrangeas. Inorganic fertilizers may also include time-released ingredients that dissolve slowly and feed the plant over a period of weeks or months. We’ve opted to exclude inorganic fertilizers from our recommendations because of their potentially negative impact on the environment.
- Organic: Many gardeners prefer using only natural fertilizers that contain ingredients such as earthworm castings, poultry manure, or compost. Organic fertilizers contain no chemicals, and they may not be as strong as inorganic fertilizers. They may, however, help increase soil health in addition to providing nutritional value. For example, compost doesn’t just provide the plant with essential nutrients; it also helps heavy clay soil drain better.
N-P-K Ratio
Commercial fertilizers are labeled by the amounts of nitrogen (N), phosphorus (P), and potassium (K) they contain by weight, which appears on the package as the N-P-K ratio. Hydrangeas will benefit from an all-purpose, balanced fertilizer, such as a 10-10-10 N-P-K, that contains equal amounts of each nutrient. A balanced fertilizer will encourage healthy foliage as well as bountiful blooms. For gardeners explicitly seeking to increase the blooms’ quantity and size, a fertilizer with a higher concentration of phosphorus (the middle number), such as a 10-20-10 N-P-K, may be beneficial.
Plant Needs
The hydrangea will tolerate partial sun, but it prefers a mostly shady spot in the yard. When possible, locate the shrub where it will not receive direct sun in the late afternoon in hot climates. Morning sun is usually acceptable and well tolerated. In northern climes where afternoon temps are moderate, some hydrangeas will also thrive if they receive some early afternoon sun. It’s the combination of hot temperatures and blazing sun that can take a toll on these spectacular shrubs. Hydrangeas like a permanent spot in the landscape, so planting them in pots or grow bags might not allow the shrubs to reach their full potential.
Soil Condition
Well-drained soil that’s high in organic matter is optimal for growing hydrangeas. Heavy, clay-type soil and sandy soil will benefit from additional organic matter, such as compost or dried leaves. By adding organic matter, the gardener will increase drainage and enhance the soil’s phosphorus level, which is favorable to producing colorful hydrangea blooms. Before amending soil, it’s a good idea to take a sample of the existing soil to a local extension office for testing. The test results will include recommendations for creating healthy, balanced soil.
Color and pH
White hydrangea species produce only white flower heads, but an interesting thing happens to colored hydrangeas when the gardener alters the soil’s pH level. The more acidic the soil’s pH, the more likely it is that the hydrangea flowers will be blue. The pH scale ranges from 0 to 14, with 7 considered neutral. Levels higher than 7 are considered alkaline, while levels lower than 7 are considered acidic. The greater the pH variation, the more pronounced the hydrangea color change.
- Neutral: At a neutral soil pH level, around 7, colored hydrangea will produce flowers in shades of pink to deep pink.
- Alkaline: At pH levels higher than 7, hydrangea flowers are a light, clear pink hue.
- Slightly acidic: When the soil’s pH is around 6, the blooms take on a dark pink or even slightly red or purple hue.
- Strongly acidic: When the soil’s pH level is lower than 6, hydrangea blooms tend to turn blue. This is the most desirable color for many gardeners, who regularly amend the soil to achieve beautiful blue flower heads.
When shopping for hydrangea fertilizers, you may notice that a good number of them are called acidic fertilizers. In addition to the product’s N-P-K nutrients, acidic fertilizers contain pH-changing additives, such as sulfur or aluminum sulfate. For those who strive for blue flower heads, it’s worthwhile to purchase a pH soil tester to monitor the soil’s pH level.
FAQs
Hydrangeas grow in most regions of the country and are prized for their spectacular blooms, so it’s natural to have a few questions about how to make the most of these eye-catching shrubs.
Q. When do hydrangeas start to bloom?
In warm climates, hydrangeas start to bloom in early summer. In northern climes, they bloom in mid-summer.
Q. What is the best time to fertilize hydrangeas?
It depends on the type of fertilizer. It’s a good idea to give hydrangeas a first feeding in mid-to-late spring. After that, apply additional fertilizer at intervals recommended by the manufacturer. Time-released fertilizers might need to be applied only once every 3 months, while other types should be applied every 1 to 2 weeks.
Q. How do I fertilize hydrangeas?
It’s essential to follow the directions on the product label. Liquids can be diluted and poured around the plant’s base or sprinkled on the foliage, while granules are often worked into the top inch or so of the soil. Fertilizer spikes are inserted near the base of the plant and pushed beneath the soil’s surface.
The post The Best Fertilizers for Hydrangeas appeared first on Bob Vila.
]]>The post How to Get Rid of Caterpillars appeared first on Bob Vila.
]]>While backyard gardens attract some “pests” that are actually beneficial to the ecosystem, they also appeal to a number of insects that are detrimental to plants. While there are caterpillars, which are the larvae of moths and butterflies in the order Lepidoptera, that gardeners welcome to their properties—planting extra pots of dill for swallowtail caterpillars, and making sure there’s milkweed for monarchs—there are others that are unwelcome whenever they turn up: Tomato hornworms, tent caterpillars, and cabbage loopers, for example, have big appetites and can decimate gardens, and even trees, rapidly.
Getting rid of caterpillars in your garden is doable, but you have to act quickly and be diligent. These all-natural methods can help you regain control of your landscape.
1. Hand-Pick Them

SUPPLIES
5-gallon bucket
Dish soap
Gardening gloves
When it comes to caterpillar removal, the fastest way to address the problem is to pick them off by hand.
Fill a bucket about halfway with hot water and a couple of tablespoons of mild dish soap, pull on a pair of rubber or canvas gardening gloves, and head out to your garden to do a different kind of picking.
This time, you’ll want to lift caterpillars from the leaves—checking all of the undersides, where caterpillars are known to hide—and drop them one by one into the bucket to drown. The protective hand gear will ensure that you aren’t stung by the spines on some varieties of caterpillar as you handle them, like the saddleback.
While this method is the most proactive, it also may require repeating to remove the entire population.
Pro tip: Removing tomato hornworms is easiest to do at night. Bring a black-light flashlight with you because hornworms glow in the dark.
Tried-and-True Advice
“Most caterpillars don’t do much damage to garden plants, so I leave them alone. However, I do take action against cabbage loopers, which love munching on my brassicas!
I find the best way to control cabbage loopers and other pest caterpillars is with physical barriers. By keeping vulnerable crops protected with row covers from the very beginning of the season, moths can’t lay their eggs on my plants and I have minimal caterpillar issues. Sometimes I also plant additional dill, parsley, and mustard plants on the side of my garden to act as sacrificial trap crops to entice caterpillars away from my more valuable produce.”
—Lauren Landers, Contributing Writer
2. Empty the Nest
SUPPLIES
A more aggressive way to attack the problem is to destroy the caterpillars’ nest.
You’ll often find these silk-spun homes hanging from tree limbs. Simply punch your implement of choice (either a long sharpened stick or broom handle work well) into the nest itself, then spin and scrape along its interior to remove all of its inhabitants. Afterward, dispose of the nest and its contents in a bucket of warm, soapy water to drown remaining caterpillars.
For the best chance of success, attack the camp early in the morning or late at night to guarantee that the majority of the caterpillars will be in the nest. While immediately effective, this method may also require repeating should any remaining caterpillars rebuild their home.
3. Spray Bt
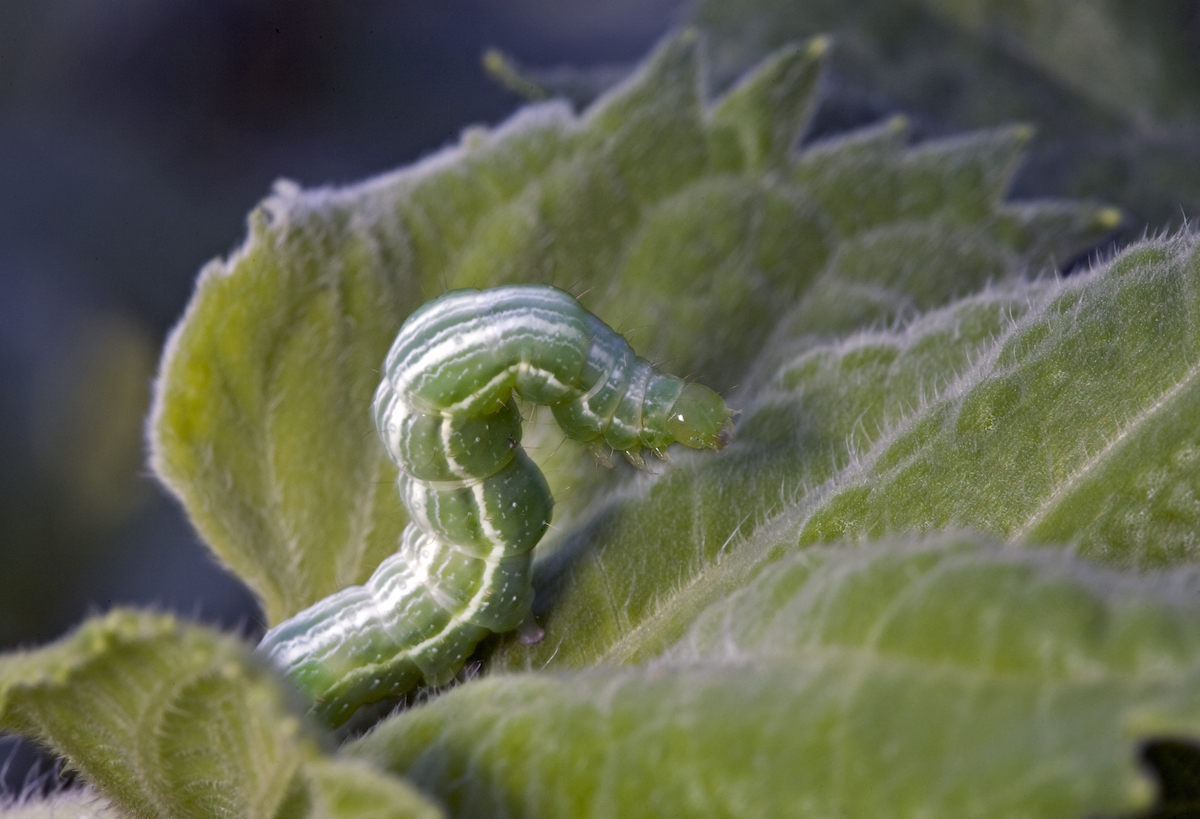
SUPPLIES
Bacillus thuringiensis
Gardening gloves
Homeowners who aren’t interested in hunting and handling these pests can opt to administer the hands-off—and hand-down most effective—extermination solution, Bacillus thuringiensis (Bt).
This naturally occurring soil bacteria kills caterpillars in a matter of days by destroying the lining of their stomachs. Simply dust its powder or mist its liquid form directly onto your garden plants and wait for the caterpillars to get hungry.
Apply without worry about negative side effects: Bt is completely safe for the plants, their pollinators, pets, and humans. The bacteria is only toxic to caterpillars, as well as some moths and worms who’d like to munch on your greens.
Reapply after a week or two if your infestation still exists, as your first application would have broken down in direct sunlight and rainfall.
4. Make Homemade Caterpillar Deterrent
SUPPLIES
Spray bottle
Molasses
Dish soap
Garlic
Vegetable oil
If you’re not ready to shell out for caterpillar control, you can mix up a home remedy to get the job done. For plants, a regular spray of a molasses solution (1 tablespoon molasses, 1 teaspoon dish soap, and a liter of warm water) or a garlic solution (three crushed cloves of garlic, 1 tablespoon vegetable oil, 1 teaspoon dish soap, and a liter of water) will deter insects from munching.
The post How to Get Rid of Caterpillars appeared first on Bob Vila.
]]>The post The Best Backpack Sprayers for Easier Yard Work appeared first on Bob Vila.
]]>Built for comfort and ease of use, the backpack sprayer is becoming a go-to tool for gardeners, landscapers, and pest-control professionals—as well as home dwellers who simply want to enjoy a weed- and insect-free outdoor space. A backpack sprayer’s ergonomic design features adjustable shoulder straps and a spray wand, allowing you to carry fertilizer, herbicide, pesticide, or other liquids on your back rather than hauling around a heavy metal cart or handheld manual sprayer.
We tested and reviewed a variety of outstanding backpack sprayers. We also spoke to Tim Sherrer, owner of Expest Exterminating based in Snellville, Georgia, who shared his pest control expertise. Preview our top picks below, and then keep reading to learn how these tools work, features to consider, and how to pick the best model for your space and style. Later on, check out our reviews of the best backpack sprayers for lawn and garden maintenance.
- BEST OVERALL MANUAL: Field King Max 190348 Backpack Sprayer
↓ Jump to Review - BEST OVERALL MOTORIZED: Field King 190515 Battery-Powered Backpack Sprayer
↓ Jump to Review - BEST BANG FOR THE BUCK: Chapin 61800 4-Gallon Manual Backpack Sprayer
↓ Jump to Review - UPGRADE PICK: My4Sons M4 4-Gallon Battery-Powered Backpack Sprayer
↓ Jump to Review - BEST PROFESSIONAL: PetraTools HD5000 Battery-Powered Backpack Sprayer
↓ Jump to Review - BEST HOBBYIST: Chapin 61900 4-Gallon Manual Backpack Sprayer
↓ Jump to Review - ALSO CONSIDER MANUAL: Solo 425 4-Gallon Backpack Sprayer
↓ Jump to Review - ALSO CONSIDER MOTORIZED: PetraTools HD4000 4-Gallon Backpack Sprayer
↓ Jump to Review
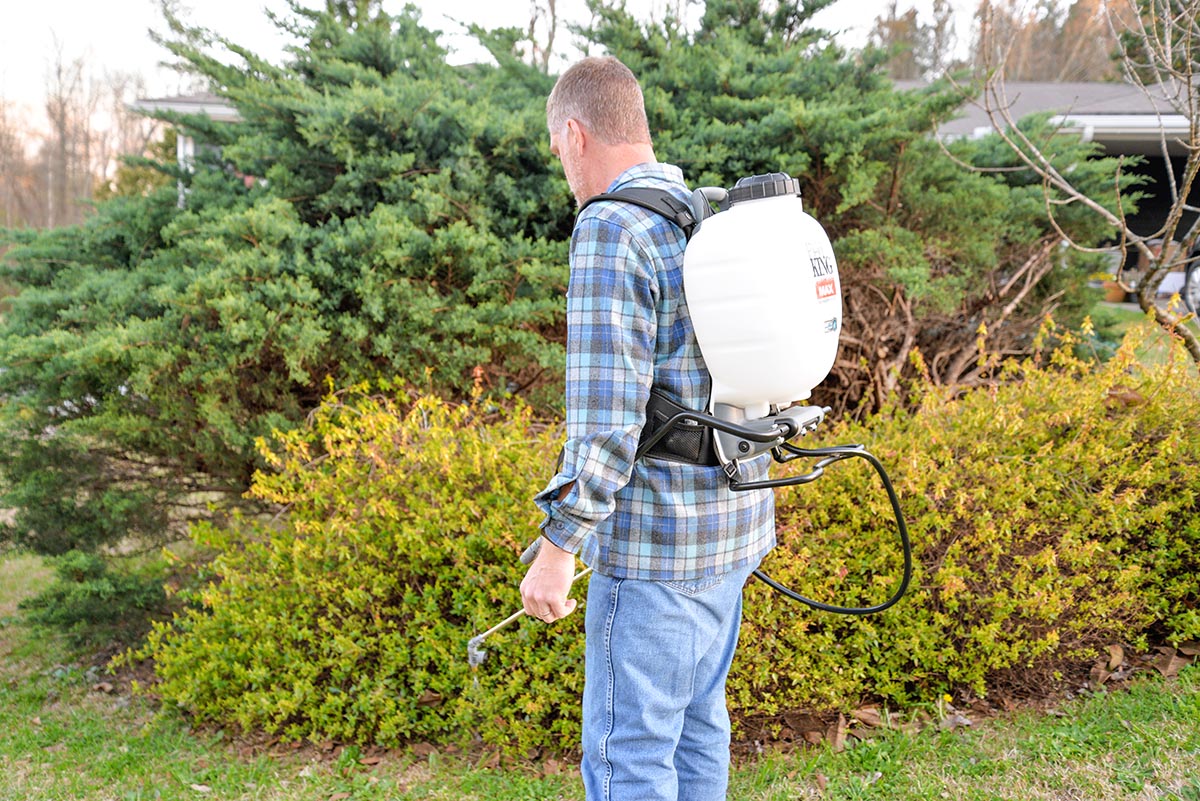
How We Tested the Best Backpack Sprayers
We considered these backpack sprayers from a home-dweller’s perspective. Although several of our picks offer truly professional-level performance and durability, our testing criteria centered on basic functionality, ease of use, operator comfort, and overall value.
To gauge mobility and operational comfort, we filled each sprayer to capacity with plain water and walked a spray route: putting on and taking off the backpack, walking between house and foundation plants, opening and closing a gate, uphill and downhill, and over small obstacles. Scoring favored sprayers that stayed most secure with less “slosh” and that generally felt most comfortable.
We then pressurized each sprayer, either by switching it on or by manually pumping and tried each nozzle. We noted ease and comfort of operation, speed of attaining initial pressure, motor noise, and drips from spray tips after releasing the spray trigger. The best backpack sprayers were easy to operate, versatile, fast, quiet, and drip-free.
| Testing Stats | |
| Products tested | 8 |
| Hours spent testing | 4 to 6 hours |
| Tests performed | 6 |
| Price range | $150 to $200 |
Our Top Picks
We tried each of the following sprayers in our backyard testing program. Read on to learn their individual features and benefits, how each one performed, and why we included them in this lineup of the best backpack sprayers.
Best Overall Manual
Field King Max 190348 Backpack Sprayer
What We Like
- Very comfortable harness system can be worn for long periods of time
- 4 interchangeable nozzles included with purchase to satisfy multiple users’ preferences
- High maximum psi of 150; suitable for small- to large-scale spreading
What We Don’t Like
- Manual operation increases user fatigue over extended periods of use
Specs
- Pressure: 150 pounds per square inch (psi)
- Tank capacity: 4 gallons
- Type: Manual
Our Ratings: Ease of Use 4/5; Comfort 5/5; Functionality 4/5; Durability 5/5; Value 4.7/5
If you’re looking for excellent performance with long-lasting comfort, the manual Field King Max 190348 is bound to deliver on both fronts. It features a 150 max psi— adequate power for most applications—and an internal pump design to contain leaks within the tank.
There are four nozzles: one for stream-to-cone spray patterns, one for a wide flat fan spray pattern, one for a narrow flat fan spray pattern, and one for a foaming spray. While a bit of muscle is required for operation, we found the Field King Max to be the best manual backpack sprayer we tested, largely due to its harness system. It isn’t especially well padded, but it includes a hip belt, sternum strap, and wide shoulder straps that did not dig into the shoulders during testing. It also had the least amount of drip after releasing the spray trigger, when compared with the other manual sprayers.
Get the Field King 190348 backpack sprayer at Amazon, Northern Tool + Equipment, or Gemplers.
Best Overall Motorized
Field King 190515 Battery-Powered Backpack Sprayer
What We Like
- Powered by rechargeable 20V lithium-ion battery for long usage times
- Padded shoulder straps and hip belt keep the unit in place comfortably; most comfortable battery-powered sprayer tested
- No drips when the spray trigger is released; no wasted product
What We Don’t Like
- Low psi limits this option’s uses; may not be ideal for some tasks
- Battery must be removed for charging
Specs
- Pressure: 40 psi
- Tank capacity: 4 gallons
- Type: Battery-powered
Our Ratings: Ease of Use 4.3/5; Comfort 5/5; Functionality 5/5; Durability 4/5; Value 4.7/5
With a 4-gallon tank and a 4-hour battery charge, the Field King 190515 backpack sprayer is ideal for an enthusiastic amateur landscaper. It features a fully padded harness to cushion your shoulders against muscle strain, a preset rating of 40 psi that users can increase if necessary, and a lockable shutoff on the wand to help reduce hand fatigue. A built-in carry handle and wand storage make transportation simple.
In our tests, the Field King 190515 was the most comfortable to carry battery-powered backpack sprayer, thanks to a generous amount of padding in the shoulder straps and hip belt. At 40 psi, it offered the lowest pressure rating, but that was still plenty of pressure to apply a variety of spray patterns, from a fine mist to a coarse shower of heavier droplets. The lithium-ion battery saves significant weight compared to the lead acid batteries in other sprayers, and the price is comparatively affordable. Good performance and excellent value.
Get the Field King 190515 backpack sprayer at Amazon or Forestry Suppliers.
Best Bang for the Buck
Chapin 61800 4-Gallon Manual Backpack Sprayer
What We Like
- Adjustable brass spray nozzle accommodates users during multiple tasks
- Great price for this sprayer’s quality; can last for years of use
- Clean, efficient operation for weeds, fertilizer, and pest control
What We Don’t Like
- Minimal harness support and padding; may dig into the user if worn for extended periods
- Manual operation can increase user fatigue; may not be ideal for some users
Specs
- Pressure: 60 psi
- Tank capacity: 4 gallons
- Type: Manual
Our Ratings: Ease of Use 4/5; Comfort 3/5; Functionality 4/5; Durability 3/5; Value 4/5
Users are unlikely to make a mess when filling the tank of this affordable backpack sprayer, thanks to a large 5-inch-diameter opening that helps prevent spills. It weighs about 9 pounds when the tank is empty and comes with adjustable padded shoulder straps to help support the tank when it’s full. The adjustable brass spray nozzle allows users to change the spray pattern from a fine mist to a coarse stream. This backpack sprayer from Chapin has a maximum psi of 60, and it requires manual pumping to keep the sprayer pressurized while in use.
When we tested this sprayer, it became apparent that Chapin saved costs on the harness system to preserve tank and pump quality at a bargain price. The manual pump and tank system proved easy to use and was efficiently designed. The spray tip dripped only slightly after the trigger was released. The bare-bones harness system, which consisted of thinly padded shoulder straps and a minimal lumbar pad at the base of the tank, was fine for limited work with a partially filled tank but was not comfortable for extended use.
Get the Chapin 61800 backpack sprayer at Amazon or Gemplers.
Upgrade Pick
My4Sons M4 4-Gallon Battery-Powered Backpack Sprayer
What We Like
- Accessible variable pressure switch can adjust the pressure of the product
- Automatically maintains psi between 40 and 60 for pest control, fertilizers, and weeds
- Excellent shoulder-strap padding supports the users’ back and hips while in use
- Sprays up to 30 feet; suitable for large-scale product applications
What We Don’t Like
- Heavier than the other battery-powered sprayers; may wear on some users
- Cannot be used if the battery isn’t charged
Specs
- Pressure: 60 psi
- Tank capacity: 4 gallons
- Type: Battery-powered
Our Ratings: Ease of Use 4.3/5; Comfort 5/5; Functionality 5/5; Durability 5/5; Value 4.3/5
This backpack sprayer from My4Sons is a premium product that comes at a premium price. It includes such impressive features as a variable pressure switch that allows the user to adjust the output pressure to the optimal level. It also boasts a variety of nozzles so users can switch between them, depending on the job and personal preference.
The battery-powered backpack sprayer has a motorized pump that works continuously to keep the pressure inside the sprayer between 40 and 60 psi. When used with the right nozzle and held at the right angle, this pressure allows the unit to spray up to 30 feet in a horizontal direction. Just keep in mind that even if the 4-gallon tank is filled and ready to go, the sprayer will not run unless the battery is charged.
In testing, we really liked the build of this My4Sons sprayer. The combination of a low-profile tank and thick padded shoulder straps provides excellent comfort, balance, and maneuverability. The powerful pump brought the tank up to pressure in a matter of seconds and ran quieter than other motorized sprayers tested. Pressure was excellent and no drips, and we felt it was definitely worth the added cost for those who use a sprayer frequently.
Get the My4Sons backpack sprayer at Amazon.
Best Professional
PetraTools HD5000 Battery-Powered Backpack Sprayer
What We Like
- High-volume tank is suitable for large-scale product applications; perfect for weeding, fertilizing, and pest control
- Converts from backpack to cart for increased portability and mobility
- Variable pressure switch can adjust the output level of the product for added versatility
- Includes 4-foot and 100-foot spray hoses depending upon the application area
What We Don’t Like
- Oversize tank can be cumbersome in backpack mode
- Cannot be used if the battery isn’t charged
Specs
- Pressure: 80 psi
- Tank capacity: 6.5 gallons
- Type: Battery-powered
Our Ratings: Ease of Use 5/5; Comfort 4/5; Functionality 4/5; Durability 5/5; Value 4/5
Professionals in the market for a new backpack sprayer may appreciate the PetraTools backpack sprayer’s 6.5-gallon tank and its rugged steel cart for hauling the unit from the vehicle to the work site. It features a 100-foot hose for treating large areas without moving the sprayer from the cart.
This battery-powered sprayer provides a base setting of 70 psi that can be increased to suit user needs—a great versatility factor when working on a variety of yards over the course of a long day.
This convertible backpack/cart sprayer offers excellent versatility for intensive spraying in a compact area or dispersed use over a larger area. In testing we found that the 6.5-gallon spray tank is too heavy to completely fill for backpack mode but a good size for the cart. The conversion from backpack to cart mode was quick and uncomplicated. The pump offers ample pressure to apply common lawn and garden chemicals, and the wand operated drip-free.
Get the PetraTools backpack sprayer at Amazon.
Best Hobbyist
Chapin 61900 4-Gallon Manual Backpack Sprayer

What We Like
- Wand-mounted pressure gauge monitors spray pressure
- Multiple spray tips included for various spray patterns
- 3-stage filtration system resists clogging
What We Don’t Like
- Steel spray wand may not be appropriate for use with some chemicals
- Manual operation can increase user fatigue
Specs
- Pressure: 60 psi
- Tank capacity: 4 gallons
- Type: Manual
Our Ratings: Ease of Use 4/5; Comfort 4/5; Functionality 4/5; Durability 4/5; Value 4.3/5
For versatility and safety, the Chapin 61900 sprayer can handle some of the most volatile fertilizers, weed killers, and pest control treatments in use today. It features Viton seals, which are specially manufactured to be chemically resistant, and a three-stage filtration system to prevent clogging.
A wand-mounted pressure gauge and a control flow valve both assure the user that the spray and pressure levels are consistent, while three different nozzles are included for direct stream, fan spray, and foaming applications. Great for home use or for industry professionals who need a single sprayer suited for multiple applications.
In our tests, the Chapin 61900 proved comfortable and capable as well as affordable. The wide shoulder straps and hip belt provided good comfort and excellent stability. The built-in pressure gauge gave a sure indication of adequate operating pressure, which the other manual sprayers tested did not offer. For just a few dollars more than our budget pick, the price appears to be a bargain for this upgraded sprayer.
Get the Chapin 61900 backpack sprayer at Amazon.
Also Consider Manual
Solo 425 4-Gallon Backpack Sprayer

What We Like
- Comfortable padded straps can support the back and hips of the user
- Collapsible carry handle provides added versatility and maneuverability
- 5 spray tips included with purchase depending on the application type
- Four pressure settings integrated; suitable for small- to large-scale applications
What We Don’t Like
- No padding in the lumbar area or on the hip belt; may not be ideal for some users
Specs
- Pressure: 60 psi
- Tank capacity: 4 gallons
- Type: Manual
Our Ratings: Ease of Use 4/5; Comfort 3/5; Functionality 4/5; Durability 4/5; Value 4/5
Gardeners looking for a durable sprayer for regular or intermittent use should consider the Solo backpack sprayer. It offers reliable operation and quality components, like a manual diaphragm pump that produces up to 60 psi, a full array of five spray nozzles for customized applications, an unbreakable wand, and padded shoulder straps. This sprayer is suitable for use with liquid concentrates, wettable powders, and bleach solutions that could damage other sprayers.
In our tests, this Solo sprayer came up to full pressure quickly and produced an excellent spray pattern with no drips. It was comfortable and easy to carry when half full, but at capacity, the shoulder straps dug in a bit too much for comfort. The plastic spray wand provided some flexibility and, as required equipment for use with bleach solutions and certain other chemicals, makes a good all-purpose applicator.
Get the Solo backpack sprayer at Ace Hardware, The Home Depot, Northern Tool + Equipment, or Gemplers.
Also Consider Motorized
PetraTools HD4000 4-Gallon Backpack Sprayer
What We Like
- Adjustable pressure output depending upon the application type and size
- Automatic pump to maintain 70 psi while spraying
- Low-profile tank is easier to carry that some comparable options
- Well-padded shoulder straps are comfortable for the user
What We Don’t Like
- Thin nylon waist belt does not relieve shoulder pressure
- No padding in the lumbar area; may not be ideal for those with back problems
Specs
- Pressure: 70 psi
- Tank capacity: 4 gallons
- Type: Battery-powered
Our Ratings: Ease of Use 4.7/5; Comfort 4/5; Functionality 4/5; Durability 5/5; Value 4.3/5
Capable of operating for up to 8 hours on a single battery charge while maintaining a constant pressure of 70 psi, this PetraTools backpack sprayer is an excellent choice for anyone with a lot of ground to cover.
The 4-gallon tank can handle large yards without frequent refills, and it’s translucent, so users can see how much liquid is left at any time. With padded straps for added comfort and a wide-mouth tank lid to offset spills, this motorized backpack sprayer will keep the operator working comfortably all day long.
We really liked this PetraTools sprayer’s low-profile tank and padded shoulder straps. It felt comfortable and well balanced for limited use. Unfortunately, the thin nylon waist belt only provides lateral stabilization without relieving weight from the shoulders, which makes it less than ideal for extended use. The pump worked quickly and was fairly quiet—nearly on the level of our upgrade pick and for about $80 less.
Get the PetraTools backpack sprayer at Amazon.
Jump to Our Top Picks
What to Consider When Choosing a Backpack Sprayer
Before opting for the first hobbyist or professional backpack sprayer you see, take some time to familiarize yourself with the various product factors likely to lead you to the right decision. Consider the pressure (psi), tank capacity, the type of liquid delivery system, and the type of pump that pressurizes the backpack sprayer.
Pressure
Pounds per square inch (psi) is the unit of measure identifying the amount of pressure a backpack herbicide sprayer can propel through its nozzle. The average for a backpack sprayer is around 70 psi, but smaller models can use as little as 40 psi, and a commercial backpack sprayer may use as much as 150 psi.
Pressure is important to ensure that a backpack sprayer operates effectively. Too little pressure will produce an uneven spray that reduces the effectiveness of its contents, while too much will prove excessive for a smaller yard.
If you have a large yard with many hard-to-reach spots, or you are a professional who works in many different-size spaces, a sprayer with a psi rating of 70 or above is your best bet. For those with average-size or smaller yards, a moderate rating between 40 and 70 psi is more than enough to spray your space.
Piston vs. Diaphragm
Backpack sprayers generally come in one of two types of liquid delivery systems: piston pump and diaphragm pump.
- A piston pump works by drawing liquid from the tank into an enclosed chamber on the upstroke and pushing the liquid out through the outlet valve or nozzle on the downstroke. Piston pump sprayers are more popular with the average home dweller because of their simple design, easy accessibility for repairs, and beneficial psi ratings.
- A diaphragm pump is designed for the safety of professionals who use potent pest control and weed killer chemicals. It is a sealed system that works by moving liquid from one side of a chamber to the other with a diaphragm so that one side is always full and one side is always empty. The diaphragm pump cannot produce the same pressure as the piston pump but is better suited to pros because it’s made of more chemically resistant materials.
Manual vs. Motorized
Backpack sprayers use an internal pump to draw liquid out of the chamber, through a hose, and out through a wand and nozzle. This pump can be operated manually, or an electric backpack sprayer will often use a motorized system—the pricier option.
Manual backpack sprayers operate via a hand pump attached to the backpack chamber. Pumping manually for an extended period can cause muscle fatigue and pain, so while this style of sprayer is fine for smaller yards, once-per-season jobs, and the average home dweller, it’s less suited to professionals who have to spray for hours at a time. Manual backpack sprayers cost as little as $40 to as much as $150, on average.
Motorized backpack sprayers are powered either by battery or gas, with a battery backpack sprayer offering more versatility and a simpler setup. A motorized sprayer automatically pumps the liquid from the backpack chamber to the wand, requiring no physical work by the user. Intended for large projects and long workdays, a motorized sprayer (which can run between about $100 and $500) is a better choice for the busy professional who’ll rely on it daily.
That said, Sherrer explains, “Most homeowners can use a backpack sprayer with a hand pump for effective results.” A motorized option may only be worth the jump in price for those looking for a more heavy-duty option to use more often.
Tank Capacity
Sprayers are available in a tank capacity range between 2 and 7 gallons. Carry smaller-capacity sprayers with a handle, and tote the largest tanks with a wheeled cart. A 4-gallon backpack sprayer is considered to be about average in size.
Sprayers that fall between these two size extremes are true backpack sprayers—light enough to carry on your back but too heavy to lug around by hand. For typical jobs, such as fertilizing a lawn or spraying an insect infestation, a 4-gallon tank can do the trick for a yard between 5,000 and 10,000 square feet.
Additional Features
Backpack sprayers may include a variety of features, such as a built-in gauge to monitor the pressure of the unit while in use, extra padding in the shoulder straps for added comfort, a foaming nozzle, and a foldaway pump handle that won’t get in the way while spraying. Larger models may offer an extended hose and wheeled cart that can be used for more complex yards and heavier tanks.
“Some backpack sprayers are designed with detachable and changeable nozzles,” Sherrer says. “Some nozzles produce a pin stream, which is useful when spraying in cracks and crevices or when a precise application is needed. Fan spray nozzles are useful when applied over a larger area.” He also adds that “the ability to adjust the application flow will make any sprayer more versatile and effective.”
Tips for Using a Backpack Sprayer
Backpack sprayers are helpful tools for quickly and efficiently treating the yard and garden with liquid fertilizers, herbicides, and insecticides. But to ensure against over- or under-spraying an area, it’s important to keep the same walking speed and distance from the target during use.
Additionally, users should ensure that the backpack sprayer is properly pressurized at all times so that it’s easier to maintain an even spraying pressure. By taking the time to balance the pressure, the same amount of solution will be applied to each area of the yard and garden.
Before starting to use a backpack sprayer, adjust the shoulder straps so that the unit fits properly. You don’t want to have to deal with a shifting tank of fertilizer, water, or pesticide while working because it will take extra effort to control the moving weight, increasing fatigue.
In general, remember to:
- Maintain a uniform walking speed.
- Balance the spraying pressure.
- Adjust the straps before use for a secure fit.
FAQs
Buying and using a backpack sprayer brings up several questions. We’ve answered some of the common questions below.
You can fill a backpack sprayer with almost any liquid solution that has a similar consistency to water. This includes insecticide, herbicide, and liquid fertilizers. Just make sure the solution isn’t too corrosive or volatile, as these dangerous substances might eat through the walls of the sprayer.
Backpack sprayers are safe to use as long as they are filled with suitable solutions and proper precautions are taken to protect the eyes, skin, and respiratory system during use. The reason for the added personal protection is that when the liquid sprays from the backpack, some might get caught in the wind and blow back toward the user. While this wouldn’t matter much with water, it could be hazardous when the sprayer is filled with pesticide or herbicide.
The maximum distance that a sprayer can spray a liquid solution is determined by the maximum psi of the unit, the type of nozzle, the wind direction, the force of the wind, and the angle of the spray wand. On average, a backpack sprayer can spray up to about 10 to 20 feet, though there are models that can reach over 30 feet.
To clean a backpack sprayer after using it to apply a volatile chemical like herbicide or pesticide, follow these simple steps:
Responsibly empty any excess solution from the sprayer tank and add about half a tank of water.
Flush the sprayer system by using the sprayer until the tank is empty again.
Fill the tank half full with water again, this time adding any cleaning agents or neutralizing solutions that can help to remove remnants of the herbicide or pesticide solution.
Open all recirculation lines and any other hoses on the backpack sprayer.
Shake or agitate the unit to ensure the cleaning solution reaches every inch of the backpack sprayer.
Fill the tank to the top with water, and agitate again before emptying the sprayer.
Refill the sprayer with water to rinse out any remaining cleaning solution.
The post The Best Backpack Sprayers for Easier Yard Work appeared first on Bob Vila.
]]>When searching for showstopping landscaping plants, many homeowners gravitate toward plants that bloom. But foliage doesn’t have to be merely backdrop scenery; it can take center stage. Through color, shape, or texture, some plants produce dramatic foliage that can sometimes rival flowers.
Foliage typically outlasts flowers, providing allure even when flowering plants aren’t in bloom. Foliage may also be a solution for shadier areas where flowering plants struggle, or it might complement modern architectural styles better than the bosomy blooms found in cottage gardens. Striking as their foliage may be, some plants also produce flowers, providing a one-two punch of beauty.
1. Red Twig Dogwood (Cornus sericea)
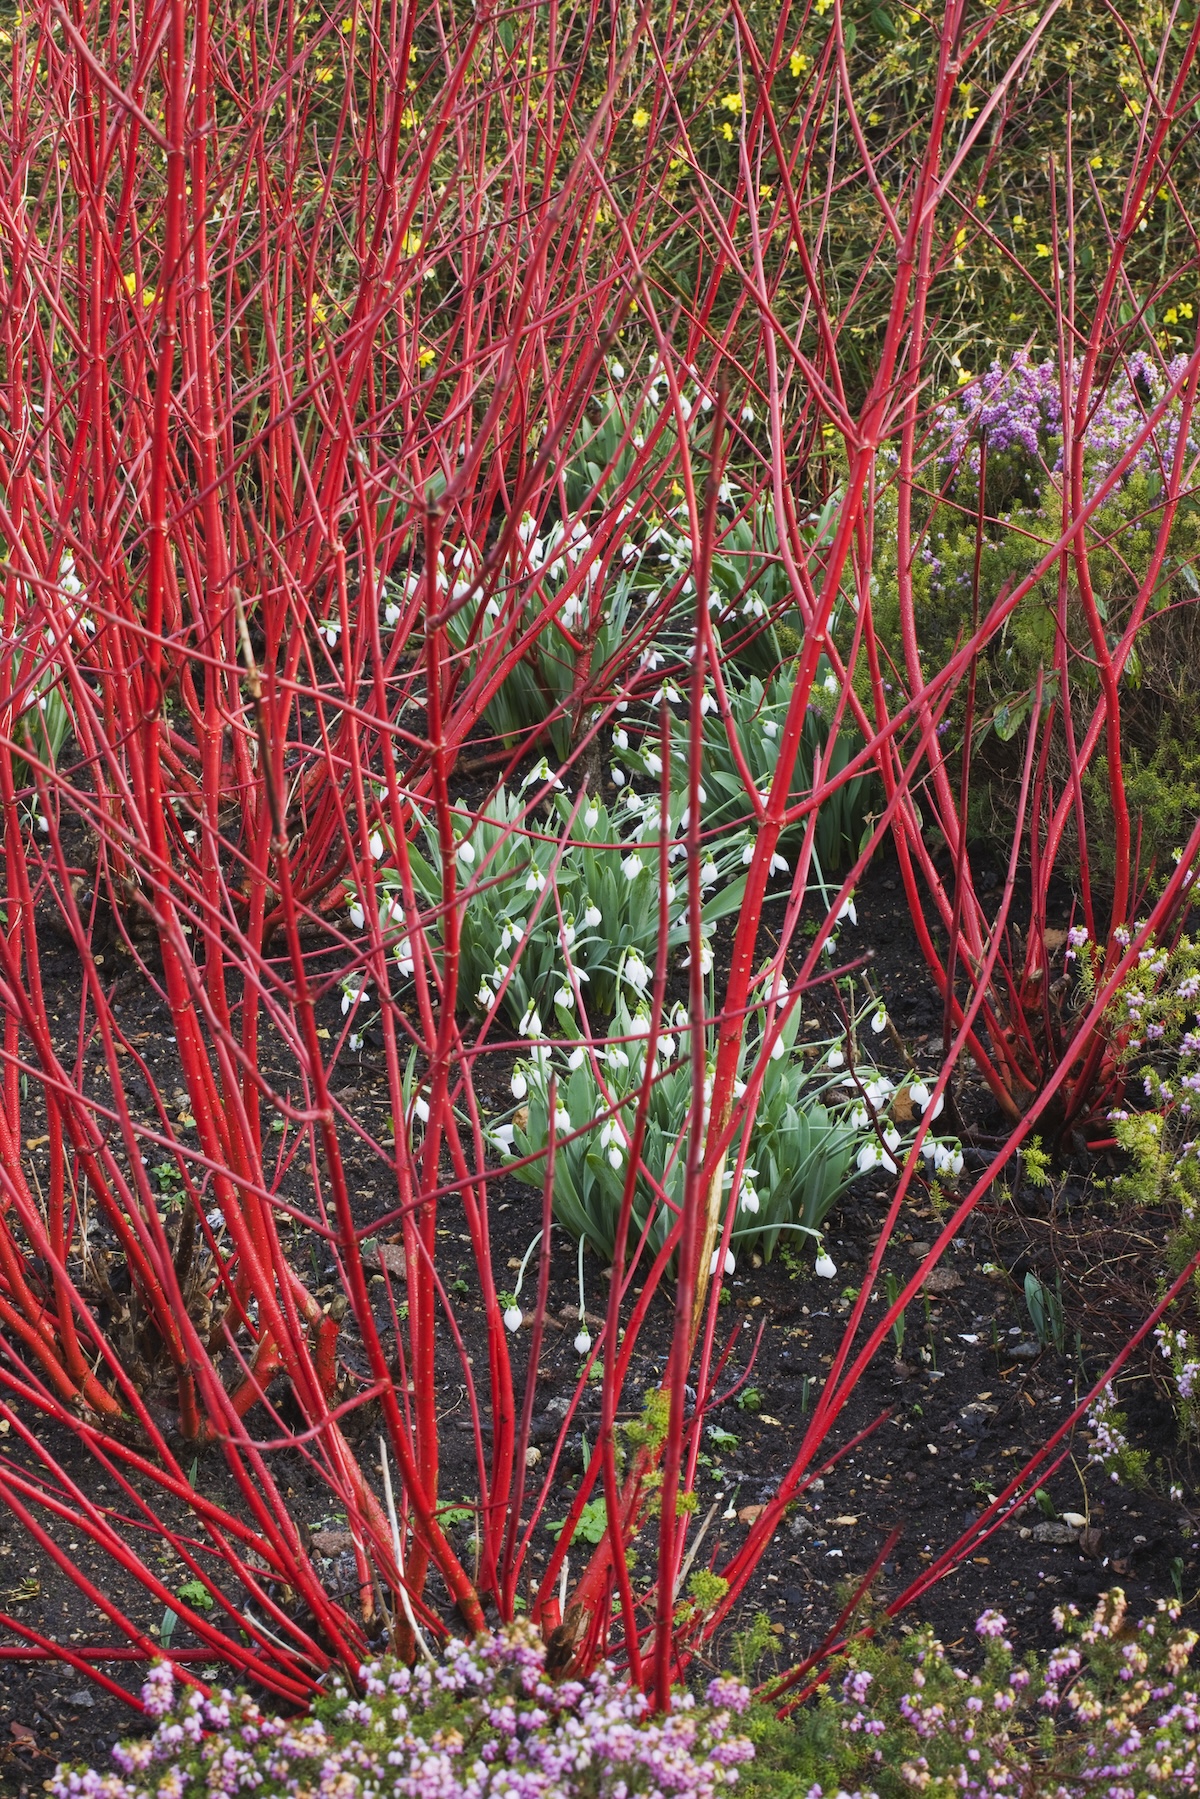
Prized for its pop of color against an often-snowy winter background, the red twig dogwood is a four-season plant, producing fragrant white flowers in spring and, in summer, offering variegated foliage, which turns rose-red in autumn and is adorned with red berries, before falling to reveal its brilliant red branches.
A fast-grower, this shrub can get quite large—up to 9 feet tall and 12 feet wide—but can (and should) be pruned and even periodically trimmed to the ground to control growth. Red twig dogwood is easy to grow, even in boggy conditions, and is as popular with pollinators, and resistant to deer.
Best For: Moist areas that receive full to partial sun; can be a specimen or part of a thicket
Hardiness Zones: 2-7
2. Canna Lily (Canna)

Canna lilies add a tropical look to the garden. Reaching heights of up to 10 feet tall, they can also serve as a seasonal privacy screen, with their large, green-and-bronze striped or variegated banana-like leaves along tall stalks inducing tropical vibes. While they produce stems of showy lily-shaped flowers in red, orange, yellow, or salmon, the foliage itself is a powerful draw.
In northern zones, otherwise easy-to-grow canna rhizomes must be dug in late fall and stored. They can be re-planted in late spring. When planted in full sun, they reward the gardener with blooms all summer.
Best For: Garden beds, borders, containers, and sunny areas where tall plants are desired
Hardiness Zones: 6-10
3. Caladium (Caladium x hortulanum)
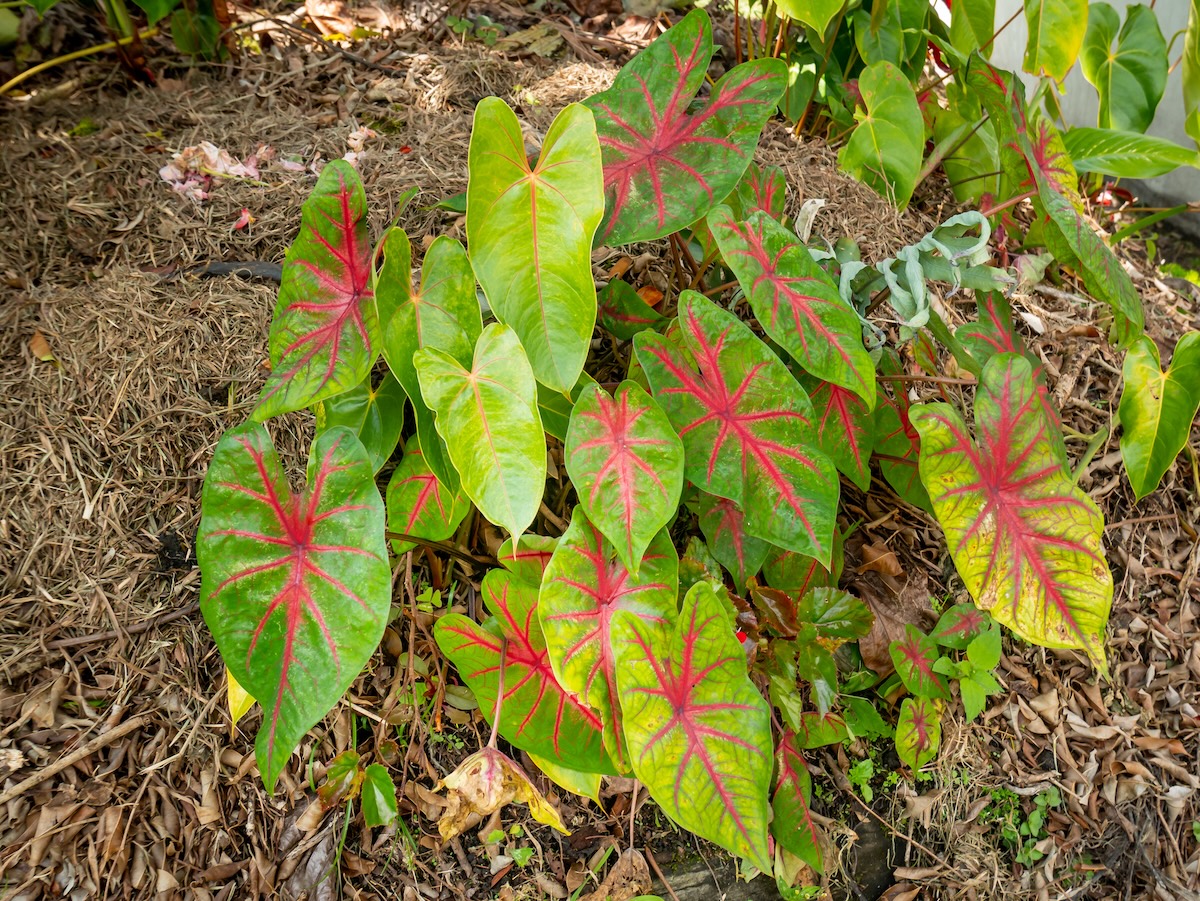
Considered an annual in northern gardens, caladiums offer a tropical touch of color with their large, translucent heart- or arrowhead-shaped leaves in green, red, pink, and white, with mottling or stripes created by dramatically conspicuous veining. These lovely landscaping can be brought indoors to overwinter or tubers can be dug and stored for planting the following spring.
Capable of producing tiny flower spikes, their foliage, which lasts throughout the growing season, is the main attraction. Best suited for partial shade, caladiums are ideal for borders and containers. But they come with a caution: they’re toxic to cats, dogs, and horses.
Best For: Partial shade, borders, containers, indoors or out
Hardiness Zones: 9-11
4. Rex Begonia (Begonia rex-cultorum)
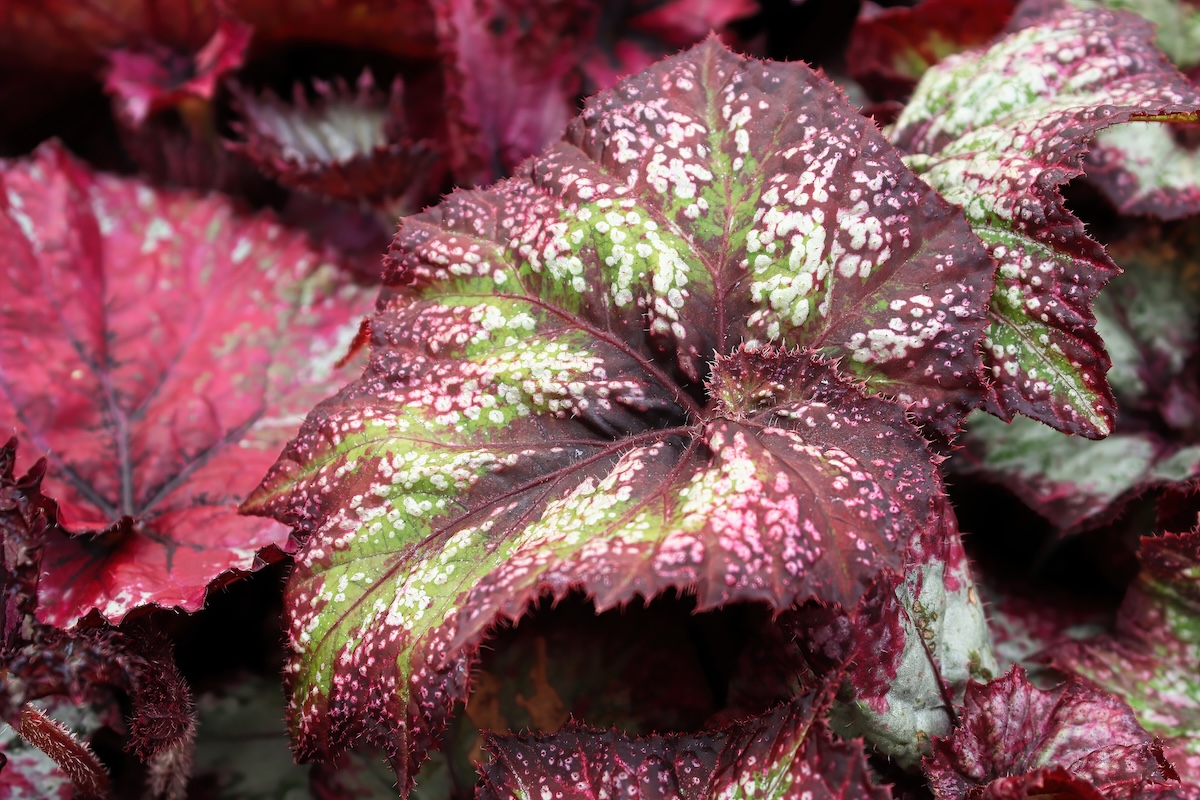
With large swirled, spotted, spiraled, ruffled, or winged leaves in shades of green, red, silver, and purple, who needs flowers? Except that Rex begonias, sometimes known as painted-leaf begonias or fancy-leaf begonias, do produce dainty little flowers that add to this fibrous plant’s charms.
What doesn’t add to its charm is its fussiness. They need bright indirect light: too little light forces dormancy, while too much burns. They like regular water, but too much causes leaf drop, withering and ultimately, death.
These small plants grown from rhizomes can be rewarding, but are toxic to people and pets.
Best For: Shady flower beds or potted plants, inside and out
Hardiness Zones: 10-12
5. Hosta (Hosta lancifolia)

Known for brightening shady corners around the yard, the herbaceous hosta is an easy-care perennial grown from rhizomes. It produces large leaves in a range of shapes, textures, and colors, including shades of green, gold, blue, and variegated patterns.
Capable of growing in full shade, hostas perform better when they receive at least some sun. Given adequate light, many varieties send up tall stalks of tiny purplish-white flowers, but it’s the foliage that is the true attraction. While deer love them and can devour mass plantings, hostas are toxic to pets.
Best For: Shady beds with rich, well-drained soil
Hardiness Zones: 3-9
6. Ornamental Kale (Brassica oleracea)
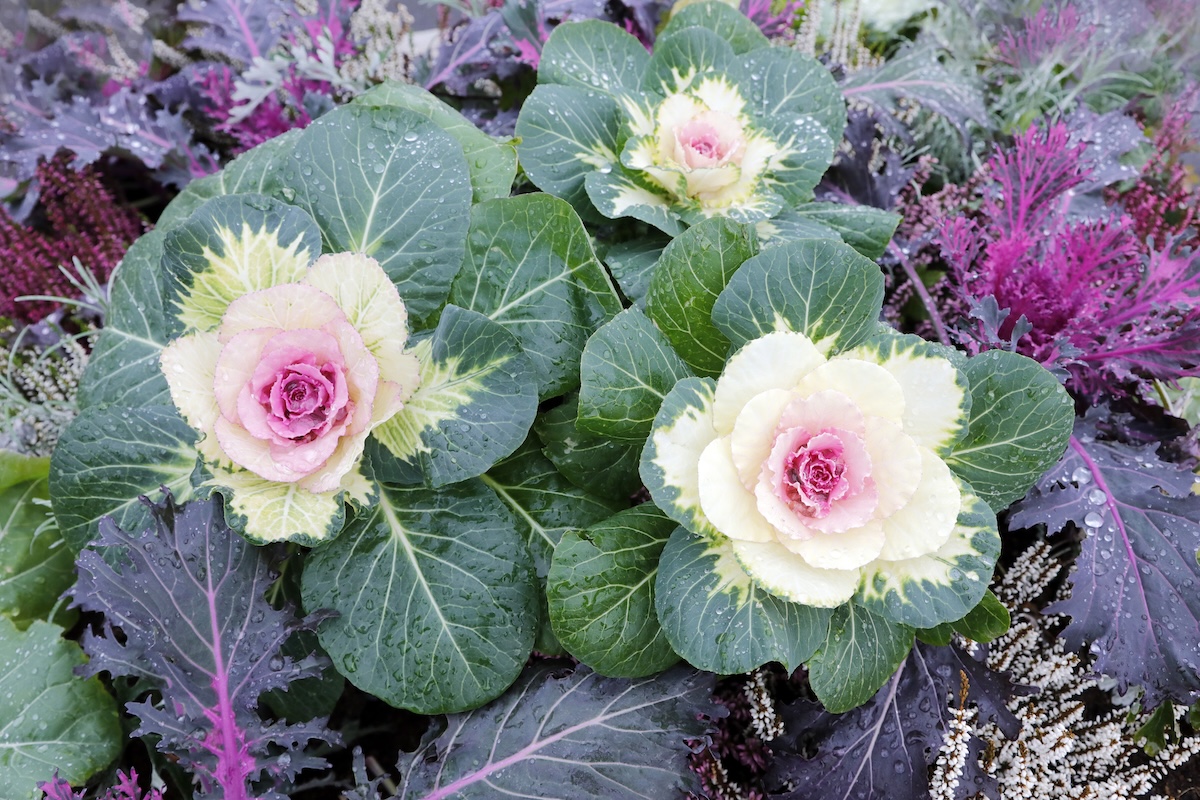
While other plants begin dying off in autumn, ornamental kale withstands temperatures as low as 5 degrees. Bred for looks over flavor, ornamental kale is nevertheless edible and may appeal to local wildlife, but its vibrant purples, roses, and whites on broad serrated, curly, or fringed leaves that form flower-like rosettes make ornamental kale a popular fall favorite.
Easily grown in sunny locations during the cooler spring and fall seasons, ornamental kale prefers the moist, well-drained soil conditions consistent with those times of year. Spreading up to one foot wide, it grows only about 15 inches tall, making it an ideal low border plant.
Best For: Ground cover, edging in cool weather
Hardiness Zones: 2-11
7. Dusty Miller (Jacobaea maritima)
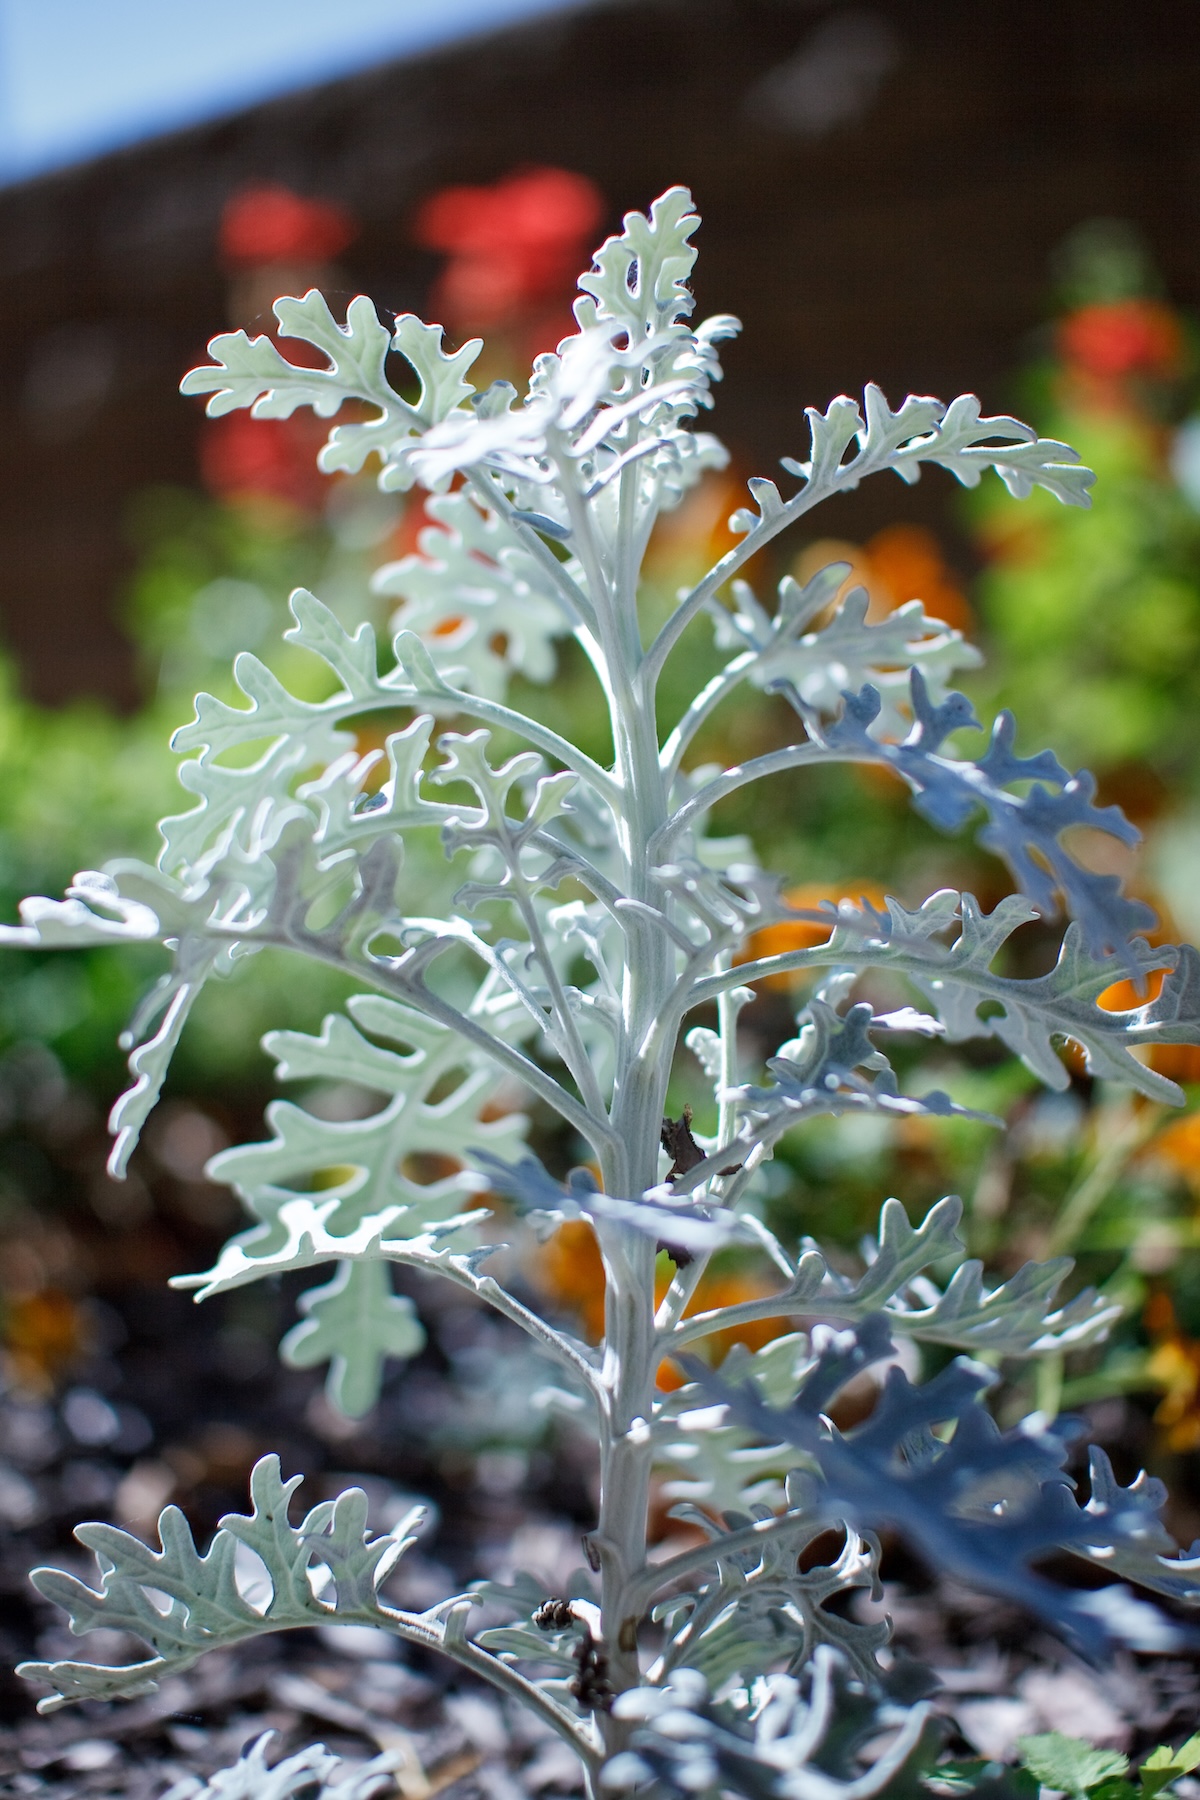
Prized for its soft, silvery, deeply lobed leaves that adopt an almost fern-like quality, dusty miller is a common garden companion to brightly flowered annuals. An evergreen perennial in southern climes, it’s used as an annual in northern regions, where its fuzzy, feathery leaves add texture to the landscape.
Drought-tolerant, dusty miller prefers full sun, but tolerates partial shade. Capable of producing small yellow flowers, this low-maintenance plant is most often used for its neutral, complementary foliage. A well-behaved plant that doesn’t spread more than 2 feet, it is poisonous if ingested.
Best For: Borders, edging, containers
Hardiness Zones: 8-11
8. Lamb’s Ear (Stachys byzantina)
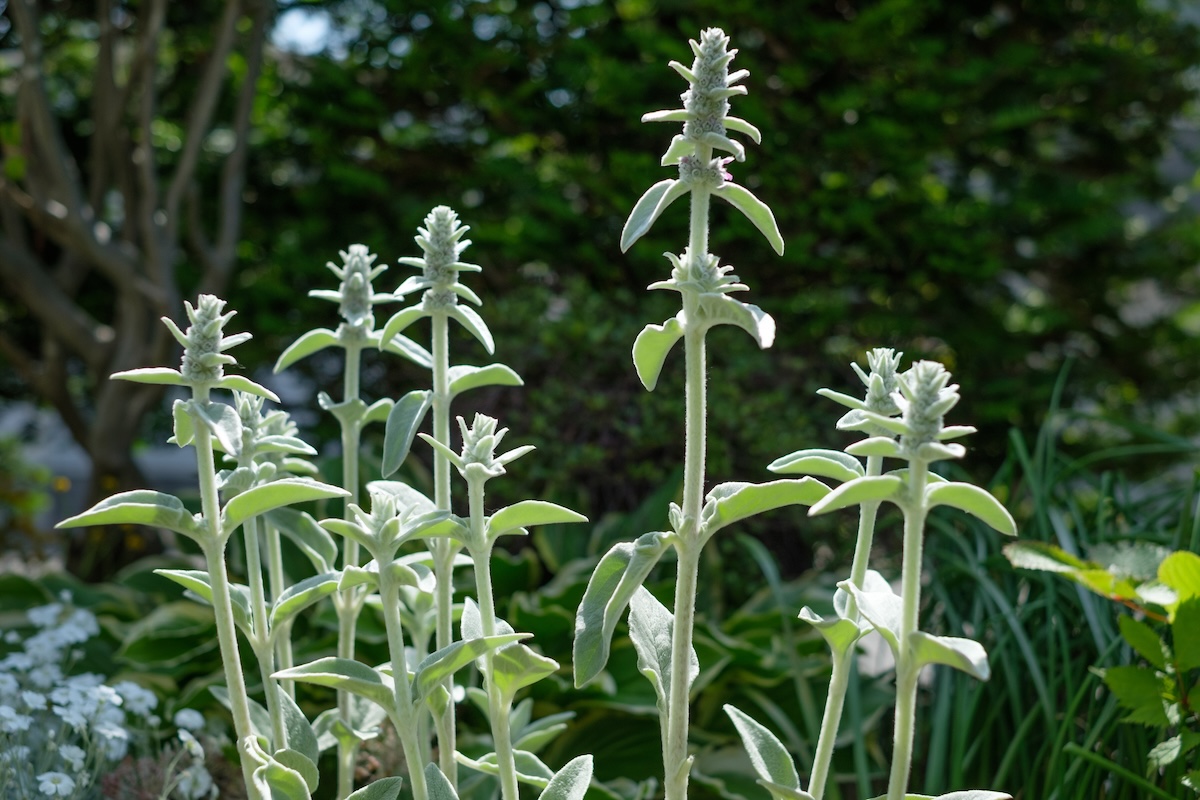
Another silver siren of the garden, lamb’s ear is an herbaceous perennial known for its plump, fuzzy silver leaves. A fast-spreading, drought-tolerant, deer-resistant, low-growing (12 to 18 inches) groundcover, it adds pleasing texture to garden beds and pathways and acts as a contrasting neutral to bright blooms of companion plants.
Best grown in full sun, this fuzzy-wuzzy tolerates partial sun as well as poor soil, but it doesn’t like too much dampness. Although new cultivars don’t bloom, older varieties may produce small flower spikes of pink, purple, or white in spring and summer.
Best For: Groundcover, garden beds, edging
Hardiness Zones: 4-9
9. Coral Bells (Heuchera sanguinea)
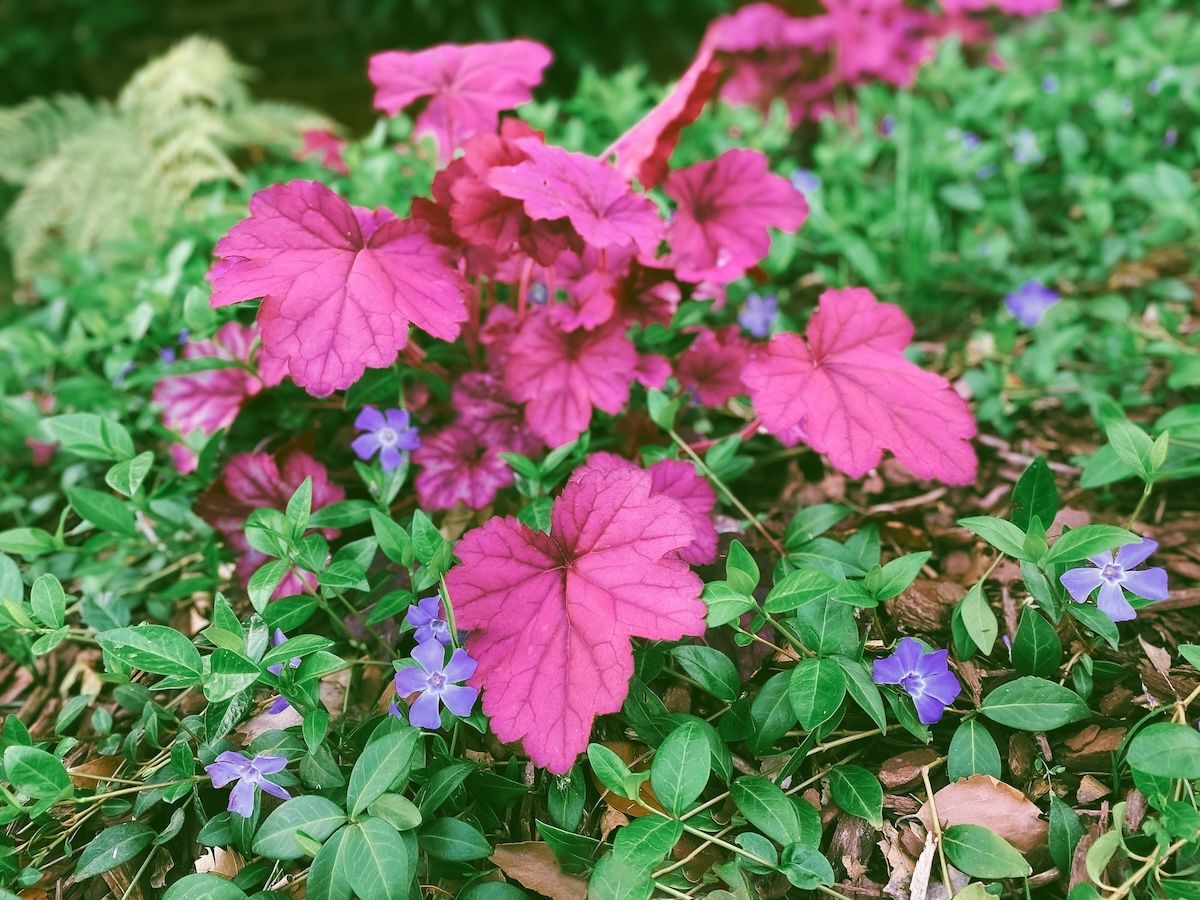
A short-lived perennial foliage plant native to North America, coral bells are available in numerous varieties and hybrids. In general, the plant develops into round mounds with a crown at its base. Lobed leaves may be green, bronze-green, lime green, gold, deep purple, or wine-red, particularly on the underside, which produces a vivacious effect in a breeze.
Given partial sun to full shade and consistently moist soil, these small (6 to 18 inch tall) plants produce masses of small, delicate, almost airy red or pink bell-shaped flowers on tall stems in spring or early summer.
Best For: woodlands, rock gardens, borders, containers, groundcover
Hardiness Zones: 4-9
10. Pink Muhly Grass (Muhlenbergia capillaris)
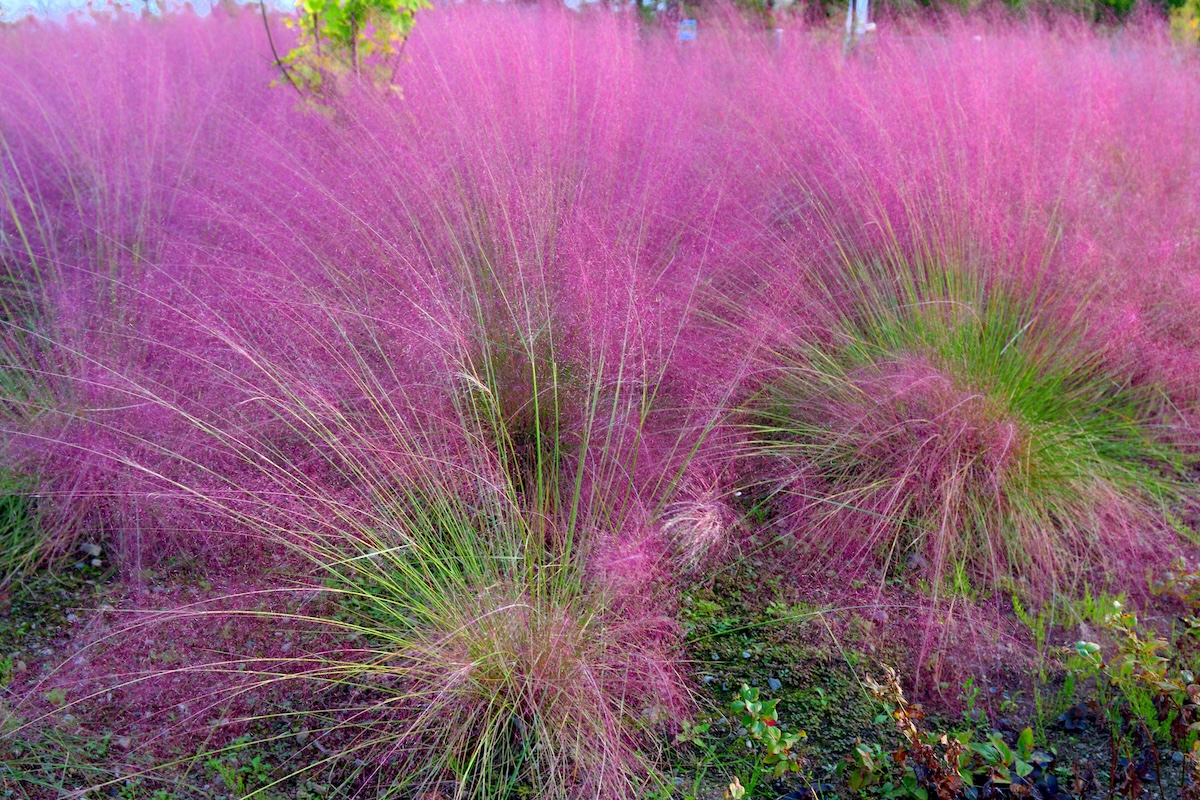
Pink muhly grass, also called pink hair grass, makes a statement with its masses of pink flower panicles gently blowing in the wind atop 3-foot-tall dark green clumping foliage. “Ornamental grasses provide a soothing sound throughout your landscape, especially on a breezy day,” observes Matt Morelli, region technical manager for TruGreen. “Not only do they sway in the wind, these grasses can also provide privacy, depth, and character to the landscape with very little maintenance requirements.”
The pink plumes provide late season color, but the bushy grass adds interest all year. Grown best in full sun, this deer-resistant, native ornamental grass thrives in even the poorest soils.
Best For: Sunny spaces with good drainage
Hardiness Zones: 5-11
11. Jacob’s Ladder (Polemonium)

Jacob’s ladder’s fern-like, purple-flushed leaves make it a garden focal point, whether it’s in bloom or not. It’s a shade-loving perennial that produces clusters of fragrant, dainty, deep blue bell-shaped flowers in the spring.
A low-maintenance plant, Jacob’s ladder likes moist but not soggy soil. At only about a foot tall and twice as wide, it has the appearance of a woodland shrub that is, fortunately, wildlife-resistant. Sometimes called Creeping Jacob’s ladder, it self-seeds, but is not an aggressive spreader.
Best For: Shady or partially shady woodsy areas with moist soil
Hardiness Zones: 4-8
The post 11 Plants That Look Stunning in a Home Landscape With or Without Blooms appeared first on Bob Vila.
]]>The post The Best Garden Fertilizers, Vetted appeared first on Bob Vila.
]]>Garden plants need nutrients to grow and remain healthy. Adequate soil fertility is as important to plants as a healthy diet is to animals and people. Experienced gardeners know the necessity of understanding soil nutrients so they can use them at the optimal time and in the right proportion with the best fertilizer to supplement the soil.
Choosing a fertilizer can be downright overwhelming because there are so many types and options available. Our favorite is Jobe’s All-Purpose Granular Fertilizer, because of its fast-acting, balanced, multipurpose formula that works for many different types of plants. Read on for tips and suggestions to help when shopping, and don’t miss our roundup of all our favorite picks among the best garden fertilizers available.
- BEST OVERALL: Jobe’s Organics All Purpose Granular Fertilizer
- BEST BANG FOR THE BUCK: Burpee Natural Organic All-Purpose Plant Food
- BEST ORGANIC: Sunday All-Purpose Plant Food Mix
- BEST LIQUID: GS Plant Foods Organic Fish and Kelp Blend
- BEST FOR VEGETABLES: Dr. Earth Organic and Natural Home Grown Fertilizer
- BEST FOR FLOWERS: Jobe’s Organics Annuals and Perennials Plant Food
- BEST PLANT STARTER: Espoma Organic Bio-Tone Starter Plus Fertilizer
- BEST ACIDIC: Dr. Earth Organic and Natural Acid-Lovers Fertilizer
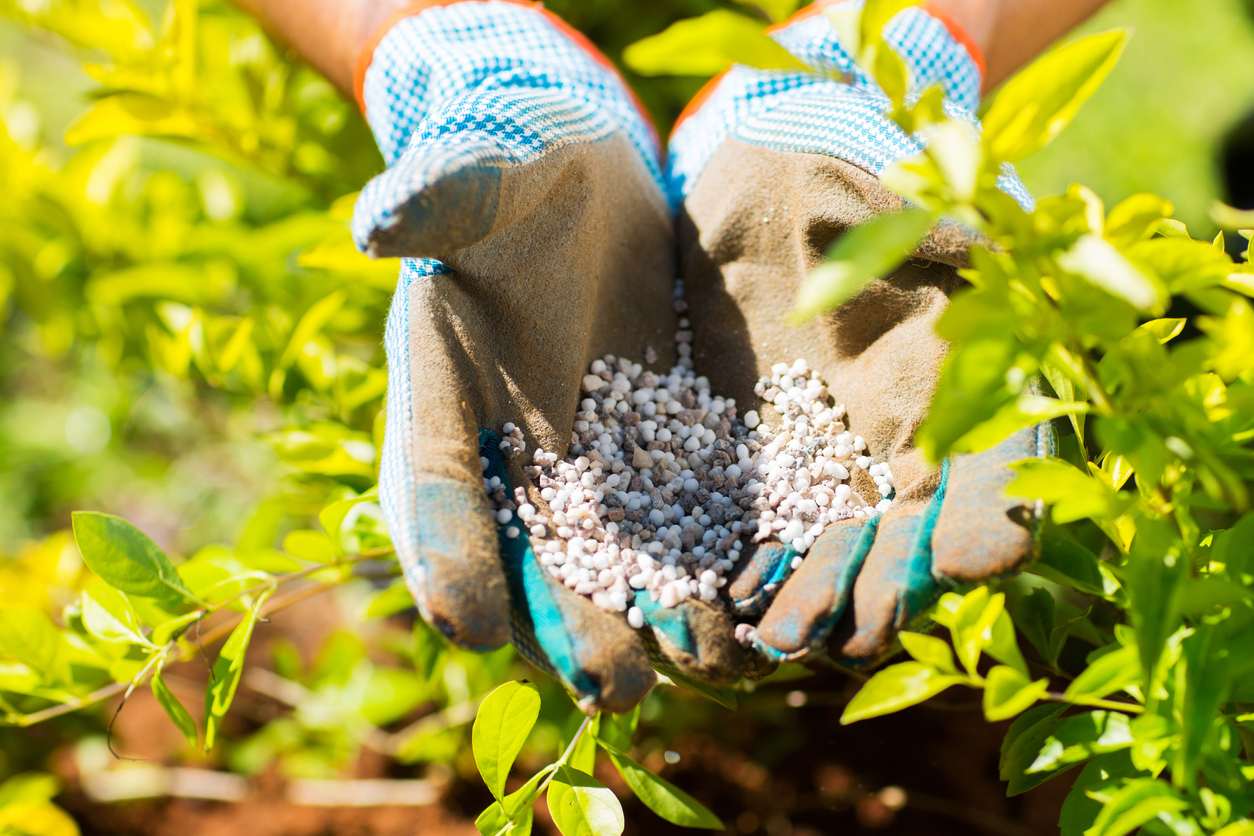
Before You Buy Garden Fertilizer
Choosing the right garden fertilizer is highly dependent on the types of plants being fed. Before buying garden fertilizer, take stock of the plants in the garden and research their individual nutritional needs. Flowers have different nutritional needs than vegetables, and seedlings have different nutritional needs than mature plants.
Before buying and applying a garden fertilizer, consider performing a soil test to determine the soil’s pH level and nutrient content. Use these test results to determine which type of fertilizer is the best fit.
Product Comparison
| Type | NPK Ratio | Quantity | |
| Jobe’s Organics All Purpose Granular Fertilizer | Granular | 4-4-4 | 16 pounds |
| Burpee Natural Organic All-Purpose Plant Food | Granular | 4-4-4 | 4 pounds |
| Sunday All-Purpose Plant Food Mix | Granular | 6-3-7 | 4 pounds |
| GS Plant Foods Organic Fish and Kelp Blend | Liquid | 2-3-1 | 32 fluid ounces |
| Dr. Earth Organic and Natural Home Grown Fertilizer | Granular | 4-6-3 | 4 pounds |
| Jobe’s Organics Annuals and Perennials Plant Food | Granular | 3-5-4 | 4 pounds |
| Espoma Organic Bio-Tone Starter Plus Fertilizer | Granular | 4-3-3 | 4 pounds |
| Dr. Earth Organic and Natural Acid-Lovers Fertilizer | Granular | 3-4-3 | 4 pounds |
Our Top Picks
Organic fertilizers are the safest and most versatile for most landscapes and home gardens. They are unlikely to harm plants from accidental overapplications, are generally people- and pet-safe, and pose a lower risk for water pollution when used according to directions. That said, be sure to feed plants consistently for the best results.
Best Overall
Jobe’s Organics All Purpose Granular Fertilizer
What We Like
- Contains bacteria and fungi for soil health
- Increases root mass and promotes healthy plant growth
- Fast-acting, balanced, multipurpose formula
What We Don’t Like
- Needs to be applied every 4 to 8 weeks
- Can have a strong smell, attracting dogs
Product Specs
- Type: Granular
- NPK ratio: 4-4-4
- Quantity: 16 pounds
This all-purpose fertilizer includes a combination of healthy bacteria, mycorrhizal fungi (fungi that form a symbiotic association with plants), and archaea (a microorganism that aggressively breaks down material). It checks the boxes for most basic plant needs, plus it is Organic Materials Review Institute (OMRI) listed for organic gardening by the USDA, which means it’s 100 percent organic and made with all-natural ingredients.
The blend of beneficial microorganisms in the fertilizer helps to improve soil quality, increases root mass, and promotes plant growth. The nitrogen-phosphorus-potassium (NPK) ratio is 4-4-4, which makes it a suitable fertilizer for flowers, a vegetable garden, shrubs, trees, and houseplants.
Get the Jobe’s Organics all-purpose garden fertilizer at Amazon or The Home Depot.
Best Bang For The Buck
Burpee Natural Organic All-Purpose Plant Food
What We Like
- Also contains micronutrients and beneficial microbes
- Has received an OMRI label for organic use
- Fine granular texture, making it easy to spread
What We Don’t Like
- Isn’t as readily available from major retailers
Product Specs
- Type: Granular
- NPK ratio: 4-4-4
- Quantity: 4 pounds
Burpee natural organic all-purpose plant food offers great value for a product that is effective and only contains organic ingredients. This fertilizer contains a balanced 4-4-4 formula of macronutrients as well as calcium, minor nutrients, and beneficial microbes. While some nutrients are released immediately, this is a slow-release product that feeds plants for up to 3 months. This versatile formula is suitable for seed starting, bedding plants, vegetable gardens, trees, shrubs, and container gardening, according to the manufacturer.
It comes in a 4-pound resealable bag that’s easy to store between feeding sessions. The product has been certified organic and given an OMRI label for organic gardening.
Get the Burpee garden fertilizer at Amazon or Burpee.
Best Organic
Sunday All-Purpose Plant Food Mix
What We Like
- Suitable for both outdoor and indoor plants
- Offers higher nutrient levels than many competing products
- Turkey litter and feather meal improve soil health slowly over time
What We Don’t Like
- Should be applied every 4 to 6 weeks, which is more often than other options
Product Specs
- Type: Granular
- NPK ratio: 6-3-7
- Quantity: 4 pounds
Sunday is known for its all-natural plant care products, and the all-purpose plant food mix is a star performer. According to the manufacturer, it’s a good choice for new or established flowers, vegetable gardens, trees, and shrubs.
Organic fertilizers typically have lower nutrient levels than inorganic formulas, but this product has an NPK ratio of 6-3-7, providing higher levels of nitrogen and potassium than many other organic fertilizers on the market. The fertilizer contains ingredients like turkey litter and feather meal to improve soil health.
While it needs to be applied every 4 to 6 weeks, the amount of fertilizer needed during each application is much less than for other products on this list. It’s also suitable for both indoor and outdoor plants, making it a versatile pick for those with a variety of plants to feed.
Get the Sunday garden fertilizer at Sunday.
Best Liquid
GS Plant Foods Organic Fish and Kelp Blend

What We Like
- Liquid formulas provide immediate absorption
- Suitable for most plant types, and can be used on both plants and flowers
- Made from a renewable raw material
What We Don’t Like
- The smaller container comes at a high price per ounce
Product Specs
- Type: Liquid
- NPK ratio: 2-3-1
- Quantity: 32 fluid ounces
Water-soluble fertilizers penetrate the soil, and foliage absorbs them immediately, giving the plants fast access to nutrients. Fish emulsion and kelp are excellent natural sources of nitrogen, phosphorus, and potassium—the three nutrients that help plants thrive. GS Plant Foods’ organic liquid fish and kelp blend delivers these nutrients in a 2-3-1 NPK ratio, so it is safe for any type of plant and serves as a compost enhancer.
Although liquid fertilizers do not tend to last as long as granular fertilizers, they typically come in concentrated forms that need to be diluted before applying. Organic liquid fish and kelp blend comes in a 1-quart, 1-gallon, 5-gallon, or 55-gallon container. It’s compliant for use in organic gardening and OMRI listed for organic use.
Get the GS Plant Foods garden fertilizer at Amazon.
Best For Vegetables
Dr. Earth Organic and Natural Home Grown Fertilizer
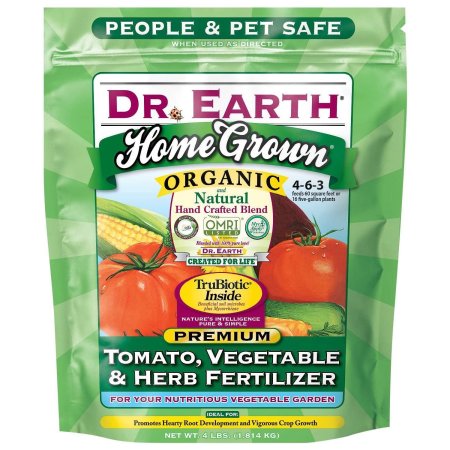
What We Like
- Contains organic and feed-grade ingredients
- The formula includes both essential nutrients and trace elements
- Designed to be used as a starter, a top dressing, or a compost tea
What We Don’t Like
- Primarily used for vegetable growth; not suitable for all plant types
- The powder form must be worked into soil
- Dogs may be attracted to the food-grade ingredients
Product Specs
- Type: Granular
- NPK ratio: 4-6-3
- Quantity: 4 pounds
Made from human- and feed-grade ingredients, Dr. Earth fertilizer is enriched with multiminerals, proteins, carbohydrates, humic acids, and trace elements that promote the healthiest soils. It’s versatile, too. Use Dr. Earth as a starter fertilizer during initial planting and transplanting and regularly as a top dressing or in compost tea.
Dr. Earth fertilizer contains no synthetic chemicals, chicken manure, or toxic ingredients, so it’s safe for pets and people. This fertilizer is sustainably made in the United States and carries the OMRI seal.
Get the Dr. Earth Home Grown garden fertilizer at Amazon or Target.
Best For Flowers
Jobe’s Organics Annuals and Perennials Plant Food

What We Like
- Improves soil condition over time
- Pet- and people-friendly
- Balanced formula for flowering plants
What We Don’t Like
- Strong smell of manure
Product Specs
- Type: Granular
- NPK ratio: 3-5-4
- Quantity: 4 pounds
Featuring Biozome with archaea (Jobe’s proprietary microbe package), this fertilizer rapidly breaks down nutrients in the soil for faster results and improves soil condition over time by increasing microorganism activity for a healthier, living soil. Made from all-natural materials and certified for organic use, this fertilizer is pet- and people-friendly, will not cause fertilizer burn, and is safe for the environment.
The fertilizer analysis for this Jobe’s product is 3-5-4, which makes it a good source of nutrients for most annual and perennial plants. Use the granular formula on flowering plants such as impatiens, begonias, marigolds, zinnias, blue minks, lilies, daylilies, peonies, ferns, and more.
Get the Jobe’s Organics annuals and perennials garden fertilizer at Amazon or Ace Hardware.
Best Plant Starter
Espoma Organic Bio-tone Starter Plus Fertilizer
What We Like
- Designed to promote root growth
- Contains beneficial fungi along with key macronutrients
- Ideal for starting a wide variety of plants
What We Don’t Like
- Works best when placed in the hole at planting
Product Specs
- Type: Granular
- NPK ratio: 4-3-3
- Quantity: 4 pounds
Specially enhanced with beneficial bacteria and starter cultures of seven different beneficial mycorrhizal fungi, Espoma Organic Bio-tone Starter Plus fertilizer promotes maximum root development directly after transplanting. Mycorrhizal fungi work symbiotically with the root system of the plants to greatly increase the amount of water and nutrients a plant can use.
Use of Bio-tone Starter Plus during planting will help seedlings develop a healthy colony of mycorrhizal fungi so the plants will settle into their new homes more quickly and thrive in the long run. With an NPK ratio of 4-3-3, Bio-tone Starter Plus is a good all-purpose starter fertilizer that gardeners can use in garden beds for all types of plants.
Get the Espoma fertilizer at Amazon or Ace Hardware.
Best Acidic
Dr. Earth Organic and Natural Acid Lovers Fertilizer
What We Like
- Helps lower soil pH
- Assists plants with absorbing nutrients efficiently
- Designed for fast release
What We Don’t Like
- Strong smell
- Isn’t suitable for products requiring alkaline soil
- Has a Proposition 65 warning
Product Specs
- Type: Granular
- NPK ratio: 3-4-3
- Quantity: 4 pounds
Some plants need a little acidity to look their best. Acid fertilizers lower soil pH to free up and help plants access nutrients rendered unavailable in high-pH soils. Dr. Earth Organic and Natural Acid Lovers fertilizer is ideal for hollies, gardenias, hydrangeas, blueberries, evergreens, ferns, shade plants, azaleas, camellias, rhododendrons, and maples. It temporarily lowers pH values in the soil, allowing the plants to absorb the nutrients they need to promote healthier foliage and bigger blooms.
This fertilizer is specially designed to release a portion of nutrients quickly and provide continuous feeding for several months of long-lasting results. It’s also safe for people and pets when used as directed.
Get the Dr. Earth Natural Acid Lovers garden fertilizer at Amazon or The Home Depot.
Or, DIY Your Own Garden Fertilizer
Compost can provide beneficial microbes and nutrients for plants. It can be made easily at home with vegetable scraps and yard clippings. Ingredients like coffee grounds, banana peels, and other kitchen scraps all make excellent natural fertilizers. Compost should make up about half of the total volume of the fertilizer blend.
Bone meal provides phosphorus, which encourages root growth, flower production, and better fruit yields. This organic material also helps plants resist disease and increases the number of beneficial microorganisms in the soil. Bone meal should make up one quarter of the total volume of the fertilizer blend.
Kelp meal is full of trace minerals like calcium, iron, zinc, magnesium, and boron that help keep plants healthy. Kelp meal can help promote microbial activity in the soil as well as improve its structure. This organic material should make up one eighth of the total volume of the fertilizer blend, too.
Fish emulsion is a great source of nitrogen, which helps plants produce the protein needed for photosynthesis, flowering, and fruiting. Fish emulsion also contains other essential minerals like potassium, calcium, and magnesium that allow plants to thrive even when conditions are unfavorable. This organic material should also make up one eighth of the total volume of the fertilizer blend.
Jump to Our Top Picks
How We Chose the Best Garden Fertilizers
Garden fertilizers can give new plants a boost and feed plants throughout their growing season. We looked at fertilizer types and common plant needs to come up with this carefully curated list of some of the best garden fertilizers.
We considered more than 20 garden fertilizer options, and we weighed a number of practical considerations. We analyzed the nutrient ratios, the purpose of various products, and the quantity of fertilizer in packages before making our recommendations.
The list includes multipurpose formulas and a few designed for specific garden uses.
- Organic vs. inorganic: We only considered organic fertilizers for this guide since they are capable of top-notch performance without causing any negative environmental impact.
- Type: We considered both liquid and granular formulas for our recommendations since both fertilizer types offer unique benefits.
- Value: Since fertilizers vary in type and quantity, it can be hard to determine a product’s value. We ensured that each recommended product offered excellent value, regardless of the format.
Our Verdict
We recommend Jobe’s Organics all-purpose garden fertilizer as our top pick for its organic formulation, fast-acting results, and ready availability. There are other common garden fertilizer options, including Miracle-Gro Shake ‘N Feed All Purpose Plant Food and JR Peters All Purpose Fertilizer. However, they do not meet our sustainability guidelines and are not recommended in our top picks due to their potentially harmful ingredients and negative impact on the environment.
Types of Garden Fertilizers
Fertilizer comes in three basic forms: granules, liquid, and stakes. Each type of fertilizer can be classified as either organic or inorganic.
Granule Fertilizers
Gardeners apply fertilizer granules by either mixing them into the soil at planting time or by “top dressing.” Top dressing simply means sprinkling the granules on the soil surface over the plant’s root zone. Granular fertilizers are available in either slow-release or quick-release formulas.
- Slow-release fertilizers provide a steady flow of nutrients for an extended time, up to a full growing season. These fertilizers comprise organic or inorganic ingredients. Soil microbes break down organic slow-release fertilizer and make it available for plants to use. Manufacturers coat inorganic slow-release fertilizer pellets to slowly dissolve as water moves through the soil.
- Quick-release fertilizer is inorganic. It should dissolve fully into the soil within just a few weeks, giving plants a quick burst of nutrients.
Liquid Fertilizers
Liquid fertilizers include ready-to-mix dry granules and liquid concentrates. They can consist of either organic or inorganic ingredients. Water-soluble fertilizers can soak the roots, or in some instances, spray right onto plant foliage. These formulas are available to the plant immediately.
Fertilizer Spikes
Fertilizer spikes also come in either organic or inorganic formulas. They act similarly to slow-release fertilizers. Calculate the number of spikes needed for a plant based on plant size and manufacturer directions. Space the spikes evenly around the edge of the plant’s root zone and push them into the soil.
Organic vs. Inorganic Fertilizers
There are two major differences between organic and inorganic fertilizers: ingredients and the way nutrients become available to the plant.
- Organic fertilizers add vital organic matter to the soil and work with the living microorganisms in the soil to feed plants. These fertilizers come from plant and animal sources: composted chicken manure, bone meal, blood meal, alfalfa meal, cottonseed meal, and kelp meal.
- Inorganic fertilizers are highly concentrated and feed plants directly. Manufacturers make inorganic, or synthetic, fertilizers from the synthesized chemicals of nitrogen, phosphorus, and potassium, sometimes as byproducts of other industrial processes.
What to Consider When Choosing Garden Fertilizer
NPK Ratios
It is usually best to begin with a soil test to determine the natural fertility of a garden soil before applying fertilizer. Contact the local Cooperative Extension Service to submit a soil sample for testing. The results will show which nutrients the soil might lack, so those nutrients can be provided in the form of fertilizer.
The major nutrients in fertilizer are nitrogen, phosphorus, and potassium. Fertilizer products list these elements on the bag as a ratio such as 10-10-10 or 4-3-4. The package listing always appears in the order NPK.
Determining the right ratio for a garden depends on what the specific plants need.
- Nitrogen supports foliage plants’ growth. High-nitrogen fertilizer is useful to help grass start growing in spring or to help leafy greens produce a heavy yield.
- Phosphorus helps plants establish roots, produce flowers, and develop fruit. High-phosphorus fertilizer is useful as a starter fertilizer or to spruce up annual flower beds.
- Potassium is an important element for rigid stems and overall plant health. Potassium helps plants get through drought and other growing stresses.
Plant Needs
Different kinds of plants, and plants at various stages of life, have different nutrient requirements. Flowering and fruiting plants need plant food with higher phosphorus content, while plants grown for foliage need more nitrogen.
Planting a new flower, vegetable, or herb bed? Use a starter fertilizer to help the young plants become established in their new home.
Do the azaleas, camellias, gardenias, or blueberries look weak and puny? Perk them up with a fertilizer specifically formulated for acid-loving plants.
Quantity
Regular fertilizer applications keep plants vigorous and productive. How often fertilizer should be applied depends on the soil type and whether the plants are in raised beds or containers. Most plants growing in porous, well-drained soil or in containers need more frequent feeding, about every 3 to 4 weeks throughout the growing season. Plants growing in clay soils typically require less fertilizer. One application every 4 to 6 weeks after planting is usually enough.
Typically, granular fertilizer will go further than a liquid fertilizer. To determine how much fertilizer is needed, look at how much area one bag or bottle covers and divide that by the square footage of the garden beds. The result will indicate how much fertilizer will get the plants through the growing season.
FAQs
Q. When should I fertilize my garden?
The best time to fertilize outdoor plants is when they are placed in the ground, beginning with added compost or a starter fertilizer. After that, plants need nutrients during their peak growing season, typically spring through summer. When choosing a long-acting or continuous feeder, you can apply it less often.
Q. What is the best fertilizer for vegetables?
Vegetables need a good start since they typically have a short, one-time growing season. Start them out with a boost of nutrients and good soil, and then apply a balanced fertilizer for vegetables and herbs like Dr. Earth Home Grown garden fertilizer for tomato, vegetable, and herb gardens.
Q. What is the best fertilizer for garden plants?
The best fertilizer depends on the plants. Lawn fertilizers, for example, differ from vegetable fertilizers. Many native plants need little to no fertilizer, assuming they are growing in decent soils. But flowering plants often need a boost so the plant can stay healthy plus send extra energy into producing lots of large, colorful flowers. Try Jobe’s Organics all-purpose garden fertilizer for beautiful blooms.
Q. When should I apply 10-10-10 fertilizer to my vegetable garden?
Apply most balanced (10-10-10) fertilizers monthly during the growing season to boost the health of perennial plants. But be sure to check the package directions, since some fertilizers have slow-release formulas that last longer.
Q. How do you naturally fertilize soil?
Nutrient-rich soil is the best type for gardens, and keeping soil balanced and with plenty of humus is preferred by many gardeners over adding fertilizer regularly. Get healthy soil with annual additions of organic compost such as manure, homemade compost from kitchen scraps, and even leaves or grass clippings. Mix up the ingredients for the best effect, and use organic fertilizer as needed.
Q. Are eggshells good for fertilizer?
Ground-up eggshells can add some calcium and other nutrients. They won’t necessarily provide all nutrients that all plants need, and they break down slowly, so effects are not immediate. Still, adding them can be part of any effort to maintain soil health; they do not contain enough of any ingredient to harm plants.
The post The Best Garden Fertilizers, Vetted appeared first on Bob Vila.
]]>The post How Starting Seeds Indoors This Year Will Help You Grow a Better Garden Than Ever appeared first on Bob Vila.
]]>If you’re itching to get your garden going, there’s no need to wait until the weather outside is agreeable (and really, your garden will thank you for your impatience). By growing plants from seeds that you start indoors, you’ll save money and have access to a wider variety of vegetables, fruits, and flowers than you can buy at garden centers as seedlings.
Starting seeds indoors also helps extend the growing season for vegetables like peppers and tomatoes, since hardened-off seedlings will be weeks ahead of seeds sown directly in the ground. Although some plants, like carrots and beets, fare best when sowed directly in the ground, many others transplant well. What are you waiting for? Learn more about starting seeds indoors and avoiding potential missteps in the process.

Tools & Materials
Bobvila.com may earn a commission from purchases made through these links.
What to Know Before You Sow
Some seeds require stratification.
Many seeds can be sown as is, but some have additional requirements. If you’re sowing only vegetable seeds and annual flowers, you can likely skip this step. Some plants, however, require stratifying, or chilling, to mimic the overwintering cycle a fallen seed would undergo in nature. Among those that need stratification are black-eyed Susan and some types of milkweed.
If your seed packet calls for stratifying, place the seeds on a dampened paper towel and fold the paper gently before slipping it into a zip-top plastic bag and placing it in your fridge. Depending on the seeds, they may need to remain in the fridge for 1 to 3 months; the suggested chilling time should appear on the seed packet.
Scarify your seeds, if called for on the packet.
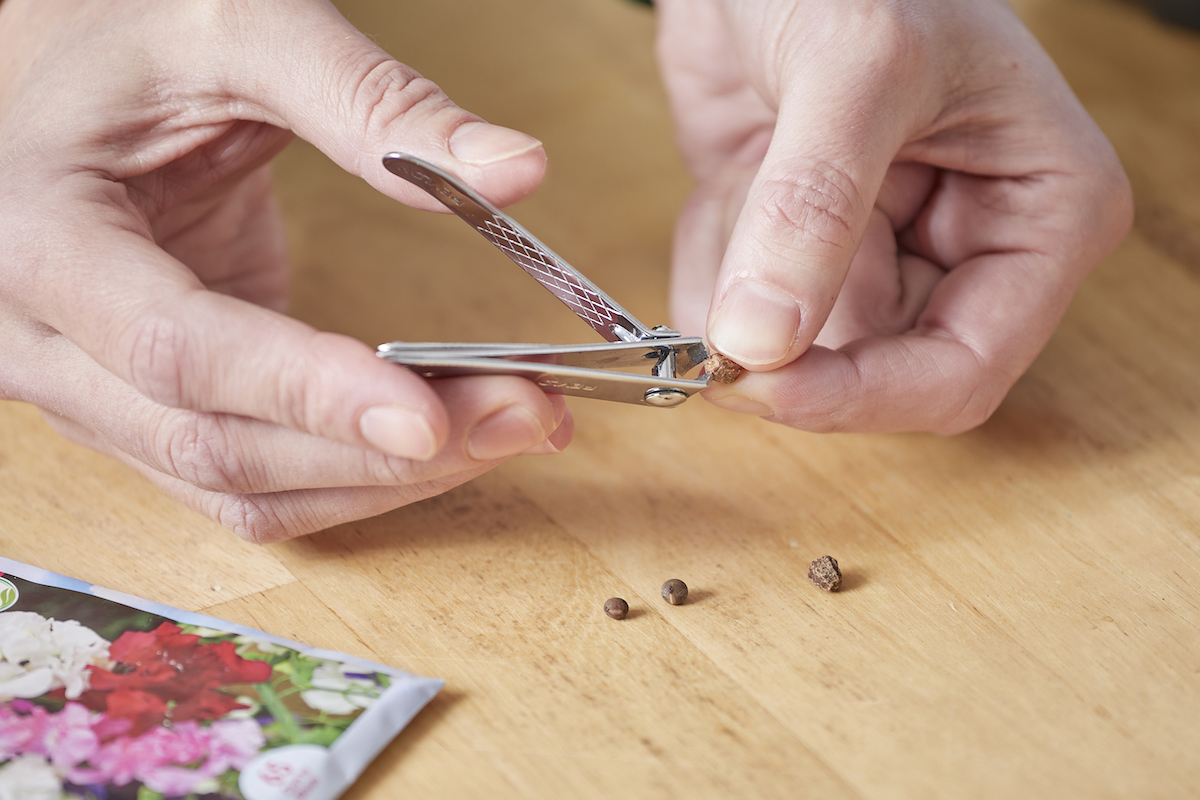
Scarifying is the process of nicking the outer shell of a seed to encourage it to germinate. Some seed shells (like those for nasturtiums and sweet peas) are so hard that the rate of germination is low unless they get a little help breaking out of their shells. A simple way to do this at home is to chip the edge of the seed with sharp fingernail clippers—only enough to perforate the hard shell casing and no more.
Start seeds at the right time.
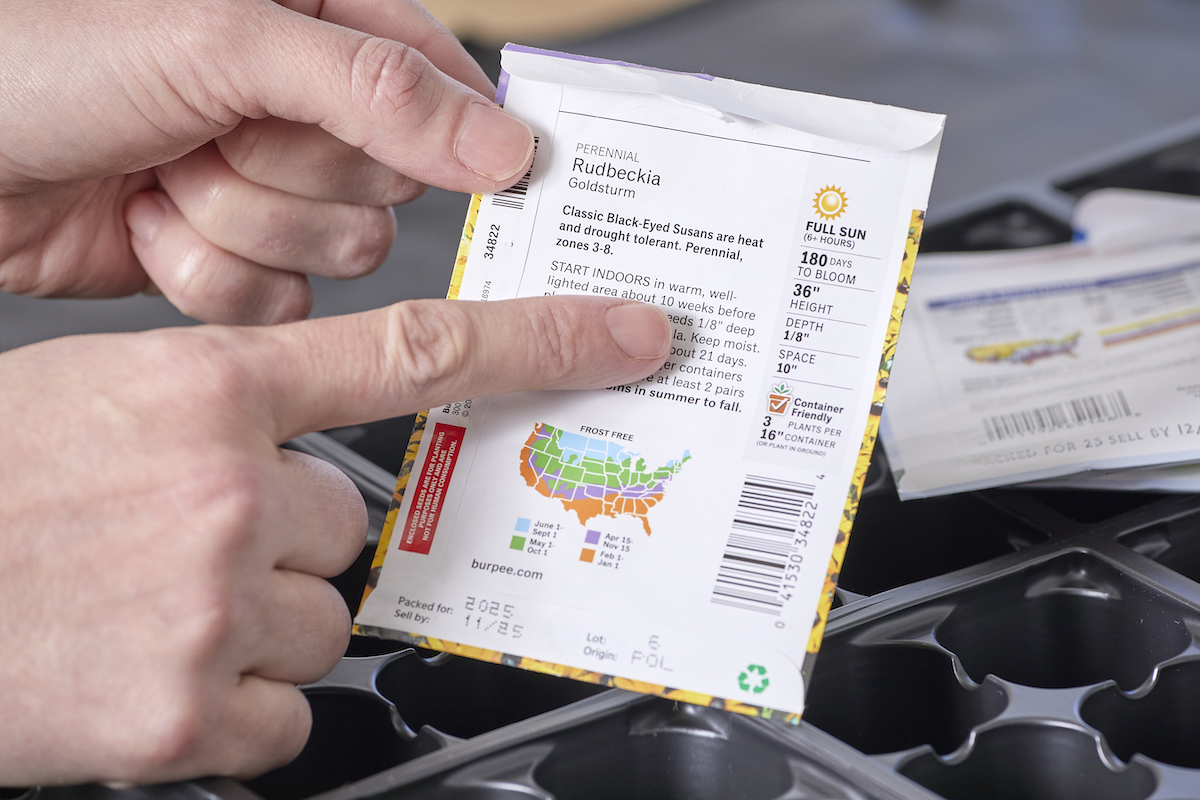
A plant’s seed packet lists the best time to start the seeds. Many vegetable seeds should be started 4 to 6 weeks before the last expected frost date in your area. Other seeds, including many perennial flowers, should start earlier, as much as 8 to 10 weeks or 10 to 12 weeks before the last frost date. If you’re starting perennials, make sure the mature plants will survive in your growing zone through winter.
Sow and Grow
Prep your mix for planting.
Pour sterile seed-starting medium in a clean bowl and add just enough warm water to dampen it. Use of a sterile mix, not garden soil, is important to avoid spreading diseases to the young seedlings. Seed-starting mix is designed to be lighter and airer so that seeds and young roots can break through the soil.
Fill up your tray.
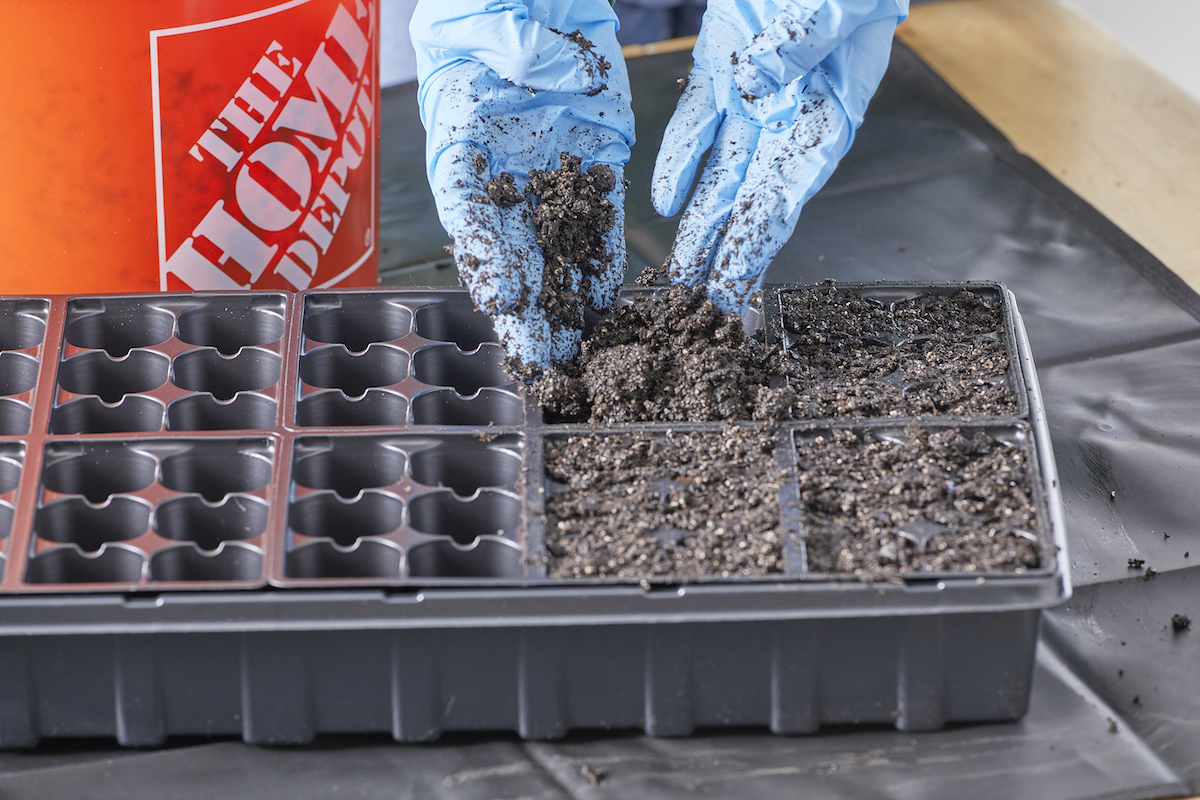
Purchase a plastic grow flat or tray designed for seed starting. A long, shallow container is designed specifically to accommodate a growing plant and its roots. Seed-starting kits might come with an insertable tray consisting of multiple cells with drainage holes and a bottom tray to catch and hold water. Having a tray with individual sections makes it easier to keep the roots of the seedlings separate after they start to grow, and the cells are tiny enough to hold one seedling each.
Moisten the seed mix well, so that it feels like a wrung-out sponge. Distribute the moistened mix between the individual cells in the tray and fill each one almost to the top. Another option is to set tiny peat pots in a large bottom tray or use peat starter pods.
Plot out the plants.
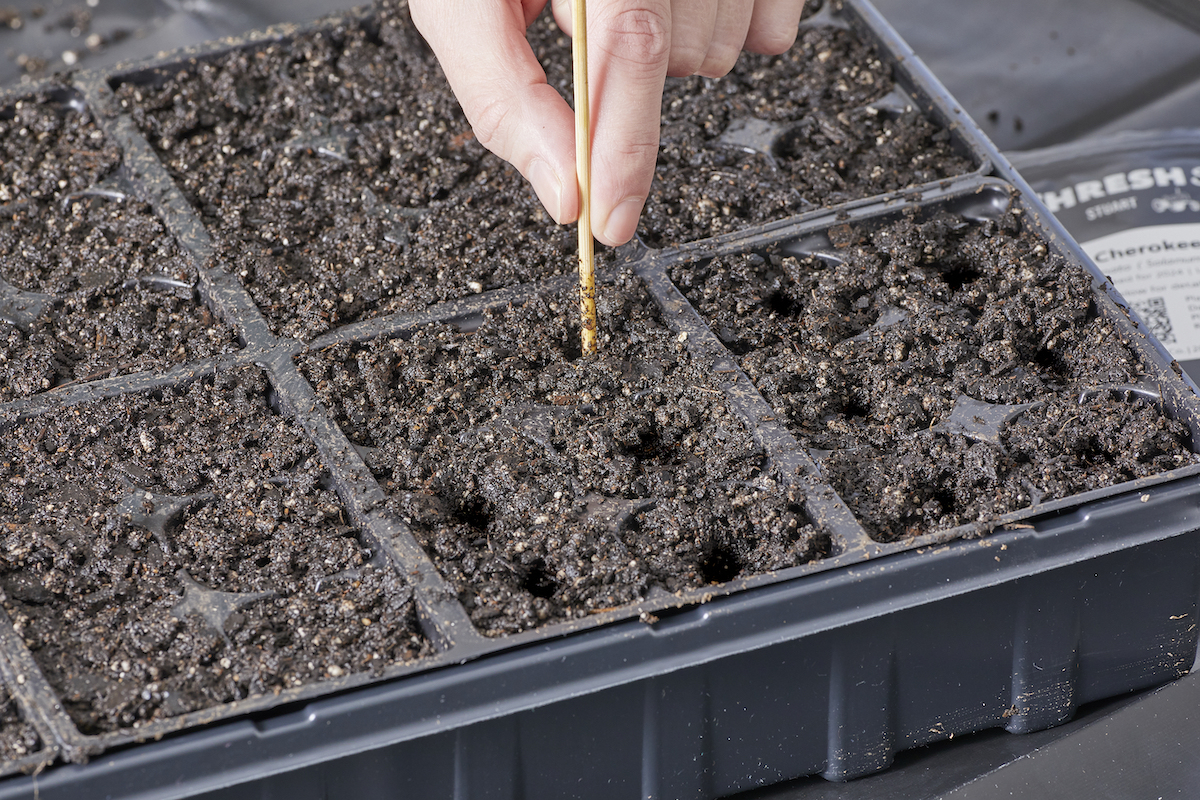
Make an indentation in the top of the planting mix in each cell, or make shallow rows if you’re using a flat without individual cells. The packet will tell you how deeply the seeds should be planted, but the general rule is to plant a seed four times as deep as its width. Large seeds, like cantaloupe and sunflower, need to be planted deeper than small, fine seeds.
Drop in seeds.
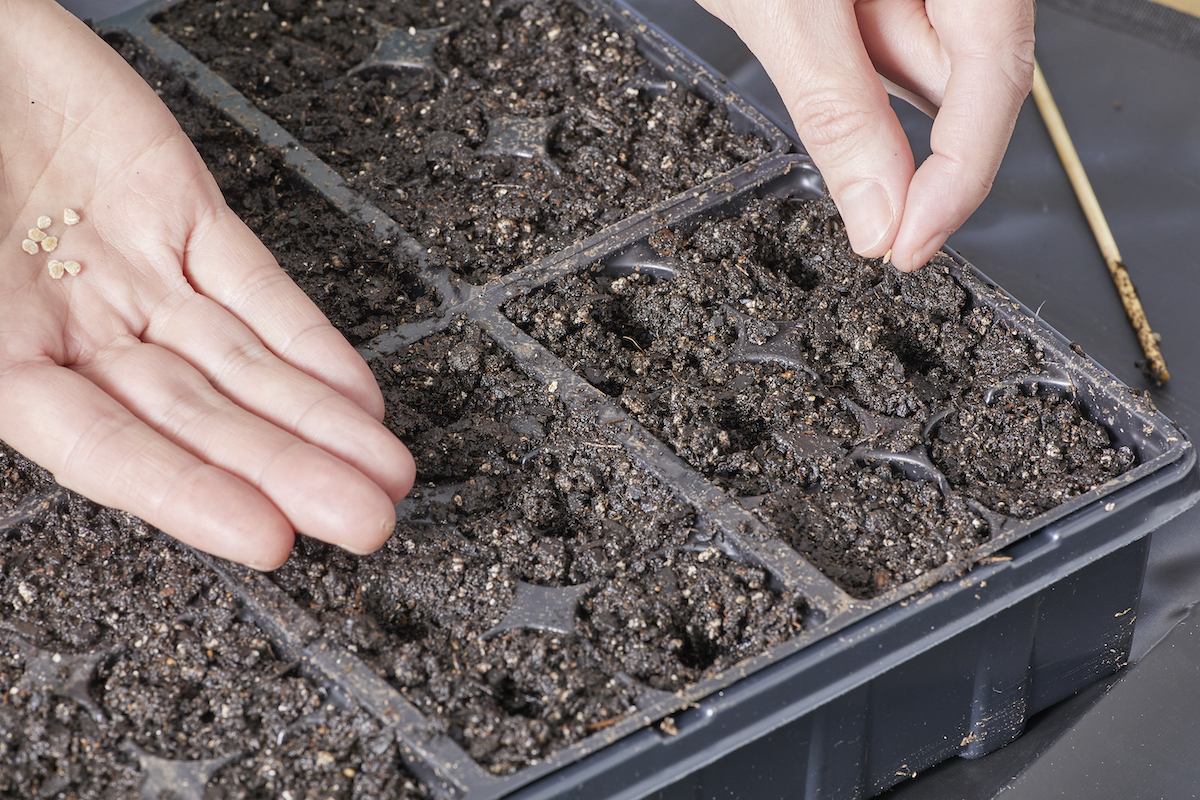
Allot one seed per cell or distribute them evenly in the shallow rows. Plant each at the depth listed on the seed packet. If the packet says they require light to germinate, then don’t cover them; these seeds may be sprinkled on top of the seed-starting mix. If there aren’t instructions regarding light for the seeds, cover them with the moistened medium to match the recommended depth, patting the soil very lightly on top. Then, cover the seed tray with a fitted plastic top or with plastic wrap to keep the medium from drying out.
Find an indoor spot with optimal temperatures.
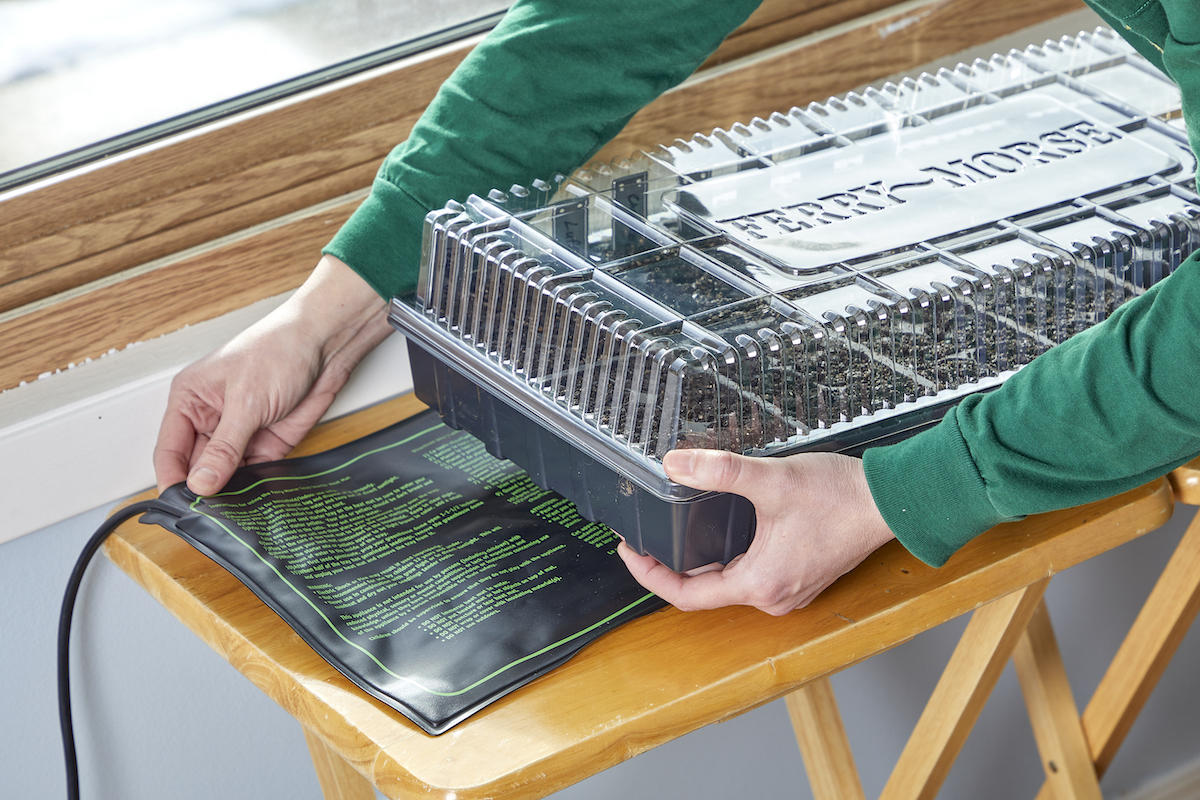
Find a room-temperature or warmer spot for the seed tray, based on recommended temperature per the seed label. Both the ambient air temperature and soil temperature can affect seed germination. Adding gentle bottom heat for the soil often raises the temperature 10 to 20 degrees. Use a heated growing pad or place the tray on top of a refrigerator where it’s slightly warm.
For seeds that require cooler temperatures to germinate (like carrots, cabbage, or Swiss chard), find a cool part of the house away from heat sources until they sprout (or start the seeds outdoors in spring as directed by the seed label).
Wait Until Sprouts Start
Check seeds daily.
Germination times vary by seed type, so check seeds daily for moisture and for the chance to see a new sprout. Some seeds (such as lettuce and kale) can germinate within a couple of days, while others (including perennial flowers) can take two or more weeks.
Give sprouts the light they need.
Once the seeds sprout, remove the plastic cover and move the seedlings near a sunny window or place them under grow lights to encourage healthy growth. Don’t place them in direct sunlight, where they can become too warm—a table near a sunny window is sufficient. When using a grow light, place it directly overhead if possible and keep the bulbs about 2 to 6 inches above the surface of the sprouts’ leaves.
Water carefully and consistently.

Water plants as needed to keep the starting mix damp, but not soggy. If the seed-starting mix is moist and the tray is covered, you might not have to add any more water to get the seeds to sprout; if you do, a gentle mist is the best option. Once seedlings emerge, a few clues can help you know when to water: the tray feels lighter than normal, or the soil changes color or pulls away from the side of the tray.
Water sprouts carefully, either from above with a gentle mist or flow, or by pouring water into the tray beneath the pots so they can wick moisture up. Just be sure not to leave standing water in the tray for long; drain excess water after the soil feels damp.
Provide air circulation.
When setting a seed tray on top of the fridge or in a closet out of the way, recognize that the soil might not get enough air circulation. Lack of moving air combined with wet soil causes fungi to thrive. Damping off is a soil-borne fungal disease that often affects new seedlings, and can lead to demise of the plants. One way to provide airflow is to place a small fan near the seed-growing area; don’t point the fan directly at tender seedlings.
Thin out seedlings.
If you’ve hedged your bets at seed-sowing time by placing two or more seeds in some or all cells, you will have to sacrifice a few starts. The small cells in most seed-starting trays are designed to hold a single plant. Even if you sow in rows (indoors or out), thinning starts keeps the young plants from competing for resources and root space. As tough as it is to dispose of a successful sprout, it will pay off. Instead of pulling out the weaker of the starts, use a tiny pair of manicure scissors to snip it off at soil level; this avoids disturbing the other start.
Know when to pot up seed starts.
When the seedlings develop their first true leaves, transplant them into individual peat pots. This ensures they have room to grow as they prepare for transplanting outdoors. The first leaves that emerge are called cotyledons, or “seed leaves”—the plant’s true leaves will develop next. As one or more sets of true leaves develop (typically about 4 to 5 weeks after sowing), the seedling likely is strong enough to be transplanted into a peat pot where it can remain until it’s time to plant it in the garden. Any good potting soil will do for filling the peat pots.
Get Ready to Garden
Prepare the garden for transplants.
Till and prepare your garden soil in preparation for the new plants. Break up large clods and remove twigs and rocks. Most vegetables thrive in well-draining soil and full sunlight, but other plants have different light requirements, so choose a spot that’s suitable for your specific plants.
Harden off plants to make the switch to outdoors.
After sprouts have recovered from being potted up, and hopefully a week or so before time to plant outdoors, place young potted-up plants outdoors in a protected area. This means out of the direct sun and wind at first. Gradually introduce them to outdoor conditions by starting with only an hour or two of exposure the first trip outdoors and more time and sunlight each subsequent day as they gain strength.
Called “hardening,” this gives the tender plants a chance to adapt to the outdoor environment before you move them to their final growing spot. After hardening, transplant the young plants into the garden, leaving the peat pots in place if you like—they should biodegrade in the soil (or remove and compost them). Just be sure to tear off the top half-inch of each pot so it won’t wick moisture from the transplant, and the bottom of the pot to ensure delicate roots can go through. After planting, water the new transplants well to give them a good start in the garden.
Final Thoughts
The advice above can help new gardeners’ chances of success by ensuring seeds and young seedlings get the right water, light, soil, airflow, and space to grow. All you have to do is combine these tips with the wealth of information on each plant’s seed packet, so be sure to read those labels.
The other insurance for success is experience, even a failure or two. Make notes on what does and doesn’t so you can adjust for the next round of indoor seed starting.
The post How Starting Seeds Indoors This Year Will Help You Grow a Better Garden Than Ever appeared first on Bob Vila.
]]>As you approach spring landscaping chores, you might be considering adding a dogwood tree to your yard. But, when do dogwoods bloom? They typically flower between early spring and early summer, depending on the species and the climate it inhabits. Many also offer colorful drupes and fall foliage after the “dog and posy” show.
Their common name may derive from dagwood—not the comic strip character but the branches once used to skewer meat. Types of dogwood trees vary from the 6- to 12-inch miniature dogwood “tree” known as bunchberry to the giant dogwood, which can reach 60 feet. Their flowers also vary from large “blooms” composed mostly of leaf bracts to tiny blooms in clusters.
1. Cornelian Cherry Dogwood or European Cornel (Cornus mas)
Named for its “cherries,” oblong red drupes, rather than for its flowers, the European Cornelian Cherry Dogwood can bloom during winter in the mildest areas of its range. However, it usually produces its tiny yellow flowers in small clusters in early spring before foliage appears. Its edible but tart ½ to 1 inch long fruits ripen to red in midsummer and are most often used in jellies.
This dogwood shrub has typical oval dogwood leaves whose fall color can vary from dull green to the purplish-red more common with Cornus species. It will sucker, which can be a good thing if you want a hedge, but you can prune the shrub into a tree shape instead if you prefer. Choose Golden Glory for more prolific bloom or Variegata for variegated foliage.
Hardiness Zones: 4 to 8
Mature Height: 15 to 25 feet
2. Dwarf Dogwood or Bunchberry (Cornus or Chaemaepericlymenum canadensis)
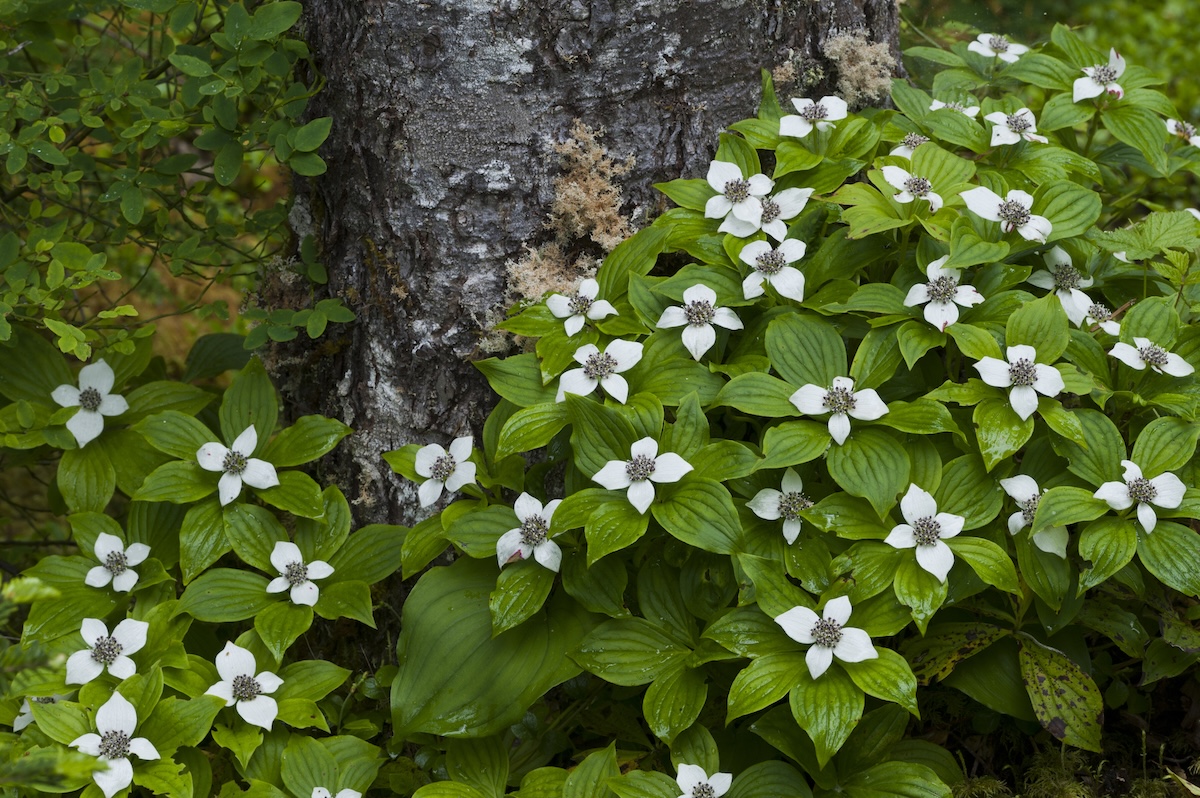
The dwarf dogwood tree isn’t actually a tree but a native woody ground cover that usually doesn’t surpass 1 foot in height. It begins to flower in late spring and sometimes persists blooming until midsummer. As with most dogwoods, its “petals” actually are colored leaf bracts—white in this case—while the true flowers are the bracts’ greenish centers.
The bracts are followed in late summer by clusters of edible ¼-inch red drupes. Bunchberry grows in either partial shade or dappled shade in a woodland-like setting where it won’t be trampled underfoot. According to Clemson Cooperative Extension, “Dogwoods prefer moist, well-drained, acidic soil that is high in organic matter.”
Hardiness Zones: 2 to 6
Mature Height: ½ to 1 foot
3. Eastern or Flowering Dogwood (Benthamidia or Cornus florida)
Clemson Extension notes that the flowering dogwood tree “is the species most people think of when the word dogwood is mentioned.” In other words, it is top dog! Flowering dogwood characteristics include 3- to 6-inch “blooms,” each made up of four notched white, pink, or yellow leaf bracts surrounding the true yellow-green flowers at their center.
Those “blooms” appear in mid to late spring before the trees’ leaves, followed by clusters of nontoxic but bitter drupes that redden along with the foliage in early to mid-autumn. According to Jenny Rose Carey, author of Glorious Shade, “If you are encouraging wildlife to your garden, this is a must-have tree. Birds and other animals love the fruits. I refer to them as an ‘energy bar’ for migratory birds returning to their winter residences.”
This species, which prefers partial shade, is prone to fungal diseases. Resistant cultivars include Appalachian Spring and Appalachian Joy.
Hardiness Zones: 5 to 9
Mature Height: 15 to 30 feet
4. Chinese Evergreen or Strawberry Dogwood (Cornus capitata subsp. angustata)
Although most dogwoods are deciduous, the leathery leaves of the Chinese Evergreen type can persist through winter in Zones higher than 6, but are more likely to turn reddish green and drop during winter in Zone 6 and lower. Its 3- to 6-inch late spring and early summer “blooms” offer un-notched leaf bracts surrounding the true yellow-green flowers, so the blooms appear more star-shaped than the earlier blooming Benthamidia (Cornus) florida’s cross-shaped ones.
This evergreen’s flowers are followed by roundish strawberry-like fruits, which ripen to red. NCSU Cooperative Extension admits that those fruits “are technically edible but are better left to the birds.” Clemson Cooperative Extension recommends “complete, acid-forming organic fertilizers” for dogwoods, applied in mid-spring and, 6 weeks later, in early summer.
Hardiness Zones: 6 to 9
Mature Height: 12 to 20 feet
5. Giant Dogwood (Cornus or Swida controversa)

Native to the Orient and one of the tallest of the dogwood tree varieties, this species can reach 45 feet with its branches held horizontally like the tiers of a wedding cake. Its white flowers, on the other hand, are very small but produced in large 3- to 7-inch clusters in late spring to early summer, followed by blue-black fruits in late summer. Those fruits attract birds and other animals but are considered inedible for humans.
As with most dogwoods, the tree can thrive in either full sun or partial shade. For a white wedding cake look, choose the variegated cultivar (Variegata). If you prefer dark green leaves and orange/red fall color, select June Snow.
Hardiness Zones: 5 to 8
Mature Height: 35 to 45 feet
6. Kousa or Chinese Dogwood (Cornus kousa or Benthamidia japonica)
Like the eastern type, this nonnative dogwood makes 3- to 6-inch white or pink blooms. However, they have pointed rather than notched petals and appear about a month after those of Cornus florida, in late spring to early summer once the trees have leafed out. Those flowering trees also produce raspberry-like pinkish-red fruits that are edible. Their fall leaf color varies from purple to red to yellow. Kousa is more sun-loving than the eastern dogwood and also more disease-resistant, making it one of the most vigorous dogwood flowering trees.
For that reason, Chinese dogwood often has been crossed with C. florida to produce cultivars that offer the best traits of both species. Purely kousa cultivars include the variegated dogwood tree Summer Fun, as well as Moonbeam, which has unusually large 7-inch flowers.
Hardiness Zones: 5 to 8
Mature Height: 20 to 30 feet
7. Pacific or Western Dogwood (Cornus nuttallii)
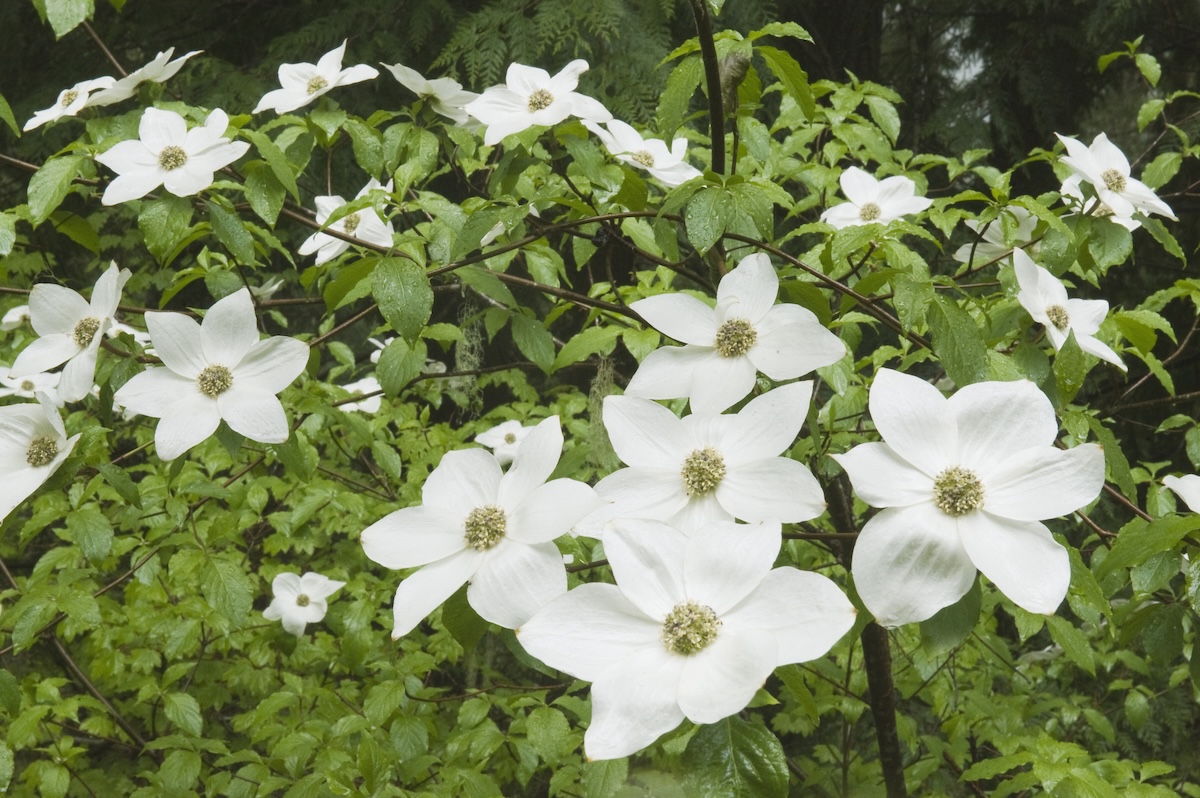
The western dogwood native to the Pacific Northwest and California resembles the eastern one, but it is less hardy, and its “blooms” often offer six to eight white pointed leaf bracts—rather than four notched ones—clustered around the greenish or purplish true flowers at the center. It also may bloom twice, once in spring before the tree leafs out and again in late summer or fall, with flowers up to 6 inches across. Of its pinkish-red fruit, Calscape notes that “Though edible, it is not very palatable.’
Unfortunately, the western dogwood shares the eastern dogwood’s vulnerability to anthracnose and also often is crossed with C. kousa for greater disease resistance. Fall foliage may be yellow, red, or pink. Cultivars include Colrigo Giant with 6-inch flowers and the yellow variegated Goldspot.
Hardiness Zones: 7 to 9
Mature Size: 15 to 40 feet
8. Pagoda Dogwood (Cornus or Swida alternifolia)
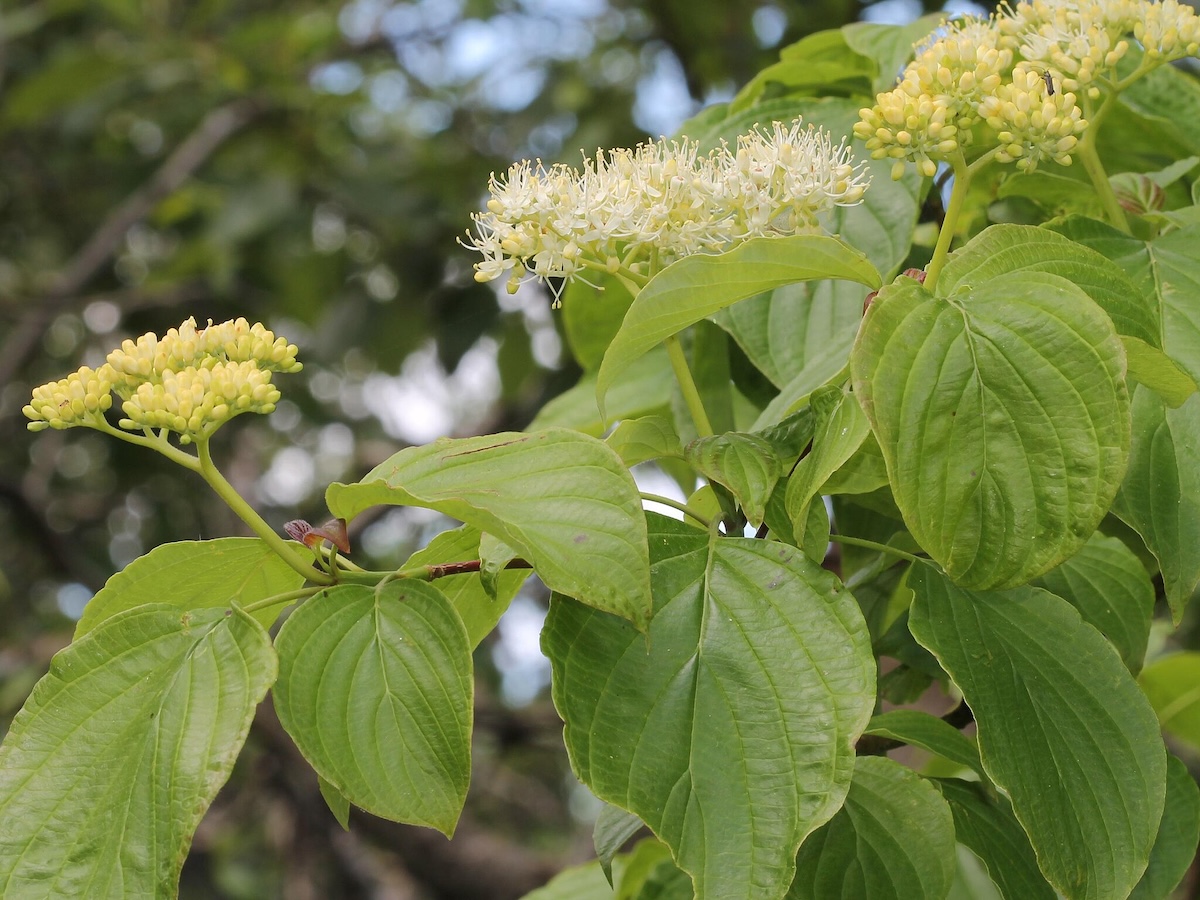
Except for the fact that it is native to North America, the pagoda dogwood might be considered a shorter version of the Oriental giant dogwood. It too offers tiered branches and tiny white blooms in clusters in late spring and early summer followed by bitter blue-black berries in mid to late summer and red foliage in autumn.
The Pagoda dogwood generally tops out at about 25 feet and its flower clusters measure only about 2 to 3½ inches across. So, this small dogwood tree fits into the backyard landscape more easily than the giant one does. Its variegated cultivars include Argentea and Golden Shadows.
Hardiness Zones: 3 to 7
Mature Height: 15 to 25 feet
9. Redtwig or Red Osier Dogwood (Cornus or Swida sericea or stolonifera)

Popular as a winter shrub for its red stems that stand out against the snow (though a few cultivars offer yellow stems instead), this osier is native to North America and typically inhabits somewhat boggy locations. Therefore, it may make a good choice for a poorly draining area of your yard where nothing else will grow.
This dogwood bush produces clusters of small white flowers in late spring and early summer followed by bitter drupes in late summer. According to North Carolina Extension, the edible white fruits with blue tinge “are attractive to birds and hold even more ornamental value than the flowers.” Also ornamental is the red or orange fall foliage which darkens to purple. This fast-growing shrub tends to spread rapidly via underground stems, so it could become invasive if not kept in check. Choose Baileyi for particularly vivid red stems, or Flaviramea for golden-yellow stems.
Hardiness Zones: 2 to 7
Mature Height: 5 to 9 feet
10. Tatarian or Red-Barked Dogwood (Cornus or Swida alba)
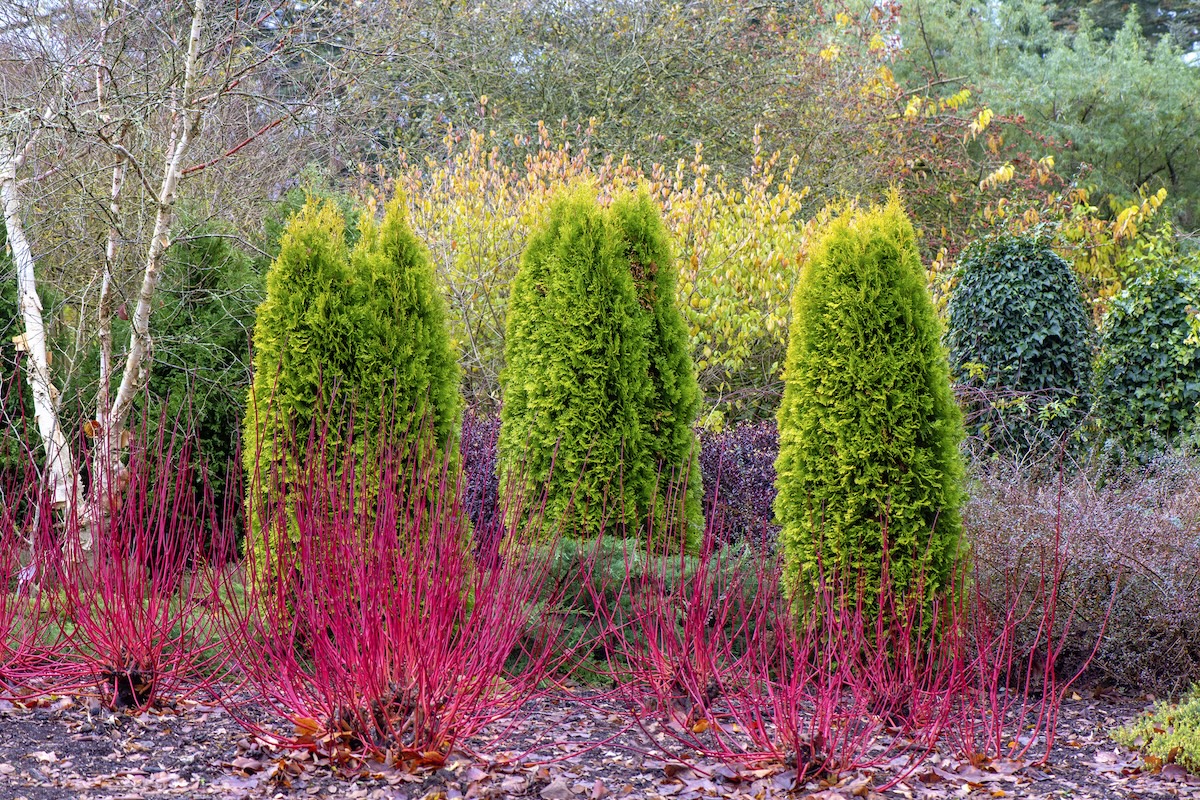
Tartarian Dogwood might be called the Asian form of Redtwig Dogwood, since it shares most of the characteristics of that species, including the red stems, clusters of white flowers, and white drupes. In both species, younger stems offer the reddest hues, so it’s a good idea to remove about a fourth of the older ones in spring for better color in winter. Both can be used as either full sun shrubs or partial shade shrubs.
Missouri Botanical Garden agrees that Tatarian dogwood is similar in appearance to redtwig dogwood, “but generally does not spread as aggressively.” Cultivars of this dogwood shrub include the variegated Elegantissima and the smaller-than-usual Sibirica, whose height tops off at about 7 feet.
Hardiness Zones: 3 to 7
Mature Height: 8 to 10 feet
The post 10 Types of Dogwood Trees to Beautify Your Yard Year-Round appeared first on Bob Vila.
]]>The post The Best Seed Starting Mixes of 2025 for Successful Germination appeared first on Bob Vila.
]]>Seed starting mixes are clean and lightweight, offering an optimal foundation for seed germination. They come in various mediums, including loose grow mixes (similar to potting soil), expandable coconut coir bricks, or easy-to-transplant pellets.
Unlike regular garden soil, which can be too dense for tiny roots to expand, seed starting mixes are airy, providing the right environment for delicate roots to take hold. After researching more than 20 of the best grow mix options, our favorite is the Espoma Organic Seed Starter Premium Potting Soil Mix. It’s suitable for flowers and vegetables and is organic and non-compacting, encouraging the growth of healthy plants.
We also interviewed a horticulturist for expert opinion on the benefits and differences between each type of grow mix and how to incorporate them into your home gardening practices. Read on for some of the best seed starting mixes available today and some things to keep in mind while you shop.
- BEST OVERALL: Espoma Organic Seed Starter Premium Potting Soil Mix
↓ Jump to Review - RUNNER-UP: Hoffman Seed Starter Potting and Planting Soil
↓ Jump to Review - BEST BANG FOR THE BUCK: Miracle-Gro 8-Quart Seed Starting Potting Mix
↓ Jump to Review - BEST WINDOW KIT: Window Garden Mini Greenhouse Seed Starter Kit
↓ Jump to Review - BEST ORGANIC: Coast of Maine Sprout Island Organic Seed Starter
↓ Jump to Review - BEST COCONUT COIR: Burpee Organic Coconut Coir Seed Starting Mix
↓ Jump to Review - BEST STARTER PELLETS: Jiffy-7 36-Millimeter Peat Pellet Seed Starter Plugs
↓ Jump to Review - BEST PEAT-FREE: SpongEase Pro Coco Coir Brick
↓ Jump to Review
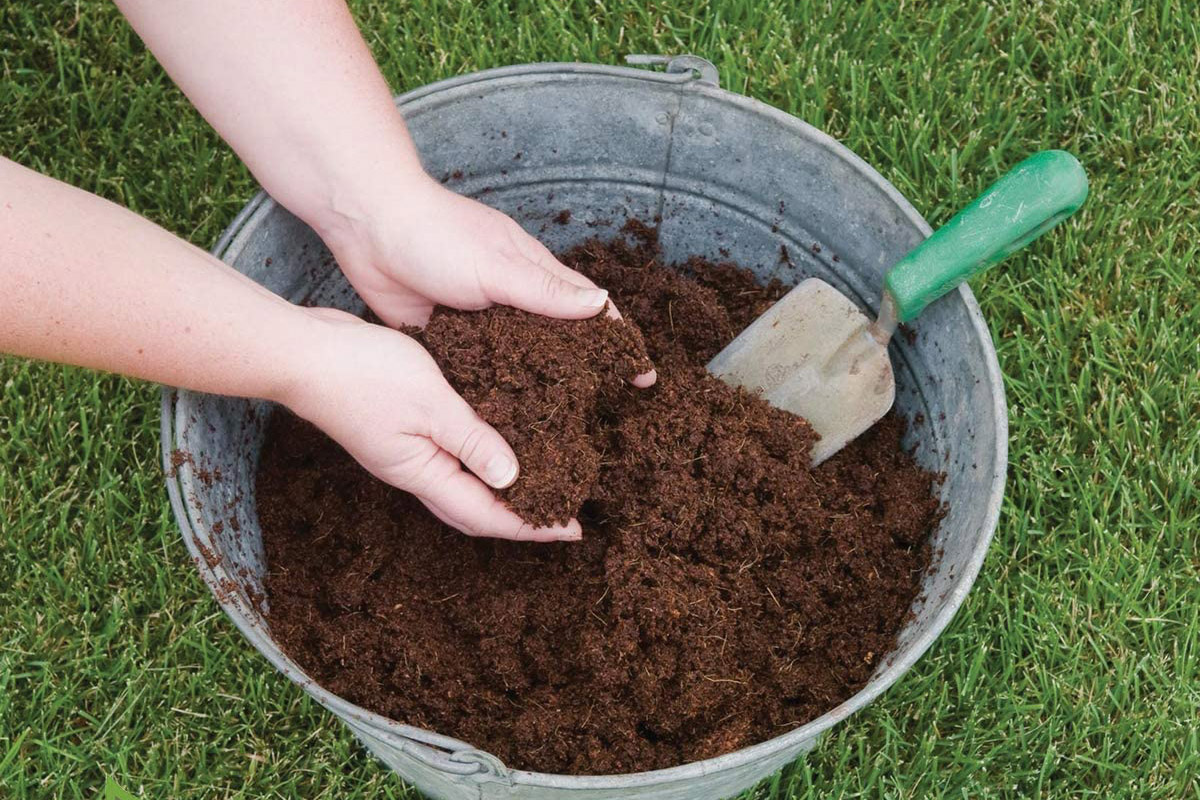
Before You Buy Seed Starting Mix
Before spring arrives, garden centers begin stocking large bags of growing medium, but don’t grab one without reading the label. Growing mixes come in various blends, some designed to amend outdoor garden beds, while others are for potted plants. Still others contain fertilizers for specific plants, such as “acid-loving” or “indoor.” Along with standard potting soil, most of these options are not suitable for starting seeds because they contain some contaminants. Choose a mix labeled for starting seeds to ensure it doesn’t contain traces of fungus or bacteria that could wipe out tiny seedlings.
| Ingredients | Quantity | Organic | |
| Espoma Organic Seed Starter Premium Potting Soil Mix | Sphagnum peat moss, perlite, limestone to adjust pH, and yucca extract | 8 or 16 quarts | Yes |
| Hoffman Seed Starter Potting and Planting Soil | Sphagnum peat moss, vermiculite, limestone, and a wetting agent | 4, 10, or 18 quarts | No |
| Miracle-Gro 8-Quart Seed Starting Potting Mix | Sphagnum peat moss, perlite, fertilizer, and a wetting agent | 8 quarts | No |
| Window Garden Mini Greenhouse Seed Starter Kit | 30- to 36-millimeter fiber soil | 3 trays with 10 cells each (30 cells total) | Unspecified |
| Coast of Maine Sprout Island Organic Seed Starter | Sphagnum peat moss; perlite, kelp meal, worm castings, lobster meal, dehydrated poultry manure, dolomitic lime, and well-aged compost | 8 or 16 quarts or 2 cubic feet | Yes |
| Burpee Organic Coconut Coir Seed Starting Mix | Compressed coir soil derived from coconut husks | 8 or 16 quarts | Yes |
| Jiffy-7 36-Millimeter Peat Pellet Seed Starter Plugs | Compressed peat moss | 50 pellets | Yes |
| SpongEase Pro Coco Coir Brick | Yes | 1 brick makes 2 gallons of soil | Yes |
Our Top Picks
Best Overall
Espoma Organic Seed Starter Premium Potting Soil Mix

What We Like
- All-natural potting mix for seedlings and root cuttings
- Helps improve moisture retention
- Noncompacting; intended to promote better root growth
- Suitable for vegetables and flowers
What We Don’t Like
- Some users report poor growth with certain plants
Specs
- Ingredients: Sphagnum peat moss, perlite, limestone to adjust pH, and yucca extract
- Quantity: 8 or 16 quarts
- Organic: Yes
Espoma’s organic seed starter mix contains all-natural ingredients, including sphagnum peat moss, peat humus (a decomposed ingredient from peat bogs), perlite, and Myco-tone, a proprietary blend of ingredients designed to help seedlings develop strong roots. This premium seed-starting mix retains moisture without compacting. Its all-natural formula helps when rooting cuttings, and it produces healthy plants with abundant blooms, making it well suited for both flowers and vegetables. This potting mix comes in an 8-quart or 16-quart bag.
Get the Espoma seed starting mix at Amazon, The Home Depot, TrueValue, or Walmart.
Runner-up
Hoffman Seed Starter Potting and Planting Soil
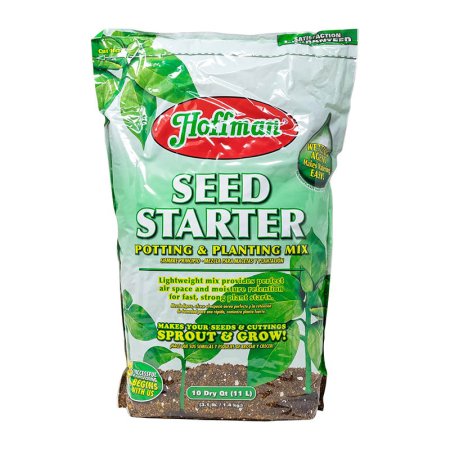
What We Like
- Lightweight, loose, and fertile soilless mix
- Specially formulated to promote seed germination
- Contains 6 components blended in proper proportions
- Also suitable for root cutting and transplanting
What We Don’t Like
- Takes some time to fully germinate some seeds
Specs
- Ingredients: Sphagnum peat moss, vermiculite, limestone, and a wetting agent
- Quantity: 4, 10, or 18 quarts
- Organic: No
This seed-starting mix from Hoffman, which comes in a 4-, 10-, or 18-quart bag, contains Canadian sphagnum peat moss, vermiculite, limestone (a pH adjuster), and a wetting agent. We like that this mix retains moisture while providing a light, airy growing medium that promotes seed germination and root development. Also use this seed-starting mix to root cuttings and in larger containers when transplanting seedlings. Ground limestone makes this mix work as a potting soil and for acid-loving plants, such as hydrangea or blueberries.
Get the Hoffman seed starting mix at Amazon, Kmart, or Walmart.
Best Bang for the Buck
Miracle-Gro 8-Quart Seed Starting Potting Mix
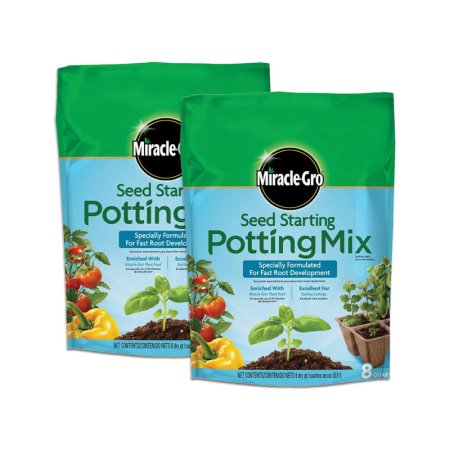
What We Like
- Enriched with Miracle-Gro Plant Food
- Formulated to boost root development
- Good choice when starting from seed
What We Don’t Like
- Intended for container use only
- Some users report a sour smell
Specs
- Ingredients: Sphagnum peat moss, perlite, fertilizer, and a wetting agent
- Quantity: 8 quarts
- Organic: No
From a manufacturer well-known in the gardening industry, this Miracle-Gro potting mix is specially formulated to boost root development. Miracle-Gro contains sphagnum peat moss, perlite, fertilizer, and a wetting agent. The mix helps retain moisture and drains well, and it won’t pack down.
The included fertilizer contains nitrogen, phosphate, and potash to help stimulate sprout growth, root development, and blooms. This Miracle-Gro product, which comes in an 8-quart bag, is suitable for starting root and leaf cuttings as well as starting seed trays. Also use it in larger containers when transplanting.
Get the Miracle-Gro seed starting mix at Amazon (2-pack), Ace Hardware, The Home Depot, Lowe’s (2-pack), or Tractor Supply Co.
Best Window Kit
Window Garden Mini Greenhouse Seed Starter Kit
What We Like
- 3 mini greenhouses are reusable
- Offers a moist, warm environment for seed germination
- Creates a better root system
- Makes new plants easy to transplant
What We Don’t Like
- Pricey compared to other seed starter kits
- Seeds must be purchased separately
Specs
- Ingredients: 30- to 36-millimeter fiber soil
- Quantity: 3 trays with 10 cells each (30 cells total)
- Organic: Unspecified
This Window Garden seed-starting kit features three grow trays that are small enough to fit on a windowsill. Each tray comes with 10 compressed coconut coir grow pods. A clear dome sits atop each tray to act as a mini-greenhouse and help keep the pods from drying out.
Put the fiber soil pods in the bottoms of the trays and add warm water; the pods will expand and become light and fluffy. Each pod contains only organic coconut coir. When the seedlings are ready for transplanting to garden soil, insert the entire pod in the garden.
Get the Window Garden seed starting mix at Amazon, Target, Bed Bath & Beyond, or Walmart.
Best Organic
Coast of Maine Sprout Island Organic Seed Starter
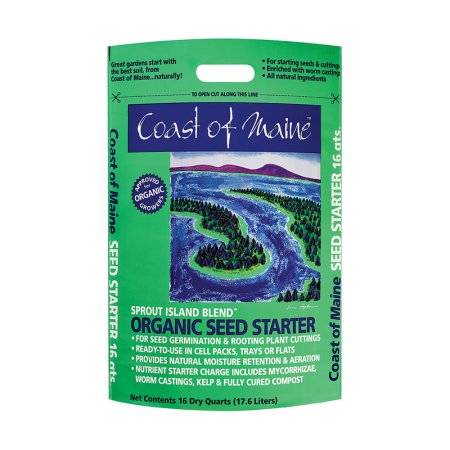
What We Like
- Designed specifically for germinating seeds and rooting cuttings
- All-natural fertilizer made with rich ingredients
- Provides ample drainage and water retention
What We Don’t Like
- Some users report poor consistency and mold
- Some say this mix attracts flies
Specs
- Ingredients: Sphagnum peat moss; perlite, kelp meal, worm castings, lobster meal, dehydrated poultry manure, dolomitic lime, and well-aged compost
- Quantity: 8 or 16 quarts or 2 cubic feet
- Organic: Yes
This Coast of Maine organic seed starting mix contains a blend of ingredients designed specifically for starting seeds and root cuttings, including sphagnum peat moss, perlite, aged compost, kelp meal, and worm castings. We appreciate that this mix also contains an all-natural fertilizer to encourage growth and help produce disease-resistant plants.
Coast of Maine seed starter is a lightweight, well-draining growing medium that won’t pack down, so tender seedling roots can develop. It retains moisture to help prevent roots from drying out. The mix comes in 8- and 16-quart bags. There’s also a 2-cubic-foot option.
Get the Coast of Maine seed starting mix at Amazon, The Home Depot, Target (2-pack), Ace Hardware, or Walmart.
Best Coconut Coir
Burpee Organic Coconut Coir Seed Starting Mix
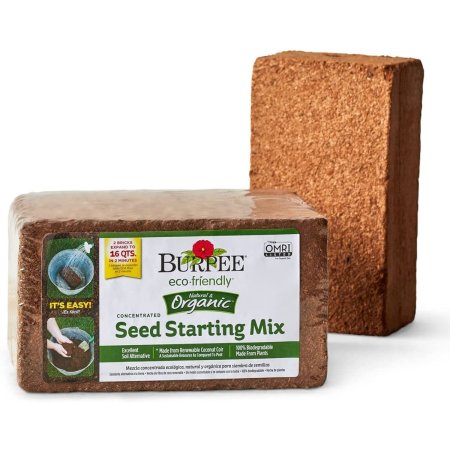
What We Like
- Compact size; easy to store
- Expands to 8 quarts of soil when watered
- Ideal for seed starting
- Balanced pH improves nutrient absorption by seedlings
What We Don’t Like
- Dries out faster than other mixes
Specs
- Ingredients: Compressed coir soil derived from coconut husks
- Quantity: 8 or 16 quarts
- Organic: Yes
The compressed coconut coir in this seed-starting mix comes as an 8-quart, 7.25- by- 6- by-4-inch compressed brick. Just add water and crumble it to obtain 8 quarts of seed-starting mix. The Burpee Organic Seed Starting Mix contains only coconut coir to help promote plant and root growth.
Once expanded with water, use the coir in any seed-starting container, by itself or in combination with potting soil to grow larger plants. The material retains moisture yet won’t pack down.
Get the Burpee seed starting mix at Amazon, The Home Depot, or Burpee (2-pack).
Best Starter Pellets
Jiffy-7 36-Millimeter Peat Pellet Seed Starter Plugs
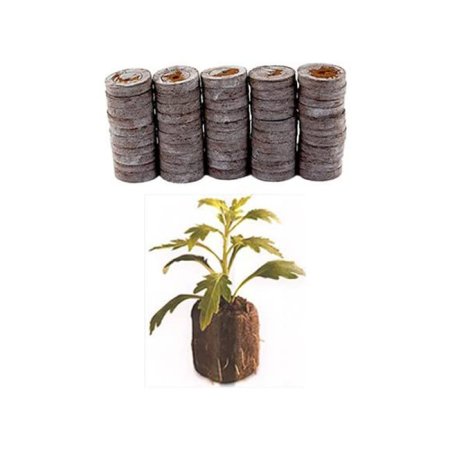
What We Like
- 50 pellets included
- Pods are biodegradable
- Suitable for transporting
What We Don’t Like
- Some user reports of mold growth
Specs
- Ingredients: Compressed peat moss
- Quantity: 50 pellets
- Organic: Yes
These Jiffy-7 peat pellets arrive in small, compressed discs but expand into fluffy grow pods when immersed in water. This soilless seed starting mix contains only compressed peat moss—nothing else. The user places a pellet in the bottom of a plastic flat or tray and pours in warm water to trigger expansion. When the expansion is complete, the pellet measures 1.5 inches by 1.5 inches, just large enough to insert a seed or two in the top of the peat moss.
The peat moss is held in place with a thin biodegradable net, and gardeners place the entire unit in the soil when transplanting to the garden or a larger pot. Buyers receive 50 compressed peat pellets per package.
Get the Jiffy-7 seed starting mix at Amazon, Grower’s Solution, or Walmart.
Best Peat-Free
SpongEase Pro Coco Coir Brick

What We Like
- Compact and easy to store when not using
- More environmentally friendly than peat moss products
- Affordable; product makes 2 gallons of soil
What We Don’t Like
- Grittier texture than other coco coir products
Specs
- Ingredients: Coconut coir
- Quantity: 1 brick makes 2 gallons of soil
- Organic: Yes
The SpongEase Pro Coco Coir Brick squeezes nutrients down to a compact brick full of goodness. Made of raw coconut coir, this fibrous block expands to a light texture designed to aerate, retaining moisture. At the same time, it provides a nutritious boost for starting seeds.
Gardeners can rehydrate the entire block to create 2 gallons of soil or hydrate only the amount needed to fill their seedling starter trays. The compressed packaging stores easily and provides options for a wide range of gardening needs and uses. This organic and eco-friendly starting mix for seeds makes a good substitute for peat since coco coir saturates more quickly than peat moss, although it dries out more quickly, so be aware of this when using.
Get the SpongEase seed starting mix at Amazon or The Home Depot (3-pack).
Jump to Our Top Picks
How We Chose the Best Seed Starting Mixes
We researched the most sought-after seed starting mixes in their respective categories and discovered that the best options are determined by their ingredients, form, quantity provided, and other special features included by top brands.
While searching for the best seeding mix available, the most effective and popular types among users for outdoor and indoor plant growth were potting soil mixes, pods, and sponges. These mixes included coconut coir, sphagnum peat moss, perlite, fertilizer, wetting agents, and even compost. We looked for versatile mixes that would grow everything from flowers to tomatoes from seed.
The seeding mixes allow for drainage, water-retention, root cutting, and transplanting while young seeds begin to grow. Many come with large quantities of up to 16 quarts or 50 pods or sponges. Plus, the majority of these picks are 100 percent certified organic seed starters.
What to Consider When Choosing the Best Seed Starting Mix
Most seed-starting mixes are soilless, which means they contain no dirt. While established plants may thrive in real garden soil or potting soil, the delicate roots of just-sprouted seeds may find it challenging to do so.
“Seed mixes are designed to create the perfect environment for seeds to germinate and develop their first roots,” says Michael Clarke, horitculturist and founder of Yardwork, based in San Juan Capistrano, California. “Because regular garden soil can be too dense and not drain well, the newly formed roots can become compacted or damaged from mold growth. The mixes also need to be lightweight, drain well, and sterile, to give seeds the best chance to thrive without the competition of soil-borne diseases or pests which can be present in garden soils.”
Ingredients
Most seed-starting mixes contain one or more of the following ingredients:
- Sphagnum peat moss: The most common base ingredient in seed-starting mixes, sphagnum peat moss is the decomposed material of sphagnum moss, a moss that grows in peat bogs. After it’s sterilized and dehydrated, sphagnum peat moss provides an optimal base for seeds to sprout; it’s absorbent yet won’t pack down. Peat moss, also popular for compressing into small pods, is called “peat pellets,” which expand into fluffy grow mix for starting seeds when immersed in water.
- Coconut coir: Removed from the outside of coconuts during the harvest process, coir is the fibrous layer that surrounds a hard coconut shell. Formerly discarded as a waste product, coir is now valued for its ability to retain moisture without compacting, making it well suited as an ingredient in seed-starting mixes. Like sphagnum peat moss, coir can be dehydrated and compressed into plugs for rehydrating and starting seeds.
- Perlite: Perlite is a byproduct of volcanic glass that’s been heated to high temperatures, resulting in a product that resembles puffy white beads. Perlite retains a small amount of moisture, but its primary purpose is to keep the growing mix from compacting.
- Vermiculite: Almost as light as perlite but highly absorbent, vermiculite is a silica mineral that’s mined from the earth. It’s in potting soil and seed-starting mix to lighten the mixture and help retain moisture.
- Diatomaceous earth (DE): This powdery natural product in some seed-starting mixes helps kill insects. Diatomaceous earth contains the finely ground fossils of tiny aquatic organisms known as “diatoms.” When insects come into contact with DE, the powder sticks to their bodies and acts as a desiccant to dehydrate and kill them.
- Lime: Powdered lime is in some seed-starting mixes to help lower the pH level of the mix to around 6 to 6.5 on the pH scale. The pH scale ranges from 0 to 14, with 7 considered neutral. Higher numbers indicate greater alkaline content, and lower numbers indicate more acidic content. Most plants grow well in soil with a pH level of around 6.5 to 7.
- Wetting agent: Completely dry grow mix ingredients initially resist absorbing water, so some manufacturers include a wetting agent (surfactant) that helps the material absorb water. A wetting agent, such as powdered kelp, is needed the first time the material is moistened.
Organic vs. Non-Organic
When a starter soil for seeds is labeled “organic,” gardeners know that all its ingredients are natural and contain no chemicals or synthetic agents. Most seed-starting mixes contain most, if not all, natural ingredients, but the inclusion of synthetic fertilizers disqualifies it as organic. An organic seed-starting mix may be more important to those who produce edible vegetables rather than flowers or ornamental plants.
Sterilization
Manufacturers remove fungi and bacteria from seed-starting mix by heating it to over 200 degrees Fahrenheit for a period of time, usually at least 30 minutes, to destroy pathogens that might kill tender seedlings. Depending on the manufacturer, heat may be applied by forcing steam through the material or by submerging the mixture in water and heating the water. Sterilizing the mixture gives delicate seeds their best chance at survival.
Aeration and Moisture Retention
A seed-starting mix should retain its lightness and loft, even when wet. Not only do new roots need moisture to grow, but they also need oxygen. Manufacturers add perlite and vermiculite to aerate the mix. Starting seeds in compact or heavy garden soil usually results in poor germination rates. Optimal seed-starting mixes retain just enough moisture for the mixture to stay damp to the touch while still providing the aeration necessary for roots to develop.
pH Levels
If a seed-starting mix is labeled as having “balanced pH,” the pH should fall between 6.5 and 7. Adjusting the pH level of a seed-starting mix isn’t always essential, since the natural ingredients in most mixes fall within the correct pH levels. Monitoring pH is more important if the plant is grown hydroponically (in water). pH adjusting solutions, known as “pH UP” and “pH DOWN,” are available to mix with the water in a hydroponic system to help maintain a neutral pH level.
Tips for Using Seed-Starting Mix
The best time to start seeds indoors depends on the type of seed and your USDA growing zone. Use a seed-starting mix rather than soil or potting mix to increase seed germination and get tiny seedlings off to a healthy start. Employ these tips to simplify the process and increase success.
- “It’s best to moisten the mix before planting seeds. It should be damp, but not soaking wet, to prevent the seeds from drying out too quickly,” says Clarke.
- If the tap water is high in mineral content, consider using distilled water to avoid creating a high alkaline pH environment.
- Consider wearing a dust mask when working with a dry seed-starting mix since some contain powdery, fine elements that can become airborne.
Clarke also cautions against watering plants too frequently. “It’s best to use seed liners or trays containing drainage holes to prevent water from sitting at the bottom,” he says.
FAQs
By using a seed starting soil, you increase the chance of successfully growing from seeds to transplant to the garden later. Frequently asked questions about seed starter mixes appear below.
None, actually! Avoid planting seeds in natural soil; instead, opt for a commercial seed-starting mix for optimal germination and survival rates when starting seeds indoors. The best indoor seedling starter mix only needs three ingredients for seeds to germinate: sphagnum peat moss (or coco coir), perlite, and vermiculite.
Potting soil is denser and may contain larger bits of ingredients, such as twigs or clumps. Potting soil for indoor plants usually does not drain as well as starting mix and is packed with richer nutrients (which seeds don’t actually need to germinate)
Seed starting mix is very fine and contains no large pieces, drains well, and helps prevent compacting inside the small seed starting cells or containers.
No, once it’s been used, it’s no longer sterile. But you can sprinkle leftover mix on the garden or blend it into a potted plant to help lighten the soil.
No. Seed starting mixes don’t have expiration dates. However, users should take care when storing unused starting mix to prevent mold growth or bugs.
Seedlings should be kept in a seed-starting mix for about 3-4 weeks or until the roots develop and become visible at the bottom of the tray or soil block.
Whether or not you should cover a seed to help it germinate depends on the type of plant you’re growing. In general, covering seeds with a dome or plastic will keep them damp, helping them germinate faster. However, fungal infections can take hold if you keep germinated seeds covered too long.
Seed starting mix should be damp to the touch but not soaking wet.
Why Trust Bob Vila
Bob Vila has been America’s Handyman since 1979. As the host of beloved and groundbreaking TV series including “This Old House” and “Bob Vila’s Home Again,” he popularized and became synonymous with “do-it-yourself” home improvement.
Over the course of his decades-long career, Bob Vila has helped millions of people build, renovate, repair, and live better each day—a tradition that continues today with expert yet accessible home advice. The Bob Vila team distills need-to-know information into project tutorials, maintenance guides, tool 101s, and more. These home and garden experts then thoroughly research, vet, and recommend products that support homeowners, renters, DIYers, and professionals in their to-do lists.
The post The Best Seed Starting Mixes of 2025 for Successful Germination appeared first on Bob Vila.
]]>Understanding seasonal pest patterns can help you take action to prevent infestations that could damage your yard or home. By knowing when certain pests are most likely to invade, you can be on alert and implement targeted measures, whether that means scheduling a pest service or using some DIY tools like setting traps or using natural methods.
Each year presents a different story on the type and number of insects that could show up in your area. Much of this depends on climate patterns. “The warmer it is, the more pests will thrive and the more populations we’ll see,” says Emma Grace Crumbley, an entomologist with Mosquito Squad Plus, a pest control company with more than 200 locations nationwide.
Crumbley believes that 2025 climate patterns will be very similar to those of 2024. Keep in mind that 2024 was the warmest year on record, according to the National Oceanic and Atmospheric Administration. Crumbley suggests that if these climate patterns “of being warmer than usual and more precipitation than usual in a lot of regions [continue], that will naturally make all our pests across the board have a spike this year.”
Discover which insects to look out for in the coming months as warmer temperatures arise, where pests might appear, and what you can do to prevent an infestation on your property.

5 Pests to Watch for in the Coming Months
The following insects are most likely to cause trouble in and around your house as temperatures warm up in the spring, says Crumbley.
Mosquitoes (Culicidae family)
Nobody enjoys dealing with itchy mosquito bites, but these critters are more than a nuisance. Unfortunately, of the 200-plus mosquito species in the U.S., about 12 types can cause diseases—even deadly ones. More than 1,000 Americans experience serious illness or death because of a mosquito bite every year.
Last year, there was a huge spike in mosquitoes over the summer, along with the emergence of several mosquito-borne illnesses throughout the U.S., says Crumbley. “We saw dengue and West Nile virus become more prevalent. And at the end of last year, in the northeastern part of the country, we saw encephalitis (EEE) start to pop up as well.”
This year could be as bad or worse than last year, warns Crumbley. “The second it starts getting warmer, especially for mosquito populations, I would expect to see an uptick pretty quickly in areas that typically have a warm, wet climate.”
Spotted Lanternflies (Lycorma delicatula)
These pests are one of the newest invasive insect species spreading across the country. First introduced in Pennsylvania in shipping cartons from Asia, these flying insects are either black with bright white spots, vibrant red with black and white spots, or gray-winged with black spots, depending on their stage.
While spotted lanternflies do not bite or sting and are not dangerous to people or animals, they excrete a sticky sugary substance called honeydew that builds up and leads to fungi. The sooty mold can damage plants, trees, outdoor furniture, and cars. They also are a nuisance to buildings. “They’ll lay their eggs and colonize on trees nearby homes,” says Crumbley. “When it gets cold they want to find a way inside a warm area,” she says. Crumbley adds that people complain about the insects coming into their homes.
“They’re certainly going to be spreading throughout this next year,” says Crumbley. “They are mostly in the Northeastern U.S., but last year they got introduced to Georgia as well.”
Asian Longhorned Ticks (Haemaphysalis longicornis)
Crumbley has also been keeping an eye on Asian longhorned ticks, another invasive insect. When unfed, they are light reddish-tan to dark reddish with brown and have dark markings, while adult females are gray-green with yellowish markings. Introduced a few years ago in New Jersey, the ticks pose a large risk for the health and safety of livestock animals and can carry pathogens that make people ill. Also called the bush, cattle, or scrub tick, the insects can now be found in the eastern half of the country from New York south to Georgia and west to Missouri.
“They’re capable of not only biting and being annoying and sucking blood, but they can also spread diseases to livestock,” says Crumbley, which can threaten owners’ livelihood. They could be vectors of Rickettsial diseases like Rocky Mountain spotted fever, which can develop an allergy to red meat. “These ticks can also spread anaplasmosis to people, which can develop to either minor symptoms like fever, chills, headache, and muscle aches to more severe symptoms, including respiratory failure, bleeding problems, organ failure, and even death,” says Crumbley.

Cicadas (Cicadoidea family)
Last spring, three different broods of cicadas emerged at the same time, but this year won’t be as intense. “There is going to be a brood of periodical cicadas that will emerge in a few months,” says Crumbley. Brood XIV, the second largest group of periodical cicadas, appears every 17 years and is also called the Greater Eastern Brood since it will mostly appear in the Eastern U.S. “Based on the data we have from the last time they emerged, it seems likely the states of Tennessee, Kentucky, West Virginia, and Pennsylvania will be hit the hardest, but they could emerge in neighboring states as well,” says Crumbley.
Cicadas don’t bite or sting, but they cause a nuisance with their loud chirping and by flying into everything. “They’re clumsy flyers, so if you leave a window or a door open, they can fly right in,” says Crumbley. To prevent an influx of these creatures in your home, keep doors and windows closed as much as possible and add screens if you don’t have them yet, she suggests.
Joro Spiders (Trichonephila clavata)
Joro spiders are another annoying invasive pest to watch for this year. First introduced in Georgia, they are now appearing in Tennessee, North Carolina, South Carolina, Maryland, and Florida. “They’re large, yellow and black, and they build really massive, sturdy webs that have a golden tint to them,” says Crumbley. Fortunately, they are not harmful to human health, but they are another type of spider to control in your yard and home, since they might reduce populations of helpful native spiders.

Tips to Prevent an Insect Infestation on Your Property
Wondering how to battle a surge of creepy crawlies at home this year? Keep in mind that pests rely on food, shelter, and water or moisture to thrive. If you can remove those elements, you will drastically decrease the pest population, advises Crumbley. Here are some tips to get started.
- Learn how to identify insects when they appear. Some resources include the National Pest Management Association or your County Extension Office. You also can refer to Pestworld.org, iNaturalist, and the Identification Technology Program at the U.S. Department of Agriculture (USDA) Animal and Plant Health Inspection Service (APHIS) Plant Protection and Quarantine (PPQ) division, or your pest control company’s website.
- Choose integrated pest management (IPM) strategies instead of going straight to pesticides. For example, try reducing clutter, removing trash, installing physical barriers, setting traps, and getting rid of overgrown vegetation.
- Seal cracks in doors and walls to prevent insects from sneaking in.
- “Remove any standing water source that’s not necessary outside,” says Crumbley. Examples include water collecting in a bird bath or on an old tarp in the corner of your yard.
- Avoid overgrown grass and debris in your yard and wood piles close to your house.
- Monitor vegetation for bite marks, discoloration, and other signs that could indicate an insect infestation.
- Hire a professional pest control company, but be sure to ask that they use natural pest-control solutions, such as a botanical insecticide derived from essential oils.
The post Pest Predictions: 2025 Could Be a Doozy for Many Households appeared first on Bob Vila.
]]>The post The Best Moisture Meters, Tested and Reviewed appeared first on Bob Vila.
]]>Moisture meters can test the moisture content of many different materials, including drywall, paneling, and wood studs. Furniture makers and other woodworkers use them frequently to ensure they’re working with a quality product, and flooring contractors use the meters to determine ideal moisture conditions when installing a laminate or wood floor over a concrete slab or subfloor.
For home and building inspectors, a moisture detector is a necessary tool for verifying the condition of a home. Similarly, you can use this tool to verify that your home is moisture-free or ensure the quality of materials during DIY projects. A moisture meter can help you determine if there is too much moisture or your home needs a dehumidifier.
Our favorite is the General Tools Digital Pin/Pinless Moisture Meter. We like it because of its built-in temperature and humidity sensors, pin/pinless design, holes built into the cap for quick calibrating, and durable storage case.
This guide features hands-on testing of the top-rated moisture meter options available. Some passed with flying colors, while others didn’t make the cut.
- BEST OVERALL: General Tools Digital Pin/Pinless Moisture Meter
- BEST BANG FOR THE BUCK: Proster Digital Handheld Moisture Meter for Wood
- UPGRADE PICK: Wagner Meters Orion 940 Pinless Wood Moisture Meter
- BEST COMBINATION: Teledyne Flir Extech MO55 Pin/Pinless Moisture Meter
- BEST FOR WOOD: Tavool Digital Pin Moisture Meter for Wood
- BEST EASE OF USE: Lignomat Mini-Ligno E/D Pin Moisture Meter
- BEST FOR PROFESSIONALS: Protimeter BLD5365 Surveymaster Moisture Meter
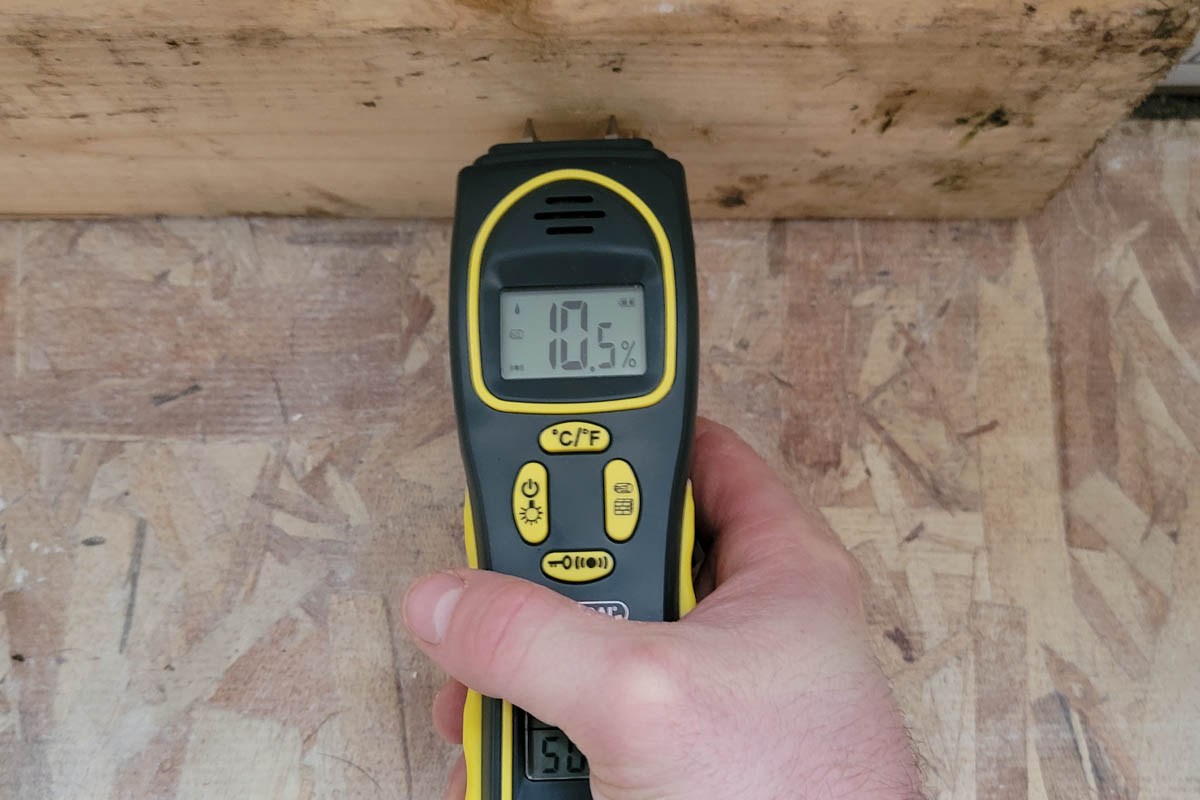
Product Comparison
| Style | Range | Accuracy | |
| General Tools Digital Pin/Pinless Moisture Meter | Combination | 5 percent to 50 percent in wood; 1.5 percent to 33 percent in building materials | 3 percent |
| Proster Digital Handheld Moisture Meter for Wood | Pin | 0 percent to 99.9 percent in wood | 0.5 percent |
| Wagner Meters Orion 940 Pinless Wood Moisture Meter | Pinless | 4 percent to 32 percent | Unspecified |
| Teledyne Flir Extech MO55 Pin/Pinless Moisture Meter | Combination | – 5 percent to 50 percent in wood; 1.5 percent to 33 percent in building materials (pin) – 0 percent to 99 percent in wood and other materials (pinless) | 3 percent |
| Tavool Digital Pin Moisture Meter for Wood | Pin | 6 percent to 60 percent in wood; 0 percent to 40 percent in building materials | 2 percent |
| Lignomat Mini-Ligno E/D Pin Moisture Meter | Pin | 6 percent to 45 percent | 0.5 percent |
| Protimeter BLD5365 Surveymaster Moisture Meter | Pin | 7.9 percent to 99.9 percent with pins, and 70 to 999 with the pads | 1 percent |
Our Top Picks
The top-rated products below were chosen for quality, price, and customer satisfaction to help you find the best moisture meter for your projects. And, to make sure you know everything you need to, we performed hands-on testing with several models. The following meters are ranked among the best.
Best Overall
General Tools Digital Pin/Pinless Moisture Meter
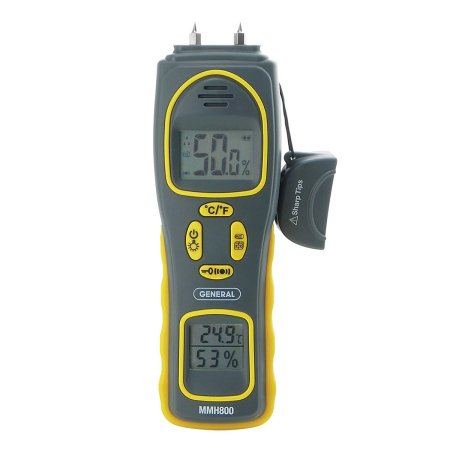
What We Like
- Great versatility for multiple projects
- Pin and pinless design for added flexibility
- Comes with durable case
- Cap has holes
What We Don’t Like
- Temperature resets to Celsius every time it’s powered on
- No “mold tester” as description claims
This multifunctional moisture meter helps DIYers test for moisture using pinless, flat sensors without damaging the material. If the meter finds moisture, the user can remove the cap to expose two pins for accurate moisture measurement within 3 percent, humidity measurement within 5 percent, and temperature measurement within 2 degrees.
Considered the best moisture meter for plaster walls, it can be used for drywall, carpeting, flooring, brick, grout, soil, paper, or powders, and it shows readings on two bright displays. The meter has a moisture level range of 5 percent to 50 percent for wood and 1.5 percent to 33 percent for other building materials, plus a humidity range of 25 percent to 95 percent and a temperature range of 32 to 140 degrees.
During testing, this General Tools digital moisture meter proved to be accurate and easy to use. We liked that it didn’t take much setup, and there aren’t any complicated charts to read in order to set it to the correct species. The built-in temperature and humidity sensors work well and are easy to read. Also, we like that we could use the cap to check our calibration. The only thing that we found frustrating is that it reverted to Celsius every time we turned it off and back on. Also, there is no “mold tester” as the product description claims.
Product Specs
- Style: Combination
- Range: 5 percent to 50 percent in wood; 1.5 percent to 33 percent in building materials
- Accuracy: 3 percent
Get the General Tools digital moisture meter at Amazon or General Tools.
Best Bang for the Buck
Proster Digital Handheld Moisture Meter for Wood

What We Like
- Screen is simple and very easy to read
- Versatile tool with broad temperature range
- Very easy to use with no complicated settings
- Affordable compared to other moisture meters
What We Don’t Like
- Designed for wood use only
This digital handheld moisture meter from Proster is made for use with wood and wood products only. This specialization comes with two big benefits: The first is that DIYers can get this moisture meter for a bargain compared to other models. The second is that the Proster can provide impressive accuracy to within 0.5 percent on a massive scale of 0 percent to 99.9 percent for wood, firewood, logs, cardboard, paper, and other wood products.
The pin moisture meter settings can switch between four different wood groups containing 50 wood species for precision measurement. The large LCD screen is easy to read, and the body of the device comes in sturdy ABS plastic for superior durability. This moisture meter won’t work with concrete, gypsum, drywall, or other nonwood building materials, but DIYers with wood-based projects have an affordable specialty pick.
We really like the Proster meter. Unlike other models that require lengthy user manual reads and have complicated settings, this affordable meter has everything we need to know displayed right on the front. We liked the wide range, though we suspect that anything above 70 percent would probably feel like it was dripping wet to the touch. The only real drawback of the Proster is that it’s for wood use only, meaning it isn’t very helpful for locating leaks or moisture in building materials.
Product Specs
- Style: Pin
- Range: 0 percent to 99.9 percent in wood
- Accuracy: 0.5 percent
Get the Proster moisture meter at Amazon or Proster.
Upgrade Pick
Wagner Meters Orion 940 Pinless Wood Moisture Meter

What We Like
- Incredibly accurate (despite an unspecified accuracy by the manufacturer)
- Comes with a calibration plate and durable carrying case
- Adjustable for several tree species
What We Don’t Like
- Limited moisture range only up to 32 percent
For shoppers with extra room in their meter budget, the Wagner Meters Orion 940 is one of the best pinless moisture meter options worth considering. While the model might be a bit expensive, it does offer deeper, more accurate readings than most meters, and it does it without pins.
This model from Wagner Meters features a measurement range of 4 percent to 32 percent. It also comes with a chart that allows the user to calibrate it to a specific value assigned to a species, offering the most reliable readings possible. And, unlike many other pinless meters, this model can take measurements in wood as thick at 1.5 inches, or the full thickness of a stud. Should you question its calibration, it comes with a calibration plate for checking at any point.
There’s a bit of a learning curve when it comes to the Orion. First, we had to read the manual to discover how to change the species setting, but once we did, the change was easy. Also, cycling through the calibration, species, and materials menu was a little confusing at first. Although it doesn’t have a tremendous range, it was incredibly accurate and consistent. Truth be told, we used this model as the baseline for accuracy in our test.
Product Specs
- Style: Pinless
- Range: 4 percent to 32 percent
- Accuracy: Unspecified
Get the Wagner Meters moisture meter at Amazon, Acme Tools, or Wagner Meters.
Best Combination
Teledyne Flir Extech MO55 Pin/Pinless Moisture Meter
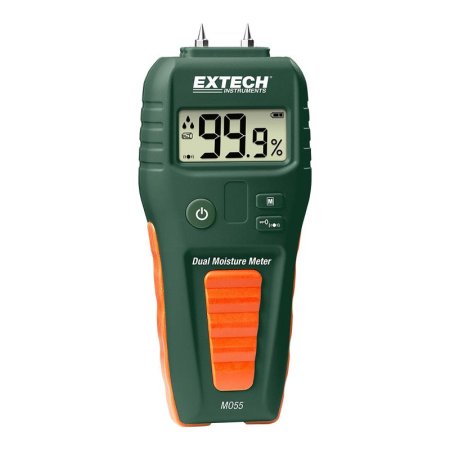
What We Like
- Easy to use with a simple screen
- Offers visual guide and audio alerts for moisture content
- Ideal when precision is key
What We Don’t Like
- Material setting button seems sensitive
Anyone looking for a combination pin/pinless moisture meter might not want to overlook the Extech MO55 pin/pinless moisture meter from Teledyne Flir. This meter offers accurate pinless readings between 0 percent to 99 percent in both wood and other building materials, as well as a 5 percent to 50 percent range in wood and 1.5 percent to 33 percent range in building materials when using the pins.
A calibration test in the cap allows users to check the Extech’s accuracy before relying on its readings. It also features a visual guide to moisture, with one digital raindrop representing dry wood, two drops for medium moisture, and three representing wet wood.
When we were testing the Extech in pin mode, we continued to press the materials button, which would inevitably give us a reading of our index fingers rather than the material we were testing. Beyond that, we liked how easy the Extech was to use, and we appreciated the digital raindrops and audio alerts that speed up according to a wood’s moisture content. And, we continued to check this model’s accuracy with its built-in calibration gauge.
Product Specs
- Style: Combination
- Range:
- 5 percent to 50 percent in wood; 1.5 percent to 33 percent in building materials (pin)
- 0 percent to 99 percent in wood and other materials (pinless)
- Accuracy: 3 percent
Get the Teledyne Flir Extech moisture meter at Amazon, Acme Tools, or Teledyne FLIR.
Best For Wood
Tavool Digital Pin Moisture Meter for Wood
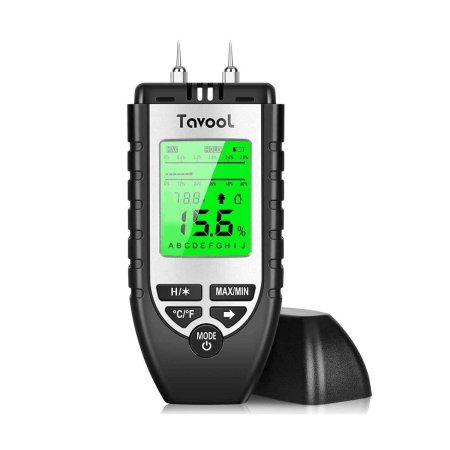
What We Like
- Excellent pin design
- Includes a built-in thermometer for added versatility
- Best digital screen in the test
What We Don’t Like
- Many of the tree species in the guide go by their scientific names
The Tavool digital moisture meter is an excellent addition to any woodworking shop. This moisture meter for wood comes with seven calibration scales for wood so DIYers can be as precise as possible with their measurements at an accuracy within about 2 percent. The pin moisture meter also can measure the temperature of the material within 4 degrees to help quickly track down leaks.
The moisture meter uses a scale of 6 percent to 60 percent for wood and 0 percent to 40 percent for other building materials. Its big, backlit LCD screen makes for easy readability, even in dim lighting. A “Hold” key freezes readings on the screen, while the built-in memory function stores readings so the user doesn’t have to keep track.
The Tavool was one of the biggest surprises we found during testing. For one, the digital screen is both easy to read and full of information. We liked that this moisture meter features a built-in temperature sensor as well. But the one “point” we liked most about the Tavool was its pin design; the pins are long and thin enough to plunge deeply into wood but not so thin that they’re not durable. The only issue we found came when adjusting for species. Tavool, for some reason, included scientific names for tree species. We didn’t bring our biology book, so we had to do a lot of googling.
Product Specs
- Style: Pin
- Range: 6 percent to 60 percent in wood; 0 percent to 40 percent in building materials
- Accuracy: 2 percent
Get the Tavool moisture meter at Amazon.
Best Ease of Use
Lignomat Mini-Ligno E/D Pin Moisture Meter
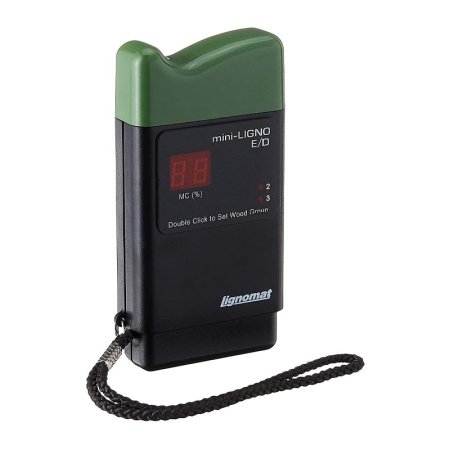
What We Like
- Doesn’t get any easier to use
- Extreme accuracy
- Cap forms a comfortable handhold
What We Don’t Like
- Feels like an old-school design (but is that really bad?)
The Lignomat Mini-Ligno E/D moisture meter is a premium tool designed for a specialized purpose. This pin moisture meter comes calibrated for use with wood and wood products, but it boasts an accuracy of 0.5 percent on a precision scale of 6 percent to 45 percent. Its sturdy body is easy to hold and use, with sharp pins that can push through even the toughest wood.
The body of the moisture meter holds a longer second set of pins for deeper penetration, but the real benefit of this model is the simplicity of the design. Select the wood type to be measured, then push the pins into the material. A unique on-off switch between the pins activates the meter so the user only has to look at the reading on the bright, digital LED display.
We’ll try not to gush, but the Lignomat moisture meter is pretty much everything you need from a moisture meter, and it’s by far the easiest to use in the group. First, this thing doesn’t even have a power button; simply poke it into a piece of wood and it will give you a reading. Second, it provides readings for a wide range of species while only requiring the user to switch between “Group 2” or “Group 3”—no fancy calculations necessary. And, we couldn’t help but enjoy the Lignomat’s accuracy and the way the cap forms a comfortable hand-hold during testing. If we’re going to complain about something, it’s that this thing looks and feels like it’s straight out of the 1980s, but we’re not so sure nostalgia is a bad thing.
Product Specs
- Style: Pin
- Range: 6 percent to 45 percent
- Accuracy: 0.5 percent
Get the Lignomat moisture meter at Amazon or Acme Tools.
Best for Professionals
Protimeter BLD5365 Surveymaster Moisture Meter

What We Like
- Comprehensive tool set with plenty of accessories
- Very accurate
- Excellent pin penetration for deep readings
What We Don’t Like
- Pinless readings are not shown as a percentage
- Doesn’t adjust for species
The Protimeter BLD5365 Surveymaster professional moisture meter is dual functional but doesn’t just use standard pins and pads to take readings. It also features a set of 5-inch pins for deep penetration and a moisture probe that can plug into the unit to help with taking readings in difficult-to-access areas. It even includes a calibration tool to ensure the readings are accurate.
The heavy-duty design and highly accurate moisture readings within 1 percent make this a must-have tool for discerning DIYers and industry professionals like contractors, surveyors, inspectors, and many more. With two modes of operation for search (pinless) and measure (pin), the moisture meter works with concrete, wood, tile, vinyl, drywall, and many other building materials with a scale of 7.9 percent to 99.9 percent using the pins and a relative scale of 70 to 999 using the pads (where 70 to 169 is dry, 170 to 199 is at risk, and 200 to 999 is considered wet).
During testing, we liked the accessories and could definitely see their usefulness. Even grabbing readings from boards right in front of us was easier, since we could look at the display while getting the reading at the same time. Also, we enjoyed the 1 percent accuracy and excellent pin penetration. Our only concerns were that we would prefer the pinless readings in a percentage, and we couldn’t adjust it for species.
Product Specs
- Style: Pin
- Range: 7.9 percent to 99.9 percent with pins, and 70 to 999 with the pads
- Accuracy: 1 percent
Get the Protimeter moisture meter at Amazon.
Also Tested
We also tested the General Tools pinless digital moisture meter and the Klein Tools ET140 pinless moisture meter; however, neither of these models passed our tests.
The General Tools pinless moisture meter uses a measurement range of 0 percent to 53 percent for softwoods like pine, a range of 0 percent to 35 percent for hardwoods like maple, and a relative scale for drywall and masonry. This meter was difficult to use, and didn’t register moisture readings anywhere near the range of the other models on the list. It could’ve been a calibration issue, but since it automatically calibrates, we didn’t have any luck.
The Klein ET140 is a durable pinless moisture meter that calibrates for each material with the push of a mode button that switches between types of material for precise measurement. Unfortunately, during our repeated testing of this model, it consistently read 4% moisture and the unit could not be recalibrated after multiple attempts. We’re big fans of Klein Tools, but this one didn’t make the grade.
Jump to Our Top Picks
How We Tested the Best Moisture Meters
Typically, we love testing products, but this moisture meter test was tough. First, every meter had a different range and accuracy rating, which made establishing baselines difficult. While we were conducting moisture meter reviews, we found that each product had a different method of adjusting for certain species, so we spent an entire day reading user’s manuals—surely a better test for eyeglasses and patience than moisture meters.
Eventually, with everything dialed in as well as possible, we began checking moisture levels. For some variety, we used three pieces of pine lumber from a recent project. One piece soaked in a bowl of water overnight. The other piece sat in an oven and dried at 225 degrees for 2 hours. The third piece was left alone. We checked each of the meters using all three of these pieces of lumber and compared readings.
Next, we checked the meters on a small section of drywall, a small section of concrete foundation, and an unfinished oak stair tread. Those readings were collected and compared as well.
Finally, we went through all the settings, modes, and extra features (for those that had them). At this point, we had a solid grasp on which models were worth the money and which we needed to discard from the test.
What to Consider When Choosing a Moisture Meter
Before purchasing a moisture meter, it’s a good idea to educate yourself about these important considerations to make sure that you settle on the appropriate product for your purposes.
Types of Moisture Meters
DIYers and professionals in industries like home inspection, fine carpentry, and flooring use three common types of moisture meter: pin, pinless, and multifunctional.
Pin
Pin moisture meters get their name from the two metal prongs, or pins, that emerge from the top of the meter like antennae. These pins are what measure the moisture percentage. Using a pin moisture meter requires aligning the pins with a spot on the material, and then pushing them so they penetrate the material.
Once the pins are inserted, users can operate the moisture meter with a control pad to send an electrical signal down one pin. This signal travels through the material on its way to the other pin. The moisture meter uses this signal to measure the material’s resistance to electrical current, which can help determine its moisture content.
This method of measurement is considered invasive because it requires puncturing the material to obtain a result. However, pin moisture meters are the only type that can help identify the exact location of moisture.
Pinless
Pinless moisture meters, so named for their lack of measurement pins, do not penetrate the material to get a reading. Instead, a plate on the back of the meter lays flat against the material and a high-frequency signal travels through it. The signal changes based on the material’s ability to store an electrical charge, which enables the moisture meter to detect the levels of moisture in the substance.
The main benefit of pinless moisture meters becomes clear when testing drywall. Having to drive holes into drywall to detect moisture can quickly turn it into Swiss cheese. A pinless moisture meter can check for moisture multiple times without damaging the drywall.
Although pinless moisture meters are less invasive than pin meters, their readings show moisture in a general area rather than a specific spot. A good option for regular moisture detection is a multifunctional moisture meter. Multifunctional moisture meters use both methods of measurement for noninvasive, precise moisture detection if an issue is discovered.
Accuracy
DIYers and pros looking for a moisture meter place accuracy as one of the most important factors in deciding which one to buy. A unit lacking in accuracy is essentially useless for measuring moisture. However, not all units advertise the same accuracy rate.
High-quality moisture meters should be accurate to within 0.1 percent, but these high-end models can cost a lot. For a less-expensive option, some moisture meters are accurate to within 5 percent. This still represents a reasonable accuracy rating for the average DIYer, but if a project or professional requires a more precise measurement, it is best to stick to the high-end models. It isn’t advisable to invest in a moisture meter that has more than a 5 percent variance in its accuracy.
All moisture meters’ readings are displayed as a percentage of moisture content (% MC). Typically, a moisture meter is calibrated for use with wood and has a scale between 5 percent (dry) and 40 percent (saturated). Measuring nonwood materials like concrete uses a relative scale from 0 (dry) to 100 (saturated). Moisture meters for use with gypsum or drywall offer a third scale that ranges from 0.2 percent (dry) to 50 percent (saturated). Before deciding on a moisture meter, determine the accuracy levels you need and the materials you will want to check.
Durability
A product’s durability is important to anyone who will be using a moisture meter regularly on job sites. Even a newer model with the best features should survive having its pins pushed into a wall or being jostled in a tool box.
The moisture meter should include the features a DIYer wants but also have a reputation for durability and long life. Consider options that have a rubberized casing, a heavy-duty design, or shock resistance built in. These moisture meters will survive a few falls without damage and make a great investment because they’ll need to be replaced less frequently.
Ease of Use
Choose a moisture meter that is relatively simple to use. Complicated moisture meters take much longer to read than those with a more straightforward design and can lead to inaccurate and inconsistent readings that could result in undetected moisture damage.
Instead, opt for a moisture meter with an easy-to-read, backlit digital display that shows the information you need. Users should be able to navigate easily between the menus on the device and switch between functions quickly. Pinless moisture meters are much easier to use than pin moisture meters, but the trade-off is in pinpoint accuracy.
Range of Measurement
The range of measurement a moisture meter offers is determined by the minimum and maximum moisture percentages it can read. The broader the range of measurement, the less precisely the device will measure, with some moisture meters offering as wide a range as 0.2 to 60 percent.
Smaller, more precise scales provide more accurate measurement and frequently come in meters used in the flooring and fine carpentry industry to ensure optimal moisture percentage. However, most DIYers would benefit more from a broader scale range so they can use the same meter for many applications.
Additional Features
Moisture meters, like most electronic devices, can pack plenty of additional features to make the task easier. One of these features is a temperature display that can track a hot or cold water leak. Following changes in the temperature helps locate the source.
Other features include memory functions that can keep track of previous readings instead of having to write them down or remember them, audible alerts for the moisture level reading, and a carrying case to protect the moisture meter.
The Advantages of Owning a Moisture Meter
Having a moisture meter handy can save you a lot of trouble in your home and with DIY projects. It is easy to quickly test areas that look like they might be accumulating moisture to determine whether there is an issue. By taking the reading yourself, you avoid having to call a professional inspector and paying a costly fee only to find no moisture problem exists. If you have frequent problem areas in your home or in a high-moisture basement or cellar, a moisture meter can take regular readings to quickly identify and treat mold growth.
In addition, a moisture meter improves the outcome of DIY projects by providing accurate moisture readings for flooring projects, when installing wallpaper, and during woodworking projects. Without a moisture meter, DIYers only can guess at the moisture content in a material, which could lead to problems with mold growth or structural issues if the moisture buildup becomes severe.
- Owning a moisture meter helps you to detect problems without having to call in a professional.
- Regular readings in high-moisture homes can help detect and stop mold growth.
- Using a meter for flooring, wallpapering, and other DIY projects will ensure a high-quality finish and appropriate moisture percentages.
FAQs
Before buying a new moisture meter, take a look at the most frequently asked questions and their answers below.
Q. How does a moisture meter work?
Pin moisture meters work by measuring the resistance an electrical current meets when passing through a material. Inserting the pins into the material sends a current down one pin to flow into the second. The meter then measures the resistance the current met traveling through the material between the pins to generate a moisture reading.
Pinless moisture meters use a high-frequency signal to permeate the material. The electrical signal changes based on the material’s ability to hold a charge, and the moisture meter receives a measurement of the moisture content in the material.
Q. What is a normal reading on a moisture meter?
In general, a reading of 5 to 12 percent is optimal, but a normal reading on a moisture meter depends on the material. Drier materials like drywall should have lower moisture readings of around 5 to 7 percent. Damp materials like wall studs and framing lumber have acceptable moisture levels of up to 12 percent.
Q. What is a bad moisture meter reading?
A bad moisture reading would be one that climbs to 20 percent or higher—in this environment, your porous materials like lumber may be susceptible to mold growth or decay.
Q. Does moisture in walls mean mold?
Not necessarily. A moisture meter can be used to help detect problem areas, but it cannot detect mold. The hope is that you would use the moisture meter to detect a leak before the mold can form. But if the moisture is left untreated, it can become the perfect environment for mold spores to flourish.
Q. How do you use a moisture meter on drywall?
To use a moisture meter for drywall, first ensure that the meter is calibrated to accurately measure moisture in the material. If the meter is not calibrated, the results will be inaccurate.
Once the meter is calibrated to test drywall, operate the moisture meter normally according to product instructions. Insert pin meters into the drywall in several different spots to get an accurate reading of the entire wall. Similarly, a pinless meter should scan several sites on the wall for a full scope of its moisture content. For drywall, a reading of 5 percent to 7 percent is optimal.
Q. Are moisture meters accurate?
A dependable moisture meter may boast an accuracy within 3 percent of the reading, with some professional-grade models getting within 0.5 percent.
The accuracy of a moisture meter varies depending on the material you are testing, the calibration of the meter, the type of moisture meter, the procedures used during the test, and the meter’s functionality, which can vary based on upkeep and maintenance of the unit.
Above all, a moisture meter for walls and other structures will be most accurate if used correctly. A high-quality moisture meter used on the correct material by an experienced DIYer can accurately measure moisture to within 0.1 percent. However, an inexpensive moisture meter used on an inappropriate material without a proper scale could return inaccurate readings in the same way that a poor-quality stud finder can fail to find a stud if used improperly.
The post The Best Moisture Meters, Tested and Reviewed appeared first on Bob Vila.
]]>The post The Best Fertilizers for Indoor Plants, Tested and Reviewed appeared first on Bob Vila.
]]>Fertilizers for indoor plants provide essential nutrients for houseplants living in containers, helping them stay strong, healthy, and pest-free. After researching dozens of the most popular indoor houseplant fertilizer products, we tested nine top performers for 30 days to learn more about their effectiveness for different plants, soils, and growing environments. We also contacted a landscape expert with more than 30 years of experience to get insights on the benefits of using a houseplant fertilizer.
Based on our research and test results, our top recommendation is the Espoma Organic Indoor Plant Food—a balanced formula that’s easy to apply, effective, and inexpensive. Ahead, follow along with the results of our tests of the best fertilizers for indoor plants before choosing the one that meets your needs.
- BEST OVERALL: Espoma Organic Indoor Plant Food
↓ Jump to Review - BEST BANG FOR THE BUCK: Miracle-Gro Water Soluble All-Purpose Plant Food
↓ Jump to Review - BEST ORGANIC: Neptune’s Harvest Fish and Seaweed Fertilizer
↓ Jump to Review - BEST SLOW-RELEASE: Osmocote Plus Smart-Release Plant Food
↓ Jump to Review - BEST LIQUID: Dyna-Gro SuperThrive Grow 7-9-5 Liquid Plant Food
↓ Jump to Review - BEST FOR CACTUS: Grow More Cactus Juice Cacti & Succulents Fertilizer
↓ Jump to Review - BEST FOR FLOWERING PLANTS: JR Peters Jack’s Classic 10-30-20 Blossom Booster
↓ Jump to Review - BEST FOR HERBS: Dr. Earth Organic Life All Purpose Fertilizer
↓ Jump to Review - BEST ALL-PURPOSE: JR Peters Jack’s Classic 20-20-20 Plant Food
↓ Jump to Review

Fertilizer for Indoor Plants Comparison Chart
| Product Name | Type | Size | NPK |
| Espoma Organic Indoor Plant Food | Organic liquid concentrate | 8 ounces | 2-2-2 |
| Miracle-Gro Water-Soluble All-Purpose Plant Food | Water-soluble granules | 0.5, 3, 5, 5.5, 6.25, and 10 pounds | 24-8-16 |
| Neptune’s Harvest Fish and Seaweed Fertilizer | Liquid | 18 and 36 ounces, 1 and 5 gallons | 2-3-1 |
| Osmocote Plus Smart-Release Plant Food | Slow-release pellets | 1, 2, 4.5, and 8 pounds | 15-9-12 |
| Dyna-Gro SuperThrive Grow 7-9-5 Liquid Plant Food | Water-soluble liquid | 8 and 32 ounces, 1 gallon | 7-9-5 |
| Grow More Cactus Juice Cacti & Succulents Fertilizer | Liquid | 16 ounces | 1-7-6 |
| JR Peters Jack’s Classic 10-30-20 Blossom Booster | Water-soluble granules | 1.5 pounds | 10-30-20 |
| Dr. Earth Organic Life All-Purpose Fertilizer | Slow-release pellets | 1, 4, 12, and 40 pounds | 4-6-5 |
| JR Peters Jack’s Classic 20-20-20 Plant Food | Water-soluble granules | 8 ounces, 1.5, 4, and 10 pounds | 20-20-20 |
Our Top Picks
We tested the best indoor plant fertilizers for a range of specific houseplant needs. If you’re looking for the best plant food for your indoor home garden, check out these reviews.
Best Overall
Espoma Organic Indoor Plant Food
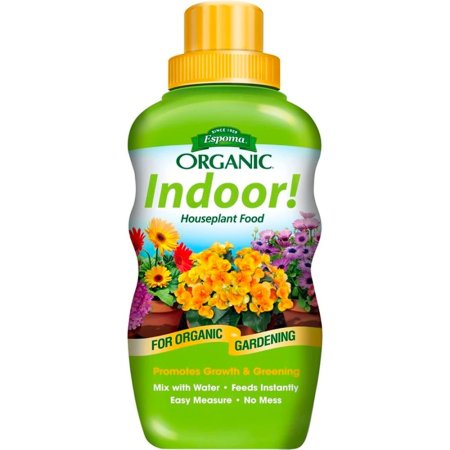
What We Like
- Concentrated formula is easy to mix and apply
- Includes humic acid and beneficial microbes
- Very affordable organic option
What We Don’t Like
- Bottle size isn’t economical for big plant collections
- Requires frequent applications
Specs
- Type Organic liquid concentrate
- Size 8 ounces
- NPK 2-2-2
Our Ratings: Ease of Use 4.5/5; Odor 5/5; Effectiveness 4/5; Value 4.5/5
In our test, the Espoma organic indoor houseplant food proved effective and easy to use. As a concentrated liquid plant food, it requires mixing, which is as simple as filling the cap halfway full (about 2 teaspoons) with fertilizer and the rest of the way with water. Its smell isn’t as pungent as other organic fertilizers we’ve tested and doesn’t linger long after application.
This natural plant food’s ingredients are derived from hydrolyzed poultry manure, hydrolyzed soy protein, hydrolyzed fish protein, bone meal, and kelp extract. It also contains added beneficial microbes proven to enhance nutrient absorption and minimize waste as well as humic acid to regulate soil pH and increase water retention. Even at its regular vs. sale price, this is the most affordable organic houseplant fertilizer we tested in terms of both the purchase price and cost per application. If you have a particularly large collection of indoor plants, however, you may want to wait for a sale as this concentrate only comes in 8-ounce bottles.
Read our full review: Espoma Organic Indoor Plant Food
What our tester says: “This formula is mild and doesn’t deliver fast bursts of growth, but by using in on our plants twice a month, they stay healthy and attractive, with no noticeable insect or disease issues.”—Mark Wolfe, Product Reviews tester and writer
Get the Espoma fertilizer for indoor plants at Amazon, Ace Hardware, Walmart,or Target.
Best Bang for the Buck
Miracle-Gro Water Soluble All-Purpose Plant Food

What We Like
- General purpose formula promotes growth and health
- Works for both houseplants and outdoor garden plants
- Lowest cost per application of all tested products
What We Don’t Like
- Low phosphorus level isn’t ideal for flowering plants
- Highly concentrated formula must be diluted
Specs
- Type Water-soluble granules
- Size 0.5, 3, 5, 5.5, 6.25, and 10 pounds
- NPK 24-8-16
Our Ratings: Ease of Use 4.5/5; Odor 5/5; Effectiveness 4/5; Value 4.5/5
Miracle-Gro has been around for generations, and our test results show why. It’s easy to use and store, produces zero smell, delivers fast results, and is incredibly inexpensive overall and per application. To use these highly concentrated fertilizer granules, simply measure them with the included scoop and mix with water. They will dissolve instantly without clumping or stirring.
Since this product is so concentrated, it’s important to soak the soil when watering but not add so much solution that it runs off. This prevents unused water-soluble nutrients from flowing out of the soil (and perhaps down the drain, depending on your watering process), which can contribute to pollution. Excess nitrogen and phosphorus from private septic systems and municipal sewage treatment facilities can contaminate groundwater and cause unchecked algae growth in streams, lakes, and rivers. To help prevent this, consider capturing and storing any excess water that drains off after fertilization. Use plain water next time your plants need a drink, and then apply the stored runoff during subsequent fertilization.
What our tester says: “Our plants responded really well to us alternating Miracle-Gro applications with plain water during testing. They all sent out a flush of fresh new growth about 2 days after the first treatment and looked healthy and strong by the end of the month.”—Mark Wolfe, Product Reviews tester and writer
Get the Miracle-Gro fertilizer for indoor plants at Amazon, Lowe’s, Ace Hardware, The Home Depot, Walmart,or Miracle-Gro.
Best Organic
Neptune’s Harvest Fish and Seaweed Fertilizer
What We Like
- Minimally processed natural ingredients
- OMRI listed for use in organic gardening
- Concentrated liquid formula is easy to apply
- Generous phosphorus content stimulates root and flower production
What We Don’t Like
- Strong fish smell lingers around for a day
- Doesn’t include measurement tool for mixing
Specs
- Type Liquid
- Size 18 and 36 ounces, 1 and 5 gallons
- NPK 2-3-1
Our Ratings: Ease of Use 4.5/5; Odor 3/5; Effectiveness 4/5; Value 4/5
This organic fertilizer from Neptune’s Harvest is formulated with a combination of fresh fish and seaweed from the North Atlantic. It’s certified by OMRI, so you can rest assured it’s made exclusively with natural and organic ingredients. After watering our test plants with it for a month, the results were excellent: lush new growth and no symptoms of overfertilization or infestation.
To use this concentrated formula, mix it according to the label’s instructions and apply every two weeks. Unfortunately, Neptune’s Harvest doesn’t come with any type of measuring device for this process. While one cap approximates the required tablespoon per gallon of water, the cap isn’t designed for that purpose, which makes it very hard to clean. Still, we had to figure out a way because the dirty cap made the bottle a smelly mess—and the smell is acute, especially in its undiluted state. It is not horrible like rotten fish, but it gives off an intense fish smell that lingers for a day after feeding. Odor aside, the nutrient analysis is just right for stimulating root and bud development, so this could be an excellent choice for cultivating seedlings, reducing transplant shock, and boosting flowering plants. shock, and boosting flowering plants.
Get the Neptune’s Harvest fertilizer for indoor plants at Amazon or Neptune’s Harvest.
Best Slow-Release
Osmocote Plus Smart-Release Plant Food
What We Like
- Continuously feeds for up to 6 months
- Available in 4 different sizes
- Great for indoor and outdoor plants
What We Don’t Like
- Difficult to measure for pots smaller than 6 inches
Specs
- Type Slow-release pellets
- Size 1, 2, 4.5, and 8 pounds
- NPK 15-9-12
Our Ratings: Ease of Use 5/5; Odor 5/5; Effectiveness 4/5; Value 5/5
We anticipated some difficulty gauging the effectiveness of a slow-release fertilizer in just a few weeks, but we were pleasantly surprised. Within a month, our test plants perked up and began showing additional growth. Each had a nice new flush of foliage that looked healthy and strong. The best part was that we didn’t need to mix up fertilizer or follow a weekly or biweekly application—we simply used the included measuring scoop to get the appropriate quantity of fertilizer pellets, pushed them down into the soil’s surface with a small stick, and watered each pot as usual.
Although the purchase price of the Osmocote is slightly higher than some of the other fertilizers we used, the product’s value shines through in the season-long feeding it provides. In fact, on a per-application basis, it’s actually one of the least expensive options we recommend (approximately $.32 per application for 2 gallons of soil). It also eliminates the hassle of mixing solutions and keeping up with a feeding schedule.
Get the Osmocote fertilizer for indoor plants at Amazon, Lowe’s, Ace Hardware,or The Home Depot.
Best Liquid
Dyna-Gro SuperThrive Grow 7-9-5 Liquid Plant Food

What We Like
- Formula is perfect for flowering plants
- Ultraconcentrated liquid is budget friendly
- Can also be used in hydroponics and outdoor gardens
What We Don’t Like
- Difficult to measure accurately in small amounts
Specs
- Type Water-soluble liquid
- Size 8 and 32 ounces, 1 gallon
- NPK 7-9-5
Our Ratings: Ease of Use 4/5; Odor 5/5; Effectiveness 4/5; Value 4/5
The most difficult part of working with the Dyna-Gro fertilizer was measuring the minuscule amount of concentrate needed for a quart of plant food (a quarter of a quarter teaspoon, or .042 ounces). To address this, we mixed up a gallon of fertilizer solution and stored the extra three quarts until needed. Now, each time we apply it, we appreciate that this well-balanced fertilizer provides both micronutrients and a beneficial NPK content, delivering 2 percent calcium along with traces of magnesium, boron, chlorine, cobalt, copper, iron, manganese, molybdenum, sodium, and zinc—all of which are required for long-term plant health.
Our results with Dyna-Gro were similar to those using Osmocote but not as rapid as with Miracle-Gro. The plants produced a healthy flush of new foliage with no symptoms of stress, disease, or insect infestation. This was the only synthetic fertilizer we applied with each watering, so our long-term concern was that residue could accumulate in the soil and cause problems with extended use. When using this product long-term, buyers should monitor their plants for signs of stress and flush the soil with clear water.
Dyna-Gro offers recommendations for different application rates to fit a variety of growing situations. You can feed at each watering with a solution of ¼ or ½ teaspoon per gallon of water or increase the ratio to 1 teaspoon per gallon for a biweekly or monthly feeding schedule. They also provide instructions for use in hydroponic systems, siphon feeders, irrigation injectors, or foliar spray.
Get the Dyna-Gro fertilizer for indoor plants at Amazon or Walmart.
Best for Cactus
Grow More Cactus Juice Cacti & Succulents Fertilizer
What We Like
- Low nitrogen for cacti and succulents
- Value price is great for large cacti collections
- Supports healthy plant tissue and drought resistance
What We Don’t Like
- Must be applied frequently for best results
- For cacti and succulents only
Specs
- Type Liquid
- Size 16 ounces
- NPK 1-7-6
Our Ratings: Ease of Use 4.5/5; Odor 5/5; Effectiveness 4/5; Value 4.5/5
It was much more difficult to gauge our success with Cactus Juice compared to the other fertilizers we tested. The test cacti simply didn’t grow as quickly as other types of houseplants, and we didn’t expect them to. But they looked great and continued to improve throughout the month of testing. The color of the foliage deepened noticeably, and the first hints of flower buds began to appear by the end of the month. In short, everything progressed as it should.
Like most of the other liquid fertilizers we tested, this one did not include a measuring device. Using a measuring spoon to gauge the bottle cap volume, we found that half a capful approximates a teaspoon, so we used it to measure afterward. But then we had to clean it thoroughly before replacing it on the bottle. The tall, narrow 16-ounce bottle itself was easy to handle and poured cleanly.
Get the Grow More fertilizer for indoor plants at Lowe’s or Amazon.
Best for Flowering Plants
JR Peters Jack’s Classic 10-30-20 Blossom Booster

What We Like
- NPK content is perfect for flowering plants
- Also suitable for boosting vegetable and fruit production
- Feeds through both roots and leaves
What We Don’t Like
- Easy to overfertilize if not careful
Specs
- Type Water-soluble granules
- Size 1.5 pounds
- NPK 10-30-20
Our Ratings: Ease of Use 4.5/5; Odor 5/5; Effectiveness 4/5; Value 5/5
We fed Jack’s Classic Blossom Booster to two African violets, two Reiger begonias, and a phalaenopsis orchid. All of these plants had just completed a resting phase when we started the feeding test, and by the end of the month, both the violets and begonias had begun to produce an abundance of new flowers, while the orchid was starting to send up a new flower spike.
This fertilizer comes with its own measuring scoop, and its granules dissolve instantly without clumping. While the 1.5-pound size could be a bit much for those with just one or two indoor plants, its value increases since it’s labeled for use on “all indoor and outdoor flowering plants.” At about $.04 per feeding, this specialty plant food is very cost-effective and produces quality results across a range of different types of flowering plants.
Get the JR Peters Blossom Booster fertilizer for indoor plants at Amazon or JR Peters.
Best for Herbs
Dr. Earth Organic Life All-Purpose Fertilizer

What We Like
- Minimally processed organic ingredients from natural sources
- Suitable for culinary herbs and other edible plants
- Dry formula is easy to apply
What We Don’t Like
- Bulkier and a bit more expensive per application
Specs
- Type Slow-release pellets
- Size 1, 4, 12, and 40 pounds
- NPK 4-6-5
Our Ratings: Ease of Use 5/5; Odor 4/5; Effectiveness 4/5; Value 4/5
This Dr. Earth fertilizer smells mildly like a hayfield, probably due to the high alfalfa meal content, and also contains fish bone meal, fish meal, and kelp meal that (thankfully) does not emit a noticeable fishy smell. It’s easy to apply (although no measuring scoop is included), and because it contains no animal manure, it doesn’t produce any of the “off” smells often associated with organics.
In our trial, we used this Dr. Earth fertilizer for potted plants on potted herbs. As with the Osmocote product, it only required applying it once and watering as necessary. By the end of the month, our plants looked great and had beautiful new flushes of fresh foliage and buds. As much as we like this organic option, it is a bit more costly and bulky than other houseplant food products we tested. The 4-pound bag we used was relatively large and inconvenient for storage, and more product (by volume) is needed per feeding. Also, at $.32 per application, it was the second most expensive fertilizer we tested. However, for shoppers interested in working with nature to improve the soil and grow edible plants with a reduced risk of nutrient runoff, this Dr. Earth product is one of the best houseplant fertilizers available.
Get the Dr. Earth fertilizer for indoor plants at Amazon or Ace Hardware.
Best All-Purpose
JR Peters Jack’s Classic 20-20-20 Plant Food
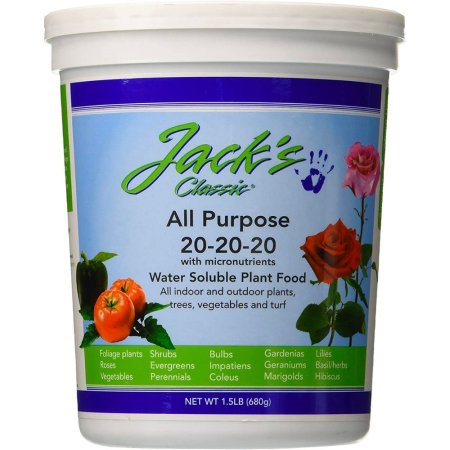
What We Like
- 20-20-20 formula works for most plant types
- Water-soluble granules are easy to measure, mix, and apply
- Affordable at about $.04 per application
What We Don’t Like
- Careless use may lead to plant damage or nutrient pollution
Specs
- Type Water-soluble granules
- Size 8 ounces, 1.5, 4, and 10 pounds
- NPK 20-20-20
Our Ratings: Ease of Use 4.5/5; Odor 5/5; Effectiveness 4/5; Value 4.5/5
This water-soluble plant food comes in a plastic tub and includes a measuring scoop, making it very easy to store and mix. As with Miracle-Gro and the other JR Peters product we tested, the granules dissolve instantly in water and are easy to sweep up if a few spill. But more importantly, our plants love this fertilizer for the quick burst of nutrients each feeding provides.
After the first application, we noted deep greening of the foliage within 3 days and new bud development within a week. The second application was less like flipping on a light switch and more like nudging a merry-go-round already in motion. Growth continued progressing, culminating in a lush new foliage display by month’s end. Just be careful to mix and apply this product strictly according to the label directions to avoid overfertilizing, waste, and excessive nutrient runoff.
Get the JR Peters 20-20-20 fertilizer for indoor plants at Amazon.
Jump to Our Top Picks
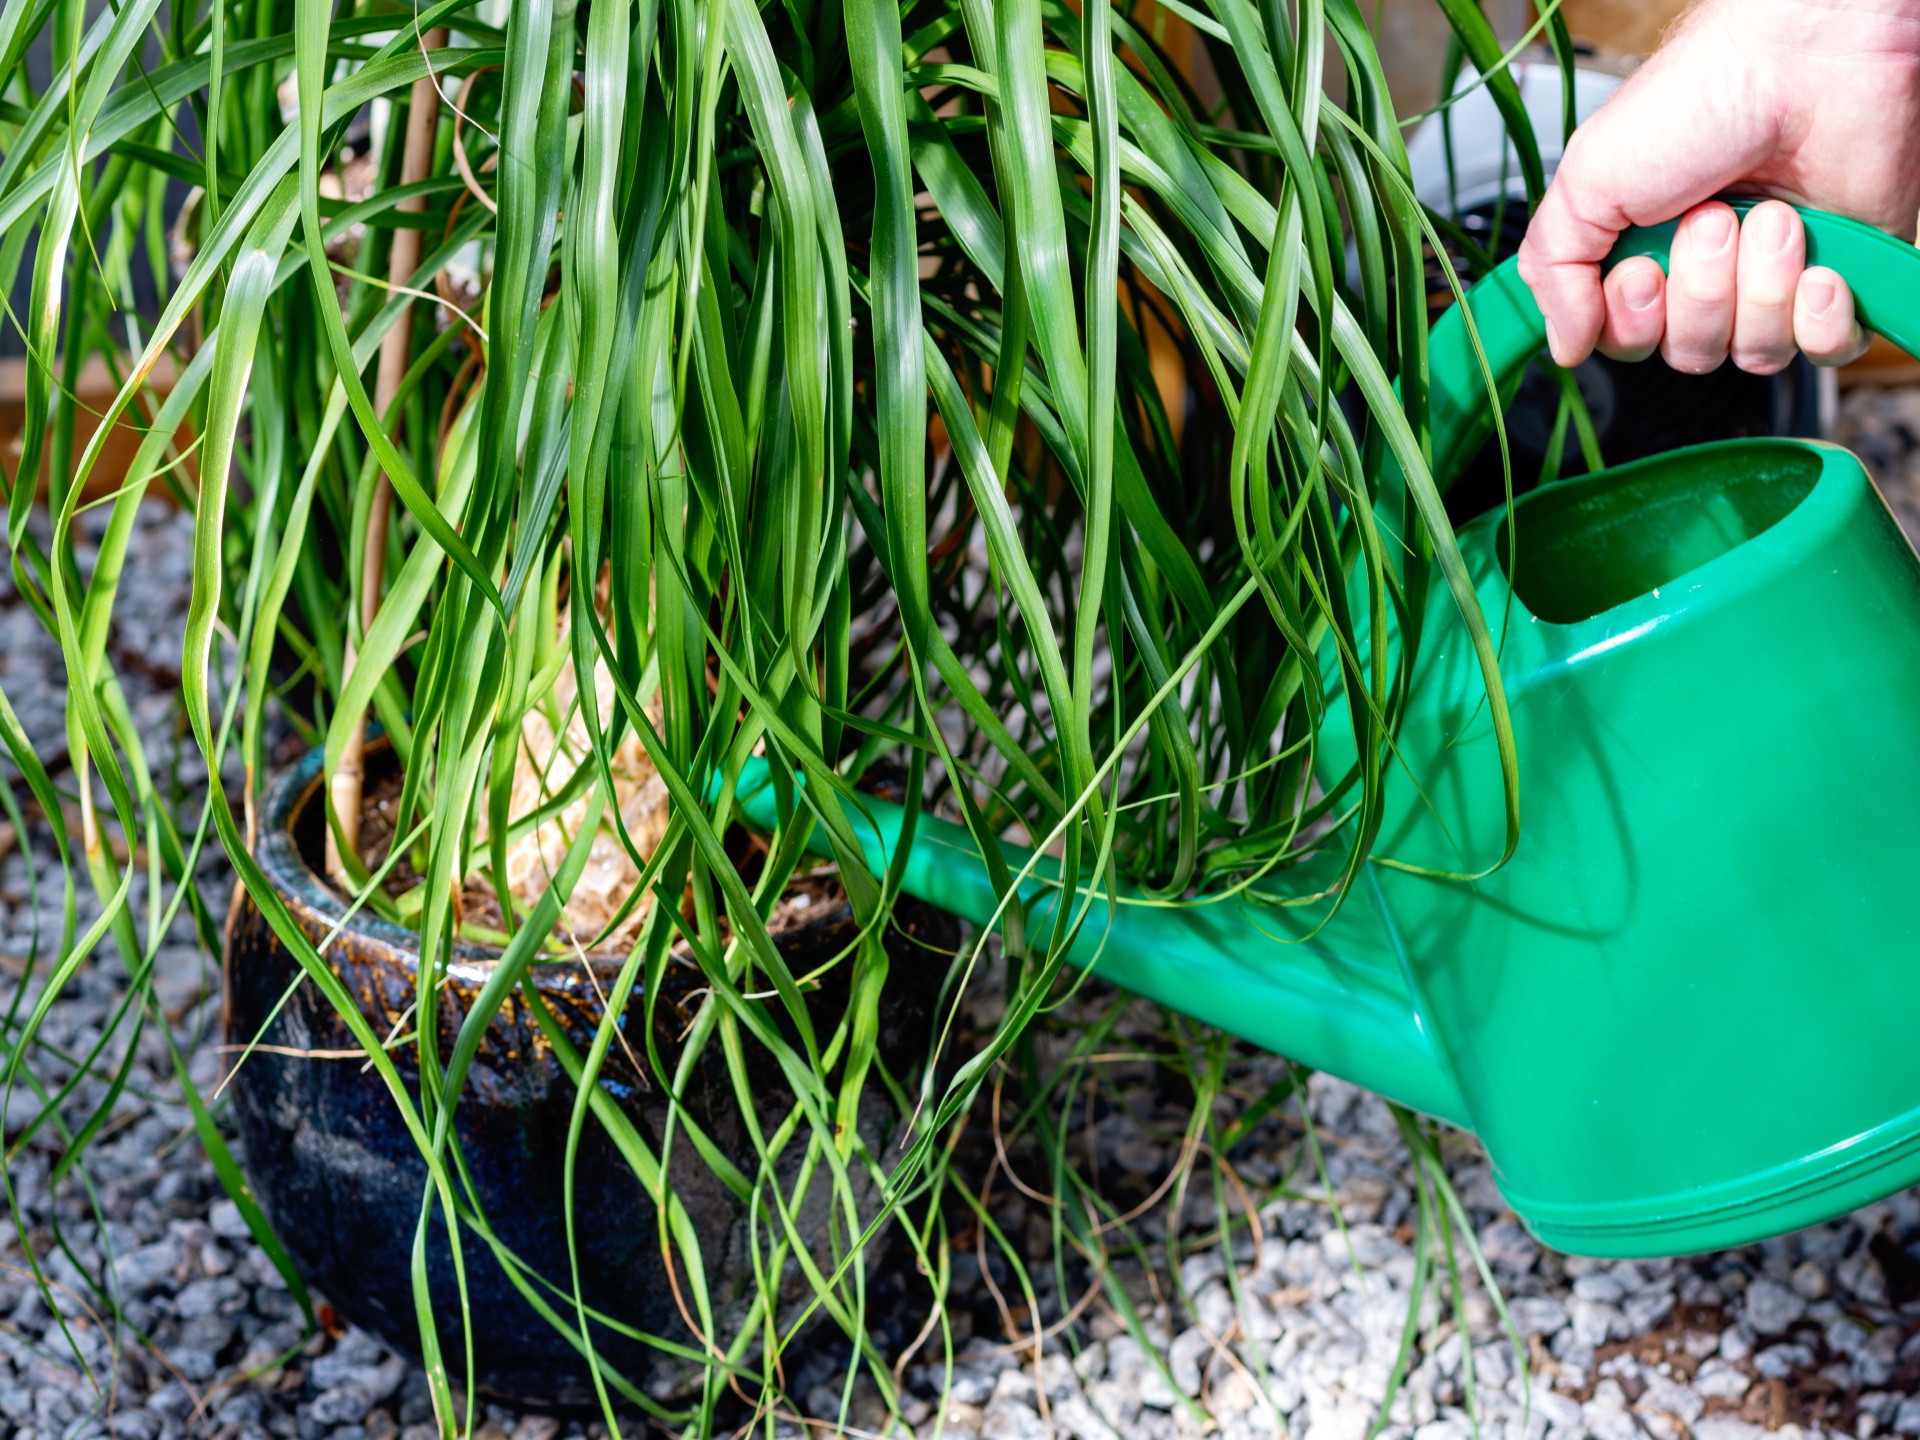
How We Tested the Best Fertilizers for Indoor Plants
Our tests looked at organic and synthetic fertilizers as well as liquid concentrates, water-soluble granules, and dry-application formulas. To obtain comparable results, we set up a trial with nine groups of five houseplants each, all healthy and growing in 6-inch pots. Seven of the groups were made up of common foliage plants like pothos, dracaena, snake plant, and croton, and two specialty groups featured cacti and succulents in addition to flowering houseplants.
We tested these fertilizers from early February through early March, starting as the plants completed a semi-dormant phase. Throughout testing, we monitored them for changes in health and vigor, foliage color, new growth, and infestation by insects or diseases. We also compared the up-front costs of the products along with the application rates, storage, mixing, and user convenience. We recorded our observations, scored each product on a scoring rubric, and gave awards to worthy products based on performance.
| Testing Stats | |
| Products tested | 9 |
| Time spent testing | 4 weeks |
| Tests performed | 4 to 5 |
| Price range | $10 to $20 |
Our Ratings: Fertilizers for Indoor Plants
| Product Name | Ease of Use | Odor | Effectiveness | Value |
| Espoma Organic Indoor Plant Food | 4.5 | 5 | 4 | 4.5 |
| Miracle-Gro Water-Soluble All-Purpose Plant Food | 4.5 | 5 | 4 | 4.5 |
| Neptune’s Harvest Fish and Seaweed Fertilizer | 4.5 | 3 | 4 | 4 |
| Osmocote Plus Smart-Release Plant Food | 5 | 5 | 4 | 5 |
| Dyna-Gro SuperThrive Grow 7-9-5 Liquid Plant Food | 4 | 5 | 4 | 4 |
| Grow More Cactus Juice Cacti & Succulents Fertilizer | 4.5 | 5 | 4 | 4.5 |
| JR Peters Jack’s Classic 10-30-20 Blossom Booster | 4.5 | 5 | 4 | 5 |
| Dr. Earth Organic Life All-Purpose Fertilizer | 5 | 4 | 4 | 4 |
| JR Peters Jack’s Classic 20-20-20 Plant Food | 4.5 | 5 | 4 | 4.5 |
What to Consider When Choosing a Fertilizer for Indoor Plants
While it’s easy to assume that all indoor plant fertilizers offer similar performance, several factors affect their functionality. Keep reading to learn about several of the most important features to consider when choosing the best fertilizer for indoor plants.
Types of Fertilizers for Indoor Plants
The three primary types of fertilizer are liquid, granular, and slow-release pellets. Each kind has advantages and disadvantages.
Liquid
Before applying it to a plant’s leaves or soil, liquid fertilizers for plants must be mixed with water, which requires some additional measuring. However, the water makes liquid plant foods easier to apply sparingly and avoid overfertilization. Liquid houseplant fertilizer and food are typically best for those with many houseplants because a large amount of water must be used to dilute very little fertilizer. However, liquid indoor plant fertilizers move through soil and plant systems rapidly and must be applied frequently—every 1 to 2 weeks.
Granular
Granular fertilizers are affordable and effective. Simply sprinkle the fertilizer on top of the soil, then mix or water it in. Synthetic fertilizer granules gradually dissolve as the plant is watered, typically within about 30 days. Organic plant food nutrients are released by soil microbial activity, also within about a month. Use a granular houseplant fertilizer when initially planting or repotting a plant so it can be thoroughly mixed into the soil. It typically must be reapplied after 4 to 6 weeks.
Slow Release
Slow-release indoor plant fertilizers come in several formats, including pellets, spikes, pods, and capsules. Because they emit nutrients gradually, they can last 3 to 6 months. They’re typically only available in traditional—not organic—formulas.
NPK Ratio and Plant Species
The best fertilizers contain a mixture of macronutrients—nitrogen (N), phosphorus (P), and potassium (K)—along with traces of micronutrients. The balance of these three macronutrients is represented by its NPK guaranteed analysis, which is listed on the fertilizer’s packaging.
For example, a guaranteed analysis of 10-10-10 means that 10 percent of the fertilizer, by weight, is nitrogen; 10 percent is phosphorus; and 10 percent is potassium. The remaining 70 percent can be made up of any combination of micronutrients and inert ingredients. Explicit details are shown on the back of the houseplant fertilizer label.
The guaranteed analysis is sometimes converted to an NPK ratio. For instance, 10-10-10 fertilizer has a ratio of 1-1-1, whereas 10-30-20 fertilizer has an NPK ratio of 1-3-2. The NPK ratio is a good way to compare different brands and formulations of fertilizers. Three different fertilizers may have three different analyses, for example, 5-5-5, 10-10-10, and 20-20-20, but the same 1-1-1 NPK ratio. This comparison could indicate that the products may work for the same plant types, using different application rates.
Because each plant species has different nutritional needs, a “perfect” NPK ratio doesn’t exist. Generally, green houseplants require a balanced NPK ratio or one that’s slightly higher in nitrogen. A higher balance of phosphorus is particularly beneficial for flowering plants such as African violets, oxalis, and peace lilies. Phosphorus also aids in fruit production, making it beneficial to edible plants like citrus trees and tomatoes. Potassium is closely linked to general plant health, healthy cellular structure, and drought resistance.
Organic or Traditional
One of the primary decisions shoppers must make is choosing between a traditional or an organic fertilizer.
- Organic fertilizers are made entirely from minimally processed natural ingredients. Although organic fertilizers are free of potentially harmful chemicals and synthetics, their nutrient values aren’t as concentrated as traditional products. Moreover, over time, their natural content can emit an unpleasant odor. Since the marketing term “natural” isn’t regulated particularly well in fertilizers, look for a product approved for certified organic use by the OMRI.
- Traditional or synthetic fertilizers contain a balanced blend of minerals for feeding houseplants. They typically cost less than organic fertilizers and come in more concentrated formulas.
Application
A fertilizer’s ease of application depends largely on whether it’s a liquid, granular, or slow-release formula.
- Liquid fertilizers must be diluted with water according to the manufacturer’s instructions. Pour liquid fertilizers onto the plant’s soil, or if directed by the manufacturer’s instructions, some liquid fertilizers may be absorbed through plant foliage.
- Granular fertilizers can be sprinkled evenly on the soil’s surface and mixed into the top 3 inches of soil before it’s watered, which releases the nutrients.
- Slow-release fertilizers vary in application method. Follow the manufacturer’s instructions for fertilizing with pods, spikes, pellets, or capsules.
Tips for Using the Best Fertilizer for Indoor Plants
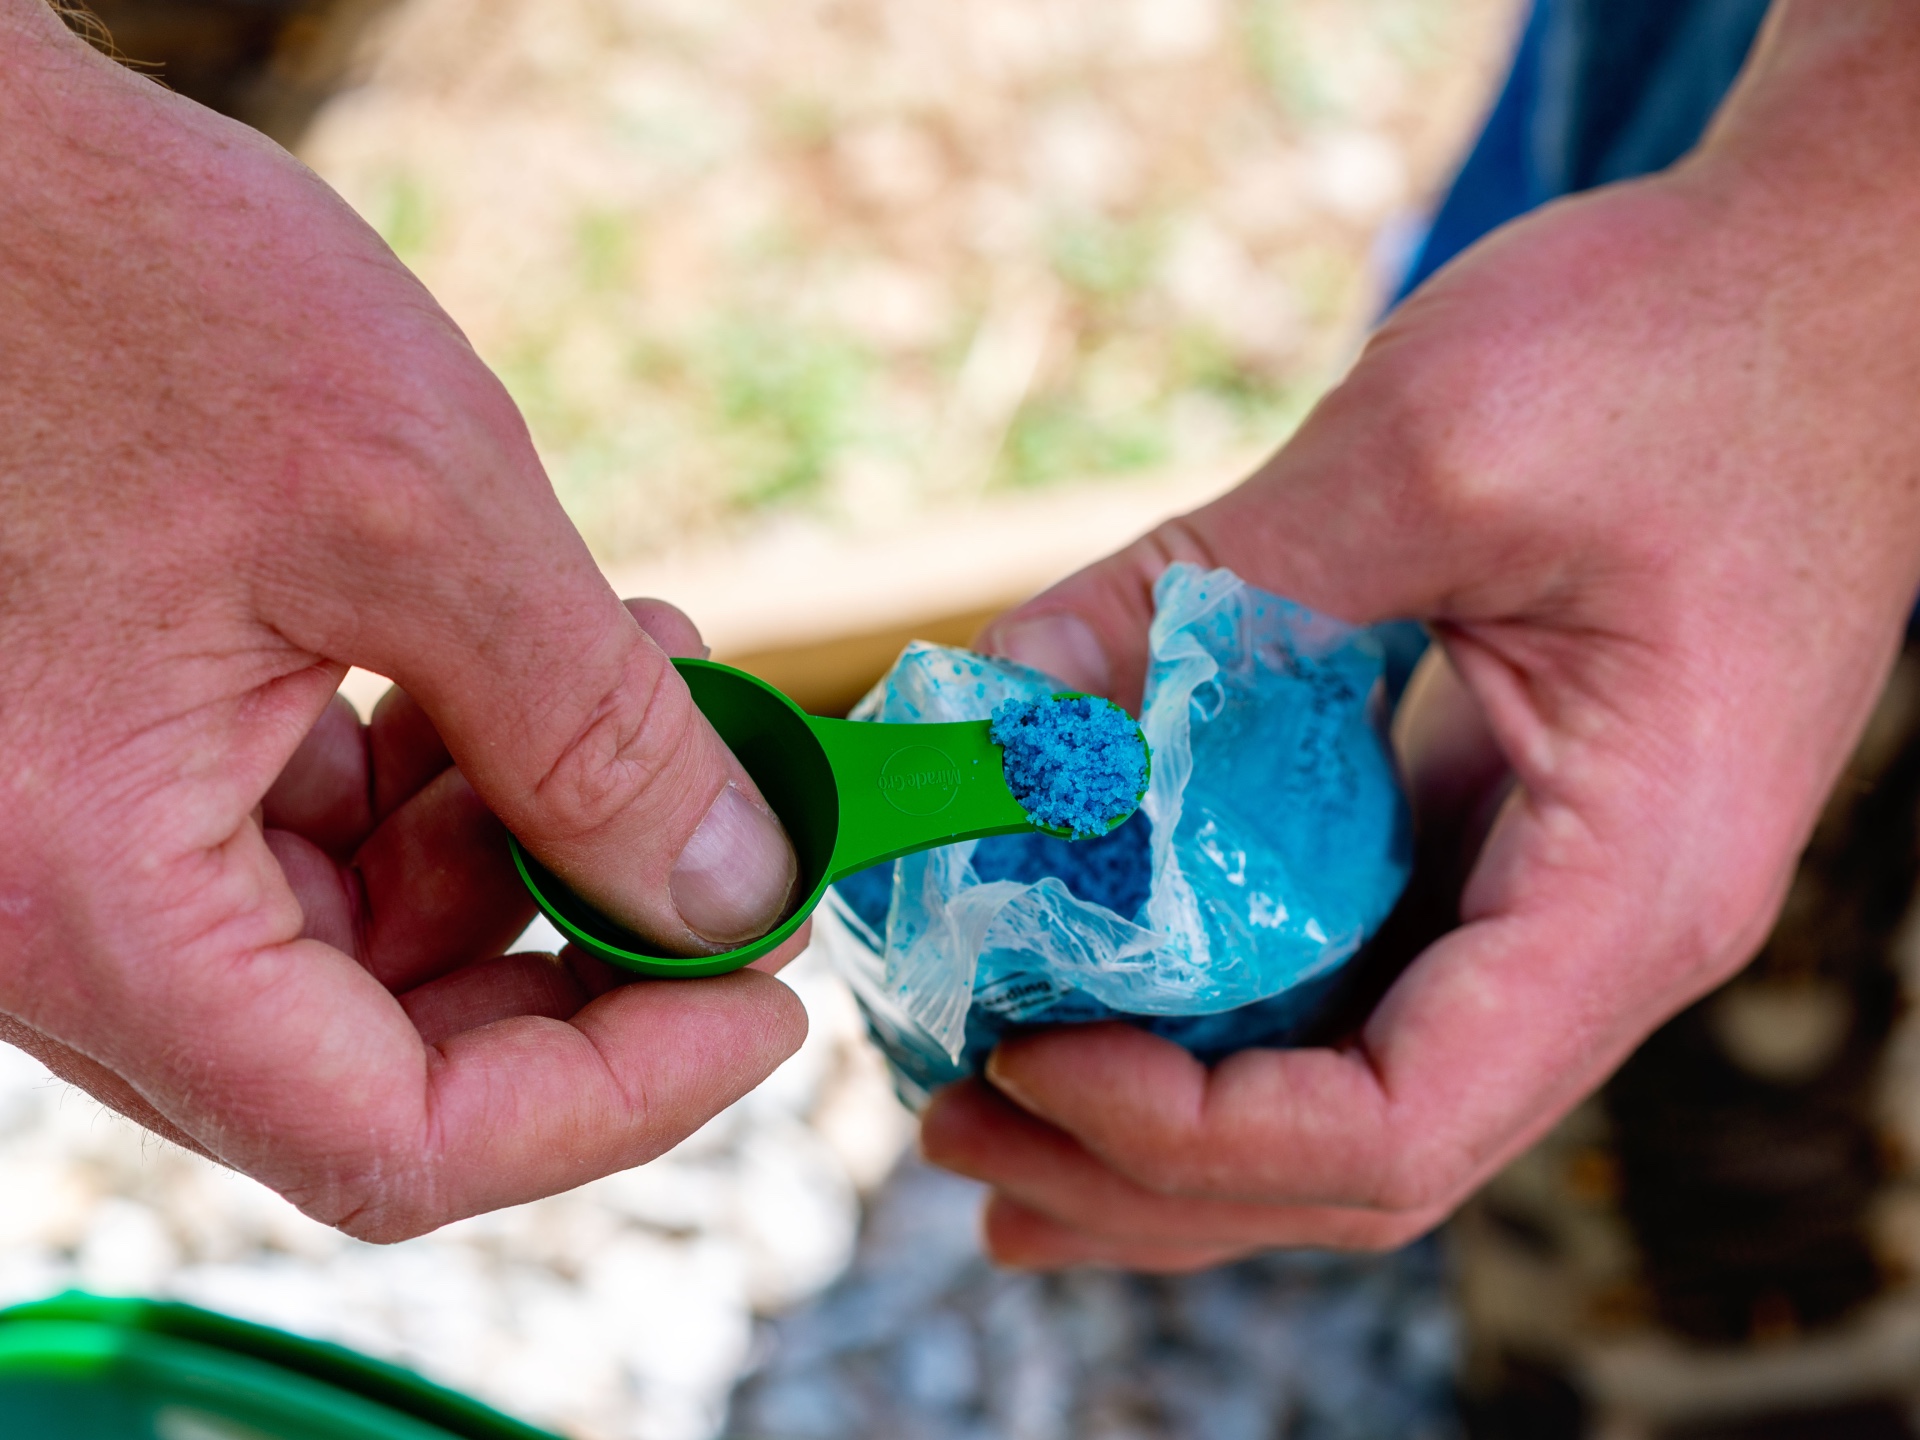
To know how to fertilize plants without risking overfertilization or other fertilizer mistakes most home gardeners make, follow these tips:
- Since all fertilizers are different, follow the instructions on the manufacturer’s label.
- Avoid over-fertilization. Reduce your fertilizing schedule if your plant’s leaves droop or begin to look burnt at the edges.
- Avoid fertilizing plants that are stressed by drought, disease, or insect infestation. Treat the problem first, then fertilize after the plant recovers.
- Know how to recognize nutritional deficiency based on leaf color: According to Ward Dilmore, founder and head landscape designer at Petrus Landscaping, “brow leaves can be a sign of a lack of potassium,” and “yellow leaves are a very common sign of a lack of nitrogen.” Purple leaves often indicate the plant needs more phosphorus.
- There’s no need to fertilize most houseplants during their dormant season if you live in an area that experiences standard seasonal temperature changes.
- If you’re still experiencing issues, use a soil test kit to check the soil’s nutrient levels and adjust fertilizer application as appropriate.
FAQs
While you now know more about choosing the best fertilizers for indoor plants, you might still want more information about how to use them. Here are some answers to some of the most frequently asked questions about the proper fertilization of plants.
Houseplants have been removed from their natural habitat and therefore lack the macronutrients and micronutrients present in their native soil that help them remain healthy. Good fertilizer for houseplants supplements these nutrients.
Houseplant fertilizers contain a mixture of macronutrients (nitrogen, phosphorus, and potassium) and micronutrients that supplement the nutrients already in the plant’s soil. These ingredients can come from a variety of sources. In fact, you can make homemade plant food with a few everyday household products.
The fertilization method depends on the chosen formula. Add powder and granular fertilizers to the plant’s soil, and then water. Dilute liquid fertilizers with water before application.
The ideal fertilization schedule depends on the type of fertilizer you choose. Liquid fertilizer should be applied every 2 to 4 weeks, whereas a granular fertilizer only needs to be applied every 4 to 6 weeks. Fertilize with a slow-release formula every 3 to 6 months.
Overfertilization is a common problem with houseplants. The signs of overfertilization vary depending on the plant species, but they include symptoms like wilting, burnt leaves, and dried leaf margins.
When asked about fertilizer application, landscape expert Ward Dilmore said, “During the spring and summer, most indoor plants benefit from monthly fertilizing. In fall and winter, when plants enter dormancy it’s best not to fertilize at all as it will allow the plants to go into dormancy without it pushing out new growth.” Start fertilizing your houseplants in early spring, about 8 weeks before the last expected frost. In areas that don’t experience winter frosts, reduce applications to half strength.
Meet the Tester
Mark Wolfe is a writer and product tester with a background in the nursery and landscaping industry. For more than 20 years, he mowed, edged, planted, pruned, cultivated, irrigated, and renovated beautiful landscapes. Now he tests and writes reviews about the latest outdoor power equipment, hand tools, lawn-care products, and other outdoor-living goods.
Additional research provided by Savannah Sher.
The post The Best Fertilizers for Indoor Plants, Tested and Reviewed appeared first on Bob Vila.
]]>When considering how to prune a lemon tree, keep in mind that: “Pruning is generally not required to keep citrus productive or attractive,” according to UC Davis. “However, you should remove deadwood, very weak shoots or suckers and prune any crossing branches.” California Rare Fruit Growers calls those discards the four Ds: “dead, damaged, diseased, and dysfunctional branches.”
Just don’t get carried away with your cutting. “Excessive pruning usually results in reduced fruit production, vertical shoots called water sprouts, and suckers,” warns Alabama A & M Extension. Therefore, never remove more than 20 to 30 percent of your tree’s canopy.
Tools & Materials
Bobvila.com may earn a commission from purchases made through these links.
Project Overview
Working Time: 30 minutes
Total Time: 40 minutes
Skill Level: Beginner
Estimated Cost: $30 to $90
When to Prune Lemon Trees
Since lemon trees can bloom and bear on and off throughout the year, it may be difficult to prune them without also removing flowers and fruit. However, they generally bloom most heavily in late winter and spring, and then fruit most heavily in fall.
Therefore, Laurelynn and Byron Martin advise in their book Growing Tasty Tropical Plants: “For the least disruption to fruiting, wait until the spring flush of flowering is complete to head back plants.” Spring’s new growth also will allow you to easily see which branches were winter-killed and should be removed.
Before You Begin

If you’ve used your pruning tools on other trees, soak them in a bleach solution—one part bleach to nine parts of water—for 10 minutes before you begin cutting. That will help prevent the spread of disease. Also, wear long, heavy gloves to protect yourself from lemon tree spines.
STEP 1: Remove any suckers and water sprouts from your lemon tree.
Except for seedlings, most lemon trees are grafted onto more vigorous rootstock such as trifoliate orange. Suckers are the vertical shoots which sometimes emerge below the graft from that rootstock. They should be removed at once since they “suck” energy from the actual lemon tree and produce inferior fruit.
Water sprouts do the same, but spring from dormant buds on the tree branches instead. Cut both suckers and water sprouts back to the trunk, root, or branch from which they emerged. Use pruning shears for shoots under ½ inch in diameter, and use loppers or a pruning saw for larger ones.
STEP 2: Remove branches which are dead and those marked by disease.
Avoid tip pruning lemon trees since that causes heavy growth where the cut was made. Instead, if part of a branch is dead or diseased, remove the entire branch.
To avoid causing a large one—more than 1 inch in diameter—to tear away from the trunk when you are cutting it, use a pruning saw to make your first cut part way up from the bottom of the branch at a 1-foot distance from the trunk. Make your second downward cut a little further out. Then saw the remaining 1-foot stub off closer to the trunk, leaving its “collar” in place.
STEP 3: Remove spindly branches and those which cross into the center.
According to IFAS Extension “Three to five main shoots should be selected at planting to form the primary scaffold framework for the mature tree.” Thereafter try to keep the center of the tree open enough that dappled sunlight falls on the ground beneath it at noon.
You can do that by removing spindly branches and those which cross into the center of the tree from the outside. Also, if two branches are rubbing against each other, remove the smaller one. You may snip off lemon tree thorns too, if you prefer, to prevent them from scratching you.
Pro tip: If you remove enough lemon tree leaves that the branches are exposed to direct sunlight, you’ll need to whitewash them to prevent burning from the sunlight. To whitewash, mix one part of white interior latex paint with one part of water and brush it onto the exposed branches. That should provide sufficient sunscreen to allow your lemon tree to bask rather than bake.
STEP 4: Thin the lemon tree back to the height you prefer.

If you are growing lemon trees indoors, it’s likely that you’ll want to keep them no taller than 5 feet or so. However, a dwarf lemon tree that doesn’t surpass 10 feet also is a good idea for outdoors, so you can harvest fruit while standing on the ground.
When cutting back lemon trees, avoid shearing off the tips of these fast-growing fruit trees as if they were hedges—unless they actually are hedges. Instead, shorten each too-tall shoot by pruning it back to the next lateral branch. Because lemon fruits bend branches, keep the lowest ones at least 2 feet above the ground.
STEP 5: Root prune a container tree to keep it small enough.
An important part of how to trim a lemon tree is how to trim its roots. If your potted specimen is outgrowing its container but you don’t have room for a larger one, lemon tree care may require you to prune its underpinnings.
Remove your recently watered tree from its pot and use a sharp knife to slice off 1 to 2 inches of the roots and soil around the outer edge of the root ball. After returning the tree to its container, add fresh potting soil to the space now opened up between the root ball and the pot.
Final Thoughts
Whether your lemon is an indoor fruit tree—which you grow as a big houseplant—or a larger outdoor cultivar, the above directions on how to prune citrus trees should help you keep it growing and glowing.
The post How to Prune a Lemon Tree the Right Way appeared first on Bob Vila.
]]>Decorating your home with indoor plants improves the aesthetic and can be beneficial to your health and happiness. However, if caring for plants is too cumbersome and ends up causing a major inconvenience and stress, then it might be a wise decision to try some artificial plants instead.
Fortunately, you can feel some of the positive attributes of natural plants with fake ones, such as their ability to boost one’s mood simply by looking at them. Plus, some real plants can trigger allergies, attract pests inside the home, and even cause toxic reactions to both people and pets.
Opting for certain fake plants that look real might be a solution, especially when it comes to plants that are particularly challenging to care for daily or in certain conditions. “Fake plants are perfect for people who lack the skills, experience, or simply the desire to care for real plants,” says Zeeshan Haider, CEO and founder of Greenry Enthusiast in Sheridan, Wyoming. “They are a great way to add greenery to your home without the worries of keeping real plants alive.” Many artificial plants actually cost less in the long run compared to real plants and can be purchased at places such as Wayfair, Amazon, Target, The Home Depot, Lowe’s, and IKEA.
Here are five plants that are particularly challenging to take care of indoors yet can easily be replaced by fake ones.
1. Elephant’s Ear (Alocasia spp.)
It’s a bit of a challenge to grow alocasia indoors, says Caleb Young of Rare Indoor Plants. “They like high humidity and a warm environment. If the roots stay too wet or it gets too cold, they’re quick to show signs of stress,” he says. Elephant ears require consistently moist—but not soggy—soil since they are susceptible to root rot, which can make them challenging to care for.
This plant relies on bright indirect sunlight when grown indoors, so it is also critical to avoid placing it in full direct sunlight because this can lead to leaf burn. Another major problem with growing this plant indoors is that it is toxic to dogs, cats, horses, and humans, causing mouth and stomach irritation and possibly vomiting if ingested; a fake Elephant Ear would be safer.
2. Calathea (Calathea spp.)

Commonly referred to as prayer plant, pinstripe plant, or rattlesnake plant, calatheas are attractive but difficult to grow indoors, given their requirements for the right amount of light, water, and nutrients. “Calatheas are pretty with their colorful leaves, but they’re hard to maintain when it comes to care,” says Young. He says the plants need high humidity and consistent watering. “If those aren’t spot on, they’ll start showing stress with browning edges,” Young says.
The prayer plant is known to curl, fade, or droop under the wrong conditions. These houseplants do best with indirect light and should never receive direct sunlight because that will lead to leaf burn, causing the leaves to curl, turn brown, and fall off the plant. Given their specific humidity needs, it is necessary to mist the plant with water once or twice a day, run a humidifier, or grow it in a large terrarium. All of these options require additional work to keep the plant flourishing, and to consider an artificial calathea instead. Finally, they are susceptible to spider mite infestations, which can lead to the leaves curling up.
3. Fiddle-Leaf Fig (Ficus lyrata)
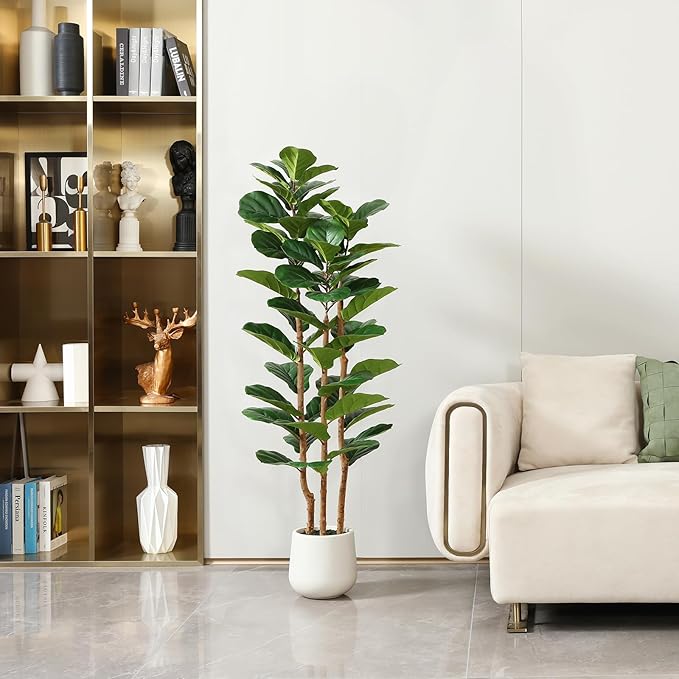
An artificial fiddle leaf fig tree is a much better option than a real one since it’s toxic to pets and people, quite finicky, and hard to keep alive. “The fiddle-leaf fig is an absolute diva—she requires perfection when it comes to lighting, no drafts, and plenty of attention, or she will drop leaves all over the place,” says Haider.
Fiddle-leaf figs love bright, filtered light such as being in front of a window with eastern exposure. If that’s not possible, they might need LED grow lights. However, too much direct sun can burn the plant and turn the leaves brown. The water temperature also has to be just right; if the water is too hot or too cold, then the plant can go into shock. Finally, this plant is susceptible to common pests like mealybugs, scale, whiteflies, aphids, and fungus gnats.
4. Maidenhair Fern (Adiantum spp.)
A maidenhair fern is among the hardest plants to grow indoors, mainly because the leaves are so thin. “This plant is super delicate and really hard to keep alive in drier homes,” says Young. “It needs constant moisture and humidity, so if it doesn’t get those conditions, it starts wilting or turning brown pretty fast.”
These plants demand 60 percent humidity, which is unrealistic for a healthy home, and a good reason for a faux fern instead. Therefore, they need to be placed inside an enclosure to control humidity levels, such as a fern case, large terrarium, or glass cloche. They also like bright, indirect sunlight; if they are left in dim spots, they will struggle. Finally, fern spores can trigger allergic reactions like rashes and hay fever.
5. Phalaenopsis Orchid (Phalaenopsis spp.)
Also called moth orchids, Phalaenopsis orchids are one of the most popular orchids, but can be challenging to care for as a houseplant. “They are gorgeous yet very vulnerable and quite easy to damage,” says Haider. They are also really picky, according to Young. “They need the perfect balance of light, humidity, and watering. A lot of people struggle with getting the watering just right,” says Young. As a result, the plants end up wilting or never blooming, Young adds. These plants also need bright, indirect sunlight, so if a sunny spot inside isn’t available, the best alternative is to purchase faux silk orchids.
The post You Won’t Believe These 5 Houseplants Are Fake (and Better for Decorating Than Their Live Equivalents) appeared first on Bob Vila.
]]>As an enthusiastic gardener passionate about outdoor and indoor plants, I’m always looking for new and exciting varieties. One of the perks of being a garden writer is that I often have the privilege of testing out fresh introductions as they hit the market. I must say, 2024 has delivered an impressive array of must-have plants poised to transform any space. There were plenty of amazing new plants that caught my eye, but my top picks include dazzling reimaginations of a beloved houseplant, miniaturized versions of edible garden classics, and innovative shrubs that have garnered a near-cult following among gardening enthusiasts. Whether you’re a seasoned green thumb or a beginner, there’s something magical about discovering fresh varieties that breathe new life into your collection.
New Pothos Varieties
Pothos (Epipremnum) doesn’t get the credit it deserves. Often dismissed as a generic office staple, this resilient houseplant is a superstar for its ability to thrive with minimal care. Its forgiving nature makes it an excellent choice for new indoor gardeners, while its diverse varieties offer something for seasoned plant enthusiasts. Earlier this year, Costa Farms added two striking new varieties to their Trending Tropicals line: Silver Streak (Epipremnum amplissimum) shown above on the left and Skeleton Key (Epipremnum pinnatum Skeleton Key) shown above on the right.
These new additions are a far cry from the familiar golden pothos you’ve seen hanging in offices and waiting rooms. Skeleton Key features uniquely shaped leaves that resemble—true to its name—skeleton keys when mature, adding an architectural flair to its trailing habit. “Bright light is best, but it tolerates low and medium lighting conditions,” says Justin Hancock, horticulturist at Costa Farms. “In lower light levels, it’s slower and more likely to have lanky internodes” he adds. Silver Streak, on the other hand, boasts elongated, lance-shaped leaves adorned with silvery stripes that shimmer in the light, giving it an elegant and modern look. “Because it’s not variegated—like a lot of the other trendy pothos varieties are—it’s a faster grower,” says Hancock, “If you’re used to a variety like Marble Queen, you may be surprised at this one.”
Together, these varieties showcase the versatility and beauty of pothos, proving that this houseplant is anything but ordinary.
Eclipse Bigleaf Hydrangea (Hydrangea macrophylla ‘Bailmacseven’)

As a passionate hydrangea enthusiast, I’m always thrilled to discover a new, standout variety. The Eclipse Bigleaf Hydrangea from First Editions Shrubs and Trees is a true showstopper that checks all the boxes for garden lovers. Its stunning dark pink blooms and deep purple foliage offer an unforgettable contrast that dazzles any landscape. It’s the perfect addition to the gothic garden trend.
Like its Endless Summer cousins, this is an everblooming variety, providing a continuous display of flowers throughout the growing season. I had the privilege of seeing this extraordinary plant in person at the 2024 Penny McHenry Hydrangea Festival, where it was rightfully awarded Hydrangea of the Year—a favorite among enthusiasts year-round! “Eclipse brings such a new take on bigleaf hydrangeas in the garden with its deep purple leaves and contrasting cranberry or amethyst-colored blooms,” says Ryan McEnaney, spokesperson for First Editions Shrubs & Trees. “It adds a new way of using this beloved hydrangea in the garden or in deco pots and plays really well with perennials and grasses to make a statement.”
Orange Glow Knock Out Rose (‘Radslam’ PP 35,826 CPBRAF)

The Orange Glow Knock Out Rose is a vibrant addition to any garden, appreciated for its stunning orange blooms and ease of care. I’ve had Knock Out roses for years, and I love that they are easy to grow and offer tons of nonstop color. The Orange Glow is incredibly fragrant, adding a sensory delight to its visual appeal. Its unparalleled rust resistance makes it a top performer in practically any garden.
“Orange Glow’s incredible rust resistance makes it a top-performer in every climate and a standout on the West Coast,” says Stephanie Waltz, rose trial coordinator from Star Roses and Plants. This versatile rose can be planted individually, in groups, or mixed with other perennials and shrubs to add a striking pop of color. Perfect for gardeners of all skill levels, Orange Glow is a real showstopper!
Kitchen Minis

During a press trip to Ball Horticultural this summer, I saw and tasted fruit from some of the most exciting plant introductions for 2024—Kitchen Minis. This collection offers compact, easy-to-grow plants perfect for small spaces, bringing fresh produce and herbs directly to your kitchen or patio with minimal effort. The lineup includes tomatoes, peppers, cucumbers, and herbs, each offering a bountiful harvest over several weeks. “With Kitchen Minis, the true concept is ‘No Garden? No Problem’,” says Katie Rotella, senior public relations and digital manager at Ball Horticultural Company. “This opens the door for so many different lifestyles to care for and harvest their own vegetables and herbs,” she adds. “And there’s no requirement for a large garden space. This appeals to busy families, people living with a disability, urban dwellers, or those looking to put a kitchen garden close to the culinary action.”
Although I was impressed by the entire collection, four varieties caught my eye in particular. Standouts include Tomato Siam (Solanum lycopersicum), a compact yet prolific producer of flavorful cherry tomatoes that’s perfect for containers, and Basil Bonsai (Ocimum basilicum), a charming, petite herb with the same robust flavor as full-sized basil. Also on my list are Pepper Hot Fajita (Capsicum annuum), a spicy ornamental pepper that doubles as an edible accent, and Cucumber Quick Snack (Cucumis sativus), which produces crisp, snack-sized cucumbers ideal for fresh eating. These innovative plants are perfect for gardeners of all levels looking to refresh their collections with compact, high-yielding options. I’ve already purchased seeds to grow them in my vegetable garden for 2025!
Jurassic Stegosaurus Holly Fern (Cyrtomium fortunei ‘MONSTGO’)

As a fan of low-maintenance plants, I’m always drawn to options that bring unusual texture and beauty to the garden, like the Jurassic Stegosaurus Fern. This striking fern from Monrovia is as easy to care for as it is eye-catching, with its dramatic, deeply lobed fronds that add a fun, textural element to any landscape or container. Its robust nature makes it perfect for gardeners at all levels, thriving in shaded areas with minimal upkeep.
“Our Jurassic series may change everything you think you know about ferns,” says Katie Tamony, trend spotter at Monrovia. “These unique selections provide so many options for shady gardens, with interesting forms and textures that are perfect for creating calm and serene outdoor spaces. Jurassic Stegosaurus Holly Fern is also a wonderful indoor plant.”
The post Our Favorite New Plants of 2024 and Why We Love Them appeared first on Bob Vila.
]]>Garlic is one of the easiest garden plants to grow, which, along with its health benefits and pungent flavor, is just another reason to love it. This low-maintenance relative of the onion is typically planted in fall about a month before the first frost in order to allow the chill to induce dormancy and give it time to produce bulbs for harvest the following summer. But those who relish the taste of fresh garlic (which can be eaten immediately after harvest) may want to learn how to grow garlic indoors so they have a ready supply at hand, no matter the season.
Before You Begin
Spatially, garlic is a good fit for growing indoors because it’s comfortable in compact spaces. However, there are other things to consider:
- Garlic requires 6 to 8 hours of direct light. Where natural light is insufficient, grow lights can be substituted, but it doesn’t grow as well under manmade light.
- Garlic (especially hardneck varieties) needs cold temperatures for a dormancy period before planting. When growing indoors, this can be replicated by placing bulbs in the refrigerator.
- All parts of garlic are toxic to dogs and cats, so ensure their safety when planting indoors.
How to Grow Garlic Indoors in 6 Easy Steps
Growing garlic indoors can be easier than outdoors because you’re in control of the environment, eliminating pest infestations and providing consistency in growing conditions. But this is only a benefit if you provide all the elements this root vegetable needs to thrive.
Step 1: Select the right varieties of garlic for indoor cultivation.

There are approximately 300 varieties of garlic, and these are divided into hardneck and softneck types. While all types can be grown indoors, softneck types tend to do better inside because hardneck types prefer colder climates.
Winter garlic is easy to grow indoors, as it doesn’t have a period of dormancy and is less demanding, says Anastasia Borisevich, plant expert at Plantum. “Spring garlic is better suited for growing garlic greens, as it will yield smaller bulbs but bigger scapes.”
Some varieties that do well indoors include:
- Inchelium Red: an award winner that generally produces 15 cloves per 3-inch bulb
- Early Purple Italian: an easy grower and attractive plant
- Cal Early: a non-GMO heirloom variety with a mild flavor
Step 2: Choose the right-sized container.
Garlic can grow in a compact container of 6 to 8 inches diameter, depending on the number of cloves planted, but because it’s essentially a root crop, the pot should be deep enough—at least 8 inches—to allow bulbs to develop.
Clay pots are a good choice, but whatever type of material the container is made from, it should have good drainage. A five-gallon bucket can suffice, but will need holes drilled in the bottom to allow water to drain.
Step 3: Use the right soil.
Choose a lightweight, sterile commercial potting mix that includes vermiculite or perlite to aid with water retention and drainage. While garlic likes loamy, sandy soils, Borisevich says, “Any store-bought all-purpose soil mix will work fine for garlic.” Because garlic appreciates soil with good fertility, opt for a mix with peat or compost. Alternatively, you can add organic fertilizer to boost the soil’s nutrients.
You can also make soil for growing garlic yourself by mixing two parts leaf mold compost, two parts other compost, and three parts sand.
Step 4: Prepare the garlic bulbs for planting.
Separate the bulb(s) you intend to plant into cloves, leaving as much of the papery skin on as possible. Place them in a plastic bag with a little soil. Put the bag in the freezer and leave it there for 4 to 6 weeks. This process, called vernalization, replicates the conditions the cloves would face outdoors. Alternatively, if the outside temperatures are cool, you can place them outdoors. This cold period is essential for growing garlic bulbs indoors because it encourages garlic cloves to sprout.
Step 5: Plant the cloves in soil.
Garlic cloves should be planted about 2 inches deep, with the pointy end up, and spaced about 6 inches apart. Gently tamp down the soil around the planted cloves. Irrigate until excess water drains off. Garlic likes soil that is consistently moist, but not soggy. During its germination period, it may need watering more heavily.
Place the container in a cool, sunny spot where it will receive plenty of bright, indirect light.
Step 6: Maintain conditions for healthy growth.
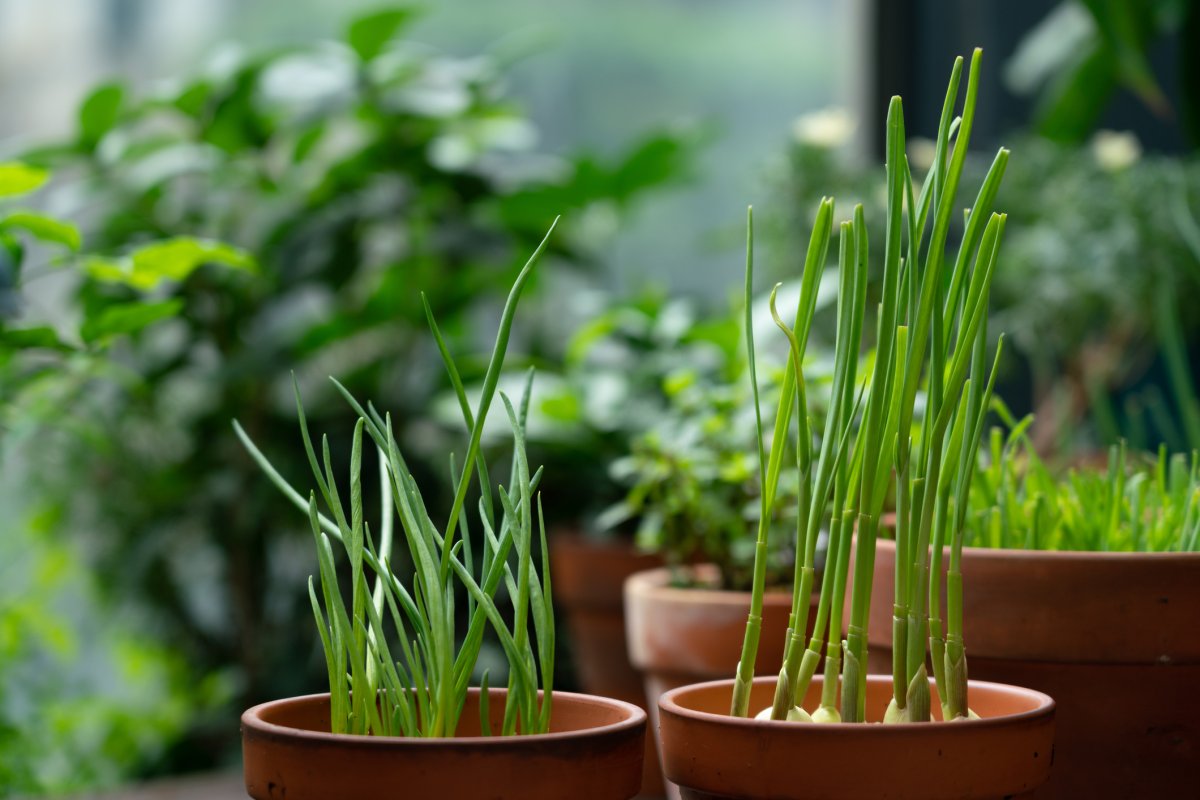
To get the most out of your garlic harvest, maintain the conditions that will allow the plants to thrive.
- Keep garlic where it will receive at least 6 hours of direct sun, or use grow lights indoors.
- The ideal air temperature range for growing garlic is 60 to 75 degrees Fahrenheit, with the cooler end of that range being the most ideal.
- Soil should be consistently moist, but not soggy. Avoid overwatering.
- Use a fan for air circulation to prevent mold and mildew.
- Fertilize every 2 to 3 weeks once sprouts are 6 inches tall. Borisevich suggests using “complex mineral fertilizers that contain all basic nutrients, as well as microelements that increase the plants’ resistance to pests and diseases.”
- Sturdy bamboo stakes in the pots will hold the garlic upright.
Final Thoughts
These easy steps will enable you to grow garlic indoors year-round, providing fresh flavor for your favorite dishes. Garlic doesn’t require a lot of attention, but it does need planning to include a period of cold dormancy. After that, all it takes is nutrient-rich, well-draining soil, at least 6 hours of direct light, consistent moisture, and regular fertilizing.
Fortunately, garlic doesn’t produce strong odors while growing, but it is toxic to dogs and cats, so take precautions.
The post Yes, It’s Possible to Grow Garlic Indoors—Here’s How appeared first on Bob Vila.
]]>