The post Yes, Your Home Needs a Radon Test Kit — And These Are the Best appeared first on Bob Vila.
]]>Radon test kits detect the presence of radon gas, a byproduct of uranium decay in rock and soil. Radon can enter homes by seeping through cracks in the foundation, slowly accumulating until it reaches dangerous levels. Prolonged exposure to this harmful gas can cause health issues like headaches or even cancer.
Radon is tasteless, odorless, and colorless, making it undetectable without specialized radon testing equipment. These home technology tools can measure radon levels over a few days or months or provide continuous monitoring. Since no level of radon exposure is considered safe, knowing which radon sensor you can rely on is essential.
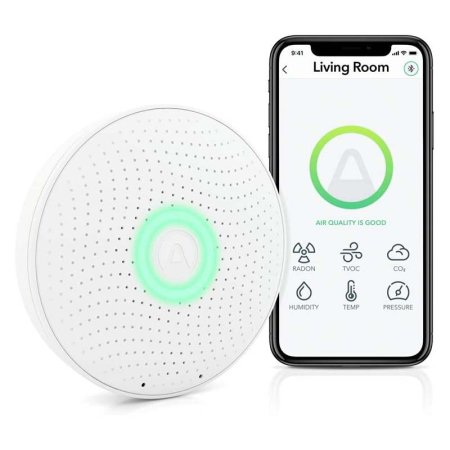
After tapping a home safety expert for insights and testing a few popular options, we chose the Airthings Corentium Home Radon Detector as the best radon test kit. It’s portable, has an easy-to-read screen, and takes multiple measurements to capture trends. Below, we detail what we like and don’t like about this product and the rest of our picks so you can choose one of the best radon test kits to keep your family safe.
- BEST OVERALL: Airthings Corentium Home Radon Detector
↓Jump to Review - BEST BANG FOR THE BUCK: First Alert RD1 Radon Test Kit
↓Jump to Review - UPGRADE PICK: Airthings Wave Plus Smart Radon Detector
↓Jump to Review - BEST SMART: Airthings View Plus Smart Air Quality & Radon Monitor
↓Jump to Review - BEST SHORT-TERM: AccuStar Short-Term Charcoal Canister Radon Test Kit
↓Jump to Review - BEST LONG-TERM: Ecosense RadonEye Radon Sensor & Detector
↓Jump to Review

Radon Test Kits Comparison Chart
| Product Name | Type | Results | Portability |
| Airthings Corentium Home Radon Detector | Battery-operated device | Instant on device | Portable |
| First Alert RD1 Radon Test Kit | 1-time test kit | Must be mailed to lab; results emailed 3 to 5 days after lab receipt | Portable |
| Airthings Wave Plus Smart Radon Detector | Battery-operated smart device | Instant in app and on device | Portable; mounts to wall or ceiling |
| Airthings View Plus Smart Air Quality & Radon Monitor | Battery- or USB-powered smart device | Instant in app and on device | Portable; mounts to wall |
| AccuStar Short-Term Charcoal Canister Radon Test Kit | 1-time test canister | Must be mailed to lab; results available next business day | Portable |
| Ecosense RadonEye Radon Sensor & Detector | Plug-in device | Instant in app and on device | Portable but requires outlet |
Our Top Picks
After researching dozens of radon test kits and testing a few as part of our guide on the best air quality monitors, we recommend the following six options for their ease of use, accuracy, and value.
Best Overall
Airthings Corentium Home Radon Detector

What We Like
- First results shown on screen within 24 hours
- Lightweight and portable
- Displays both long- and short-term readings
What We Don’t Like
- Some users’ units stopped working after a few years
Specs
- Type Battery-operated device
- Results Instant on device
- Portability Portable
The Corentium Home radon detector kit by Airthings is one of the first continuous radon test kits to use batteries, allowing you to take it into any space that needs testing. The clear digital display provides both long- and short-term radon levels, revealing daily fluctuations as well as overall averages. Once you’ve tested your home for at least 30 days, Airthings also makes it easy to generate a free self-inspection report through its website.
Though this portable radon detector does start delivering readings within 24 hours, the manufacturer recommends waiting at least 20 days before taking action if levels appear high. This ensures plenty of time for results to stabilize, so you know your readings are reliable. To test another area after your first test is complete, simply reset the unit and move it to a new location.
Get the Airthings Corentium Home radon test kit at Amazon, Ace Hardware, Walmart, or Airthings.
Best Bang for the Buck
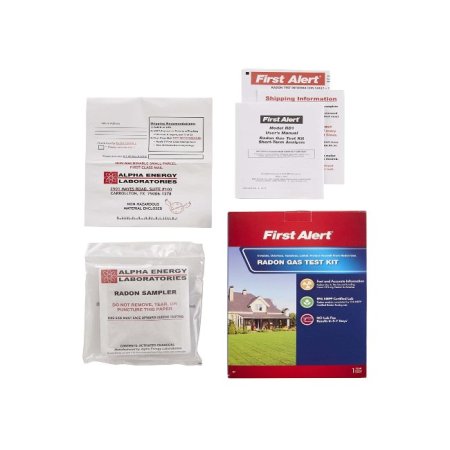
First Alert RD1 Radon Test Kit
What We Like
- Listed under the EPA’s Radon Gas Measurement Proficiency Program
- Low price includes lab fees in most states
- Results emailed 3 to 5 business days after receipt
What We Don’t Like
- Can only be used once
- User pays shipping costs
Specs
- Type 1-time test kit
- Results Must be mailed to lab; results emailed 3 to 5 days after lab receipt
- Portability Portable
The First Alert RD1 home radon test kit is a simple and effective way to detect dangerous radon gas in your home. It essentially functions as a disposable radon detector that you allow to sit for a few days and then send away for results. To use, simply open the sealed activated charcoal packet, place it in the lowest livable area of your home, and leave it. After 2 to 4 days, seal it up and send it to the lab. Within 3 to 5 days of lab receipt, you’ll receive the results by email.
Unlike most mail-in radon test kits, this simple charcoal option includes the laboratory fee for most states (excluding New Jersey), though you will need to pay for shipping. Still, its price and reliability are difficult to beat for those looking for a one-time, short-term test.
Get the First Alert radon test kit at Amazon, Lowe’s, or First Alert.
Upgrade Pick
Airthings Wave Plus Smart Radon Detector
What We Like
- Provides continuous results via Bluetooth
- Monitors radon, CO2, VOCs, humidity, temperature, and air pressure
- Visual indicator shows current air quality
What We Don’t Like
- Detailed results only available within Bluetooth range
Specs
- Type Battery-operated smart device
- Results Instant in app and on device
- Portability Portable; mounts to wall or ceiling
While the Airthings Wave Plus radon and air quality monitor is more expensive than our top two picks, it also tests a lot more than just radon. Once set up, this unit provides continuous readings for radon gas buildup, carbon dioxide (CO2), volatile organic compounds (VOCs), humidity, temperature, and air pressure.
The Wave Plus radon gas monitor runs on batteries and is easy to mount on a wall or ceiling. Its on-unit color-coded display indicates whether air quality is good (green), fair (yellow), or bad (red). For more detailed information, pair the unit with the Airthings app via Bluetooth for real-time reading and tips on how to improve indoor air quality. You can also see current and past readings on Airthings’ web dashboard.
What our tester says: “This Airthings monitor is quite an overachiever! As part of a larger test, we exposed it to a dish of oil-based stain for 2 hours. When we checked back in, the light was red (indicating hazardous air quality), and the app showed the volatile organic compound levels had spiked.”—Glenda Taylor, Product Reviews tester and writer
Get the Airthings Wave Plus radon test kit at Amazon or The Home Depot.
Best Smart
Airthings View Plus Smart Air Quality & Radon Monitor

What We Like
- Wi-Fi and Bluetooth connectivity; compatible with IFTTT, Homey, Google Assistant, and Amazon Alexa
- Detects a wide range of pollutants and irritants
- Data available on unit, app, and Airthings website
What We Don’t Like
- Requires 6 AA batteries
Specs
- Type Battery- or USB-powered smart device
- Results Instant in app and on device
- Portability Portable; mounts to wall
This smart monitor from Airthings makes it easy to check levels of radon, PM2.5 (particulate matter), CO2, temperature, VOCs, air pressure, and humidity. It also provides pollen forecasts so those with allergies can stay informed about outdoor conditions. As a continuous radon monitor, this unit has its own display showing current levels, and users can also check the app or Airthings website for long-term readings. It also features a visual indicator with green, yellow, and red status lights for at-a-glance monitoring.
The View Plus is compatible with IFTTT, Homey, Google Assistant, and Amazon Alexa and runs via batteries or the included USB-C cable. You can place it virtually anywhere indoors to test levels in multiple locations or mount it to the wall to ensure continually safe radon levels in a basement.
Get the Airthings View Plus radon test kit at Amazon or Airthings.
Best Short-Term
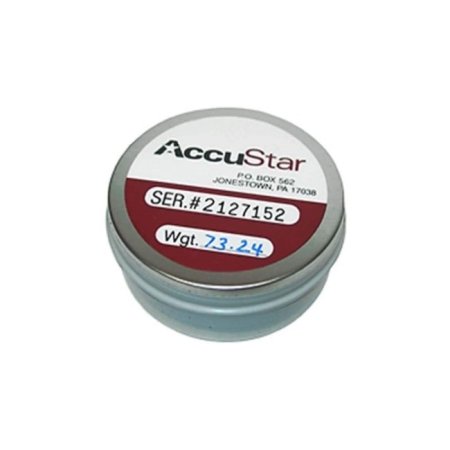
AccuStar Short-Term Charcoal Canister Radon Test Kit
What We Like
- Same-day results available if received by noon
- Easy to use; requires zero technological know-how
- Durable canister design keeps results safe
What We Don’t Like
- Doesn’t measure radon; only reports whether levels are under 4 pCi/L (picocuries per liter)
Specs
- Type 1-time test canister
- Results Must be mailed to lab; results available by next business day
- Portability Portable
This short-term test kit by AccuStar uses activated charcoal to absorb radon and its byproducts over a 48- to 96-hour period. Its easy-to-use design simply requires you to leave the unit undisturbed for a few days, mail it in, and wait for the results, which can arrive same-day if the canister is received by noon.
Though the cost of the AccuStar radon detection kit includes laboratory fees, you will need to pay to ship the unit in. The durable canister protects the test unit while in transit, ensuring your results remain accurate and safe from interference. This low-tech pick is perfect for those nervous about determining radon safe levels on their own and real estate agents testing radon in homes for clients.
Get the AccuStar radon test kit at Amazon, The Home Depot (2-pack), or AccuStar Labs.
Best Long-Term
Ecosense RadonEye Radon Sensor & Detector

What We Like
- First reading is 90 percent accurate and available in 10 minutes
- Results shown in app and on device
- Tracks short- and long-term readings and trends
What We Don’t Like
- Some reports of Bluetooth connectivity issues
Specs
- Type Plug-in device
- Results Instant in app and on device
- Portability Portable but requires outlet
The Ecosense RadonEye home radon detector takes 30 independent counts of pCi/L levels every hour, delivering the very first reading just 10 minutes after setup. To get started, simply plug in the electronic radon detector and leave it on a flat surface to allow it to begin collecting data.
Short-term results from this radon gas detector are displayed on the unit’s OLED screen and updated every 10 minutes. Additional hourly, monthly, and yearly data is available via Bluetooth connectivity on the RadonEye app. This pick’s continuous monitoring system not only provides an average reading over time, it also sounds an alarm if radon levels exceed 4 pCi/L.
Get the Ecosense radon test kit at Amazon, Walmart, or Ecosense.
Jump to Our Top Picks
How We Chose the Best Radon Test Kits

When gathering our list of recommendations, we primarily considered the most important aspects of radon home kits—accuracy and ease of use. We selected a variety of units that make it simple to test for radon, choosing a few one-time kits that need to be sent to a laboratory as well as several that offer instant access to results via the unit itself or an app.
Most picks on our list are battery-operated units, though some can also be powered using a standard plug or a USB cable. We also included one low-tech option that does not require power at all and simply needs to sit and absorb radon for a few days before being mailed in for reading. Finally, since the prices of radon detectors can vary greatly, we were careful to include picks at a range of costs since everyone needs to be able to afford to test for cancer-causing radon gas.
What to Consider When Choosing a Radon Test Kit
To select one of the best radon kits for your needs, it’s important to consider test type, accuracy, and ease of use and installation.
Types of Radon Test Kits
A radon test kit will use one of several methods to test the air in your home for elevated radon levels. Regardless of which type of radon monitor you choose, these helpful devices are the only way to determine your family members’ exposure to this harmful gas other than a professional radon inspection.
Short-Term Radon Test Kits
Radon kits for short-term use collect readings from your home over a 2- to 90-day period and must then be sent to a laboratory for the results to be read. The lab fees necessary for proper testing are likely included with your purchase, though shipping generally costs extra.
Because short-term radon test kits are the fastest and least expensive test option, real estate agents often use them to check for safe radon levels before selling a home. However, since radon levels fluctuate, short-term test kits are not the most accurate testing method. For definitive results, long-term testing is necessary.
Long-Term Radon Test Kits
As their name indicates, long-term radon test kits are designed to test levels of radon gas over a longer period, such as weeks, months, or years. Like short-term tests, some are single-use devices that must be sent to a laboratory to be read, though others have screens or Bluetooth connectivity that allows you to monitor levels yourself.
Since a long-term radon test kit collects a greater volume of data, periodic spikes that naturally occur are less likely to raise unnecessary alarms, which may happen with more limited readings. The downside of this type of detector is that it will typically be more expensive than a one-time use or short-term kit and may not be necessary if radon levels are consistently lower than 4 pCi/L.
Alpha-Track Radon Test Kits
The alpha-track radon test kit is a long-term test that measures levels of radon using polycarbonate plastic sheets placed in the lowest livable level of the home. If radon gas is present, it will emit alpha particles that create tracks on these sheets, with higher levels of gas producing greater numbers of tracks. Once the test kit has collected data for the suggested amount of time, it is sent in to be read. Generally speaking, alpha-track tests are more accurate than short-term test kits but don’t provide the ongoing measurements offered by long-term detectors.
Charcoal Radon Test Kits
Charcoal radon test kits are short-term options that work similarly to alpha-track units, though they use charcoal rather than polycarbonate plastic to measure levels. Generally speaking, they’re also cheaper and faster since they only monitor radon gas for between 2 and 90 days. For this reason, they are less accurate since they are susceptible to radon spikes and possible interference during shipping.
Digital Radon Test Kits
Digital radon test kits are also known as radon detectors, and they are the most expensive type of radon tester for home use. Most digital units can be mounted to the wall or ceiling or simply placed in the lowest level of the house.
However, installation requirements typically extend well beyond mounting, as most of these kits use Bluetooth connectivity to deliver detailed readings to an app. Some digital kits also offer recent readings directly on the test unit, though their screens aren’t often large enough to display the long-term data that makes digital tests so valuable. Further adding to their worth, many digital kits also test home air quality levels of humidity, carbon dioxide, volatile organic compounds, and more.
Accuracy
Accuracy is one of the most important factors to consider when choosing a radon test. Generally speaking, the longer a radon test kit collects data, the more accurate the results will be. This is because increased testing time allows you to determine average pCi/L levels without the influence of random positive or negative spikes.
Since short-term radon tests are susceptible to spikes in radon levels that can skew the average, they are considered the least accurate test option. Because they collect more data, long-term and continuous tests are the most accurate radon test kits available.
Ease of Use and Installation
Radon test kits are designed to be easy to use, both for the consumer’s benefit and to ensure accurate results. Passive radon test kits, like charcoal and alpha-track test kits, are easy to set up but must be sent to a lab for results.
On the other hand, active radon test kits, like digital radon detectors, are a bit more involved in setup but relatively easy to use after that. More advanced smart home-compatible detectors require additional technical know-how for ongoing use. It’s a good idea to consider your radon testing needs and comfort using technology before selecting a test kit.
FAQs
The following frequently asked questions section can help answer questions like “What is radon testing?” or “How much does a radon mitigation system cost?”.
Radon tests work by measuring the amount of radon in the air. Charcoal devices absorb radon, enabling lab techs to count radioactive particles to estimate levels. Alpha-track kits must also be read in labs, but they use a plastic film that produces marks when radon gas strikes it. Digital detectors have sensors that detect and count alpha particles before displaying them on the device or in an app.
Radon test kits are generally used by opening a sealed package and leaving the test kit exposed to the air for a certain amount of time. Some must be sent in to be read, while others provide measurements you can access yourself.
Radon levels should be placed on the lowest occupied level of the home. Most manufacturers recommend setting them on a surface a few feet off the floor or mounting them to a wall so they won’t be accidentally disturbed or knocked over by kids or pets.
If your home tests positive for high levels of radon, contact a qualified radon mitigation contractor. They can provide an estimate for installing a radon mitigation system that will continually remove excess radon from your home.
While buildings and homes on hillsides may be more likely to be affected by radon, any structure can be subject to radon contamination. Kevin Feak, Senior Fire Protection Engineer for the architecture and planning firm LaBella, says, “Radon is heavier than room air and will move to the lowest area. Areas below ground level, such as basements or crawl spaces, are at the highest risk.”
The Environmental Protection Agency (EPA) guide to radon recommends testing for radon at least every 2 years. The EPA also suggests testing if you renovate your home or are considering selling it, as you will need to provide test results to the buyer.
According to licensed Professional Engineer Kevin Feak, “The first step in determining your radon risk is to use the EPA’s Radon Zone Map. The second step is testing for radon with either a home test or calling a professional. Lastly, a mitigation system can be used to remove radon from your home or business.”
Different types of home radon test kits have different levels of reliability, with long-term tests being the most reliable and short-term tests being less reliable. Still, since short-term tests are typically less expensive, using them to perform more frequent tests over time can be an economical way to measure radon levels.
The post Yes, Your Home Needs a Radon Test Kit — And These Are the Best appeared first on Bob Vila.
]]>If you’ve been searching for ice melt and coming up empty–you’re not alone. A relentless winter sent demand for the product skyrocketing, and store shelves are bare. With ice and packed snow making sidewalks and steps dangerously slick, you need an alternative, and here it is. Right now, the Bigfoot Ice Chopper is on sale on Amazon for $20.92 (Save $12.07).
Save 37%
Bigfoot Ice Chopper
Yes, it takes a little manual effort, but the Bigfoot Ice Chopper does the hard work for you. Made from heavy-duty, cold-rolled steel, it has a sharp reinforced edge to break through thick ice and a cushioned grip to absorb impact. This isn’t your average snow shovel—it’s built to break up ice and packed snow fast. Best of all, you’ll never have to worry about running out of ice to melt again. But don’t wait–this deal won’t last!
More Great Ice-Removing Products We Love
While the Bigfoot Ice Chopper is the best deal we’ve seen, you may be able to purchase other ice-breaking tools online and pick them up locally. It’s a good idea to have an ice-removal option ready before the next storm hits. Here are some of our favorite picks.
Craftsman 48-inch L Forged Ice Scraper available at Lowe’s for $34.98
This ice scraper has a wood handle and a cushioned, non-slip grip. It’s suitable for clearing packed snow and ice from walkways with its 7-inch forged steel blade.
Husky 47-inch Carbon Steel Ice Scraper available at The Home Depot for $38.22
The Husky ice scraper’s tempered steel blade features an electrostatic powder coating for durability. It also has a varnished hardwood handle and a soft grip for maximum comfort.
Snow Joe Impact-Reducing Steel Ice Chopper available at The Home Depot for $30.26
The Snow Joe ice breaker has an internal spring-loaded mechanism that makes using it more comfortable. It also has a D-shape handle, similar to those found on traditional snow shovels, for the best grip.
Garant Nordic 54-inch L Steel Sidewalk Scraper available at Ace Hardware for $18.99
This sidewalk scraper is just right for slipping under packed ice and snow and forcing it up and off. We love that it’s priced under $20!
Cub Cadet 28-inch 3-Stage Gas Snow Blower available at Tractor Supply for $1,799.99
We’ve tested many snow blowers, but if you’re looking for one powerful enough to chop ice and packed snow, you’ll need a 3-stage model. This Cub Cadet isn’t cheap, but if you’re looking for a machine that will do all the work for you–this is the one.
Our Tested Guides and Reviews
If you’re still looking for ways to keep your sidewalks, steps, and driveways safe and clear during the winter, check out our tested guides and reviews for tips and product recommendations.
The post Ice Melt is Sold Out Everywhere—But Here’s the Solution, and it’s on Sale appeared first on Bob Vila.
]]>The post The Best Plug-In Air Fresheners appeared first on Bob Vila.
]]>Spray an air freshener and it may mitigate bad house smells momentarily. But, plug-in air fresheners combat unpleasant odors continuously, masking or even eliminating them completely. These products come in a number of different formats and typically work by heating oil or wax to aerosolize or vaporize fragrances. Although air purifiers sanitize the air by filtering out dust, mold spores, pet dander, and more.
While choosing the best plug-in air freshener might seem like a simple decision, there are a number of considerations to weigh. Our favorite was the plug-in air freshener from Febreze because of its simple design and effective refills. This guide explores important features and considerations and some of the top products on the market.
- BEST OVERALL: Febreze Odor-eliminating Plug Air Freshener
- BEST BANG FOR THE BUCK: Air Wick Plug in Scented Oil Starter Kit
- BEST ECO-FRIENDLY: Air Wick Botanica Plug in Scented Oil Starter Kit
- BEST DIFFUSER: Pure Daily Care Ultimate Aromatherapy Diffuser Set
- BEST AIR PURIFIER: LEVOIT Smart WiFi Air Purifier for Home
- BEST MINI AIR PURIFIER: Germ Guardian Pluggable Air Purifier & Sanitizer
- BEST FOR BATHROOM: Mindful Design Frosted Pagoda Wax Warmer Plug-In
Product Comparison
| Type | Scent(s) | Longevity | |
| Febreze Odor-eliminating Plug Air Freshener | Heated oil | Clean linen, lily, and pear | 50 days (per refill) |
| Air Wick Plug in Scented Oil Starter Kit | Heated oil | Lavender and chamomile | 60 days (per refill) |
| Air Wick Botanica Plug in Scented Oil Starter Kit | Heated oil | Caribbean sweetgrass and sandalwood, French lavender and honey, pineapple and Tunisian rosemary, and Himalayan magnolia and vanilla | 60 days (per refill) |
| Pure Daily Care Ultimate Aromatherapy Diffuser Set | Essential oil diffuser | Lavender, eucalyptus, tea tree, orange, peppermint, lemongrass, jasmine, nutmeg, clove, and spearmint | Unlimited |
| LEVOIT Smart WiFi Air Purifier for Home | Air purifier | N/A | Unlimited |
| Germ Guardian Pluggable Air Purifier & Sanitizer | Air purifier | N/A | 4,000 to 5,000 hours |
| Mindful Design Frosted Pagoda Wax Warmer Plug-In | Wax warmer | Universal | 4 to 8 hours |
Our Top Picks
The following recommendations take into account the abovementioned factors and features for choosing the best plug-in air freshener, in addition to overall quality and value. Check out these top options in a variety of categories for eliminating unpleasant odors and controlling the air quality in your home.
Best Overall
Febreze Odor-eliminating Plug Air Freshener
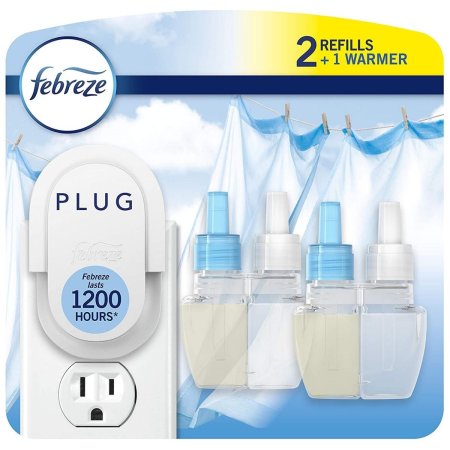
What We Like
- Refill cartridges
- Suitable for large and small spaces
- Compatible with horizontal and vertical outlets
- Compact and lightweight
What We Don’t Like
- Should not be used in enclosed areas with pets
- Cannot be used with extension cords
- Not compatible with wet or moist areas
This heated oil set from Febreze packs a serious punch—and some pleasant scents. It includes the plug-in warmer as well as one to two refill cartridges, each of which features two rotating, complementary scents that feature notes of lily and pear. Use the highest setting for large open spaces and the lowest setting for smaller rooms.
Each cartridge operates for 1,200 hours (approximately 50 days) at the lowest setting. The warmer is also compatible with all other versions of Febreze plug-in cartridges for more tropical, musky, or floral scents. The warmer is compatible with both horizontal and vertical outlets and can be placed upside down if necessary.
Product Specs
- Type: Heated oil
- Scent(s): Clean linen, lily, and pear
- Longevity: 50 days (per refill)
Get the Febreze plug-in air freshener at Target or Walmart.
Best Bang for the Buck
Air Wick Plug in Scented Oil Starter Kit

What We Like
- Extra refills
- 5 settings
- Lasts for 360 days total on the lowest setting
- Dye- and phthalate-free
- Recyclable and eco-friendly
What We Don’t Like
- Some users report issues with the scent quality
Air Wick’s scented oil starter kit features two warmers and six refills at a budget-friendly price. Control the amount of fragrance emitted by choosing from five settings for tackling cooking, musty, and pet odors. This kit provides a lavender aroma for 360 days on the lowest setting, with each cartridge lasting for approximately 60 days.
The oil is free of dyes and phthalates and contains natural fragrances, which include notes of lavender essence as well as chamomile and woods. The packing materials and glass cartridges are recyclable to make the product eco-friendly. The refills are also compatible with all other Air Wick plug-in air fresheners.
Product Specs
- Type: Heated oil
- Scent(s): Lavender and chamomile
- Longevity: 60 days (per refill)
Get the Air Wick Starter Kit at Amazon, The Home Depot, and Walmart.
Best Eco-Friendly
Air Wick Botanica Plug in Scented Oil Starter Kit

What We Like
- Free of propellants, dyes, and phthalates
- Cruelty-free
- Responsibly-sourced oil
- 100 percent recyclable packaging
What We Don’t Like
- Some users report poor scent quality
Air Wick’s Botanica line is tough on unpleasant smells and gentle on the planet. The oil contains responsibly sourced ingredients and no chemical propellants, dyes, or phthalates, and it was not tested on animals. The scent features Caribbean sweetgrass and sandalwood, and the sweetgrass essential oil is responsibly sourced from Haiti. It comes in a 100 percent recyclable box and is made in a zero-waste plant.
The kit includes two warmers and six refills, each of which provides up to 60 days of pleasant, warm aromas on the lowest setting. Air Wick also makes a number of other eco-friendly Botanica fragrances, including French Lavender and Honey, Pineapple and Tunisian Rosemary, and Himalayan Magnolia and Vanilla.
Product Specs
- Type: Heated oil
- Scent(s): Caribbean sweetgrass and sandalwood, French lavender and honey, pineapple and Tunisian rosemary, and Himalayan magnolia and vanilla
- Longevity: 60 days (per refill)
Get the Air Wick Scented Oil Starter Kit at Amazon.
Best Diffuser
Pure Daily Care Ultimate Aromatherapy Diffuser Set

What We Like
- Suitable for aromatherapy
- 10 essential oils with amber jars for sun protection
- BPA-free plastic construction
- 400-millimeter capacity
- 7 ambient light modes
What We Don’t Like
- No longevity between reloads listed
- Pricey compared to similar options
Pure Daily Care makes an excellent starter kit for those interested in aromatherapy. This diffuser comes with 10 therapeutic-grade essential oils, including lavender, eucalyptus, tea tree, orange, peppermint, lemongrass, jasmine, nutmeg, clove, and spearmint. Each is packaged in a 10-milliliter amber jar that protects the oil from sun degradation.
The diffuser itself is made from BPA-free plastic with a wood grain design and has a 400-milliliter capacity. It features seven ambient light modes with two light intensity settings as well as a timer and an auto-shutoff feature that detects low water levels.
Product Specs
- Type: Essential oil diffuser
- Scent(s): Lavender, eucalyptus, tea tree, orange, peppermint, lemongrass, jasmine, nutmeg, clove, and spearmint
- Longevity: Unlimited
Get the Pure Daily Care diffuser set at Amazon or Walmart.
Best Air Purifier
LEVOIT Smart WiFi Air Purifier for Home
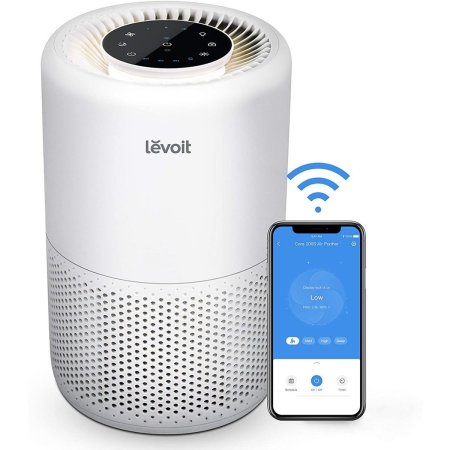
What We Like
- Connects to Wi-Fi networks; controllable through smartphones and tablets
- Removes 99.97 percent of airborne contaminants
- 3-step filtration system
- Circulates air multiple times per hour
- Night mode
What We Don’t Like
- Pricey
- No air quality sensor built-in
LEVOIT smart air purifier connects to a Wi-Fi network, allowing users to control it remotely from a smartphone or a tablet. Eliminate 99.97 percent of airborne contaminants that are 0.3 microns in size, including dust, pollen, mold, and pet dander, using the ultrafine nylon prefilter, activated carbon filter, and HEPA filter. In a 183-square-foot room, this air purifier circulates air five times per hour and twice per hour in a 376-square-foot room.
For uninterrupted sleep, users can turn off all display lights while the purifier is operating. Sleep mode also operates quietly at just 24 decibels, while “high-speed” mode produces 45 decibels of sound, which is comparable to the sound of a fridge running.
Product Specs
- Type: Air purifier
- Scent(s): N/A
- Longevity: Unlimited
Get the LEVOIT Smart WiFi air purifier at Amazon or Target.
Best Mini Air Purifier
Germ Guardian Pluggable Air Purifier & Sanitizer
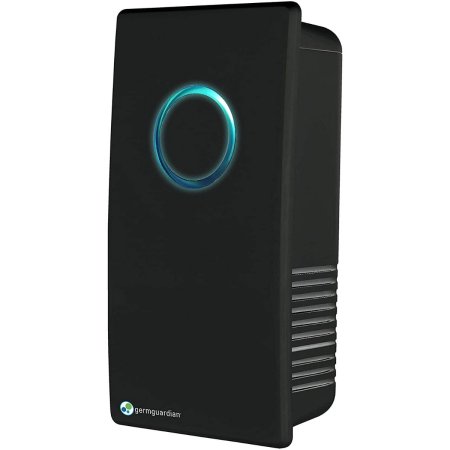
What We Like
- Compatible with standard wall outlets
- UV-C light technology; removes VOCs, germs, and viruses
- Compact, lightweight design
What We Don’t Like
- Not suitable for large spaces
- Replacement bulbs sold separately
Many plug-in air purifiers sit on a tabletop, but mini models rest directly on a wall outlet, taking up minimal space. Despite its compact size, this Germ Guardian product is powerful enough to sanitize the air in small spaces. Rather than filters, it uses UV-C light to remove airborne germs and viruses and reduce volatile organic compounds (VOCs). The light actually alters the genetic structure of particles like influenza, killing them before they are breathed in. Each bulb lasts for between 4,000 and 5,000 hours.
Product Specs
- Type: Air purifier
- Scent(s): N/A
- Longevity: 4,000 to 5,000 hours
Get the Germ Guardian mini air purifier at Amazon, The Home Depot, and Walmart.
Best for Bathroom
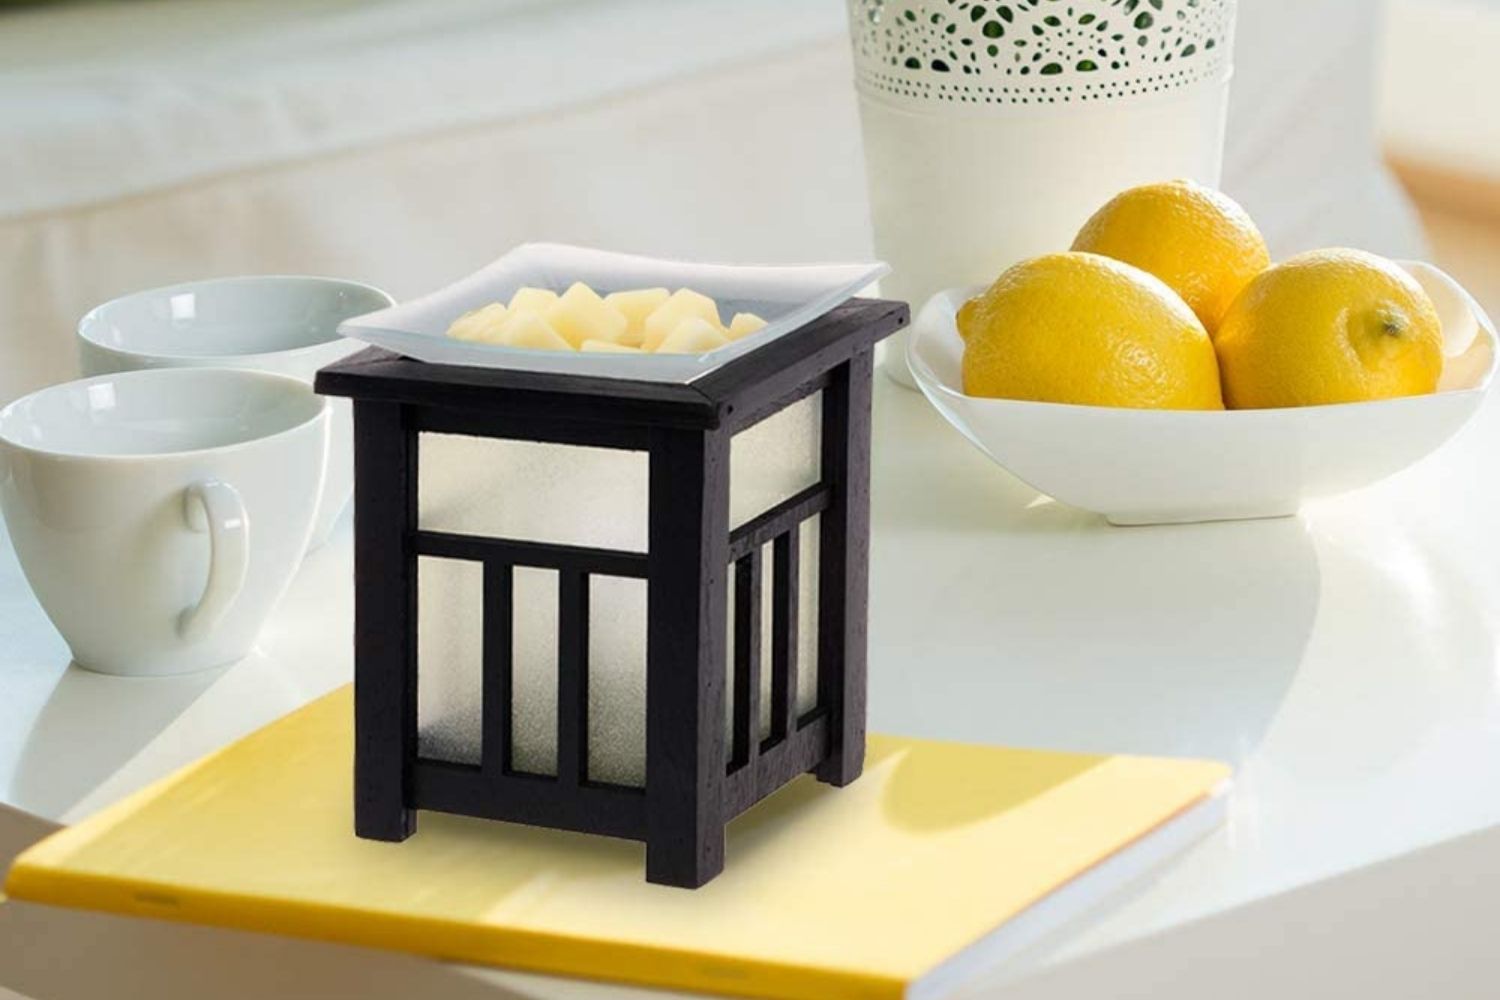
Mindful Design Frosted Pagoda Wax Warmer Plug-In

What We Like
- Removable dish
- Toggle switch turn-on
- Produces aroma and light
What We Don’t Like
- Wax not included
- Should be used with soy-based waxes for best results
To bring a spa-style vibe to any bathroom, consider this Mindful Design product. As a wax warmer, it provides the peaceful ambiance of a scented candle without the stress of an open flame. The pagoda-shaped warmer has a wood frame and glass siding, and it uses a glowing filament bulb to create a gentle golden glow for a relaxing atmosphere.
The outlet cord features a toggle switch so users can easily turn the warmer off when leaving the room. The bowl is removable for easy cleanup once the wax has cooled. The wax is not included; purchase soy-based wax for the best results.
Product Specs
- Type: Wax warmer
- Scent(s): Universal
- Longevity: 4 to 8 hours
Get the Mindful Design plug-in air freshener at Amazon.
How We Chose the Best Plug-In Air Fresheners
We researched the most sought-after plug-in air fresheners in their respective categories and discovered that the best options are determined by their type, size, fragrances offered, longevity, ease of setup and use, and other special features included by top brands.
To ensure our list included top picks that satisfied a range of preferences, we included heated oil models, essential oil diffusers, air purifiers, and wax melts that are compact enough to fit standard wall outlets as well as tabletops and vehicles. While many options come with various fragrances, some options remove unpleasant odors with air purification and elimination without the use of natural or artificial fragrances.
Though some options on our list provide unlimited usage, all of the other products listed above offer odor control for 4 hours to as long as 360 days at a time in small to large rooms. Each option is also easy to set up and use by simply plugging in or refilling a reservoir with water and compatible essential oils. Plus, these air fresheners are suitable for use in living room, kitchen, automotive, and bathroom spaces and their odors.
What to Consider When Choosing the Best Plug-in Air Freshener
A number of factors and product features may affect a plug-in air freshener’s scent, settings, aesthetic, convenience, and overall quality. Keep reading to learn important considerations when shopping for the best plug-in air freshener for unpleasant home smells.
Types of Plug-in Air Fresheners
There are four basic types of plug-in air fresheners for unpleasant odors: heated oils and sprays, wax warmers, essential oil diffusers, and air purifiers. Each provides varying benefits and offers differing levels of convenience, longevity, and additional features.
Heated Oil and Spray
These standard plug-in air fresheners are energy efficient, emitting a fairly strong fragrance while using a minimal amount of electricity. They feature cartridges filled with a wide variety of scented oils, which are then aerosolized and sprayed into the room. Most models are compatible with any refill cartridge from the same brand. Each cartridge lasts between 30 and 60 days, though longevity varies from brand to brand.
Some folks find the fragrance from this type of air freshener to be overpowering, but there are products that let you control the level of scent emitted, adjusting it to room size or user preference. Be mindful of standard plug-in air fresheners when it comes to children and pets, because heated oils and sprays are dangerous if ingested.
Wax Warmers
Wax warmers act as a safer alternative to burning candles, relying on either a light bulb or a warming plate as a heat source instead of an open flame. Bulbs for plug-in wax warmers range from 25 to 40 watts, and various models may emit soft, ambient light to mimic a candle. While some models may come with wax, it can also be purchased separately.
These products feature a heat-resistant bowl where users place wax melts or pucks that come in various natural and synthetic fragrances. The wax takes several hours to cool completely and should not be accessible to children or pets. Each wax melt lasts for up to 10 hours.
Essential Oil Diffusers
Essential oils are natural, plant-derived substances said to have a number of aromatherapeutic benefits. Essential oil diffusers heat essential oils to break them down and dispense the smaller particles into the air. Most models also use water to provide both a humidifying and air- freshening effect.
While the water reservoir must be refilled daily, only a few drops of essential oil are required. Some oil diffusers are sold with essential oils while others require that you purchase them separately. Essential oil diffusers should only be used for half an hour at a time because prolonged exposure to essential oils may have negative health effects.
Air Purifiers
Air purifiers actually eliminate unpleasant odors rather than simply covering them up. Not only that, but they also improve air quality by removing dust, pollen, mold, and pet dander. They are the ideal choice for reducing airborne contaminants that aggravate allergy symptoms and cause respiratory issues. They draw in odors and particles from the air, then use filters to purify the air before recirculating it into the room.
The highest-quality filters are known as HEPA (high-efficiency particulate air) filters. They have been certified to trap 99.97 percent of all particles that are 0.3 microns or larger in size. HEPA filters must be changed every 3 to 6 months.
When choosing an air purifier, consider the size of your space. Most manufacturers will stipulate the ideal room size for their product and provide an air change per hour (ACH) rate, which lets users know how many times per hour it will filter all of the air in the room.
Location
When choosing an air freshener, first consider where it will be placed. While a stronger fragrance may be a great choice for a large open space, it may be overpowering in a small bathroom. Also, consider any pets or young children in the household, and be sure to place the plug-in air freshener out of their reach.
Note that your vehicle may also benefit from a plug-in product. Some are designed to be plugged into a car’s 2-volt outlet, while others use a USB cable. They’re convenient for covering up the smell of fast food or stinky sports equipment. They typically power on when the engine is running to avoid wasting the car’s battery.
Scent
One of the primary considerations when choosing an air freshener is whether to go with a scented or unscented version. Standard air fresheners, as well as essential oil diffusers and wax warmers, feature a wide variety of fresh scents that can be swapped out seasonally or depending on your preference.
Decide whether natural aromas from essential oils or synthetic scents are the better choice for your household, keeping in mind that some artificial smells may act as irritants to allergy sufferers. Also remember that air purifiers eliminate odors without emitting any additional scent.
Settings
Each type of plug-in air freshener can feature a range of settings.
- Some standard air fresheners allow users to control the level of fragrance emitted based on how strong they want the smell to be. Others feature night-lights that are convenient for late-night bathroom trips.
- Essential oil diffusers may include timers, ambient light settings, and auto-shutoff features that detect low water levels.
- Air purifiers often feature different fan settings, timers, and filter change indicators. They may also include smart technology, allowing users to control them remotely via a smartphone or a tablet.
Aesthetic
When choosing an air freshener that will be placed in a visible location, the product’s appearance is a key consideration.
- Heated oil and spray air fresheners typically have a simple plastic design and display the color of the oil or liquid.
- Wax warmers vary widely in appearance, with options to suit a number of different decor styles. They may have either a natural, a contemporary, or a bohemian aesthetic.
- Essential oil diffusers come in a variety of shapes and sizes and feature casings made from plastic, wood, glass, and terra cotta.
- Air purifiers often feature streamlined modern designs that help them blend in with existing decor items.
Convenience
Some shoppers may prioritize convenience when choosing a plug-in air freshener. Air purifiers offer optimal convenience since their filters only need to be changed a few times per year. Essential oil diffusers, on the other hand, need their water reservoirs filled daily.
When shopping for a standard plug-in air freshener, look for a model that is compatible with both vertical and horizontal outlets that can be plugged in upside down if necessary.
FAQs
Here are answers to some of the most frequently asked questions about plug-in air fresheners for bad home smells.
Q: Do plug-in air fresheners use a lot of electricity?
Plug-in air fresheners are very energy efficient, using an average of 4 watts of power.
Q: Are plug-in air fresheners a fire hazard?
While some plug-in air fresheners have been blamed for causing fires, this is extremely rare. These incidents are typically caused by faulty wiring.
Q: What is the most effective air freshener?
Air purifiers are more powerful than traditional air fresheners because they actually filter and eliminate dust and mold particles to clean the air in your home. The LEVOIT Smart WiFi Air Purifier for Home is one of the best air purifier options available.
Q: What is the longest-lasting plug-in air freshener?
The Air Wick Plug in Scented Oil Starter Kit is one of the most long-lasting plug-in air fresheners on the market, with the included cartridges lasting for a total of 360 days.
Q: How often do plug-in air fresheners need to be replaced?
The cartridges on standard plug-in air fresheners typically need to be replaced every 30 to 60 days, depending on the brand.
The post The Best Plug-In Air Fresheners appeared first on Bob Vila.
]]>The post Our Favorite Attic Insulation is Surprisingly DIY-Friendly appeared first on Bob Vila.
]]>Adding sufficient attic insulation is an excellent way to protect your home from temperature extremes and moisture damage while reducing heating and cooling costs. Insulation acts as a barrier to prevent the transfer of heat flow from the inside to the outside of the house in winter or from the outside to the inside in summer.
After reviewing several types of attic insulation, including the most sought-after products, our top pick is the Owens Corning R-38 Faced Fiberglass Insulation. Made of stiff fiberglass batts, this insulation is easy to cut and install and won’t slip out of place. It also offers a Kraft paper-faced side to mitigate moisture issues.
We also spoke to a veteran roofer and contractor for an expert opinion on insulation types for attics, R-values, and when to DIY versus when to call in a professional. Read on for key tips and a curated list of some of the best attic insulation products on the market.
- BEST OVERALL: Owens Corning R-38 Faced Fiberglass Insulation
↓ Jump to Review - BEST BANG FOR THE BUCK: Frost King CF1 “No Itch” Natural Cotton Insulation
↓ Jump to Review - BEST BLANKET: Owens Corning R-30 Unfaced Fiberglass Insulation
↓ Jump to Review - BEST BLOWN-IN: Greenfiber 25 lbs. Cellulose Blown-In Insulation
↓ Jump to Review - BEST RADIANT FOIL: US Energy Products Double Bubble Foil Insulation
↓ Jump to Review - BEST FOAM BOARD: Owens Corning Pink Insulation FOAMULAR 250 Board
↓ Jump to Review

Before You Buy Attic Insulation
In most circumstances, it makes sense to add attic insulation. However, in a few situations, installing insulation can cause serious problems, such as in older homes that were built with large gaps between the walls to account for the moisture that naturally leaks into homes. The gaps allow the moisture to dry without causing damage to the structure, but if these spaces are filled with insulation, it can absorb the moisture and lead to mold and rotted wood.
If you have an old or wood-shingled roof and you attempt to install insulation on the ceiling of your attic, a similar situation could occur. These older roofing materials were made to get wet, breathe, and dry, but with insulation blocking the wood, the moisture will only accumulate.
According to Michael Casolaro, President & Owner of MCAS Roofing & Contracting, Inc. in Croton-on-Hudson, New York, you should avoid adding insulation to attics with existing ventilation or moisture issues. “If your attic has existing moisture problems, mold, poor ventilation, or exposed wires, homeowners should avoid installing insulation before first fixing these issues. Adding insulation to an attic in any of these conditions can make your problems worse,” he says.
Also, avoid using insulation anywhere near knob and tube wiring, which is an outdated electrical system that’s a major fire hazard and should be replaced as soon as possible.
Attic Insulation Comparison Chart
| Type | R-Value | Material | |
| Owens Corning R-38 Faced Fiberglass Insulation | Blanket | R-38 | Fiberglass |
| Frost King CF1 “No Itch” Natural Cotton Insulation | Blanket | R-4 | Cotton |
| Owens Corning R-30 Unfaced Fiberglass Insulation | Blanket | R-30 | Fiberglass |
| Greenfiber 25 lbs. Cellulose Blown-In Insulation | Blown-in or spray foam | R-19 to R-60 | Cellulose |
| US Energy Products Double Bubble Foil Insulation | Radiant foil | Not specified | Aluminum polyester and polyethylene |
| Owens Corning Pink Insulation FOAMULAR 250 Board | Foam board | R-10 | Extruded polystyrene |
Our Top Picks
The top-rated products below were chosen for their quality, price, and customer satisfaction to help you find the best attic insulation to protect your home from high- and low-temperature extremes.
Best Overall
Owens Corning R-38 Faced Fiberglass Insulation
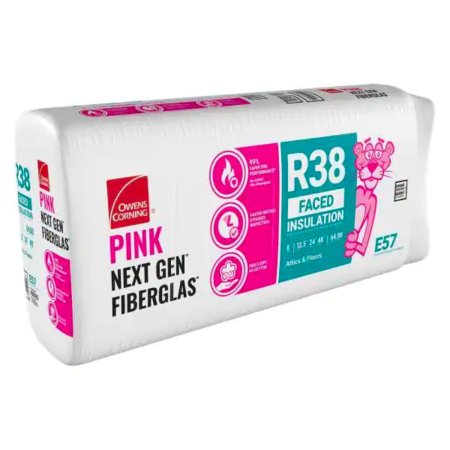
What We Like
- GreenGuard Certified for low chemical emissions
- Features a Kraft paper vapor retarder
- DIY-friendly; easy to cut and install
- Can be installed on top of existing insulation
What We Don’t Like
- Must be covered with a 15-minute thermal barrier
Specs
- Type: Blanket
- R-Value: R-38
- Material: Fiberglass
Install this insulation from Owens Corning in an uninsulated attic or add it as a second layer to increase the R-value potential of a home and cut heating and cooling costs. It features a Kraft paper barrier to help prevent moisture issues and is GreenGuard-certified for low chemical emissions into indoor air.
Each package includes eight pieces of fiberglass attic insulation, and each piece measures 48 inches by 16 inches. Using all eight pieces without cutting them covers a 42.67-square-foot space with 12.5-inch thick insulation. This blanket-style attic insulation is easy to cut and install, and the thick insulating material also helps reduce noise and vibration in your home.
Get the Owens Corning R-38 attic insulation at The Home Depot or Lowes.
Best Bang for the Buck
Frost King CF1 "No Itch" Natural Cotton Insulation
What We Like
- Suitable for attic floors, ceilings, and walls
- Doesn’t require gloves or safety glasses when cutting
- Works around pipes, ducts, windows, and doors
- Resistant to mold, mildew, and fire
What We Don’t Like
- May not provide ample thermal insulation
Specs
- Type: Blanket
- R-Value: R-4
- Material: Cotton
Affordable and effective, this natural cotton attic insulation by Frost King is 1 inch thick and measures 16 inches by 48 inches. Use one or more pieces on attic walls, floors, and as attic ceiling insulation, or cut or rip up smaller pieces of insulation to fill in gaps around pipes, ducts, windows, and doors.
While this isn’t waterproof insulation, it’s made with cotton denim that’s resistant to mold and mildew. This is an all-natural alternative to woven fiberglass. Moreover, natural cotton denim is safe and easy to install with just your hands and a utility knife.
Get the Frost King attic insulation at Amazon, Ace Hardware, The Home Depot, and Walmart.
Best Blanket
Owens Corning R-30 Unfaced Fiberglass Insulation
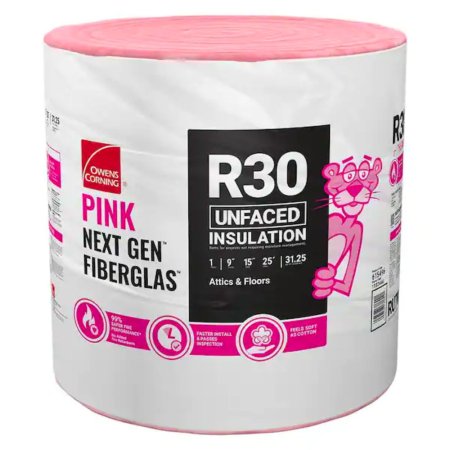
What We Like
- Made with 65 percent recycled content
- Easy to cut and position
- Helps regulate heat in every season
- Provides noise-reducing benefits
What We Don’t Like
- May not provide ample thermal insulation
Specs
- Type: Blanket
- R-Value: R-30
- Material: Fiberglass
This blanket insulation from Owens Corning is easy to cut, position, and install in almost any space. The woven fiberglass insulation is made with 65 percent recycled content and feels as soft as cotton.
This blanket insulation for a roof with attic space comes in 9-inch-thick insulation rolls. It boasts an R-value of 30, keeping your home warm in colder months and cooler in the warmer months. It also aids in reducing the transmission of noise.
Get the Owens Corning R-30 attic insulation at The Home Depot, Lowes, or Ace Hardware.
Best Blown-in
Greenfiber 25 lbs. Cellulose Blown-In Insulation
What We Like
- 25 percent reduction in heating and cooling costs
- Made with 85 percent recycled material
- Reduces noise by 60 percent
- Reduces fire hazards
What We Don’t Like
- Some users report unpleasant smell
Specs
- Type: Blown-in or spray foam
- R-Value: R-19 to R-60
- Material: Cellulose
With versatile application options and an R-value of R-19, the Greenfiber Cellulose Blown-In insulation is a viable option for attics, sidewalls, and ceilings. Whether you spray it on or opt for blow-in application, this insulation is easy to apply over existing insulation or alone and reduces your heating and cooling costs by up to 25 percent.
This insulation can cover 48 square feet of attic space and is suitable for all climates. It also reduces noise in your home by 60 percent, is made with 85 percent recycled material, and uses low-energy manufacturing. Finally, it has ample fire resistance and is carbon-locked, which makes it long-lasting.
Get the Greenfiber attic insulation at The Home Depot or Lowe’s.
Best Radiant Foil
US Energy Products Double Bubble Foil Insulation

What We Like
- Reflects up to 97 percent of heat
- Suitable for high-heat regions
- Light weight for easy cutting and installation
What We Don’t Like
- Needs used with foam board or blanket insulation
Specs
- Type: Radiant foil
- R-Value: Not specified
- Material: Aluminum polyester and polyethylene
This radiant foil attic insulation by US Energy Products is a solid option when paired with another insulating material like foam board or blanket insulation because radiant foil can reflect up to 97 percent of radiant heat. The secondary insulator resists the flow of the residual heat. This insulation is easy to cut with a utility knife or scissors and simple to install with staples, nails, or an adhesive.
The insulation acts as a sandwich, with two layers of reflective metalized aluminum polyester film on the outside and two layers of polyethylene air bubbles on the inside. The air bubbles reduce the flow of heat, while the foil reflects the radiant heat. This construction keeps homes cool in warmer climates and warm in colder weather.
Get the US Energy insulation on Amazon.
Best Foam Board
Owens Corning Pink Insulation FOAMULAR 250 Board

What We Like
- Suitable for attics, cavity wall insulation, and more
- Easy to install; can be cut if necessary
- Keeps moisture out
- Maintains R-value in extreme temperatures
What We Don’t Like
- Some users report awkward sizing
Specs
- Type: Foam board
- R-Value: R-10
- Material: Extruded polystyrene
Foam board insulation is rigid and lightweight, making it easy to carry and install on floors, walls, ceilings, and around windows. Use a warm utility knife to slice through this foam board from Owens Corning with a high degree of precision. This method allows users to form the insulation to the exact size requirements or even to cut rounded shapes in the foam board so heat isn’t lost around pipes or other obstructions.
This insulation has low water absorption potential and is ideal for creating a vapor barrier in narrow gaps around windows and doors where significant amounts of heat can be lost from a home in the winter months.
Get the Owens Corning attic insulation on The Home Depot.
How We Chose the Best Attic Insulations
We researched the most sought-after attic insulations in their respective categories and discovered that the best options are determined by their type, R-value, materials, ease of application, and other special features included by select brands.
While assembling our list of top picks, we made sure to include diverse options, including blanket, spray/blow-in, radiant foil, and foam board insulation with R-values ranging from R-1.3 to R-40 for any required heat resistance. These insulation options are made with fiberglass, cotton, cellulose, polyester, polyethylene, and polystyrene, all of which are easy to install and suitable for cutting or adjusting as needed.
Our top picks also offer mold-, mildew-, and fire-resistance and the added benefit of noise reduction. Plus, many of the above options are made with recycled or pre-consumed materials and are eco-friendly.
Types of Attic Insulation
Several different types of attic insulation are available, including blanket, spray foam, radiant foil, and foam boards, each with benefits and shortcomings.
According to Casolaro, the three best types of attic insulation include spray foam, fiberglass batts, and blown-in insulation. “Spray foam does the best job of insulating your attic, but it’s the most expensive,” he says “Fiberglass batts are affordable, but it’s more likely that air will leak through gaps. Most often, I’ll recommend blown-in insulation, which balances effectiveness with cost.”
Read below for a more detailed look at the pros and cons of each type of attic insulation so you can decide which is best for your unique circumstances.
Blanket Insulation
Blanket insulation is one of the most common types of insulation for walls and attic floors; however, don’t use it in open spaces because the fiberglass particles can affect the air quality in your home. Cut the thick pieces of insulation to fit tightly between the gaps in wooden frames or around pipes, wires, and other obstacles.
While this insulation is also one of the most inexpensive and easiest types to install, it isn’t as effective as spray foam insulation. When installing blanket insulation, wear a breathing mask and protective gloves to avoid irritating your lungs and skin.
Spray Foam
Spray foam insulation is the primary type of attic insulation. Pair it with blanket insulation to better insulate edges and corners, and use it to seal gaps in existing walls. Spray foam attic insulation costs more than other types and can be a hassle to remove. However, it’s the most effective option for insulating your home against the transmission of hot and cold air.
The spray foam is made of liquid polyurethane, which, when sprayed into the cavity of your wall or attic, expands and hardens into a solid foam. If you haven’t used spray foam insulation before, consider hiring a professional to install it to ensure your home is adequately protected.
Blow-In
Blown-in insulation refers to blowing or spraying insulation products into wall cavities, attics, and floors. Methods vary depending on the form of insulation selected. Two of the most common types of blow-in insulation are fiberglass, rock wool, and cellulose, which are applied in an attic space with a blowing machine for easy, even distribution.
Conveniently, most blown-in options can be applied over existing insulation and fill between existing wall studs and ceiling joists for increased insulation.
Radiant Foil
Because it’s designed primarily to reflect heat away from your home, radiant foil insulation is more common in warmer climates. It works through its reflective foil barrier, which is attached to kraft paper or polyethylene bubbles. The bubbles help prevent the transfer of heat through the barrier because they provide a pocket of air, which reduces the rate at which heat can move through the substance.
While standard insulation reduces the flow of heat, radiant foil reflects it. Because of this difference, radiant foil cannot be measured using the same factors attributed to blanket, spray, or foam board insulation. Radiant foil usually is the most affordable type of insulation.
Foam Boards
Low in cost and easy to install, foam board insulation is generally made of polyurethane, polystyrene, or polyisocyanurate. Sheets of foam board can be cut to fit tightly between wall studs or attic ceiling joists. Because they are not as effective at insulating, foam boards are not as popular as blanket insulation.
However, foam boards don’t cause moisture accumulation and mold growth as can blanket insulation, because the solid foam doesn’t absorb much moisture. Instead, it dries in a relatively quick time frame.
What to Consider When Choosing the Best Attic Insulation
Finding the proper insulation for your home isn’t difficult once you’ve determined which type of insulation to purchase. If you’re wondering what is insulation made of or how to find the correct R-value for your geographic location, here’s what you need to know.
R-Value
Attic insulation ranges in effectiveness, so manufacturers and industry professionals typically reference insulation’s R-value to help people find the best attic insulation for their homes. R-value is a measurement of the insulation’s resistance to the flow of heat. The higher the R-value rating of a product, the more effective it is at reducing energy costs.
R-values for insulation are usually listed in the product description or on the product packaging. However, radiant foil insulation isn’t measured by R-value because it’s designed to reflect heat instead of reducing the transmission of heat. The optimal R-value for the insulation in your home also depends on your geographic location. Review this Energy Star R-value chart to learn the estimated R-value for your area.
Material
Insulation for attic spaces can be constructed from a wide range of materials, including cellulose, fiberglass, mineral wool, liquid polyurethane, and polystyrene.
- Cellulose insulation was used regularly in buildings for most of the last 100 years. This insulation material consists of cellulosic fibers like newspaper, cardboard, cotton, straw, hemp, and sawdust. At just 3.8 per inch of cellulose insulation, the R-value is relatively low.
- Fiberglass insulation is made from tightly woven fibers that are light, malleable, and relatively simple to cut and install. This material is regularly used in blanket insulation and has an R-value of 2.7 per inch.
- Mineral wool has an R-value of 3.3 per inch. It’s a stone-based mineral fiber insulation material that contains basalt rock and recycled steel slag.
- Liquid polyurethane is the main ingredient in spray foam insulation. The R-value of this type of insulation ranges from 3.5 per inch to 6.5 per inch, depending on whether you’re using open-cell (3.5) or closed-cell (6.5) spray foam.
- Polystyrene is used to create foam board insulation with a variable R-value of 3.8 per inch to 5 per inch, depending on whether it’s expanded polystyrene (styrofoam) or extruded polystyrene, which can be identified by the blue or pink color.
- Cotton is a very reliable insulation material for your attic and it is commonly made with recycled materials and is very easy to cut and install. This material is also safer than fiberglass during installation and use as there are fewer fibers floating around.
Tips for Installing Attic Insulation
Keep in mind that insulation cannot be installed just anywhere in your home. For instance, if blanket insulation is placed over air intake vents, the harmful particles can circulate through your home. Additionally, placing insulation near exposed electrical connections or over the top of heat vents could cause a fire.
Based on the type and style of the home, also consider how and where to place the insulation. Older homes and homes with wooden shingles may be built with a design that allows the natural evaporation of excess moisture. Insulation installed in these areas acts as a sponge, soaking up the moisture instead of allowing it to dissipate. As moisture builds up, mold can grow and eventually rot out the wood.
With blanket insulation, cut spaces in the insulation to allow it to fit around obstructions like drainage pipes, large water pipes, attic fans, and HVAC ducts. When blanket insulation becomes compressed, it’s less effective at insulating your home, such as when you forcibly install a piece of insulation around a pipe instead of cutting a gap to allow it to fit comfortably.
- Don’t install insulation over air vents, near electrical circuits, or in any other areas where it poses a risk.
- Carefully inspect older homes before installing insulation to ensure it won’t cause moisture accumulation that can lead to mold and rot.
- Blanket insulation is not as effective if it’s compacted during installation, so cut spaces for large drainage pipes and other obstacles instead of forcing the insulation to fit around them.
- Don’t install insulation in attics with moisture problems without first rectifying the issue. If you’re unsure if there’s moisture in the walls, use a moisture meter for detection, or call in a pro.
While laying insulation in attic spaces can be DIY-friendly, some situations require a professional insulation contractor. “If you’re a DIYer, you might be able to install your own insulation. However, there are a few situations where you should work with a pro,” advises Casolaro. “If you choose spray foam insulation, it’s tricky to install correctly without experience. Also, if your home is older, there’s a greater risk of exposed wires, moisture, and improper ventilation. A professional is more likely to recognize these issues.”
FAQs
Before investing in new attic insulation, take a look at these frequently asked questions regarding how to insulate an attic.
The best R-value depends on the typical temperature fluctuations in your city or state, but average R-value recommendations for attic spaces range between R-30 to R-49.
Spray foam insulation is the most effective type, with a maximum R-value of 6.5 per inch.
Yes, you can. If this occurs, moisture can become trapped inside the space, causing mold and air quality problems.
You can remove the old attic insulation before adding new insulation, but it isn’t necessary unless the old insulation is wet, made with hazardous materials (like asbestos), or simply degrading too quickly to serve any remaining purpose.
The rate at which attic insulation needs to be replaced depends on the type and whether or not you’ve experienced roof damage or pest infestations. Fiberglass and cellulose insulation can begin degrading 15 to 20 years after installation, while mineral wool, spray foam, and foam board can last for decades.
If your attic was previously poorly insulated, new insulation can greatly improve your home’s comfort levels and energy bills. The U.S. Department of Energy estimates that sealing air leaks and adding insulation can help households lower their heating and cooling costs by 20 percent.
Why Trust Bob Vila
Bob Vila has been America’s Handyman since 1979. As the host of beloved and groundbreaking TV series including “This Old House” and “Bob Vila’s Home Again,” he popularized and became synonymous with “do-it-yourself” home improvement.
Over the course of his decades-long career, Bob Vila has helped millions of people build, renovate, repair, and live better each day—a tradition that continues today with expert yet accessible home advice. The Bob Vila team distills need-to-know information into project tutorials, maintenance guides, tool 101s, and more. These home and garden experts then thoroughly research, vet, and recommend products that support homeowners, renters, DIYers, and professionals in their to-do lists.
The post Our Favorite Attic Insulation is Surprisingly DIY-Friendly appeared first on Bob Vila.
]]>The post The Best Double-Sided Tapes appeared first on Bob Vila.
]]>Move over, duct tape, there’s another tape that has nearly as many uses. Double-sided tape can be used to adhere any two surfaces a user wants to stick together tightly—without the need for glue or nails—in crafting, household, industrial, or manufacturing applications.
With so many products to choose from, it can be hard to select the best double-sided tape for a project. We’ve done the legwork with this comprehensive review, aiming to help shoppers make the right purchase. Our favorite is the Tough & Clear from Gorilla, offering a versatile and strong bond suitable both indoors and outdoors.
- BEST OVERALL: Gorilla Tough & Clear Double-Sided Mounting Tape
- BEST BANG FOR THE BUCK: Phinus Clear Waterproof Double-Sided Mounting Tape
- BEST HEAVY-DUTY: Hitlights Heavy-Duty Double-Sided Foam Mounting Tape
- BEST REMOVABLE: Scotch Removable Double-Sided Tape Dispensered Roll
- BEST FOR CARPET: XFasten Double-Sided Tape
- BEST FOR PAINTED WALLS: Scotch-Mount Indoor Double-Sided Mounting Tape
- BEST FOR CRAFTS: AJ Sign World 164-Foot Premium Double-Sided Adhesive

Product Comparison
| Length | Color | Features | |
| Gorilla Tough & Clear Double-Sided Mounting Tape | 60 or 150 inches long by 1 inch wide; 48 inches long by 2 inches wide | Clear | Weatherproof, 12- to 37.5-pound hold (depending on tape length) |
| Phinus Clear Waterproof Double-Sided Mounting Tape | 10 feet long by 0.75 inches wide | Clear | Nonresidue, weatherproof |
| Hitlights Heavy-Duty Double-Sided Foam Mounting Tape | 32 feet or 100 feet long by 0.39 inches wide | Black | Foam core |
| Scotch Removable Double-Sided Tape Dispensered Roll | Various, from 200 to 450 inches long | Clear | Removable, dispenser included |
| XFasten Double-Sided Tape | Various, from 15 to 30 yards long | White | UV-, heat-, and moisture-resistant |
| Scotch-Mount Indoor Double-Sided Mounting Tape | Various, from 55 to 350 inches long | White | Industrial-strength adhesive holds up to 15 pounds |
| AJ Sign World 164-Foot Premium Double-Sided Adhesive | 164 feet long by 0.5 or 1 inch wide | Clear | Ultrathin, tearable by hand |
Our Top Picks
Double-sided tape can work in a variety of scenarios if the right option is used. The ones listed here were selected for their quality and price to help shoppers find the best one for their projects.
Best Overall
Gorilla Tough & Clear Double-Sided Mounting Tape
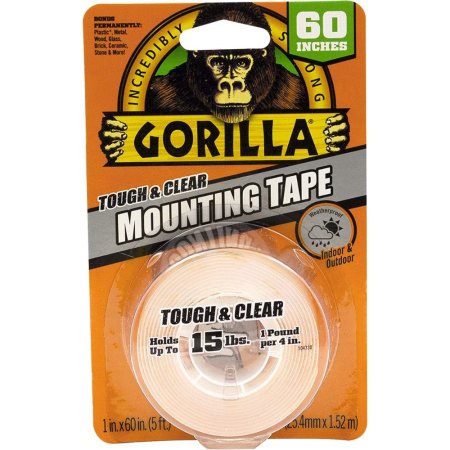
What We Like
- Suitable for use both indoors and outdoors
- Easily bonds to a wide variety of materials
- Ideal for use on glass without creating tape marks
What We Don’t Like
- Removing the backing can be quite tricky
Products Specs
- Length: 60 or 150 inches long by 1 inch wide; 48 inches long by 2 inches wide
- Color: Clear
- Features: Weatherproof, 12- to 37.5-pound hold (depending on tape length)
Gorilla’s double-sided tape is great for projects where traditional fasteners won’t work. The tape works on a variety of surfaces, including stone, concrete, glass, metal, bricks, tile, plastic, and wood. However, because it’s a permanent tape and features a strong adhesive, it’s not recommended for delicate surfaces such as painted drywall.
This mounting tape holds 1 pound per 4 inches of tape. It’s good for both indoor and outdoor applications and it won’t yellow over time. The tape is moisture- and heat-resistant up to 194 degrees Fahrenheit.
Gorilla tape offers a wide range of mounting, repairing, and bonding applications. For those who need a permanent tape that mounts in an instant with a long-lasting, weatherproof bond, Gorilla’s product is a solid choice.
Get the Gorilla double-sided tape at Amazon or The Home Depot.
Best Bang for the Buck
Phinus Clear Waterproof Double-Sided Mounting Tape

What We Like
- Suitable for a variety of surfaces
- Waterproof, weatherproof, and multipurpose
- Nonresidue adhesive formula
What We Don’t Like
- Isn’t suitable for use on delicate surfaces
Products Specs
- Length: 10 feet long by 0.75 inches wide
- Color: Clear
- Features: Nonresidue, weatherproof
A budget-friendly option, this double-sided tape by Phinus works best on smooth surfaces, such as glass, metal, plastic, ceramic tile, and marble. Because it has a strong acrylic adhesive base, it’s not suitable for delicate surfaces such as wallpaper, painted surfaces, or broken walls.
The tape is flexible and leaves no residue when removed from proper surfaces. It has a cold/heat resistance of -4 to 160 degrees Fahrenheit and is resistant to moisture and solvents, making it useful outdoors as well as inside the home.
Get the Phinus double-sided tape at Amazon (2-pack).
Best Heavy Duty
HitLights Double Sided Tape
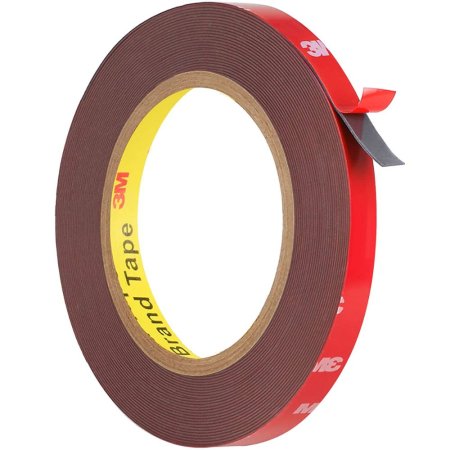
What We Like
- Provides flexibility on more difficult surfaces
- Ideal for installing LED strips on multiple surfaces
- Provides an excellent permanent bond
What We Don’t Like
- Tape is difficult to remove once applied
Products Specs
- Length: 32 feet or 100 feet long by 0.39 inches wide
- Color: Black
- Features: Foam core
This industrial-strength, high-bond acrylic foam tape is suitable for most applications, including outdoor use. It works on a variety of materials, including aluminum, steel, glass, and plastics.
HitLights is a heavy-duty double-sided tape that grabs a firm hold immediately. The bond created by this permanent tape actually strengthens over time, and the product truly shines in cases where waterproof adhesion is required.
Get the Hitlights double-sided tape at Amazon or Hitlights.
Best Removable
Scotch Removable Double-Sided Tape Dispensered Roll
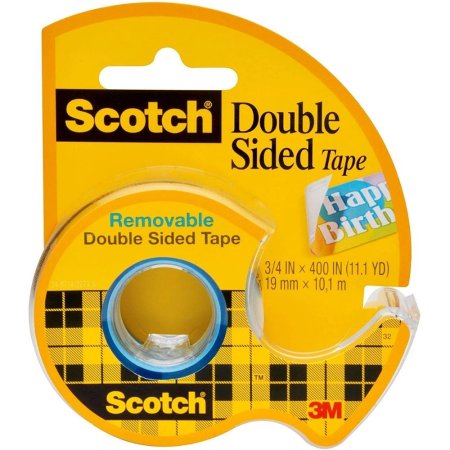
What We Like
- Ideal for small projects like scrapbooking
- Tape comes in the included dispenser
- Gentle enough to not damage delicate surfaces
What We Don’t Like
- Removability sacrifices adhesive strength
Products Specs
- Length: Various, including 200 inches long by 0.75 inches wide, 250 inches long by 1 inch wide, 300 inches long by 3 inches wide, and 450 inches long by 1 inch wide
- Color: Clear
- Features: Removable, dispenser included
This removable tape features a unique adhesive that holds paper securely but is easy to reposition or remove if needed or desired. This ability makes Scotch’s tape a terrific option to use in small projects, such as photo albums and scrapbooks. (The tape is acid-free and archival, so it will not yellow or damage either photographs or papers.)
For light-duty mounting needs, this double-sided tape is a fine option, not least because it comes in an easy-to-use tape dispenser that allows the tape to glide off the roll smoothly.
Get the Scotch removable double-sided tape at Amazon, Target (3-pack), Staples, or Office Depot.
Best for Carpet
XFasten Double Sided Carpet Tape
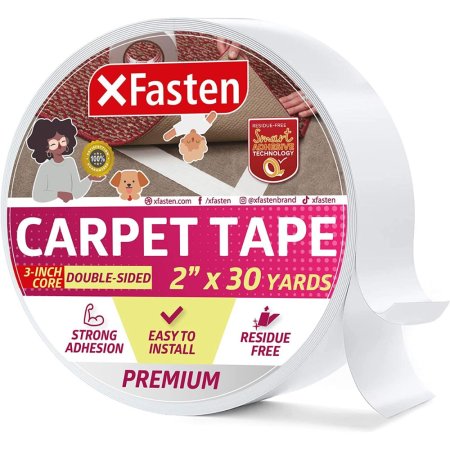
What We Like
- Can easily stick to most surfaces
- Sticky enough to hold most rugs in place
- Resistance to heat, moisture, and UV light
What We Don’t Like
- Unless installed carefully, rugs may still curl up in the corners
Products Specs
- Length: Various, including 15 yards long by 3 inches wide, 20 yards long by 2 inches wide, 20 yards long by 4 inches wide, and 30 yards long by 2 inches wide
- Color: White
- Features: UV-, heat-, and moisture-resistant
XFasten’s durable carpet tape is a top solution for keeping area rugs and runners firmly in place. If the rug may need to be moved later, no worries—the tape can be removed easily by hand without leaving a sticky residue behind.
Surfaces must be dry and free of debris before application, but the tape is safe for use on hardwood, vinyl, and tile, as well as on carpeting of all types.
Get the XFasten double-sided tape at Amazon or XFasten.
Best for Painted Walls
Scotch-Mount Indoor Double-Sided Mounting Tape
What We Like
- Suitable for most common uses around the home
- Comfortably tackles most DIY projects
- Thick and pliable tape
What We Don’t Like
- Mounting heavier objects may start to fail over time
- Removing the tape may inadvertently peel some paint off the wall
Products Specs
- Length: Various, including 55 inches long by 1 inch wide, 125 inches long by 1 inch wide, and 350 inches long by 0.75 inches wide
- Color: White
- Features: Industrial-strength adhesive holds up to 15 pounds
Not all double-sided tapes like to adhere to painted surfaces, but Scotch’s foam mounting tape delivers a strong, permanent bond in 30 seconds flat and is able to hold 1 pound per 5.5 inches of tape up to a maximum of 15 pounds when using 80 inches of tape.
This product is ideal for mounting pictures and decorations, not least because it can be used on most types of walls, including ceramic tile and wood surfaces that are clean, dry, and smooth. However, this tape is not recommended for use on wallpaper or delicate surfaces. For the best results, apply when the temperature is between 50 and 100 degrees Fahrenheit.
Get the Scotch-Mount double-sided tape at Amazon (125 inches), Ace Hardware (350 inches), The Home Depot (55 inches), or Lowe’s (350 inches).
Best for Crafts
AJ Sign World 164-Foot Premium Double-Sided Adhesive
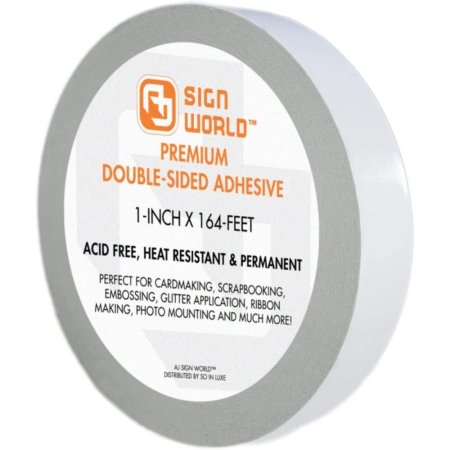
What We Like
- Relatively affordable price point
- Tape is very thin and easy to tear
- Backing is easy to remove
What We Don’t Like
- Adhesive is quite strong and doesn’t remove easily
Products Specs
- Length: 164 feet long by 0.5 or 1 inch wide
- Color: Clear
- Features: Ultrathin, tearable by hand
AJ Sign World’s acid-free tissue tape excels in all types of arts and crafts applications. It’s easy to tear by hand—no scissors required—and it’s transparent, which makes the tape more versatile. This 1-inch wide tape is only suited for use on smooth surfaces. Note also that this is a permanent tape. Once it’s on, it’s on for good.
Those who are looking for a thinner version of this AJ Sign World tape may want to consider the 0.5-inch-wide version.
Get the AJ Sign World double-sided tape at Amazon.
Jump to Our Top Picks
How We Chose the Best Double-Sided Tapes
To build our top picks list, we researched all the top double-sided tape brands available across several categories. Our recommendations cover a range of specific uses for the best double-sided tapes, each offering unique qualities to suit a household task or project.
Our top picks are available in a variety of colors and lengths. We made sure to include a varied selection of adhesive strengths, from options that can be easily removed and repositioned to others capable of holding up to 15 pounds of weight. Our list also includes a range of both thick and thin tapes, which are better suited to different tasks.
What to Look for When Choosing Double-Sided Tape
Double-sided tape is a versatile, economical alternative to glue. It has pressure-sensitive adhesive exposed on both sides of the tape which allows two items to be bonded together. The adhesive lies on top of a carrier material, which can range from film as thin as a fraction of a millimeter up to a thick foam several millimeters thick.
Unlike single-side tape, double-sided tape creates an invisible bond between two objects. Moreover, there’s little time required for the bond to form—simply peel and stick. The tape is often used to hang signs or temporary displays, attach foam to wall panels or flooring underlayment to floors, secure and hold carpets in place for major events or trade shows, and much more. The type of double-sided tape required depends on the application.
When shopping for double-sided tape, consider the tape type, adhesive level, thickness, width, application setting, and other factors. Below are some common characteristics to take into account when picking the right double-sided tape for a particular project.
Type
There are several types of double-sided tape with various carrier materials, each serving a specific purpose. Double-sided tape types fall into one of the below categories:
- Tissue tape is the most common type used for light bonding tasks. It’s mostly used for stationery, art, crafting projects, office, and general applications. Double-sided tissue tape is easy to tear, and is thin enough that it can adhere to irregular surfaces. It’s also inexpensive and a good alternative to glue.
- Acrylic tape is primarily used in industrial environments. It’s stronger than tissue tape and is weather-resistant, making it ideal for both indoor and outdoor use. Acrylic double-sided tape should only be used when permanent bonding is needed.
- Polyethylene tape, also known as foam double-sided tape, provides thick cushioning and insulation. Double-sided polyethylene tape is well-suited for uneven surfaces.
- Floor tape is used on floor surfaces, like carpet, to hold items like area rugs or runners in place. They have medium adhesion, which allows for removal without residue.
- Double-sided tape has either acrylic or rubber adhesives. Acrylic adhesives are stronger but more expensive and rubber adhesives are generally cheaper but less suited for long-term applications. Acrylic adhesive is also more heat- and light-resistant than rubber.
Thickness and Width
Double-sided tape has either thick or thin bonding systems. Tapes with thick bonding systems adhere well to unusual, non-uniform, or highly patterned and textured surfaces. This type of tape usually has a foam carrier layer. Thin bonding systems are significantly thinner. Sometimes the carrier layer is so thin that they are pretty much an adhesive on top of a silicone liner. These tapes are best suited for light adhesion applications.
Width varies quite a bit with double-sided tape. Rolls are available in widths less than 1/4-inch to several inches wide. Each type of tape will have several width options to suit specific projects.
Bonding Surfaces
The right double-sided tape for a project depends on the surface of the two objects that the user wants to stick together. Surface energy is the degree of attraction or repulsion force a material exerts on another material. Double-sided tape works best on surfaces with a high surface energy, like glass, glazed tile, and bare metals. The surface energy of plastic can vary quite a bit, but in general, it’s best to use a stronger tape. Then there’s silicone, which has such low surface energy that conventional adhesives won’t stick to it. Silicone needs a very tacky adhesive, or one specially formulated to adhere to it.
For flat and smooth surfaces like glass, aluminum, and PVC, thinner tape works well. For rougher surfaces like wood, cement, brick, and stucco, thicker tapes work best. Painted or coated surfaces need thicker, stronger tape as well.
Environment
The environment plays an important role in the adhesion of double-sided tape. Is the tape for indoor or outdoor use? Some tapes are not designed to hold up in outdoor environments.
For outdoor tapes, the weather impacts adhesion quality. The cooler the temperatures, the weaker the resulting bond will be. But high heat isn’t good for adhesion either—it can cause the adhesive to melt and loosen the bond.
Dust, grease, or moisture can also compromise the bond between two surfaces. Cleaning the surface with rubbing alcohol and making sure it’s completely dry before application will guarantee a stronger bond.
Object Weight
Double-sided tapes are rated by the maximum load they can hold. In general, thicker tapes hold more weight. Additionally, tapes with acrylic-based glue will hold more weight. However, the strength of the bond depends on the surface and weight of the object.
The load capacity is determined by the tape’s adhesive viscosity. Adhesive viscosity is similar to liquid viscosity— if it flows easily, it has low viscosity; if it does not, it has high viscosity. However, the viscosity rating for double-sided tape basically determines how well it binds to uneven surfaces. For rough surfaces, a viscous tape is preferable because it will spread into all the nooks and crannies of the uneven surface. Smooth surfaces do not need tape that is as viscous.
In some tapes, viscosity increases as the tape cures on the surface, strengthening the bond.
Pick a tape that best matches the surface energy of the items and consider the maximum load rate.
Longevity
Double-sided tape is either removable or permanent. The removable variety is meant for temporary use and is easily removed. Permanent tapes are used mostly in industrial manufacturing, but strong tapes are also available for home use. These tapes are typically used in lieu of glue or nails to permanently hold two objects together.
The longevity of the bond depends on how strong the adhesive is, as well as the environment. In climate-controlled environments, most double-sided tapes will hold a bond until the user removes it. In outdoor environments, the bond is subjected to heat, cold, and moisture, which will eventually cause the bond to deteriorate.
Removal
There may come a time when it’s necessary to remove double-sided tape. Thankfully, for most of them, a little heat will cause the adhesive to melt and break the bond. A blow dryer or a heat gun can be used to warm the surface and slightly melt the adhesive. Sometimes the tape will release from one side but hold fast to the other. In that case, it may be necessary to apply more heat to break the bond.
If heat does not remove the adhesive, try commercial residue cleaners. These products work by dissolving the sticky adhesive on the tape, making it easier to remove. Pour some of it on the tape and let it soak in for a few minutes, then scrape it off.
FAQs
Now that you have read through the characteristics of double-sided tape, you may still have a few questions. Read on to see some of the commonly asked questions about double-sided tape.
Q. How do you prepare a surface for tape application?
The surface must be free from dust, dirt, and oil, and be completely dry before application. Use rubbing alcohol to wash away any residue and dry with a tack cloth before applying the tape.
Q. What is the ideal temperature for applying double-sided tape?
The ideal temperature for both the surface and the tape is 65 degrees Fahrenheit, or 18 degrees Celsius.
Q. What is the strongest double-sided tape?
VHB tape, such as the Hitlights double-sided tape, is the strongest double-sided tape available for consumers.
Q. Can double-sided tape be removed?
Yes. Typically applying heat to the surface will cause the adhesive to melt and release the bond.
The post The Best Double-Sided Tapes appeared first on Bob Vila.
]]>The post We Tested the Best Upholstery Steam Cleaners for Chemical-Free Sanitizing appeared first on Bob Vila.
]]>Steam cleaners use pressurized steam from heated water to clean both soft and hard surfaces. This method requires zero cleaning solutions and chemicals, making it a preferred cleaning procedure for many health-conscious users, as well as those with sensitivities or allergies. Steam cleaning lifts away dirt and grime from upholstery and other materials while killing germs, bacteria, and pathogens, leaving behind freshened and deodorized surfaces.
To find the best upholstery steam cleaner, we tested a number of popular models that we found through extensive product research and used them to steam furniture, car interiors, throw pillows, and other household surfaces. We also put them through a stain test, evaluating how well each model removed six common household stains. Our top pick was the Kiato handheld steam cleaner thanks to its large amount of steam produced in such a lightweight unit.
In addition to cleaning upholstery, steam cleaners also function well for sanitizing sealed floors, windows, tile, and other indoor and outdoor applications. Read on to learn about the best upholstery steam cleaner for your home and how we tested each model.
- BEST OVERALL: Kiato Handheld Steam Cleaner
- BEST BANG FOR THE BUCK: Bissell Steam Shot Handheld Steam Cleaner & Sanitizer
- BEST FOR CAR UPHOLSTERY: Wagner 925E SteamMachine Elite Portable Steamer
- BEST FOR VERSATILITY: Bissell PowerFresh Pet Lift-Off 2-in-1 Steam Mop
- BEST CANISTER MODEL: McCulloch MC1375 Canister Steam Cleaner
- BEST HEAVY-DUTY: Dupray Neat Steam Cleaner
- BEST FOR SPOT CLEANING: Steamfast SF-210 Everyday Steam Cleaner
- BEST ACCESSORIES: Costway Heavy-Duty Steam Cleaner With Accessories

Product Comparison
| Type | Tank Capacity | Dimensions | Weight | |
| Kiato Handheld Steam Cleaner | Handheld | 450 milliliters (250 milliliters maximum load) | 7.48 inches high by 5.03 inches wide by 9.84 inches deep | 4.66 lbs |
| Bissell Steam Shot Handheld Steam Cleaner & Sanitizer | Handheld | 6.6 ounces | 8.5 inches high by 5 inches wide by 9.5 inches deep | 4 lbs |
| Wagner 925E SteamMachine Elite Portable Steamer | Canister | 40 ounces | 23 inches high by 19.5 inches wide by 23 inches deep | 8.31 lbs |
| Bissell PowerFresh Pet Lift-Off 2-in-1 Steam Mop | Handheld steamer and floor mop | 13.5 ounces | 44.7 inches high by 11.14 inches wide by 13.2 inches deep | 10.6 pounds |
| McCulloch MC1375 Canister Steam Cleaner | Canister | 48 ounces | 10.5 inches high by 12.13 inches wide by 15.55 inches deep | 10.78 pounds |
| Dupray Neat Steam Cleaner | Canister | 54 ounces | 9.5 inches high by 10.5 inches wide by 10.5 inches long | 9 pounds |
| Steamfast SF-210 Everyday Steam Cleaner | Handheld | 6 ounces | 8.25 inches high by 5.5 inches wide by 10.5 inches deep | 2.6 pounds |
| Costway Heavy-Duty Steam Cleaner With Accessories | Canister steam cleaner and floor mop | 51 ounces | 14 inches high by 17 inches wide by 11 inches deep | 10.8 pounds |
Our Top Picks
The following products are some of the best on the market for steam-cleaning upholstered furniture. We tested each, evaluating them for their design, water-tank capacities, power options, accessories, and versatility. These steam cleaners can help keep upholstered furniture fresh and clean.
Best Overall
Kiato Handheld Steam Cleaner
What We Like
- Emits large amounts of steam
- Lightweight and comfortable to use
- Push-down steam-release button automatically turns off
- Removed coffee and wine stains
What We Don’t Like
- Smaller water tank lasts only 8 minutes
- Holding the steam-release button is cumbersome for large jobs
Product Specs
- Type: Handheld steam cleaner
- Tank capacity: 450 milliliters (250 milliliters maximum load)
- Dimensions: 7.48 inches high by 5.03 inches wide by 9.84 inches deep
- Weight: 4.66 lbs
The Kiato handheld steam cleaner is a 10-in-1 tool designed to tackle hard and soft surfaces, including furniture, car interiors, tile, windows, and carpet. It features a lightweight design and a push-button steam release. It also comes with a 10-piece accessory kit that includes a fabric steamer and a microfiber sleeve to go on top.
This model heats up to 221 degrees Fahrenheit in 2 minutes and 30 seconds. After filling the water tank and securing the lid, you can plug this steamer in and wait for the LED light to go off. The unit is then ready for use. Using the Kiato handheld steamer is as simple as pressing the button to release steam. It automatically turns off when you let go of the button. Although it has a 450-milliliter tank capacity, you will only want to add 250 milliliters at a time.
We were impressed by how much steam the Kiato steam cleaner emitted. We used it to steam a microfiber recliner, clean a mattress, and loosen mineral deposits inside a dishwasher. When we put it up against household stains, it performed well, removing the coffee, dirt, and wine stains. It removed about 70 percent of the tomato sauce and some of the chocolate. Like the rest of the models, it didn’t work on oil.
The Kiato handheld steam cleaner was among the easiest to use, and its small size makes storage simple. It never felt uncomfortable, even when we used it for 15 minutes straight. Since it emits so much steam, it’s ideal for blasting stuck-on debris off hard surfaces.
Get the Kiato upholstery steam cleaner at Amazon.
Best Bang for the Buck
Bissell Steam Shot Handheld Steam Cleaner & Sanitizer
What We Like
- The fabric steamer attachment left furniture looking clean and refreshed
- 10 accessories add to the product’s suitability for many household chores
- Easy to empty after use, and its compact size makes it easy to store
What We Don’t Like
- Curved-front design; tips forward when holding it
- Wasn’t able to remove chocolate, tomato sauce, or dirt stains
Product Specs
- Type: Handheld steam cleaner
- Tank capacity: 6.6 ounces
- Dimensions: 8.5 inches high by 5 inches wide by 9.5 inches deep
- Weight: 4 lbs
The Bissell Steam Shot steam cleaner is an affordable handheld steam cleaner with 10 multisurface tools. The easy-to-attach accessories make it possible to refresh fabric, brush away grime from hard surfaces, clean windows, and scrub dirty grout. It kills up to 99.9 percent of bacteria and germs on hard surfaces.
The Bissell Steam Shot has only one steam setting, which makes it easy to use. Fill the tank with water, secure the lid, and plug it in. The heater warms in 30 seconds, and when the LED light turns off, the steamer is ready to use. It features a steam-release button that powers off when disengaged.
During testing, the Bissell Steam Shot worked well. It emitted enough steam to leave fabric looking refreshed and loosened dirt on hard surfaces for easy cleaning. The one thing we didn’t like was the curved-front design, which caused this model to lean forward slightly when holding it. It felt less stable than models without a curved design.
The Bissell Steam Shot removed wine and coffee stains during our testing. It only removed about 50 percent of the dirt, chocolate, and tomato sauce stains. While it works great for refreshing fabric and cleaning hard surfaces, it’s not our top pick for stain removal.
Get the Bissell Steam Shot upholstery steam cleaner at Amazon.
Best for Car Upholstery
Wagner 925E SteamMachine Elite Portable Steamer

What We Like
- Performed the best in our stain test, removing dirt, coffee, wine, chocolate, and tomato sauce
- Long hose, wheeled design, and 20 attachments for easy and versatile use
- Canister features a built-in compartment for attachment storage, preventing items from getting lost
- Can use the trigger for steam release, or set it for continuous steam
What We Don’t Like
- Large tank capacity means a longer wait time for steam, taking up to 9 minutes
- We experienced some water spitting while steaming, causing excess moisture on the fabric
Product Specs
- Type: Canister steam cleaner
- Tank capacity: 40 ounces
- Dimensions: 23 inches high by 19.5 inches wide by 23 inches deep
- Weight: 8.31 lbs
The Wagner SteamMachine Elite steam cleaner features a canister design and 20 attachments. Its large 40-ounce water tank provides up to 40 minutes of continuous steam. This powerful steamer can tackle almost any job, from vehicle carpet and upholstery to dirty barbecue grills.
The 8-foot steam hose and wheeled design make this model easy to maneuver. The canister design also features attachment storage, which helps keep accessories from getting lost.
Getting started is as simple as installing an attachment, filling the water tank, securing the lid, and turning the machine on. After about 9 minutes, it produces large amounts of steam that you can control via a trigger. The trigger has two settings: press release or continuous steam.
The Wagner SteamMachine Elite was one of our favorite models due to its ease of use and efficacy. It performed the best in our stain test, breaking down the wine, coffee, and dirt. It also removed about 90 percent of the tomato sauce and chocolate stains.
This model contains a fabric steamer with a bonnet and a carpet glider. We used both to refresh the fabric interior of a truck. We also tested it on hard surfaces, including a toilet. The steam blasted stuck-on dirt from hard-to-reach nooks and crannies.
Get the Wagner upholstery steam cleaner at Amazon or The Home Depot.
Best for Versatility
Bissell PowerFresh Pet Lift-Off 2-in-1 Steam Mop
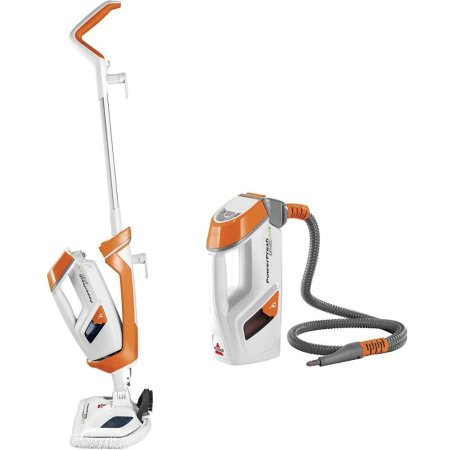
What We Like
- Multipurpose cleaning tool; comes with 13 accessories and works on a variety of surfaces
- Kills 99.9 percent of germs and bacteria; great for homes with kids and pets
- Easy to switch from mopping to the handheld attachments for easy whole-house cleaning
What We Don’t Like
- Somewhat small tank capacity; needs refilling during larger cleaning jobs
- Handheld steamer spat water and didn’t remove stains as well as other models
Product Specs
- Type: Handheld steamer and floor mop
- Tank capacity: 13.5 ounces
- Dimensions: 44.7 inches high by 11.14 inches wide by 13.2 inches deep
- Weight: 10.6 pounds
This steam-cleaning unit from Bissell is designed with versatility in mind. In its fully assembled form, it functions as a heavy-duty floor mop. Alternatively, you can detach the canister and deploy it along with the extension hose and attachments to steam-clean upholstery, pet beds, bathroom and kitchen fixtures, and a variety of other surfaces.
An included tool bag holds a set of 13 accessories for a broad array of cleaning applications. The included fabric-steamer attachment works especially well with the handheld portion of this steam cleaner for cleansing, deodorizing, and sanitizing upholstery.
Water in the 13.5-ounce tank heats up quickly, producing steam that kills up to 99.9 percent of germs and bacteria. The 25-foot-long power cord facilitates steam cleaning of even the most hard-to-reach places.
For testing, we started by using this steam cleaner as a mop, and it worked well, leaving our floors clean and streak-free. Next, we tested the handheld canister on our stain board using the fabric steamer attachment and dabbing the stain with a microfiber cloth. It tackled the dirt, wine, and coffee stains but wasn’t a match for the chocolate or tomato sauce. The handheld steamer spat water more than other models, preventing the steam from being as powerful or continuous.
Even though this steam mop didn’t perform as well in our stain-removal tests, it did a good job overall. It’s an ideal choice for those who want a versatile steam mop with a lift-off canister. However, folks who want just an upholstery steamer might fare better with a different option.
Get the Bissell PowerFresh upholstery steam cleaner at Amazon, Target, Bissell, or Walmart.
Best Canister Model
McCulloch MC1375 Canister Steam Cleaner
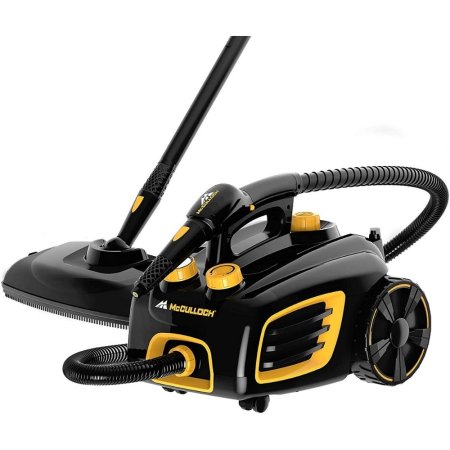
What We Like
- Delivers up to 90 minutes of power, which is enough for most upholstery cleaning
- Variable steam-flow system with an easy-to-control knob; up to 58-psi steam pressure
- 20 accessories work on a variety of surfaces; great for tough stains or general cleaning
- Users can control steam via the trigger or lock it in place for continuous steam
What We Don’t Like
- Water takes time to heat up; can become frustrating when refilling during long cleaning jobs
- Using the steamer at its highest power results in a lot of moisture on upholstery
Product Specs
- Type: Canister steam cleaner
- Tank capacity: 48 ounces
- Dimensions: 10.5 inches high by 12.13 inches wide by 15.55 inches deep
- Weight: 10.78 pounds
Thanks to its canister design, this steamer houses a large-capacity water tank that delivers up to 90 minutes of continuous steam-cleaning power. The tank holds 48 ounces of regular tap water, and it heats to more than 200 degrees Fahrenheit in under 12 minutes.
The on-demand variable steam-flow system allows users to dial in an exact steam flow from low pressure up to 58 pounds per square inch (psi). Accessing hard-to-reach spaces is easy thanks to an 18-foot power cord and a 7-foot steam hose.
With 20 included accessories, this unit can take on a multitude of house-cleaning tasks. In addition to refreshing upholstery, this steamer works on ceramic tile, sealed flooring, grout, and more.
The McCulloch blasted through dirt, coffee, and red wine stains during testing. It also did the best on oil, eliminating about 50 percent of the stain. Since this model doesn’t come with a dedicated fabric steamer attachment, we used the jet nozzle to steam the soiled areas and then dabbed them with a microfiber cloth. Doing so was effective, lifting dirt and leaving the fabric looking refreshed.
The McCulloch came with a bag for its attachments, which helped us keep everything together. Since the canister is on wheels, it was also easy for us to maneuver. We used the jet nozzle to spray around a sink faucet, and it loosened stuck-on dirt and some of the mineral deposits. This model came with many more attachments, including a mophead. It emitted a large amount of steam, making it ideal for household and heavy-duty jobs.
Get the McCulloch upholstery steam cleaner at Amazon or Walmart.
Best Heavy-Duty
Dupray Neat Steam Cleaner
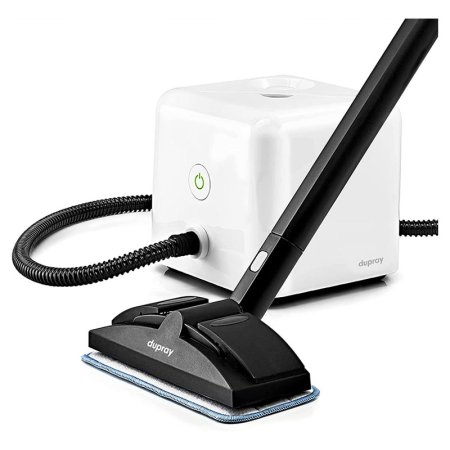
What We Like
- Compact and modern design stores easily in a small space
- Delivers an impressive 50 minutes of continuous steam for tackling large jobs
- Performed well in our stain test, removing dirt, wine, and coffee from microsuede
- Mop glides smoothly for easy and streak-free floor cleaning
What We Don’t Like
- Some water spits out before the steam, which can saturate upholstery
Product Specs
- Type: Canister steam cleaner
- Tank capacity: 54 ounces
- Dimensions: 9.5 inches high by 10.5 inches wide by 10.5 inches long
- Weight: 9 pounds
When it comes to taking on big cleaning jobs, this large-capacity steam cleaner should do the trick. Thanks to the portable cube-shaped unit that combines an impressive 54-ounce water tank, 16-foot-long power cord, and 6.5-foot-long steam hose, the Dupray steamer is capable of delivering 50 minutes of continuous steam with ample maneuverability to reach furniture and surfaces throughout the home. The wheels on this steam cleaner allow for smooth rolling from room to room, and a retractable handle makes carrying this 9-pound unit a breeze.
Water in the tank heats to 275 degrees Fahrenheit, producing steam that kills 99.9 percent of bacteria, viruses, and pathogens in upholstery, bedding, and other household surfaces.
When we unboxed the Dupray Neat steam cleaner, we were immediately impressed by the quality. The attachments felt well constructed and the fabric steamer’s microfiber bonnet was much thicker than those from other models. We also liked the unique modern aesthetic and the cord storage on the bottom of the cube.
When we put this model to the test, it blasted through dirt, coffee, and wine stains on our microsuede fabric. It did OK on the tomato sauce and chocolate stains, eliminating about 50 percent of the soiled area. We also tested the mop attachment, which glided smoothly across our hardwood floors, picking up dirt and leaving the floors streak-free.
Get the Dupray upholstery steam cleaner at Amazon, The Home Depot, or Walmart.
Best for Spot Cleaning
Steamfast SF-210 Everyday Steam Cleaner
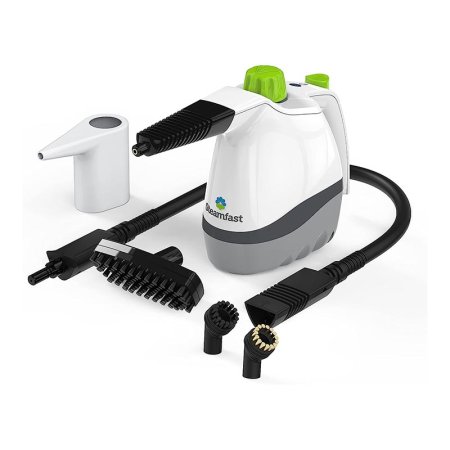
What We Like
- Compact, lightweight unit is comfortable to use and ideal for cleaning tight spaces
- Includes 6 attachments that are easy to connect and can tackle most cleaning jobs
- Budget-friendly price point compared to similar options; a good beginner option
What We Don’t Like
- Runs for only 8 minutes; not suitable for extended use
- Was the only steamer unable to remove a dirt stain from our microsuede test fabric
Product Specs
- Type: Handheld steam cleaner
- Tank capacity: 6 ounces
- Dimensions: 8.25 inches high by 5.5 inches wide by 10.5 inches deep
- Weight: 2.6 pounds
When those everyday oops moments occur, this convenient steam cleaner makes short work of sanitizing household surfaces, including upholstery. The 6-ounce water tank heats up in just 3 minutes, producing 8 minutes of pressurized steam for removing dirt and grime.
Despite its small size—it weighs just 2.6 pounds—this handheld cleaner is surprisingly versatile. Use one of the six included attachments for cleaning upholstered furniture as well as a wide array of hard surfaces in kitchens and bathrooms. A 12.5-foot-long power cord allows for easy maneuverability, while the 28-inch extension hose offers even greater capacity for reaching out-of-the-way surfaces and overlooked crevices.
While it performed the worst in our stain removal tests, this model is still handy for quick fabric refreshes and sanitizing hard surfaces. The Steamfast steam cleaner was able to remove wine, coffee, and tomato sauce from our test fabric but failed to remove dirt, chocolate, or oil.
This steamer is easy to use. It has only one setting, so after filling it with water, all we had to do was plug it in and wait for it to warm up. In addition to steaming upholstery, we used it to steam inside an oven, and it successfully loosened up most of the stuck-on food. The small size makes it easy to store—great for those short on space.
Get the Steamfast upholstery steam cleaner at Amazon, The Home Depot, or Walmart.
Best Accessories
Costway Heavy-Duty Steam Cleaner With Accessories
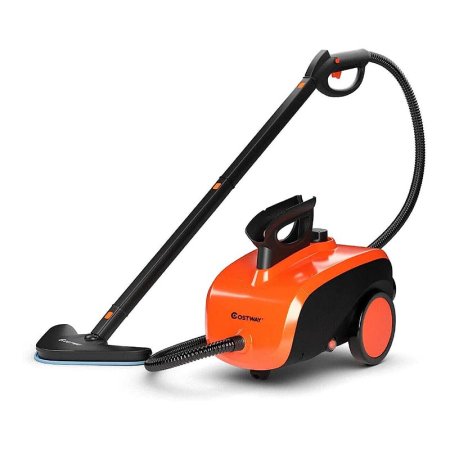
What We Like
- Multipurpose tool that comes with 18 cleaning accessories to tackle most jobs
- Unit has 2 large wheels and a 79-inch hose, making it easy to maneuver
- Includes an organized cable-management system to wind around neatly when not in use
What We Don’t Like
- Lower steam pressure may struggle with more stubborn stains
- No indicator light to signal when the steam is ready for use
Product Specs
- Type: Canister steam cleaner and floor mop
- Tank capacity: 51 ounces
- Dimensions: 14 inches high by 17 inches wide by 11 inches deep
- Weight: 10.8 pounds
This multipurpose steam cleaner includes 18 attachments for taking on a variety of cleaning tasks around the home. When it comes to cleaning upholstery, the steam jet nozzle and nylon brushes are especially helpful. Functional accessories such as a mophead, brass utility brushes, a scrubbing pad, and a squeegee facilitate cleaning and sanitizing not only upholstery, but also sealed floors, bathroom tile, kitchen appliances, and children’s toys.
The 16-foot power cord and 79-inch steam hose, as well as the wheels, a rolling caster, and ergonomically designed curved handle, offer ample maneuverability for reaching numerous surfaces in the home. In addition to removing dirt, grime, spills, and messes, this steam cleaner sanitizes household surfaces. Unseen and undesirable intruders such as germs, bacteria, viruses, mold spores, and bed bugs are no match for the 226 degree Fahrenheit pressurized steam.
The Costway steam cleaner holds 51 ounces of water in its tank, heating it to produce steam in under 10 minutes. It delivers 40 minutes of continuous steam-cleaning time.
Like the other canister models we tested, the Costway steam cleaner produced large amounts of steam and was better able to power through stains than handheld options. It eliminated dirt, coffee, and wine from our test fabric. While it didn’t completely eliminate tomato sauce or chocolate, it visibly reduced the stained areas.
This model comes with many useful accessories, including a mop and carpet glider. We used the carpet glider to refresh fabric seats and carpet in an old truck and tested the mop on tile floors. The attachments were easy to use, and the mop left the floor clean. We also tried out the trigger that locks in place for continuous steam.
Get the Costway upholstery steam cleaner at Amazon or The Home Depot.
Jump to Our Top Picks
How We Tested the Best Upholstery Steam Cleaners
We researched the best upholstery steam cleaners with high customer satisfaction in a variety of categories. After compiling our list, we tested each model. Our tests consisted of using each upholstery steam cleaner on furniture, mattresses, and car upholstery to evaluate the ease of use. We then put all models through a more extensive test, assessing how well they could remove six common stains: dirt, vegetable oil, tomato sauce, red wine, coffee, and chocolate sauce.
We assembled a test board consisting of foam, batting, and microsuede fabric attached to plywood. We added ⅛ teaspoon of each test substance to the board and allowed it to dry for an hour. We then used each steam cleaner to remove the stains. If the steam cleaner came with an upholstery steamer and microfiber bonnet, we used it for stain removal. For models that didn’t come with an upholstery steamer bonnet, we relied on the jet nozzle to steam the stain and then dabbed it with a microfiber cloth. These methods were equally effective.
No steam cleaner was able to remove the oil stain, but all had varying degrees of success with the other substances. The biggest factor in stain removal was the amount of steam the machine emitted.
We also evaluated any extra attachments, how easy it was to empty and store each model, and how effective the steamers were for other household surfaces. We assigned and tracked number values for easy comparison.
What to Consider When Choosing an Upholstery Steam Cleaner
Before purchasing an upholstery steam cleaner, it’s essential to consider what your needs are. Manufacturers offer a wide array of types, sizes, water-tank capacities, attachments, and accessories, each with their own benefits and optimal uses. Ahead, learn about the features that may influence your selection process as you search for the best upholstery steam cleaner to suit your purposes.
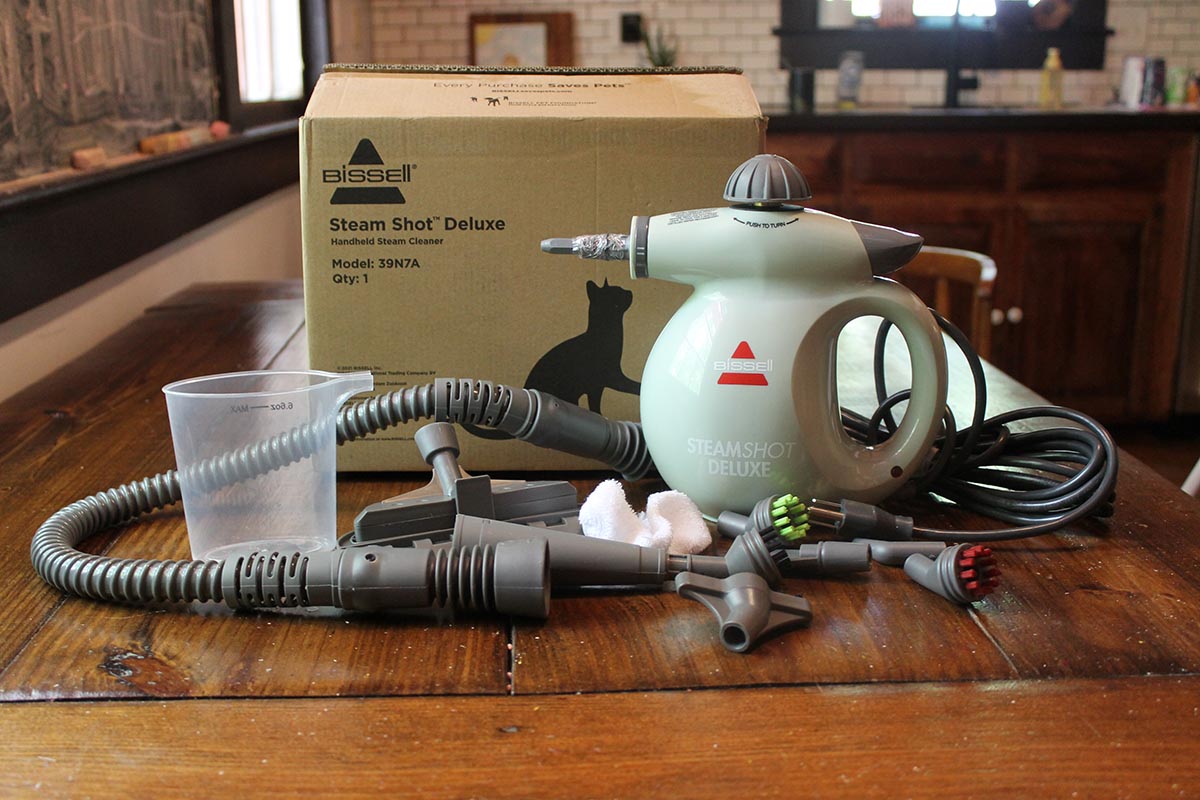
Type
Steam cleaners that work well for upholstery materials are versatile and capable of taking on many other cleaning tasks around the house. Depending on the type, steam cleaners tackle dirt, grime, and messes on both soft and hard surfaces, indoors and outdoors. Here’s an overview of the types of steam cleaners available on the market, along with information about how they function for cleaning upholstery.
- Handheld steam cleaners make upholstery cleaning easy as you simply hold the steamer units adjacent to the upholstered furniture and move them along the surface.
- Vacuum-type steam cleaners facilitate the cleaning of floors and carpets, but many of them feature reconfiguration capability, breaking down into handheld units that work well for upholstery. Users move the handheld units along the surface of upholstery fabric for cleaning.
- Vapor steam cleaners utilize steam from water heated to at least 240 to 260 degrees Fahrenheit, resulting in a low-moisture vapor that leaves minimal residual dampness. Vapor steam cleaners utilize higher temperatures than many other steam cleaners do.
- Cylinder steam cleaners (also known as canister steam cleaners) feature steam hoses attached to the rolling cylinders or canisters that hold large-capacity water tanks for extended steam-cleaning time. Attachments for the steam hoses facilitate upholstery cleaning as you move them along the surface.
- Garment steam cleaners feature handheld nozzles on the ends of steam hoses that attach to water tanks. The steam loosens and lifts dirt, deodorizes, and freshens upholstery fabrics on furniture as well as clothing.
Size and Weight
Consider how you plan on using your steam cleaner to determine the ideal size and weight. Larger and heavier models offer the capacity for heavy-duty cleaning and extensive cleaning sessions, while small and lightweight units offer the advantages of portability and convenience for quick cleanups.
For example, canister models are considerably larger and weigh more than handheld steam cleaners, but they offer the advantage of large-capacity water tanks that deliver continuous steam for anywhere between 30 and 90 minutes. On the other hand, a small handheld steamer weighs much less than a canister or vacuum type, but it holds less water and produces steam for only a few minutes before it requires refilling.
Corded vs. Cordless
Steam cleaners operate on corded electrical power from standard household outlets. After the electrical power source heats the water in the cleaner’s water tank to above 212 degrees Fahrenheit, creating steam, the pressurized steam is forced through a hose or a nozzle, delivering powerful cleaning action to household surfaces.
Some steam cleaners include extra-long power cords for enhanced maneuverability, allowing you to access hard-to-reach places throughout the home for cleaning and sanitizing. Since steam cleaners draw a large amount of electricity, there are currently no cordless options.
Power and Runtime
Battery runtime is associated with the volume of water held in the steam cleaners’ tanks. Larger water tanks in canister models may produce steam for up to 90 minutes of continuous cleaning. Alternatively, the small water tanks in lightweight, handheld steam cleaners produce enough steam for approximately 8 to 10 minutes of runtime. Of course, the tanks may be refilled as often as necessary for continuous cleaning.
Heating time is another feature to consider. Related to the volume capacity of the water tanks and the power of the heating elements, heating times vary from approximately 30 seconds to 12 minutes. A faster heating time means that the water converts to steam more quickly, allowing you to jump right into the task at hand.
Steam Settings
In the process of selecting the best steam cleaner for upholstery, shoppers may also want to consider their needs for a steamer that is capable of accomplishing other cleaning tasks. Many steam cleaners offer versatility via low-, medium-, and high-steam pressure settings. Users can adjust the settings to facilitate cleaning various surfaces and accomplishing either light freshening jobs or the tough removal of stuck-on dirt, grime, and stains.
Cleaning upholstery requires low to medium steam pressure, depending on the type of fabric and the degree of soil. Delicate upholstery fabric should be steam-cleaned on the lowest steam setting. Thicker, more durable fabric can tolerate a medium steam setting, especially if tough stains and stuck-on messes present cleaning challenges. Manufacturers of some steam cleaners recommend their use on leather upholstery, but you’ll want to check manufacturers’ information before using steam cleaners on leather furniture.
Alternatively, you can adjust the steam pressure settings to medium or high for cleaning hard surfaces. High-pressure steam works well on tile, grout, granite, stainless steel, and sealed flooring. Keep in mind that using a high-pressure setting will cause the steam to run out more quickly, resulting in the need to refill the water tank.
Tank Capacity
Every steam cleaner contains a water tank with a heating element that heats the water above 212 degrees Fahrenheit to produce steam. Handheld units include tanks that generally hold about 6 to 8 ounces of water for steam production. These are lightweight and easy to handle, but they produce steam for only about 8 to 10 minutes before the small water tanks run dry. Handheld steam cleaners are ideal for quick touch-ups and brief everyday cleaning chores.
On the other hand, users sometimes need to tackle cleaning jobs that require extended steam- producing runtimes. For these tasks, larger steam cleaners with increased water-tank capacities fill the bill.
Canister or cylinder steam cleaners feature larger water tanks that usually hold about 40 to 54 ounces of water. Heating the larger volumes of water to build up steam, these types of steam cleaners can deliver up to 90 minutes of continuous steam for extended cleaning sessions.
Maneuverability
When steam-cleaning upholstery, you’ll want to maneuver the steam-releasing units over and under the curved surfaces of furniture and into cracks and crevices. For this reason, steam cleaners with long power cords as well as extension hoses with easy-to-hold nozzles make the job easier. Maneuverability is a particularly valuable feature for reaching into a vehicle to clean car interiors, which are susceptible to accumulating dirt and debris.
Some steam cleaners offer power cords up to 18 feet long and steam hoses up to 8 feet long. With these features, you can direct the steam to hard-to-reach places for accurate targeting of dirt and grime.
A canister or a cylinder steam cleaner with a long extension hose allows you to reach into nooks and crannies. Alternatively, a lightweight handheld steamer with a long power cord provides up-close and targeted cleaning power.
Attachments
Many steam cleaners include attachments to facilitate cleaning a variety of objects and materials. Some common attachments include steam hoses, straight nozzles, angled nozzles, metal brushes, nylon brushes, window squeegees, mop pads, and scrapers.
For steam-cleaning upholstery, nylon brushes, steam hoses, and angled nozzles work particularly well, allowing you to maneuver the steam over, under, and around curved surfaces.
Shoppers looking for steam cleaners that can accomplish a range of cleaning jobs beyond sanitizing upholstery will want to take note of what attachments, if any, are included with each available steam cleaner.
FAQs
Q. What surfaces can a steam cleaner be used on?
Steam cleaners can be used on both hard and soft household surfaces, including upholstery, clothing, sealed flooring, ceramic tile, grout, stainless steel, and more.
Q. Do upholstery steam cleaners utilize chemicals?
No. The primary reason for using steam cleaners is that the cleaning action comes from pressurized steam created by heated water, which contains zero cleaning solutions or chemicals.
Q. Should hot or cold water be put in a steam cleaner?
Pour cold water into the tank of the steam cleaner. The heating element will heat the water to produce steam.
Q. Does steam-cleaning kill bugs?
Yes. Steam cleaning kills bed bugs on the surface of mattresses and bedding as well as those embedded ¾ inch deep into the fabric surfaces.
Q. How long should upholstery be steam-cleaned?
Hold the steamer nozzle on the upholstered surface to release the steam, but keep it moving. Don’t hold the nozzle in one place so long that the upholstery becomes damp.
Meet the Tester
Katie Barton has more than 10 years of experience in product writing, has tested dozens of cleaning products, and has authored hundreds of articles for major media outlets. Her cleaning and organizing advice has been featured on a variety of popular home and finance websites. She takes an unbiased approach to product testing, using each product multiple times or for several days to determine efficacy. Her goal is to help readers decide which products are worth their hard-earned money and which fall flat.
Additional research provided by Carol Benton.
The post We Tested the Best Upholstery Steam Cleaners for Chemical-Free Sanitizing appeared first on Bob Vila.
]]>The post The Best Weeding Tools, Tested and Reviewed appeared first on Bob Vila.
]]>Though herbicides control weeds, these chemicals can pose serious health risks to humans and wildlife. Manual weeding, on the other hand, gets the job done without harm to people, pets, or the environment. With a well-made weeding tool and some vigilance, banishing these pesky plants can be fairly simple.
Weeds proliferate in your garden seemingly overnight, and it’s easiest to remove them when they’re young. Some weeds, such as dandelions, develop a single taproot that grows deeper into the soil as the plant matures. The longer the taproot, the more difficult it becomes to eradicate. Though some weeds release without a fight, others will have gardeners wondering whether they need a jackhammer to dislodge them. That said, timing and soil conditions are key to weed removal: After a rainfall, soil is softer and more willing to release roots.
With a proliferation of weed-control tools available, choosing the right one for the task at hand may feel like a shot in the dark. To help, we searched out and tested tools that work best for a variety of circumstances. Our favorite was the Original Weeder from CobraHead, thanks to its versatile uses and durable tempered steel head. Shoppers looking for the best weeding tool will want to check out our shopping considerations and product reviews ahead.
- BEST OVERALL: CobraHead Original Weeder & Cultivator Garden Tool
- BEST BANG FOR THE BUCK: Radius Garden Ergonomic Weeder
- BEST KNIFE WEEDER: Nisaku NJP801 Yamagatana Stainless Steel Knife
- BEST STANDING WEEDER: Grampa’s Weeder
- BEST FORK WEEDER: Corona Extended Reach ComfortGel 2-Prong Weeder
- BEST SHORT-HANDLE HOE: Elegital Blue Arrow Express Kana Hoe 217 Garden Tool
- BEST LONG-HANDLE HOE: Truper Tru Tough Welded Warren Hoe

Product Comparison
| Type | Handle Length | Head Size | |
| CobraHead Original Weeder & Cultivator Garden Tool | Digging, cutting, raking | 8 inches | 5 inches long by 1 inch wide |
| Radius Garden Ergonomic Weeder | Digging | 5.75 inches | 9 inches long by 1.5 inches wide |
| Nisaku NJP801 Yamagatana Stainless Steel Knife | Digging, cutting | 5.5 inches | 7.5 inches long by 1.75 inches wide |
| Grampa’s Weeder | Digging, pulling | 39 inches | 1 inch wide by 2.5 inches deep, with a 5.5-inch step lever |
| Corona Extended Reach ComfortGel 2-Prong Weeder | Digging, pulling | 34 inches | 3 inches long by 0.5 inch wide |
| Elegital Blue Arrow Express Kana Hoe 217 Garden Tool | Digging, chopping, slicing | 5 inches | 5 inches long by 1.25 inches wide |
| Truper Tru Tough Welded Warren Hoe | Digging, chopping | 54 inches | 6 inches long by 4.75 inches wide |
Our Top Picks
With our shopping considerations in mind, which we look at later in greater detail, we created a list of the best weeding tools for typical lawn, garden, and landscape projects. Read on to learn more about these tools and how they performed in our tests.
Best Overall
CobraHead Original Weeder & Cultivator Garden Tool
Bob Vila Approved recognizes the household and DIY products that impressed us most in our real-world testing and that exemplify core values of the Bob Vila brand, including craftsmanship, innovation, and value for the dollar. Winners of this designation come recommended by our professional review team and are personally approved by Bob Vila.
This Bob Vila Approved product carries our brand’s highest level of recommendation.
Bob Vila Approved recognizes the household and DIY products that impressed us most in our real-world testing and that exemplify core values of the Bob Vila brand, including craftsmanship, innovation, and value for the dollar. Winners of this designation come recommended by our professional review team and are personally approved by Bob Vila.
Product Specs
- Type: Digging, cutting, raking
- Handle length: 8 inches
- Head size: 5 inches long by 1 inch wide
What We Like
- Multiuse tool works great for both for weeding and planting
- Tempered steel head is durable and easily lasts several seasons
- Thick, comfortable handle; ideal for long hours in the garden
- Works in any soil type; provides excellent versatility
What We Don’t Like
- Only for up-close work; may require lots of bending and kneeling
- Cuts deep taproots instead of pulling them
Great for removing stubborn weeds from heavy soil, this weeding tool’s curved, forged-steel end hooks deeply beneath the weed to lift and remove it. It’s made to easily pierce soil and let the user apply pressure from the side, bottom, or any angle in between to find the weed’s weakest point.
The multifunction tool’s shovellike tip resembles a snake head and can be used for planting rows of seeds, scratching in fertilizer around plants, and scraping out young weed seedlings. The plastic grip is designed to help gardeners keep a firm hold while they work.
In testing, the CobraHead’s versatility truly impressed us. The curved shaft and fingernail-like shape of the blade dug deep into the soil for removal of taproot, yet it just scratched the surface to cultivate safely next to young seedlings. In addition to our in-ground and container garden weeding tests, we used the CobraHead to prepare planting spots for new seedlings. The tough blade quickly loosened the surface to a depth of about 4 inches with little effort.
The thick handle provided a sure, comfortable grip in either hand. The drawback of this tool’s design is that it easily cuts off the deepest taproots, leaving the stump behind to resprout. But for young weeds of all types, cultivating near sensitive plants, and occasional soil preparation work, this is a handy little tool. We can highly recommend the CobraHead’s unique shape and lightweight design to tackle weeding and many other garden-related tasks.
Get the CobraHead weeding tool at Amazon, Gardener’s Edge, or Grow Organic.
Best Bang for the Buck
Radius Garden Ergonomic Weeder
Product Specs
- Type: Digging
- Handle length: 5.75 inches
- Head size: 9 inches long by 1.5 inches wide
What We Like
- Digs deeply to remove the whole tap root
- Comfortable ergonomic handle helps reduce fatigue after prolonged use
- Strong die-cast aluminum blade will not bend
What We Don’t Like
- Requires bending or kneeling; not a long tool
- Thick blade is more difficult to use in heavy soil
Gardeners need a strong grip to weed in dense soil, but as hands tire, grip strength suffers. The curved handle on the Radius Garden weeding tool is designed to keep the user’s hand and wrist aligned while pushing the serrated aluminum tool next to the root to lift out the weed. This impressive tool helps remove deeply rooted weeds that grow at the base of vegetables, shrubs, and perennials—and it’s a bargain, to boot.
The narrow blade easily cuts through any type of soil to remove pesky weeds and help to navigate around nearby plants without damaging their roots. The unusual shape of the thermoplastic grip provides a smooth, comfortable surface that’s easy to hang on to.
Another versatile weeder that doubles as a transplanter, this Radius hand tool proved impressive for the price. It was very effective at removing established taproot weeds, with the narrow blade easily reaching 5 to 6 inches deep to loosen the soil for thorough removal without breaking the root. For shallow, fibrous weeds, we slid the blade just below the soil surface at a shallow angle, a slow process, but ultimately successful.
As a transplanter for seedlings, however, it worked quite well. It was lightweight and easy to use, and the oversize ergonomic cushioned grip left us with virtually no hand fatigue after extended use. Those who need a taproot weeding tool for working in confined spaces will find this one quite helpful, and it’s likely to come in handy for other chores as well.
Get the Radius Garden weeding tool at Amazon.
Best Knife Weeder
Nisaku NJP801 Yamagatana Stainless Steel Knife
Product Specs
- Type: Digging, cutting
- Handle length: 5.5 inches
- Head size: 7.5 inches long by 1.75 inches wide
What We Like
- Mid-tang stainless steel blade is very sharp and durable
- Sharp edge and measured blade markings helps with precision
- Comfortable nonslip grip feels good in the hand
- Hard plastic sheath included to protect the blade when not in use
What We Don’t Like
- Premium price point compared to similar products
- Sheath not as durable as the knife; may need replacing every few seasons
Though several popular configurations of weeding knives exist, we prefer the classic Japanese hori hori knife design. This weeding tool by Nisaku combines classic style with modern materials that will probably last a lifetime. The stainless steel blade features one smooth sharpened edge and one serrated edge to cut easily through weed roots, divide clumps of perennials, and cut garden twine. The concave face of the blade is ideal for removing taproots, and engraved measurement markings help to gauge transplant planting depth.
The ergonomic contoured handle includes a textured surface for improved grip and a wide molded hilt loop for hanging on a hook in the garden shed. The knife comes with a plastic sheath for safe carrying and storage.
In testing, the do-it-all Nisaku hori hori garden knife proved comfortably constructed, well-balanced, and easy to use for large and small hands. It did a great job of taproot removal and skimming the soil beneath fibrous rooted weeds, though it was less successful when it came to prying weeds from narrow cracks between bricks and pavers. We also used it to dig, divide, and transplant a few hostas that had finished blooming, and it made quick work of the tough fibrous roots.
The blade’s material construction looks, feels, and is in fact extremely high quality: high carbon 440C stainless steel hardened to HRC 58—similar in material and hardness as professional kitchen knives and top-notch pocket knives. Even after digging around in the dirt, the edges were still sharp enough to slice easily through ¼-inch-thick forsythia branches. Though we found the plastic scabbard to feel rather cheap, we believe that serious gardeners will want to keep this tool close at hand for all sorts of chores.
Get the Nisaku weeding tool at Amazon or The Home Depot.
Best Standing Weeder
Grampa’s Weeder
Product Specs
- Type: Digging, pulling
- Handle length: 39 inches
- Head size: 1 inch wide by 2.5 inches deep, with a 5.5-inch step lever
What We Like
- Can easily pull taproot lawn and garden weeds
- Made from durable hardwood handle and steel head
- Works from a standing position; better for reducing back pain
What We Don’t Like
- Specialty single-task tool not as versatile as other weeders
- Weeds can clog the tool head; can require manual removal
Before the days of spray-on weed killers, obtaining a weed-free lawn meant pulling the pesky unwanted plants by hand. Grampa’s Weeder was probably hailed as a miracle back saver when it was introduced in 1913. Now the classic design represents an efficient alternative to chemical controls. Plus, it can be rather fun to use.
The simple, ingenious design features a steel step-on lever connected to a hinged jaw. Step down to insert the tool into the soil, then lever back on the handle to pull out the weed, root and all. Results are immediate, with no ugly dead weeds left in the lawn.
During tests, we found Grampa’s Weeder was most effective for use on dandelions and other fleshy rooted and rosette-forming weeds such as wild violet and wild lettuce. We had the greatest success when our clay-based soil was moist but not muddy. When the soil was too wet, the tool lost gripping ability, and when the soil was dry, the weed roots were more likely to break off. But in the most favorable conditions, we pulled 10 to 12 weeds per minute (5 to 6 seconds per weed).
Working just a few minutes a day, long enough to fill a bucket with weeds, we completely eradicated weeds from 5,000 square feet of lawn in 3 days. Grampa’s Weeder worked just as well in landscape and flower beds. For those who deal with regular invasions of taproot and fleshy root weeds, this could be a helpful weapon to fight the good fight.
Get the Grampa’s Weeder weeding tool at Amazon, Ace Hardware, or Garrett Wade.
Best Fork Weeder
Corona Extended Reach ComfortGel 2-Prong Weeder
Product Specs
- Type: Digging, pulling
- Handle length: 34 inches
- Head size: 3 inches long by 0.5 inch wide
What We Like
- Cushioned nonslip grip is easier to handle for long periods
- Capable of pulling out tough taproot weeds
- Works from a standing position to save users’ backs
- Also useful as a trash gatherer; multi purpose tool
What We Don’t Like
- Taller or shorter users may find it less comfortable
- Sharp head sometimes cuts off some of the root
Two-prong weeders are taproot specialists, and this one from Corona is one of the best. This weeding tool is made of steel with a sharpened heat-treated fork-tipped blade. It features a long handle that turns weeding into stand-up work, saving the user’s back and knees, while a trapezoidal-shaped cushioned-grip handle reduces hand fatigue.
We used this Corona tool to pull weeds from lawn, landscape, and garden beds. Although it is made of steel, it felt lightweight to carry around, and we appreciated the simplicity of the design—a complete lack of moving parts. It proved easy to operate one-handed: Slide the head into the ground next to the weed, then pull the lever backward to excavate the weed. It worked best on medium to large weeds (smaller weeds often slipped between the forks) when soil was damp. Mud, unfortunately, prevented the lever action from working properly, while hard dry soil led to root breaks and only partial removal. This weed puller was especially useful for woody weeds such as young oak, sweet gum, and elm seedlings. Despite soil condition issues, the tool proved to be an easy-to-use, easy-to-store asset for patrolling the yard.
Get the Corona weeding tool at Ace Hardware, Lowe’s, or Acme Tools.
Best Short-Handle Hoe
Elegital Blue Arrow Express Kana Hoe 217 Garden Tool
Product Specs
- Type: Digging, chopping, slicing
- Handle length: 5 inches
- Head size: 5 inches long by 1.25 inches wide
What We Like
- Sharp blade easily slices through roots; great for dealing with lots of weeds
- High-carbon-steel blade and hardwood handle
- Blade easy to sharpen and stays sharp a long time
- Blade is angled for user comfort and efficient work
What We Don’t Like
- Not designed for left-handed use
- Overall tool length feels a bit too short
A kana hoe, which works on the pull stroke, is used for scraping and slicing cleanly through shallow roots in the upper layers of soil. This one from Elegital is built for up-close work in raised beds, container gardens, and in-ground gardens. The broadly curved blade is attached to the handle at a comfortable angle to reduce hand and wrist fatigue while working aggressively. It features a hardwood handle and a high-carbon-steel head that stays sharp longer and resharpens more easily than other types of steel.
The size of this tool was just right for scratching out 2 or 3 square feet of weeds at a time. The sharp blade sliced right through, whether the weeds were young or well established. In established garden areas, three or four strokes were adequate to cut through weed roots and break up the resulting debris. It works the soil to a depth of up to 4 or 6 inches, so it’s useful for preparing planting holes as well. However, where thick tree roots or large rocks were present, it became much less effective.
This kana hoe would be a great choice for general weeding and replanting in raised beds or well-established in-ground gardens but probably not for landscape beds. Note: The blade orientation is for right-handed users. Lefties may want to check out this one from Bonsai.
Get the Elegital weeding tool at Amazon.
Best Long-Handle Hoe
Truper Tru Tough Welded Warren Hoe
Product Specs
- Type: Digging, chopping
- Handle length: 54 inches
- Head size: 6 inches long by 4.75 inches wide
What We Like
- Welded steel head and hardwood handle is durable and long lasting
- Lightweight and easy to use; works large soil areas quickly
- Also useful for planting and cultivating
What We Don’t Like
- Not built for use in untilled soil
This garden hoe is designed to be effective at eliminating different kinds of weeds in different garden spaces, and help with planting too. With an overall length of 54 inches, the Truper Tru weeding tool is a back-saving weed slayer. It offers plenty of reach to work through raised beds efficiently and in-ground gardens without unnecessary bending and stooping. It features a 54-inch hardwood handle and welded steel head.
We liked that we could easily use any edge of this hoe to eradicate weeds in different ways. Between rows of garden vegetables, we mostly used the long, slightly curved sides of the blade to scrape the weeds away, switching to the right or left side as needed to avoid damaging garden plants. Between plants spaced at least 4 or 5 inches apart, we employed the pointed end to scratch out weeds. In addition to weeding, we used this hoe to pull soil into mounds (“hills”) to plant squash and to create long, narrow furrows for planting beans.
The hardwood handle was lightweight and strong, and it felt good in hand, but it is no doubt susceptible to degradation if left exposed to the elements. Plus, we found that the tool was not particularly effective at working in heavy clay soil that had not been previously tilled. Still, this Warren hoe would make an excellent primary weeding tool for any vegetable gardener, and its versatility will suit those just beginning to establish a garden tool collection or with limited storage space.
Get the Truper weeding tool at Amazon, DK Hardware, or North 40 Outfitters.
Jump to Our Top Picks
How We Tested the Best Weeding Tools
Those looking for nontoxic ways to eliminate weeds from lawns and gardens typically begin by simply pulling them by hand. Soon enough they realize that specialized tools are better for controlling the toughest weeds. The locations where those tools will be used and the types of weeds that are present play dominant roles in deciding which weeding tools are best suited for the job. Our tests, therefore, included a variety of tools designed for specific tasks.
We carried out our weeding tool tests in two trial areas: a lawn and a vegetable garden. Both areas included a variety of common weeds with different growth habits, such as dandelions, wild violet, crabgrass, and spurge. We used each tool for a minimum of an hour to weed in one or both of these areas, depending on the tool design. For instance, we used the Warren hoe only in the garden, but we tested the Radius weeding tool in both areas.
For inclusion in this guide, we required that a tool offer excellent results in one or more critical weeding tasks: general weed control in raised or in-ground garden beds, general weed control in container gardens or confined spaces, or removing taproot and rosette weeds from lawns. Because of the diversity of designs tested, we evaluated each tool based on its ability to perform its own designed purpose instead of comparing dissimilar tools.

What to Consider When Choosing the Best Weeding Tool
With a wide array of weeding tools from which to choose, it may be difficult to decide on the best ones to maintain garden beds and lawns. However, shoppers may appreciate the variety when they understand the features each tool offers, from pulling weeds to cutting through compacted soil. Take some time to learn about these implements and the factors that set them apart to find the best tool for weeding any yard.
Types of Weeding Tools
The method of weed removal, such as digging, chopping, cutting, slicing, or raking, distinguishes the several types of weeding tools from one another.
Digging and Chopping
Taproot weeds such as dandelions require a digging tool that penetrates soil deeply enough to dislodge the entire root. Traditional fork-tongue fishtail weeders work well. Snakehead and spearpoint tips also rise to the task. Grub hoes, the toughest of these tools, may make the best match for large weeds in heavy soil.
Short-handled chopping hoes help remove large weeds in areas that require more precision, such as around the base of perennials and shrubs. Steel diggers, perhaps the best digging tools for hard clay soil, won’t bend or break in denser soils.
Cutting and Slicing
Although not always useful on deeply rooted weeds, cutting tools such as knives and sickles work well on roots that are more fibrous, such as those of crabgrass and creeping Charlie, which sit close to the soil surface.
Knives cut away entire pieces of weed-infested turf and scrape out weeds from sidewalk cracks and pavers. Slicers, such as stirrup-style hoes, skim the surface of the soil with a push/pull motion. They quickly remove smaller weeds or those in cultivated beds.
Raking
Ideal for loose, easy-to-work soil in cultivated flower and vegetable gardens, raking weeders, like stirrup hoes, forks, and hybrid cultivators, combine digging and raking tools on a single head to lift clusters of shallow-rooted weeds.
These tools work with a push/pull action, skimming the soil surface and dislodging smaller weeds that gardeners can gather and discard or leave in place to decompose and feed the soil. Consider a long-handled raking weeder for removing weeds around shrubs and a short version for raised beds and tight spaces.
Size and Weight
The size and components of a weeding tool have the most impact on its weight. Hand tools may weigh less than a pound and usually no more than 5 or 6 pounds. Lighter manual full-length tools such as hoes and forks usually weigh between 5 and 10 pounds.
A heavy tool can be tiring to wield when weeding for a long period, so try to strike a balance between durability and weight (not to mention cost). Aluminum and plastic garden tools are lighter and less expensive, but they most likely won’t last very long. Steel and fiberglass are pricier and last longer. Wooden tools weigh more and cost less.
Those working on a small flower bed with minimal growing areas may find a smaller, lighter tool sufficient. Smaller tools allow for more flexibility and precision in tighter spaces. More extensive gardens require heavier, sturdier tools that provide more leverage for digging and breaking up soil.
Blade and Handle Material
Stainless steel, aluminum, plastic, wood, and fiberglass figure prominently into the handles and blades of weeding tools.
- Steel lasts a long time and gets the job done, but it’s not lightweight. A steel shaft or handle weighs more than aluminum, plastic, and fiberglass. And only stainless steel or powder-coated steel resists rust.
- Aluminum weighs less than steel and resists rust. On the other hand, this less expensive material bends and dents more easily than steel. Aluminum may not stand up well to hard, rocky soil.
- Plastic handles weigh less and cost less, but the lightweight, inexpensive material can break or crack with heavy or extended use—so they’re hardly a bargain in the long run.
- Wood handles and shafts provide a cost-effective, durable, and moderate weight option. But wood can break, crack, and rot in certain weather conditions.
- Fiberglass provides a strong and lightweight handle at a slightly higher price. This material stands strong against rust and extreme weather.
Handle Length
For the right handle length, consider both the work area and the user’s own physical limitations. Large garden beds and walkways are best weeded from an upright position that takes the stress off the back, helping gardeners do the greatest amount of work with the least amount of effort. If bad knees or hips make it difficult to kneel comfortably, choose a longer handle.
Some weeders include a feature that lets users pull the weed and discard it without having to bend over. Raised beds and tight spaces are conducive to short-handled weeders that let gardeners—especially those with healthy joints—get up close. Some weeding tools include an ergonomic grip that keeps the hand and wrist at the same angle, eliminating strain on joints caused by prolonged repetitive use.
Grip
Rubber coating on grips and handles can help alleviate wear and tear on hands. Shoppers will want to keep in mind that regardless of the ergonomic or fatigue-relieving features any handle or grip might offer, it’s still a good idea to wear a quality pair of gardening gloves to avoid scratches and cuts from branches, stones, and thorns.
Plastic handles designed in ergonomic shapes that offer a comfortable grip work fine for smaller tools. However, they often can’t handle the leveraging pressure that larger tools can, and they will snap easily.
FAQs
Many different tools can aid in removing weeds. As noted in this guide, weeding tools typically fall into three categories: digging and chopping tools, cutting and slicing tools, and raking tools. Within these categories, there are a variety of options, including fork weeders, snakehead weeders, spearpoint-tip weeders, grub hoes, knife weeders, sickles, and stirrup hoes.
It’s important to move carefully around flowers, shrubs, and other plants to avoid damaging their roots. With this in mind, the Elegital weeding tool is a good choice for maintaining control while removing weeds from around plants.
Pullers tend to be the best dandelion weeder tools. One of the best tools for removing dandelions is Grampa’s Weeder.
The best hand weeder can vary depending on the user and the task at hand, but the CobraHead weeding tool and the Radius Garden weeding tool are among the best hand weeders available.
The post The Best Weeding Tools, Tested and Reviewed appeared first on Bob Vila.
]]>The post The Best Retractable Garden Hose Reels to Keep Hoses Contained, Tested appeared first on Bob Vila.
]]>If you’ve ever used a hose around the garden, you may know the struggle of wrangling it when you’re done with a given task. Although many garden hose storage options seek to simplify putting away a garden hose, few make it as easy as a retractable hose reel. There are a number of retractable hose reels on the market, and we tested eight top models for functionality, durability, installation ease, value, and curb appeal.
How does a retractable hose reel work? A round housing unit holds a garden hose and a reel powered by a large spring. As you extend the hose from the unit, a spring attached to the reel begins to wind and tighten. When you’re finished using the hose and want to store it, simply tug the hose to release a locking mechanism and engage the spring-loaded reel, which automatically winds up the hose in about 20 seconds.
Our top pick was the 130-foot retractable option from Giraffe Tools thanks to its lockable hose and 180-degree swivel. Find out how each product fared in our hands-on testing and which ones are our top picks for the best retractable garden hose reels in various categories.
- BEST OVERALL: Giraffe Tools 130-Foot Retractable Garden Hose Reel
- RUNNER-UP: Aquazilla 100-Foot Retractable Garden Hose Reel
- BEST BANG FOR THE BUCK: Eneacro 100-Foot Retractable Garden Hose Reel
- UPGRADE PICK: Macnaught 60-Foot Retractable Garden Hose Reel
- BEST FOR SMALL YARDS: Gardena 50-Foot Wall-Mounted Hose Reel
- BEST FOR MEDIUM YARDS: Giraffe Tools 90-Foot Retractable Garden Hose Reel
- BEST FOR LARGE YARDS: Giraffe Tools 155-Foot Retractable Garden Hose Reel
- BEST SPIKE-MOUNTED: Gardena 66-Foot Retractable Hose Reel on Metal Spike
Product Comparison
| Length | Size | Nozzle | |
| Giraffe Tools 130-Foot Retractable Garden Hose Reel | 130 feet | ½-inch diameter | Adjustable with 9 spray pattern |
| Aquazilla 100-Foot Retractable Garden Hose Reel | 100 feet | ⅝-inch diameter | Pistol grip with 9 spray patterns |
| Eneacro 100-Foot Retractable Garden Hose Reel | 100 feet | ½-inch diameter | Pistol grip with 9 spray patterns |
| Macnaught 60-Foot Retractable Garden Hose Reel | 60 feet | ½-inch diameter | Not included |
| Gardena 50-Foot Wall-Mounted Hose Reel | 50 feet | Unspecified | Fire hose |
| Giraffe Tools 90-Foot Retractable Garden Hose Reel | 90 feet | ⅝-inch diameter | Pistol grip with 9 spray patterns |
| Giraffe Tools 155-Foot Retractable Garden Hose Reel | 155 feet | ½-inch diameter | Pistol grip with 9 spray patterns |
| Gardena 66-Foot Retractable Hose Reel on Metal Spike | 66 feet | Unspecified | Fire hose |
Our Top Picks
These top picks represent some of the best retractable garden hose reels on the market today. They are easy to operate, with proven designs that will quickly retract a hose without tangling. We’ve included a selection of reels to accommodate various hose lengths, and we extensively tested each model for functionality and durability.
Best Overall
Giraffe Tools 130-Foot Retractable Garden Hose Reel
What We Like
- 130-foot hose locks at any length, making it ideal for all yard sizes
- Auto-rewind system retracts the hose without any kinking or tangling
- Hose reel features a 180-degree swivel and is removable for storage
What We Don’t Like
- Loose rubber gaskets inside the hose’s couplings fell out upon unboxing
Our Ratings: Installation 5/5; Curb Appeal 5/5; Functionality 5/5; Durability 5/5; Value 5/5
Product Specs
- Length: 130 feet
- Size: ½-inch diameter
- Nozzle: Adjustable with 9 spray patterns
With its ample length and durable construction, this retractable garden hose reel from Giraffe Tools is a quality choice for just about any yard. It comes equipped with a 130-foot hose that locks at any length, allowing it to reach even the far corners of a lawn. The hose itself is made of an abrasion-resistant hybrid material that can handle pressures of up to 600 pounds per square inch (PSI)—nearly twice what most hoses can handle—without bursting. This is a key feature, given that the hoses in retractable reels generally aren’t replaceable.
The Giraffe Tools retractable hose reel came with everything we needed to mount the bracket to our wooden post, and the process was simple, taking less than 10 minutes. The handy quick-release system made it easy to set the reel in the bracket and remove it for portability or storage. The hose pulled out smoothly, requiring little effort on our part. To retract the hose, we gave it a gentle tug, and the auto-rewind system kicked in, rolling it up without any kinking or tangling.
We also appreciated the hose’s high-quality spray nozzle, which features nine unique spray patterns. We repeatedly dropped the hose on our concrete patio to test for durability, and there was no damage to the nozzle or couplings. The only malfunction we encountered was minor: The rubber gaskets in the hose’s couplings were loose, falling out as we unboxed the reel. It was easy to put them back in place, but potential buyers will want to keep this in mind.
Get the Giraffe Tools 130-foot retractable garden hose reel at Amazon, Lowe’s, or The Home Depot.
Runner-up
Aquazilla 100-Foot Retractable Garden Hose Reel
What We Like
- Easy-to-install mounting bracket; hose reel locks in place via a metal pin
- 100-foot hose length is ideal for yards and gardens of all sizes
- Durable 9-pattern spray nozzle is suitable for various applications
What We Don’t Like
- Retraction requires the gentlest of pulls; required several attempts after each use
Our Ratings: Installation 5/5; Curb Appeal 5/5; Functionality 4/5; Durability 5/5; Value 5/5
Product Specs
- Length: 100 feet
- Size: ⅝-inch diameter
- Nozzle: Pistol grip with 9 spray patterns
The Aquazilla retractable water hose reel was on par with our top pick, earning it the Runner-Up award. The hose features a ⅝-inch diameter and a 100-foot length, perfect for extended reach through the yard. The mounting bracket has a 180-degree swivel, and the hose locks at any length.
Upon unboxing the Aquazilla retractable garden hose, we were impressed with the attractiveness of the design. A handle at the top of the reel made it easy for us to carry and then install the product. It took us a mere 5 minutes to install the mounting bracket on our wooden post; the reel hooked to the bracket via a removable metal pin.
During testing, we could pull the hose smoothly from the reel, and it locked into place the second we stopped pulling. Our only issue was that retracting the hose required only the gentlest tug, which we never could seem to achieve on the first try. However, once the hose did retract, the hose guide prevented any kinking. The heavy-duty, pistol-grip spray nozzle resisted any cracking when we dropped it on our concrete patio. We also found the nozzle’s nine different spray patterns useful for many applications, including rinsing off our patio and watering flowers.
Get the Aquazilla retractable garden hose reel at Amazon.
Best Bang for the Buck
Eneacro 100-Foot Retractable Garden Hose Reel
What We Like
- Reasonably priced compared with retractable hose reels of a similar size
- Easiest to pull the hose of all the models we tested
- 100-foot hose length is suitable for yards and gardens of all sizes
What We Don’t Like
- Plastic housing unit appears to be of lower quality than other top picks
Our Ratings: Installation 5/5; Curb Appeal 3/5; Functionality 5/5; Durability 3/5; Value 5/5
Product Specs
- Length: 100 feet
- Size: ½-inch diameter
- Nozzle: Pistol grip with 9 spray patterns
This retractable garden hose reel from Eneacro offers several good features at a reasonable price. It automatically locks at any length and retracts slowly using an internal breaking mechanism. The hose’s 100-foot length makes it suitable for yards and gardens of all sizes. The reel includes a side mount and can rotate 180 degrees to reach all parts of a yard, and users can remove the reel from the bracket for easy winter storage.
Upon unboxing, it was apparent why this garden hose reel was cheaper than other products on our list. The plastic housing unit was thinner, and the hose looked to be of lower quality. However, looks can be deceiving, as we were pleasantly surprised by this hose reel’s performance.
We installed the mounting bracket by drilling four pilot holes and then screwing the bracket in place. We then attached the reel and began using the hose. This hose was the easiest to pull among all of our top picks. There was no resistance, and drawing out the entire hose length took zero force. When we had finished using it, the hose retracted smoothly. The hose also features a handy pistol-grip nozzle with nine spray patterns. While this model’s housing unit appears to be a lower quality than that of the other products, it’s still an ideal option for users who value ease of use—and at a lower price.
Get the Eneacro retractable garden hose reel at Amazon.
Upgrade Pick
Macnaught 60-Foot Retractable Garden Hose Reel
What We Like
- Features durable construction and an attractive modern design
- Hybrid polymer hose is thick, flexible, and resistant to kinking
- Simple installation and easy to remove from the mount for portability or storage
What We Don’t Like
- Inconsistent retraction; the hose sometimes rewinds to one side rather than evenly throughout the reel
- Doesn’t include a spray nozzle or screws for the mounting bracket
Our Ratings: Installation 5/5; Curb Appeal 5/5; Functionality 3/5; Durability 5/5; Value 4/5
Product Specs
- Length: 60 feet
- Size: ½-inch diameter
- Nozzle: Not included
For shoppers who want to invest in a higher-priced retractable hose reel, it’s best to choose a sturdy model designed for ease of use like this Macnaught hose reel that features heavy-duty construction and a high-quality hose. Although the 60-foot hose has a smaller ½-inch diameter, it’s made from a hybrid polymer material that doesn’t hold a coiled shape, making it easier to extend and less likely to kink.
When we unboxed the hose reel, we were impressed with the material quality. The hose felt flexible but thick—definitely a grade above the other options. The housing unit featured durable plastic and a modern design. It included a metal bracket for installation; unfortunately, though, no screws were included. Luckily, we had some screws on hand and were able to mount the bracket to our post in just a few minutes.
Similar to other retractable garden hose reels, this model locks automatically and retracts with a gentle pull. However, the retraction was inconsistent during our testing. Sometimes the garden hose would retract in an even pattern, while other times it would all go to one side. In those instances, we’d have to unwind the hose and retract it again to straighten it out. An additional downside to this model is that it didn’t include a spray nozzle.
Get the Macnaught retractable garden hose reel at Amazon.
Best for Small Yards
Gardena 50-Foot Wall-Mounted Hose Reel
What We Like
- Includes hose guide for easy, even retraction within the reel
- Reel attaches to the mounting bracket via a removable metal pin
- Hose is easy to pull out, locks in place, and smoothly retracts
What We Don’t Like
- Hose features plastic couplings with snap-on connections, which may be less desirable
Our Ratings: Installation 5/5; Curb Appeal 4/5; Functionality 4/5; Durability 4/5; Value 4/5
Product Specs
- Length: 50 feet
- Size: Unspecified
- Nozzle: Fire hose
The shorter 50-foot hose on this Gardena model is ideal for keeping flower beds and landscaping in smaller yards well irrigated. Similar to other hose reels, it mounts to a wall and swivels 180 degrees to access different parts of the yard. A bracket on the mount pairs with a standard padlock (not included) to prevent theft. Users can easily remove the reel from the mount for winter storage.
We installed the bracket to our wooden post with four screws and then set the reel on top, locking it in with a metal pin. We then tested the hose, pulling it out and retracting it more than a dozen times. The hose extended and retracted smoothly and efficiently each time. This product includes a handy hose guide for installation on the corner of a house or building to prevent snags.
Rather than metal couplings like the other hose reels we tested, this product has plastic couplings with snap-on connections. The water source hook-up, however, has a standard threaded connection. Additionally, this hose reel has a basic fire-hose nozzle, which wasn’t our favorite, but it works well for watering plants.
Get the Gardena 50-foot retractable garden hose reel at Amazon.
Best for Medium Yards
Giraffe Tools 90-Foot Retractable Garden Hose Reel
What We Like
- Attractive and high-quality housing unit made from reinforced propylene plastic
- Kink-proof hose retracts via a guide that keeps it tidy inside the housing unit
- 90-foot hose length and versatile spray nozzle are ideal for many applications
What We Don’t Like
- Doesn’t pull as smoothly as other tested products from this brand; requires force
Our Ratings: Installation 5/5; Curb Appeal 5/5; Functionality 4/5; Durability 5/5; Value 4.5/5
Product Specs
- Length: 90 feet
- Size: ⅝-inch diameter
- Nozzle: Pistol grip with 9 spray patterns
The Giraffe Tools 90-foot retractable garden hose reel is an attractive option for midsize yards and gardens. The housing unit is durable, consisting of reinforced propylene plastic that won’t fade in the sun. The reel features a self-layering system that guides the hose into the unit smoothly and without any kinking.
This model included everything we needed to mount it, including a propylene bracket and four screws with plastic anchors. After mounting, all we had to do was set the reel in place. We started our functionality testing by pulling the length of the hose out of the reel multiple times. We immediately noticed that this model required much more force to pull than the other Giraffe Tools models we tested.
The retraction on this hose worked as expected, rewinding smoothly and without kinks. We repeatedly dropped the nine-setting spray nozzle on the concrete patio to mimic the regular wear and tear the hose might experience. The couplings never warped, and the nozzle didn’t crack or show any signs of damage. Overall, this is a high-quality retractable garden hose reel, but it requires some upper body strength to extend the entire length of the hose.
Get the Giraffe Tools 90-foot retractable garden hose reel at Amazon, Lowe’s, or The Home Depot.
Best for Large Yards
Giraffe Tools 155-Foot Retractable Garden Hose Reel
What We Like
- Extra-long hose length of 155 feet is ideal for large yards, gardens, and barns
- Durable, heavy-duty housing is made from reinforced and fade-resistant propylene
- Versatile spray nozzle with 9 spray patterns meets multiple needs
What We Don’t Like
- Long hose length makes reel heavier to carry and install
- Wider mounting bracket may limit installation options
Our Ratings: Installation 5/5; Curb Appeal 5/5; Functionality 5/5; Durability 5/5; Value 4.5/5
Product Specs
- Length: 155 feet
- Size: ½-inch diameter
- Nozzle: Pistol grip with 9 spray patterns
With a whopping 155 feet of hose length, this Giraffe Tools option is one of the longest retractable garden hose reels on the market, making it ideal for yards that extend far from the spigot. The reel functions similarly to other retractable hose reels, locking automatically at any length and retracting with a simple tug.
The mounting bracket was wider than others on our list, requiring a minimum of a 4-inch by 6-inch post on which to mount it. Alternatively, users can mount it directly to the side of a house or building. We installed the bracket on our wooden post, which took only a few minutes. We then set the reel in place and began using the hose. The reel weighs about 40 pounds, making it slightly more challenging to install.
We expected such a long hose to be more difficult to pull, but it wasn’t. It pulled smoothly from the reel, locking in place each time we stopped. It also retracted with a gentle tug, never kinking. The durable sprayer nozzle featured the same nine-setting pistol grip as on all the Giraffe Tools models we tested. We subjected the nozzle to many drops on our concrete patio, and it held up well. And we found the multiple sprayer settings useful for a variety of applications.
Get the Giraffe Tools 155-foot retractable garden hose reel at Amazon or The Home Depot.
Best Spike Mounted
Gardena 66-Foot Retractable Hose Reel on Metal Spike
What We Like
- Easy-to-install metal ground spike eliminates the need for wall mounting
- Hose pulls out smoothly and retracts with a gentle tug
- 66-foot length suits small to medium yards and gardens
What We Don’t Like
- Includes a basic adjustable nozzle instead of a higher-quality spray nozzle
- Expensive for the quality and size of the hose reel
Our Ratings: Installation 4/5; Curb Appeal 4/5; Functionality 5/5; Durability 3/5; Value 3.5/5
Product Specs
- Length: 66 feet
- Size: Unspecified
- Nozzle: Fire hose
Users who can’t or don’t want to wall-mount a hose reel can still enjoy the benefits of a retractable garden hose with the spike-mounted Gardena 66-foot hose reel. The housing unit is constructed with frostproof and UV-resistant material and features RollControl technology for safe retraction.
This hose reel came with everything we needed to install it. We mounted the stake by finding a suitable, utility-free area in our yard and then used the included metal rod to twist the stake into place. We couldn’t get the stake all the way into the ground, but we pushed it deep enough to support the hose reel. We then assembled the reel and placed it on the mount.
The hose didn’t feel quite as durable as the other models we tested, but it extended and retracted smoothly with no tangling or kinking. The 66-foot length makes it best suited for small to medium yards. This model has a fire-hose adjustable nozzle, which didn’t have the quality of the nozzles on other top picks. However, it still held up to many drops on the concrete patio and worked well for watering plants.
Get the Gardena 66-foot retractable garden hose reel at Amazon.
Jump to Our Top Picks
How We Tested the Best Retractable Garden Hose Reels
- Products tested: 8
- Hours spent testing: 6.5
- Tests performed: 5
- Average price: $180
Before starting our hands-on testing of the best retractable garden hose reels, we researched top consumer needs and considered more than 15 options with high user reviews. Then, we narrowed our list to eight models to test and spent a month installing and using each retractable hose reel.
First, we mounted each hose reel to a wooden post using the included bracket and screws, if applicable. To test for functionality, we extended the full length of the hose and then retracted it at least a dozen times, noting the overall ease or difficulty, the smoothness, and how well it retracted. We also dropped the hose couplings and any included nozzles on our concrete patio multiple times to mimic the natural wear and tear these parts may undergo. Finally, we kept all of our test results in a rubric, and—at the end of the testing period—used these results to rate each product and award it as the top pick in one of the categories.
| Installation | Curb Appeal | Functionality | Durability | Value | |
| Giraffe Tools 130-Foot Retractable Garden Hose Reel | 5 | 5 | 5 | 5 | 5 |
| Aquazilla 100-Foot Retractable Garden Hose Reel | 5 | 5 | 4 | 5 | 5 |
| Eneacro 100-Foot Retractable Garden Hose Reel | 5 | 3 | 5 | 3 | 5 |
| Macnaught 60-Foot Retractable Garden Hose Reel | 5 | 5 | 3 | 5 | 4 |
| Gardena 50-Foot Wall-Mounted Hose Reel | 5 | 4 | 4 | 4 | 4 |
| Giraffe Tools 90-Foot Retractable Garden Hose Reel | 5 | 5 | 4 | 5 | 4.5 |
| Giraffe Tools 155-Foot Retractable Garden Hose Reel | 5 | 5 | 5 | 5 | 4.5 |
| Gardena 66-Foot Retractable Hose Reel on Metal Spike | 4 | 4 | 5 | 3 | 3.5 |
What to Consider When Choosing a Retractable Garden Hose Reel
Although knowing the length of the hose is key when you’re purchasing a retractable garden hose reel, there are other important factors to consider, such as the hose diameter, nozzle type, and mounting design.
Length
“Hose length is definitely a top consideration,” says Jeremy Yamaguchi, CEO of Lawn Love. “If you want to be able to extend your hose out to water the plants across your lawn without requiring a watering can to make up the difference, then make sure to measure the distance you need.”
Though other types of hose storage solutions may allow you to add length by attaching an additional hose, you won’t be able to add to or replace the hose that comes with a retractable reel. The best way to determine the length you’ll need is to measure from an outdoor spigot to the farthest point in the yard. Hose lengths for retractable garden hose reels typically range from about 50 to 150 feet.
Mounting and Portability
A retractable garden hose holder comes with a mounting kit for installation on the side of a house, shed, or even a fence or post. The mounting kit allows the reel to hinge left to right 180 degrees, making it easier to direct the hose toward a flower bed, driveway, or other location.
Mounting the hose reel is necessary to provide a solid base while pulling the hose for retraction. A hose reel wall mount typically has a removable pin that allows the user to detach the entire device from the mount, which is convenient when storing the hose in a shed or garage for the winter.
Hose Size
Hose sizes for retractable garden hoses vary from ⅜ of an inch in diameter up to ⅝ of an inch in diameter. A larger-diameter hose can carry more water and therefore produce a higher flow rate than a smaller-diameter hose. With this in mind, a ⅜-inch or ½-inch hose is best suited for watering plants, while a ⅝-inch hose is ideal for uses that demand higher water volume, such as running a sprinkler or washing a car.
Nozzle Type
Some garden hose reels feature one of two types of nozzle: pistol grip or fire hose. Pistol-grip models fit ergonomically in the hand with a grip and trigger that allow the user to regulate the amount of output. The nozzle has a throttle tip for toggling between eight or nine spray patterns, including a stream, broad fan, and mist.
Fire-hose nozzles are long and straight. The user can adjust the spray from a high-pressure stream to a broad fan by twisting the nozzle. Though a fire-hose nozzle doesn’t offer the same variety of spray patterns as a pistol-grip nozzle, it is usually made from all-metal parts and is typically more durable.
Most nozzle types use standard fittings, so you can easily replace one later with an aftermarket nozzle, if necessary.
The Advantages of Owning a Retractable Garden Hose Reel
Although retractable reels are one of the more expensive storage solutions for garden hoses, there are several good reasons to invest in one. A retractable hose reel makes it easy to collect and store a garden hose that is up to 155 feet in length, eliminating the need to wrangle a hose manually. Garden hose reels also feature wall mounts, which can inconspicuously attach to a house or shed, unlike a hose reel cart that requires indoor storage. These reels detach easily from their mounts and double as a storage container for the hose during winter months. A retractable garden hose reel can:
- Eliminate the need to manually wind up a hose
- Store the hose in an out-of-the-way place
- Allow for convenient transport of the hose for winter storage
“With longer hoses, it’s definitely helpful to have a crank feature or a retractable design to bring the hose back into place. If you don’t need a long hose and/or don’t need to take it out very far, a retractable hose may be an unnecessary expense,” says Yamaguchi. With that in mind, if you have a small yard with low water needs, a quality expandable hose may be sufficient.
FAQs
If you’re wondering how to use your new retractable garden hose reel or want to know what to do if the hose becomes damaged, read on for answers to these frequently asked questions.
A retractable garden hose reel makes it easier to collect and store the hose by eliminating the need to manually wind it up. A quality hose reel also provides a tidy place to store the hose during the winter months.
To use a hose reel, grab the nozzle end and pull the hose to the desired location for watering. The hose will automatically lock when you stop pulling. To retract the hose, give it a quick tug. The hose reel will automatically wind up the hose in about 20 seconds.
Most hoses in retractable hose reels are not replaceable. If the hose becomes damaged, however, you may be able to repair it with a patch kit.
Meet the Tester
Katie Barton has over 10 years of experience in product writing, has tested dozens of cleaning products, and has authored hundreds of articles for major media outlets. Her cleaning and organizing advice has been featured on GOBankingRates, Realtor.com, Yahoo!, Cabin Life, and more. She takes an unbiased approach to product testing, using each product multiple times or for several days/weeks to determine efficacy. Her goal is to help readers decide which products are worth their hard-earned money and which fall flat.
Additional research provided by Tony Carrick.
The post The Best Retractable Garden Hose Reels to Keep Hoses Contained, Tested appeared first on Bob Vila.
]]>The post The 7 Wood Chippers That Cut Best in Our Tests appeared first on Bob Vila.
]]>A wood chipper cuts twigs, limbs, branches, and other solid yard material into small pieces. These chips may provide mulch for a garden, kindling for a fire pit, or even the raw material for pressed wood to make furniture or complete other carpentry projects.
The best wood chipper for home usemust accommodate the twigs and branches you feed into it and suit your power requirements. While thebest electric wood chipperis quieter and runs on a home power supply, gas and power take-off (PTO) models are much more powerful, cutting through more material at a faster pace.
We interviewed a landscaping expert to get his insight on what specifically to look for. Then we shopped around to identify electric and gas-powered wood chippers that our readers could count on for their outdoor cleanup projects. Then we spent more than 8 hours assembling and testing the following picks in a huge brush pile in order to compare wood chippers.
Through this testing, we selected the Earthquake K33 Chipper Shredder as our best overall wood chipper for its ability to shred and chip branches of 3 inches in diameter, 301 cubic centimeter (cc) 4-cycle gas engine, low shredder hopper, and dock-and-lock bagging system.
Continue reading for insight on our shopping considerations and check out ourwood chipper reviews to see how each of these models performed in our tests—and why one of them may be the best wood chipper for your project.
- BEST OVERALL: Earthquake K33 Chipper Shredder
- BEST BANG FOR THE BUCK: Sun Joe CJ601E Electric Wood Chipper
- UPGRADE PICK: DK2 OPC503 3-Inch Disk Chipper Shredder
- BEST FOR COMPOSTING: Earthwise Electric 15-Amp Corded Chipper Shredder
- BEST WITH LEAF VACUUM: Troy-Bilt CSV060B Chipper Shredder Vacuum
- BEST HEAVY-DUTY: Champion Power Equipment 3-Inch Chipper Shredder
- ALSO CONSIDER: Predator 6.5 HP 212cc Chipper Shredder
Product Comparison
| Engine | Branch Capacity | Weight | |
| Earthquake K33 Chipper Shredder | 301cc gas engine | 3 inches | 140 pounds |
| Sun Joe CJ601E Electric Wood Chipper | 14 amp (A) corded electric | 1.5 inches | 25.4 pounds |
| DK2 OPC503 3-Inch Disk Chipper Shredder | 7 horsepower (hp) 208cc Kohler Command Pro gas engine | 3 inches | 187 pounds |
| Earthwise Electric 15-Amp Corded Chipper Shredder | 15A corded electric motor | 1.75 inches | 30 pounds |
| Troy-Bilt CSV060B Chipper Shredder Vacuum | 163cc gasoline engine | 1.5 inches | 125 pounds |
| Champion Power Equipment 3-Inch Chipper Shredder | 224cc Champion gasoline engine | 3 inches | 135.6 pounds |
| Predator 6.5 HP 212cc Chipper Shredder | 212cc gas engine | 3 inches | 120 pounds |
Our Top Picks
We tested some of the top-rated wood chippersin our test facility brush pile. Read on to learn how each of these machines performed in our tests and why we consider them to be among the best wood chippers for home use.
Best Overall
Earthquake K33 Chipper Shredder
What We Like
- Starts easily and handles tough material without stalling
- Chips branches up to 3 inches in diameter
- Easy loading of leaves and small debris
- Includes a dock-and-lock bagging system
- Large 11-inch airless wheels
What We Don’t Like
- Pricey compared to other options
- The included bottle of oil isn’t enough
Product Specs
- Engine: 301cc gas engine
- Branch capacity: 3 inches
- Weight: 140 pounds
The best all-around wood chipper we tested was durably built, easy to operate, and tackled the toughest branches without bogging down. It also featured a compact design that made it easy to transport and store. A 301cc gas engine and dual-knife chipper disc allow the Earthquake K33 chipper shredder to tackle branches up to 3 inches in diameter. Four hammer assemblies (two J-hammers and two tri-hammers) on the shredder make quick work of leaves, pine cones, smaller sticks, and other yard waste.
The big, powerful engine is the key to this chipper’s success. It started on the first pull and produced more than 13 foot-pounds of torque, while the other gas models in the test group averaged just over 11 foot-pounds. With that kind of power, the Earthquake K33 did an outstanding job chipping the thickest branches that bogged down or stalled out the other chippers.
When it came to shredding, we liked that the hopper opening was just 35 inches high, whereas some of the others were over 40 inches high. The lower height made it easier to load, especially when we were dumping large quantities of debris from a container. To offset the low height and still allow for leverage to make transport easy, the handlebar attaches at an angle so that it is higher than the rim of the hopper.
The debris bag worked great, too. Rather than relying on a drawstring as most models did, this one uses a locking bracket with its own handle. A support rod holds the bag open so that it fills all the way, with no need to reposition or shake down the material. When it’s full, the handle rotates off the mounting bracket for transport, and a heavy-duty zipper on the opposite end facilitates fast disposal.
We felt that the performance and build quality warranted the premium price for this wood chipper. Although it’s not the cheapest model available, the Earthquake K33 would make a smart pick for heavier use on larger properties.
Get the Earthquake wood chipper at Amazon, Lowe’s, or Mowers at Jacks.
Best Bang for the Buck
Sun Joe CJ601E Electric Wood Chipper
What We Like
- Shreds branches up to 1.5 inches thick
- Strong 14A electric motor
- Upright configuration saves space in storage
What We Don’t Like
- Not made for shredding leaves or soft, pliable stems
- Operates more slowly than other electric chippers
Product Specs
- Engine: 14 amp (A) corded electric
- Branch capacity: 1.5 inches
- Weight: 25.4 pounds
For those who want to save money when cleaning up a small yard, Sun Joe’s 14A electric wood chipper could be considered thebest budget wood chipperaround. This affordable small wood chipper uses an electric motor that runs at speeds up to 4,300 revolutions per minute (rpm). As a light-duty chipper, it won’t clear fallen trees or do heavy landscaping work, but it cuts sticks and limbs up to 1.5 inches thick and produces usable mulch for the garden or yard. When the job is done, its compact, upright design won’t take up a lot of room.
This electric chipper has the lowest average price of all the models we tested, making it a smart choice for budget shoppers with limited storage space. Setup and start-up took about 15 minutes, and all tools were included in the box. We also noticed right away that this chipper was even lighter than the other electric models, weighing in at just over 25 pounds. The stated reduction ratio is 16:1 (to reduce a volume equal to 16 bags of debris down to one).
After a half hour of grinding branches, we noted that this Sun Joe model operates somewhat slower than other electric chippers and produces larger particles. In 30 minutes of chipping a mix of green and woody branches, it produced approximately 15 gallons (three 5-gallon buckets full) of chips. The motor strained a few times but never jammed, so we didn’t get to try out the jam-clearing function in a real-world scenario. The compact, upright build; strong performance; and maintenance-free design make this an easy choice for everyday use.
Get the Sun Joe wood chipper at Amazon, Lowe’s, or The Home Depot.
Upgrade Pick
DK2 OPC503 3-Inch Disk Chipper Shredder
What We Like
- Professional-grade Kohler gasoline engine for durability
- Large hopper capacity and lower height for easier loading
- Air-filled off-road tires and removable ATV towing hitch
- Drop stand and locking wheels
What We Don’t Like
- Horizontal configuration takes up more storage space
- Top discharge configuration can become clogged with fine debris
Product Specs
- Engine: 7 horsepower (hp) 208cc Kohler Command Pro gas engine
- Branch capacity: 3 inches
- Weight: 187 pounds
The towable DK2 chipper shredder features a 7 hp 208cc Kohler Command Pro engine and dual high-strength steel-carbide cutting blades for reliable performance in tough conditions. Pneumatic off-road tires, a removable ATV towing hitch, and a drop stand make it easy to access worksites on difficult terrain. The wheels lock in place for added safety while chipping. An extra-large hopper and branch auto-feed chute placed at a comfortable height make it easier to load composting materials, yard waste, brush, and branches up to 3 inches in diameter.
After about a half hour of easy assembly, we fueled up the DK2 chipper shredder and moved it in place for testing. The large air-filled tires and hand-truck configuration made it the easiest gas-powered model to move manually; the added convenience of the removable tow bar was icing on the cake. Locking the wheels in place for operation required removal of the wheel pins from the end of the axle, sliding the wheels outward on the axle, and reinstalling the pins through the wheels and axle. In practice, this was only slightly awkward and less complicated than it may sound. The machine started on the first pull and ran smoothly throughout the test.
We operated the chipper for a half hour, feeding it a combination of green and dried hardwood branches, sunflower stalks, cornstalks, brush, and dried leaves. We really liked the wide mouth and comfortable height of the chute at just 36 inches high. It made it super easy to load leaves and other fine-textured materials. Even the largest, driest branches presented no problem. However, we did note that some of the fine material fed through the hopper accumulated at the base of the discharge chute. It did not clog the flow, but we recommend occasionally checking for excessive buildup during the course of a workday. Overall, this was the most pleasurable chipper shredder we tested. It was very easy to maneuver, powerful, and relatively quiet compared to competitors.
Get the DK2 wood chipper at Tractor Supply Co. or The Home Depot.
Best for Composting
Earthwise Electric 15-Amp Corded Chipper Shredder
What We Like
- Powerful exhaust-free operation
- Includes a 1.2-bushel collection bin
- Processes large branches
- Lightweight yet durable construction
What We Don’t Like
- Limited working range without extension cord
- Shallow plastic hopper is somewhat flimsy
Product Specs
- Engine: 15A corded electric motor
- Branch capacity: 1.75 inches
- Weight: 30 pounds
When processing organic waste for composting, a clean, quiet electric chipper makes sense. The Earthwise 15A electric chipper grinds sticks and branches up to 1.75 inches in diameter and other yard and garden waste into smaller, more uniform particles for fast, efficient composting. It requires no gas or oil and virtually no maintenance. The included 1.2-bushel plastic collection bin makes it easy to capture chips, and the slim design with rear wheels makes for easy transport.
The Earthwise electric chipper was the easiest to assemble of all the models we tested, taking only about 10 minutes. However, we didn’t love the lightweight plastic snap-in-place hopper since the tabs lined up with difficulty and the assembled hopper was too easy to knock off while working. On the other hand, we really liked the plastic collection bin that simply slides into place and backs out like a drawer.
Feeding a wide range of such materials as plant stalks and woody branches was a breeze, and the included tamper tool helped us safely feed smaller items. The motor operated quietly, unfazed by even the largest, driest woody material, and the finished chips were quite uniform in appearance. We filled the collection bin within the half-hour testing time frame. The strong electric motor, compact build, and generously sized collection bin make this an easy choice for composting enthusiasts.
Get the Earthwise wood chipper at Amazon, The Home Depot, or Walmart.
Best with Leaf Vacuum
Troy-Bilt CSV060B Chipper Shredder Vacuum
What We Like
- Excellent versatility; chips, vacuums, shreds, and bags
- Gas engine reduces user fatigue
- 24-inch vacuum width
- Onboard vacuum hose reaches into tight spots
- Accepts branches up to 1.5 inches in diameter
What We Don’t Like
- Requires more storage space than other chipper shredders
- Does not work well in natural areas or tall grass
Product Specs
- Engine: 163cc gasoline engine
- Branch capacity: 1.5 inches
- Weight: 125 pounds
Anyone looking to win “Tidiest Yard in the Neighborhood” will want to look into Troy-Bilt’s chipper-shredder-vacuum combo. With its 24-inch vacuum opening, leaf removal is as simple as walking across the lawn. Need to collect a few leaves blown beneath the shrubs or a pile near the front-door vortex? Just detach the 8-foot-long 7-inch-diameter vacuum hose and it will reach them. If a few sticks fell from the shade tree, simply insert them into the 1.5-inch chipper feed chute.
This machine operates somewhat like a push lawn mower. The deck height is adjustable for optimal leaf pickup. It rolls smoothly on 11-inch rear wheels and 8-inch front wheels. The cast-aluminum impeller is powered by an easy-starting California Air Resources Board (CARB)–compliant 163cc engine. It turns eight bags worth of yard waste into a single bag of chips and collects them in the onboard 2-bushel felt bagger.
This Troy-Bilt model arrived mostly assembled, with the exception of the handle, bagger, and hose. Installing those took about 15 minutes. Then we added oil and gas, adjusted the deck height, and started testing.
We found that the Troy-Bilt exhibited good suction, easily picking up dry or damp leaves, small pine cones, and twigs from the lawn, and the hose feature sucked up matted debris from beneath shrubs. The 1.5-inch chipper feature operated smoothly and efficiently for the most part. We tested it with both green wood and dried hardwood branches, though strongly curved and crooked branches did need to be broken into short pieces or tossed aside in a few cases.
The weight of the engine and deck countered the weight of the debris bagger quite well until the bag was mostly full. Emptying the bagger onto the ground was easy enough, but transferring the chips to a disposal bag was awkward. This machine could really help those who live where summer storms regularly leave debris in the yard or where autumn leaves fall over an extended period of time. It could also boost productivity during spring cleanup.
Get the Troy-Bilt wood chipper at The Home Depot, The BuildClub, or Troy-Bilt.
Best Heavy-Duty
Champion Power Equipment 3-Inch Chipper Shredder
What We Like
- Powerful 224cc engine and dual-blade chipper
- Extra-large shredder hopper handles debris up to 0.5 inches thick
- Branch feed chute accepts straight limbs up to 3 inches thick
- Hand-truck style makes it easy to maneuver over uneven terrain
What We Don’t Like
- Tall stance makes loading more difficult
- Handle built into the hopper rim with no padding or finger molding
Product Specs
- Engine: 224cc Champion gasoline engine
- Branch capacity: 3 inches
- Weight: 135.6 pounds
The ruggedly built Champion Power Equipment 3-inch portable chipper shredder proved to be the best heavy-duty wood chipper in our tests. A clean CARB-compliant 224cc Champion gas engine drives the chipper’s steel blades. This chipper grinds the equivalent of 20 bags of yard debris to fit into one bag. The large hopper is suitable for shredding fine debris like twigs, leaves, and other material smaller than 0.5 inches thick, while the branch feed chute accepts limbs up to 3 inches in diameter. The discharge chute features an adjustable angle top and comes with an easy-to-use 2-bushel drawstring collection bag for fast, easy cleanup.
As with the other models we tested, we set aside 30 minutes and a large pile of branches, brush, and leaves to test the Champion chipper shredder. After 45 minutes of easy assembly, we added gas and oil before going to work. The tall height of the hopper rim, which is where the transport handle is located, was a help and a hindrance. Because the wheels are on the same side of the machine as the handle, it easily maneuvers like a hand truck over all kinds of terrain, and the tall height provides welcome leverage. Later on, however, we realized that the 50-inch-tall hopper was less comfortable for loading debris compared to models with lower hoppers.
The engine started on the first pull of the recoil cord. We were impressed by the smooth operation and grinding power provided by the big gas engine. This was the largest gas engine in our test lineup. The automatic feed branch chute fed really fast, even with dry, large-diameter hardwood. The hopper, as noted earlier, was a bit too high for comfort but was wide enough to hold lots of material. The machine never clogged or showed signs of struggle with the workload. We also noted the machine’s small footprint, which makes it ideal for saving space in storage. This is a great choice for making fast work of occasional tough cleanup jobs.
Get the Champion Power Equipment wood chipper at The Home Depot.
Also Consider
Predator 6.5 HP 212cc Chipper Shredder
What We Like
- Affordable and effective for medium-duty cleanup
- Easy to load with leaves and small debris
- 2-bladed chipper flywheel makes quick work of larger branches
- Includes discharge collection bag
What We Don’t Like
- Less powerful engine
- Can get bogged down with tougher branches
Product Specs
- Engine: 212cc gas engine
- Branch capacity: 3 inches
- Weight: 120 pounds
No need to overspend on a seldom-used specialty tool. The Predator chipper shredder is value priced and delivers more chipping capability than electric models, along with the freedom of movement that only comes with gas-powered equipment. In terms of its overall build, it mimics our top pick but comes with a smaller 212cc engine and a drawstring debris bagger.
We assembled the Predator wood chipper in about 45 minutes, and other than having difficulty trying to read the tiny lettering used in the instructions, assembly went smoothly. This chipper does not come with engine oil, so be prepared with 2 quarts of 10W-30. Immediately after fueling up the first time, it started on the third pull, but going forward the engine started on either the first or second pull every time.
This chipper comes equipped with air-filled tires. For us, that was a good thing, as they rolled easily across all types of terrain, including wet ground. However, users will need to be cautious to prevent punctures. Another unique feature was the wheel brakes that could be locked for safety while chipping.
This chipper was a bit underpowered for branches thicker than about 2 inches. When we fed it larger material, the engine consistently bogged down, and in three cases stalled out. It was not a great performer compared to the other gas models we tested, but it was several hundred dollars cheaper on average. As a step up from electric chippers, the Predator wood chipper was a lot faster, more powerful, and generally more convenient for working anywhere on the property. Budget-conscious shoppers in need of a light- to medium-duty wood chipper will find good value here.
Get the Predator wood chipper at Harbor Freight.
Jump to Our Top Picks
How We Tested the Best Wood Chippers
Our testing observations and comparison started with unpacking and assembling the chippers. All of the electric wood chippers came together in about 15 minutes as they were all comparatively lightweight and compact. While basic, disposable tools were included in the packaging; however, using personally owned tools ought to make the job go faster and easier. All of the electric chippers require a heavy-duty 12-gauge extension cord to avoid tripping the circuit breaker during operation.
Assembling each of the gas-powered chippers took 45 minutes to 1 hour and required installation of the hopper, branch chute, safety guards, discharge chute, wheels, and standing brace. These machines all weigh more than 100 pounds, so it’s a good idea to have a helper. Again, the included tools will get the job done, but using ones from a personal tool kit makes the process more comfortable. The packages included engine oil and gasoline that must be added before operation.
After assembly, we transported each of the chippers across the lawn to the worksite. In so doing, we noted that the small plastic wheels on the electric chippers provided the most stability on solid, flat ground. The larger hard wheels on the gas machines worked fine on average lawns but caused some struggles on sloped, uneven surfaces. The towable DK2 chipper, which includes a handle for moving by hand, was the easiest to move on rough ground.
In general, chippers with wheels on the same side of the machine as the handle—what we called a “hand-truck” configuration—were easier to maneuver than those with wheels and handles on opposite sides of the machine, like a wheelbarrow. The wheelbarrow configuration requires the user to lift the handle and bear more of the machine’s weight versus the hand-truck configuration, which transfers more weight to the wheels.
Finally, we set up and operated each chipper for 30 minutes. During operational testing, we fed each model a combination of large and small branches, including green wood and dried wood, and dry leaves (when applicable) to observe the full range of functionality. In addition to the machine’s ability to chip, we observed chip consistency, working stability, operator comfort, and noise level from a purely subjective standpoint to help determine our preferences and recommendations.
We also spoke to Kaustubh Deo, president of Blooma Tree Experts, a tree care company based in Seattle, Washington, featuring International Society of Arboriculture (ISA)–certified arborists with over 17 years of experience. He says that once you’ve purchased a chipper, “Don’t forget to follow the maintenance instructions in the guides. Make sure you keep the chipper knives sharp and rotate them.” He also adds this expert tip: “Rental shops that rent out chippers should be able to sharpen chipper knives for you.”
What to Consider When Choosing a Wood Chipper
Before buyers choose a wood chipper for their yard cleanup needs, they’ll want to take a few minutes to educate themselves on the most important shopping considerations for these tools.
Types of Wood Chippers
Wood chippers fall into three main types based on their power source: electric, gas, and PTO.
Electric
Electric wood chippers often look a lot like golf bags. These compact machines run quieter than either gas or PTO chippers, but they often lack the power and capacity needed to deal with material larger than 2 inches in diameter.
For small branches and yard trimmings, an electric wood chipper does the trick. They’re reasonably priced, lightweight, and easy to use. Plug them into a standard outlet, and they’re good to go.
Gas
The most common residential models, gas wood chippers are larger, louder, and produce gasoline exhaust. Gas-powered wood chippers generally employ 4-cycle engines from 150cc to 250cc and produce 7 to 10 hp. To find the models with the lowest exhaust emissions, look for the CARB-compliant label. CARB adheres to the highest emission standards in the United States.
More powerful than electric options, gas chippers need not sit near an outlet and won’t tether the user to an extension cord. Situated in the middle of the price range for chippers, gas-powered options cost more than electric ones but are not quite as much as PTOs. Gas chippers can typically handle material of more than 3 inches in diameter.
PTO
PTO refers to the drive shaft on the wood chipper, through which it attaches to a splined output shaft on a tractor, mower, or truck. Through this connection, the PTO wood chipper draws energy from the engine of the vehicle. This method of energy supply makes PTO wood chippers more effective than their gas or electric counterparts. They can cut through more material at a faster rate.
The best PTO wood chippersmake an excellent choice for anyone who lives on a large plot of land. They cost more than either electric or gas chippers, and they require a compatible vehicle to work. These machines are much larger and less convenient for average home landscapes. Although professionals will want to findthe best commercial wood chipper, we did not test PTO-driven models.
Bag Capacity
Not all wood chippers use bags or bins to gather the chipper refuse. Those who are looking for one that comes with a bag or bin will want to consider the storage container’s capacity. Larger bags make a great choice if users plan to use the wood chipper for a big cleanup project.
Keep in mind that the larger the bin, the heavier and more cumbersome it will be to empty. If weight is a concern, a model with a smaller bag or bin will require more frequent but easier emptying—a smart choice to avoid the risk of injury that comes with lifting a heavy bag.
Cutting Blades
Wood chippers use one or both of two cutting-blade types to grind up yard waste: fixed blades, also called knives; or hinged blades, sometimes called hammers. The most commonly used material for both blade types is hardened chromium-alloy steel. Steel tends to bend rather than chip and may be resharpened numerous times before it needs to be replaced.
A wood chipper’s ability to cut through material fed into the machine is a key factor. Shoppers will want to think about how they’ll use their wood chipper. An electric wood chipper will be fine for small branches and clippings. These devices usually shred branches up to 2 inches in diameter across the widest point. Those dealing with larger material will want to consider a gas or PTO chipper, which may be able to shred materials up to 4 inches in diameter. Some commercial wood chipper models cut through branches up to 7 inches in diameter, though these cost significantly more than the average residential wood chipper.
Torque
A wood chipper uses a powerful motor to turn a series of cutting and grinding blades with enough force (torque) to cut through solid wood quickly. Torque describes the rotational force, typically measured in foot-pounds, that a motor imparts on an object. In wood chippers, torque forces the blades to cut through any appropriate material pushed into the hopper. Most residential wood chippers get a torque rating between 7 and 15 foot-pounds.
Shredding Chute
Many chippers include two different chutes for feeding material into the machine: a long, narrow branch chute for thick branches; and a wide shredding chute, also known as a hopper. Shaped like a broad funnel, the shredding chute compresses bundles of thin pliable twigs and branches so that they can contact the blades more efficiently. This separate chute shreds less rigid material, such as weeds, leaves, grass, and other soft plant waste, so it can come in handy for common yard work.
While a leaf shredder would tackle this job, a wood chipper with a built-in shredding chute gets the same results in a more cost-effective and space-saving way. However, a wood chipper/leaf shredder combo will cost more than a model without the shredder. But this combo may be considered the best residential wood chipper option.
Reduction Ratio
The reduction ratio of a wood chipper indicates how small the material will be after it has passed through the wood chipper. For example, if a wood chipper has a reduction ratio of 8:1, it will reduce the material down to an eighth of its original size. Another way to think of it is that it can reduce eight bags of yard waste to fit into one bag. The reduction ratio of most wood chippers typically ranges from 8:1 to 20:1.
Chippers need more power and energy to cut materials into smaller pieces. As the engine size increases, so does the price of the chipper. If users don’t need to cut material into tiny pieces, they can save money by choosing a chipper with a lower reduction ratio.
Weight and Mobility
Weight and mobility rank as key considerations in the purchase of a wood chipper, but many shoppers overlook these factors. Thebest small wood chipper for the extent of yard work is typically the ideal purchase. A wood chipper that’s too big or doesn’t have decent wheels can be very difficult to move around the yard, which reduces overall yard cleanup efficiency.
Look for wood chippers that come with sturdy stands and large wheels capable of moving over grass, paving stones, deck boards, sticks, and any other obstacles on the ground. Keep in mind that the heavier a wood chipper, the more difficult it will be to move across uneven ground or up steep inclines. For larger properties with fewer trees, a lightweight wood chipper may be ideal because users can move it around the yard quickly and effectively without significant fatigue.
How to Use a Wood Chipper Safely
There’s a reason wood chippers make frequent appearances in horror films. This incredibly dangerous yard tool should only be operated by an experienced user who is sure to take the following safety precautions:
- Read the manufacturer’s instructions thoroughly before using a wood chipper.
- Use hearing protection, eye protection, hand protection, and a hard hat.
- When users are feeding branches into the wood chipper, they shouldn’t force stubborn branches into the blades. Users will want to let the chipper pull branches in while they stand to the side to avoid flying debris.
- Keep hands and any other body part away from the wood chipper when it is connected to a power source. A simple accident could result in severe injury or death.
- Users will want to disconnect the power and the spark plug before performing maintenance to ensure that the wood chipper does not start up while they’re vulnerable to the blades.
The Advantages of Owning a Wood Chipper
Yard-waste disposal is the greatest benefit of owning a wood chipper. Bushes require regular trimming, trees may need pruning, and old trees shed dead branches frequently, which can create a substantial pile of wood and yard material to remove. A wood chipper makes it easy to use or dispose of that debris.
Wood chippers are also a useful tool to reduce the potentially harmful emissions produced by burning chemically treated wood. Instead of releasing these toxic fumes and unpleasant odors into the air, wood can be mulched and used to protect plants.
Besides mulch, users may also create pressed wood for carpentry projects or biofuel for certain cars or other machinery.
To recap, a wood chipper:
- Quickly process yard waste into small, easily managed chips;
- Provides an environmentally friendly means of disposing of yard waste; and
- Produces useful materials like mulch, pressed wood, and biofuel.
FAQs
Q. How big a wood chipper do I need?
Electric wood chippers are made for processing small and midsize twigs and branches. For this purpose, most users only require a wood chipper with a 1.5-inch cutting diameter. But if you have older trees on your property, or wish to grind up leaves and other finely textured material, you may want to have a larger gas-powered chipper. These models feature a hopper for processing fine materials and a larger branch chute to chip branches up to 3 inches in diameter.
Q. How do you use a wood chipper?
Choose a level location for the machine to sit. Once it is in position, set the parking brake on any equipment used to haul it and then adjust the chip deflector and chip chute to direct chips to your desired location.
Check the chipper for any debris before starting. If it is clear, start it up. If it isn’t, you’ll want to disconnect the spark plug and clean it out before turning it on. Never perform maintenance of any kind without disconnecting the power.
With the engine started, feed material into the wood chipper, blunt end first. The machine will begin chipping away, allowing you to back off and move to the side of the chipper so you don’t get hit by pieces that may shoot out. Once you have finished chipping, clean up the wood chips with a leaf blower or leaf vacuum and either dispose of them or put them to good use.
Q. How do you feed a wood chipper?
To feed material into the wood chipper, begin with the blunt end and carefully guide it into the chipper. You may also want to include a mixture of dry and green limbs so that the moisture from the green branches can help to cool and lubricate the wood chipper’s knives.
Q. How loud is a wood chipper?
A wood chipper’s noise output generally falls between 85 and 110 decibels, which is more than enough to warrant hearing protection.
Q. How much does a wood chipper cost?
Wood chippers range in price from about $150 to well over $2,000, depending on the type, size, torque, and overall power. Typically, residential wood chippers cost about $200 to $800, though heavy-duty models can greatly exceed this amount.
Q. Can wood chippers shred leaves?
Some wood chippers can also shred leaves, but if you don’t need to chip any wood, it may be better to invest in a dedicated leaf shredder instead. These tools tend to take up less space and they are more affordable.
Q. Is it better to chip wood when it is dry or wet?
Dry wood is harder and causes more wear and tear on the chipper’s blades, so it’s best to do wood chipping when the wood is cool and moist.
Q. What shouldn’t I put in a wood chipper?
Keep yourself safe and protect your equipment by only chipping branches within the size range your machine is built to process. Never place branches that may have nails or screws, lumber, excessively sappy wood, long vines, palm fronds, or other fibrous materials into the chipper.
Q. How do you clean a wood chipper?
Start any maintenance process by stopping the engine (ensuring all moving parts have stopped before proceeding) and disconnecting the spark plug wire or power cord to prevent accidental start-up.
To clean the wood chipper, begin by removing the flail screen and any larger debris. Clean the flail screen separately, and then clean the chute and around the muffler with water and a brush or dry cloth. Avoid using a high-pressure spray of water because it can contaminate the fuel system.
Meet the Tester
Mark Wolfe is a writer and product tester with a background in the nursery and landscaping industries. For more than 20 years he mowed, edged, planted, pruned, cultivated, irrigated, and renovated beautiful landscapes. Now he tests and writes reviews about the latest outdoor power equipment, hand tools, lawn care products, and other outdoor-living goods.
Additional research provided by Timothy Dale and Tom Scalisi.
The post The 7 Wood Chippers That Cut Best in Our Tests appeared first on Bob Vila.
]]>The post The Best PEX Crimp Tools for Plumbing Projects, Tested appeared first on Bob Vila.
]]>PEX (cross-linked polyethylene) tubing is widely used in today’s plumbing and HVAC systems because it’s flexible and easy to work with if you have high-quality PEX crimp tools. We researched more than 20 PEX crimpers, and we chose four for hands-on testing. While all performed well, our favorite is the Iwiss iCrimp F1807 kit for its durability and multipurpose versatility.
In addition to the ones we tested, we’re featuring several additional PEX piping tools that we feel would be good picks for anyone working with PEX tubing. Keep reading to find out what to look for when shopping for tools for PEX plumbing, and find out how the following earned a spot on this lineup of the best PEX crimp tools.
- BEST OVERALL: Iwiss iCrimp F1807 All-In-One Crimping Tool Kit
↓ Jump to Review - RUNNER-UP: Plumbflex Crimper Tool Kit
↓ Jump to Review - BEST BANG FOR THE BUCK: Iwiss iCrimp CRP1096 PEX Cinch Tool Kit
↓ Jump to Review - BEST MULTIPURPOSE: SharkBite PEX Crimp Tool
↓ Jump to Review - BEST COMPACT: Iwiss iCrimp IWS-FAS PEX Copper Ring Crimp Tool Kit
↓ Jump to Review - BEST MULTISIZE HEAD: Apollo PEX Multi-Head Crimp Tool Kit
↓ Jump to Review - BEST FOR TIGHT SPACES: Iwiss iCrimp Angle Head F1807 PEX Crimp Tool Kit
↓ Jump to Review - BEST PROFESSIONAL: Milwaukee M18 Press Tool Kit With PEX Crimp Jaws
↓ Jump to Review - ALSO CONSIDER: Iwiss iCrimp IWS-C Angle PEX Crimping Tools
↓ Jump to Review
Product Comparison
| Type | Length | Capacity | |
| Iwiss iCrimp F1807 All-In-One Crimping Tool Kit | Crimps | 15.55 inches | ⅜-, ½-, ¾-, and 1-inch PEX pipes |
| Plumbflex Crimper Tool Kit | Clamps | 11 inches | ½- and ¾-inch PEX pipes |
| Iwiss iCrimp CRP1096 PEX Cinch Tool Kit | Clamps | 11.02 inches | ⅜-, ½-, ¾-, and 1-inch PEX pipes |
| SharkBite PEX Crimp Tool | Crimps | 14.5 inches | ⅜-, ½-, ¾-, and 1-inch PEX pipes |
| Iwiss iCrimp IWS-FAS PEX Copper Ring Crimp Tool Kit | Crimps | 12.2 inches | ⅜-, ½-, ¾-, and 1-inch PEX pipes |
| Apollo PEX Multi-Head Crimp Tool Kit | Crimps | 17 inches | ⅜-, ½-, ¾-, and 1-inch PEX pipes |
| Iwiss iCrimp Angle Head F1807 PEX Crimp Tool Kit | Crimps | 13.7 inches | ½- and ¾-inch PEX pipes |
| Milwaukee M18 Press Tool Kit With PEX Crimp Jaws | Crimps | 13.5 inches | ⅜-, ½-, ⅝-, ¾-, and 1-inch PEX pipes |
| Iwiss iCrimp IWS-C Angle PEX Crimping Tools | Crimps | 7.87 inches | ½- and ¾-inch PEX pipes |
Our Top Picks
The best PEX crimp tools on the market are made with effectiveness, ergonomics, and ease of use in mind. Check out our list of the ones we tested plus some additional models we think look great.
Best Overall
Iwiss iCrimp F1807 All-In-One Crimping Tool Kit
Our Ratings: Ease of Use 4.5/5; Performance 5/5; Durability 5/5; Value 5/5
Product Specs
- Type: Crimps
- Length: 15.55 inches
- Capacity: ⅜-, ½-, ¾-, and 1-inch PEX pipes
What We Like
- Accommodates PEX A, B, or C tubing types
- PEX crimp removal tool and pipe cutter included
- Includes a go/no-go gauge
- Hard carrying case included
What We Don’t Like
- Hand strength needed to crimp
If you’ll be installing a lot of PEX, this Iwiss iCrimp kit has everything you need in one place. The kit comes with a crimper; jaws for ⅜-, ½-, ¾-, and 1-inch pipe; a PEX pipe cutter; and a crimp-removal tool. It also features a go/no-go gauge and a wrench for calibrating the crimper. We liked the way all the tools fit nicely into the included hard plastic carrying case for protection.
The Iwiss PEX crimping tool kit is easy to use. We were able to change jaws when we were crimping different sizes of tubing. The long handles make applying sufficient force for crimping relatively easy, but it still takes some hand strength to crimp the rings snugly. The included go/no-go gauge is a definite perk.
After crimping a ring on a PEX fitting, we used the gauge to see if we’d crimped it accurately. The removal tool made it easy to cut through incorrectly fitting crimp rings, and the cutter was a nice bonus because it ensured flush tubing edges that fit smoothly against the shoulders of the copper fittings. This kit gives you everything you need to run PEX tubing.
Get the Iwiss iCrimp F1807 all-in-one PEX crimp tool at Amazon.
Runner-up
Plumbflex Crimper Tool Kit
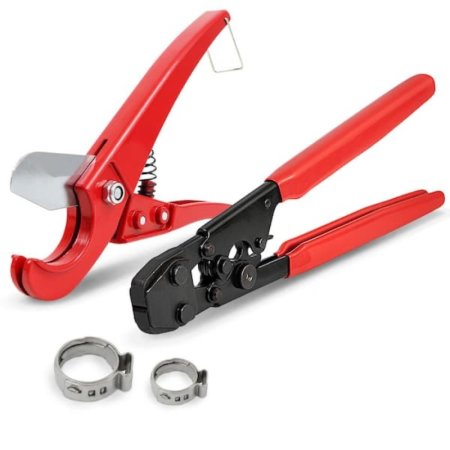
Our Ratings: Ease of Use 4.5/5; Performance 4.8/5; Durability 4.5/5; Value 5/5
Product Specs
- Type: Clamps
- Length: 11 inches
- Capacity: ½- and ¾-inch PEX pipes
What We Like
- Works with cinch rings from different manufacturers
- Includes a high-quality cutter
- Comes with 50 clamps in both sizes
- Attached cinch rings securely in testing
What We Don’t Like
- Doesn’t come with a go/no-go tool
- Not suitable for ⅜- or 1-inch PEX
The Plumbflex PEX crimper is suitable for use with ½- and ¾-inch tubing, the most common sizes used in residential construction. This clamp-type tool performed flawlessly in our tests. We used it to attach stainless steel cinch clamps to both sizes of PEX tubing, and the fittings were snug and secure. Plus, it comes with 50 clamps of each size, so we had plenty to test with.
It doesn’t come with a go/no-go tool, but you can pick one up for under $10 from any home improvement store. We used one of the go/no-go tools that came with another model we tested, and each clamp we applied was right on target.
One of the benefits of a PEX clamp tool (including this one) over a traditional crimp tool is the ability to reach into tight spots because there’s no need to spread the handles as far. We tried out the Plumbflex on a few cinch rings we had from a different manufacturer, and it worked just as well.
Another perk is the PEX cutter that comes with the clamp tool. It cuts the tubing straight and flush so the edges fit smoothly against the shoulders of the brass crimp fittings. If you won’t be installing narrower ⅜-inch or larger 1-inch tubing, the Plumbflex is a quality pick.
Get the Plumbflex PEX crimp tool at The Home Depot.
Best Bang For The Buck
Iwiss iCrimp CRP1096 PEX Cinch Tool Kit
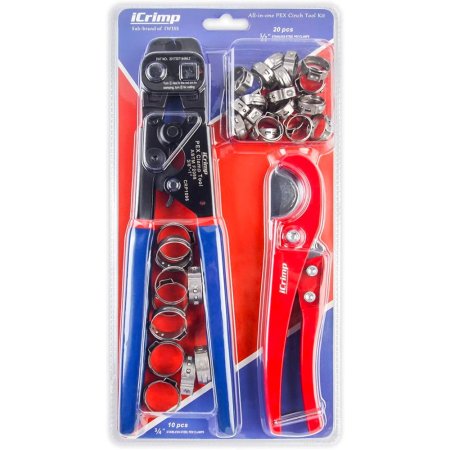
Our Ratings: Ease of Use 4.5/5; Performance 4.5/5; Durability 4.5/5; Value 4.8/5
Product Specs
- Type: Clamps
- Length: 11.02 inches
- Capacity: ⅜-, ½-, ¾-, and 1-inch PEX pipes
What We Like
- Works with multiple sizes of PEX
- Comes with 30 cinch rings
- Compact size for working in tight spaces
- Comes with good cutter
What We Don’t Like
- No storage case included
- Complicated removal function
If you’re looking for a budget-friendly tool for securing stainless steel cinch rings, look no further than the iCrimp PEX cinch tool. This clamp cincher works for any size PEX and comes with 30 clamps, so you can get started right away. It performed well in our tests, but it took a bit more hand strength to completely snug the cinch rings than the Plumbflex model.
Still, it did a good job and comes with a top-notch PEX cutter. The only downside was that the removal feature of the tool didn’t work well for us. We followed the instructions for adjusting the tool from the clamping feature to the removal feature (which requires about five steps), and then we tried to cut the tabs, but all we got were smashed tabs. Maybe we didn’t do it right (that’s likely), but it seems like a complex process and simpler to just use a dedicated removal tool.
One additional thing to note is that the iCrimp cinch tool cannot be calibrated. However, we found it well calibrated right out of the package, and it should be fine for completing most PEX plumbing projects. This tool lets you make high-quality connections at an affordable price point.
Get the Iwiss iCrimp CRP1096 PEX crimp tool at Amazon.
Best Multipurpose
SharkBite PEX Crimp Tool
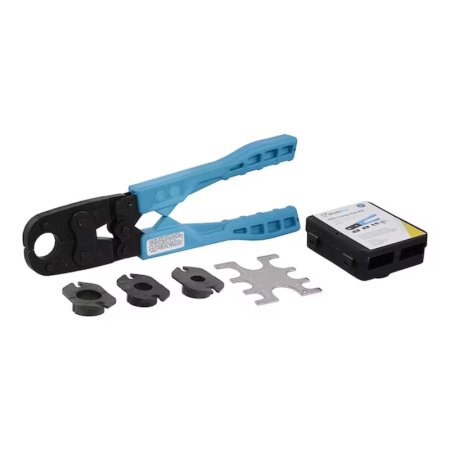
Our Ratings: Ease of Use 4.8/5; Performance 5/5; Durability 5/5; Value 4.8/5
Product Specs
- Type: Crimps
- Length: 14.5 inches
- Capacity: ⅜-, ½-, ¾-, and 1-inch PEX pipes
What We Like
- Consistently made secure connections
- Easy-to-change jaws
- Go/no-go gauge included
- Mini hard case
- Ergonomic handles for comfort
What We Don’t Like
- Heavier than some at nearly 4 pounds
- Limited use in tight spots
We’re big fans of traditional push-to-connect SharkBite fittings, so we were excited to test the brand’s crimper tool and weren’t disappointed. At just under 4 pounds, the SharkBite crimper is one of the heavier PEX plumbing tools we tested, but it did a spectacular job of creating a secure connection each time.
We tested it with stainless steel crimp rings, but it’s also designed to accommodate copper crimp rings. Changing jaws on the SharkBite was simple, and it comes with a go/no-go gauge so we could check each ring after crimping to ensure it was correct. It performed flawlessly.
The SharkBite comes complete with a mini hard case that secures the gauge and the jaws, and it fits over the head of the PEX pipe crimping tool. We actually prefer this type of case because it doesn’t take up a lot of space in our tool box, and we can even slip it in a tool belt. The mini case protects the working parts of the tool and keeps the accessories secure.
However, it doesn’t come with a removal tool and is not designed for use in restricted spots—its handles must be completely opened (nearly 180 degrees) to crimp a ring. However, it manages all standard PEX sizes, and the ergonomic handles reduce hand fatigue.
Get the SharkBite PEX crimp tool at Lowe’s.
More Great Options
While we didn’t personally test the following PEX plumbing crimpers, they were on our short list before we selected the ones we wanted to test—and they’re still among our top picks.
Best Compact
Iwiss iCrimp IWS-FAS PEX Copper Ring Crimp Tool Kit
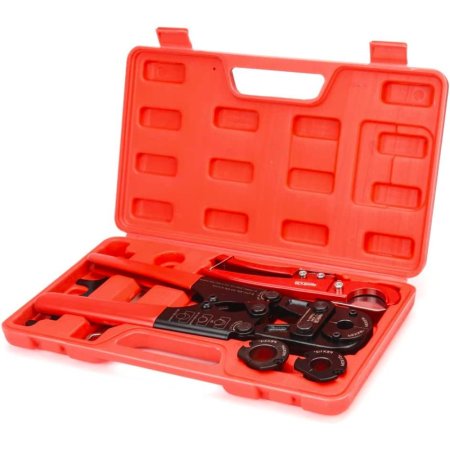
Product Specs
- Type: Crimps
- Length: 12.2 inches
- Capacity: ⅜-, ½-, ¾-, and 1-inch PEX pipes
What We Like
- High-leverage design
- Multiple jaw sizes
- PEX cutter and go/no-go gauge included
- Comes in a hard plastic case
What We Don’t Like
- Shorter handle than comparable options
We know it can be tough to find a compact PEX crimper that fits in a tool box but still provides the leverage required to seal off a PEX joint. But if you’re looking for just that kind of item, check out the Iwiss IWS-FAS PEX crimping tool. This crimper uses a high-leverage design that allows the user to apply enough pressure for a perfect seal despite its compact 12.2-inch design.
This PEX crimping kit is more than just an innovative tool. We like that it comes with the jaws required for crimping ⅜-, ½-, ¾-, and 1-inch pipe, plus a PEX cutter, a go/no-go gauge, and a hard plastic case to carry it all. That’s a lot!
Get the Iwiss iCrimp IWS-FAS PEX crimp tool at Amazon or Walmart.
Best Multisize Head
Apollo PEX Multi-Head Crimp Tool Kit
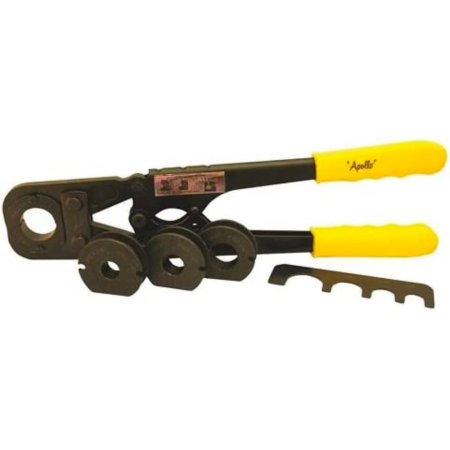
Product Specs
- Type: Crimps
- Length: 17 inches
- Capacity: ⅜-, ½-, ¾-, and 1-inch PEX pipes
What We Like
- 4 sets of jaws
- Go/no-go gauge and wrench included
- Plastic carrying case
What We Don’t Like
- Big, heavy construction
For a heavy-duty crimping tool that can tackle most PEX tubing plumbing projects, we think the Apollo PEX multihead crimp tool kit is worth a look. This tool kit comes with the crimper, four sets of jaws (⅜-, ½-, ¾-, and 1-inch sizes), a go/no-go gauge, and a wrench for adjustments and calibration. The jaws swap out with two hex bolts, which the included wrench also fits.
The Apollo provides plenty of leverage for sealing off plumbing joints, good for creating up to 100 pounds of force. The components pack nicely into the plastic carrying case, keeping everything secure and in one place between projects. The only thing we would like it to include is a PEX cutter to make straight flush cuts.
Get the Apollo PEX crimp tool at Amazon, The Home Depot, or Walmart.
Best For Tight Spaces
Iwiss iCrimp Angle Head F1807 PEX Crimp Tool Kit

Product Specs
- Type: Crimps
- Length: 13.7 inches
- Capacity: ½- and ¾-inch PEX pipes
What We Like
- Suitable for crimping tasks in tight spaces
- Tubing cutter and crimping rings included
- Go/no-go gauge included
- Hard plastic carrying case
What We Don’t Like
- Shorter handles provide limited leverage
- No PEX cutter included
One advantage that PEX fittings have over copper piping is that in-wall repairs in tight spaces are much easier and safer, but they can still be challenging to reach and crimp. This product’s unique offset-head design allows the user to get a grip on any ½- or ¾-inch crimp, even in hard-to-reach places. We think this would be optimal for renovations where the user is retrofitting the plumbing.
This kit’s crimper comes with built-in jaws for ½- and ¾-inch pipe, as well as a tubing cutter and several crimp rings. It also has a go/no-go gauge, alerting the user to calibration issues and potential leaks. All of this gear stores away in a hard plastic carrying case. While we didn’t test this model, we’re familiar with many Iwiss iCrimp PEX plumbing tools, and we’ve never had a problem with any of them.
Get the Iwiss iCrimp angle head PEX crimp tool at Amazon.
Best Professional
Milwaukee M18 Press Tool Kit With PEX Crimp Jaws
Product Specs
- Type: Crimps
- Length: 13.5 inches
- Capacity: ⅜-, ½-, ⅝-, ¾-, and 1-inch PEX pipes
What We Like
- Power PEX crimp tool
- Fast and precise alignment
- Green light to show cycle is complete
- Kit includes charger, 2 batteries, and case
What We Don’t Like
- Bulk makes it challenging to work in tight spaces
- Cutter, ⅜-inch, and ⅝-inch jaws are not included
We’re well aware that using a manual PEX crimp tool all day can result in hand pain. While we’ve never used a powered crimp tool, we think the technology is awesome and we’re looking forward to seeing more manufacturers implement it in the near future.
Milwaukee’s powerful 18-volt press tool kit is the solution many professionals prefer. Spring-loaded jaws provide precise alignment for flawless fitting of all PEX crimp sizes. According to Milwaukee, this tool is 40 percent faster than powered rivals, with a full cycle taking just 3 seconds.
Optimized force means no calibration intervals interrupt work, and no calibration tool is required. A pre-press battery check ensures sufficient charge to complete the crimp successfully, and a green LED confirms this at the end of the cycle. However, there’s no cutter in the kit, and while three sets of jaws are included, the ⅜- and ⅝-inch versions cost extra.
Get the Milwaukee PEX crimp tool at The Home Depot or Amazon.
Also Consider
Iwiss iCrimp IWS-C Angle PEX Crimping Tools
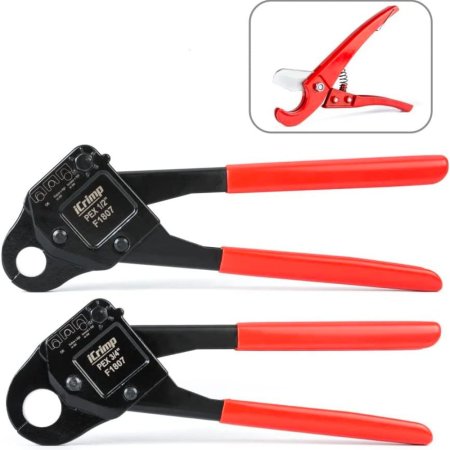
Product Specs
- Type: Crimps
- Length: 7.87 inches
- Capacity: ½- and ¾-inch PEX pipes
What We Like
- PEX cutter included with purchase
- Compact size for tight spaces
- Precalibrated design
What We Don’t Like
- Short handle may be difficult for some users
Occasionally, plumbing projects and repairs get so tight and restricted that they require scaled-down tools to get the job done. For projects like those, we like the iCrimp angle PEX crimp tool combo. This two-pack of PEX crimping tools features a ½-inch crimper and a ¾-inch model, plus a PEX tubing cutter, both sized to easily fit in a standard tool box.
These PEX crimping tools can fit in some tight spots thanks to their compact size and diameter-dedicated jaws. Unlike many other crimp tools, both of these tools come from the factory precalibrated. If you’re looking at making water-supply line repairs or retrofits, we think this is a good pick for getting in those tight spots.
Get the Iwiss iCrimp IWS-C angle PEX crimp tool at Amazon.
Jump to Our Top Picks
How We Chose and Tested the Best PEX Crimp Tools
| Testing Stats | |
| Products tested | 4 |
| Time spent testing | 3 hours |
| Tests performed | 4 |
| Price range | $32 to $750 |
Before selecting the tools we wanted to test, we chatted with Korey Gregory, superintendent at water damage specialists ASAP Restoration in Tempe, Arizona. He stresses that “ineffective PEX crimp tools don’t create a tight enough seal around the ring.”
We then extensively researched and chose to test PEX crimp tools made for PEX A, B, or C with crimps or clamps to suit individual users’ preferences. We selected models for various PEX tubing sizes, including ⅜-, ½-, ¾-, and 1-inch sizes. Several of our picks come from Iwiss, a leading manufacturer of high-quality crimping tools.
In actual testing, we used each tool to securely attach rings or clamps to PEX fittings. We swapped out the jaws (when applicable) and used the accessories that came with the tools to see how well they were made. We used go/no-go gauges to determine whether the crimping tools were securing the fasteners to the correct degree.
During the tests, we awarded points based on a rubric. Afterward, we averaged the points to find our top pick and categorize the other models according to their best uses.
What to Consider When Choosing a PEX Crimp Tool
Gregory offers some additional sound advice: “One of the ways to ensure that you get a quality crimper is to choose ones with longer handles rather than shorter ones. Longer handles help to give you leverage when doing the actual crimping.” He adds, “If you are starting a plumbing business, have wrist problems, or just a huge number of PEX crimps to do, then a powered PEX crimper tool might be worth the investment.”
Types of PEX Crimp Tools
PEX is a flexible tubing that can transport fresh water, hot water, radiant heating, and even sprinkler-system water, making it very popular in residential applications.
These plastic pipes all work the same way, and most of the same joints will apply for all three types. However, their makeup and characteristics vary. One thing to understand is that PEX A, B, and C do not indicate a grade or quality of PEX piping. Those designations simply designate the manufacturing process used to create the pipe.
PEX A
PEX A is the most expensive type of PEX, and it has some desirable properties. For one, even though it comes in rolled coils, PEX A will hold its new shape when straightened, making it easier to install through wall cavities and floors. However, PEX A does have the potential to leach more production-related chemicals, like toluene and methyl tert-butyl ether (MTBE), into the water supply. Also, it has a lower bursting pressure than PEX B.
PEX B
PEX B can cost half as much as PEX A, and that price comes with some advantages and disadvantages. PEX B has a higher bursting pressure than PEX A, and chemical leaching from the pipe is considerably less likely. However, it doesn’t straighten well and it kinks relatively easily, which can make it a bit of a hassle to install.
PEX C
PEX C isn’t very common, and DIYers are unlikely to come across it. The manufacturing process used to create PEX C makes it relatively weak compared to PEX A and B. It’s also less resistant to oxidation, meaning PEX C will wear down through normal usage faster than A and B.
Crimps vs. Clamps
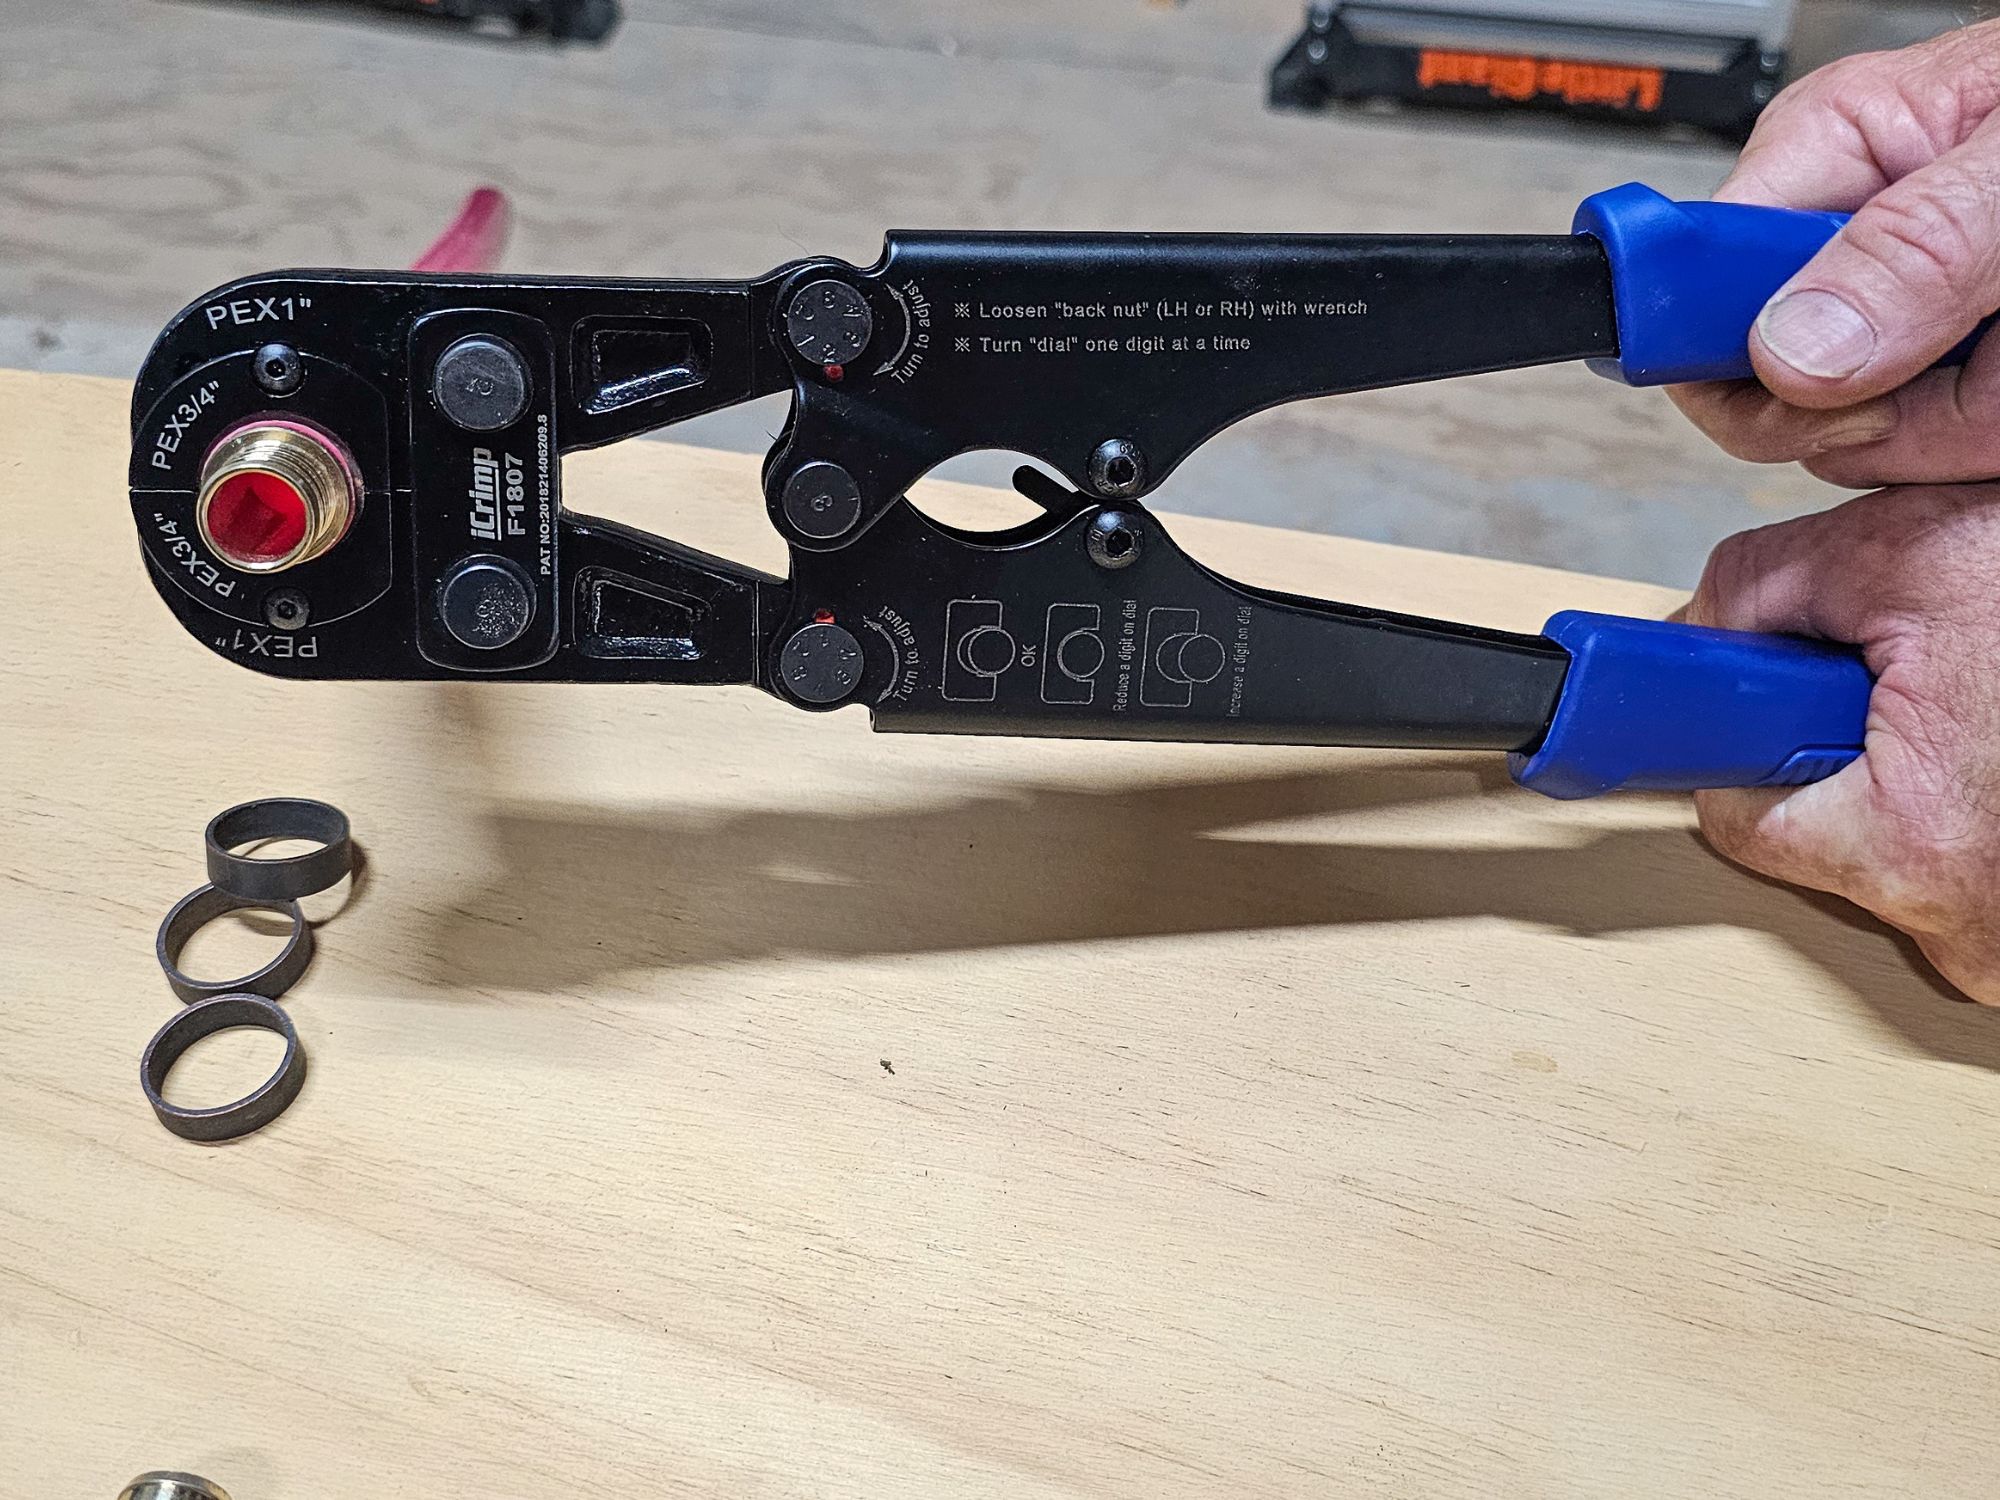
When shoppers are learning about PEX plumbing tools, a key point is that there are crimps and clamps.
- Crimps may be stainless steel or copper crimp rings that slide over a joint, and the crimping tool squeezes the entire ring down onto the barbed fitting underneath. Copper crimps are burlier than clamps, but they’re more susceptible to corrosion.
- Clamps are stainless steel bands with small tabs and locking holes. Clamping tools squeeze a tab that snugs the crimp fitting over the tubing. Stainless steel clamps are easier to install and less likely to corrode, but they’re also much thinner than copper crimps, so they may bend or separate more easily.
Length
For putting strong pressure on a crimp, longer handles are better. The longer the tool’s handle, the more leverage the user can apply to the crimp or clamp, requiring less effort to create a perfect seal. Look for a pipe crimping tool at least 11 inches in length. Since longer-handled PEX piping tools can be slightly awkward, they might have more of a learning curve than shorter-handled ones.
Clamps tend to be easier to secure and require less effort, so handle length isn’t as much of a priority.
Weight
Plumbers and electricians who use these tools regularly will want to look for options between 1 and 9 pounds; most options weigh under 4 pounds. However, heavyweight options may provide more crimping power than their lighter counterparts.
Pipe
Before picking a crimping or clamping tool, know what type of pipe it works for. While many types of clamping and crimping tools work for plumbing joints, not all of them work for PEX pipe.
Some tools work for both copper and PEX pipe, but they generally require additional jaws or PEX crimp fittings. Buying models with added features can get expensive quickly, but for those who do a lot of plumbing, it might be worth the investment to be able to perform multiple plumbing functions with a single tool. Switching a fitting on a clamping tool takes less time than sweating a copper joint with flux and solder.
Capacity
Don’t worry about choosing the PEX crimp tool that is the right size. Because PEX comes in only a few sizes—⅜, ½, ¾, ⅝ , and 1 inch—most clamping or crimping tools made for PEX will do. Swapping between those sizes is usually pretty straightforward.
Electrical and plumbing crimping tools typically have 1-inch jaws that can crimp 1-inch pipe, but their kits come with smaller jaws for tackling smaller pipes. To clamp those smaller pipes, simply open the 1-inch jaws and slip the necessary-size clamping jaws inside.
Clamping tools are often one size fits all. They slide over the knob on the clamp and squeeze it, and those knobs are relatively universal in size.
Gauge
The point of any plumbing job is to avoid leaks. With PEX crimps, it can be difficult to tell by eye or feel if there’s a good seal. Some tools come with go/no-go gauges to help ensure each fitting is tightly sealed.
These gauges have U-shaped cutouts meant for specific pipe sizes. To use a go/no-go gauge, slide it over the joint. Check it from several angles. The gauge should slip over the crimp about halfway before stopping. If it slides over the crimp—or not at all—the joint may have problems when pressurized.
Calibration
Over time, clamping and crimping tools can fall out of perfect calibration. Applying pressure many times throughout a plumbing project can stretch the jaws, in which case they’ll need a little tightening.
Most PEX crimp and clamp tools have adjustment screws, and they often come with the wrenches required to tighten them. Use these to tighten the tools back to the ideal settings. Many have adjustments on both jaws, allowing for calibrating to a perfectly round result.
The gauge can also determine if the jaws are overtightened, which can just as easily lead to a leak.
Removal Function
Many of the best PEX clamp tools have removal functions for separating clamps from the pipe. Don’t expect to reuse these clamps or crimps, though, as the removal process either cuts them or damages their integrity. However, the fitting underneath should be completely intact.
Removing crimps requires an entirely different tool with a blade for cutting through the crimp rings.
FAQs
PEX B is considered the best all-around PEX pipe. It leaches far fewer chemicals and has a higher bursting pressure. The disadvantage is that it can be harder to work with.
They can fail, but it’s usually due to human error. If the clamp is applied crookedly or unevenly, it will leak. To ensure that the clamps stay in place, check that the clamp or cinch type is compatible with the pipe being cinched.
You cannot get a solid, accurate, leak-free joint with pliers, which can’t apply even pressure all around the crimp. Though this can help with some of the more nitty-gritty problems, a proper PEX pipe crimping tool is the best option.
PEX can run through floor joists, stud walls, or almost anywhere else that would normally hold plumbing (according to local code).
PEX should not run directly to an electric or tankless water heater, but it can run to a copper riser 18 inches or more in length, coming directly from the water heater. But be advised that the PEX tubing must be 6 inches away from the exhaust vent of the heater.
PEX may be able to last more than 100 years. While it hasn’t been around long enough to verify that longevity, long-term testing indicates it could last a century before breaking down. However, it’s important to note that hungry rodents can also cause damage.
Typically, you will squeeze the crimper handles until they’re fully closed. At that point, the crimp is complete. Don’t stop squeezing before the handles are closed or the connection may leak.
PEX should be crimped or clamped at each fitting, but it should only take one solid squeeze of the handles to complete the crimp if the tool is properly calibrated.
Meet the Tester
Glenda Taylor is a product tester and writer specializing in the construction, remodeling, and real estate industries.
Additional research provided by Tom Scalisi.
The post The Best PEX Crimp Tools for Plumbing Projects, Tested appeared first on Bob Vila.
]]>The post The Best Soils for Raised Beds in Your Garden appeared first on Bob Vila.
]]>For plants, soil provides another vital element. It doesn’t just deliver nutrients to hungry fruits, vegetables, and flowers; good garden bed soil increases the airflow around plant roots to avoid compaction and improve drainage as it retains moisture for basic hydration.
Gardening with raised beds provides more control over the soil. However, the best soil for raised beds depends on the plants you want to grow. Many soil types are suitable for a variety of uses, while others are more specific in their purpose. To bolster our own research, we interviewed Elizabeth Jones, the seed librarian at the Jefferson Public Library in Jefferson, Georgia, and owner of Excel at Gardening, who gave us her expert advice on soil.
Our favorite was FoxFarm’s Happy Frog potting soil for its organic mix of pH-balanced ingredients. Read on for more of the top soils for raised beds and some things to keep in mind as you shop.
- BEST OVERALL: FoxFarm Happy Frog Potting Soil
- RUNNER-UP: Sunday Natural Moisture Potting Soil Mix
- BEST BANG FOR THE BUCK: Mountain Valley Minute Soil Compressed Coco Coir
- BEST ORGANIC: Organic Plant Magic Compressed Potting Soil
- BEST TOPSOIL: Michigan Peat Garden Magic Top Soil
- BEST COMPOST: Charlie’s 10-Pound Compost
- BEST PEAT MOSS: Hoffman Canadian Sphagnum Peat Moss
- BEST VERMICULITE: Ferry Morse Professional Grade Vermiculite
- BEST FOR VEGETABLES: Coast of Maine Castine Organic Raised Bed Mix
- BEST FOR HERBS AND FLOWERS: Miracle-Gro Raised Bed Soil

Product Comparison
| Ingredients | Quantity | Organic? | |
| FoxFarm Happy Frog Potting Soil | Earthworm castings, bat guano, and aged forest products | 2 cubic feet |  |
| Sunday Natural Moisture Potting Soil Mix | Sphagnum peat moss, peat humus, coir, perlite, ground limestone | 20 quarts |  |
| Mountain Valley Minute Soil Compressed Coco Coir | Compressed coco coir | 15 gallons (from 1 block); other sizes available | |
| Organic Plant Magic Compressed Potting Soil | Coco coir, worm castings, and fertilizer | 12 cups (expands to 3 gallons) | |
| Michigan Peat Garden Magic Top Soil | Reed sedge peat and sand | 4.5 cubic feet | |
| Charlie’s 10-Pound Compost | Chicken manure, biochar, organic grasses and organic crop production residue | 0.4 cubic feet | |
| Hoffman Canadian Sphagnum Peat Moss | Peat moss | 10 quarts | |
| Ferry Morse Professional Grade Vermiculite | Vermiculite grades | 8 quarts | |
| Coast of Maine Castine Organic Raised Bed Mix | Fully cured compost, sphagnum peat moss, dehydrated poultry manure, lobster and crab shell meal, greensand, biochar, worm castings and mycorrhizae | 1 cubic foot | |
| Miracle-Gro Raised Bed Soil | Sphagnum peat moss, compost, worm castings, alfalfa and kelp meal | 1.5 cubic feet | |
Our Top Picks
Here are some of our top soil recommendations to help fill raised garden beds. There are specialized soils as well as general mixes to help plants thrive, including soils from brands long trusted in the gardening world. All you’ll need to do is slip on your gardening gloves, open up the bags, fill up your beds, refill your watering can, and get growing.
BEST OVERALL
FoxFarm Happy Frog Potting Soil
Product Specs
- Ingredients: Earthworm castings, bat guano, and aged forest products
- Quantity: 2 cubic feet
- Organic: Yes
What We Like
- Mycorrhizal fungi content promotes root development
- Excels at starting seeds
- Great for winter sowing
- pH-balanced product ideal for fruits, vegetables, and flowers
What We Don’t Like
- Comes at a premium price
The FoxFarm Happy Frog organic garden soil contains a mix of microbes with mycorrhizal fungi and sediment. The fungi content enhances the nutrient uptake of the root system by creating a symbiotic relationship with the root mass. Essentially, it expands the root’s reach, promoting their development.
That fungi content gets balanced with sediment that maintains the light texture and aeration needed to let plant roots expand as they consume nutrients. The mix contains a pH balance for optimal growth that’s supportive of fruit, vegetables, or flowers. Keep in mind that the soil has been inoculated with mycorrhizal fungi, so there is a possibility to see white growth in the mix, which is normal.
Get the FoxFarm soil for raised beds at Amazon, Target, or Walmart.
RUNNER-UP
Sunday Natural Moisture Potting Soil Mix
Product Specs
- Ingredients: Sphagnum peat moss, peat humus, coir, perlite, ground limestone
- Quantity: 20 quarts
- Organic: No
What We Like
- Ideal for repotting plants into containers and raised beds
- Also includes ground limestone for added nutrients
- Helps drain and aerate roots for better plant growth
What We Don’t Like
- Users will want to pair it with a fertilizer for best results
With ingredients like peat humus for nutrients, perlite for aeration, and peat moss for moisture retention, Sunday’s soil mix provides the right growing conditions for healthy plant growth and proper drainage. This is especially useful when used in a raised bed setting, where aeration and drainage are vital to plant success.
This 20-quart bag of soil is suitable for both indoor and outdoor use and is especially great for repotting plants and herbs in containers. A final special ingredient in this product is ground limestone, which adds essential calcium and magnesium nutrients to the soil for optimal plant growth. Sunday does note to consumers, however, that this is not a substitute for fertilizer.
Get the Sunday soil for raised beds at Sunday.
BEST BANG FOR THE BUCK
Mountain Valley Minute Soil Compressed Coco Coir
Product Specs
- Ingredients: Compressed coco coir
- Quantity: 15 gallons (from 1 block); other sizes available
- Organic: Yes
What We Like
- Compact, lightweight, and easy to store until needed
- Available in multiple sizes, either as large bricks or smaller pucks
- Suitable for a range of flowers, plants, and herbs
What We Don’t Like
- Coco coir is nutrient-poor, requiring supplements for better plant growth
- Retains moisture extremely well; not suitable for all plants
Mountain Valley Minute Soil compressed coco coir fiber grow medium squeezes the growing medium down to a compact brick full of goodness. Made of raw coconut coir, this fibrous block expands to a light texture designed to aerate and it retains moisture. At the same time, it provides a nutritious boost for topsoil.
Gardeners can rehydrate the entire block to create 15 gallons of growing medium or hydrate only the amount needed for a specific project. The compressed packaging stores easily and provides options for a wide range of gardening needs and uses. These compressed blocks come in several sizes to suit most gardener’s available storage space.
Get the Mountain Valley soil for raised beds at Amazon or True Leaf Market.
BEST ORGANIC
Organic Plant Magic Compressed Potting Soil
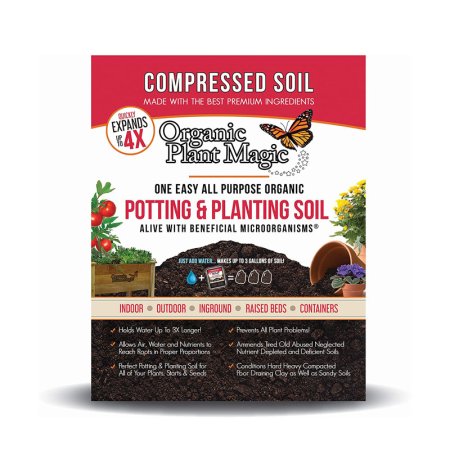
Product Specs
- Ingredients: Coco coir, worm castings, and fertilizer
- Quantity: 12 cups (expands to 3 gallons)
- Organic: Yes
What We Like
- Holds 50 percent more water than regular soil
- Can be used on existing soil as a nutrient boost
- Can be rehydrated as needed
What We Don’t Like
- Not available in multiple size options
Organic Plant Magic compressed organic potting soil for gardens and plants contains natural, organic fertilizer ingredients to feed and nourish plants. This compressed soil can be rehydrated and used as the nutrient layer or applied directly to existing soil without rehydrating. This dry, organic mix alone holds 50 percent more water than regular soil, which is one reason it works so well for raised beds.
The soil contains natural coconut coir, worm castings, mycorrhizae, helpful bacteria, amino acids, and humic acids. These ingredients work together for a slow release of nutrients so that plants don’t get overwhelmed. This package requires 12 cups of water to create 2 pounds of compressed soil. The mixture then expands to create 3 gallons of usable healthy soil.
Get the Organic Plant Magic soil for raised beds at Amazon or Organic Plant Magic.
BEST TOPSOIL
Michigan Peat Garden Magic Top Soil

Product Specs
- Ingredients: Reed sedge peat and sand
- Quantity: 4.5 cubic feet
- Organic: Yes
What We Like
- Works well with heavy clay soils to help loosen the mixture
- Helps increase water retention in lighter soils
- Can be used as a top dressing and to fill holes in lawns and gardens
What We Don’t Like
- Must be mixed with other soil
Topsoil fills a raised bed rather than nourishing the plants in it. The Michigan Peat Garden Magic top soil does that with a mix of reed sedge peat and sand. For gardeners who are using dirt from the natural landscape, this garden soil mix can loosen heavy clay soils and improve the water retention of light, airy soils.
Sometimes topsoils can arrive with twigs and debris that aren’t harmful but don’t help your garden. The Michigan Peat topsoil (usually) arrives without clumps or these surprise additions, sticking with pure ingredients. However, the topsoil is designed to be used as conditioner for heavy soil or mixed with other growing mediums, but not used on its own.
Get the Michigan Peat soil for raised beds at Amazon.
BEST COMPOST
Charlie’s 10-Pound Compost

Product Specs
- Ingredients: Chicken manure, biochar, organic grasses and organic crop production residue
- Quantity: 0.4 cubic feet
- Organic: Yes
What We Like
- Composted for 8 to 12 weeks
- Powerful formula, yet it’s still safe to use in direct contact with plants
- Affordable compared to other big name brands
What We Don’t Like
- Made to be used as an amendment/natural fertilizer only
Charlie’s Compost has natural ingredients composted and ready for plants to soak up nutrients. It contains a garden soil mix of chicken manure, cornstalks, forest products, hay, straw, clay, and microbe inoculants. Before being bagged, the ingredients are composted for 8 to 12 weeks, at which time they’re ready for application to the garden.
The blend is designed to be mixed with other soils or as an additive around plants. If used in direct contact with plants, be sure to use it sparingly: It’s powerful enough to burn delicate plants. There have also been (rare) instances of bags arriving with ingredients that aren’t completely broken down.
Get the Charlie’s Compost soil for raised beds at Amazon.
BEST PEAT MOSS
Hoffman Canadian Sphagnum Peat Moss
Product Specs
- Ingredients: Peat moss
- Quantity: 10 quarts
- Organic: Yes
What We Like
- Provides ample drainage and aeration
- Also adds great moisture retention
- Relatively affordable bag
What We Don’t Like
- Designed to be mixed with heavy soil
Hoffman Canadian sphagnum peat moss contains 99.8 percent natural ingredients, consisting almost entirely of natural peat. This mix helps break up compacted soils, aerate roots, and improve drainage. However, the peat also holds water for better moisture retention in a raised bed setting.
This bag provides a big bang for the buck. It’s meant to mix with other soils, so even in a large raised bed, it can go a long way. Keep in mind that heavily compacted soils will require more peat to loosen the soil than light, airy soils.
Get the Hoffman peat moss at Amazon.
BEST VERMICULITE
Ferry Morse Professional Grade Vermiculite

Product Specs
- Ingredients: Vermiculite grades
- Quantity: 8 quarts
- Organic: No
What We Like
- Can be added to other soils for a potent mix
- Suitable for seedlings and plants that prefer a high moisture content
- Can help promote aeration in more compacted soils
What We Don’t Like
- May provide too much moisture for some plants
- Not meant to be the primary growing medium
The professional-grade vermiculite by Ferry Morse contains a mix of vermiculite grades, fine to coarse, in one mix. However, it tends to contain more fine-grade particles, which makes a difference in the plants for which it works best—mostly plants that prefer a high moisture content. With the right soils, it can be used to improve aeration and keep plants well hydrated.
This vermiculite provides adequate moisture levels for seedlings, too. However, the fine grade doesn’t take much moisture to keep plants healthy. Gardeners need to know their plants and soil mixes well when using this vermiculite. In some cases, it can retain too much moisture for plants that are easily overwatered.
Get the Ferry Morse vermiculite at Amazon, Ace Hardware, or Ferry Morse.
BEST FOR VEGETABLES
Coast of Maine Castine Organic Raised Bed Mix
Product Specs
- Ingredients: Fully cured compost, sphagnum peat moss, dehydrated poultry manure, lobster and crab shell meal, greensand, biochar, worm castings and mycorrhizae
- Quantity: 1 cubic foot
- Organic: Yes
What We Like
- Specially designed for outdoor raised garden beds
- Balanced pH is safe to use for vegetables, fruits, plants, and flowers
- OMRI listed for guaranteed natural and organic materials
- Website has a handy calculator for how much users need for their space
What We Don’t Like
- Moisture retention and nutrients not suitable for indoor use or potted plants
Coast of Maine Organic & Natural Mix nourishes plants with natural ingredients designed for plants meant for human consumption. That doesn’t mean it can’t work well for flowers and inedibles, but when it comes to vegetables, organic ingredients ensure top nutrients. It’s OMRI listed, providing an extra layer of assurance that ingredients meet requirements to qualify as natural and organic.
This raised bed mix contains fully cured compost, dehydrated poultry manure, sphagnum peat moss, biochar, worm castings, lobster and crab shell meal, greensand, and mycorrhizae.
A wide and varied mix of ingredients balances pH and provides nutrients for an equally diverse range of plants. Keep in mind that this soil is designed specifically for outdoor raised beds. It’s not one to use with indoor potted plants because it won’t provide the right moisture retention or nutrients.
Get the Coast of Maine soil for raised beds at Amazon, The Home Depot, Target, or Coast of Maine.
BEST FOR HERBS AND FLOWERS
Miracle-Gro Raised Bed Soil
Product Specs
- Ingredients: Sphagnum peat moss, compost, worm castings, alfalfa and kelp meal
- Quantity: 1.5 cubic feet
- Organic: Yes
What We Like
- Premixed bag is specially formulated for raised bed gardens
- Mixture can help control weeds and pests
- Certified by the Organic Materials Review Institute
What We Don’t Like
- Does not control moisture as well as other options
The OMRI-certified Miracle-Gro raised bed soil mix provides organic matter needed for good drainage while growing flowers, herbs, vegetables, and fruits. The raised bed soil requires no mixing. Designed specifically for raised beds, this mixture helps keep pests and weeds under control.
The premixed blend comes in 1.5 cubic foot bags. It takes about three bags to fill a 2-foot by 2-foot bed that is 1 foot high.
Get the Miracle-Gro soil for raised beds at Ace Hardware, Lowe’s, or Tractor Supply Co.
Jump to Our Top Picks
How We Chose the Best Soil for Raised Beds
We researched the most sought-after soil for raised beds in their respective categories and discovered that the best options are determined by their ingredients, quantity, versatility, and other special features included by top brands.
While searching for the best garden bed soil, we reached out to Teri Valenzuela, the natural science manager at Sunday, a nationwide lawn and garden care company. Her advice? “Look for ingredients like fresh compost or peat humus for good nutrient levels, vermiculite or perlite for aeration, and peat moss or coconut coir for moisture retention. These ingredients provide the right growing conditions for healthy plant growth and proper drainage.”
She adds that shoppers will want to “avoid mixes with heavier in-ground garden soil mixes, bio-solids containing contaminants, and excessive wood products. They may hinder plant growth by impacting drainage and nutrient availability.”
With these expert tips in mind, we made sure to include a wide range of soil recipes on our list of recommendations that meet these standards, avoiding poorer quality mixes. As such, many of our chosen mixes are formulated to provide drainage and aeration and select options can be used for indoor and outdoor plants, vegetables, fruits, flowers, and herbs.
Whether you need 1 cubic foot or over 15 gallons of soil, the above list includes options that resist compacting, are pH-balanced, and can be used on existing soil with grown plants as well as seedlings. Many of our picks can be mixed with other soils to create a custom blend that works perfectly for your own plants.
What to Consider When Choosing Soil for Raised Beds
Growing flowers and food in a raised garden bed differs from growing them directly in the ground. Consider these key points before dumping dirt into your raised beds.
Raised Bed Height
Knowing the size of your raised bed garden will help you determine how much soil you will need to fill it. Thankfully, there are plenty of useful calculators that can help with this task, taking into account shape and dimensions. In general, the taller the raised bed, the more raised bed soil you’ll need.
Taller raised beds or tabletop designs can eliminate back strain and make gardening more comfortable. Alternatively, you can fill the bottom of a tall ground level bed with filler like dead leaves or cardboard to minimize the amount of raised bed soil mix you’ll need.
Plant Type and Root Depth
The plants grown in the garden will determine the best raised bed soil depth needed for optimum growth. Generally, a good rule of thumb is to build a raised bed that’s at least 6 inches deep. This depth allows for drainage and retains moisture at levels needed for many common crops. However, some plants have deeper roots than others. For example, if you plan to grow root vegetables like carrots, a depth of 12 inches is preferable.
Raised beds are great for any kind of plant but work particularly well for growing vegetables. Elevating the growing space keeps weeds at bay and the soil warm and prevents compaction. Gardeners also get to start with pristine, neutral-pH soil. However, if you’re using previously used soil, do a soil test to determine whether you need any amendments or fertilizer to renew the nutrients.
Soil Components
Many gardeners have tried-and-true soil mix recipes, but in general, it’s best to avoid settling for uber-cheap bags of raised bed soil. A good soil mix contains topsoil, a small amount of substrate, and a significant amount of compost, which contains nutrients that improve soil conditions.
The least expensive bags of soil are usually low quality and full of weed seed, debris, and other nasty contaminants. They’re also unlikely to contain many valuable nutrients.
Topsoil is basically filler soil needed for everything from raised bed gardening to indoor potted plants. It makes up the bulk of most raised bed soil mixes. It’s not very rich in nutrients but is a necessary component that contains organic matter.
The substrate makes up a small percentage of the raised bed soil mix but is extremely important. It helps control moisture content, which is key in a raised bed. Some of the substrates that might appear in soil mixes include peat moss, rock phosphate, vermiculite, perlite, and coco coir. Again, the type of plants you choose to grow will help determine the appropriate substrate to support them.
Be careful to avoid adding too much peat moss, which can increase the acidity of the soil and throw off the pH balance. Some gardeners prefer to fill raised garden beds with a topsoil-free mix, using equal parts compost, perlite, and coco coir. It makes for a fluffy, moisture-retaining growing medium.
Compost from multiple sources is best because it provides a wide variety of nutrients. It can even come from your own backyard pile that consists of leaves, grass clippings, and other yard waste.
In the world of soil, the term “organic” refers to organic materials such as compost and mulch. “Nonorganic” materials aren’t necessarily harmful. They’re just inert and include things like pebbles, rock phosphate, and perlite. Nonorganic soil that contains no organic matter lacks nutrients but is also free of contaminants. When the terms are used in this way, the term “nonorganic” doesn’t mean synthetic fillers or chemicals; it means that the substances are not nor have they ever been alive.
However, the term “organic” can also mean free of synthetic chemicals and pesticides. The USDA’s National Organic Program (NOP) covers farm practices, including soils and other substances applied to crops like organic fertilizer. In addition, the Organic Materials Review Institute (OMRI), a volunteer organization, lists products that organic farmers can use to produce food. Both the NOP or OMRI list possible soils, amendments, and fertilizers that can be used and still maintain an “organic” garden.
Topsoil
Topsoil isn’t the same as garden soil. As the name suggests, it’s the top layer of soil. This general-purpose soil is ideal for filling in garden beds or preparing a bare lawn for growth.
It’s not very nutrient-rich, but it contains important organic matter, so it’s not entirely useless. If you buy topsoil bags and plan to use them to fill your raised beds, pour the topsoil in first since this soil makes a great base layer and filler. Then cover the topsoil with a more nutrient-rich mix of compost, peat moss, and substrates that will nourish the plants.
Fertilizer
The best raised bed soils contain nutrients that fuel growth. Organic, natural fertilizers include various types of compost, sea kelp, and worm castings. These fertilizers enhance the quality and condition of the soil without you having to worry about contamination. The slow-release properties of organic fertilizers prevent potentially harmful buildup and ensure that your plants aren’t harmed by a flood of nutrients all at once.
According to Jones, “You want to check what type of fertilizer is in the soil and how long it takes for it to break down so you don’t overfertilize and burn your plants. You’ll also know how often you need to fertilize again. I prefer getting premixed soil to minimize how much work (physical labor) I’ll have to do. Hand mixing and moving dirt is hard work.”
It’s also important to note that some raised bed soil mixes may contain synthetic fertilizers. They provide a quick nutrient boost but don’t improve soil condition and texture like organic options. This is why it is best to choose or make a soil mix with organic nutrient sources.
FAQs
It depends entirely on the size and shape of the raised bed. If you know your garden bed’s dimensions, you can plug them into a soil calculator to find out how much you need.
If you’re buying potting soil in bags, it’s typically premixed, so there’s not much to do other than water it before planting. Topsoils that act as fillers require you to layer substrate and/or compost on top. Once you’ve done that, it’s all about water. Watering the soil prior to planting, using either a watering can or a garden hose, ensures your plants have enough moisture to start growing.
A topsoil product is a great filler, but it’s not designed to be the main nutritive soil in a raised bed. The plants need nutrients, and topsoil is not rich in organic matter like compost or potting soils.
Yes. In fact, the Square Foot Gardening Foundation recommends a compost-only option for gardeners on a budget or those who don’t have access to other mix-ins. However, while this can be cheaper (if you have access to free compost), the soil in a compost-only bed can become compacted.
Jones shares her insights on this topic: “Signs that you need more soil nutrients: The plants aren’t thriving as they did in years past. Could be stunted, low fruit/vegetable production, or generally unhealthy.”
She adds, “All beds are going to lose soil. It’s the nature of raised beds. I add more soil to mine a minimum of every 2 years, more if needed. I will side-dress with compost and manure every year. Plus, I add things like egg shells, coffee grounds, and wood ash.”
The post The Best Soils for Raised Beds in Your Garden appeared first on Bob Vila.
]]>The post Yes, You Need a Fertilizer Spreader (Not Your Hands) To Treat Your Lawn—These 9 Tested Best appeared first on Bob Vila.
]]>Whether seeding a new lawn, feeding an existing garden, or treating a yard for an insect infestation, a fertilizer spreader is an invaluable tool. These machines apply lawn care products quickly and evenly without requiring you to touch them, keeping you safe from contacting potentially dangerous chemicals and resulting in more consistent application with less product waste. In the winter, they can also be used to spread salt on icy walkways and paths. But knowing which spreader is right for your property and needs requires a little research, which is why we tested 13 popular models before selecting just nine to recommend.
Based on our tests and the professional opinions of two lawn care experts, we chose the Earthway 50-lb. Commercial Broadcast Spreader as our top pick. This three-point fertilizer spreader holds a substantial amount of product, delivers a consistent spread pattern, and is easy to maneuver—even when full. However, there’s also a lot to like about the rest of the models that passed our tests, so it’s worth reviewing all of the best fertilizer spreaders before choosing the one that’s right for you.
- BEST OVERALL: Earthway 50-lb. Commercial Broadcast Spreader
↓ Jump to Review - RUNNER-UP: Titan Attachments Professional Broadcast Spreader
↓ Jump to Review - BEST BANG FOR THE BUCK: Scotts Turf Builder EdgeGuard Mini Broadcast Spreader
↓ Jump to Review - UPGRADE PICK: Scotts Elite Spreader
↓ Jump to Review - BEST FOR LARGE YARDS: Agri-Fab 130-lb. Push Broadcast Spreader
↓ Jump to Review - BEST PULL-BEHIND: Agri-Fab 130-lb. Tow-Behind Broadcast Spreader
↓ Jump to Review - BEST DROP: Scotts Turf Builder Classic Drop Spreader
↓ Jump to Review - BEST MANUAL HANDHELD: Scotts Whirl Hand-Powered Spreader
↓ Jump to Review - BEST BATTERY HANDHELD: Ryobi 18V One+ 1-Gallon Power Spreader
↓ Jump to Review
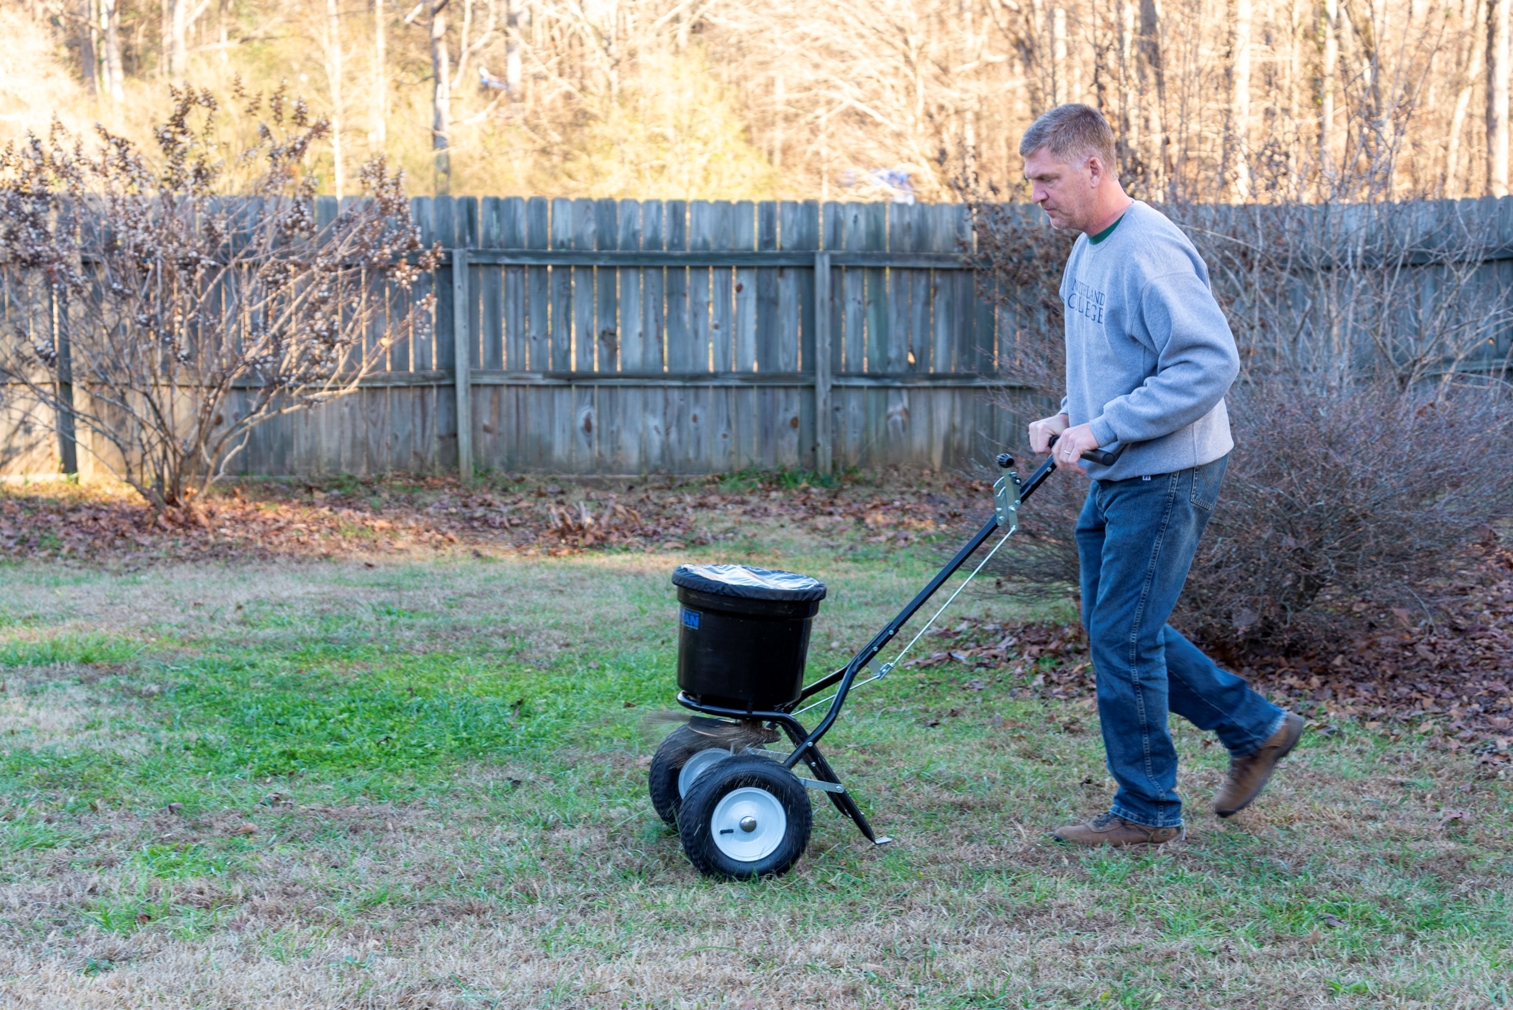
Fertilizer Spreaders Comparison Chart
| Product Name | Type | Capacity | Flow Controller |
| Earthway 50-lb. Commercial Broadcast Spreader | Walk-behind, rotary | 50 pounds | Sliding lever |
| Titan Attachments Professional Broadcast Spreader | Walk-behind, rotary | 50 pounds | Sliding lever |
| Scotts Turf Builder EdgeGuard Mini Broadcast Spreader | Walk-behind, rotary | 25 pounds | Dial and spring lever |
| Scotts Elite Spreader | Walk-behind, rotary | 60 pounds | Dial and spring lever |
| Agri-Fab 130-lb. Push Broadcast Spreader | Walk-behind, rotary | 130 pounds | Sliding lever |
| Agri-Fab 130-lb. Tow-Behind Broadcast Spreader | Tow-behind, rotary | 130 pounds | Sliding lever |
| Scotts Turf Builder Classic Drop Spreader | Walk-behind, drop | 32 pounds | Dial and spring lever |
| Scotts Whirl Hand-Powered Spreader | Handheld, rotary | 2 pounds | Dial and spring trigger |
| Ryobi 18v One+ 1-Gallon Power Spreader | Handheld, rotary | 10 pounds | Dial and sliding lever |
Our Top Picks
Each of the following models earned a spot on our list based on their standout performance in our hands-on tests. Read on to learn more about their spreading capacity, holding capacity, precision, and method of operation.
Best Overall
Earthway 50-lb. Commercial Broadcast Spreader
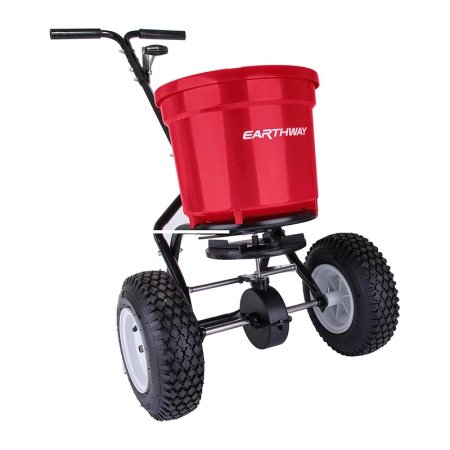
What We Like
- Heavy-duty steel T-handle, epoxy-coated frame, and pneumatic stud tires
- Easy to operate and maneuver when full
- Instructions for assembly and use are simple to follow
What We Don’t Like
- Takes up a lot of storage space
- Doesn’t come with a rain cover
Specs
- Type: Walk-behind, rotary
- Capacity: 50 pounds
- Flow controller: Sliding lever
Our Ratings: Durability 5/5; Maneuverability 5/5; Ease of Assembly 5/5; Storage 3/5; Value 5/5
The Earthway walk-behind broadcast fertilizer spreader is a commercial-grade multiuse spreader sized for yards between 10,000 square feet and an acre. It features a heavy-duty poly hopper with a 50-pound capacity, and its frame has a 175-pound load-bearing limit for withstanding uneven terrain. The 13-inch-diameter stud tires are attached via rustproof rims, and the super-duty gearbox is durable enough to last for years.
While the assembly instructions for this pick were incredibly easy to follow, assembly and calibration still took a few hours. However, once we got started actually using this rugged yard fertilizer spreader, we found its two-position height adjustment handle and T-speed lever comfortable despite our different heights, and we liked how evenly the three-hole drop shut-off system delivered product across our lawn. Even when fully loaded, the air-filled pneumatic stud tires rolled effortlessly up and down slopes and over rough ground, cushioning bumps to maintain a highly consistent distribution pattern. In addition to being an excellent choice for year-round use as a lawn seed fertilizer spreader, this Earthway model would also work well with ice-melting products.
What our tester says: “Once we got to testing this spreader, we both remarked on how durable it felt and how comfortable and easy it was to operate. Since it is on the large side, it would be nice if it had a rain cover so we could store it outside, but that’s really the only thing about this pick that we don’t love.”—Mark Wolfe, Product Reviews tester and writer
Get the Earthway fertilizer spreader at Amazon, The Home Depot, Walmart, Northern Tool + Equipment, or Earthway.
Runner-up
Titan Attachments Professional Broadcast Spreader
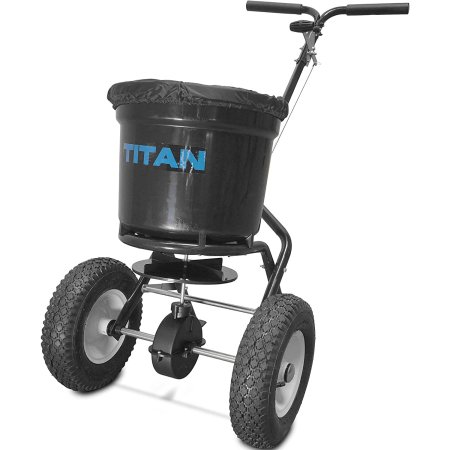
What We Like
- Large hopper is ideal for big properties
- 3-position handle makes it easy to control flow
- Comes with a rain cover for outdoor storage
What We Don’t Like
- Instructions are a bit hard to follow
- Too large for most small- and medium-sized yards
Specs
- Type: Walk-behind, rotary
- Capacity: 50 pounds
- Flow controller: Sliding lever
Our Ratings: Durability 5/5; Maneuverability 5/5; Ease of Assembly 4/5; Storage 4/5; Value 4.5/5
Titan Attachments broadcast fertilizer and seed spreader is a versatile, high-capacity tool designed to evenly distribute herbicides, fertilizers, insecticides, grass seed, and even ice melt. With a 50-pound drum and three-position gearbox, it holds plenty of product and is easy to control for consistent application.
Built for year-round use, this spreader features a high-grade steel frame, heavy-duty plastic components, and pneumatic tires that make it possible to run on turf or sod without damaging the grass. Despite its sturdy construction, it only weighs 25 pounds, making it light enough to maneuver without much effort but heavy enough to tackle hilly, root-filled, and rugged terrain. It covers a wide path for efficient lawn fertilizer application and is probably best for open spaces that are 10,000 square feet or larger. Though it was relatively quick to assemble and calibrate at about an hour and 15 minutes, the instructions would be fairly hard to follow if you didn’t have much experience putting this type of tool together.
Get the Titan Attachments fertilizer spreader at Amazon, Walmart, or Titan Attachments.
Best Bang for the Buck
Scotts Turf Builder EdgeGuard Mini Broadcast Spreader
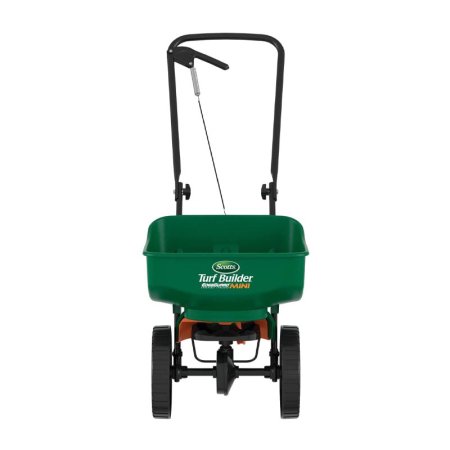
What We Like
- Comes precalibrated and fully assembled
- Folds down for storage
- EdgeGuard feature keeps fertilizer on lawns only
What We Don’t Like
- Hard to get the last bit of fertilizer out
- Can be difficult to maneuver on uneven ground
Specs
- Type: Walk-behind, rotary
- Capacity: 25 pounds
- Flow controller: Dial and spring lever
Our Ratings: Durability 3/5; Maneuverability 3/5; Ease of Assembly 5/5; Storage 5/5; Value 5/5
Scotts Turf Builder EdgeGuard mini broadcast spreader is small, lightweight, and easy to store, making it ideal for those with limited space. Though it can hold up to 5,000 square feet of lawn products for yards up to 10,000 square feet, its fold-down handle makes it easy to tuck out of the way when the work is complete. It also includes a control panel with precision rate settings for more accurate coverage and an EdgeGuard feature that blocks the right side to prevent fertilizer from spraying onto sidewalks or flower beds.
During testing, we appreciated that this little spreader didn’t need any assembly. Its hard plastic wheels came attached and the spreader itself was already calibrated. Still, the wheels are fairly skinny and hard, so they didn’t roll as smoothly across uneven ground as air-filled tires. Also, we noticed that the last bits of product always got stuck to the bottom of the spreader due to static buildup. For the price, though? It’s a great choice for homeowners with small- to mid-sized yards and limited storage space who still want easy operation and precision coverage.
Get the Scotts EdgeGuard fertilizer spreader at Amazon, Lowe’s, Tractor Supply Co., Ace Hardware, The Home Depot, Walmart, or Scotts.
Upgrade Pick
Scotts Elite Spreader
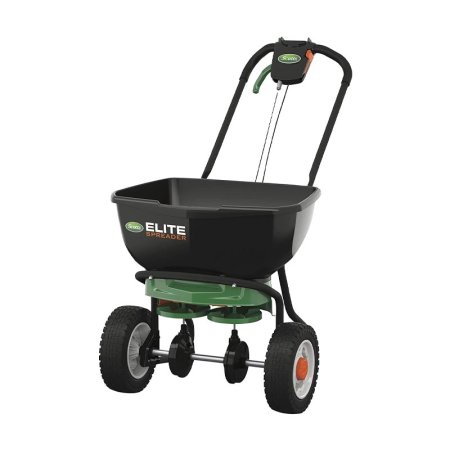
What We Like
- 2 rotors for consistent coverage
- Holds up to 60 pounds to treat over 20,000 square feet
- Arrives calibrated and mostly preassembled and folds for storage
What We Don’t Like
- Some fertilizer discharges toward the wheel during use
- Wheels aren’t great for rough ground
Specs
- Type: Walk-behind, rotary
- Capacity: 60 pounds
- Flow controller: Dial and spring lever
Our Ratings: Durability 4/5; Maneuverability 3/5; Ease of Assembly 4/5; Storage 4/5; Value 4/5
The Scotts Elite spreader is a high-capacity option designed to efficiently cover up to 20,000 square feet with 60 pounds of product. Its twin discharge design evenly lays down material in a 6-foot-wide path, meaning it spreads fertilizer twice as fast as more basic models.
Assembly of the Scotts Elite was quick and easy—all we had to do was snap on the wheels and unfold the handle. The soft plastic wheels rolled much more easily over varying terrain than the standard hard-plastic wheels on less expensive Scotts spreaders, but not as well as air-filled tires. We liked that the comfortable ergonomic handle has a smartphone holder so you can stay connected as you work. This is also a versatile spreader since it can accommodate large particles of corrosive rock salt in addition to standard-sized ice melt, making it a good all-around spreader for midsize suburban yards, especially in icy climates.
Get the Scotts Elite fertilizer spreader at Amazon, Lowe’s, Tractor Supply Co., Ace Hardware, The Home Depot, Walmart, Blain’s Farm & Fleet, or Scotts.
Best for Large Yards
Agri-Fab 130-lb. Push Broadcast Spreader
What We Like
- Holds 130 pounds, covering up to 25,000 square feet
- Large air-filled pneumatic tires
- Easy to smoothly control fertilizer flow
What We Don’t Like
- Gearbox feels a bit undersized for so much weight
- Coverage path also feels narrow for such a big machine
Specs
- Type: Walk-behind, rotary
- Capacity: 130 pounds
- Flow controller: Sliding lever
Our Ratings: Durability 4/5; Maneuverability 5/5; Ease of Assembly 2/5; Storage 2/5; Value 4/5
The Agri-Fab push broadcast spreader is big enough to apply conventional or organic lawn fertilizer to yards of up to 1 acre. With a 130-pound hopper, it holds nearly three times as much product as our top two picks. Depending on how you have it set, it can distribute a path width of 8 to 12 feet and cover up to 25,000 square feet with each load.
Despite its large capacity, this lightweight spreader weighs only 6.81 pounds, enabling excellent maneuverability even when full. Its steel rod flow-control arm makes it easy for users to open and close the rustproof poly-constructed hopper, and the heavy-duty 1-inch pneumatic tires offer a smooth ride even over roots and rocks or through dips in the yard.
Assembly of this spreader takes about an hour, plus you’ll need another 10 minutes or so to calibrate it. Although the coverage path is similar to 50-pounder spreaders, the massive hopper reduces time spent refilling, making it an efficient option for larger properties.
Get the Agri-Fab push fertilizer spreader at Amazon, Tractor Supply Co., Northern Tool + Equipment, or Target.
Best Pull-Behind
Agri-Fab 130-lb. Tow-Behind Broadcast Spreader
What We Like
- Low center of gravity increases stability
- Durable steel frame and 13-inch pneumatic tires
- Short trailer tongue makes it easy to maneuver
What We Don’t Like
- Control arm awkward to maneuver from mower seat
- Gearbox seems a bit undersized
Specs
- Type: Tow-behind, rotary
- Capacity: 130 pounds
- Flow controller: Sliding lever
Our Ratings: Durability 4/5; Maneuverability 4/5; Ease of Assembly 3/5; Storage 2/5; Value 4/5
The Agri-Fab pull-behind fertilizer spreader functions as a large motorized fertilizer spreader when attached to a lawn tractor, riding lawn mower, or other vehicle via its universal hitch. Designed for properties of 1 acre or more, it features a 130-pound heavy-duty plastic hopper and a steel direct flow control arm, which is accessible from the driver’s seat for quick and even application of seed and other lawn care materials.
When trying out this tow-behind model, we liked its squatty dimensions, short hitch length, and 13-inch pneumatic tires, which made it highly maneuverable, even around curves. The low height also allowed for easier loading and improved stability on hilly ground. However, we found the control lever, located on the trailer tongue, to be somewhat awkward to operate from the mower seat.
Get the Agri-Fab tow-behind fertilizer spreader at Amazon, Lowe’s, Tractor Supply Co., Ace Hardware, Walmart, Northern Tool + Equipment, Target, Blain’s Farm & Fleet.
Best Drop
Scotts Turf Builder Classic Drop Spreader
What We Like
- Built-in cable-driven gate control for accurate application
- Heavy-duty frame built for long-term use
- Works well along flower beds and gardens
What We Don’t Like
- Too small for large spaces
- Plastic wheels aren’t great for uneven ground
Specs
- Type: Walk-behind, drop
- Capacity: 32 pounds
- Flow controller: Dial and spring lever
Our Ratings: Durability 3/5; Maneuverability 3/5; Ease of Assembly 5/5; Storage 4/5; Value 5/5
The Scotts classic drop spreader is a reliable choice for small properties. Its heavy-duty plastic hopper holds 32 pounds of fertilizer for new grass or already established lawns, which is enough to cover up to 10,000 square feet. It features a 22-inch spread pattern for excellent coverage and accuracy, controllable by a cable-driven gate on the handle. Select from 23 spreader settings to customize the application rate and then squeeze the handle to open the hopper to let it flow.
We liked that this spreader came preassembled and calibrated. It also laid a highly consistent path of fertilizer, but we had to pay attention to prevent gaps in coverage. Like many other Scotts spreaders, this one features hard plastic wheels that sometimes struggle on uneven ground or imperfect grass. Its tubular frame seems strong and durable, but the other parts are mainly lightweight plastic. This would make a good fertilizer spreader for occasional use, especially if the property has numerous plant beds, sidewalks, tree rings, and other obstacles that users need to work around.
Get the Scotts Classic fertilizer spreader at Amazon or Ace Hardware.
Best Manual Handheld
Scotts Whirl Hand-Powered Spreader
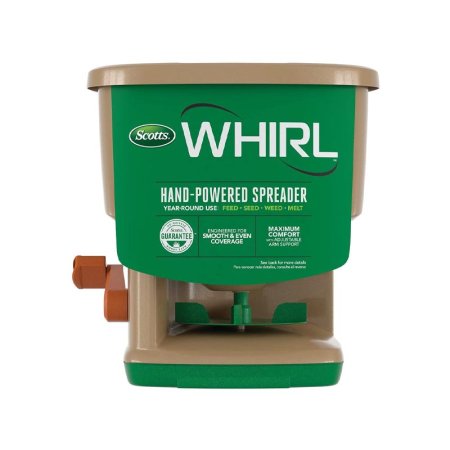
What We Like
- Takes up almost no storage space
- Noncorrosive materials also compatible with garden fertilizers, weed killers, and ice melt
- No assembly required
What We Don’t Like
- Less accurate than walk-behind spreaders
- Flow can be inconsistent at times
Specs
- Type: Handheld, rotary
- Capacity: 2 pounds
- Flow controller: Dial and spring trigger
Our Ratings: Durability 4/5; Maneuverability 5/5; Ease of Assembly 5/5; Storage 5/5; Value 4/5
The Scotts Whirl fertilizer hand spreader is a convenient year-round tool for small yards. It measures just 8.5 inches high by 8.7 inches wide by 13.1 inches deep and weighs only about a pound, making it convenient to carry and store. Since it’s constructed from heavy-duty plastic, it’s safe to use with everything from spring and winter grass fertilizer to ice melt without worrying about corrosion, as you might with a spreader with metal components.
We liked this spreader because it takes up almost no storage space and is super easy to operate. All we had to do was fill the hopper, squeeze the trigger, and turn the handle. It has an adjustment dial to control the opening width, and the trigger opens the hopper gate to release the material as you turn the baseplate crank. There’s even a slide-out wrist support to help steady the hopper and reduce operator fatigue during use. This would be a good tool for seeding bare spots created by chinch bug damage, treating difficult-to-reach areas, or spreading ice-melt products.
Get the Scotts Whirl fertilizer spreader at Amazon, Lowe’s, Tractor Supply Co., Ace Hardware, The Home Depot, Walmart, or Target.
Best Battery Handheld
Ryobi 18V One+ 1-Gallon Power Spreader
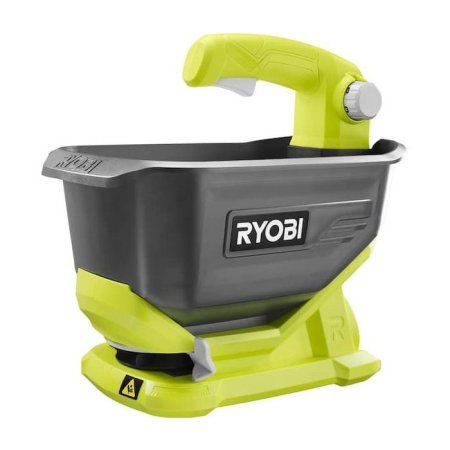
What We Like
- No assembly required
- Great for small areas or more precise application
- Works with everything from organic fertilizer to ice melt
What We Don’t Like
- Battery sold separately
- No always-on setting
Specs
- Type: Handheld, rotary
- Capacity: 10 pounds
- Flow controller: Dial and sliding lever
Our Ratings: Durability 4/5; Maneuverability 5/5; Ease of Assembly 5/5; Storage 5/5; Value 4.25/5
The Ryobi 18V (volt) One+ 1-gallon power spreader is a cordless battery-powered tool that makes it easy to distribute fertilizer and seed as well as ice melt. Compatible with the brand’s One+ battery system and equipped with a 10-pound hopper, it’s great for quick and easy application in small- to medium-sized spaces. It features an adjustable flow rate that allows you to customize spread based on material and desired coverage and a lightweight design that’s easy to maneuver, especially compared to large, push-type spreaders.
Those looking to cover a large property will likely find their hand getting tired since there’s no always-on setting. Instead, users must hold the trigger down to propel product out, making it a better option for spot treatments or small spaces. However, if you already own compatible 18V Ryobi tools and prefer the precision of a hand spreader, it’s an excellent option.
What our tester says: “I like this little battery-powered hand spreader for spot-treating areas of my yard that seem to struggle, but I also used it this past winter to apply salt to my front porch and steps so delivery people didn’t slip. Since I already had other 18V Ryobi tools, this multi-function spreader made an especially nice addition to my lineup.”—Michelle Larson, Product Reviews tester and writer
Get the Ryobi fertilizer spreader (tool only) at The Home Depot.
Jump to Our Top Picks
How We Tested the Best Fertilizer Spreaders
| Testing Stats | |
| Products tested | 13 |
| Hours/weeks/time spent testing | 37 hours |
| Tests performed | 5 |
| Price range | $30 to $370 |
Testing fertilizer spreaders meant rating them based on ease of assembly and calibration; distribution width, accuracy, and consistency; ease of controlling the on-off function while in motion; maneuverability over varying terrain; and user comfort.
To arrive at these ratings, we assembled each model, loaded them with lawn fertilizer, and ran them across a tarp on level ground, measuring discharge width and consistency. During that process, we tested the on-off functionality while moving, which is important at start-up and when preparing for end turns. Finally, we pushed or pulled each spreader through a variable-terrain course, observing the way it rolled over bumps and dips and navigated corners.
| Product Name | Durability | Maneuverability | Ease of Assembly | Storage | Value |
| Earthway 50-lb. Commercial Broadcast Spreader | 5 | 5 | 5 | 3 | 5 |
| Titan Attachments Professional Broadcast Spreader | 5 | 5 | 4 | 4 | 4.5 |
| Scotts Turf Builder EdgeGuard Mini Broadcast Spreader | 3 | 3 | 5 | 5 | 5 |
| Scotts Elite Spreader | 4 | 3 | 4 | 4 | 4 |
| Agri-Fab 130-lb. Push Broadcast Spreader | 4 | 5 | 2 | 2 | 4 |
| Agri-Fab 130-lb. Tow-Behind Broadcast Spreader | 4 | 4 | 3 | 2 | 4 |
| Scotts Turf Builder Classic Drop Spreader | 3 | 3 | 5 | 4 | 5 |
| Scotts Whirl Hand-Powered Spreader | 4 | 5 | 5 | 5 | 4 |
| Ryobi 18v One+ 1-Gallon Power Spreader | 4 | 5 | 5 | 5 | 4.25 |
What to Consider When Choosing a Fertilizer Spreader
To help us determine which fertilizer spreader features matter most, we also spoke to Taylor Olberding, co-founder of nationwide lawn maintenance company Heroes Lawn Care, for his professional opinion. In addition to considering your property’s size and unique features, it’s also important to consider whether you’d rather push, pull, or carry the spreader and whether there are any extras that might make using it more comfortable. You’ll also want to pay attention to what it’s made from since some materials are more durable than others.
According to Olberding, users should “Ensure it has air-filled tires (not plastic tires), is made of stainless steel/noncorrosive material with a plastic hopper, and can be easily configured based on the fertilizer product.” He also adds, “Ensure you are able to adjust the openings for accurate application and have an edge guard to help prevent fertilizer from spreading onto nontarget areas.”
Types of Fertilizer Spreaders
Two basic types of spreaders exist for dry applications––rotary spreaders, also known as broadcast spreaders—and drop spreaders. There are also spreaders designed for liquid products, including homemade lawn fertilizer.
Rotary/Broadcast Spreaders
A rotary spreader uses a rotating base plate to disperse seeds or granules that pour slowly from a hopper. They are called broadcast spreaders because they throw the product several feet to the front and sides of the spreader path.
Rotary spreaders cover an area three times their width, or broader, on every pass. These are the fastest tools you can use to spread dry materials, but their spreading abilities are less accurate than those of drop spreaders. Rotary spreaders are available in several sizes, so you can buy one that works for a tiny garden, a large estate lawn, and anything in the middle.
Drop Spreaders
When precision is critical, choose a drop spreader. These devices drop a swath of product through a wide, narrow opening directly beneath the spreader. They provide calibrated coverage, but the precision boosts the chance that the user will miss or double-cover an area.
For users who have precise application needs, this tool is ideal. Users can easily control where a drop spreader distributes the product because it only drops between its wheels. The downside is that users will spend more time covering a lawn using a drop spreader than a rotary spreader.
Liquid/Spray Spreaders
The most efficient way to spread liquid fertilizer and other liquid lawn treatments is with a hose-end chemical spreader/sprayer. These devices automatically mix the correct proportion of concentrated chemicals with a flowing stream of water that travels through the spreader and out the nozzle.
Liquid spreaders are especially useful as secondary tools for emergency treatments and for applying product quickly, although they are less accurate than the other two types of spreaders. Remember, too, that liquid lawn chemicals deliver fast results, but most liquids dissipate more quickly than granules, so regular use is costly.
Method of Operation
The most popular spreaders are broadcast because they offer a balance between speed and precision. Manufacturers make these spreaders in a wide range of sizes, including everything from small, handheld models to extra-large spreaders that can be pulled behind vehicles.
Drop spreaders are the best choice when users must navigate obstacles and narrow spaces. They work exceptionally well on small to medium intensively landscaped yards.
Holding Capacity
It is important to know the spreader’s holding capacity because that will determine how often the spreader will have to be refilled based on the size of the area it needs to cover. Ideally, users will want to simply fill the spreader once and deposit the treatment over the entire area.
Holding capacity and lawn size go hand in hand. A handheld spreader is well suited for small lawns up to 1,500 square feet. For medium-sized lawns up to 5,000 square feet, a small walk-behind spreader suits the job. Large walk-behind spreaders work well for yards up to about 20,000 square feet. Go for a tow-behind spreader if the yard is larger than half an acre.
Spreading Capacity
Spreading capacity refers to the types of fertilizers or materials a spreader can handle. The best fertilizer spreaders can help with planting grass seeds and distributing pelletized chemicals, but far fewer can handle sand, powdered lime, and compost.
Precision
All lawn spreaders deliver better precision than spreading fertilizer by hand, making them useful tools since applying too much or too little product is one of the most common fertilizer mistakes people make. Still, some spreaders are more precise than their competitors, and spreaders that are more accurate tend to be slower. For example, drop spreaders are precise but slow, whereas broadcast spreaders are a bit less accurate but fast. Liquid spreaders are not exact, but they are quite quick.
Drop spreaders are the most precise because manufacturers calibrate them for a consistent flow rate to spread only a thin band directly beneath the hopper and between the wheels. You can calibrate a broadcast spreader to deliver a steady flow rate, but you must walk at a consistent pace for even coverage. Manufacturers calibrate liquid spreaders to mix the amount of concentrate per gallon of water accurately, but you are in control of the coverage.
The Advantages of Owning a Fertilizer Spreader
A fertilizer spreader simplifies lawn treatments because it allows users to quickly and evenly apply seed, fertilizer, and lawn pest control products. You will also save time and money using a spreader because it allows you to quickly and evenly apply lawn products.
- Spreaders apply lawn treatments far more evenly than hand spreading.
- Fertilizer spreaders significantly reduce the time and effort users expend to apply lawn treatments.
- The use of a fertilizer spreader for lawns minimizes the user’s exposure to chemicals.
FAQs
Even if you’ve already chosen the best fertilizer spreader for your yard, you may still have a few questions. The following answers to frequently asked questions should fill in any remaining gaps in your knowledge about operating and caring for these tools.
Refer to your spreader owner’s manual to find the correct setting for the product you will spread. The product label tells you how many pounds to apply per 1,000 square feet.
Load the hopper with enough product for the square footage of the area you will cover. Select the correct setting for the material you spread, squeeze the handle, and walk from one corner of the yard, continuing in straight parallel lines until the area is covered.
You can spread fertilizer by hand, though your results might not be as consistent as they are with a spreader. Don gloves and pour granular fertilizer into a plastic bucket. Start to walk at one corner of the yard and toss the fertilizer in a sweeping motion as you walk in straight lines. Try to keep a consistent pace to spread the product as evenly as possible.
For more even coverage, apply half the fertilizer while you walk in parallel lines in one direction, then apply the other half while you walk in a perpendicular set of parallel lines.
To clean a fertilizer spreader, empty the hopper and use compressed air or a rag to remove all granules and residue from the spreader’s parts. Thoroughly wash the spreader, paying close attention to crevices and moving parts where debris may be lodged. Allow the spreader to dry thoroughly and store it out of the elements once you’re done.
We checked in with Chris Ramos from Blain’s Farm & Fleet to see when he recommends customers fertilize their lawns, and he had this to say: “Fertilizing in fall proves best because root strengthening through winter leads to a healthier spring lawn. Applying fertilizer during spring can benefit grasses that need an early growth advantage, especially cool-season varieties.”
It’s always a good idea to read the label for post-application recommendations straight from the manufacturer. However, it’s generally best practice to water the area lightly to help the product get into the soil and avoid mowing for a few days to prevent the fertilizer from getting kicked up before it has a chance to work.
“To find the right setting, check the product label, which generally includes the settings for seeds and fertilizers. If you are still unsure, begin with a lower application rate and add more if necessary to prevent overapplication,” says Ramos.
Meet the Tester
Mark Wolfe is a product tester and writer with an extensive background in the nursery and landscaping industries. He kept his tool box well stocked in order to build or repair fences, walls, irrigation systems, and equipment on any given day. Now he tests and writes reviews about the latest hand tools, lawn care products, outdoor power equipment, and other outdoor-living goods.
The post Yes, You Need a Fertilizer Spreader (Not Your Hands) To Treat Your Lawn—These 9 Tested Best appeared first on Bob Vila.
]]>The post Is Your Bermuda Grass Looking Patchy? Here’s the Best Fertilizer To Fix It appeared first on Bob Vila.
]]>Fertilizers for Bermuda grass are high in nitrogen with lower levels of phosphorus and potassium, providing the nutrients this warm-season grass needs to grow into a lush green lawn. Drought tolerant and not picky about the soil in which it grows, Bermuda grass (Cynodon dactylon) is soft yet tough enough to stand up to kids, pets, and other traffic. Though it’s relatively easy to care for, it’s still important to choose the right lawn care products for growing Bermuda grass to ensure a strong and healthy lawn.
To help you select a good fertilizer for Bermuda grass, we spoke to an award-winning landscape contractor and international arborist about which types of fertilizers are best and how to apply them. Based on our research, our top pick is the Scotts Southern Turf Builder Lawn Food—a high-nitrogen fertilizer that enhances nutrient and water absorption. For the healthiest and best-looking lawn, we recommend you review all of our fertilizer recommendations before selecting one of the best fertilizers for Bermuda grass to meet your lawn’s needs.
- BEST OVERALL: Scotts Southern Turf Builder Lawn Food
↓ Jump to Review - BEST BANG FOR THE BUCK: Miracle-Gro Water Soluble Lawn Food
↓ Jump to Review - BEST ORGANIC: Jonathan Green Organic Lawn Food
↓ Jump to Review - BEST LIQUID: Simple Lawn Solutions Energizer Micronutrient Blend
↓ Jump to Review - BEST NITROGEN ONLY: Simple Lawn Solutions High Nitrogen Lawn Food
↓ Jump to Review - BEST FAST-ACTING: Scotts Green Max Lawn Food
↓ Jump to Review - BEST FOR NEW GRASS: Scotts Turf Builder Lawn Food
↓ Jump to Review
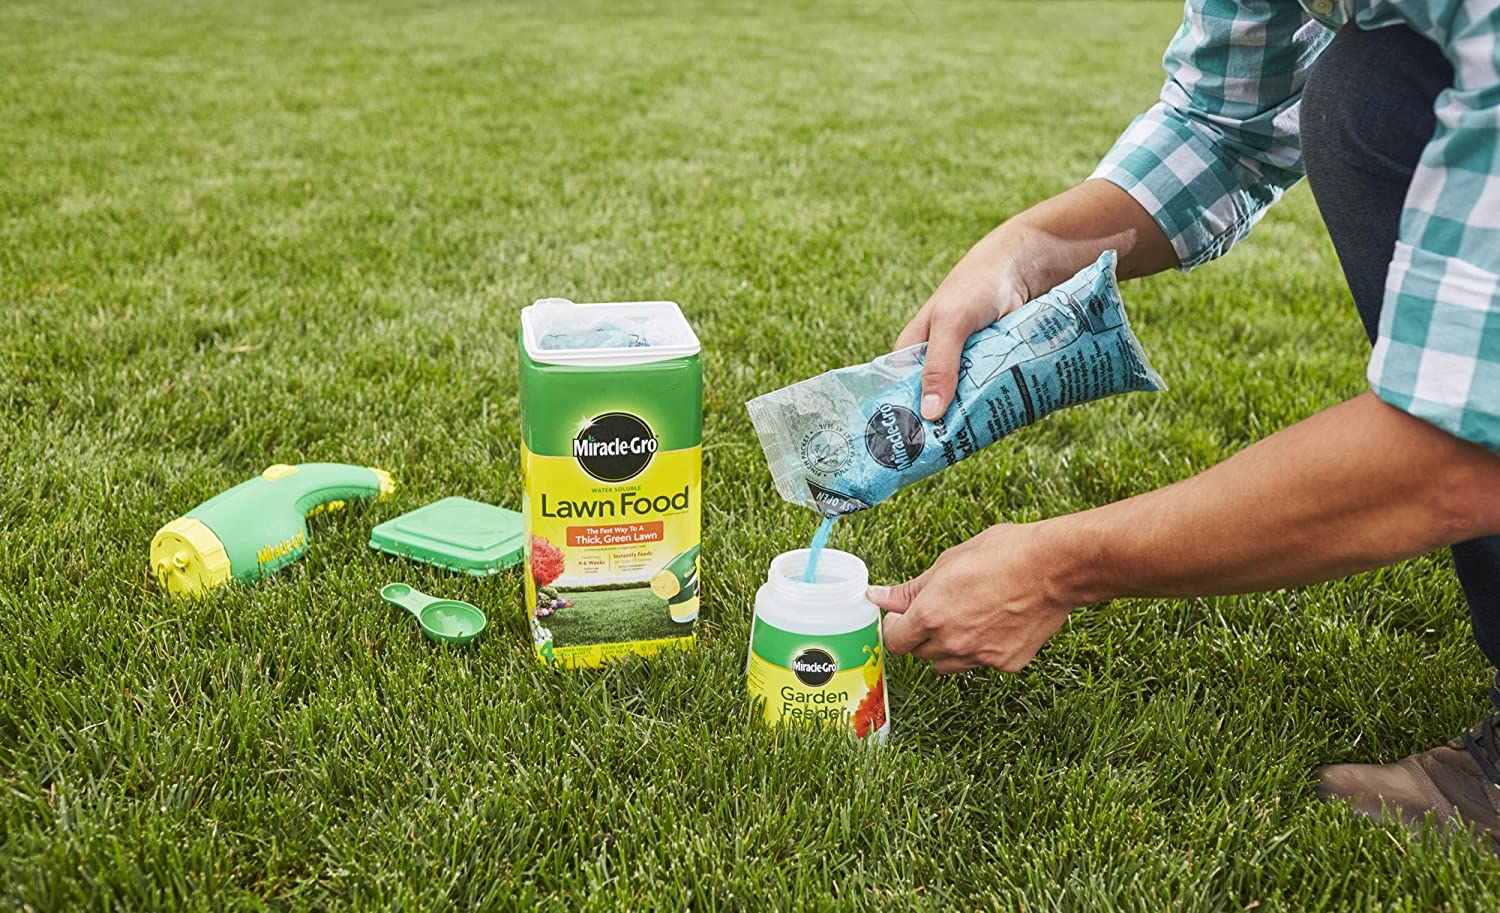
Fertilizers for Bermuda Grass Comparison Chart
| Product Name | NPK Ratio | Quantity | Coverage |
| Scotts Southern Turf Builder Lawn Food | 32-0-10 | 14.06, 28.12, or 42.18 pounds | 5,000, 10,000, or 15,000 square feet |
| Miracle-Gro Water Soluble Lawn Food | 30-0-6 | 5 pounds | 7,200 square feet |
| Jonathan Green Organic Lawn Food | 10-0-1 | 17 or 51 pounds | 5,000 or 10,000 square feet |
| Simple Lawn Solutions Energizer Micronutrient Blend | 6-0-0 | 32 ounces | 3,200 square feet |
| Simple Lawn Solutions High Nitrogen Lawn Food | 28-0-0 | 32 ounces | 3,200 square feet |
| Scotts Green Max Lawn Food | 27-0-2 | 16.67 or 33.33 pounds | 5,000 or 10,000 square feet |
| Scotts Turf Builder Lawn Food | 32-0-4 | 12.5 or 37.5 pounds | 5,000 or 15,000 square feet |
Our Top Picks
Without the proper fertilizer or weed and feed for Bermuda grass, your lawn may look sickly and sparse. Each of the following fertilizers provides the nutrients Bermuda lawns need, enhancing color uniformity and promoting a thick, dense turf.
Best Overall
Scotts Southern Turf Builder Lawn Food
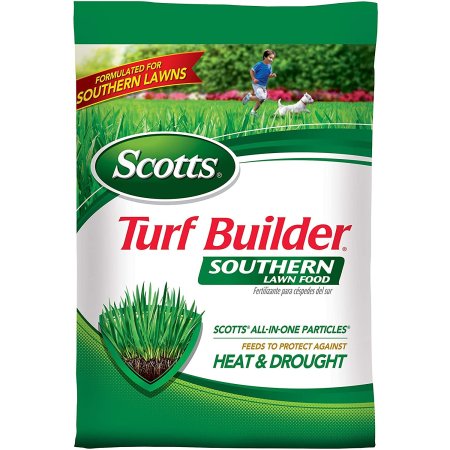
What We Like
- Feeds for up to 8 weeks
- 3 sizes for various property needs
- Helps lawns absorb water and nutrients
What We Don’t Like
- Can’t be used within 1 month of first frost
Specs
- NPK ratio: 32-0-10
- Quantity: 14.06, 28.12, or 42.18 pounds
- Coverage: 5,000, 10,000, or 15,000 square feet
The Scotts Southern Turf Builder lawn food is specifically designed for warm-season grasses like Bermuda grass. Its 32-0-10 NPK ratio provides an ample dose of nitrogen to promote lush, green growth while also supplying a good amount of potassium for enhanced drought and heat tolerance. Though this is our top pick for Bermuda lawn maintenance, it’s safe for use on all grass types and can also be applied while lawns are wet or dry. When used as directed, you can walk on it immediately after application, making it a smart choice for families and pet owners.
This Bermuda grass care product uses Scotts’ All-in-One Particles technology to build strong, deep roots that can withstand challenging conditions. We also really like that it comes in three sizes yet only requires application every 6 to 8 weeks. Depending on the size of your yard, you may only need one bag. Though watering is not required after application, Scotts says light watering will help it act faster.
Get the Scotts Southern fertilizer for Bermuda grass at Lowe’s, The Home Depot, Walmart, or Scotts.
Best Bang for the Buck
Miracle-Gro Water Soluble Lawn Food
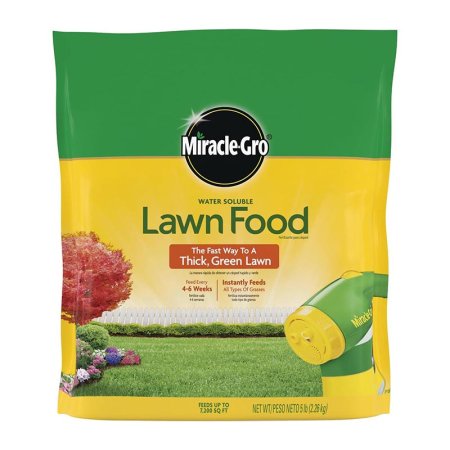
What We Like
- Dissolves easily when used with a Garden Feeder
- Feeds up to 7,200 square feet of Bermuda grass
- Starts feeding instantly for quick results
What We Don’t Like
- Ideal application method requires additional purchase
Specs
- NPK ratio: 36-0-6
- Quantity: 5 pounds
- Coverage: 7,200 square feet
Miracle-Gro’s water-soluble lawn food is a fast-acting fertilizer with an NPK ratio of 36-0-6 designed to promote a lush lawn. Its high concentration of nitrogen plus added iron help grass develop a gorgeous green color within days of application. This Miracle-Gro fertilizer is safe for use on both warm- and cool-season grasses and is easy to apply with the aid of the brand’s hose-end garden feeder (sold separately)—simply fill the dispenser with the water-soluble granules, attach a garden hose, and spray the lawn in a uniform pattern. When applied in this way, a 5-pound container can feed lawns up to 7,200 square feet.
Miracle-Gro recommends using this product for Bermuda grass lawn care every 4 to 6 weeks during the growing season. The quick-release formula provides a rapid nutrient boost, making it ideal for lawns in poor condition.
Get the Miracle-Gro fertilizer for Bermuda grass at Amazon, Ace Hardware, Walmart, or Miracle-Gro.
Best Organic
Jonathan Green Organic Lawn Food

What We Like
- Safe to walk on immediately
- Works for up to 10 weeks
- Overapplication doesn’t cause turf burn
What We Don’t Like
- Needs to be applied when lawn is dry and recently mowed
Specs
- NPK ratio: 10-0-1
- Quantity: 17 or 51 pounds
- Coverage: 5,000 or 15,000 square feet
Jonathan Green’s organic lawn food is a granular fertilizer for Bermuda grass made from a mix of plant and animal proteins like feather meal, soybean meal, molasses, and wheat middlings. Its 10-0-1 NPK slow-release formula provides a steady delivery of nitrogen as well as supplemental iron to keep grass green and lush for up to 10 weeks.
This organic fertilizer is safe for kids and pets to walk on immediately after application, and even when overapplied, it won’t burn your grass. It’s well suited to both cold- and warm-season grasses and can be used in spring, summer, or fall. For best results, the manufacturer suggests distributing it when grass is dry and has been recently mowed. It’s available in either a 17-pound bag covering up to 5,000 square feet or a 51-pound bag that feeds up to 15,000 square feet, making it easy to find the right fit for lawns of all sizes.
Get the Jonathan Green lawn fertilizer for Bermuda grass at Amazon, Walmart, or Johnathan Green.
Best Liquid
Simple Lawn Solutions Energizer Micronutrient Blend
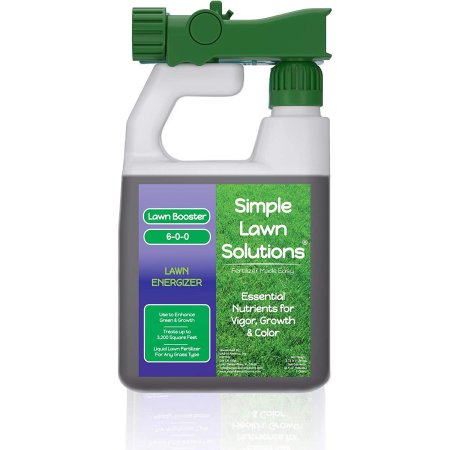
What We Like
- Comes with a hose attachment
- Ideal for small to medium lawns
- Easy-to-use liquid solution
What We Don’t Like
- 1 bottle won’t be enough for large lawns
Specs
- NPK ratio: 6-0-0
- Quantity: 32 ounces
- Coverage: 3,200 square feet
The Simple Lawn Solutions lawn energizer has a simple 6-0-0 NPK ratio with added nutrients like sulfur, magnesium, and manganese. This formula helps improve soil composition and supports enzyme production, protein synthesis, and nutrient absorption for a healthy, thick lawn. It’s also enhanced with iron, helping grass produce chlorophyll to create an intensely green hue.
Since this is a liquid pick, its uptake into grass roots and blades is relatively quick, so you should notice results within days of application. Though we chose the 32-ounce size for inclusion in our list, this product is also available in 1- and 2.5-gallon containers—they just don’t come with the convenient spray applicator attached. Since this concentrated product must be diluted, it may be smart to buy the bottle with the applicator first and refill it with more budget-friendly bottles for subsequent use. The 32-ounce size will treat up to 3,200 square feet, while the 2.5-gallon jug covers up to 32,000 square feet.
Get the Simple Lawn Solutions energizer fertilizer for Bermuda grass at Amazon or Simple Lawn Solutions.
Best Nitrogen Only
Simple Lawn Solutions High Nitrogen Lawn Food
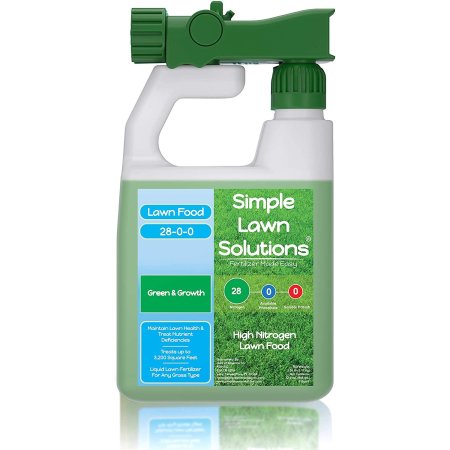
What We Like
- Uses a blend of quick- and slow-release nitrogen
- Comes in a ready-to-use sprayer and bigger jugs
- Can be used on all types of grass
What We Don’t Like
- Sprayer bottle has limited coverage
Specs
- NPK ratio: 28-0-0
- Quantity: 32 ounces
- Coverage: 3,200 square feet
If you want immediate greening and lasting results, Simple Lawn Solutions high-nitrogen lawn food is the pick for you. The concentrated liquid has a 28-0-0 NPK ratio with 70 percent quick-release and 30 percent slow-release nitrogen to get Bermuda grass lawns healthy and keep them that way. Like the other Simple Lawn Solutions product on this list, this one is available in a convenient 32-ounce hose-end dispenser jug for easy application over 3,200 square feet of lawn as well as larger bottles that don’t have the sprayer.
This nitrogen-only product is particularly effective for treating nitrogen deficiencies and enhancing lawn thickness. It’s suitable for use on all types of grass and shows results within days. Still, the fact that it comes in a ready-to-spray bottle does bump up the price a bit, so you may want to buy larger refill bottles after your initial purchase to help bring the overall cost down.
Get the Simple Lawn Solutions high-nitrogen fertilizer for Bermuda grass at Amazon, The Home Depot, or Simple Lawn Solutions.
Best Fast-Acting
Scotts Green Max Lawn Food
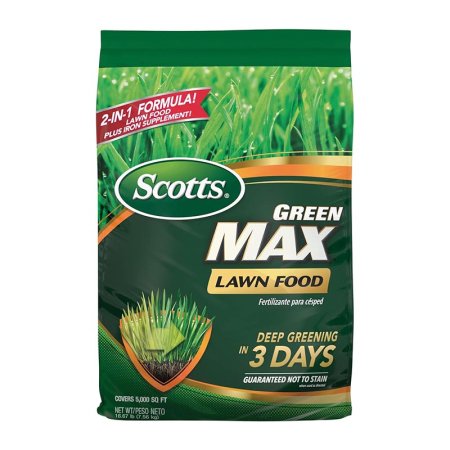
What We Like
- Has added iron for enhanced greening
- Results in just 3 days; works for up to 8 weeks
- Also available in a ready-to-spray liquid formula
What We Don’t Like
- Can cause turf burn if overapplied
Specs
- NPK ratio: 27-0-2
- Quantity: 16.67 or 33.33 pounds
- Coverage: 5,000 or 10,000 square feet
Scotts Green Max lawn food is a dual-action fertilizer that delivers quick greening and thickening for Bermuda grass and all other lawn types. Its 27-0-2 NPK ratio formula also includes 5 percent iron for enhancing greening in just 3 days, and it can be applied in the spring, summer, or fall. You can spread it while grass is wet or dry and walk over it immediately after.
Like all high-nitrogen fertilizers, this pick can cause burn grass if overapplied. For best results, Scotts recommends using it with a broadcast/rotary spreader on a setting of 3¼ to 3¾ or a drop spreader on 7 to 7½. A 16.67-pound bag is enough to cover up to 5,000 square feet, and it’s also available in 33.33-pound packages that feed up to 10,000 square feet.
Get the Scotts Green Max fertilizer for Bermuda grass at Amazon, Lowe’s, Tractor Supply Co., Ace Hardware, Walmart, or Scotts.
Best for New Grass
Scotts Turf Builder Lawn Food
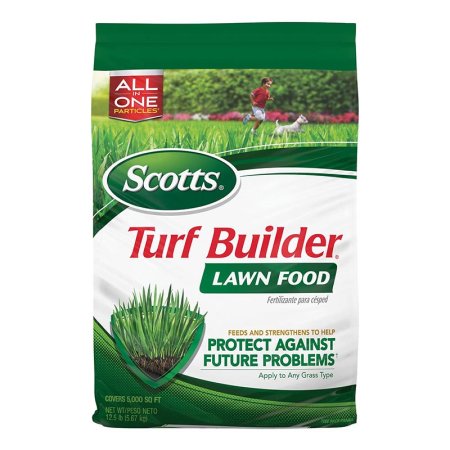
What We Like
- Safe for use when seeding
- Promotes root development to prevent future problems
- Compatible with any grass type
What We Don’t Like
- Some reports of increased weed growth
Specs
- NPK ratio: 32-0-4
- Quantity: 12.5 or 37.5 pounds
- Coverage: 5,000 or 15,000 square feet
This Turf Builder lawn food from Scotts is safe to use when seeding and helps build deep roots to encourage quick and vigorous growth. Its high nitrogen content is compatible with all grass types, aiding each in absorbing water and nutrients. By encouraging such strong growth, this pick protects your lawn against future problems.
This granular fertilizer comes in 12.5- and 37.5-pound bags for 5,000 or 15,000 square feet of coverage, respectively. It’s easy to apply using a spreader, and Scotts has setting instructions on the back of the bag. For quick results, the company recommends watering after application, though it’s not necessary. Scotts also says your lawn will look its best if you use this product every 6 to 8 weeks during the growing season.
Get the Scotts Turf Builder fertilizer for Bermuda grass at Amazon, Lowe’s, Tractor Supply Co., Ace Hardware, The Home Depot, Walmart, or Scotts.
Jump to Our Top Picks
How We Chose the Best Fertilizers for Bermuda Grass
To gather our list of top picks for Bermuda grass fertilizer, we drew on our team’s lawn care experience and the advice of a landscaping expert. We identified the most important features to look for first and then found a variety of products that met those criteria.
To ensure compatibility with Bermuda grass specifically, we prioritized fertilizers with high amounts of nitrogen, no phosphorus, and relatively low levels of potassium. We also considered ease of application, including frequency of suggested feedings, and looked for both liquid and granular options as well as synthetic and organic options. Lastly, we prioritized products that come in a range of sizes so shoppers with small and large lawns have plenty of excellent fertilizers to choose from.
What to Consider When Choosing the Best Fertilizer for Bermuda Grass
Reviewing the following considerations prior to making your final fertilizer selection will help ensure you choose the right product for your needs.
Fertilizer Types
Lawn fertilizers come in three main types: liquid, granular, and water-soluble. Each has its benefits and drawbacks.
- Liquid: This type of fertilizer gives Bermuda grass a quick burst of nutrients as the grass absorbs them directly through its foliage, which is the quickest way. However, due to their short-lived effects, they typically require more frequent applications. Liquid lawn fertilizers often come concentrated and require a garden-type pump sprayer or hose-end dispenser for application.
- Granular: Dry granular fertilizers come in tiny pebbles for application with push-type fertilizer spreaders. Some formulations dissolve slowly to release nutrients over time, though some contain a percentage of quick-release nutrients for faster results. Generally speaking, the overall effects of granular fertilizers last longer than those of liquid products, allowing for less frequent applications.
- Water-soluble: Water-soluble fertilizers are small, sand-like bits that dissolve quickly in water. They’re typically used with a hose-end dispenser so lawnkeepers can fertilize and water the grass simultaneously. Because water-soluble fertilizers generally require a hose for application, they’re best for smaller yards.
NPK Ratio
Commercial lawn and yard fertilizers contain premeasured quantities of nitrogen (N), which stimulates leafy green growth; phosphorus (P), which plays a vital role in flower and fruit production; and potassium (K), which boosts overall plant health. These three nutrients are listed on the fertilizer package by weight.
The best fertilizer for Bermuda grass will have an N-P-K ratio high in nitrogen with little or no phosphorus and a small amount of potassium. For example, an NPK ratio of 32-0-10 contains 32 percent nitrogen, no phosphorus, and 10 percent potassium. This is a great ratio for Bermuda grass.
Organic vs. Synthetic
Most lawn fertilizers contain synthetic ingredients, but the demand for organic fertilizers made of natural ingredients is increasing.
- Organic: Natural lawn fertilizers contain various blends of nonchemical nutrients, such as poultry manure, compost, livestock manure, and earthworm castings. They often cost more because the ingredients require more work to collect, treat, and turn into fertilizer. Most organic lawn fertilizers come in granule form and don’t cause harm to plants or aquatic life if they drain into waterways.
- Synthetic: Formulated in a lab with chemicals or artificial versions of natural ingredients, synthetic fertilizers contain concentrated nutrients, such as potassium, phosphorus, and nitrogen. Some brands contain other minerals, including calcium or boron, to increase soil health. Excess chemical runoff from synthetic fertilizers may harm fish if it gets into waterways and ponds.
Application
Many types of Bermuda grass require fertilizing only once or twice per growing season to reach their full potential, but some of the new hybrid forms of Bermuda grass, such as Midway, Tifway, or Tifgreen, benefit from more frequent applications.
The first fertilizer application of the year should be after late spring or early summer once the grass is fully green. At this time, growers can apply an all-purpose lawn fertilizer with a high ratio of nitrogen according to the instructions on the package. If you intend to overseed with more Bermuda grass seed, wait 2 weeks after fertilizing.
Depending on the product you’re using, you may need to apply a second round of fertilizer in midsummer and a third in the fall. You may want to use a lawn fertilizer containing a higher level of potassium for the fall application, as this will help with disease resistance and root strength for Bermuda grass in winter.
For the best long-term results, consider having the soil tested for deficiencies and add additional nutrients as needed. In most communities, growers can take soil samples to their local County Extension Agency for a comprehensive soil test and nutrient recommendations.
FAQs
Though you probably aren’t still asking, “What is Bermuda grass?” you may still have questions about fertilizing this type of grass. Read on for answers to the most commonly asked questions about the best fertilizers for Bermuda grass.
It depends on the fertilizer’s potency and whether it’s a quick- or slow-release formula. In general, Bermuda grass needs fertilizer every 4 to 6 weeks.
The best time to fertilize a lawn of Bermuda grass is late spring once it’s fully green. Reapply fertilizer in midsummer and fall or more often depending on the fertilizer’s strength.
Use a pump-type sprayer or a hose-end sprayer to apply liquid fertilizer and a push-spreader for granular fertilizers. Be sure to follow the instructions on the package to avoid overapplication that causes fertilizer burn.
In most cases, yes—though it is best to wait after heavy rain when water is still running off the lawn because the fertilizer could wash away.
Most granular fertilizers can remain on the lawn for a couple of days before watering, but check the instructions to be sure.
We spoke to Scott Seargeant, an award-winning International Consulting Arborist and owner of Seargeant Landscape & Arboriculture, about whether it’s better to mulch or bag Bermuda grass clippings. He said, “Mulching Bermuda grass is better than bagging it. The clippings will break down and return some of the elements back into the ground where the grass can use them again.”
Yes, you can overfertilize Bermuda grass, in fact, overfertilization is one of the fertilizer mistakes most people make.
We also asked landscape contractor Scott Seargeant this question, and he gave the following advice: “Mowing Bermuda grass at a lower height of about 1 inch will cause it to grow more horizontally. Adding a moderate amount of fertilizer will increase growth. This should be done in warm to hot weather.”
The post Is Your Bermuda Grass Looking Patchy? Here’s the Best Fertilizer To Fix It appeared first on Bob Vila.
]]>The post The Best Fertilizers for Zoysia Grass appeared first on Bob Vila.
]]>Native to Asia, zoysia is a warm-season turf grass commonly grown in the southern part of the U.S., where summer temps easily reach the century mark. It tolerates extreme heat, high humidity, and even slight drought. In general, most all-purpose lawn fertilizer products are also optimal for zoysia grass because turf grasses have similar nutritional needs.
Those looking to establish a new zoysia lawn or boost the health of an existing one can often do so by applying lawn fertilizer. Our favorite fertilizer for zoysia grass is the Scotts Green Max Lawn Food for its easy-to-apply granular formula; NPK ratio of 27-0-2; and 10,000-square-foot coverage area. However, we found all the selected products on this list to be effective and reliable.
Ahead, learn what type of fertilizer is desirable for use on a zoysia spread, and find out why the following lawn-food products are among the best fertilizers for zoysia grass.
- BEST OVERALL: Scotts Green Max Lawn Food
Jump to Review - BEST BANG FOR THE BUCK: Miracle-Gro Water Soluble Lawn Food
Jump to Review - BEST BALANCED FORMULA: Simple Lawn Solutions Advanced 16-4-8 Balanced NPK
Jump to Review - BEST PLUS WEED CONTROL: Scotts Turf Builder Weed and Feed 3
Jump to Review - BEST FOR ALKALINE SOIL: The Andersons PGF Complete 16-4-8 Fertilizer
Jump to Review - BEST WITH MICRONUTRIENTS: Simple Lawn Solutions Lawn Energizer
Jump to Review - BEST SLOW-RELEASE: Milorganite Slow-Release Nitrogen 6-4-0 Fertilizer
Jump to Review - ALSO CONSIDER: Pennington 100536576 UltraGreen Lawn Fertilizer
Jump to Review
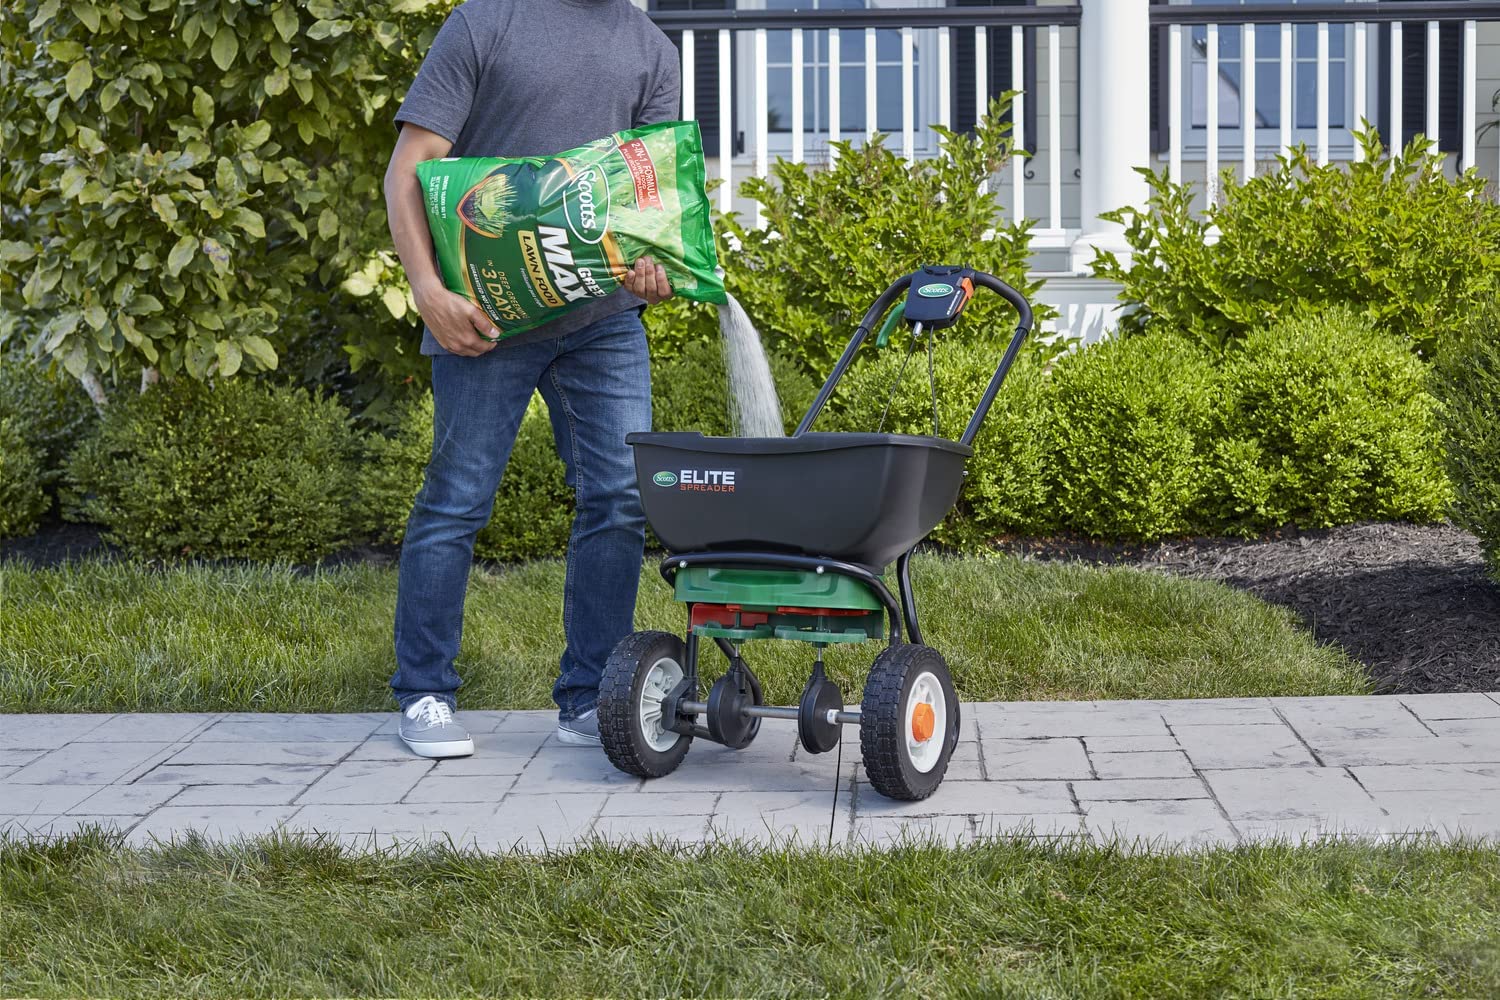
Product Comparison
| Type | Coverage | NPK Ratio | |
| Scotts Green Max Lawn Food | Granular | Up to 10,000 square feet | 27-0-2 |
| Miracle-Gro Water Soluble Lawn Food | Water-soluble granules | Up to 7,200 square feet | 36-0-6 |
| Simple Lawn Solutions Advanced 16-4-8 Balanced NPK | Concentrated liquid | Up to 3,200 square feet | 16-4-8 |
| Scotts Turf Builder Weed and Feed 3 | Granular | Up to 5,000 square feet | 28-0-3 |
| The Andersons PGF Complete 16-4-8 Fertilizer | Granular | Up to 5,000 square feet | 16-4-8 |
| Simple Lawn Solutions Lawn Energizer | Concentrated liquid | Up to 12,800 square feet | 6-0-0 |
| Milorganite Slow-Release Nitrogen 6-4-0 Fertilizer | Slow-release granules | Up to 2,500 square feet | 6-4-0 |
| Pennington 100536576 UltraGreen Lawn Fertilizer | Granular, slow-release | Up to 5,000 square feet | 30-0-4 |
Our Top Picks
To qualify for a spot in this lineup of the best fertilizers for zoysia grass and be considered an asset to regular lawn care, the following products had to meet specific criteria. They have a higher nitrogen ratio than potassium or phosphorus, which is a must for any lawn fertilizer; they are straightforward to apply; and they contain quality ingredients. The following lawn fertilizers vary slightly in usage and nutritional ingredients, but each is a standout in its category.
Best Overall
Scotts Green Max Lawn Food
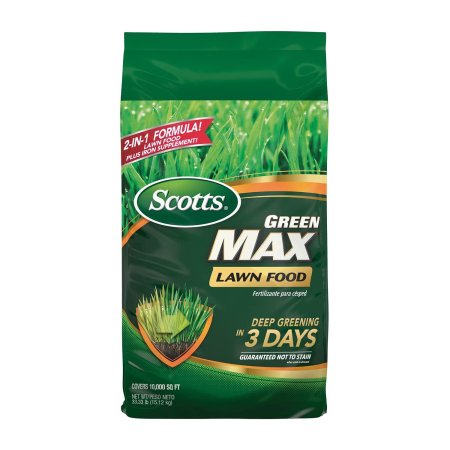
Product Specs
- Type: Granular
- Coverage: Up to 10,000 square feet
- NPK ratio: 27-0-2
What We Like
- Boosts growth and promotes quick greening
- Can be applied in any season and to any grass variety
- Treats areas of up to 10,000 square feet
What We Don’t Like
- Can stain concrete, driveways, and other surfaces
For quick zoysia greening and a boost in growth, consider Scotts Green Max Lawn Food, which features a high nitrogen 27-0-2 NPK ratio. In addition to the standard nutrients, Green Max contains iron, a micronutrient that helps lawn grasses green up quickly.
The manufacturer recommends using a drop spreader to apply this granular product for best results. When applied as directed, a 33.33-pound bag treats up to 10,000 square feet of lawn. Keep it off sidewalks and driveways, as iron tends to leave rusty stains on concrete and masonry. Brush off any errant product with a broom promptly to prevent staining.
Get the Scotts Green Max fertilizer for zoysia grass at Walmart.
Best Bang For The Buck
Miracle-Gro Water Soluble Lawn Food

Product Specs
- Type: Water-soluble granules
- Coverage: Up to 7,200 square feet
- NPK ratio: 36-0-6
What We Like
- Absorbs quickly into the ground
- Easy to apply
- Suitable for small to large yards
What We Don’t Like
- Must have a hose applicator to apply (not included)
There’s no need to spend a lot of green to feed a zoysia lawn. Miracle-Gro’s affordable water-soluble fertilizer comes with a high-nitrogen NPK ratio of 36-0-6, which helps grass develop a rich green color while boosting health and encouraging dense growth.
This option comes in a 5-pound bag of water-soluble fertilizer. Just dump a bag into a hose-end applicator, and connect the applicator to the end of a garden hose. When the water is turned on, the fertilizer is diluted and dispersed evenly for spraying over the lawn. A single box treats up to 7,200 square feet and is mild enough to use every 2 to 3 weeks if desired. It’s a budget-friendly way to keep a zoysia lawn healthy and looking great.
Get the Miracle-Gro fertilizer for zoysia grass at Amazon or Ace Hardware.
Best Balanced Formula
Simple Lawn Solutions Advanced 16-4-8 Balanced NPK
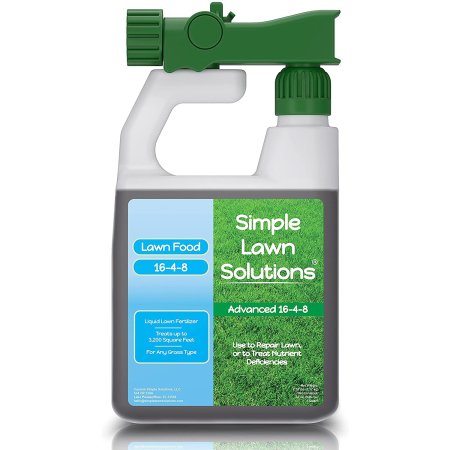
Product Specs
- Type: Concentrated liquid
- Coverage: Up to 3,200 square feet
- NPK ratio: 16-4-8
What We Like
- Contains beneficial nutrients
- Comes with a built-in sprayer attachment use
- Suitable for 3,200 square feet of any grass type
What We Don’t Like
- Slightly pricey for the coverage area provided
- Some users have reported difficulty using the hose attachment
Those looking to add a broader range of nutrients to their zoysia lawn may appreciate Simple Lawn Solutions Advanced 16-4-8 liquid fertilizer. It provides ample nitrogen and smaller amounts of phosphorus and potassium to help with root growth and encourage rich color. The product also contains seaweed and fish emulsions that may help balance soil that lacks nutrients (a soil test is recommended to be sure).
Simple Lawn Solutions is a concentrated liquid, but there’s no need to worry about measuring or mixing. It comes in its own spray dispenser that attaches to a garden hose for uniform distribution. One 32-ounce bottle treats up to 3,200 square feet of lawn.
Get the Simple Lawn Solutions Advanced fertilizer for zoysia grass at Amazon, or Simple Lawn Solutions.
Best Plus Weed Control
Scotts Turf Builder Weed and Feed 3

Product Specs
- Type: Granular
- Coverage: Up to 5,000 square feet
- NPK ratio: 28-0-3
What We Like
- High nitrogen content for lawn greening
- Suitable for areas of up to 5,000 square feet
- Easy to apply with most broadcast or drop fertilizer spreaders
What We Don’t Like
- Herbicide performance may suffer if the lawn is dry at application
- Should not be exposed to water within 24 hours of application
Dandelions and clover are no match for Scotts Turf Builder Weed and Feed 3, which does double duty as a fertilizer and a pesky weed killer. Its high-nitrogen NPK ratio is 28-0-3, making it well suited for greening up lawns, including zoysia lawns, and encouraging the grass to reach a rich color.
In addition to its nutritional content, Scotts Turf Builder Weed and Feed contains 2,4-D, a selective herbicide that kills annual weeds but won’t harm zoysia grass. The manufacturer recommends mowing the grass and watering it before applying this fertilizer—the 2,4-D herbicide adheres best to damp leaf blades, giving it the most weed-killing power.
One 14.29-pound bag of granular Scotts Turf Builder Weed and Feed for zoysia grass treats up to 5,000 square feet of lawn and is suitable for use in a broadcast or drop spreader.
Get the Scotts Turf Builder fertilizer for zoysia grass at Amazon, Lowe’s, or The Home Depot.
Best For Soil Conditioner
The Andersons PGF Complete 16-4-8 Fertilizer
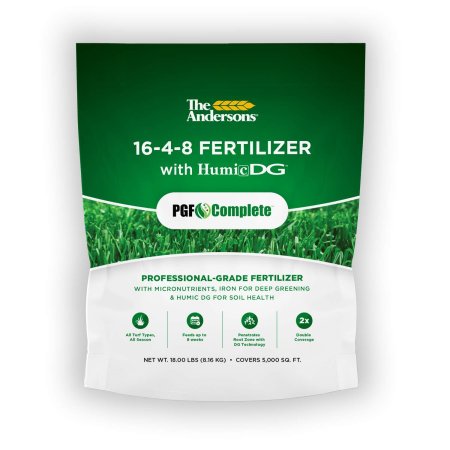
Product Specs
- Type: Granular
- Coverage: Up to 5,000 square feet
- NPK ratio: 16-4-8
What We Like
- High nitrogen content as well as humic acid
- Slow-release nutrients
- Small particle size good for even distribution
- Fast-acting formula offers visible results in 6 to 14 days
What We Don’t Like
- Other amendments may be required to reduce high pH levels
Zoysia grass grows best in soil with a pH between 6 and 6.5, but if your yard is higher on the pH scale, fertilizing with a product that neutralizes pH might be a good idea. (Rather than guessing at the pH level, the best course of action is to have the soil tested by a local extension agency or soil test kit.)
The Andersons Professional PGF fertilizer contains humic acid, which helps neutralize pH levels in any turf type. In addition, the product features a 16-4-8 NPK ratio, so the grass will receive a healthy dose of nitrogen and small amounts of phosphorus and potassium. An 18-pound bag of The Andersons PGF fertilizer will treat up to 5,000 square feet for up to 8 weeks, with visible results in 6 to 14 days.
Be aware that this product can help neutralize the pH level, but depending on the soil test results, it may not be sufficient for reducing it to an optimal level for growing zoysia. A professional soil test will be required to determine that.
Get The Andersons fertilizer for zoysia grass at Amazon (18 pounds).
Best For Maintenance
Simple Lawn Solutions Lawn Energizer
Product Specs
- Type: Concentrated liquid
- Coverage: Up to 12,800 square feet
- NPK ratio: 6-0-0
What We Like
- Nitrogen for boosting grass color
- Easy-to-use concentrated liquid
- Can be used on all grass types
What We Don’t Like
- Must be diluted and poured into a sprayer (not included)
Most of the time, high nitrogen is all that’s necessary to boost grass color and health, but that doesn’t mean additional nutrients won’t be beneficial, especially if the soil is depleted of natural nutrients (a soil test is the best way to find out).
Simple Lawn Solutions Lawn Energizer contains an added oomph of nutrients, including iron, magnesium, and manganese, which are trace minerals designed to enhance soil. The iron and nitrogen content encourages a rich color and robust growth, while the other nutrients may help root growth and overall grass density.
The product comes in a 1-gallon concentrated liquid form and can be diluted and applied via a pump-type garden sprayer to spaces of up to 12,800 square feet. Note: While Lawn Energizer may boost the health of slightly depleted soil, it may not be sufficient for correcting significant soil problems—only the result of a professional soil test will let home landscapers know how to properly amend the soil.
Get the Simple Lawn Solutions Energizer fertilizer for zoysia grass at Amazon and Simple Lawn Solutions (32 ounces).
Best Slow-Release
Milorganite 32 lb. Slow-Release Nitrogen Fertilizer

Product Specs
- Type: Slow-release granules
- Coverage: Up to 2,500 square feet
- NPK ratio: 6-4-0
What We Like
- Slowly releases nutrients into the grass
- Provides quick greening and healthy growth
- Environmentally friendly formula
What We Don’t Like
- Iron ingredients may stain concrete if not removed promptly
- May leave behind a slight earthy aroma when first applied
Some lawn fertilizers should be applied every 2 weeks, but Milorganite Slow-Release Nitrogen Fertilizer dissolves gradually, so it keeps feeding the grass for up to 10 weeks. This product has a 6-4-0 NPK ratio and contains iron to help green up the lawn quickly.
A 32-pound bag of Milorganite Fertilizer treats up to 2,500 square feet of lawn. If that seems like less coverage than other fertilizers, keep in mind that it works longer, so fewer feedings are necessary throughout the summer. The granulated formulation can be applied with a drop spreader or a broadcast spreader. To keep the iron in the product from staining concrete, sweep away any excess product that gets on sidewalks and patios immediately after application.
Get the Milorganite fertilizer for zoysia grass at Amazon, Lowe’s, or Ace Hardware.
Also Consider
Pennington 100536576 UltraGreen Lawn Fertilizer
Product Specs
- Type: Granular, slow-release
- Coverage: Up to 5,000 square feet
- NPK ratio: 30-0-4
What We Like
- Contains iron for thick greening
- Provides helpful nutrients for up to 3 months
- Compatible with most drop or broadcast spreaders
What We Don’t Like
- Iron ingredients may stain concrete if not promptly removed
- Suitable for application between June and August only
The combination of 5 percent fast-acting iron and 10.5 percent slow-release nitrogen in this Pennington UltraGreen lawn fertilizer is just the ticket for enhancing lackluster lawns for up to 3 months. With an NPK ratio of 30-0-4, there’s plenty of nitrogen to go around, but it dissolves gradually over 3 months to keep grass consistently fed. The iron in Pennington UltraGreen is fast-acting and will help grass develop a rich green color in a few short days.
A 14-pound bag of Pennington UltraGreen covers up to 5,000 square feet and can be applied by either a drop spreader or a broadcast spreader. Be sure to sweep away any product that gets on patios or sidewalks to prevent staining from the iron in the mix.
Get the Pennington fertilizer for zoysia grass at Amazon, or The Home Depot.
Jump to Our Top Picks
How We Chose the Best Fertilizers for Zoysia Grass
Lawn fertilizer products are straightforward, and most contain high nitrogen levels, the most critical nutrient for greening up a lawn and boosting growth. We looked extensively at dozens of lawn fertilizer products before selecting the ones in this lineup as among the best for zoysia grass.
In general, most lawn fertilizers will be good bets for applying to zoysia grass because zoysia has the same nutritional needs as other turfgrasses. We looked at nationally known companies with stellar reputations for making quality lawn and garden products, such as Miracle-Gro and Scotts. Still, we didn’t automatically eliminate fertilizers from smaller or niche manufacturers if they contained quality ingredients.
Finally, we looked at how satisfied customers were with different lawn fertilizer products. In the final analysis, we considered products containing additional ingredients, although our focus was still on ensuring that the product had adequate nitrogen.
What to Consider When Choosing a Fertilizer for Zoysia Grass
Keep a few basic factors in mind when shopping for a zoysia fertilizer, including yard size and product coverage rates, the overall health of the existing soil, and the preferred application method. For the best results, test the soil before applying fertilizer. Soil test kits are available online and from local extension agencies, many of which allow users to ship samples to a professional lab for testing and soil amendment recommendations.
Standard lawn fertilizers typically do not contain all the components necessary to correct significant soil problems. Rather, their primary purpose is to boost the color of the grass and make it grow faster.
Type
Fertilizer products for treating zoysia lawns are available in three standard types: liquid, water-soluble, and granular. Each has its benefits and considerations.
- Liquid: For the quickest fertilizer uptake, consider applying a liquid product. Of the three types of fertilizer, liquid works the fastest because the blades of grass readily absorb the product. Liquid fertilizers come in ready-to-use solutions and concentrated formulas that require dilution with water.
- Water-soluble: This fertilizer looks grainy, but when mixed with water, it dissolves almost immediately, making it suitable for treating with hose-end applicators. Miracle-Gro fertilizers are often water-soluble, and using them is as easy as dumping a premeasured packet into a hose-end container and then spraying old or new grass. This type of product is absorbed just as quickly as a liquid product.
- Granular: Rather than spraying, granular lawn fertilizers are applied using a fertilizer spreader, such as a drop spreader or broadcast spreader. Many are formulated to release the nutrients over time for continuous lawn feeding.
Soil pH
Zoysia grass grows well in various soil types, including sandy soil and loamy soil. It prefers a slightly acidic soil types from 6 to 6.5 on the pH scale. However, it will often tolerate slightly more alkaline or more acidic soil types (within a 0.4-point range) if other needs are met, such as regular watering and fertilizing. A few types of zoysia grass fertilizer provide pH-balance ingredients. Still, if the existing soil is over 7 (too alkaline) or under 5.6 (too acidic), it may require the application of different amendments, such as sulfur or lime. The only way to know for sure is to have the soil tested at a lab and then amended according to the recommendations before zoysia fertilization.
NPK Ratio
On virtually all zoysia grass fertilizing products (except a few all-natural products), buyers will find an NPK ratio that signifies the amount of the three essential nutrients found in fertilizer: nitrogen (N), phosphorus (P), and potassium (K).
Zoysia is like other turf grasses when it comes to an optimal NPK ratio. Look for a ratio where the amount of nitrogen is higher than both phosphorus and potassium. For zoysia, a typical NPK ratio might be 15-1-5, which indicates the product contains 15 parts nitrogen, 1 part phosphorus, and 5 parts potassium by volume.
Nitrogen is necessary for giving zoysia grass a rich green color and for boosting healthy growth. Some lawn fertilizer formulations may contain no phosphorus or potassium at all, in which case the package might read 10-0-0.
Organic vs. Synthetic
Most lawn fertilizers contain synthetic components, but a growing number of manufacturers are developing all-natural fertilizers as consumer preference for eco-friendly products increases. Lawn grasses typically react the same way to the nutrients in either type of fertilizer, so the zoysia grass will benefit from both.
- Synthetic: Fertilizers that contain chemical and artificial ingredients, such as synthetic forms of minerals and nutrients, are often less expensive to produce than natural products. These fertilizers will not go bad but may lose some of their effectiveness over time.
- Organic: Shoppers will likely notice how much more expensive all-natural fertilizers are than synthetic options—some organic products run more than three times as much for a product that covers the same size lawn. The price difference lies in the difficulty of manufacturing organic fertilizers, which typically include earthworm castings and sterilized manure ingredients. Organic fertilizers are often safer to use around pets and people, depending on the specific product.
Application
Zoysia grass doesn’t green up as early in the spring as cool-season grasses, such as fescue, and the general rule of thumb is to wait to apply fertilizer to zoysia until it’s fully green. By waiting, the grass gets a chance to green up naturally, which prompts its roots to wake up from winter and draw on their own energy. This gives them a solid start to the growing season. After the zoysia is green, applying a nitrogen fertilizer will help it maintain rich color and boost growth.
Deciding when to fertilize zoysia also depends on the product. Some products call for applying fertilizer as often as twice a month, while others should be used just once per growing season. Additionally, consider fertilizing the zoysia lawn one last time in the fall. This will strengthen the grass and help it remain resilient and healthy during its upcoming winter dormancy.
FAQs
Zoysia is a hardy, robust type of grass that thrives in heat, but it still requires some care to reach its full lush potential and stay healthy all summer long. Those learning how to care for zoysia grass will undoubtedly have some questions: What is the best fertilizer for zoysia grass, and what makes a zoysia lawn denser?
Apply fertilizer in mid to late spring after the grass greens up, then follow the manufacturer’s instructions for subsequent applications, ranging from every 6 to 12 weeks during the growing season. A final application in the fall before the grass goes dormant is also a good idea to protect the roots of zoysia during its dormancy.
Yes, it’s possible to overfertilize and weaken the grass by applying the fertilizer at a rate that exceeds the recommended rate or by using fertilizer more often than recommended.
Apply a lawn fertilizer that’s high in nitrogen, such as NPK 15-0-8. The high nitrogen will encourage a rich green color. Users will also want to apply fertilizer to grass in the spring when new seedlings are beginning to sprout to ensure they are hardy when fully grown.
Zoysia grass spreads by rhizomes that run beneath the soil. The healthier the grass is, the denser it will become. In addition to zoysia grass fertilization, mow the lawn regularly (once or twice a week) and water during times of drought.
Zoysia can tolerate frequent rainfall and slight drought conditions, but it will stay the healthiest with regular watering. Good zoysia grass care includes making sure the lawn has a minimum of 1 inch of water per week.
Zoysia is a low-growing grass that should be kept mowed at about 1 to 3 inches depending on the type of yard space and the sun exposure. Those with a lot of sun exposure will want to trim their grass to a maximum of 1.5 inches, while those with partial shade will want to consider a 2- to 3-inch mowing height. This is also convenient for those who don’t want to do a lot of maintenance since zoysia grass tends to grow slowly.
The post The Best Fertilizers for Zoysia Grass appeared first on Bob Vila.
]]>The post The Best Weed and Feed Products for Fewer Weeds and Greener Grass, Tested appeared first on Bob Vila.
]]>A drab, weedy lawn isn’t a lost cause with the help of modern weed and feed fertilizers. Designed to introduce essential nutrients to accelerate the grass’s growth, these products help lawns grow thick and healthy. At the same time, they put the hurt on weeds to choke out the plants you don’t want in favor of the lush carpet of greenery you do. After researching the top fertilizer mixes, we tested eight of the top weed and feeds on a lawn that needed some serious help. These weed and feed products were all tested for at least 4 weeks with varying results and levels of success.
After testing, we can say that our favorite is the GreenView Broadleaf Weed Control Plus Lawn Food. It’s highly concentrated, so it doesn’t take much product to make a big difference. We tested the products in a grid, and the square with this product outgrew (and out-greened) all the others.
The test lawn needed both nutrients and weed reduction, so it gave us the perfect canvas for testing. Keep reading to get a look at how the best weed and feed performed in real-world conditions and what kind of growth (and weed death) you can expect in your own yard.
- BEST OVERALL: GreenView Broadleaf Weed Control Plus Lawn Food
↓ Jump to Review - BEST BANG FOR THE BUCK: Scotts Turf Builder Weed and Feed
↓ Jump to Review - UPGRADE PICK: BioAdvanced 5-in-1 Weed & Feed
↓ Jump to Review - BEST NATURAL: Espoma Organic Weed Preventer
↓ Jump to Review - BEST COOL-SEASON: GreenView Fairway Formula Spring Weed and Feed
↓ Jump to Review - BEST WARM-SEASON: Scotts Turf Builder Southern Triple Action
↓ Jump to Review - BEST LIQUID: Scotts Liquid Turf Builder With Plus 2 Weed Control
↓ Jump to Review
Before You Buy Weed and Feed
Maintaining a healthy lawn includes mowing, weeding, watering, and fertilizing. However, fertilizing isn’t always necessary. Overfertilizing a lawn will make the grass grow more vigorously, requiring more frequent mowing or leading to runoff, which ends up in the local watershed.
Excessive fertilizing can also result in lawn burn, which is when the nitrogen and salt levels in the soil are too high and cause yellow to brown strips or patches of dead grass. A lawn only needs fertilizing if the soil lacks the vital nutrients to help it grow. Home soil test kits can be used to check the soil composition and help you decide what type of fertilizer will best nourish your grass.

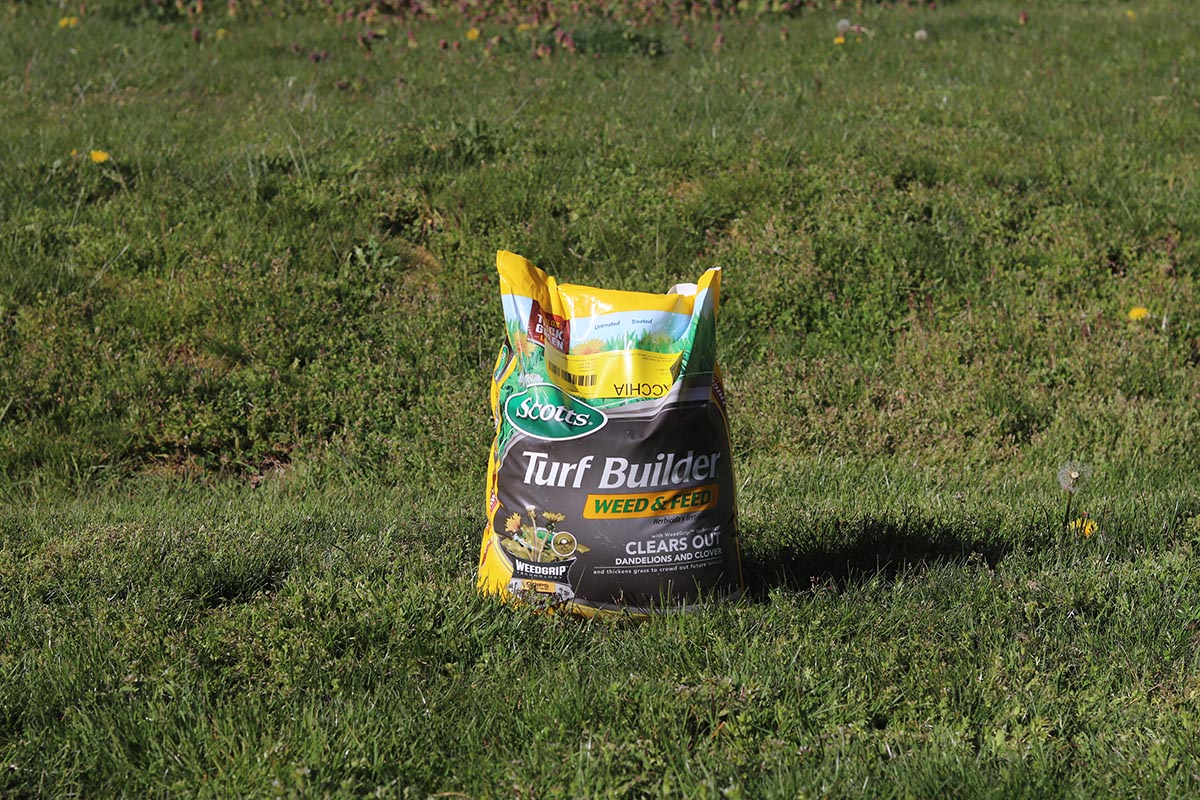

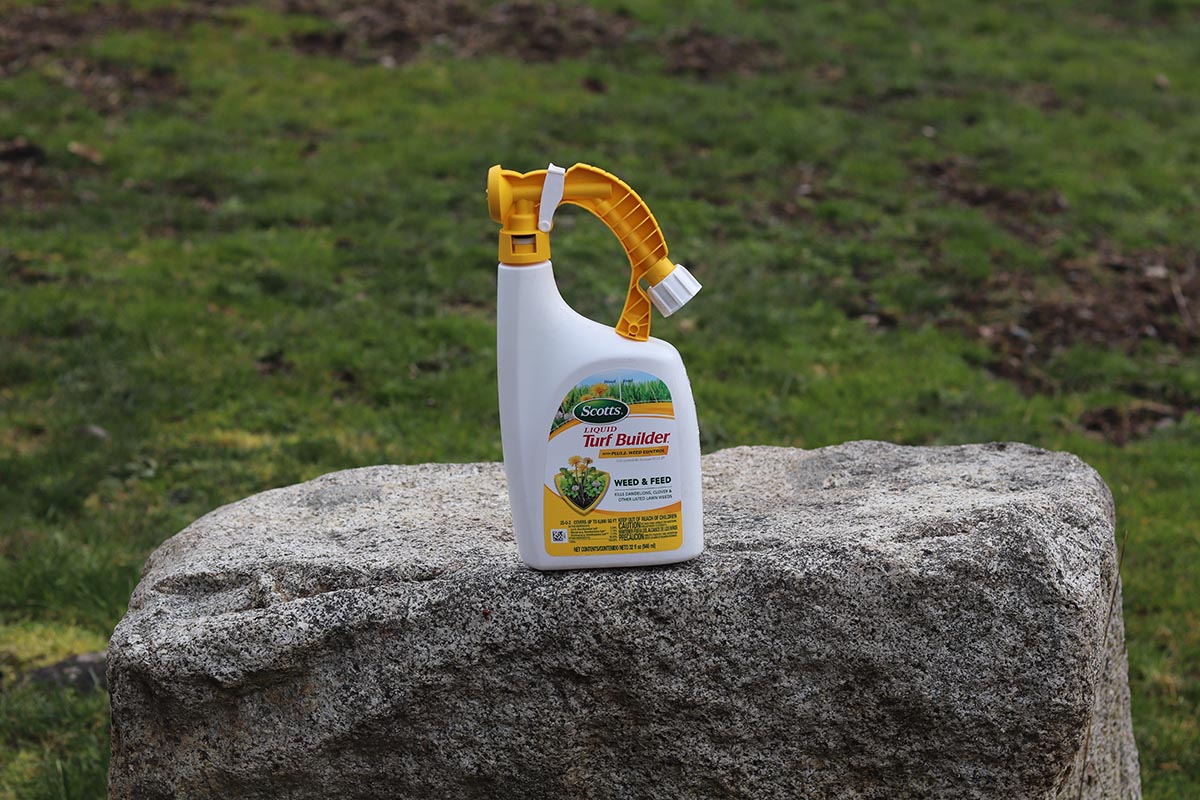
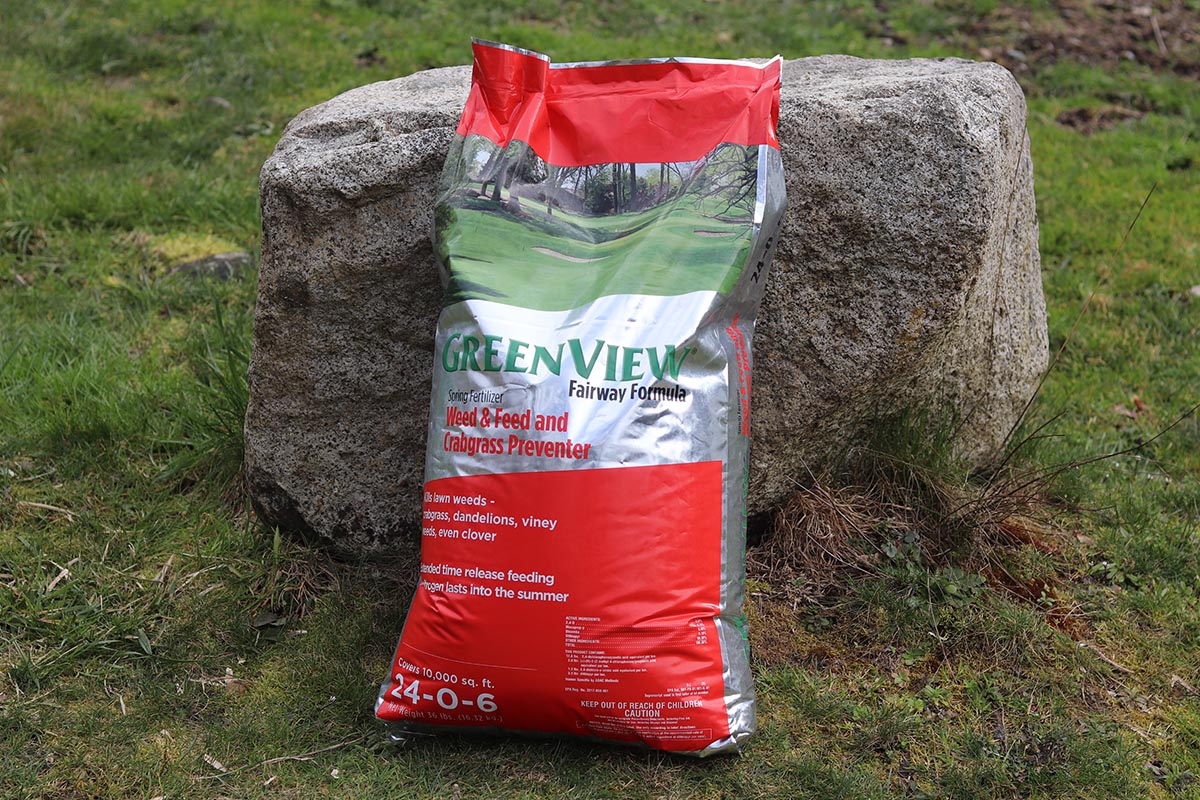
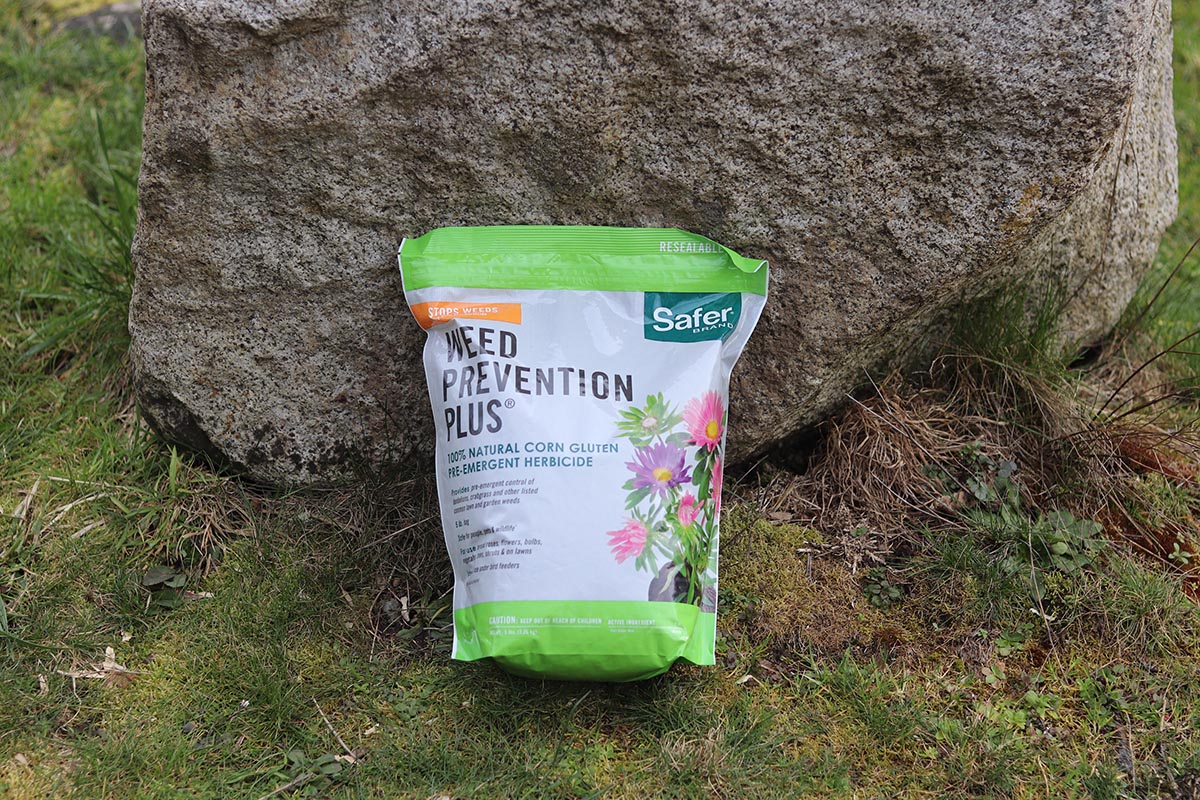
Product Comparison
| NPK Ratio | Application | Grass Type | |
| GreenView Broadleaf Weed Control Plus Lawn Food | 27-0-4 | Spring or early fall | Kentucky bluegrass, fine and tall fescues, perennial ryegrass, Bahia, St. Augustine, common Bermuda, hybrid Bermuda, zoysia, centipede, Colonial bent |
| Scotts Turf Builder Weed and Feed | 26-0-2 | Spring | Kentucky bluegrass, fescue, ryegrass, centipede, Bahia, Bermuda, zoysia |
| BioAdvanced 5-in-1 Weed & Feed | 22-0-4 | Spring, early summer, fall | Bermuda, fescue, buffalo grass, seashore paspalum, zoysia |
| Espoma Organic Weed Preventer | 9-0-0 | Spring | All grasses |
| GreenView Fairway Formula Spring Weed and Feed | 24-0-6 | Spring or fall | Kentucky bluegrass, Bermuda, buffalo grass, perennial ryegrass, fine and tall fescues, Bahia, centipede, zoysia, St. Augustine (except for Floratam) |
| Scotts Turf Builder Southern Triple Action | 29-0-10 | Active growth periods | St. Augustine, Floratam, zoysia, centipede, carpet grass |
| Scotts Liquid Turf Builder With Plus 2 Weed Control | 25-0-2 | Spring or fall | Bahia, Bermuda, centipede, zoysia, Kentucky bluegrass, fescue, ryegrass |
Our Top Picks
The following list includes the fertilizers that stood out during research and were then tested to narrow the field to some of the most effective weed and feeds on the market. This list includes both liquid and granular weed treatments.
Best Overall
GreenView Broadleaf Weed Control Plus Lawn Food
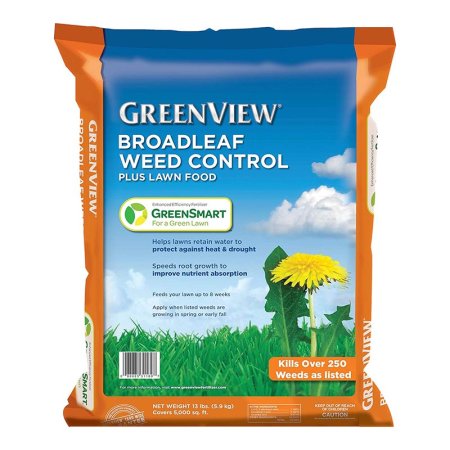
What We Like
- Doesn’t require a lot of product to make a difference
- Capable of killing over 250 weed varieties
- Slow-release nitrogen formula
- Made a noticeable difference in grass growth rate and health
What We Don’t Like
- Should not be used on Floratam St. Augustine, Dichondra, and carpet grass
- Contains 2,4-D
Our Ratings: Application 5/5; Feed Effectiveness 5/5; Weed Control 2.5/5; Value 5/5
Product Specs
- NPK ratio: 27-0-4
- Application: Spring or early fall
- Grass type: Kentucky bluegrass, fine and tall fescues, perennial ryegrass, Bahia, St. Augustine, common Bermuda, hybrid Bermuda, zoysia, centipede, Colonial bent
Taking care of a lawn and reducing common weeds is part of property ownership, and for those who want to spruce up lawn health quickly, this GreenView weed and feed mix can do it. This fertilizer and weed killer for lawns is made with a slow-release nitrogen formula that thickens grass, without excessive growth, targeting 250 weed varieties, including dandelions, clover, plantain, dollar weed, and ground ivy. It was the top performer in our testing, creating grass that outgrew the rest. It’s also a great spring or fall weed and feed.
The granules are effective for over 8 weeks and are safe to use on warm- and cool-season grass types, though there are a few varieties to avoid. Plus, the slow release nitrogen is safer to use when temperatures start to rise without burning the grass or causing other lawn injury.
The grass was noticeably taller and greener in the square with this GreenView mix. It’s also a highly concentrated fertilizer and weed preventer, so it doesn’t take a large amount to make a big difference in lawn health. While it didn’t kill existing weeds, fewer weeds grew in the area where this mix was applied. Our only issue with this product is that it contains 2,4-D (as did almost all of the other synthetic products in this test), which has the potential to affect human health and the environment. Make sure to read the application instructions to reduce the potential harmful effects.
Get the GreenView broadleaf weed and feed at Amazon, Lowe’s, Tractor Supply Co., The Home Depot, Walmart (39 pounds), or GreenView.
Best Bang for the Buck
Scotts Turf Builder Weed and Feed
What We Like
- Quick, tangible results for thickening grass and preventing weeds
- Highly concentrated and ample quantity
- Compatible with multiple grass varieties
What We Don’t Like
- Not suitable for warm-season grasses
- Contains 2,4-D
Our Ratings: Application 5/5; Feed Effectiveness 4.5/5; Weed Control 2.5/5; Value 4/5
Product Specs
- NPK ratio: 26-0-2
- Application: Spring
- Grass type: Kentucky bluegrass, fescue, ryegrass, centipede, Bahia, Bermuda, zoysia
Scotts is a well-known brand with an extensive range of lawn care products, including fertilizer and weed and grass killer. This product combines the strongest weed and feed for lawns available from Scotts. It’s supposed to kill common broadleaf weeds like dandelions and clover using WeedGrip technology while feeding the lawn for thicker grass. However, our testing revealed more feed than weed. Granted, the lawn we tested it on has a serious clover and dandelion problem. It’s possible the weed issues were too much even for this powerful weed killer. While we didn’t see a noticeable difference in weed health, they didn’t proliferate.
Scotts Turf Builder is one of the most popular and economical fertilizer and weed control combination products available. Although this weed and feed for Bermuda grass works on many common turf grasses, such as fescue, centipede, Kentucky bluegrass, ryegrass, Bahia, and zoysia, it’s not recommended for some warm-season grasses, such as St. Augustine, Dichondra, or carpet grass. As a synthetic product, it contains 2,4-D, which has the potential to damage human and environmental health.
Get the Scotts Turf Builder weed and feed at Amazon, Lowe’s, or The Home Depot.
Upgrade Pick
BioAdvanced 5-in-1 Weed & Feed
What We Like
- Works on over 200 weed and grassy-weed varieties
- Long-lasting formula feeds for up to 3 months
- Provides nutrients as well as heat and drought resistance
- Requires a minimal amount of mix to make a big difference in lawn health
What We Don’t Like
- Not suitable for new grass
- Contains 2,4-D
Our Ratings: Application 5/5; Feed Effectiveness 5/5; Weed Control 3.5/5; Value 5/5
Product Specs
- NPK ratio: 22-0-4
- Application: Spring, early summer, fall
- Grass type: Bermuda, fescue, buffalo grass, seashore paspalum, zoysia
Taking care of grass while keeping away common weeds and crabgrass can be exhausting and time-consuming. But the BioAdvanced 5-in-1 weed and feed long-lasting formula greens grass and boosts growth so much that users might need to add an extra cutting to their weekly routine. This potent mix can act as a grass killer for crabgrass as well as broadleaf weeds like clover, dandelion, chickweed, and 200 other weed and grassy-weed varieties. It also strengthens established grass by fortifying roots.
With a coverage area of over 4,000 square feet, this weed and feed mix resists the effects of heat and drought and is safe to use on cool-season grass types. It’s also a highly concentrated mix, requiring a minimal amount to be effective.
In testing, it made a big difference in grass growth rate and health, making the grass noticeably brighter and taller. However, it didn’t do much to choke out the clover and weeds, though it showed some ability to prevent new weeds from sprouting. It also contains 2,4-D, a chemical that can potentially harm the environment or people.
Get the BioAdvanced weed and feed at Lowe’s, Walmart, or BioAdvanced.
Best Natural
Espoma Organic Weed Preventer

What We Like
- Made from 100 percent corn gluten meal
- Can be used in any season and is compatible with all lawn types
- Can be used in flower beds or vegetable gardens
What We Don’t Like
- Only covers 1,250 square feet of lawn
- Doesn’t fertilize or control weeds as well as synthetic products
Our Ratings: Application 5/5; Feed Effectiveness 4/5; Weed Control 2.5/5; Value 3.5/5
Product Specs
- NPK ratio: 9-0-0
- Application: Spring
- Grass type: All grasses
Espoma’s Organic Weed Preventer is a natural solution to prevent lawn weeds without harming the environment. This product is made with 100 percent corn gluten meal, which is a byproduct of the corn-milling process that contains a high amount of nitrogen. When applied to your lawn, the nitrogen in the corn gluten meal provides a slow-release fertilizer to nourish the grass and make it more resistant to weeds. Additionally, the corn gluten meal acts as a natural pre-emergent herbicide that inhibits the growth of weed seeds by drying out their roots.
Unlike chemical-based weed preventers, Espoma’s Organic Weed Preventer is safe for pets, children, and the environment. It can safely be used on flower beds and in gardens. During testing, we found that much more of this mix is required to be as effective as synthetic fertilizers. The granules are also more noticeable on the lawn. However, we didn’t have to worry about children or pets walking on that lawn while the granules were still visible. We also appreciated that it can safely be used on flowers and vegetable gardens.
This fertilizer/weed preventer did improve grass color and growth, but it didn’t perform as well as synthetic products. Espoma can help prevent pre-emergent weeds, but not those already growing.
Get the Espoma weed and feed at Ace Hardware or Walmart.
Best Cool-Season
GreenView Fairway Formula Spring Weed and Feed
What We Like
- Kills over 200 varieties of weeds
- Slow-release formula fertilizes for up to 12 weeks
- 36-pound bag treats up to 10,000 square feet of lawn
- Made a noticeable difference in the health and growth rate
What We Don’t Like
- Contains 2,4-D
- Didn’t kill existing weeds
Our Ratings: Application 5/5; Feed Effectiveness 5/5; Weed Control 2.5/5; Value 4.5/5
Product Specs
- NPK ratio: 24-0-6
- Application: Spring or fall
- Grass type: Kentucky bluegrass, Bermuda, buffalo grass, perennial ryegrass, fine and tall fescues, Bahia, centipede, zoysia, St. Augustine (except for Floratam)
GreenView Fairway Formula fertilizes lawns, targets over 200 lawn weed species, and prevents crabgrass from growing. It contains both slow-release and quick-release nutrients that feed a lawn for up to 12 weeks at a time. We like that the slow release reduces the number of times the fertilizer would need to be applied in a year.
Due to the slow-releasing formula, GreenView Fairway Formula is best for use on established lawns with a healthy root system. Using it on new grass may result in burning and stunted growth. It can be used on warm- or cool-season grasses, but check the acceptable grass varieties as there are some exceptions.
This mix noticeably boosted grass health during testing, with the grass growing at a faster rate and being greener than non-treated grass. It comes in a large bag and doesn’t require a lot of granules to be effective, making it an economical option for large lawns. However, we didn’t notice any difference in weed health, either killing them or preventing more from growing.
Get the GreenView Fairway Formula weed and feed at Tractor Supply Co., Ace Hardware (18 pounds), The Home Depot, Walmart, or GreenView.
Best Warm-Season
Scotts Turf Builder Southern Triple Action
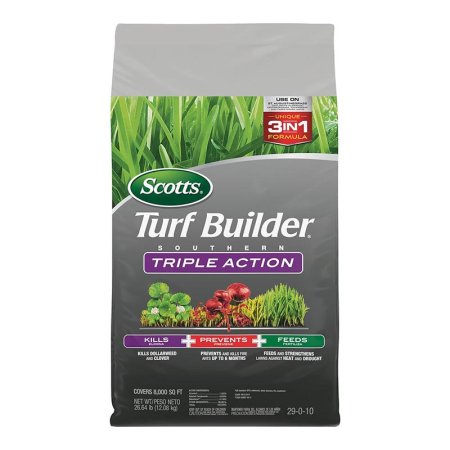
What We Like
- Helps lawns withstand heat and drought
- Large coverage area of up to 8,000 square feet
- High-nitrogen formula
What We Don’t Like
- Not safe for people and pets until fully watered in and dry
- Contains Atrazine
Product Specs
- NPK ratio: 29-0-10
- Application: Active growth periods
- Grass type: St. Augustine, Floratam, zoysia, centipede, carpet grass
We understand that warm-season grasses need a weed and feed that can withstand heat and drought conditions while building a thick green lawn. Scotts Turf Builder Southern Triple Action is a 3-in-1 weed and feed made for southern lawns. It’s safe for use on St. Augustine, zoysia, centipede, and carpet grasses, but it’s not recommended for use on Bermuda grass. This product also contains an insecticide that targets fire ants, mole crickets, sod webworms, fleas, armyworms, and more, and it keeps them away for up to 6 months.
Please note that this product wasn’t tested due to the geographic location of the tester.
Get the Scotts Turf Builder Southern weed and feed at Amazon, Tractor Supply Co., The Home Depot, or Walmart.
Best Liquid
Scotts Liquid Turf Builder With Plus 2 Weed Control
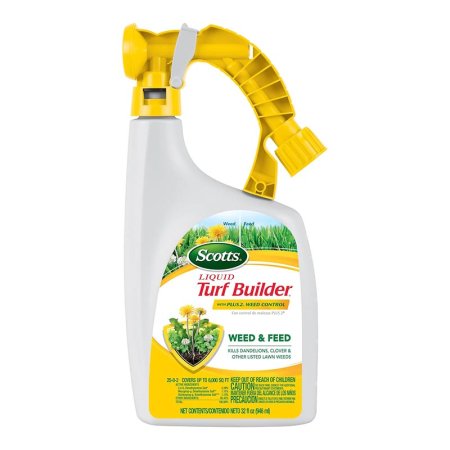
What We Like
- Suitable for fertilizing and weeding in any season on any grass type
- Easy to apply
- Affordable
- Noticeably killed weeds after a single application
What We Don’t Like
- Contains 2,4-D
Our Ratings: Application 4/5; Feed Effectiveness 3/5; Weed Control 2.5/5; Value 1.5/5
Product Specs
- NPK ratio: 25-0-2
- Application: Spring or fall
- Grass type: Bahia, Bermuda, centipede, zoysia, Kentucky bluegrass, fescue, ryegrass
Scotts Liquid Turf Builder weed spray lets users easily fertilize a lawn while killing dandelions and clover. One of this product’s best features is the ease of application. All that’s required is for the user to attach the applicator to a garden hose and apply this liquid weed and feed concentrate spray as needed. The process was easy during testing. The bottle has a clear strip so we could see how much we’d applied as we went along. That was helpful, as we applied it to a small area and didn’t want to use the entire bottle.
Scotts weed and feed helps control buckhorn, chickweed, clover, dandelion, ground ivy, henbit, knotweed, and more. Scotts Liquid Turf Builder weed and feed spray can be used with almost any grass type during any season. When used as directed, it won’t burn the lawn and only requires one or two treatments per year. However, for those who don’t notice a change in weeds after one application, it can be applied again within 3 to 4 weeks.
The brand says there should be a noticeable decline in weeds after a few days, but we didn’t notice weeds dying out until 3 weeks into testing. This was one of the few products that killed existing weeds. While it increased grass growth and deepened the green somewhat, it didn’t have the drastic health benefits for the grass as some of the other weed and feeds we tested.
Get the Scotts liquid weed and feed at Amazon, Lowe’s, Ace Hardware, or The Home Depot.
Or, DIY Your Own Weed and Feed
While there are many effective weed and feed products on the market, using commercial weed and feed can be expensive and harmful to the environment. A more natural solution is to make a DIY weed and feed using safe and effective ingredients.
Mix 1 pound of corn gluten meal, 1 cup of Epsom salt, and 1 cup of dried lawn clippings to make your own weed and feed. Corn gluten meal acts as a natural pre-emergent herbicide that prevents weed seeds from germinating, while Epsom salt provides magnesium and sulfur to nourish the grass. Dried lawn clippings act as a slow-release fertilizer that provides nutrients for healthy lawn growth. By using this natural DIY weed and feed, users can maintain a beautiful and healthy lawn without harming the environment.
Jump to Our Top Picks
How We Tested the Best Weed and Feed
| Testing Stats | |
| Products tested: | 7 |
| Hours spent testing: | 8 weeks |
| Tests performed: | 1 |
| Price range: | $20 to $70 |
We created a numbered grid using marking paint and stakes, and one weed and feed fertilizer was applied in each square. The exception was the liquid weed and feed, which required application in a larger area; it was applied to a 100-square-foot area next to the grid.
We calculated how much weed and feed to spread in each square based on the manufacturer’s instructions so that we didn’t over- or under-fertilize. The space was small enough that we spread the fertilizers by hand to prevent them from mixing. We then took pictures upon application and once a week for 4 weeks. Each weed and feed was scored according to a rubric based on how much product it required, how well it performed, and the ingredients. We also considered the eco-friendliness of each fertilizer, looking for nontoxic options and also pet-friendly weed and feed.
| Application | Feed Effectiveness | Weed Control | Value | |
| GreenView Broadleaf Weed Control Plus Lawn Food | 5 | 5 | 2.5 | 5 |
| Scotts Turf Builder Weed and Feed | 5 | 4.5 | 2.5 | 4 |
| BioAdvanced 5-in-1 Weed & Feed | 5 | 5 | 3.5 | 5 |
| Espoma Organic Weed Preventer | 5 | 4 | 2.5 | 3.5 |
| GreenView Fairway Formula Spring Weed and Feed | 5 | 5 | 2.5 | 4.5 |
| Scotts Liquid Turf Builder With Plus 2 Weed Control | 4 | 3 | 2.5 | 1.5 |
What to Consider When Choosing Weed and Feed
Not every weed and feed formula works on every type of grass or in every climate. You need to keep in mind the type of grass, the weed species you want to target, and fertilizer ingredients. Different weed and feeds are also designed for application during different seasons to provide nutrients the grass needs at specific stages of the growth cycle and to better target weeds when they’re at their most vulnerable.
Weed and Feed Type
Weed and feed can be divided into several types. The first is between natural and chemical weed and feeds. Natural weed and feeds may be organic (but not always) and often contain cornmeal as a natural weed preventative and grass fertilizer. These weed and feeds do not contain synthetic chemicals.
Chemical weed and feeds can be further divided into pre- and post-emergent weed and feeds. Pre-emergent weed and feeds contain chemicals that prevent weed seeds from germinating. They do not target already existing weeds. Post-emergent weed and feeds contain chemicals that target existing weeds while fertilizing grass. However, some products (like BioAdvanced 5-in-1 Weed & Feed, our upgrade pick), contain chemicals that affect both pre- and post-emergent weeds.
Grass Type
The best weed and feed product for a lawn depends on the grass type. Grass species have different nutrient requirements, so not all products are safe for every species of grass. Using the wrong weed and feed can stunt growth, burn, or further damage the grass. In general, grass species are divided into two categories: warm season and cool season. The seasons do not refer to the time of year but the climate and average soil temperature range.
- Warm-season turfgrasses grow best with average soil temperatures between 80 and 95 degrees Fahrenheit. Warm-season grasses thrive in the warmer climates of the southeastern and southwestern United States. They include Bahia, Bermuda, carpet grass, St. Augustine, and zoysia (Japanese lawn grass).
- Cool-season turfgrasses grow best with average soil temperatures between 60 and 75 degrees Fahrenheit. Cool-season grasses thrive in the cooler climates of the Midwest and northern regions of the United States. Some cool-season grasses are Kentucky bluegrass, perennial ryegrass, and tall and hard fescue.
Selecting a weed and feed that’s compatible with the grass species will provide far better results.
NPK Ratio
To grow a lush lawn, your soil needs to have essential nutrients. Fertilizers temporarily add nutrients to the soil. Fertilizers typically list their nutrient ratios as an NPK formula. This denotation represents the percentage of nitrogen (N), phosphorus (P), and potassium (K) in the product.
- Nitrogen (N) helps the grass grow properly and develop a green color.
- Phosphorus (P) helps develop strong root systems.
- Potassium (K) protects plants from disease, drought, and cold.
There are at least 11 states that ban phosphorus fertilizer use or sale. Luckily, many lawn weed and feed manufacturers have adapted to this and removed phosphorus from their products. Don’t worry—the weed and feed will still green and thicken the grass without the additional phosphorus.
Fertilizers can also contain secondary elements and micronutrients needed for healthy growth, such as sulfur, calcium, magnesium, boron, iron, molybdenum, zinc, copper, chloride, nickel, and manganese. To find out exactly what nutrients the lawn needs, conduct a soil test. Either purchase a test for home use or take a soil sample to the local cooperative extension testing office.
Natural vs. Synthetic
There are distinct differences between natural and synthetic weed and feeds.
Natural and organic weed and feed products contain plant-based or mineral ingredients that are safe for the environment and human health. They nourish the soil and plants to make them more resistant to weeds and prevent weed seed germination.
At this time, natural alternatives aren’t as effective as their synthetic counterparts. However, some users of natural weed and feeds report that they notice healthier grass and fewer weeds after using the products for several seasons. In short, it takes patience and consistency to see gradually improved lawn health. It also takes more of the product to fertilize, which increases the overall cost, but it’s often worthwhile for the long-term health of people and the environment.
On the other hand, chemical-based products contain synthetic herbicides that quickly kill weeds and improve grass health. However, they may contain ingredients that hurt beneficial plants, insects, and wildlife. Two of the most commonly used herbicides, 2,4-D and Atrazine, have been linked to numerous health and environmental problems. 2,4-D is a hormone-disrupting chemical that can potentially cause cancer, congenital disabilities, and developmental issues in children. Atrazine is a highly toxic herbicide that can contaminate drinking water, cause congenital disabilities, and harm wildlife.
Be careful when applying these products in areas with a shallow water table, as they have the potential to contaminate the water supply. Always follow the manufacturer’s instructions, and keep children and pets off the lawn until the product has dried or worked its way into the grass/soil.
Application
Weed and feed comes in two forms: liquid and granular. Liquid forms are simple to apply and kill weeds faster than the more economical, though slower-acting, granular forms. Weed killer spray or liquid weed and feed is designed for small yards. Granular weed and feed covers more area, often 5,000 square feet or more, and is often available in 18-pound bags and larger. Granular versions offer a better value, but users do need to water their lawns after application for the product to penetrate the grass.
FAQs
If you want a pet-safe weed and feed or are curious to know what type is best for killing stubborn weeds, read on for answers to these and other commonly asked questions.
Depending upon the brand, it may take from 5 days to up to 2 weeks to see the visible results of weed and feed. However, natural and organic products may take longer to produce visible results.
As with most gardening or fertilizing tasks, it is best to apply weed and feed in the spring. This is when weeds are actively beginning to grow, which allows the weed and feed to kill the weeds as seedlings. However, some brands do not recommend that the weed and feed become wet after application, so apply the weed and feed before rain—in some cases, at least 24 hours before any forecasts of rain.
Read the manufacturer’s instructions. Some weed and feed products should be applied a day or two after mowing, while others should not. The application time varies by product and sometimes by the season in which the product is used.
Weed and feed is a combination of fertilizer and various weed killers, so these products are not bad for your lawn.
If used properly, pet-friendly weed and feed and many standard weed and feeds are generally safe to use on lawns and spaces where dogs (and even children) are actively playing. However, always follow the package instructions because some herbicides can be moderately toxic to dogs.
Meet the Tester
Stacey L. Nash has written about home and garden products, home design and decor, and general indoor and outdoor home improvement for 5+ years. She’s passionate about research and hands-on testing to find the products that add true value to homeownership and daily life. She lives on 12 heavily wooded acres, where she and her family put home and outdoor products to the test while avoiding bears and cougars.
Additional research provided by Debbie Wolfe.
The post The Best Weed and Feed Products for Fewer Weeds and Greener Grass, Tested appeared first on Bob Vila.
]]>The post The Best Soil Test Kits, Tested appeared first on Bob Vila.
]]>Testing garden soil is the best way to determine what it needs—if anything—and how much. A variety of soil testing kits are available, but how reliable are they? Home gardeners rely on these kits when deciding whether to amend their soil, so to narrow down the best soil test kits, we tested for accuracy, dependability, and ease of use.
Soil testers range from simple pH strips to complex kits that pinpoint deficiencies. Serious gardeners will want to reach for comprehensive tests. As Jon Traunfeld, director of the Home & Garden Information Center at University of Maryland, explains, “We recommend that gardeners have their soil tested by accredited soil testing labs, public or private. A basic test that measures soil pH, important soil nutrients, and organic matter costs $20 to $25. The labs also provide recommendations for lime and fertilizer if needed.” These tests are available directly from labs or through your county extension office.
For the average home gardener though, it can be easier to buy a soil test kit online, so that’s what we tested. To ensure accuracy, we compared product results to test results acquired from the Kansas State University soil testing lab. Our favorite product ended up being the MySoil Test Kit—it was easy to use and the results were simple to interpret, and most importantly of all, they were accurate. Ahead, learn what to look for when shopping for a soil test kit, and find out why the following products are well suited for helping determine soil deficiencies.
- BEST OVERALL: MySoil Test Kit
↓ Jump to Review - RUNNER-UP: Soil Savvy Soil Test Kit
↓ Jump to Review - BEST BANG FOR THE BUCK: Atree 3-in-1 Soil pH Meter Tester Kits
↓ Jump to Review - BEST PH STRIPS: Garden Tutor Soil pH Test Strips Kit
↓ Jump to Review - BEST CHEMICAL TEST: Luster Leaf 1662 Soil Test Kit
↓ Jump to Review - BEST DIGITAL TEST: Luster Leaf 1605 Digital Soil Test Kit
↓ Jump to Review - BEST FOR CROPS: Whitetail Institute Laboratory Soil-Test Kit
↓ Jump to Review - BEST PRECISION PH: Bluelab Soil pH Pen
↓ Jump to Review

Product Comparison
| Type of Test | Tests For | Result Time | |
| MySoil Test Kit | Professional, mail-in | 13 nutrients plus pH level | Results by email within 6 to 8 days of mailing the sample |
| Soil Savvy Soil Test Kit | Professional, mail-in | 14 nutrients plus pH level | 11 days from when the sample was mailed |
| Atree 3-in-1 Soil pH Meter Tester Kits | Analog probe | Moisture, pH, light | Immediate for moisture and pH, 10 minutes for light |
| Garden Tutor Soil pH Test Strips Kit | Strips | pH levels | Within 20 seconds of testing |
| Luster Leaf 1662 Soil Test Kit | Chemical (at home) | pH, nitrogen, phosphorus, potassium | Varies by the test but all within a few minutes |
| Luster Leaf 1605 Digital Soil Test Kit | Chemical (digital results) | Nitrogen, phosphorus, potassium, and pH | Within a few seconds |
| Whitetail Institute Laboratory Soil-Test Kit | Professional, mail-in | Calcium, magnesium, phosphorus, potassium | Results available by email in one week |
| Bluelab Soil pH Pen | Digital probe | pH and temperature | Immediate |
Our Top Picks
The kits we tested had to be accurate and relatively simple to use to earn a spot on this lineup. Test kits and equipment vary by the type of test being performed, so some are better suited to home gardeners, while others appeal to commercial and agricultural growers. We tested a range of kits—some required mailing off a soil sample for professional analysis, some involved chemical testing at home, and others required nothing more than sticking a probe in the soil.
Best Overall
MySoil Test Kit
Our Ratings: Ease of Use 5/5; Accuracy 5/5; Value 5/5
Product Specs
- Type of test: Professional, mail-in
- Tests for: 13 nutrients plus pH level
- Result time: Results by email within 6 to 8 days of mailing the sample
What We Like
- Professional test for pH and a range of soil nutrients and minerals
- Process is clear and straightforward
- Results are detailed and easy to understand
What We Don’t Like
- No print option available on the website
For professional results, check out the MySoil test kit, which allows gardeners to gather soil samples and have them professionally tested. The MySoil kit offers an in-depth analysis, revealing the amounts of micronutrients, NPK, and macronutrients in the tested soil.
With the MySoil kit, we registered online and followed detailed instructions, gathering a large amount of soil from various areas of the property, mixing it together well, and filling the provided testing cup with the soil blend. Then we sent my soil sample to MySoil as well as an additional soil sample to Kansas State University’s agricultural department so we would have a quality comparison.
We received an email 6 days later with the results of the soil tests. We were impressed with the comprehensive results. The lab listed the levels of existing nutrients, including nitrogen, potassium, sulfur, calcium, iron, and more, and then compared our soil’s levels with optimal levels, which were also listed for each nutrient. We also received a bar chart that allowed us to visually compare the results, making them simple to understand.
Best of all, when the soil results from K-State came back, they were very close to the MySoil results, making us feel very comfortable with the quality of the MySoil lab results.
Get the MySoil soil test kit at Amazon or MySoil.
Runner-up
Soil Savvy Soil Test Kit
Our Ratings: Ease of Use 4/5; Accuracy 5/5; Value 5/5
Product Specs
- Type of test: Professional, mail-in
- Tests for: 14 nutrients plus pH level
- Result time: 11 days from when the sample was mailed
What We Like
- Soil-collection instructions are easy to follow
- Results provide detailed recommendations for both synthetic and organic amendments
- Tests for aluminum, which our top pick does not test for
What We Don’t Like
- Could provide a better explanation of the results
- It took the longest of all labs to get results
The Soil Savvy soil test kit offers professional soil analysis and custom fertilizer recommendations. It comes with a scoop, a collection cup containing liquid and a plastic ball, a prepaid postage envelope, and complete instructions for collecting and submitting a soil sample.
As with the other soil samples we sent in the mail for professional testing, used the same soil gathered from various spots and then blended well. We spooned the soil into the cup, sealed it, and then went online and registered the barcode that came with the kit.
The lab took a little longer than we’d anticipated to get back to us, but in 11 days, we got an email directing us to log on for my results. We were impressed by the accuracy of the test results—they were right in line with the K-State results, and we also received customized recommendations for amending my soil to make it healthier. The Soil Savvy recommendations were broken down by synthetic and organic fertilizers—telling me exactly how much of each to apply per 1,000 square feet to amend the soil.
Soil Savvy could have provided a better explanation of the results, however. We understand what nutrient ratios are, but a newbie gardener might benefit from further explanation of what the numbers mean. The lab tested for the 14 most common nutrients plus pH level.
Get the Soil Savvy soil test kit at Amazon or Soil Savvy.
Best Bang For The Buck
Atree 3-in-1 Soil pH Meter Tester Kits
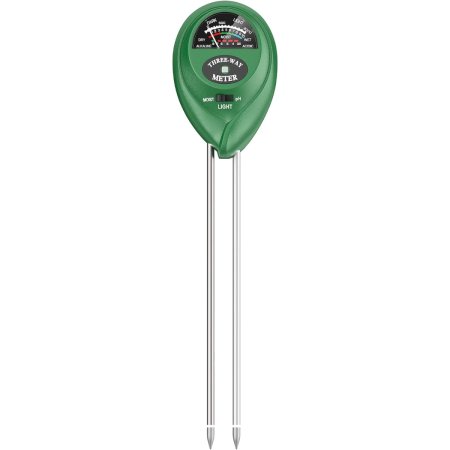
Our Ratings: Ease of Use 5/5; Accuracy 5/5; Value 5/5
Product Specs
- Type of test: Analog probe
- Tests for: Moisture, pH, light
- Result time: Immediate for moisture and pH, 10 minutes for light
What We Like
- Very simple to use and provides immediate or near-immediate results
- Doesn’t need batteries
- Low-effort option
What We Don’t Like
- Only measures moisture, pH, and light
Not all gardeners need or want a nutritional analysis of their soil. Some just want to know the pH level or how much light a plant would receive in a specific location. The Atree soil pH meter provides those answers accurately and at an affordable price.
We tested the Atree meter by inserting it in various spots in our flower garden. Over the years, we’ve added amendments, such as sulfur, to specific areas where acid-loving plants are growing, and we were curious whether this simple tester would pick up on that. It did—the soil around our hydrangeas, which we’ve amended heavily, tested at 6 on the pH scale, while the soil around our daisies registered at 6.8. Both seemed accurate based on our historical knowledge of our soil and the amendments we’ve made.
We then tested both moisture and light levels in various garden spots, and the Atree again seemed accurate. While this tester didn’t determine things like specific nutrient levels, we found that it would be great for gardeners who are happy with the health of their soil but would like to know if the light is adequate or whether the soil is draining well. The Atree did a good job measuring both.
Get the Atree soil test kit at Amazon.
Best Ph Strips
Garden Tutor Soil pH Test Strips Kit
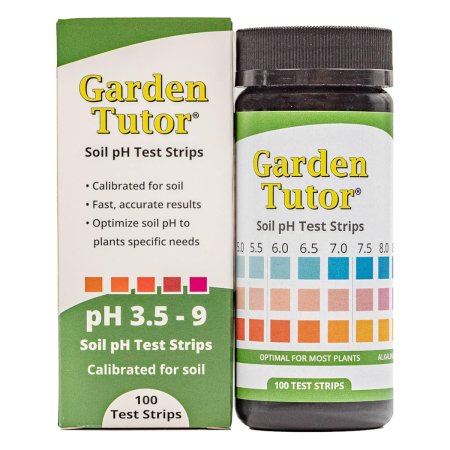
Our Ratings: Ease of Use 5/5; Accuracy 5/5; Value 4/5
Product Specs
- Type of test: Strips
- Tests for: pH levels
- Result time: Within 20 seconds of testing
What We Like
- Quick and accurate pH test results
- Simple to use and read
- Includes 100 test strips for lots of testing at an affordable cost
What We Don’t Like
- Poor packaging likely led to short shelf life
Garden Tutor’s test strips offer quick results in determining indoor or outdoor soil’s acid/alkaline content. The kit contains 100 test strips and also includes a 16-page handbook that lists optimal pH levels for growing various plants.
We found the Garden Tutor soil pH test strips to accurately determine the pH levels in various parts of our flower garden. The simplest of all the kits we tested required mixing soil from a specific garden area with water and then dipping it in a pH test strip. In a few seconds, sensitive tabs on the test strip turned color, and we visually matched them to the color-coded chart on the outside of the bottle to determine the amount of acid or alkalinity of the soil.
We tested the soil in an area we knew had a lower pH, as we’ve added pH-lowering amendments for years. The Garden Tutor test strips determined that level to be 6.1, which sounded close and aligned with other pH tests we performed. We then tested the soil in a spot we knew was more alkaline and got a higher pH reading.
One thing we wish the manufacturer would have included, however, was a moisture-absorbent pack with the strips. We used about 20 strips in our initial tests, and all were fine. Three weeks later, however, the pH pads had all turned brownish, which we suspected was due to moist air getting into the bottle.
Get the Garden Tutor soil test kit at Amazon or Garden Tutor.
Best Chemical Test
Luster Leaf 1662 Soil Test Kit
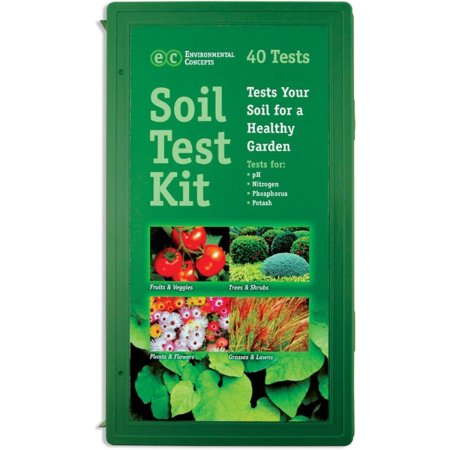
Our Ratings: Ease of Use 4/5; Accuracy 5/5; Value 4/5
Product Specs
- Type of test: Chemical (at home)
- Tests for: pH, nitrogen, phosphorus, potassium
- Result time: Varies by the test but all within a few minutes
What We Like
- Provided accurate results
- Looks intimidating but it’s relatively easy to use
- No need to send off a sample and wait days for results
- All the components fit into a small kit that’s easy to store
What We Don’t Like
- Did not have enough solution to complete 40 tests
In addition to determining soil’s pH level, the Luster Leaf soil test kit pinpoints the amount of the three most common soil macronutrients: nitrogen, phosphorus, and potassium. There’s no need for the user to send a sample to a laboratory with this chemical test.
When we first opened the Luster Leaf test kit case, we were surprised by the number of vials and bottles of solutions. It didn’t look very easy. After reading the instructions, we found it was actually pretty simple. Testing involved gathering soil, putting a tiny bit in a glass vial, adding a specific liquid and/or powder (depending on the test), and shaking the vial. We were then able to compare the color of the liquid in the vial to an included chart to get the results.
To determine the accuracy of the Luster Leaf tests, we compared the results we got from the mail-in soil tests. The NPK results were close to the lab results. For an at-home test, we were pretty impressed. (The pH, on the other hand, tested lower than the lab tests, but the soil where we took the sample for this test had been previously amended to lower pH.)
The downside? The manufacturer says the kit will perform 40 tests. We found that to be inaccurate. We followed the instructions carefully and had only enough solution to do about 15 tests.
Get the Luster Leaf 1662 soil test kit at Amazon.
Best Digital Test
Luster Leaf 1605 Digital Soil Test Kit
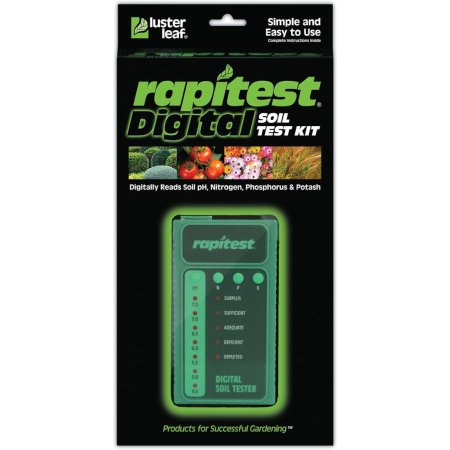
Our Ratings: Ease of Use 4/5; Accuracy 5/5; Value 4/5
Product Specs
- Type of test: Chemical (digital results)
- Tests for: Nitrogen, phosphorus, potassium, and pH
- Result time: Within a few seconds
What We Like
- Digital results are straightforward and very easy to interpret
- Testing just requires inserting the sample and pressing a test button
- Includes a booklet that has pH preferences for over 450 plants
What We Don’t Like
- Only 5 capsules per test for nitrogen, phosphorus, and potash
The second Luster Leaf kit in the lineup tests for nitrogen, phosphorus, and potassium, but it takes some of the complexity out of testing using color-coded capsules. It also takes the guesswork out of matching the results with its easy-to-read digital display. Everything is color-coded: N, P, and K correspond with purple, blue, and orange, respectively, while green is for pH.
We collected a soil sample, filled one of the four test tubes, and then added filtered water to the tube. We shook the soil and water solution, inserted a color-coded capsule in the vial, and shook again. Once the contents were well mixed, we inserted the vial into the hole at the top of the digital reader and pressed the button corresponding to the test.
This was the same test as the first Luster Leaf kit, but it was more user-friendly, and the color-coding made everything understandable. The digital reader gave me the results via a lit-up button. If the soil had too much of a nutrient, it registered as “surplus,” and lower amounts registered as “sufficient,” “adequate,” “deficient,” or “depleted.”
Unfortunately, the digital tester did not show how low or high a nutrient might have been, but we were able to look in the booklet and see optimal NPK levels for different plants, grasses, and flowers. The booklet also offered suggestions on how to amend the soil to raise or lower specific nutrient levels.
Get the Luster Leaf 1605 soil test kit at Amazon or Earth Easy.
Best For Crops
Whitetail Institute Laboratory Soil-Test Kit
Our Ratings: Ease of Use 5/5; Accuracy 5/5; Value 4/5
Product Specs
- Type of test: Professional, mail-in
- Tests for: Calcium, magnesium, phosphorus, potassium
- Result time: Results available by email in one week
What We Like
- Ideal for food plots
- Customizable—write down the intended crop for personalized results
- Detailed results arrive quickly and are tailored to the chosen crop
What We Don’t Like
- Less comprehensive than some other tests
Hobby farmers and crop growers can receive an expert soil analysis with the Whitetail Institute’s Laboratory soil test kit. Growers also receive a custom consultation and recommendations for improving their soil based on the type of crop that will be grown.
For testing, we once again used the same soil gathered from various spots, blended well, and sent the sample to Whitetail. Of the three mail-in soil kits we tested, Whitetail offered the highest level of customization. When we filled out the form, they asked what we planned to grow in the soil. We chose alfalfa and Whitetail sent specific instructions for amending the soil to make it suitable for growing alfalfa.
The nutrient test results were very close to those we obtained from the other labs and Kansas State University, but Whitetail only tested for four nutrients: phosphorus, potassium, calcium, and magnesium. We called the local extension agent and asked why. He said those are the most critical four nutrients for most agricultural crops.
We could access the test results in just one week, and a few days later, a paper copy arrived via snail mail. We found that the Whitetail test kit results would be a boon for farmers or hobby farmers who want to create optimal soil conditions for a specific crop.
Get the Whitetail Institute soil test kit at Amazon, Cabela’s, or Whitetail Institute.
Best Precision pH
Bluelab Soil pH Pen
Our Ratings: Ease of Use 3/5; Accuracy 5/5; Value 4/5
Product Specs
- Type of test: Digital probe
- Tests for: pH and temperature
- Result time: Immediate
What We Like
- Provides very precise pH testing, measuring to 0.1 degree
- Easy-to-see digital readout on a backlit LCD display
- Developed for commercial growing needs
What We Don’t Like
- Must be calibrated before use
For commercial-scale growers, hydroponic growers, or gardeners who want the ultimate in precision pH testing, consider the Bluelab pH pen that provides highly accurate acid/alkaline results. The pen comes with a backlit LCD display and requires a AAA battery for operation. It also features two-point calibration for ensuring accurate pH readings, but the calibration solution is not included.
We had to locate 7.0 and 4.01 pH solutions, and we were able to borrow some of both from the local high school chemistry class, but be aware that if you want to use this pen, you’ll need to buy some of your own.
After calibrating the Bluelab pen, which involves putting it first in one solution and then the other and pushing the calibration button each time, we were able to test the pH and the temperature of the soil of our potted plants. We were surprised at the accuracy of this pen tester as it measured pH to a tenth of a degree and clearly displayed the number on the LED screen. The pH was close to what we had gotten in other tests, but this seemed to be the most accurate of all the tests. The temperature reading was also handy, and it would be vital for hydroponic growers or commercial growers who needed to maintain a specific growing temperature.
Get the Bluelab soil test pen at Amazon or Bluelab.
Jump to Our Top Picks
How We Tested the Best Soil Test Kits
| Testing Stats | |
| Products tested | 9 |
| Time spent testing | 1 hour per kit |
| Tests performed | 9 |
| Price range | $10 to $200 |
Our goal in testing the soil test kits was to determine how accurate each was, how easy they were to use, and how beneficial the results would be for our readers. The types of soil tests varied widely—from professional tests that required sending a soil sample to a lab to simple pH meters that determined a soil’s acid or alkaline level via a probe. We extensively researched dozens of soil test kits and products before choosing which ones to test, and we intentionally chose different types of kits because growers have very different needs.
Misti Mathis, co-owner of Harvest Gold Organics, which sells plant care products out of McKinney, Texas, offers some advice on how shoppers can decide between kits: “Ultimately, the best choice depends on your specific needs and budget. While home test kits won’t be as precise as professional labs, they’re a good option for many gardeners.” She adds that “a professional lab test might be a better choice if you’re facing severe plant growth issues or have unique soil characteristics.”
To help determine the effectiveness of individual lab tests, we also sent a soil sample to the agricultural department at Kansas State University, where they do high-end soil and plant testing. The results from Kansas State were used as a starting point for comparing the other lab tests and the at-home chemical testing kits.
We awarded points for each kit or product, and at the end of testing, we added the points and used them to help determine the best uses and specific awards for each of the kits that earned a spot in this lineup.
What to Consider When Choosing a Soil Test Kit
Many gardeners and home landscapers buy fertilizer and soil amendment products that promise to produce robust plant growth, improve soil structure, or result in abundant blooms. Still, unless the products provide what the soil lacks, the results may not be what the gardener expected. In some cases—such as adding fertilizer to nutrient-dense soil—plants may even suffer from fertilizer burn. Soil testing takes the guesswork out of gardening and landscaping, and that’s why I tested the top soil test products on the market today.
Soil
Soil quality varies from location to location. The soil in some regions might be perfect for growing vegetables and flowers, while the soil someplace else must be heavily amended with organic matter to grow anything. The following four common types of soil have different properties:
- Silt: Fine and soft, silt grains are smaller than grains of sand. Silty soil is associated with prior flooding that washed topsoil downstream. Silty soils are suitable for growing most types of plants but will benefit from adding organic matter to help increase drainage. Depending on its nutrient content, silt may also require a fertilizer.
- Loamy: An optimal blend of silt, sand, clay, and organic matter, loamy soil is a gardener’s best friend. It drains well, yet resists compaction as it dries out. It’s suitable for growing fruits, vegetables, and most types of flowers and shrubs.
- Clay: While clay soil is full of nutrients, it’s composed of ultra-fine particles that stick together when wet and become rock-hard when dry. Plants don’t grow well in clay soil because their roots can’t push as easily through thick clay as they can with other soil types. Clay soil must be amended with organic matter, such as compost, to help aerate the soil and make it suitable for growing plants.
- Sandy: Better than clay because it offers spaces between the grains for roots to grow, but not as nutrient-dense as loam, sandy soil drains well. It is suitable for growing bulbs, such as tulips, and root crops, including potatoes and carrots. When preparing soil for the upcoming growing season, adding organic matter will help it retain moisture when growing other types of plants.
Test Types
Several soil-testing products are available to determine the amounts of various nutrients and macronutrients in the soil. Among the most comprehensive tests are those that involve taking soil samples and sending them to a lab for analysis. Still, at-home kits and instruments like these can be of help.
- Strips: A simple type of soil test, pH strips are coated bits of paper that determine the current acidity or alkalinity level of the soil. The gardener mixes soil with distilled water, using the recommended ratio on the package instructions. (Tap water can influence the pH readout.) After inserting the test strip in the solution, the resulting color of the strip lets the gardener know whether the soil in the garden is acidic or alkaline. A chart usually comes with pH test strips so users can compare the colors.
- Analog: These testers are commonly used to test soil for moisture content, pH levels, and some may even test the quantity of the light in specific locations. They feature aluminum probes to be inserted in the soil when taking readings. Some may use batteries, but many analog testers react to wetness in the ground and often don’t need batteries.
- Digital: Like analog soil testers, digital soil testers often come with probes to insert in the ground to determine moisture content and pH levels. They usually require batteries and may also be used in conjunction with chemical testing to help determine nutrient levels, such as the amount of nitrogen or potash in the soil.
- Chemical: At-home chemical soil tests require adding a drop or two of a specific chemical called a “reagent” to a soil sample. The reaction helps show the health of the soil. Chemical soil tests are suitable for testing one or more factors, including pH, and specific nutrients, such as nitrogen or calcium.
- Professional: The most reliable of all soil tests, professional tests require the gardener to collect a soil sample. The sample is mailed to a laboratory, where it’s analyzed for structure and a variety of nutrients. Then the lab sends the results and soil recommendations back to the gardener.
Testing
Testing kits and instruments commonly help pinpoint soil characteristics. Knowing the makeup of the soil helps you better maintain your garden. Keep in mind that various plants have specific nutrient requirements, so it’s essential to research the plant that will be grown before adding nutrients.
- Macronutrients: The three most common macronutrients needed for healthy plant growth are nitrogen (N), phosphorus (P), and potassium (K). Every bag of fertilizer will list an NPK number that identifies the amount of each of these three nutrients. The types of N, P, and K nutrients come in various forms, such as potassium carbonate for phosphorus, and urea or anhydrous ammonia for nitrogen. In general, all the NPK varieties perform similar functions. The key is knowing which specific nutrient that a plant needs and then using the soil test results to add a fertilizer formulation that helps balance nutrient levels.
- Micronutrients: Plants may require trace minerals as well as macronutrients, and a soil tester that pinpoints micronutrients, such as copper, iron, and manganese, tells the gardener if too much or not enough of these nutrients is in the soil.
- Acid or alkaline: The pH scale runs from 0 to 14, with 7 being neutral. Most garden plants prefer slightly acidic soil, between 6 and 7. However, some plants such as lilac and clematis prefer slightly alkaline soils, while azaleas prefer acidic (5.5) conditions.
- Temperature: Testing soil temperature is much like testing human temperature; the tester has a thermometer that indicates how warm or cool the soil is. This is helpful for commercial growers who want to start production as early in the spring as possible. It also can be helpful for hobby gardeners who want to make sure the soil is warm enough before they set out seedlings.
- Light: Because plants need various amounts of light, a light meter can help determine whether a location will be optimal for a specific plant variety. While plants have different light needs, all need some light for photosynthesis, which is how the plant synthesizes water and carbon dioxide into food. Most at-home light meters will display low, medium, and high lighting conditions. A gardener can use these readings to determine whether a plant is receiving enough light (or too much light) in a specific spot.
- Moisture: One of the most common soil tests is for moisture, and it’s used to determine whether the soil is draining well. Moisture meters usually have a gauge that allows the gardener to see if the soil, whether it’s in a garden bed or is a potting soil mix, is dry, moist, or wet.
Accuracy
Soil test kits vary in accuracy, with professional lab tests ranking as the most accurate. The quality and composition of the soil may also vary from one end of the garden to the other based on the amount of light that a specific spot gets, whether leaves fall and decompose in one spot, or what types of plants were grown there in the past. For example, plants in the legume family, such as soybeans or clover, can add nitrogen to the soil.
Choosing the most accurate test or tester can prove challenging, but look for features such as large, easy-to-read gauges on analog testers and probes that are solidly attached. Chemical kits should offer multiple testing processes for double-checking results, and pH test strips will be most accurate before their expiration date. No matter the individual test kit, gardeners can help avoid mistakes by performing multiple tests in different spots.
Speed of Results
The quickest results come from tests that determine pH and moisture. At-home test kits and instruments can determine these two factors in mere seconds. Testing for other nutrients may take longer, especially if the soil has to be combined with water and then allowed to settle before performing a chemical test.Light and moisture meters can often determine results in a few minutes. Retesting can be done as often as desired to get an idea of light quality during different times of the day and to see whether moisture evaporates more quickly from soil during higher outdoor temps.
The longest wait period comes when seeking professional laboratory results. The gardener must gather the soil samples, place them in a package, and mail the package to the laboratory. Depending on the speed of the lab, it may take a few days to test the sample and then a few extra days to get the results. Some labs can send results by email, which speeds up the process by a couple of days.
Ease of Use
Test kits that feature pH strips and meters with probes are simple to use and self-explanatory for the most part, but the best soil test kits come with directions on how to handle the strips and the probes, in addition to offering information for understanding the relevance of the test results. Chemical test kits can be more complex, but they come with instructions on gathering soil samples, mixing them, and choosing the chemicals to use when conducting specific nutrient tests. Chemical kits often come with charts that explain what the different results mean, such as various color changes that occur when testing for particular macronutrients and micronutrients.
FAQs
The best soil test kit can help a gardener figure out the most beneficial fertilizers or amendments to add to a garden. Below are answers to some common questions about soil testing kits.
If plants are thriving, there’s no need to test the soil. However, if plants seem to wilt, die, or just do poorly, testing the soil could help determine if the problem is due to a structure or nutrient deficiency in the soil.
Absolutely. Many DIY-type soil testers are available for testing everything from moisture and pH to the amount and type of nutrients in the soil. Some involve sending the soil sample to a professional lab—these can yield the most accurate results.
Digital soil testers are usually reasonably accurate. Gardeners can increase accuracy by performing multiple tests in different spots of the garden and comparing the results.
There are several soil testing methods. Soil test kits you can buy for at-home use feature pH strips, analog or digital meters, and chemical testing. They will include directions for the testing method. Professional testing is available by sending soil samples to a lab—you mail in a soil sample and they’ll provide results within a few days or weeks.
A pH test measures the acidity and alkalinity levels of the soil. The acidity of the soil can affect plant health, including how well it absorbs nutrients, so aiming for the ideal pH level for your plant types is one important step toward a flourishing garden.
Soil treatments are available that will either raise or lower the soil’s pH level, depending on what the gardener is growing. These are often called pH-UP and pH-DOWN products. You can also use amendments like garden lime and bone meal (which increase soil pH) and peat moss or sulfur (which lower soil pH) to naturally adjust pH levels in your garden.
Kits with pH strips may expire in a few months, especially if they’re not kept in an airtight container. Meters and monitors will not expire. However, if they’re battery operated, they will require new batteries when the old ones run down. Chemical kits are often good for 2 to 5 years.
Meet the Tester
Glenda Taylor is a product tester and writer specializing in the construction, remodeling, and real estate industries. She and her husband own a general contracting company, and Taylor is experienced in both residential and commercial building applications. She tests a wide range of power tools as well as other home improvement, household, and lawn-and-garden products.
The post The Best Soil Test Kits, Tested appeared first on Bob Vila.
]]>The post The Best Hose Nozzles for Leak-Free Gardening, Tested appeared first on Bob Vila.
]]>Using your thumb to direct the flow on an open-ended garden hose is hardly an effective way to water plants. A good hose nozzle provides superior control and helps prevent the wasteful overwatering that can harm plants. However, with so many options out there, it can be challenging to decide which hose nozzle to choose. We wanted to know whether today’s top-rated nozzles are all they’re cracked up to be, so we tried them out.
We attached the nozzles to garden hoses and cranked up the water pressure, noting how easily they connected, whether they dribbled (no one likes that!), and how well each of the spray functions performed. We watered grass, potted plants, and raised beds in our quest to determine which nozzles would earn a spot in this lineup of the best hose nozzles. After all that testing, we chose the Green Mount New Patent Garden Hose Nozzle as our top pick. It earned that spot as a result of its ergonomic design and the fact that it didn’t leak even a little.
Keep reading to learn some essential tips for choosing the best hose nozzle, and find out the best (and worst) aspects of each of the following products before selecting the right one for your yard and garden this year.
- BEST OVERALL: Green Mount New Patent Heavy-Duty Hose Nozzle
Jump to Review - RUNNER-UP: Twinkle Star Heavy-Duty Brass Adjustable Hose Nozzle
Jump to Review - BEST BANG FOR THE BUCK: Gilmour Pistol-Grip Adjustable Watering Nozzle
Jump to Review - BEST HEAVY-DUTY: Dramm Adjustable Hose Nozzle
Jump to Review - BEST WAND: The Relaxed Gardener Watering Wand
Jump to Review - BEST ERGONOMIC: Green Mount Ergonomic Handle Fireman’s Hose Nozzle
Jump to Review - BEST LIGHTWEIGHT: Gilmour Heavy Duty Thumb-Control Nozzle
Jump to Review - BEST MULTIPURPOSE: Esow Garden Hose Nozzle
Jump to Review - BEST FOR POTS: Dramm One-Touch Rain Wand
Jump to Review - BEST HEAVY USE: Fanhao Garden Hose Nozzle
Jump to Review

Product Comparison
| Type | Material | Spray Variations | |
| Green Mount New Patent Heavy-Duty Hose Nozzle | Pistol | High-density ABS plastic | Spray, mist, jet, shower, soaker, cone, and flat |
| Twinkle Star Heavy-Duty Brass Adjustable Hose Nozzle | Twist | Heavy-duty brass | Fluctuates between jet and cone |
| Gilmour Pistol-Grip Adjustable Watering Nozzle | Pistol | Zinc | Adjustable from narrow jet to wide cone with spray variations in between |
| Dramm Adjustable Hose Nozzle | Twist | Brass | Adjustable from mist to jet |
| The Relaxed Gardener Watering Wand | Watering wand | Steel and molded plastic | 8 |
| Green Mount Ergonomic Handle Fireman’s Hose Nozzle | Twist | Steel, rubber coating | Adjustable, ranging from jet to mist with various shower functions in between |
| Gilmour Heavy Duty Thumb-Control Nozzle | Pistol | Steel, rubber coating | 8 (mist, shower, rinse, soft wash, clean, sweep, jet, and bucket-filling) |
| Esow Garden Hose Nozzle | Pistol | Brushed steel and brass | Adjustable from jet to mist |
| Dramm One-Touch Rain Wand | Wand | Aluminum, rubber coating | Shower (not adjustable) |
| Fanhao Garden Hose Nozzle | Pistol | Brushed steel, brass, rubber coating | 7 (center, flat, jet, shower, mist, cone, and full) |
Our Top Picks
With so many hose nozzles on the market, selecting one can be tough. We put these nozzles through their paces, and we didn’t pull any punches so that our readers will have a good shot at getting a nozzle likely to perform well for years. All the nozzles that earned a spot in our lineup are GHT, so they’re all suitable for garden hoses in the U.S., and each one is a standout in its class.
Best Overall
Green Mount New Patent Heavy-Duty Hose Nozzle
Our Ratings: Comfort 5/5; Ease of Use 5/5; Effectiveness 5/5; Durability 4/5; Value 4.5/5
Product Specs
- Type: Pistol
- Material: High-density ABS plastic
- Spray variations: Spray, mist, jet, shower, soaker, cone, and flat
What We Like
- Nonslip ergonomic grip prevents strain on the users’ hands and arms
- Fireman-type water-adjustment handle for ease of use
- Durable construction prevents any leaks or drips
What We Don’t Like
- Handle is slightly stiff but may loosen up over time
DIY gardeners looking for a high-quality garden hose nozzle may want to check out Green Mount’s heavy-duty hose nozzle. We were certainly impressed. This hose nozzle features a large on-off handle with an ergonomic design that’s easy to grip and a pistol-grip-style handle for control. We were able to select from six spray options by twisting the selector ring, including jet, mist, soaker, and shower. We then adjusted the amount of water pressure by moving the handle forward or backward.
The Green Mount nozzle connected to the hose easily, and it didn’t leak anywhere—not where it attached to the hose and not at the nozzle openings, which was refreshing because we’ve used nozzles that dribbled so much, our sleeves would be soaked.
The construction of this Green Mount nozzle is mostly ABS plastic, making it impact-resistant and durable, but it also features a metal nozzle housing and hose fitting. It comes with a metal mesh screen that users can remove to clear clogged sediment from the nozzle. This garden hose nozzle is well suited for those with various watering needs. The spray options can provide a robust stream of water to clean off sidewalks, a gentle mist for delicate plants, such as orchids, and a soaker for quickly watering large potted plants or shrubs.
Get the Green Mount heavy-duty hose nozzle at Amazon or Walmart.
Runner-Up
Twinkle Star Heavy-Duty Brass Adjustable Hose Nozzle
Our Ratings: Comfort 3/5; Ease of Use 4/5; Effectiveness 4/5; Durability 5/5; Value 4/5
Product Specs
- Type: Twist
- Material: Heavy-duty brass
- Spray variations: Fluctuates between jet and cone
What We Like
- No-leak performance; heavy-duty construction lasts for a long time
- Easy to hold; long design is comfortable
- 4 adjustable spray pattern options integrated to suit any user’s preference
- Comes in a 2-pack
What We Don’t Like
- No padded grip; may not be ideal for some users
If we could only use two words to describe this pair of Twinkle Star twist nozzles, they’d be “rugged” and “dependable.” Some might call these old-fashioned nozzles, but there’s nothing stodgy about high performance.
Each nozzle features rubber O-rings, located in the fitting attachment and in the twisting part of the nozzle, for maximum protection against leaking. There are also four holes in the tip of the nozzle, allowing for twice the water flow of a typical brass nozzle. It was easy to connect the nozzles to the hose, and neither one leaked.
We twisted the nozzles to adjust the water flow to choose between a wide cone of spray, a powerful jet of water, and various shower-type pressures in between. There are no frills with these nozzles, just solid performance.
Get the Twinkle Star hose nozzles at Amazon.
Best Bang for the Buck
Gilmour Pistol-Grip Adjustable Watering Nozzle
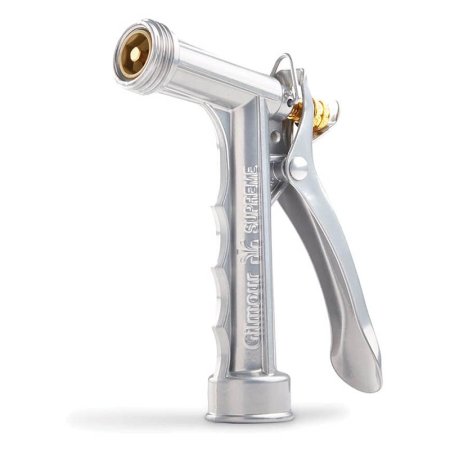
Our Ratings: Comfort 2/5; Ease of Use 4/5; Effectiveness 4/5; Durability 5/5; Value 4.3/5
Product Specs
- Type: Pistol
- Material: Zinc
- Spray variations: Adjustable from narrow jet to wide cone with spray variations in between
What We Like
- Well made and functional; ergonomic design prevents fatigue during long periods of use
- Easy to adjust water pressure via the integrated trigger
- Front threads adapt to optional spray tips to suit users’ preferences
What We Don’t Like
- No padded or nonslip grip; may cause some strain to the hands if used frequently
A simple solution to watering control, the all-metal Gilmour pistol-grip nozzle is budget-friendly and durable. It has a small flow-control dial that helps users adjust the water force. Choose from full flow, cone spray, or a sharp stream that’s designed for cleaning tough messes. The Gilmour nozzle is made from zinc to resist rusting. This is another no-frills spray nozzle that offers good performance in a tried-and-true style.
Initially, when we connected the Gilmour nozzle, we had some leaking at the fitting, but upon inspection, we’d overlooked putting the black rubber washer inside the fitting. We added the washer and experienced no more leaks.
A threaded front makes it easier to attach cleaning tools, such as specially designed brushes (not included) for scouring patio furniture, bicycles, and other grimy gear. The trigger-style nozzle has a metal loop at the top of the trigger that locks it in place to make gripping more comfortable, but in truth this isn’t the most comfortable nozzle to use. It’s not padded and doesn’t have a nonslip grip. Yet we still believe this simple watering nozzle is a good product and an excellent price.
Get the Gilmour pistol-grip hose nozzle at Amazon or Little Hardware.
Best Heavy-Duty
Dramm Adjustable Hose Nozzle

Our Ratings: Comfort 2/5; Ease of Use 5/5; Effectiveness 5/5; Durability 5/5; Value 4.2/5
Product Specs
- Type: Twist
- Material: Brass
- Spray variations: Adjustable from mist to jet
What We Like
- High-quality design; long nozzle with twist adjustment allows for ample customization
- Powerful water-jet ability; perfect for washing as well as watering
- Sturdy brass design provides no leaks and is built to last
What We Don’t Like
- No padding or nonslip grip; may cause some fatigue over prolonged use
The second twist nozzle we tested—the Dramm adjustable hose nozzle—proved to be a modest but highly efficient watering tool. A twist of the barrel was all it took to regulate the spray pattern on this all-brass nozzle. When we ran full water pressure, the Dramm nozzle narrowed the stream of water to a high-pressure jet that quickly removed dried mud from a concrete patio.
When we twisted the nozzle in the other direction, it went from jet to mist and between the two extremes ran through a range of shower-like options.
The Dramm is made from solid brass, and it didn’t leak at the nozzle end or the hose end during testing. This hardworking nozzle is designed to last, and it can serve a range of watering needs with just a simple twist.
Get the Dramm adjustable hose nozzle at Amazon.
Best Wand
The Relaxed Gardener Watering Wand
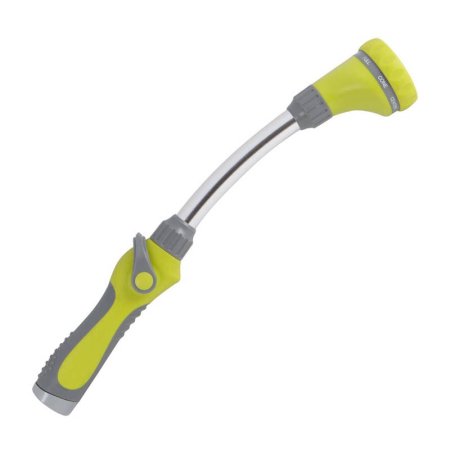
Our Ratings: Comfort 5/5; Ease of Use 4/5; Effectiveness 5/5; Durability 4/5; Value 4.5/5
Product Specs
- Type: Watering wand
- Material: Steel and molded plastic
- Spray variations: 8 (one malfunctioned during testing due to perceived manufacturing error)
What We Like
- Extended reach for watering baskets and pots and cleaning
- Ergonomic nonslip grip is ideal for frequent or long-term use
- Comes with 8 easy-to-change spray patterns
- Thumb control for easy adjustments to the water pressure
What We Don’t Like
- Some users have reported that one of the spray patterns is prone to malfunction
Hose wands can be extremely helpful when watering hanging baskets and hard-to-reach plants. At 15 inches long, the Relaxed Gardener Watering Wand proved to be just the right length to access high baskets while still being easy to handle and store. It has a nonslip ergonomic grip, and we were able to adjust water pressure via the thumb lever.
We scrolled through eight different watering spray patterns by turning the ring at the end of the nozzle. The shower and soaker patterns are excellent on this watering wand, but the Center option dribbled and sprayed off to one side. We inspected the head, and it appeared that something hard was stuck in that specific spray opening—perhaps lodged during manufacturing. We decided that this must have been a fluke, not an inherent design flaw.
The watering wand attached easily to the hose and didn’t leak except for that “center” spray setting. The wand simplified watering high baskets and potted plants while offering a range of other spray patterns that would be suitable for newly seeded lawns, flower beds, and even vegetable gardens.
Get the Relaxed Gardener hose nozzle at Amazon.
Best Ergonomic
Green Mount Ergonomic Handle Fireman’s Hose Nozzle
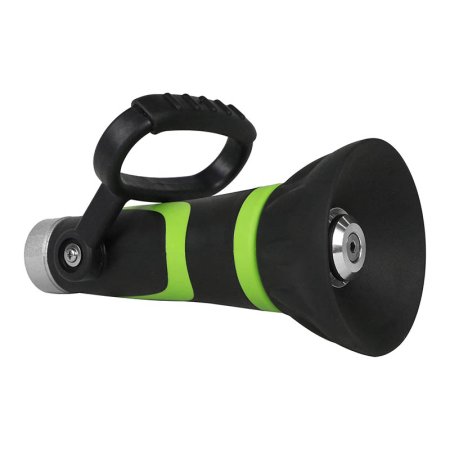
Our Ratings: Comfort 5/5; Ease of Use 4.5/5; Effectiveness 4/5; Durability 4/5; Value 4/5
Product Specs
- Type: Twist
- Material: Steel, rubber coating
- Spray variations: Adjustable, ranging from jet to mist with various shower functions in between
What We Like
- High-quality construction should last a user a long time
- Large water pressure handle is suitable for multiple uses; perfect for watering, washing, and more
- Rubberized grip is comfortable to hold for long periods of time
What We Don’t Like
- Heavyweight compared to similar hose nozzles
This sprayer nozzle excels at controlling water on even high-pressure hoses, yet while it weighs in at just under 2 pounds—about twice as heavy as the typical sprayer—it’s definitely built for comfort. This Green Mount nozzle features a large fire-hose-style handle that’s easy to grab and move, even with gloved hands, and it also has a nonslip rubber grip.
Inside the attachment fitting, we found a screen designed to keep sand and dirt out of the sprayer. There’s a wide bell-shaped dial that we twisted one way and the other to change the spray pattern from a strong jet to a fine mist, with varying shower-type sprays in between.
This nozzle boasts solid metal construction, so it should last multiple seasons without wearing out, and we felt it was very well made—no cut corners here. The only downside might be for those who experience hand or arm fatigue since the Green Mount nozzle may feel a tad heavy after a while.
Get the Green Mount ergonomic hose nozzle at Amazon.
Best Lightweight
Gilmour Heavy-Duty Thumb-Control Nozzle

Our Ratings: Comfort 5/5; Ease of Use 4/5; Effectiveness 4/5; Durability 5/5; Value 4.2/5
Product Specs
- Type: Pistol
- Material: Steel, rubber coating
- Spray variations: 8 (mist, shower, rinse, soft wash, clean, sweep, jet, and bucket-filling)
What We Like
- Quality construction; ergonomic and durable design for long-term use
- Nonslip handle is comfortable to hold while in use
- Swivel attachment ring can accommodate most garden hoses easily; no twisting required
What We Don’t Like
- Separate steel ring on end of nozzle can be accidentally loosened
Anyone hunting for a lightweight garden hose nozzle may want to give this model from Gilmour a look. Weighing under 10 ounces, it’s one of the lightest pistol-type nozzles we tested. It features eight spray patterns, including mist, shower, rinse, soft wash, clean, sweep, jet, and a bucket-filling setting—all patterns worked well.
Our favorite feature of the Gilmour nozzle was the swivel attachment ring that allowed us to connect it to the garden hose without twisting either the hose or the nozzle. It was simple to spin the attachment ring and securely attach the nozzle.
The thumb-control lever is handy to operate using the same hand holding the sprayer, but this nozzle does have one thing against it: a separate steel ring that holds the spray pattern adjustment ring in place. Rather than a single adjustment ring, the end of the sprayer features an additional steel ring that we inadvertently kept loosening when we twisted the spray adjustment ring. Each time that happened, water would dribble out from under the ring. It held better after we tightened the steel ring using some force, but we feel it would have been designed better without the additional steel ring.
Get the Gilmour thumb-control hose nozzle at Amazon.
Best Multipurpose
Esow Garden Hose Nozzle
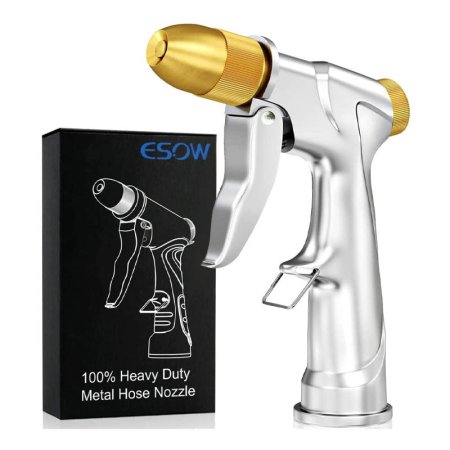
Our Ratings: Comfort 3/5; Ease of Use 4/5; Effectiveness 4/5; Durability 5/5; Value 4/5
Product Specs
- Type: Pistol
- Material: Brushed steel and brass
- Spray variations: Adjustable from jet to mist
What We Like
- High-quality materials; made with durable brushed steel and brass
- Loop integrated for the holding trigger; keeps the water running without having to grip the trigger
- Connects easily to standard garden hoses without leaking
What We Don’t Like
- Trigger may be on the short side for some users’ preferences
Right out of the package, the Esow hose nozzle displayed high-end workmanship. Its smooth steel exterior features a brushed finish for an ultrasmooth feel, and its solid brass nozzle tip turned smoothly. There was no mistaking the quality—it simply felt good to hold.
While it’s a basic hose nozzle in design, it features brass and zinc-alloy construction to resist corrosion and make it durable and impact resistant. Its pistol-grip and fine-tune nozzle adjustment make it well suited for multiple uses, from misting the flower bed to washing the car. The spraying patterns range from a jet stream for high pressure to a fan spray for covering a wide area.
It connected easily to our hose, and we didn’t detect any leaks. However, the downside to this nozzle is the length of the trigger. Maybe we just have big hands, but the trigger is barely over 2 inches long with room for only two fingers. If we didn’t use the loop to hold the trigger in the “on” position, our fingers got a little sore after about 10 minutes of constant watering. Other than that, however, this is a top-notch hose nozzle.
Get the Esow hose nozzle at Amazon.
Best for Pots
Dramm One-Touch Rain Wand
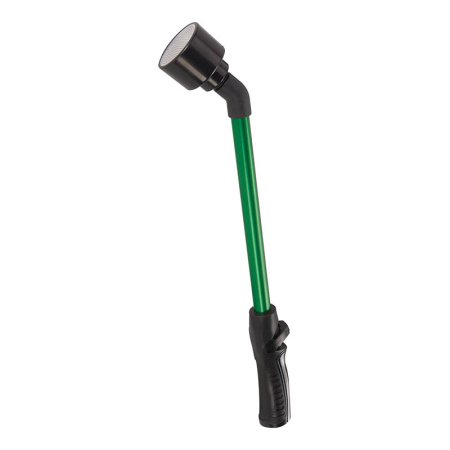
Our Ratings: Comfort 5/5; Ease of Use 4/5; Effectiveness 3/5; Durability 3/5; Value 3.5/5
Product Specs
- Type: Wand
- Material: Aluminum, rubber coating
- Spray variations: Shower (not adjustable)
What We Like
- Long 16-inch wand for ample maneuverability in hard-to-reach places
- Optimal for watering pots, washing the car, and/or cleaning the exterior of a home
- Nonslip grip can be held comfortably for long periods of time without fatigue
What We Don’t Like
- Only 1 spray pattern integrated; not as versatile as some other comparable options
The Dramm rain wand has only one spray pattern: a gentle shower that’s just the ticket for watering potted plants. Those who have tried watering potted flowers and shrubs will likely agree that most other spray patterns are either too robust, too wide, or otherwise not well suited to pot watering.
This product delivers a wonderful shower, and the pressure is controlled by a thumb lever at the top of an ergonomic, nonslip handle. The wand features a sloped head that let us reach overhead baskets without accidentally spraying on the other side.
Those in the market for an adjustable spray pattern nozzle may want to look at other options, but folks who have a lot of pots to water will likely be quite happy with this Dramm wand. It’s simple to use and the gentle rain-like, pot-pleasing spray pattern never changes.
Get the Dramm one-touch hose nozzle at Amazon.
Best Heavy Use
Fanhao Garden Hose Nozzle
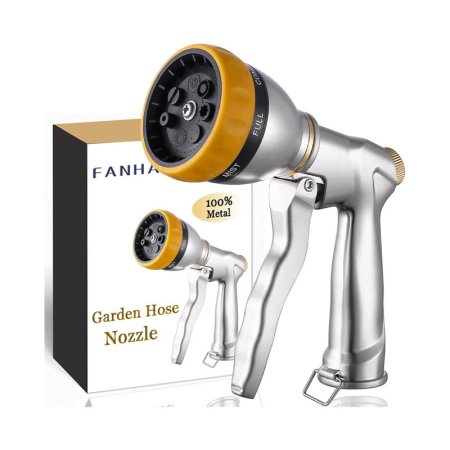
Our Ratings: Comfort 2/5; Ease of Use 5/5; Effectiveness 5/5; Durability 5/5; Value 3.9/5
Product Specs
- Type: Pistol
- Material: Brushed steel, brass, rubber coating
- Spray variations: 7 (center, flat, jet, shower, mist, cone, and full)
What We Like
- Comes with 7 spray patterns; center, flat, jet, shower, mist, cone, and full
- Easy to connect to any standard garden hose without leaking
- All-steel body components are durable enough to withstand frequent or heavy-duty use
What We Don’t Like
- No rubberized grip; may be harsh on the hands after extended use
Those looking for a heavy-duty hose nozzle won’t be disappointed with this Fanhao model. This nozzle features all-steel body components for durability and a high-density molded-plastic spray adjustment ring covered with rubberized nonslip coating. The sprayer’s brushed-steel finish is soft to the touch, and the trigger, which is nice and long for secure gripping, can be held in place while watering via an attached steel loop at the bottom of the handle.
We liked the high-end construction of the Fanhao spray nozzle, although we would have appreciated a nonslip grip on the handle to match the one on the adjustment ring. When water from the spigot is bitterly cold, the chilly temp transfers through the steel handle of this sprayer, so a coated grip would have been nice. (Tip: Wear gardening gloves for a thermal-resistant barrier between the cold steel and hands).
The Fanhao spray nozzle features seven spray patterns; center, flat, jet, shower, mist, cone, and full. Each one was distinct and functioned well without drips. Water pressure can be controlled with the hand trigger. This sprayer is well-made and designed to stand up to heavy use. If you want a spray nozzle that’s likely to last, it’s hard to go wrong with this one.
Get the Fanhao hose nozzle at Amazon.
Jump To Our Top Picks
How We Tested the Best Hose Nozzles
| Testing Stats | |
| Products tested | 10 |
| Time spent testing | 5 hours |
| Tests performed | 5 |
| Price range | $5 to $30 |
Hose nozzles are simple watering tools, but one that dribbles, leaks, or doesn’t spray as it should can be frustrating and take the fun out of gardening. Our goal in testing the top hose nozzle available today was to determine which performed best and which were well suited for various watering tasks.
We examined each hose nozzle before use and read any accompanying information to make sure we fully understood its purpose and capabilities. To ensure they were working as intended, we checked all the moving parts—handles, spray selection rings, dials, and valves. We inspected the quality of the materials to help estimate potential durability.
We attached each nozzle to the end of a standard garden hose and turned the water pressure up all the way (approximately 55 pounds per square inch, or PSI). We checked for leaks at the connection point as well as from the tip of the nozzle when using each of the available spray functions.
We scored each nozzle using a rubric—awarding points between 0 and 4, depending on how well it performed. At the end of the testing, we added up the points and used them to categorize each nozzle for its best use.
| Comfort | Ease of Use | Effectiveness | Durability | Value | |
| Green Mount New Patent Heavy-Duty Hose Nozzle | 5 | 5 | 5 | 4 | 4.5 |
| Twinkle Star Heavy-Duty Brass Adjustable Hose Nozzle | 3 | 4 | 4 | 5 | 4 |
| Gilmour Pistol-Grip Adjustable Watering Nozzle | 2 | 4 | 4 | 5 | 4.3 |
| Dramm Adjustable Hose Nozzle | 2 | 5 | 5 | 5 | 4.2 |
| The Relaxed Gardener Watering Wand | 5 | 4 | 5 | 4 | 4.5 |
| Green Mount Ergonomic Handle Fireman’s Hose Nozzle | 5 | 4.5 | 4 | 4 | 4 |
| Gilmour Heavy Duty Thumb-Control Nozzle | 5 | 4 | 4 | 5 | 4.2 |
| Esow Garden Hose Nozzle | 3 | 4 | 4 | 5 | 4 |
| Dramm One-Touch Rain Wand | 5 | 4 | 3 | 3 | 3.5 |
| Fanhao Garden Hose Nozzle | 2 | 5 | 5 | 5 | 3.9 |
What to Consider When Choosing a Hose Nozzle

There are several things to keep in mind when it comes to selecting the best garden hose nozzles, but perhaps the single most important criteria is how you plan to use it. For example, a high-pressure nozzle that’s great for washing siding won’t deliver water optimally in the garden. We considered each of the following factors—and tested them when possible—to give our readers up-to-date information about each nozzle on our list.
Plastic vs. Metal
Anything stored outside must endure a lot of wear and tear. However, hoses and their nozzles must withstand more than natural weathering; nozzles in particular may get dropped on hard surfaces or stepped on accidentally.
Plastic can crack when dropped and break down after prolonged sun exposure, while metal better stands up to impacts and the elements. Brass is a preferred material for metal hose nozzles due to its ability to resist corrosion. Some metal nozzles are dipped in a rubberlike coating, and others have a baked-on enamel finish; both methods add durability, protection, and longevity.
For dependability and durability, avoid nozzles made entirely of plastic and consider metal or a plastic-and-metal hybrid. With inner components made of metal and exteriors constructed of molded plastic, hybrids are often lighter than their all-metal counterparts.
Spray Pattern
In addition to water pressure adjustments, most hose nozzles come with adjustable spray patterns that allow users to change the amount and direction of the spray to match the specific watering situation. Need to water a pot? Just switch to the “shower” or “rain” option on the nozzle. Want to wash muddy paw prints from the patio? Switch to the nozzle’s jet function and spray the mess away.
If you’re looking for a versatile hose nozzle, one with a dial for switching between different spray patterns may be a good option. A dial generally provides a range of patterns, from a gentle mist perfect for moistening seeds to a high-pressure jet stream that blasts caked mud off the sidewalk. In addition to mist and jet, these nozzles often have several other patterns, including:
- Shower is ideal for watering the garden and container plantings.
- Flat is designed for fragile plants and young seedlings.
- Cone offers the excellent coverage needed when watering the lawn before a fertilizer application, for instance.
- Soak is designed for watering large trees and shrubs.
While these nozzles offer ample flexibility, if the large range of options is more than you need, a fitting alternative may be a basic metal nozzle that adjusts the spray from a fine mist to a powerful stream with a simple twist.
Pistol vs. Dial
The pistol grip is the most common type of hose nozzle; it has a squeeze trigger that activates water flow. When the trigger is released, the water flow stops. The amount of pressure applied to the trigger adjusts the water flow. Rotating a tiny flow adjuster above the trigger changes the spray from a mist to a jet stream.
A dial nozzle suits those who want more options. The dial usually includes six or more spray patterns, which are adjustable with the turn of the dial on the front of the nozzle. This nozzle type might have a pistol grip or a simple molded handle with a button or a slider to adjust water flow. Both types allow the user to direct the water where needed rather than using a sprinkler that tends to oversoak one area while neglecting another.
The Wand Alternative
Nozzles suit many gardeners for a host of outdoor tasks. But for watering hanging baskets and plants in hard-to-reach places, or for those with physical limitations that make bending difficult, a watering wand might be an excellent solution. Like nozzles, wands come in numerous models, but their length sets them apart. Wands may be anywhere from 10 inches to 25 inches long, and some come with a hooked sprayer head to direct water downward into the pot when watering overhead.
Available in fixed length or telescoping, watering wands can have a single pattern spray head or a dial adjuster at the end. Some have a pistol grip to squeeze with one hand, and others use a button or slider to adjust the water flow.
Another helpful feature included with some wands is a stop-valve trigger near the grip that lets the user control water flow from the watering wand, saving the walk to the faucet to turn it on and off.
Ergonomics
Ergonomic hand tools are designed to help users work pain-free. Comfort is an asset for anyone doing yard work and especially those with arthritis or strength issues in their hands and wrists. For example, maintaining constant pressure on a pistol or a trigger grip can take a toll on the hands, so many of the best garden hose nozzles are designed to stave off hand and wrist fatigue.
No-press grips allow changing water flow with a simple button or a slider that can be manipulated with a thumb. Trigger nozzles often include a metal loop at the top of the trigger that can lock the handle in the spray position and take the pressure off a hand.
Weight is another important consideration. All-metal construction nozzles, while very durable, are heavier than a hybrid made of metal and plastic.
Hose Compatibility
There are more types of hoses than the one that hooks to a lawn and garden hose. Gardeners in the U.S. use a completely different hose thread system than everywhere else in the world, so compatibility with the hose on a hose reel is key.
Nozzles sold to U.S. customers feature the standard garden hose thread (GHT) of ¾ inch. This means that the end of the hose has 11½ threads per inch and features a 1/16-inch thread pitch, which is the angle of the threads.
For basic hose nozzles sold outside of the United States, the common thread in these countries is based on British Standard Pipe (BSP). These fittings are ¾ inch in diameter, and they feature 14 threads per inch.
There also are quick-connect fittings that allow the user to snap a nozzle on and off a hose without unscrewing it. These nozzles will only work with quick-connect fittings on a hose, and they may not be necessary for the average gardener.
FAQs
After learning about the different features of hose nozzles, some new questions might spring up. After all, there are a lot of choices on the market, and you still might not be sure which garden hose nozzle is ideal for you. This section aims to offer that info, as it answers some of the most frequently asked questions about the best hose nozzles.
Finding the best garden hose spray nozzle depends on several factors, and it’s usually on a case-by-case basis. For watering pots, we appreciated the gentle rain-like spray of the Dramm one-touch hose nozzle, and those who might want the comfort of a lighter weight hose nozzle will want to consider the Gilmour thumb-control hose nozzle. While using a hose nozzle takes more hands-on watering time—as opposed to setting a sprinkler and then using a hose timer to turn the water on and off, nozzle is more versatile in its application because it can be used for a range of watering and washing chores.
Watering wands can be tricky, as they’re often too long and cumbersome to be truly useful. The Relaxed Gardener hose nozzle/watering wand is one of the best watering wands, as it lets you reach hanging baskets, but it’s not so long that it’s difficult to handle.
Often, fire-hose-style nozzles offer the most concentrated pressure. They can restrict the opening while still allowing a jet stream of water to flow through for maximum pressure.
There are several reasons a hose nozzle might leak:
If it’s leaking at the hose connection, it’s likely that the rubber ring inside the nozzle is either in poor condition or missing.
If it’s leaking at the tip, the O-rings inside the nozzle might be broken, deteriorated, or missing. Most nozzles aren’t serviceable, so they’ll likely need to be replaced.
The other leading cause for a leak is a crack or corrosion within the nozzle. If corrosion removes metal or creates an uneven seal inside the nozzle, it will leak. Also, if the nozzle was dropped, there could be a crack inside, causing the leak.
The first thing to try to repair a leak is to replace the rubber washer inside the hose connection. Very often, these rubber rings wear down or fall out, causing the handle to leak any time the hose is changed. You also can try wrapping the hose thread with a few passes of pipe tape.
One thing to avoid is overtightening the nozzle, as the leak will probably worsen, and you could ruin the threads on the hose and the nozzle.
Meet the Tester
Glenda Taylor is a product tester and writer specializing in the construction, remodeling, and real estate industries. She and her husband own a general contracting company, and Taylor is experienced in both residential and commercial building applications. She tests a wide range of power tools as well as other home improvement, household, and lawn-and-garden products.
The post The Best Hose Nozzles for Leak-Free Gardening, Tested appeared first on Bob Vila.
]]>The post 8 Organic Weed Killers That Are Safe for Organic Gardening and the Environment appeared first on Bob Vila.
]]>Despite attentive gardening practices, unwanted weeds can muscle in quickly, making organic weed killers a necessary tool for removing pesky plants without posing risks to food production or the environment. While these useful lawn-care products can help provide flowers and vegetables with the space they need to produce blossoms and edibles, it can be difficult to know which organic herbicides for weeds actually work. To help you in your search, we researched dozens of popular options and reached out to a lawn care and gardening expert for their experience-based insights.
As a result of our efforts, we found eight organic weed killers we feel confident recommending. Of those, our favorite is the Green Gobbler 20% Vinegar Weed & Grass Killer, a formula that’s easy to apply, works quickly, and is certified for organic use. Rather than spraying your garden with conventional herbicides full of toxic chemicals that do more harm than good, this and the rest of the best organic weed killers we selected use natural ingredients that work while keeping food, kids, and pets safe.
- BEST OVERALL: Green Gobbler 20% Vinegar Weed & Grass Killer
↓ Jump to Review - BEST BANG FOR THE BUCK: Natural Armor 30% Home & Garden Vinegar
↓ Jump to Review - BEST SPRAY: Natria Grass & Weed Control With Root Kill
↓ Jump to Review - BEST CONCENTRATE: Bonide Captain Jack’s Deadweed Brew Concentrate
↓ Jump to Review - BEST SPOT TREATMENT: Sunday Weed Warrior
↓ Jump to Review - BEST MULTIPURPOSE: Earthborn Elements Pure Borax Powder
↓ Jump to Review - BEST FOR GRAVEL: Ortho GroundClear Weed & Grass Killer
↓ Jump to Review - ALSO CONSIDER: Eco Living Solutions Vinegar Weed & Grass Killer
↓ Jump to Review
Before You Buy an Organic Weed Killer
The best organic weed killers are a one-step way to remove unwanted weeds like dandelions, poison ivy, and more. But they may not give you the results you’re after since they’re typically nonselective, meaning they can kill all the plants in vegetable gardens, flower beds, and grassy areas in addition to weeds. More traditional methods, such as pulling weeds by hand or using a weeding tool, may provide better weed control for lawns and spaces where you want more control over which plants you eradicate.
Organic Weed Killer Comparison Chart
| Product Name | Type | Size | Formula |
| Green Gobbler 20% Vinegar Weed & Grass Killer | Spray | 1 gallon; other sizes available | Nonselective; acetic acid |
| Natural Armor 30% Home & Garden Vinegar | Spray | 1 gallon; other sizes available | Nonselective; acetic acid |
| Natria Grass & Weed Control With Root Kill | Spray | 24 ounces; other sizes available | Nonselective; ammoniated soap |
| Bonide Captain Jack’s Deadweed Brew Concentrate | Liquid concentrate | 32 ounces; other sizes available | Nonselective; caprylic acid and capric acid |
| Sunday Weed Warrior | Spray | Two 32-ounce bottles; other sizes available | Nonselective; ammoniated soap |
| Earthborn Elements Pure Borax Powder | Powder | 1 gallon; other sizes available | Nonselective; sodium borate |
| Ortho GroundClear Weed & Grass Killer | Comfort wand spray | 1 gallon; other sizes available | Nonselective; ammonium nonanoate |
| Eco Living Solutions Vinegar Weed & Grass Killer | Liquid | 1 gallon; other sizes available | Nonselective; sodium chloride and acetic acid |
Our Top Picks
The following organic weed killers made our list because they’re potent enough to kill weeds naturally without the use of harmful chemicals that can contaminate fruits and vegetables or leave environmentally damaging residues behind. Choosing the best organic weed killer from these options depends on individual needs and weed types needing removal.
Best Overall
Green Gobbler 20% Vinegar Weed & Grass Killer

What We Like
- Organic Material Review Institute (OMRI)-listed for organic use
- Spray application makes it easier to be precise
- Starts working within 24 hours of application
What We Don’t Like
- May not totally eliminate particularly stubborn weeds
Specs
- Type: Spray
- Size: 1 gallon; other sizes available
- Formula: Nonselective; acetic acid
Crabgrass, dandelions, thistles, and other weeds are history with just a spritz of OMRI-listed Green Gobbler vinegar weed and grass killer. Derived from corn, this natural acetic acid herbicide is nonselective, meaning it kills all vegetation it’s applied to with a turnaround time of 24 hours. The easy-to-use spray attachment that comes with the gallon bottle makes application a cinch, and larger quantities are available without the extra nozzle for use as refills.
Green Gobbler is especially beneficial along fence lines, around patios and pool areas, and in mulched flower beds where common weeds and grasses tend to sprout most. Just use care not to spray it on desirable plantings because they, too, will die.
Get the Green Gobbler organic weed killer at Amazon, The Home Depot, or Green Gobbler.
Best Bang for the Buck
Natural Armor 30% Home & Garden Vinegar

What We Like
- 6 times more potent than comparable formulas
- Comes with an attachable trigger sprayer
- Ideal for large areas needing extensive weed control
What We Don’t Like
- Sprayer clogs sometimes
Specs
- Type: Spray
- Size: 1 gallon; other sizes available
- Formula: Nonselective; acetic acid
To control weeds without spending a lot of cash, consider this Natural Armor concentrate. It’s available in an economical 1-gallon jug (as well as other sizes), comes at an attractive price, and contains vinegar that’s six times more potent than the household variety. This pet-safe weed killer can be applied using the attachable trigger sprayer, poured into a smaller spray bottle, or used with a pump-type garden sprayer.
Natural Armor’s industrial-strength organic weed killer contains only pure and natural ingredients that are environmentally safe. It’s a nonselective vegetation killer that’s well suited for lawn edging and removing weeds from fence lines, between sidewalk cracks, and among patio pavers. This vinegar weed killer spray can also be used to clean mossy stone garden statues and outdoor ornaments.
Get the Natural Armor organic weed killer at Amazon or Natural Armor.
Best Spray
Natria Grass & Weed Control With Root Kill Herbicide

What We Like
- Ready-to-use formula
- Ideal for cracks in pavement, edging, and more
- Precise spray applicator enables use as a weed killer for lawns
What We Don’t Like
- Requires a relatively thick coating to work
Specs
- Type: Spray
- Size: 24 ounces; other sizes available
- Formula: Nonselective; ammoniated soap
No need to mix or pour this Natria weed remover spray into another container—it comes in its own spray bottle and comes ready to apply. Unlike our two top picks, this option uses ammoniated soap of fatty acids, a natural ingredient that penetrates weed foliage to destroy the plant. Like our other recommendations, however, it’s also nonselective, so it shouldn’t be applied on a windy day if desirable plants are nearby.
For best results, Natria recommends you apply enough of this organic product to fully saturate the weed’s foliage. The herbicide will then travel through the foliage and stems to the roots, destroying the weed completely and preventing regrowth. Though it’s a strong weed killer, Natria won’t contaminate soil, meaning gardeners can safely sow seeds 5 days after use.
Get the Natria organic weed killer (various sizes) at Amazon, Lowe’s, or Ace Hardware.
Best Concentrate
Bonide Captain Jack’s Deadweed Brew Concentrate
What We Like
- Withers broadleaf or grassy weeds within hours
- 32-ounce concentrate makes more than 8 gallons of product
- Waterproof once dried
What We Don’t Like
- Requires dilution and a container for application
Specs
- Type: Liquid concentrate
- Size: 32 ounces; other sizes available
- Formula: Nonselective; caprylic acid and capric acid
When it comes to making weed killers, Bonide has an excellent reputation, and this concentrate is no exception. It’s available in a couple of sizes, and the 32-ounce container of this organic weed killer is enough for over 8 gallons of diluted product. It’s easy to apply using a standard handheld or backpack sprayer, and once it dries, it’s waterproof for extended effectiveness.
The chemical-conscious consumer can have peace of mind from this product as it is made with coconut and palm kernel oils, both capable of killing grassy and broadleaf weeds, moss, and algae. It is also suitable for applying to patios, walkways, driveways, fences, foundations, and more in temperatures as low as 40 degrees Fahrenheit. However, given that it is a nonselective option, it may not be safe for use directly on gardens or beloved plants. But, it can be used at a safe distance around these areas to kill harmful weeds and grasses.
What our tester says: “We tried Deadweed Brew as part of our best weed killer tests by broadcasting it over a row of weeds growing between tire tracks on a gravel driveway. Within 4 hours, the weed zone had turned a pale greenish brown, and by the next morning, all the weeds were completely dead.”—Mark Wolfe, Product Reviews tester and writer
Get the Bonide organic weed killer at Amazon, The Home Depot, or Bonide.
Best Spot Treatment
Sunday Weed Warrior
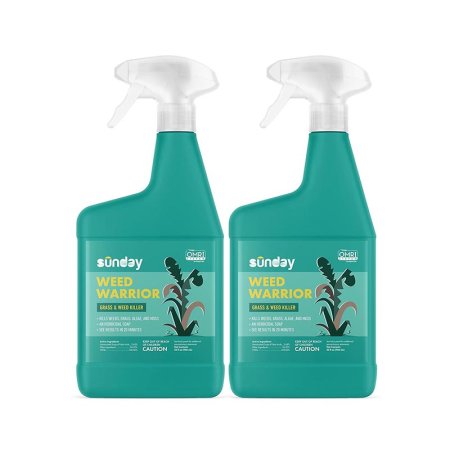
What We Like
- Easy to apply herbicidal soap kills grassy weeds
- Results start to appear in just 20 minutes
- OMRI-listed for safe organic use
What We Don’t Like
- May require periodic reapplication
Specs
- Type: Spray
- Size: Two 32-ounce bottles; other sizes available
- Formula: Nonselective; ammoniated soap
Sunday’s Weed Warrior is an herbicidal soap made from fatty acids designed to tackle grassy weeds, mosses, and algae. It works by breaking down the waxy coating that protects plants, leading to rapid dehydration and death. After application, you should start seeing visible results in about 20 minutes.
As a nonselective killer, this isn’t a good weed killer for lawns since it will kill your grass, too. However, it’s quite effective as a spot treatment along sidewalks, next to flower beds, and near concrete patios via precise application using the spray bottle. Those needing to treat larger areas will be pleased to know there are refill sizes available, including a gallon jug that has a convenient sprayer wand.
What our tester says: “The fact that I was so impressed with the Weed Warrior spot treatment that I bought the concentrated pouches to weed large areas is a testament to the product’s effectiveness.”—Daryna Tobey, Product Reviews tester and writer
Read our full review: Sunday Lawn Care Review
Get the Sunday organic weed killer (various sizes) at Amazon, The Home Depot, Walmart, or Sunday.
Best Multipurpose
Earthborn Elements Pure Borax Powder
What We Like
- Can be mixed to varying strengths for different needs
- Durable, resealable container is easy to store safely
- Great for flower beds, driveways, and stepping stones
What We Don’t Like
- Finding the right strength may require some tinkering
Specs
- Type: Powder
- Size: 1 gallon; other sizes available
- Formula: Nonselective; sodium borate
Multipurpose borax can kill weeds, control unwanted insects, and boost laundry detergent—and it’s the active ingredient in Earthborn Elements borax powder. Borax, short for “sodium borate,” is a natural mineral mined in desert regions, including California’s Death Valley.
To use, mix with water at a ratio of 10 ounces of borax to ½ cup of hot water, stirring until the powder dissolves. Next, further dilute the solution by pouring it into 2½ gallons of water, then spray it directly on weeds with a spray bottle or pump-type garden sprayer. Like many other natural weed killers, borax is nonselective, so you’ll want to take care to spray weeds only on a calm day to protect desirable plants.
Get the Earthborn Elements organic weed killer at Amazon or Earthborn Elements.
Best for Gravel
Ortho GroundClear Weed & Grass Killer

What We Like
- Listed by OMRI for safe organic use
- Results appear in about 15 minutes
- Battery-powered sprayer covers gravel pads quickly
What We Don’t Like
- Sprayer tube sometimes becomes disconnected
Specs
- Type: Comfort wand spray
- Size: 1 gallon; other sizes available
- Formula: Nonselective; ammonium nonanoate
Though we’ve yet to test it as a weed killer for gravel, we can hardly wait to unleash Ortho GroundClear’s battery-powered sprayer on our weed-prone gravel parking pad. Since this gravel area sits somewhat close to a drainage ditch, we’re careful about how we care for it, so the fact that this weed and grass killer is OMRI-certified is ideal. We also appreciate that the sprayer wand has adjustable settings to enable more precise application in mulched garden beds and alongside landscaped spaces.
Once applied, GroundClear gets to work, destroying plants’ cell membranes to cause dehydration and death in about 15 minutes. Though larger and more stubborn weeds may take a bit longer to die, this rainproof spray provides lasting effects that help prevent unwanted plants from coming back.
Get the Ortho organic weed killer (various sizes) at Amazon, Lowe’s, Tractor Supply Co., Ace Hardware, The Home Depot, Walmart, or Ortho.
Also Consider
Eco Living Solutions Vinegar Weed & Grass Killer
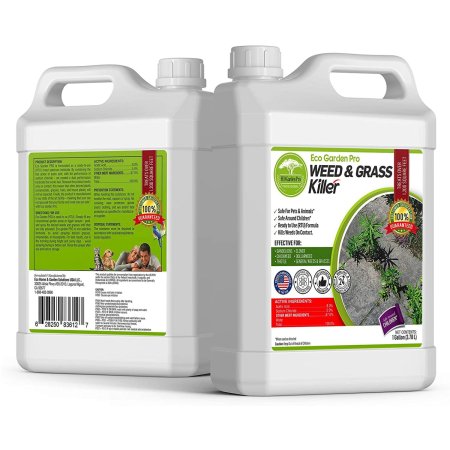
What We Like
- Listed by OMRI for safe organic use
- Results appear in about 15 minutes
- Battery-powered sprayer covers gravel pads quickly
What We Don’t Like
- Sprayer tube sometimes becomes disconnected
Specs
- Type: Comfort wand spray
- Size: 1 gallon; other sizes available
- Formula: Nonselective; ammonium nonanoate
The Eco Living Solutions vinegar weed and grass killer contains high-strength vinegar for effective natural foliage eradication. It comes ready to use and should be sprayed full strength on weeds until foliage is saturated. It’s nonselective, so take care not to let overspray get on desirable plantings.
For those looking to get rid of grass, this product also works as an organic weed killer for lawns., making it an eco-friendly way to transition to xeriscape landscaping. Safe for honey bees, soil, and groundwater, it contains no harmful or toxic ingredients and can be applied to weeds in vegetable gardens or around fruiting vines. One gallon of this ready-to-use weed killer treats 1,000 square feet, and it also comes in a larger size to cover a greater area. Results start to show in as little as 24 hours, and no retreating is necessary.
Get the Eco Garden Pro organic weed killer at Amazon or Eco Living Solutions.
Or, DIY Your Own Organic Weed Killer
If you prefer the DIY approach to killing weeds, you can make a weed killer using basic essentials you likely already have in your kitchen. Here’s Bob Vila’s favorite nonherbicide weed killer recipe.
In a large bowl, combine:
- 1 gallon of white household vinegar
- 1 cup of salt
- 1 tablespoon of dish soap
After combining the ingredients, pour the DIY weed killer into a spray bottle or sprayer and apply. This homemade weed killer recipe will create a full gallon of foolproof organic weed killer that can be applied to large or small patches of weeds.
If possible, try to apply this weirdly effective weeding solution when it is sunny to help dry out and shrivel the weeds. The combination of the weed killer and the sun will attack the weeds’ root systems and speed up the process.
For other ways to kill weeds without buying a weed killer, check out this list of homemade weed killer pros and cons. It details everything we like and don’t about popular DIY weed removal tactics.
Our Verdict
Our top pick, the Green Gobbler 20% Vinegar Weed & Grass Killer, is less toxic than traditional formulas, while the Earthborn Elements Pure Borax Powder is a great multipurpose choice. Popular lawn and garden options from Roundup and Ortho weren’t listed because they didn’t meet our sustainability guidelines—each contains ingredients like glyphosate 2,4D that have harmful environmental effects.
Jump to Our Top Picks
How We Chose the Best Organic Weed Killers
Our list of recommendations is the result of an in-depth exploration of organic weed killers, which are more environmentally friendly products for killing weeds than conventional herbicides. It includes picks for specific categories so shoppers have more targeted options for their needs as well as products that come in different sizes with varying application methods for both expansive coverage and occasional spot treatment.
Several of our recommendations are vinegar solutions of varying concentrations because vinegar kills weeds effectively without causing environmental harm. Depending on the specific weed problem, products with either 20 percent or 30 percent acetic acid will be appropriate.
What to Consider When Choosing an Organic Weed Killer
Before buying a weed killer, shoppers will want to investigate ingredients and read labels to determine whether the product will kill only specific weeds or affect all vegetation. It’s also a good idea to be mindful of the difference between organic herbicides that kill existing weeds and those that stop weed seeds from sprouting.
Pre-Emergent vs. Post-Emergent
Like chemical weed killers, organic herbicides are available in two types: pre-emergent and post-emergent. Herbicides that are pre-emergent destroy seeds or prevent them from sprouting, while the post-emergent kind kills or inhibits weeds that have already sprouted and are growing.
The difference between the two is crucial because once a pre-emergent product is sprayed on the soil, it will prevent all seeds from sprouting there—whether those of common weeds, plants you never knew were weeds, or desirable plants and flowers. While this type of spray will inhibit weed growth alongside fence lines, driveways, and patios, if any of it lands near a plot of soil intended for flowers or a vegetable garden, it’s unlikely that any seeds planted there will sprout.
Selective vs. Nonselective
A selective weed killer will destroy only specific types of weeds but not others. For example, organic herbicides developed for lawns likely target broadleaf weeds, such as chickweed and clover, but they won’t damage turf-type grasses like Bermuda grass.
Nonselective weed killers will kill all vegetation—both weeds and desirable plants—so gardeners should use them with caution. If you’re trying to get rid of dandelions that have spread throughout your lawn, remember that spraying or broadcasting a nonselective weed killer will kill the grass along with the weeds.
When it comes to natural herbicides, users have very few selective products to choose from; the majority are nonselective and designed to kill most forms of vegetation. They can be used between sidewalk cracks or patio pavers or to create fence lines but shouldn’t be used near desirable plants and flowers, especially on windy days.
Ingredients
True to form, organic weed killers will not have toxic ingredients. Shoppers looking for lawn-care items to start or maintain a garden may be surprised to find several household ingredients, such as vinegar, salt, and corn, present in some organic weed killers. Other beneficial ingredients include soaps and essential oils, such as cinnamon or clove.
Lesser-known ingredients, like citric acid, caprylic acid (a coconut oil derivative), and D-limonene (derived from citrus fruits), also feature prominently in many organic weed killers. For added benefits, manufacturers may combine two or more of the above ingredients to control specific types of weeds.
Form
Natural weed-killing products are available in various forms, with some better suited to specific types of applications.
- Spray: Easy to use and offering uniform coverage, most sprays are designed for direct application to the weed’s foliage. Spraying should be avoided on windy days to avoid harming desirable plants.
- Liquid concentrate: For those with large crops or heavy weed infestation, a liquid concentrate may be best. It can be diluted with water and easily applied over large areas with a pump-type garden sprayer.
- Powder: Meant for broadcasting over specific areas, powder herbicides can also get carried by the wind and inadvertently kill nearby plants.
- Salts: Products containing salt will kill plants, so be careful when using them. Salt makes soil infertile, and it can take years to leach it out. Salt-based nontoxic weed killers are often best for patio pavers or sidewalk joints rather than flower beds.
FAQs
If you’re switching from a traditional weed killer to an organic type, you may still have questions. Here are answers to some of the most frequently asked questions about organic weed killers.
If they contain salt, then yes, they can. Organic herbicides that contain vinegar or other nonchemical ingredients that only stay in the soil for a few days and are less likely to cause damage
Most organic weed killers are considered environmentally safe, but just because a product is natural or organic doesn’t mean it won’t cause headaches or other symptoms. Always read warning labels.
That depends on the product. Most sprays can be used whenever new weeds appear, and some may require two or more applications to get rid of certain types.
For best results, apply weed killer early in the day or late in the afternoon to prevent rapid evaporation. Avoid spraying on windy days to keep the solution from drifting onto unintended areas, and try not to spray if rain is expected so the formula doesn’t get washed away before it has a chance to work.
It’s better to spray weed killer on dry plants so the herbicide sticks instead of mixing with the moisture and running off.
Many organic weed killers work by absorbing the solution through the leaves, so cutting them before application actually reduces the surface area available, which can reduce their efficacy. Chrissie Handley, a lawn care and gardening specialist at Online Turf—a turf, compost, and soil company—agrees. “It’s not really necessary—the weed killers generally target the plants by the root, so cutting the stems won’t increase the chances of absorbing the weed killer.”
The post 8 Organic Weed Killers That Are Safe for Organic Gardening and the Environment appeared first on Bob Vila.
]]>The post Cold Bathroom? These Heaters Will Fix That in Minutes appeared first on Bob Vila.
]]>Stepping into a chilly bathroom isn’t the most pleasant experience, but fortunately, there is a wide range of bathroom heaters that can quickly warm any bathroom. We researched nearly 50 different models and tested four in our own homes, and we found a favorite. Dreo’s wall-mount space heater took top honors for its quick heating, safety features, and its ability to be controlled remotely.
In addition to the units we tested, several others met our high standards for quality, safety, and innovation, and we’ve included them here as well. Keep reading to learn more about how the following models earned their spots on our lineup of the best bathroom heaters.
- BEST OVERALL: Dreo Wall-Mount Space Heater
↓ Jump to Review - BEST BANG FOR THE BUCK: Lasko 1500W Bathroom Space Heater
↓ Jump to Review - BEST FOR DRESSING ZONE: Lasko MyHeat Personal Mini Space Heater
↓ Jump to Review - BEST OSCILLATING: Dreo Solaris Slim H3 Space Heater With ALCI
↓ Jump to Review - BEST QUIET: DeLonghi Bathroom Safe 1200W Radiant Heater
↓ Jump to Review - BEST CEILING-MOUNTED: Panasonic WhisperWarm DC Fan/Heater
↓ Jump to Review - BEST FAN: Stiebel Eltron Wall-Mounted Electric Fan Heater
↓ Jump to Review - BEST RECESSED: Broan-NuTone Comfort-Flo Wall Heater
↓ Jump to Review
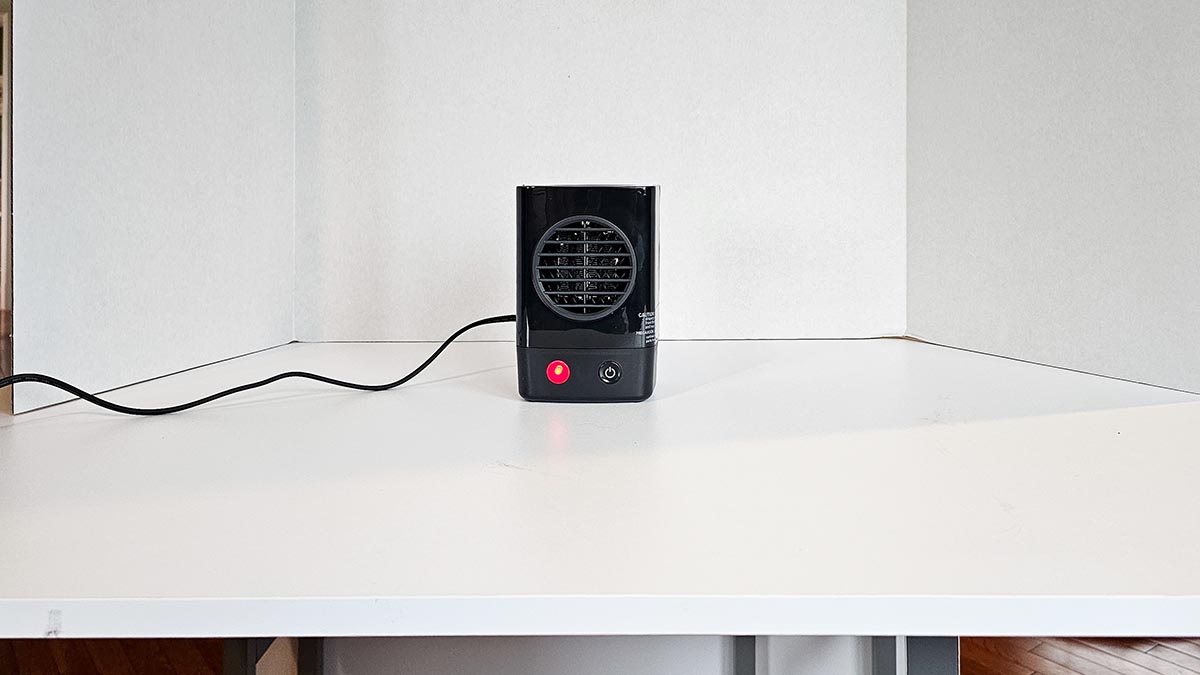
Bathroom Heaters Comparison Chart
| Max Output | Max Output | Control | |
| Dreo Wall-Mount | Wall-mount | 1500W | Direct, Remote, Smart (App) |
| Lasko 1500W | Portable | 1500W | Onboard button |
| Lasko MyHeat | Portable` | 200W | Onboard button |
| Dreo Solaris Slim H3 | Portable | 1500W | Digital thermostat |
| DeLonghi | Oil-filled radiator | 1200W | 3-Stage thermostat |
| Panasonic WhisperWarm | Ceiling-mount | 1600W | Wired wall switch |
| Stiebel Eltron | Wall-mount | 1500W | Manual thermostat |
| Broan-NuTone | Wall-mount | 1500W | Manual thermostat |

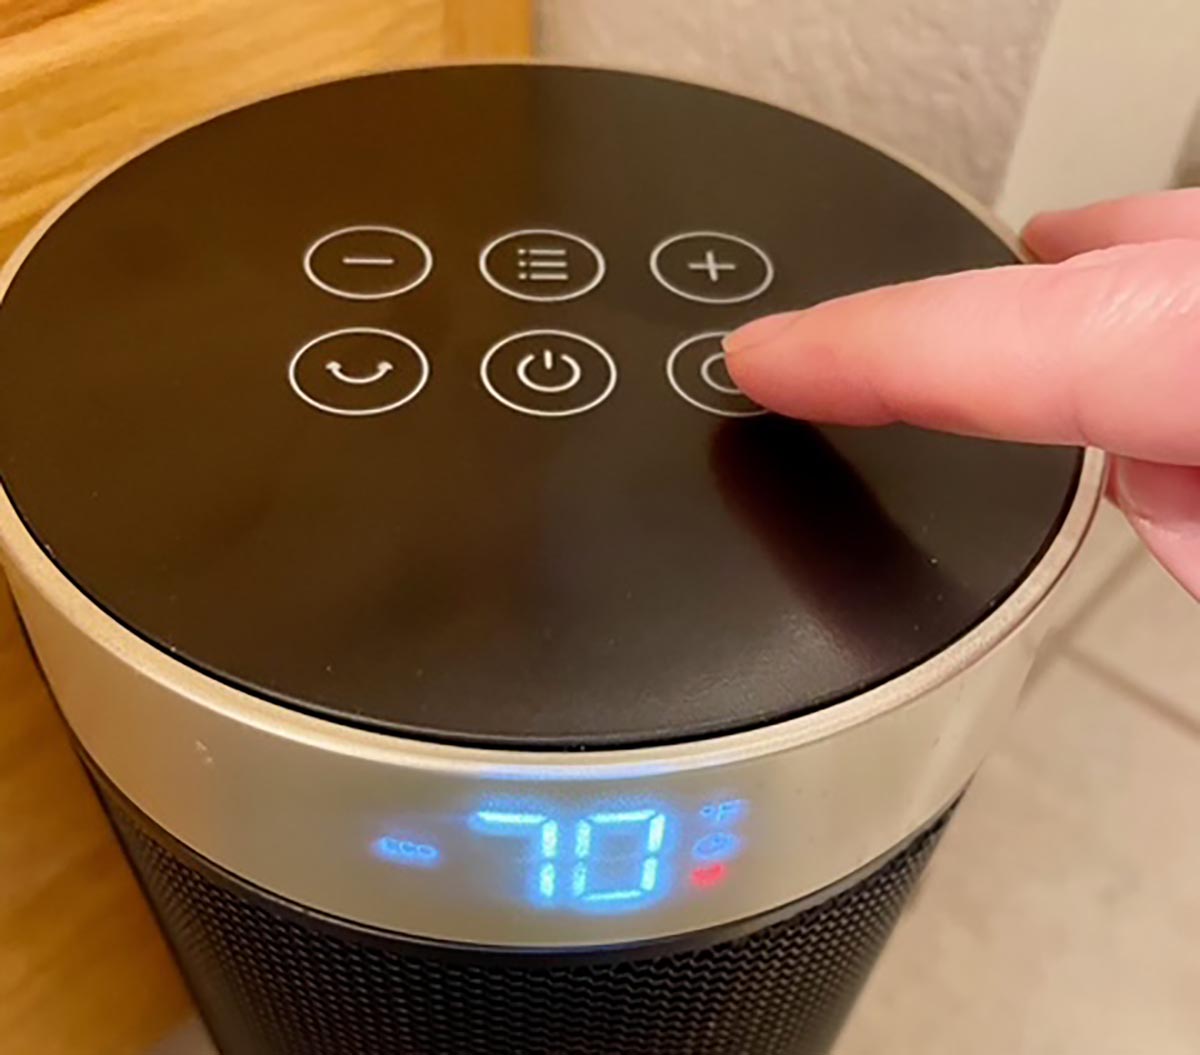
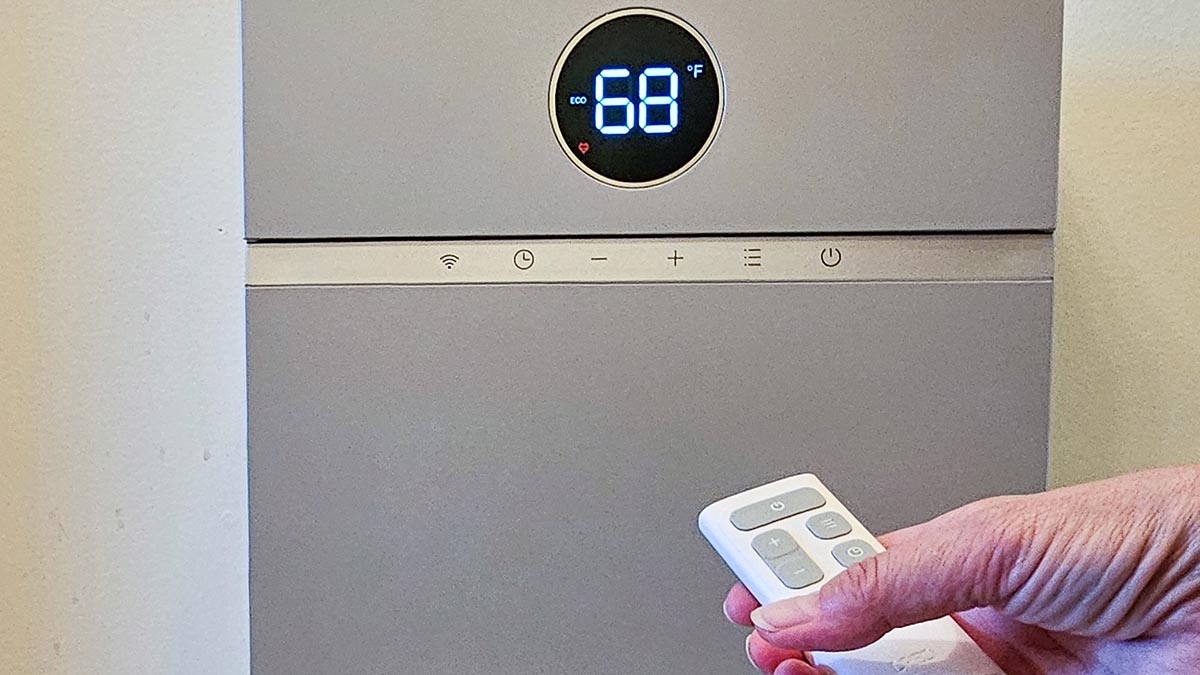

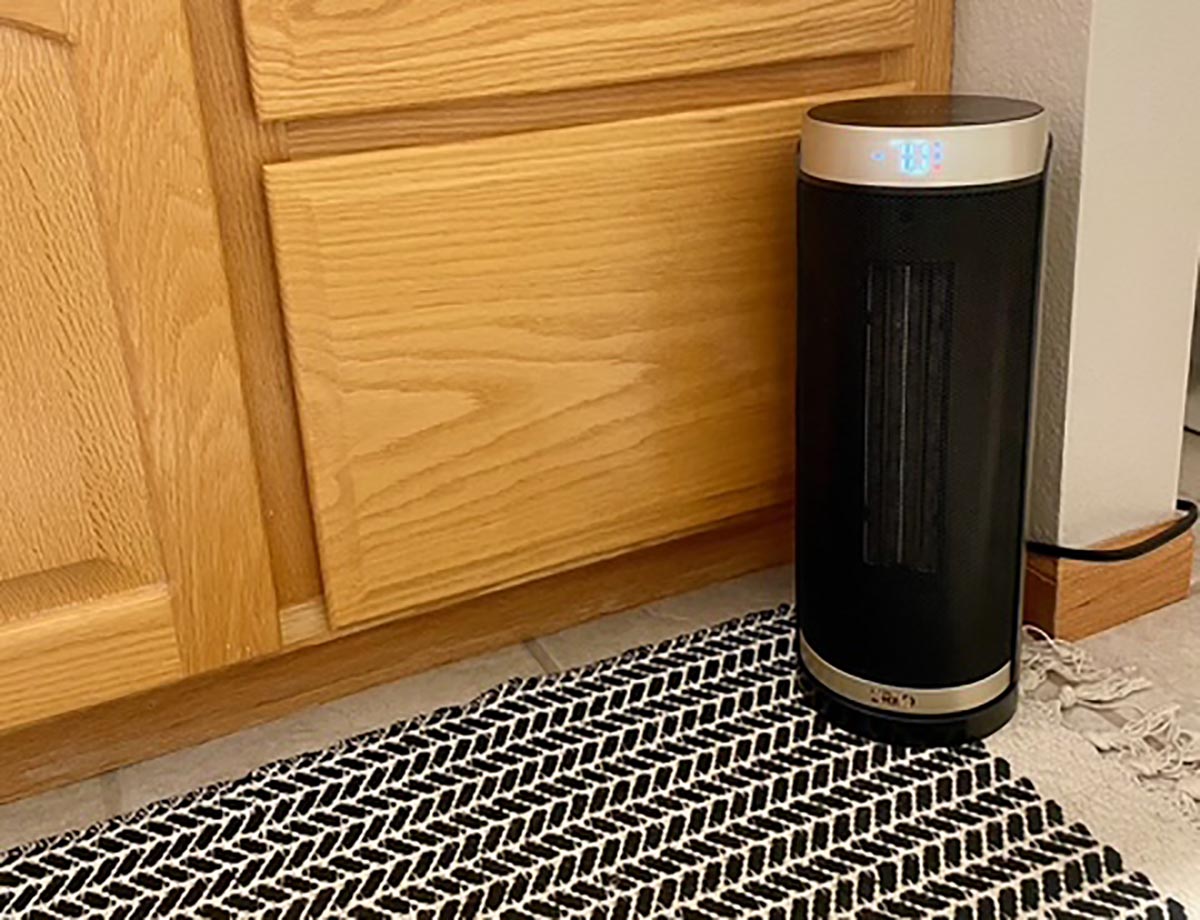
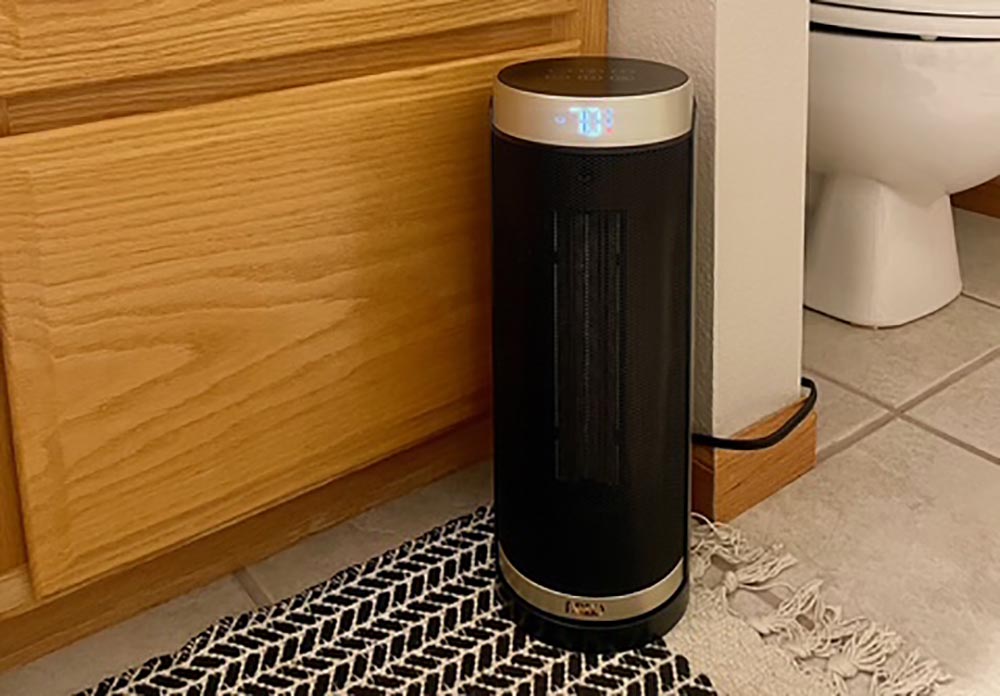
Our Top Picks
We tested the first four bathroom heaters on this list, and you’ll find a variety of options suited for various types of bathroom layouts and budgets. From wall-mount models that don’t take up floor space to small personal options for dressing nooks, these are some of the best bathroom heaters for keeping your space comfy.
Best Overall
Dreo Wall-Mount Space Heater

What We Like
- Wall-mounted convenience
- Smart app integration
- Fast heating performance
- Safe for bathrooms
What We Don’t Like
- Location depends on outlet placement
Specs
- Type: Wall-mount
- Maximum power consumption: 1500W
- Heat control: Onboard, Remote, Smart (app)
Our Ratings: Ease of Use 5/5; Performance 5/5; Functionality 4.8/5; Noise 4.8/5; Value 4.8/5
Dreo has a winner with the Dreo WH517S smart space heater. We liked being able to hang this space heater on the wall, where it was up and out of the way, rather than sitting on a wet bathroom floor. Installation was simple: Dreo included a mounting template that indicated the location for the screws, and best of all, the template came with a bubble level so that we could ensure the heater would be perfectly straight.
Setting up the app was a snap. All we had to do was plug the Dreo WH517S into the wall socket and turn it on. We already had the Dreo app on our smartphone, which immediately recognized the heater. If you don’t have the app, a QR code walks you through the steps.
We tested the space heater in a small, 65-square-foot bathroom located at the end of an HVAC duct run, so it always felt cold during the winter—until now. On a day when the outdoor temperatures were in the single digits, the WH517S raised the bathroom’s temperature from a chilly 58 degrees to 70 degrees in about 20 minutes.
This heater also comes with an ALCI plug option capable of shutting the heater off when it senses abnormal electric flow. It also has an IP24 rating, so it can take an occasional splash of water. In homes with small children, this heater can be mounted high on the wall for added safety.
What our tester says: “On winter mornings, I love being able to turn on the heater in the bathroom from my smartphone without having to get out of bed. Just 15 minutes and the bathroom is warm and comfortable for my shower.” —Glenda Taylor, Product Reviews tester and writer
Get the Dreo Wall-Mount bathroom heater at Amazon or Dreo.
Best Bang for the Buck
Lasko 1500W Bathroom Space Heater
What We Like
- Affordable, compact, and lightweight
- Heats very quickly
- Built-in 1-hour timer
- ALCI safety plug
What We Don’t Like
- Limited control features
Specs
- Type: Portable
- Maximum power consumption: 1500W
- Heat control: Onboard button (high, low, and 1-hour timer)
Our Ratings: Ease of Use 4/5; Performance 4.5/5; Functionality 4.5/5; Noise 4/5; Value 4.3/5
You don’t have to spend a lot to warm up a chilly bathroom. The Lasko 1500W bathroom space heater is compact, comes with an ALCI safety plug, and best of all, is affordable.
This Lasko heater doesn’t have many bells and whistles, but it’s a solid pick to heat a small- to medium-size bathroom. It measures just 8 inches tall by 6.25 inches wide and weighs just 3.35 pounds, making it small enough to sit on a bathroom shelf or countertop.
In our tests, this budget-friendly heater raised the temperature of our bathroom by 10 degrees in under 30 minutes when we ran it on high. We liked the option of choosing high or low power, and the heater’s 1-hour setting ensures it won’t continue to produce heat after an hour if someone leaves it running.
It comes with a cool-touch case that didn’t get hot after an hour of running the heater on high, but the grille on the front of the heater did get hot, so we’d suggest locating this bathroom heater out of the reach of pets and little hands.
Get the Lasko 1500W bathroom heater at Amazon, The Home Depot, or Walmart.
Best for Dressing Zone
Lasko MyHeat Personal Mini Space Heater
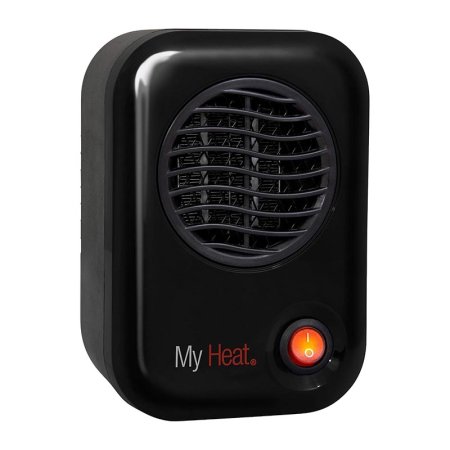
What We Like
- Super compact and space-saving
- Small space heater with compact footprint
- Simple one-button operation
- Cool-touch exterior
- Low-wattage heater
What We Don’t Like
- No ALCI plug; use in dry areas only
- Limited heat range
Specs
- Type: Portable
- Maximum power consumption: 200W
- Heat control: Onboard button (on/off)
Our Ratings: Ease of Use 5/5; Performance 4/5; Functionality 4.8/5; Noise 4/5; Value 4.5/5
For those short on bathroom space but needing some added warmth in a dry area, such as a changing corner, dressing zone, or wardrobe nook, the super-compact Lasko MyHeat personal heater is a great option.
It doesn’t come with an ALCI plug, so it’s not suitable for areas in the bathroom that are prone to occasional splashes, and it’s not powerful enough to raise the temperature of a large bathroom quickly, but in our test bathroom, after 45 minutes, the temperature climbed 10 degrees. We felt the most warmth within 3 to 4 feet of the front of the Lasko heater.
Still, it’s a nice little unit that offers just the right amount of warmth for small spaces. It’s simple to operate with a single on/off button on the front, and the cool-touch case keeps the sides and back from getting uncomfortably hot. We found the perfect spot for the Lasko MyHeat–plugged in under our dressing area bench. No more cold feet while putting on socks!
What our tester says: “I love that despite its compact size, this little Lasko bathroom heater can create real warmth. When I need spot-warming, this is the one I turn to.” —Glenda Taylor, Product Reviews tester and writer
Get the Lasko MyHeat bathroom heater at Amazon, Walmart, or Best Buy.
Best Oscillating
Dreo Solaris Slim H3 Space Heater With ALCI
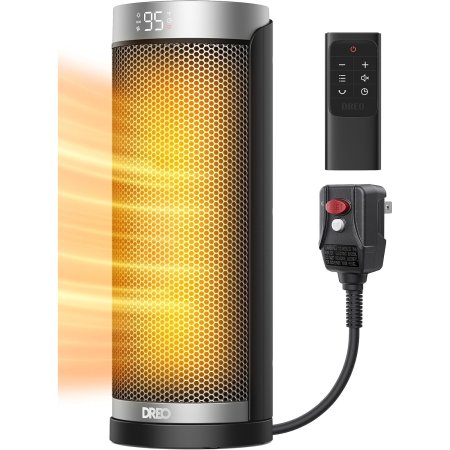
What We Like
- 70-degree oscillation
- Thermostat, timer, and remote
- ALCI safety plug
- Overheating and tip-over protection
What We Don’t Like
- Controls aren’t entirely intuitive
- No integrated cord keeper
Specs
- Type: Portable
- Maximum power consumption: 1500W
- Heat control: Digital thermostat with 1-degree increments
Our Ratings: Ease of Use 4.5/5; Performance 5/5; Functionality 5/5; Noise 5/5; Value 4.5/5
Thanks to its quiet operation, effective heating, and feature-rich design, this slim and stylish Dreo heater earned nearly perfect marks in all our tests. Though it weighs under 5 pounds and isn’t even 6 inches in diameter, it had no difficulty warming spaces significantly larger than its 200-square-foot recommended area. For that reason, we especially appreciate that it comes with a remote with an impressive 26-foot range, as we regularly have to turn it off during our baths in order to keep ourselves from getting too warm.
Still, remotes are fairly commonplace for these types of appliances, so Dreo upped the ante by adding 70-degree oscillation, a 12-hour timer, a programmable thermostat, three heat settings, and fan-only operation. The heater also features an ALCI plug, V-0 flame-retardant construction, overheating and tip-over protection, and an inline carry handle. While it did take us a bit of fumbling to figure out this unit’s touch-control buttons at first, it wasn’t so complicated that we needed to consult the manual, and we’ve now used it without issue almost every day for nearly 2 months.
Get the Dreo Solaris bathroom heater at Amazon or Dreo.
More Great Options
The following bathroom heaters were not personally tested, but we chose them for our lineup based on their quality, features, and consumer ratings. If you’re still looking for the right model, you’ll likely find it here.
Best Quiet
DeLonghi Bathroom Safe 1200W Radiant Heater
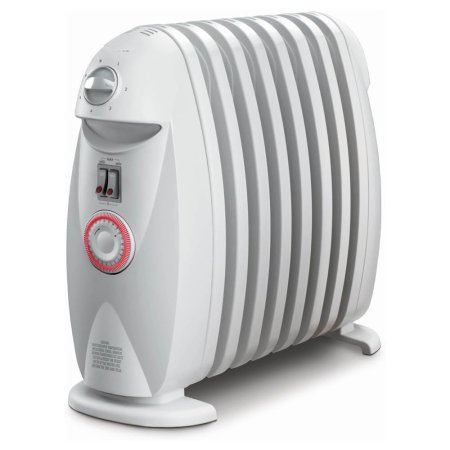
What We Like
- Completely silent radiator heater
- Fitted with a GFCI safety plug
- Offers three power settings plus programmable timer
- Built-in carry handles
What We Don’t Like
- Heating is slow
Specs
- Type: Oil-filled radiator
- Maximum power consumption: 1200W
- Heat control: 3-stage thermostat
Oil-filled radiators have long been silent heating options, but power-hungry devices have replaced them to a large extent. Still, we like the idea of this one, a lighter, maneuverable radiator from DeLonghi that weighs only 7.8 pounds. And, with a choice of three heat settings (1200W on high, 700W on medium, and 500W on low), it can be more economical than its predecessors.
It features a manually programmable timer with a 24-hour range that looks old-school but reportedly works flawlessly. The 8-fin design increases surface area so it heats consistently but without the surface getting scorching hot. We’re glad DeLonghi included a ground-fault circuit interrupter (GFCI) safety plug, which makes this radiator a good choice for bathrooms.
While the DeLonghi heater is a completely silent option, it does heat up a bit slowly, so the timer is useful for preheating the bathroom before use. We think this pick would be an excellent option for a central bathroom that’s used frequently by family members.
Get the DeLonghi bathroom heater at Amazon, Tractor Supply Co., Wayfair, or The Home Depot.
Best Ceiling-Mounted
Panasonic WhisperWarm DC Fan/Heater
What We Like
- Combines bathroom exhaust fan and heater
- Intelligent electronically commutated motor (ECM)
- Smartflow technology helps maximize performance
- Adjustable grille has a built-in diffuser
What We Don’t Like
- Professional installation is recommended
Specs
- Type: Ceiling-mounted
- Maximum power consumption: 1600W
- Heat control: Wired wall switch
A ceiling-mounted bathroom heater doesn’t use up valuable floor or wall space, and when properly installed, there should be no safety issues. The Panasonic WhisperWarm goes one better by integrating a bathroom vent with a heater in a single low-profile unit.
We like the exhaust fan, which can be set to run at 50, 80, or 110 cubic feet per minute (CFM) to suit a variety of room sizes. The heater has a fixed output of 1600W but can be connected to a thermostat, allowing full control over room warmth. The Panasonic WhisperWarm uses the brand’s own intelligent DC motor, making it an energy-efficient space heater. The grille can be adjusted to direct warm air.
A Flex-Z fast bracket is designed to simplify installation, and the Panasonic can be fitted to either 4-inch or 6-inch ducting. A dimmable LED is also an option (though at extra cost). If a ceiling-mount heater isn’t already installed, we suggest hiring an electrician, because this unit requires a dedicated electric circuit.
Get the Panasonic bathroom heater at Amazon, Lowe’s, or The Home Depot.
Best Fan
Stiebel Eltron Wall-Mounted Electric Fan Heater
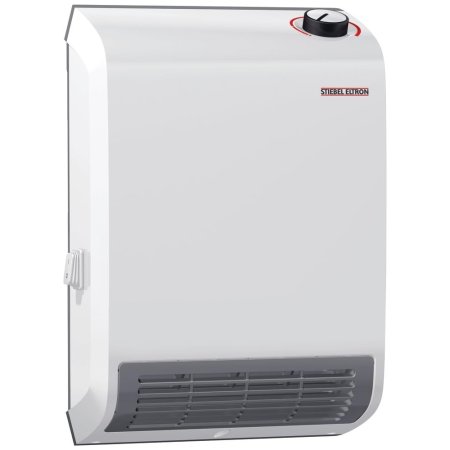
What We Like
- Downdraft fan design for quick heating
- 60-minute boost timer
- Relatively quiet 49 decibels
What We Don’t Like
- Must be hardwired; professional installation recommended
Specs
- Type: Wall-mounted
- Maximum power consumption: 1500W
- Heat control: Manual thermostat
The main draw of a bathroom heater with a fan is to spread the heat as rapidly as possible around the room, but a downside can be extra noise. The Stiebel Eltron wall heater is different in that it delivers warmth quickly while running at just 49 decibels, which is about the level of a modern refrigerator.
Its maximum output is 1500W, which Stiebel Eltron rates as sufficient for rooms up to 150 square feet. A built-in thermostat regulates performance, and we like its 60-minute boost timer, with the unit automatically reverting to its previous setting at the end of the period. There is also a frost protection setting and an on/off switch that shuts down the whole unit to prevent accidental use.
Keep in mind that this is a hardwired unit, so it can’t simply plug into an outlet. If there’s no existing hardwired heater, professional installation is a good idea.
Get the Stiebel Eltron bathroom heater at Amazon or The Home Depot.
Best Recessed
Broan-NuTone Comfort-Flo Wall Heater
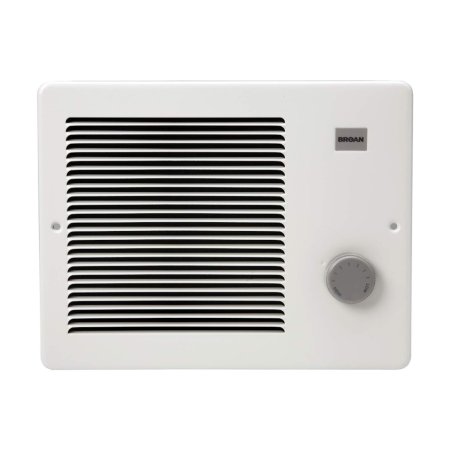
What We Like
- Fits discreetly into the wall
- The louvers help spread warm air
- Durable steel construction
- Wipe-clean white enamel finish
What We Don’t Like
- Single output level only
- Professional installation recommended
Specs
- Type: Wall-mounted
- Maximum power consumption: 1500W
- Heat control: Manual thermostat
Wall heaters for bathrooms can save valuable floor space, but they can also butt into the room, providing a frustrating obstacle. The Broan-NuTone Comfort-Flo is a recessed or in-wall bathroom heater that provides a low-profile solution that we love for small bathrooms where space is at a premium. The louvers direct the heat flow downwards, helping to spread warmth evenly, and a front-mounted knob controls the built-in thermostat.
The Broan-NuTone Comfort-Flo is factory-wired at 1500W and 120 volts. It can be converted to 750W at 120 volts or 1500W at 240 volts, which may suit some installations. Note that the choice of watts is final; it does not offer two output levels. Installation is fairly straightforward, but we suggest hiring an electrician if this heater isn’t replacing an existing bathroom with a dedicated circuit.
Get the Broan-NuTone bathroom heater at Amazon or The Home Depot.
Jump to Our Top Picks
How We Chose and Tested the Best Bathroom Heaters
When we started researching modern bathroom heating options, we quickly discovered that there were hundreds of different models available. After carefully considering nearly 50 choices, we settled on eight top models, and then we chose four of those to test in our own bathrooms.
We also looked at how safe the various models were for use in standard bathrooms.Remodeling expert Benjamin Stenson, director of operations of Norsemen, a home remodeling contractor in Louisville, Kentucky, told us, “Safety features are paramount, so users must opt for heaters designed to withstand bathroom conditions.”
Hands-on testing consisted of assessing the quality of each heater’s build, trying out each of its features, and keeping records of how quickly each one heated a small bathroom during cold weather. We noted how hot the exterior of the heaters became after an hour of continuous use, and we awarded points based on a rubric—the better a bathroom heater performed on a test or assessment, the higher the points. After testing, we summed the points and used them to determine our best overall pick and assign relevant categories for the others.
| Testing Stats | |
|---|---|
| Products tested | 4 |
| Time spent testing | Several weeks |
| Tests performed | 4 |
| Price range | $25 to $250 |
| Ease of Use | Performance | Functionality | Noise | Value | |
| Dreo Wall-Mount | 5 | 5 | 4.8 | 4.8 | 4.8 |
| Lasko 1500W | 4 | 4.5 | 4.5 | 4 | 4.3 |
| Lasko MyHeat | 5 | 4 | 4.8 | 4 | 4.5 |
| Dreo Solaris Slim H3 | 4.5 | 5 | 5 | 5 | 4.5 |
What to Consider When Choosing a Bathroom Heater
While the appearance of a bathroom heater will always impact choice, there are a number of technical aspects to consider. The information below will help shoppers choose the most appropriate types of electric bathroom heaters for their needs.
Type
The three general types of heaters for bathrooms include portable bathroom heaters, wall-mounted heaters, and ceiling-mounted heaters. Most (but not all) space heaters for bathroom use are electric. It’s harder to find non-electric heaters than electric heaters for bathroom use.
Portable
The term “portable” can refer to various bathroom heaters, including plug-ins, space heaters, and oil-filled radiators. These are usually among the most affordable bathroom heaters. Their distinguishing design feature is that they are not permanently fitted to the bathroom wall or ceiling, so they can be used in other rooms. Some are very light and easy to move. Space heaters often have carry handles. Although oil-filled radiators are heavier, they can still be moved if necessary. All of these might be good options for bathrooms not in regular use, such as in a guest accommodation.
Wall Mounted
The main advantage of wall-mounted bathroom heaters is that they don’t take up valuable floor space. They can also be very discreet. Wall-mounted exhaust fans are sometimes combined with heater elements, though these generally have more modest output.
Ceiling Mounted
Much like wall-mounted models, a ceiling-mounted bathroom heater can be both powerful and discreet. Its position also keeps it well away from small children and pets. Many are combined with an exhaust fan, which is a benefit but can complicate installation. Some ceiling models are infrared space heaters that use a large red bulb to radiate heat downward.
Size and Heat Output
Physical size will have an impact on choice, especially in smaller bathrooms. Plug-ins and small bathroom heaters can be an effective option, though recessed wall units and ceiling models have no space penalty at all once installed.
Actual heat output can be difficult to assess on an electric heater. Most indoor room heaters are rated in watts. Opinions vary, but many experts quote 5 to 10 watts per square foot as optimal for comfortable warmth. However, manufacturer figures may contradict this rule of thumb and are perhaps a better guide. Models described as providing “supplemental” heat might also fall below this standard, but it does depend on bathroom size. Bathroom heaters that provide thermostats or two output settings offer greater control over personal comfort.
Safety
Water and electricity are a dangerous mix, with a risk of serious electrical shock. The descriptive materials for any heater intended for use in the bathroom should clearly state that it is for bathroom use, but we could not find any official guidelines. Ceiling heaters for bathrooms present little risk when installed correctly because there are no exposed heater elements or plugs.
Other units may be at risk of water splashes, so thought should be given to positioning. In addition, there is some risk at wall outlets. The usual solution is to fit either an ALCI or GFCI safety plug. Both will cut power in a fraction of a second and prevent harm. Many manufacturers provide these, but they can also be retrofitted.
Some use portable propane heaters in bathrooms and other interior rooms, but if you choose that option, make sure the heater is designed for inside use. Some will give off dangerous fumes.
Additional Features
- The amount of temperature control varies considerably. Although thermostatic control is common, ceiling fans may simply be on/off devices. Thermostats may offer only two or three settings or be fully variable. They may also be combined with separate heat settings. Comparing different types of bathroom heaters can be difficult, so shoppers will want to pay attention to exactly how much flexibility and control is provided.
- Noise level is another key area. While bathroom heaters aren’t particularly noisy, fans may have an impact at high settings. Decibel ratings may be provided, though such descriptions as “low noise” and “whisper quiet” are used more often.
- Handheld remote controls are a popular extra. Functionality varies, so this is another factor worth checking. Smart control via Wi-Fi and phone apps is widely available for space heaters, allowing remote control and scheduling. These options are also available on a few wall heaters.
- Timers are sometimes offered and may be manual or digital.
- Ceiling-mounted bathroom fans may include lighting.
FAQs
There’s a lot of detailed information in the article above, and we hope it answers most questions that often crop up regarding choosing the best bathroom heater. While doing our research, we came across some queries of a more general nature, and we have addressed those here.
The best way to heat a small bathroom is often with either a portable heater, a fan-less wall panel, or a heated towel rack for the bathroom. These provide sufficient heat but are either very quiet or completely silent.
Bathroom heaters are absolutely worth it, as anyone who has had to bathe in a cold bathroom will attest. What’s more, many are very affordable as well as economical to run, so users can have a little luxury without a big bill.
Many different types of heaters are allowed in bathrooms, ranging from low-cost portable models to a variety of wall- and ceiling-mounted options. Our collection of top bathroom heaters listed above underlines the wide choice available.
Bathroom heaters are perfectly safe to use when installed and operated following the manufacturer’s recommendations. Sometimes it’s as simple as having an ALCI safety plug fitted. With others, the wiring is hidden and out of harm’s way.
It’s not a good idea if it’s a continuously running heater. However, if you have a permanently installed heater that runs on a thermostat, it’s probably okay. For trips to the restroom at night, consider a heated toilet seat and leave the space heater off.
Use 10 watts per square foot of floor space as a guide when sizing any kind of heater. For example, a 1500W bathroom heater will warm a 150-square-foot bathroom efficiently.
If it’s hardwired, probably. If it’s a high-capacity heater (1500W or up) that plugs into an outlet, it could overload the circuit if several other appliances are plugged in at the same time.
Meet the Tester: Glenda Taylor is a contractor, product tester, and writer focusing primarily on construction, DIY tools, and home appliances.
The post Cold Bathroom? These Heaters Will Fix That in Minutes appeared first on Bob Vila.
]]>The post The 15 Best Mattress Brands of 2025 appeared first on Bob Vila.
]]>A mattress is one of the most important—and often one of the priciest—purchases most people make for their bedrooms, and the right mattress is worth the investment, because quality shut-eye and better health starts with a good foundation. With a huge range of types and price points, though, choosing the right one often requires starting the search with options from the best mattress brands.
What is the best mattress to buy? It’s a tough question to answer, as each person’s needs and preferences are different. Good mattresses are supportive, comfortable, and durable, to lull sleepers into a cozy yet cradled rest night after night. Some people need extra support, while others seek out mattresses that aren’t hot, or focus on natural materials. The mattress brands listed below carry a variety of mattress types at different price points to complete the bedroom and help sleepers achieve a restful night. Learning about these well-regarded brands should help shoppers choose the right mattress with the confidence that they support their products and have earned their reputation for quality materials and excellent customer support.
1. Saatva
Price Range: $$ to $$$
Top Products: Saatva Classic Mattress (from $1,399 at Saatva) and Saatva Latex Hybrid Mattress (from $1,699 at Saatva)
For hotel-quality comfort at home, consider a mattress from Saatva, which carries luxury mattresses made from premium materials like organic cotton, CertiPUR-US certified memory foam, and eco-friendly materials. Each Saatva mattress is handcrafted to order in the U.S. using consciously sourced materials. The various mattress styles are engineered for a pain-free sleep with a dedicated lumbar support zone to help with optimal alignment.
To increase this luxurious feeling, most Saatva mattress styles also include a pillow-top design to add softness without sacrificing support. The company’s penchant for high-quality materials is evident across its range of mattress types, bedding, and bed frames, such as with the Saatva Classic Mattress, which is available in sizes from twin to split california king, firmness ranging from plush soft to firm, and two different height options, including 11.5 inches and 14.5 inches. The options give customers a wide variety of customizations to create the right base for comfortable slumber.
Shop Saatva mattresses at::
2. DreamCloud
Price Range: $$ to $$$
Top Products: DreamCloud Luxury Hybrid Mattress (from $449 at DreamCloud) and DreamCloud Premier (from $649 at DreamCloud)
DreamCloud offers premium hybrid mattresses at a reasonable price. The company’s three mattress styles blend a variety of mattress technologies, featuring three material layers to help the user sleep deeply. The supportive coil system offers a bit of bounce and enhanced edge support, layers of high-density gel memory foam provide a cool but cozy sleep, and then there’s the plush, cashmere-blend Euro top. These attributes combine the best of latex, memory foam, and coil mattresses into a hybrid that works well for many sleepers.
The DreamCloud Premier Mattress features contouring quilted gel memory foam, supportive quilted foam, therapeutic gel-infused memory foam, individually-wrapped coils, and a base layer for stability. DreamCloud offers one of the longest trial periods in the industry: A 365-night trial gives the user a full year to decide if the mattress is the right fit. Free delivery and returns make trying one of their mattresses risk-free. And for those looking to outfit the entire bedroom with plush fixings, DreamCloud also carries bed bases, bedding, and pillows.
Shop DreamCloud mattresses at
3. Casper
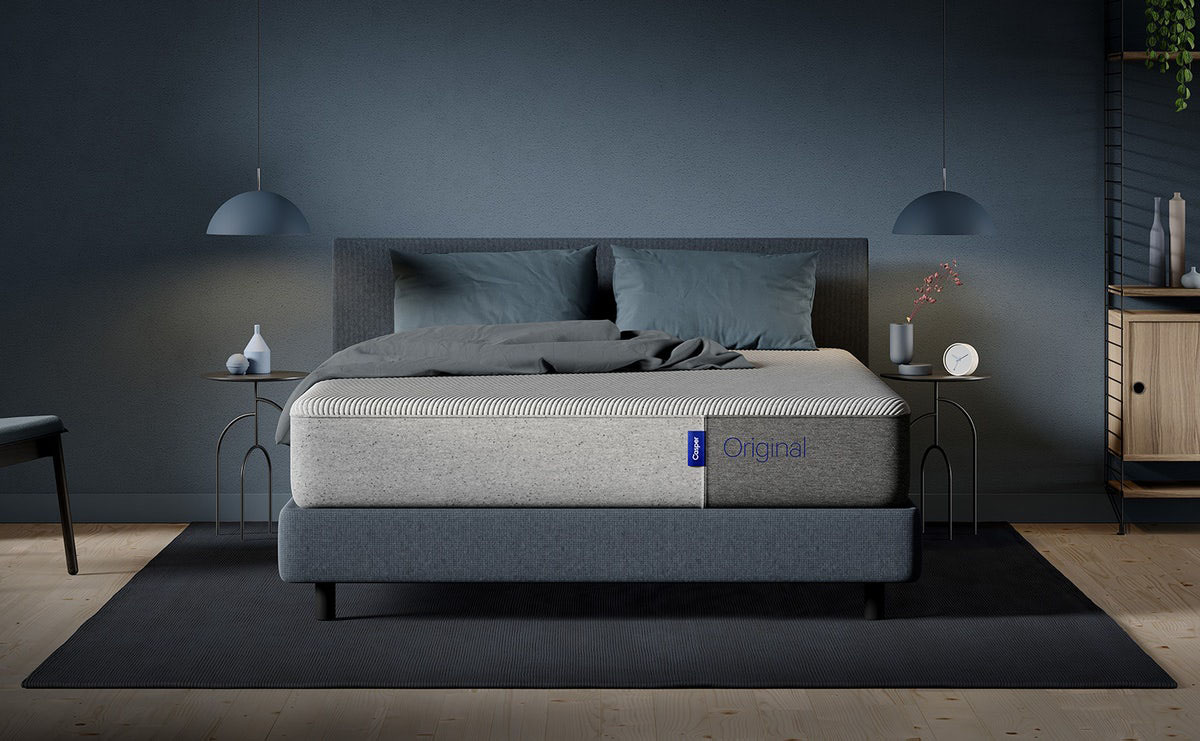
Price Range: $$ to $$$$
Top Products: Casper The One Mattress (from $599 at Casper) and Casper Sleep Element Mattress (from $335 at Amazon)
Casper prides itself on providing supportive, cooling mattresses designed for a revitalizing sleep. The brand sells several mattress types, with affordable configurations made of breathable, perforated foam or pricier hybrid mattresses with supportive inner layers. The Casper Sleep Element Mattress is a top option with breathable open-cell foam layers that help to improve airflow through the mattress, keeping users cool and relaxed while sleeping.
What started with the Casper Original has expanded into four mattress styles, from the affordable, basic Element mattress to the extra-supportive Wave Hybrid. Each of Casper’s mattresses includes a supportive design and a perforated AirScape foam layer to help the user stay cool while sleeping. The reasonable price point is appealing to a range of consumers, and the 100-day trial period is also an excellent draw.
Shop Casper mattresses at:
4. Nectar Sleep
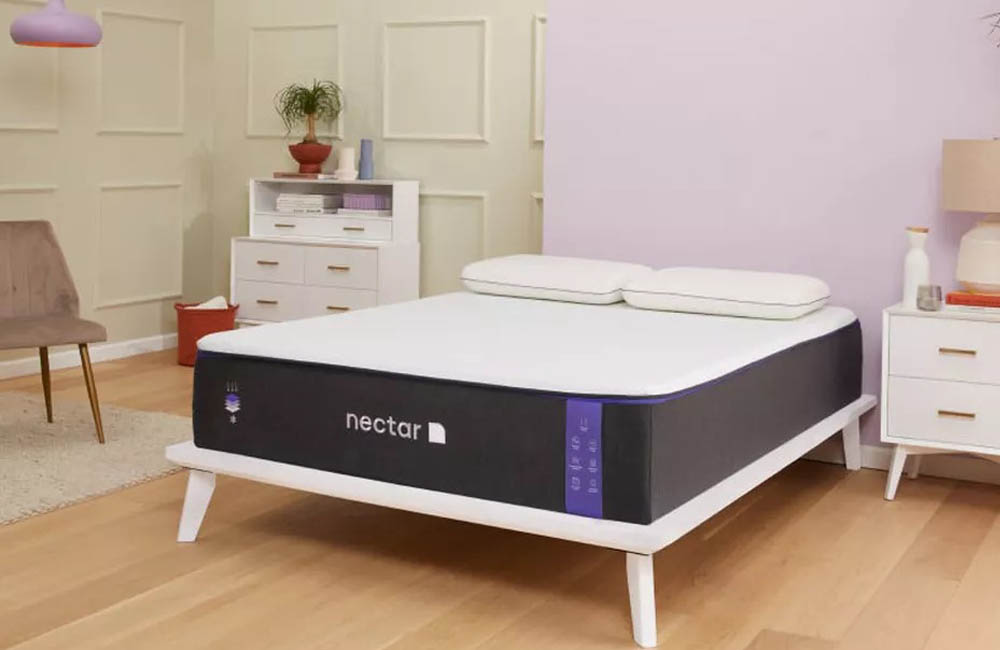
Price Range: $$ to $$$
Top Products: Nectar Premier Memory Foam Mattress (from $549 at Nectar Sleep) and Nectar Classic Hybrid Mattress (from $499 at Nectar Sleep)
Nectar Sleep offers premium mattresses at competitive prices. Founded in 2016, the company has offices in New York, San Francisco, London, and Tel Aviv. The company provides all-foam, multilayered mattresses that boast plush comfort, comfortable support, and surface cooling. The four mattress styles feature an adaptive, contoured memory-foam layer to relieve common pressure points behind the shoulders, hips, and legs.
A quality option for just about any bedroom is the Nectar Premier Memory Foam Mattress that has a foundation base to minimize motion transfer, a memory foam core for pressure relief and support, all topped with a cooling cover to keep sleepers comfortable during warm nights. This option adds motion suppression and extra cooling over the Classic model, but customers can upgrade to the Luxe or Ultra models to benefit from increased luxury. The company also offers a Hybrid option in all four levels. Nectar Sleep sells mattresses, bedroom furniture, bedding, and dog beds online and in 2,000 retail stores across the U.S. As a prominent brand in the bed-in-a-box industry, Nectar Sleep exceeds expectations when it comes to guarantees, offering a 365-night trial period, forever warranty, free shipping, and free returns.
Shop Nectar Sleep mattresses at:
5. Purple

Price Range: $$ to $$$
Top Products: Purple Restore Hybrid Mattress (from $1,699 at Purple) and Purple Mattress (from $799 at Purple)
Purple’s origin story dates back to 1989 when founding brothers Terry and Tony Pearce worked to develop a cushioning fluid to prevent wheelchair pressure sores. Their process set off a chain reaction, eventually leading to the development of their Hyper-Elastic Polymer. While a range of industries—from medical beds to shoe insoles—incorporated this ground-breaking polymer, the brothers were interested in creating something new, and the Purple mattress was born.
Purple incorporates the Pearce brothers’ invention into every mattress to create the ultimate no-pressure bed, such as the Purple Restore Hybrid Mattress, which features two inches of GelFlex® Grid and edge-to-edge coils to improve support and cradle the sleeper’s pressure points for improved sleep comfort. Each Purple mattress features the brand’s “Purple Grid’’ technology: a waffle-pattern topper made of hyperelastic polymer that is more responsive and sleeps cooler than traditional memory foam. Purple’s product repertoire includes adult and child mattresses, bed frames, pillows, seat cushions, bedding, and pet beds, to bring a cozy sleep to every member of the family.
Shop Purple mattresses at:
6. Tuft & Needle
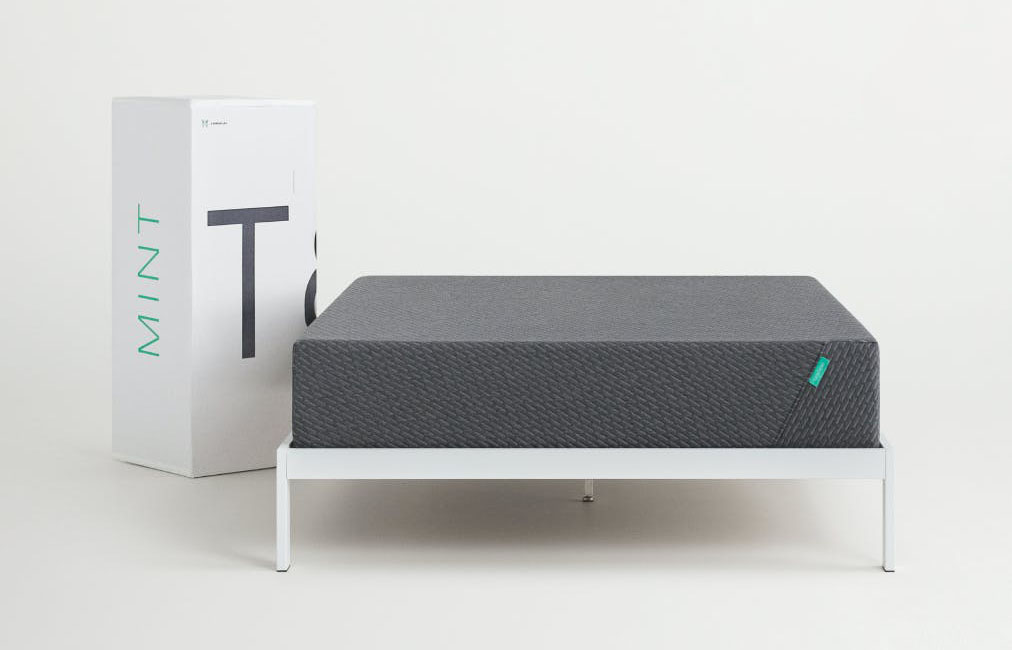
Price Range: $ to $$$
Top Products: Tuft & Needle Mint Mattress (from $636 at Tuft & Needle) and Tuft & Needle Original Adaptive Foam Mattress (from $796 at Amazon)
Tuft & Needle was created to simplify the mattress-buying process, as one of the first companies to shift the user experience online and away from overwhelming viewing rooms and salespeople. To accomplish that goal, Tuft & Needle delivers high-quality mattresses right to the front door for free, without any sales gimmicks. Tuft & Needle Mint mattresses use layers of T&N Flex, Release, and Adaptive foam for comfort, support, and pressure relief to help guarantee a restful sleep.
The company sells three types of mattresses: two foam options (Original and Mint) and one hybrid style. Each mattress style features Tuft & Needle’s proprietary Adaptive Foam, a unique type of foam that provides pressure relief and support without sinking or retaining too much body heat. As mentioned above, the Tuft & Needle Mint Mattress is an upgrade from the Tuft & Needle Original, featuring multiple layers of Adaptive Foam, a heat-regulating top, reinforced edge support, and reduced motion transfer to suit two sleepers.
If a Tuft & Needle mattress isn’t the right fit, return the mattress within the 100-day trial period for a full refund and free removal to a charity of the user’s choice.
Shop Tuft & Needle mattresses at:
7. Leesa

Price Range: $ to $$$
Top Products: Leesa Sapira Hybrid Mattress (from $944 at Leesa) and Leesa Original Mattress (from $609 at Leesa)
Leesa creates stylish and comfortable mattresses with the community in mind. Beyond using recycled and natural materials in its mattresses, the brand also works with local partners to donate one mattress to a family in need for every 10 mattresses sold. Based in Virginia, Leesa’s products are manufactured in the U.S. and ship for free from its online store. Leesa mattresses are available for testing in some West Elm, Pottery Barn, and Macy’s stores. Don’t fret if there isn’t a retailer nearby; each mattress comes with a 100-day risk-free trial period to make sure it’s the right choice.
Leesa mattresses are available in a variety of styles to suit every sleeper. The company manufactures all foam mattresses and foam-and-spring hybrids, like the Leesa Sapira Hybrid Mattress. This choice features a breathable cover, a ventilated foam layer, a memory foam recovery layer, and a responsive support layer to help keep pressure points supported throughout the night. Each style includes the brand’s premium breathable foam, a soft and stylish outer cover, and a range of other comfort features depending on the mattress style.
Shop Leesa mattresses at:
8. Nolah
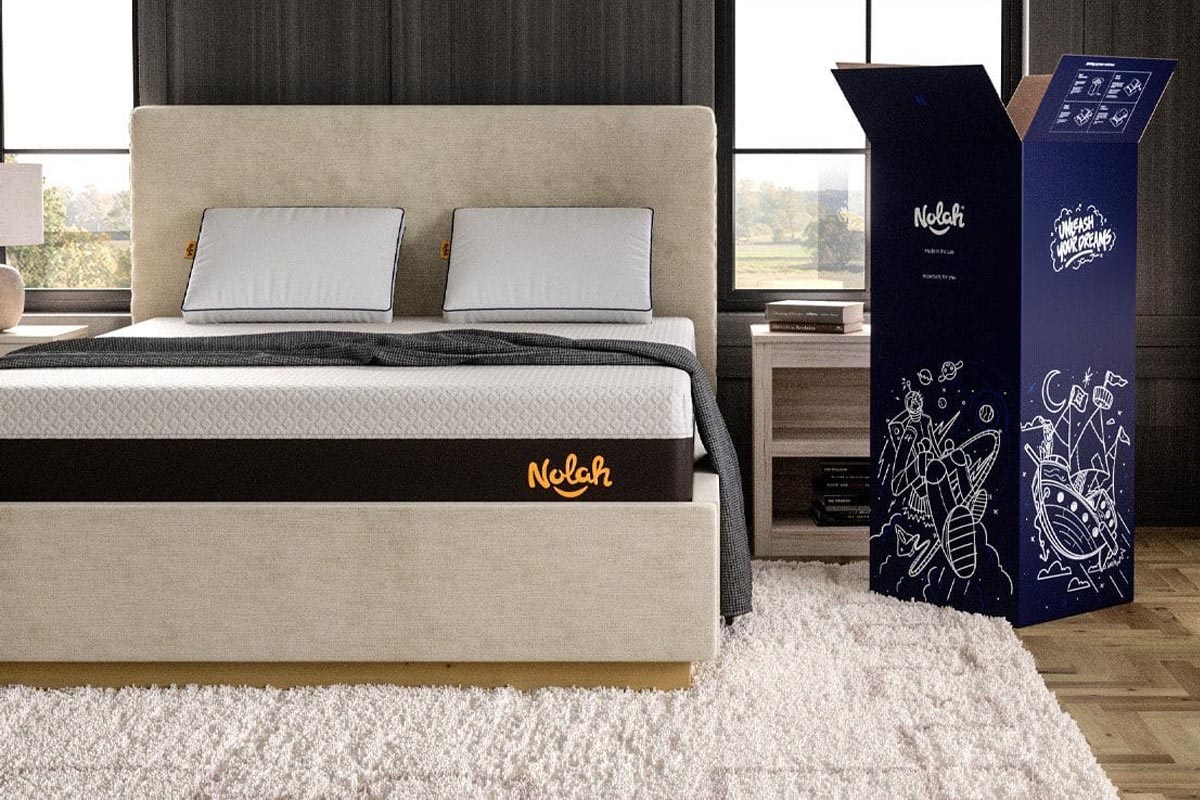
Price Range: $$ to $$$
Top Products: Nolah Signature 12-Inch Mattress (from $844 at Nolah) and Nolah Evolution 15-Inch Mattress (from $974 at Nolah)
Each of Nolah’s U.S.-manufactured mattresses features the company’s breathable and durable multilayer-foam design. For ultimate comfort, the mattresses include a high-density foam base, a supportive and high-resilience foam layer, and a top layer of cooling Nolah AirFoam. The AirFoam is a temperature-neutral foam without the heat-trapping chemicals found in some other memory-foam mattresses. Unlike many other popular mattresses on the market, this unique design excludes memory foam, with the intention of providing cooler sleep, better pressure relief, and improved durability.
Nolah carries three mattress options, ranging in height and price points, but each mattress style comes with a variety of customization choices. The Nolah Evolution 15-Inch Mattress can be customized in both size and firmness while maintaining the high-quality design that supports the curves of the body for natural spinal alignment. The mattresses cater to side and back sleepers to offer better support at key pressure points like the hips, shoulders, and back. Free shipping, free returns, and a 120-night trial period provide ample time to decide if a Nolah mattress is the right choice.
Shop Nolah mattresses at:
9. Brooklyn Bedding

Price Range: $ to $$$
Top Products: Brooklyn Signature Hybrid Mattress (from $465.50 at Brooklyn Bedding) and Brooklyn Chill Memory Foam Mattress (from $191.80 at Brooklyn Bedding)
For those who prefer the more responsive appeal of a hybrid mattress, consider a model from Brooklyn Bedding. The brand designs and manufactures its bedding at a facility in Arizona. Most sales take place online, but customers can visit showroom and partner locations in select cities across the U.S. Even with its affordable price, the Brooklyn Signature Hybrid Mattress is a high-quality product made with several layers to improve sleep, including a moisture-wicking quilted top, transition foam, and eight-inch individually encased coils that help to support pressure points and retain the natural position of the spine.
Along with bedding, pillows, and bed bases, Brooklyn Bedding carries multiple hybrid mattress options that range in firmness, materials, and price points to cater to different sleepers. Many of the company’s mattress styles provide the option to choose a firmness level and mix a supportive coil system with hyper-responsive, variable foam to create a balanced mattress. Free shipping and returns plus a 120-night trial period make it risk-free to try a mattress.
Shop Brooklyn Bedding mattresses at:
10. WinkBeds

Price Range: $$ to $$$
Top Products: The WinkBed (from $849 at WinkBeds) and WinkBeds GravityLux (from $899 at WinkBeds)
WinkBeds prides itself on making handmade luxury hybrid mattresses designed for a more restful sleep. Beyond the brand’s focus on craftsmanship, WinkBeds aims to design mattresses that prevent and relieve back pain. The various styles offer decompressing spine support and advanced pressure-point relief to support the spine, hips, and shoulders. Plus, a cooler sleeping surface offers an optimal snoozing temperature for a restful night.
Available in three firmness options, the WinkBeds GravityLux Mattress is a great choice for side, back, and side-back combo sleepers, as well as couples who are looking for a balance between motion isolation, pressure relief, and responsiveness for the ideal sleep. Purchase a WinkBeds mattress from the online store (with free shipping, free returns, and a 120-night trial) or via a handful of partner showrooms in the U.S.
Shop WinkBeds mattresses at:
11. Layla Sleep

Price Range: $$ to $$$
Top Products: Layla Memory Foam Mattress (from $599 at Layla Sleep) and Layla Sleep Hybrid Foam Mattress (from $1,099 at Layla Sleep)
Can’t decide between a soft or a firm mattress? Have the best of both worlds with a Layla Sleep mattress. Layla Sleep offers flippable foam mattresses that feature a firm side and a soft side so sleepers can pick their ideal sleeping surface without needing to swap out the mattress. One of Layla’s top products is the flippable Layla Sleep Hybrid Foam Mattress, which features an advanced coil system for zero motion transfer and tri-zone airflow layers to absorb and transfer the shock between the comfort layer and the spring system.
The company manufactures a coil-foam hybrid and full-foam option. Both styles include copper-infused memory foam, which Layla Sleep claims has cooling and antimicrobial properties for a more pleasant rest. Layla Sleep offers mattresses, bed frames, pillows, and bedding directly to consumers and supports its mattresses with a 120-night trial period with a money-back guarantee and no return fees. And for anyone who doesn’t love their choice, the company donates returned mattresses to charity rather than having customers ship them back.
Shop Layla Sleep mattresses at:
12. Avocado Mattress

Price Range: $$ to $$$$
Top Products: Avocado Green Mattress (from $1,189 at Avocado) and Avocado Vegan Mattress (from $1,189 at Avocado)
For the environmentally conscious shopper, a mattress can be a difficult purchase. Factors like mattress waste, materials, and treatment chemicals are important to consider. Handmade in California, Avocado Mattresses are 100 percent certified organic so buyers can be confident in the origins of the materials. Beyond a focus on eco-friendly materials, the company also pays mind to its supply chain, offering transparency for multiple steps—from the source of its latex to where it hand-manufactures its mattresses in Los Angeles.
The Avocado Green Mattress is made with exclusively organic materials to help give environmentally-conscious individuals peace of mind when they are making their purchases. Avocado also offers mattresses in a variety of sizes and firmness options, making it a good choice for front, side, and back sleepers. While all the brands on this list provide safe mattress options, Avocado Mattress takes care to omit chemicals that may concern health- and eco-conscious consumers.
Shop Avocado mattresses at:
13. Cocoon by Sealy
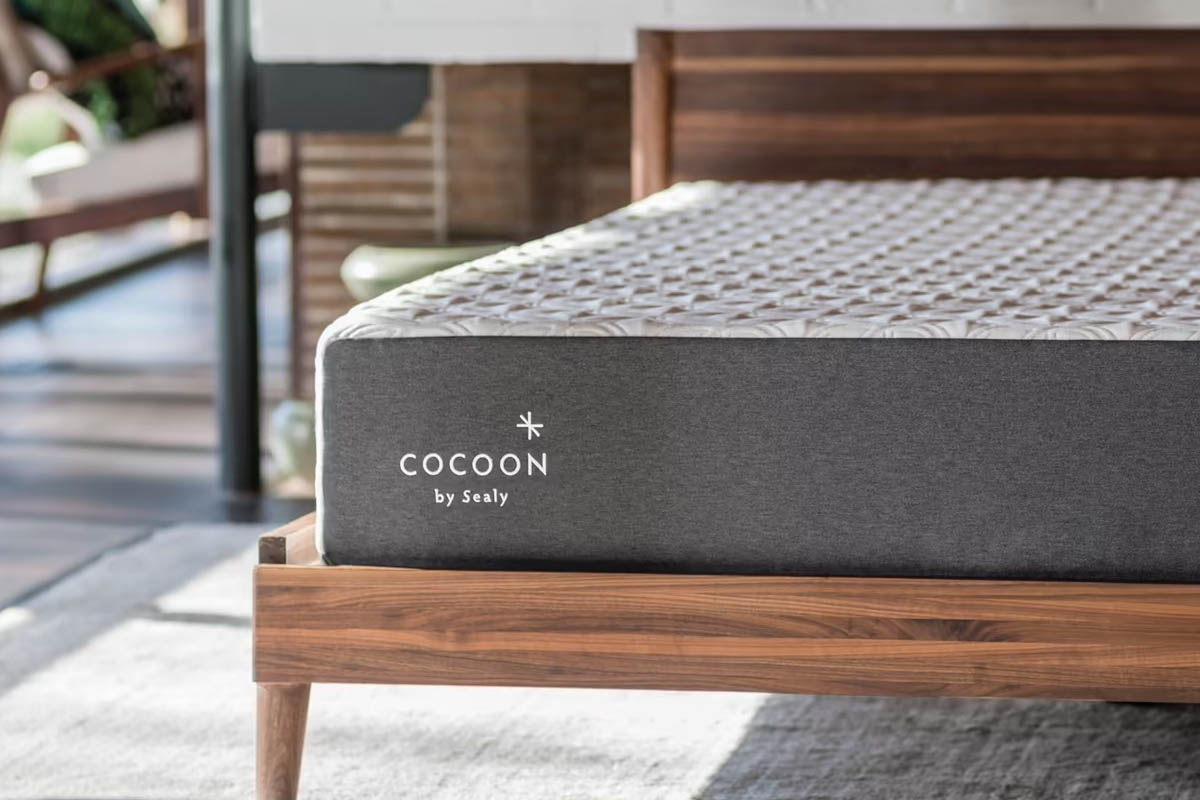
Price Range: $$ to $$$
Top Products: The Chill Memory Foam Mattress (from $399 at Cocoon by Sealy) and The Chill Hybrid Mattress (from 539 at Cocoon by Sealy)
Cocoon by Sealy is Sealy’s mattress-in-a-box brand, blending Sealy’s years of mattress expertise with a direct-to-consumer model. The brand was created with the goal of manufacturing a shippable mattress with a simpler shopping process. Cocoon by Sealy mattresses feature a resilient and high-density memory-foam top that cradles the sleeper’s body without collapsing. The company’s two mattress options include a hybrid mattress that includes coils and memory foam along with The Chill Memory Foam Mattress, which is exclusively constructed from memory foam. Cocoon by Sealy backs up its products with a 100-night free trial, so buyers can feel confident about their mattress investment.
Both mattress styles have undergone years of testing and in-house development, and are manufactured in the U.S. to ensure they measure up to Sealy’s quality and durability standards.
Shop Cocoon by Sealy mattresses at:
14. Serta

Price Range: $$ to $$$
Top Products: Serta Perfect Sleeper Pro Mattress (from $1,274 at Serta) and Serta Perfect Sleeper 14-Inch Ultra Plush Hybrid Mattress (from $725 at Wayfair)
Serta’s first mattress—The Perfect Sleeper—was released in 1931, though it would still be another two years until the company changed its name to Serta. In the more than 90 years that have followed, Serta has become a household name and a top choice for many shoppers searching for the best brand of mattress.
The Serta Perfect Sleeper Pro Mattress continues the long tradition of offering high-quality rest for weary individuals with a five-zoned design to help improve spinal alignment, responsive coils for better pressure point support, and an advanced cooling system for enhanced comfort.
Serta strives to meet the highest quality and safety standards when manufacturing their mattresses. All of the foam used in their mattresses is CertiPUR-US certified. The company is also working to decrease their carbon footprint by incorporating sustainable resources and minimizing the use of chemicals in their production.
Shop Serta mattresses at:
15. Tempur-Pedic

Price Range: $$ to $$$$
Top Products: Tempur-Pedic TEMPUR-LUXEbreeze° 13-Inch Soft Mattress (from $4,799.00 at Mattress Firm) and Tempur-Pedic Proadapt 12-Inch Firm Mattress (from $2,799 at Mattress Firm)
The special viscoelastic foam, also called Tempur material, used to make Tempur-Pedic mattresses provides just the right amount of support to alleviate pressure and keep individuals comfortable as they sleep.
Don’t skip the Tempur-Pedic Proadapt 12-Inch Firm Mattress, which is designed to alleviate aches, stiffness, pain, and sleep apnea by providing consistent support across the entire bed. Meanwhile, the hypoallergenic composition prevents dust mites from taking up residence in the mattress, making this product ideal for allergy-prone sleepers.
Tempur-Pedic is currently working towards creating zero-landfill waste and achieving carbon neutrality for their facilities. The company offers both all-foam and hybrid mattresses. The mattresses are delivered in a box, and can be ready to use within minutes of unrolling and setting up. In addition to mattresses, Tempur-Pedic also sells pillows, mattress toppers, bed bases, sheet sets, blankets, and more.
Shop Tempur-Pedic mattresses at:
How We Chose the Best Mattress Brands
What is the best mattress brand? The answer will depend on the needs and budget of the customer. With so many good mattress brands serving the varied sleeping preferences and space constraints of sleepers, it can be challenging to choose the best brands among them. To select this list of the top brands, we gave preference to brands that offer firm, soft, and hybrid options in various sizes from reputable sellers. We looked carefully at brands offering eco-friendly options, as well as those with specialized foam formulas that help keep sleepers cool and supported throughout a night’s rest. Popular brands that offer children’s mattresses, mattresses in a box delivery, and other unique features like the double-sided hybrid mattress were also given consideration for a spot on the list of the best mattress brands.
The post The 15 Best Mattress Brands of 2025 appeared first on Bob Vila.
]]>The post The Best Air Impact Wrenches of 2025 for Tough Jobs, Tested appeared first on Bob Vila.
]]>It’s difficult to imagine the immense twisting force that an air impact wrench can apply. Here’s an example: A nut that is “hand tight” requires a pressure of about 2 pounds per square foot, or 2 foot-pounds (ft-lbs). The best air impact wrenches multiply that energy more than 500 times. Air impact wrenches make easy work out of otherwise tough jobs like loosening lug nuts, in which an extension bar on a standard wrench can prove insufficient. You won’t find a pro auto shop without an impact wrench for tires, and they’re also used in engineering and construction.
Air impact wrenches are neither complicated nor difficult to use, so there’s no reason amateur mechanics shouldn’t have one of these tools at home, especially if they already own an air compressor. We tested five impact wrenches and found the Aircat 1250-K, with its high torque output (twisting force) and sturdy build, to be the best of the bunch.
We compiled the following sections to help you understand the important features of these handy tools. This information can help you find the best air impact wrench for the job.
- BEST OVERALL: Aircat 1250-K ½-Inch Nitrocat Kevlar Impact Wrench
↓ Jump to Review - BEST BANG FOR THE BUCK: ACDelco ANI405A Pneumatic Air ½-Inch Impact Wrench
↓ Jump to Review - UPGRADE PICK: Ingersoll Rand 2235QTiMAX ½-Inch Impact Wrench
↓ Jump to Review - BEST COMPACT: Aircat 1056-XL ½-Inch Nitrocat Compact Impact Wrench
↓ Jump to Review - BEST FOR HOME MECHANICS: DeWalt DWMT70773L ½-Inch Drive Impact Wrench
↓ Jump to Review - BEST HIGH-POWERED: Aircat 1150 ½-Inch Composite Impact Wrench
↓ Jump to Review - BEST FOR LUG NUTS: Ingersoll Rand 232TGSL ½-Inch Impact Wrench
↓ Jump to Review - BEST ERGONOMIC: Campbell Hausfeld ½-Inch Impact Wrench
↓ Jump to Review - HONORABLE MENTION: Workpad ½-Inch Mini Air Impact Wrench
↓ Jump to Review
| Torque | Speed | Noise level | |
| Aircat 1250-K ½-Inch Nitrocat Kevlar Impact Wrench | 1,300 ft-lbs | 8,500 RPM | 86 decibels |
| ACDelco ANI405A Pneumatic Air ½-Inch Impact Wrench | 500 ft-lbs | 8,000 RPM | 97.7 decibels |
| Ingersoll Rand 2235QTiMAX ½-Inch Impact Wrench | 1,300 ft-lbs | 8,500 RPM | 88.7 decibels |
| Aircat 1056-XL ½-Inch Nitrocat Compact Impact Wrench | 750 ft-lbs | 9,000 RPM | 85 decibels |
| DeWalt DWMT70773L ½-Inch Drive Impact Wrench | 650 ft-lbs | 7,500 RPM | Unlisted |
| Aircat 1150 ½-Inch Composite Impact Wrench | 900 ft-lbs | 9,0000 RPM | 86 decibels |
| Ingersoll Rand 232TGSL ½-Inch Impact Wrench | 500 ft-lbs | 10,000 RPM | 105.2 decibels |
| Campbell Hausfeld ½-Inch Impact Wrench | 550 ft-lbs | 8,000 RPM | Unlisted |
| Workpad ½-Inch Mini Air Impact Wrench | 500 ft-lbs | 10,000 RPM | 112 decibels |


Our Top Picks
We chose the following air impact wrenches for their performance, reliability, and value. While Aircat and Ingersoll Rand dominate the market, some interesting alternatives exist in several categories.
Best Overall
Aircat 1250-K ½-Inch Nitrocat Kevlar Impact Wrench
What We Like
- Powerful lug nut-removing torque for changing tires
- Pro-level build quality
- Three torque settings for tightening
What We Don’t Like
- Only one torque setting for reverse
Specs
- Torque: 1,300 ft-lbs
- Speed: 8,500 revolutions per minute (RPM)
- Noise level: 86 decibels
Our Ratings: Ease of Use 5/5; Ergonomics 4/5; Performance 5/5; Noise 5/5; Value 4/5
The ½-inch Nitrocat air impact wrench is an outstanding tool from the Aircat range. In terms of pure performance, to say it is impressive is an understatement. But there’s no denying that it is expensive, and casual or home users are unlikely to need the performance it delivers.
Its breakaway torque is 1,300 ft-lbs, with a normal level of 950 ft-lbs. That showed during testing. Of the five impact wrenches we tested, the Nitrocat offered the least resistance when removing lug nuts from our Toyota Tundra, spinning off each lug nut with ease using our 21-millimeter impact socket.
To maximize control, this high-torque impact wrench contains a three-way adjustment, including three torque settings for tightening bolts. This was handy in avoiding over-torquing our lug nuts when we were reattaching them. But when it comes to removal, the impact wrench only has a single torque setting. While this didn’t impact performance, it was overkill for removing our lug nuts and could potentially cause them to spin off the socket and go flying through the air.
The Nitrocat is built to take a beating with a heavy-duty stainless steel housing and Kevlar-reinforced body that’s durable enough to handle a professional shop.
For all its power and rock-solid build quality, the Nitrocat 1250-K air impact wrench still weighs under 5 pounds. The Aircat comes with a steep price tag, but for serious home mechanics or those who work on other people’s cars, it’s a worthy investment.
What our tester says: “The Aircat somehow manages to produce ample power while at the same time operating with very little vibration or noise.” —Tony Carrick, Product Reviews tester and writer
Get the Aircat 1250-K air impact wrench at Amazon or The Home Depot.
Best Bang for the Buck
ACDelco ANI405A Pneumatic Air ½-Inch Impact Wrench

What We Like
- Fraction of the price of competing impact wrenches
- 5-speed design adds versatility
- Durable build quality
What We Don’t Like
- Lacks the power of higher-end impact wrenches
Specs
- Torque: 500 ft-lbs
- Speed: 8,000 RPM
- Noise level: 97.7 decibels
Our Ratings: Ease of Use 4/5; Ergonomics 4/5; Performance 3.3/5; Noise 3/5; Value 4.5/5
The ½-inch ACDelco air impact wrench is a high-quality all-around tool that offers excellent value without much sacrifice. Its 500 ft-lbs of max torque is well below the top-performing impact wrenches on this list, but for most home mechanics, it’s more than sufficient. While we experienced a little hesitation when breaking the lug nuts on our truck free, the wrench still removed the lug nuts and did so fairly quickly. The torque output is not adjustable, but the speed adjusts via four settings that go to a maximum free speed of 8,000 RPM, giving some flexibility when working with different-size nuts
The ACDelco is noticeably louder than the other impact wrenches we tested, which is in line with its rating of 97.7 decibels. It’s heavier, too, weighing in at nearly a pound more than our top pick for this guide, though it is well balanced, and the handle does feel comfortable to hold. With its stainless-steel housing, this air impact wrench feels durable, but the steel housing does nick and scratch fairly easily.
The ACDelco’s limited torque wouldn’t pass muster for most professional auto shops, but it’s certainly adequate for home mechanics working on their own vehicles. Moreover, its low cost puts it within reach of users who might not have considered owning an air impact wrench.
What our tester says: “While the ACDelco may not match other air impact wrenches in power, it’s hard not to like the performance it offers at a super low price.” —Tony Carrick, Product Reviews tester and writer
Get the ACDelco air impact wrench at Amazon or Walmart.
Upgrade Pick
Ingersoll Rand 2235QTiMAX ½-Inch Impact Wrench
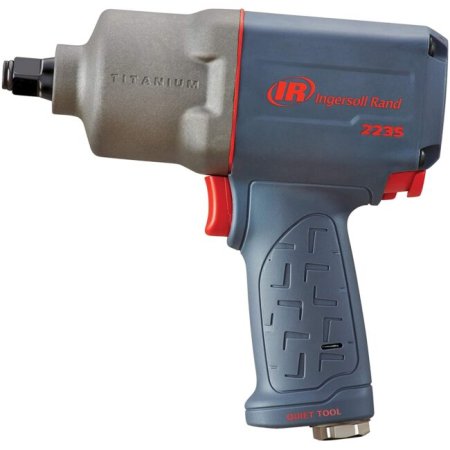
What We Like
- Produces a tremendous amount of torque
- Operates with very little vibration
- Durably built yet surprisingly light
What We Don’t Like
- Comes with a steep price tag
- Hard plastic handle
Specs
- Torque: 1,300 ft-lbs
- Speed: 8,500 RPM
- Noise level: 88.7 decibels
Our Ratings: Ease of Use 5/5; Ergonomics 4/5; Performance 4/5; Noise 5/5; Value 4/5
With a nut-busting torque rating of 1,300 ft-lbs and a standard rating of 900 ft-lbs, the ½-inch 2235QTiMAX air impact wrench from Ingersoll Rand is among the most powerful tools in its class. A four-stage power regulator provides excellent control, and the twin hammer action runs at 1,220 blows per minute (BPM).
All of those impressive specs added up to outstanding performance in testing. The 2235QTiMAX spun off our lug nuts rapidly with little resistance. Despite all that power, this heavy-duty impact wrench operates smoothly with very little vibration, making it comfortable to use. We also liked the versatility of the torque adjustment dial, which works when both tightening and in reverse. This allowed us to slow down the tightening speed to avoid over-tightening while also dialing back the power after breaking free a lug nut to prevent spinning it off into the air. Our only gripe is with the lack of a rubber grip on the hard plastic handle.
The 2235QTiMAX is also built like a rock with a titanium case that’s impact- and chemical-resistant. It’s clearly a tool that is built for professional auto mechanics. Despite its sturdy build, it weighs just 4.6 pounds.
The Ingersoll Rand 2235QTiMAX is easily the most expensive impact wrench on our list, but it’s worth the splurge for those who spend most of their weekends working in their home auto shop or those who work on other people’s cars for a living.
Get the Ingersoll Rand 2235QTiMAX air impact wrench at Amazon or Northern Tool + Equipment.
Best Compact
Aircat 1056-XL ½-Inch Nitrocat Compact Impact Wrench
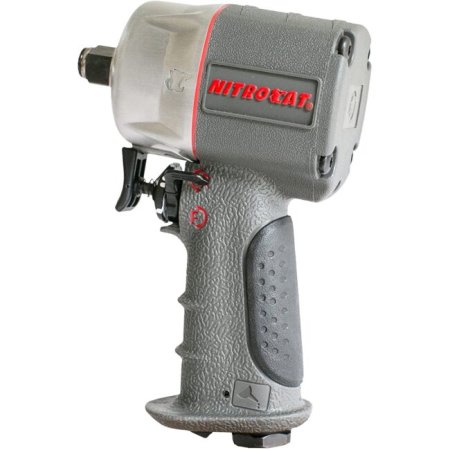
What We Like
- Compact design can fit into tight spaces
- Surprisingly powerful considering small, lightweight build
- Convenient power controls on the trigger
What We Don’t Like
- Fair amount of vibration when using
Specs
- Torque: 750 ft-lbs
- Speed: 9,000 RPM
- Noise level: 85 decibels
Our Ratings: Ease of Use 4/5; Ergonomics 4/5; Performance 3.8/5; Noise 4/5; Value 5/5
The Aircat 1056-XL’s compact lightweight design, surprising power, and affordable price tag make it a great choice for home auto mechanics. This impact wrench is the easiest to use of the five impact wrenches we tested thanks to its compact size. Its head measures just 4.25 inches front to back, it weighs only 2.5 pounds, and it has an ergonomic grip. This makes the 1056-XL easy to use with one hand in tight spaces, allowing access to bolts located deeper inside the engine bay. We also like the trigger-mounted power management switch, which makes it easy to adjust torque and speed without changing position or shifting the grip.
Despite its small size, this Aircat has a high breakaway torque of 750 ft-lbs, which was plenty of power for removing lug nuts from our truck rims, though we did notice significantly more vibration with this impact wrench over beefier models. With a max speed of 9,000 RPM, we never felt like this was an impact wrench that would slow us down. The Aircat 1056-XL has a composite housing that gives it a solid, durable feel, even with its lighter overall weight. And at just 85 decibels, the Aircat 1056-XL air impact wrench is among the quietest tools on this list. Add to that an affordable price tag, and the Aircat 1056-XL is a great option for home mechanics or as a travel tool for mechanics on the go.
Get the Aircat 1056-XL air impact wrench at Amazon or The Home Depot.
Best for Home Mechanics
DeWalt DWMT70773L ½-Inch Drive Impact Wrench
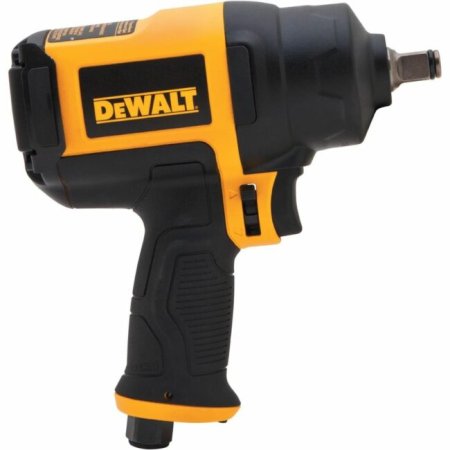
What We Like
- Ergonomic handle with shock-absorbing rubber grip
- Easy-access switch on the trigger
- Great cost value
- High breaking torque of 1,200 ft-lbs
What We Don’t Like
- Noticeable vibration when operating
- A little top-heavy
Specs
- Torque: 650 ft-lbs
- Speed: 7,500 RPM
- Noise level: Unlisted
Our Ratings: Ease of Use 4/5; Ergonomics 4/5; Performance 4/5; Noise 4/5; Value 5/5
The DeWalt ½-inch drive impact wrench provides both power and ease of use with its rugged, high-powered design and the ability to use with a one-handed grip. While the DeWalt operates at a lower speed and torque than some of the top-of-the-line models that cost twice as much, it does have a breaking max torque of 1,200 ft-lbs, which is more than enough to break even tougher lug nuts. It didn’t hesitate after repeated efforts to remove lug nuts during testing.
The DeWalt has more vibration than some of the pricier impact wrenches we tested, but it makes up for it with an ergonomic handle and shock-absorbing rubberized grip that makes it comfortable to hold. We also like the three variable-speed power settings that can be adjusted via the built-in power dial, and a direction switch that’s located at the trigger for easy access. The DeWalt also has a durable feel with a hard plastic housing and rubber bumpers on the sides that protect against scuffing or scraping.
While the DeWalt’s lower torque output means it won’t find a place in many professional auto shops, its high breaking torque output makes it more than powerful enough for automotive maintenance at home. Plus, it costs hundreds of dollars less than those higher-end impact wrenches.
Get the DeWalt air impact wrench at Amazon or The Home Depot.
More Great Options
Along with the products we hands-on tested, we also recommend the following impact wrenches, which we selected based on extensive research and customer reviews.
Best High Powered
Aircat 1150 ½-Inch Composite Impact Wrench

What We Like
- Produces high amount of torque
- Quiet operation volume at just 86 decibels
- Lightweight, ergonomic option at just 4.5 pounds
What We Don’t Like
- Longer head won’t fit into tight spaces
Specs
- Torque: 900 ft-lbs
- Speed: 9,000 RPM
- Noise level: 86 decibels
With so many good tools around, it’s tough to pick the best air impact wrench for everyone’s power needs. However, the ½-inch Aircat 1150 is likely to appeal to most people, as it certainly offers impressive performance.
The loosening torque of 1,295 ft-lbs should raise a few eyebrows as well as the standard operating torque at 900 ft-lbs with three-way adjustment. A twin hammer action works at 1,400 impacts per minute (IPM), and the free speed is 9,000 RPM; plus, at 4.5 pounds, this is not an unwieldy tool. It’s also among the quieter air impact wrenches at just 86 decibels. Plus, the ergonomic handle prevents any strain on the user’s wrists or hands.
Available as a stand-alone tool or with a number of extras, this model comes with three invaluable extensions to increase reach and versatility.
Get the Aircat 1150 air impact wrench at Amazon or The Home Depot.
Best for Lug Nuts
Ingersoll Rand 232TGSL ½-Inch Impact Wrench

What We Like
- High free speed of 10,000 RPM
- Ample nut-busting torque
- Designed to look like NASCAR impact wrenches
What We Don’t Like
- Heavy overall weight
- Very noisy at 105 decibels
Specs
- Torque: 500 ft-lbs
- Speed: 10,000 RPM
- Noise level: 105.2 decibels
Lug-nut removal is one of the most common uses for air impact wrenches, and the ½-inch Ingersoll Rand 232TGSL air impact wrench is designed specifically for this purpose. While largely intended for professional use, it also makes a good addition to a home auto enthusiast’s tool kit.
NASCAR fans might recognize its design since it’s based on the racetrack version of the tool. The 232TGSL produces 625 ft-lbs of maximum reverse torque and 500 ft-lbs of forward torque, with a regulator for power adjustment. Its BPM is 1,250, and with a free speed of 10,000 RPM, it’s the fastest full-size air impact wrench currently available.
At 6 pounds, it’s a bit of a handful, and it’s quite loud at 105.2 decibels. Nevertheless, for those who remove lug nuts all day, the performance is hard to beat.
Get the Ingersoll Rand 232TGSL air impact wrench at Amazon or Tractor Supply Co.
Best Ergonomic
Campbell Hausfeld ½-Inch Impact Wrench
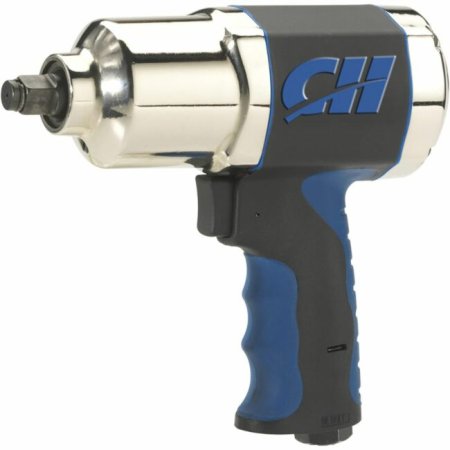
What We Like
- Well-balanced for ease of use
- 3 power settings
- Ergonomic rubberized grip
What We Don’t Like
- Weighs over 5 pounds
Specs
- Torque: 550 ft-lbs
- Speed: 8000 RPM
- Noise level: Unlisted
Campbell Hausfeld is perhaps better known for its high-performance compressors, but its ½-inch air impact wrench has plenty to offer the home auto enthusiast and DIY user. Although at 5.2 pounds it weighs more than some, it’s a well-balanced tool with a tough but comfortable rubberized grip and protective body armor.
This impact wrench’s working torque of 550 ft-lbs is plenty for the home user, with three power settings to maximize control. Its free speed is 8,000 RPM, and the hammer action produces 1,200 IPM.
Get the Campbell Hausfeld air impact wrench at Amazon or The Home Depot.
Honorable Mention
Workpad ½-Inch Mini Air Impact Wrench
What We Like
- Can fit into tight spaces
- Adjustable power settings prevent over-tightening
- Surprisingly powerful for its size
What We Don’t Like
- Not ideal for heavy-duty applications
Specs
- Torque: 500 ft-lbs
- Speed: 10,000 RPM
- Noise level: 112 decibels
Although Workpad may not be a top brand name, its ½-inch air impact wrench has all the features offered by many of its rivals and may be all that many home users need.
Although it’s called a “mini” air impact wrench, the term applies to its compact size and is no reflection on performance. In fact, the power-to-weight ratio is excellent. A maximum of 500 ft-lbs of torque is available, and there’s a three-position regulator for easy adjustment. Free speed is 10,000 RPM.
The tool has a durable, corrosion-resistant aluminum body that keeps its weight down to 3.3 pounds. The only drawback is the noise; at 112 decibels, it’s louder than many.
Get the Workpad air impact wrench at Amazon.
Jump to Our Top Picks
How We Chose and Tested the Best Air Impact Wrenches
| Testing Stats | |
|---|---|
| Products tested | 5 |
| Time spent testing | 6 hours |
| Tests performed | 2 |
| Price range | $50 to $350 |
When gathering our top picks for this guide, we looked at a range of brands to find suitable options across a variety of categories. All of our recommendations are from reputable manufacturers that produce robust tools with respectable power and are made from high-quality materials that can stand up to heavy use.
Our list of recommendations ranges from 500 to 1,300 ft-lbs of torque output, with options to suit many shoppers’ needs. We also considered noise level, reviewing tools that produce a relatively quiet 85 decibels up to 105 decibels.
Of our nine selections, we hands-on tested five. Our testing involved using each impact wrench to remove large lug nuts on a Toyota Tundra with a 21mm-deep impact socket from a Neiko Drive Master ½” impact socket set, which we had previously tested as part of a guide covering the best socket sets. Each socket was tightened to 97 ft-lbs. We evaluated each impact wrench based on several factors, including how easy it was to break each lug nut loose and remove it, the amount of vibration produced by each impact wrench, and each model’s noise level. Finally, we considered each impact wrench’s weight, ergonomics, and build quality.
| Ease of Use | Ergonomics | Performance | Noise | Value | |
| Aircat 1250-K ½-Inch Nitrocat Kevlar Impact Wrench | 5 | 4 | 5 | 5 | 4 |
| ACDelco ANI405A Pneumatic Air ½-Inch Impact Wrench | 4 | 4 | 3.3 | 3 | 4.5 |
| Ingersoll Rand 2235QTiMAX ½-Inch Impact Wrench | 5 | 4 | 4 | 5 | 4 |
| Aircat 1056-XL ½-Inch Nitrocat Compact Impact Wrench | 4 | 4 | 3.8 | 4 | 5 |
| DeWalt DWMT70773L ½-Inch Drive Impact Wrench | 4 | 4 | 4 | 4 | 5 |
What to Consider When Choosing an Air Impact Wrench
Most people’s mental image of an air impact wrench typically includes an auto mechanic attacking stubborn lug nuts. While that’s certainly a popular use for these air tools, they are versatile enough to tackle almost any hexagonal fixing. When shopping for an air impact wrench, consider the following technical features.
Torque
Torque is rotational force: the energy required to loosen or tighten screws, nuts and bolts, and other fasteners. It is generated by using a screwdriver or a wrench to tighten screws and nuts.
An air impact wrench can generate far more torque than even the strongest person. The most powerful models in this guide produce well over 1,000 ft-lbs. However, when shopping for the best air impact wrench for specific needs, remember that it’s more important to have the right amount of torque rather than the maximum available.
While users with heavy-duty needs might need the highest torque levels possible, any tool that generates 400 to 500 ft-lbs is sufficient for most users. The terms “nut busting” and “breakaway torque” are used frequently to indicate the maximum torque available for releasing difficult fixings. However, normal operating torque is lower. Depending on the intended use, it may be worth checking forward and reverse torque figures, as they often differ.
Rotation Speed and Impacts
Rotational speed, which appears in RPM on the label, is not the same as torque. Here it’s not about energy but about how quickly the socket spins. It’s an important consideration for those who work on multiple fixings, because it impacts how quickly they can be fastened or loosened. Manufacturers usually describe rotation speed as “free speed” or “no load speed,” which assumes no effort is required to turn the fixing. In the real world, even a small amount of mechanical friction reduces this speed. Nevertheless, knowing the speed is useful for comparison.
Air impact wrenches contain hammer mechanisms within the tool that jolt the socket to increase the effectiveness of the torque. Specifications are stated in impacts per minute (IPM) or, sometimes, blows per minute (BPM). A higher number generally means a more aggressive action, so if you’ll be regularly working with tough fixings, this is another area that warrants attention. That said, high IPM also means the tool vibrates more, which increases user fatigue. Twin hammer actions help balance vibration; while tools with twin hammers still vibrate, the effect is less severe.
Additional Features
- Air demands: All air tools need a portable air compressor to supply sufficient air pressure and volume. Pressure is stated in pounds per square inch (PSI) and volume in standard cubic feet per minute (SCFM, or sometimes just CFM). Air impact wrenches don’t have particularly high-pressure needs, but CFM demands can be higher than other tools. Checking these demands is vital. Many otherwise very good home air compressors may not produce the required supply.
- Weight and grip: Air impact wrenches come in a variety of sizes and materials. Weight can have a big impact on manageability and user fatigue, so while lighter tools usually cost more (because the materials are more expensive), it’s often money well spent. Users also need a good grip on the handle both for control and safety. Contoured and rubberized areas generally improve grip and ergonomics.
- Noise levels: The hammer action generated by an air impact wrench is loud. While better manufacturers try to reduce noise, most tools still exceed current safety levels. Always wear ear protection while using an air impact wrench.
- Sockets: ¼-inch drives exist on light-duty air impact wrenches, but most measure ⅜ inch or ½ inch. This measurement specifies the size of sockets needed. The sockets should be of good quality and marked as “impact ready” or something similar. Cheap socket sets are unlikely to stand up to the pounding they receive and can actually shatter under the force.
Tips for Using an Air Impact Wrench
Always be aware of the important practical and safety aspects of using these powerful tools.
A key component that may be overlooked is the compressor required to supply air. Take into account the necessary air supply specifications, but remember that optimal performance is achieved only if the compressor is properly maintained. While air impact wrenches require little maintenance, regular lubrication is vital. In both cases, always follow the manufacturer’s recommendations.
In addition:
- Make sure the air hose is properly connected to the compressor and that the air supply to the air impact wrench is set at the correct pressure (PSI).
- Although many air impact wrenches can be used with one hand, make certain to keep a good grip on the tool when loosening tight nuts and bolts. If the fixing breaks away suddenly, the torque reaction can make the tool jump and cause a nasty wrist sprain.
- Be careful when tightening nuts and bolts. If the torque is too high, the power of the air impact wrench can easily strip threads. If the tool is adjustable, always start at low pressure, then increase it if the fixing is not tight enough.
- Always wear some kind of ear protection. Even “quiet” air impact wrenches may still exceed the 80-decibel limit above which hearing damage can occur.
FAQs
The information provided here is a comprehensive overview of these tools and should help you find the best air impact wrench for your needs. We’ve backed the information with a host of real-world examples of the top tools available. However, a number of questions crop up frequently, so yours may be answered below.
Impacts per minute, also referred to as blows per minute, is how fast the tool’s internal hammer action works to help loosen tough fixings. However, as explained, it’s just one factor to consider.
The best air impact wrenches contain a “power regulator” (also called an “air pressure flow switch”) to adjust the air supply independently of the compressor. This effectively allows more precise control of torque. It’s sometimes referred to as speed control, though technically, that’s not an accurate term.
It depends on the task. The best cordless impact wrenches are less-powerful but convenient tools, particularly for light-duty tasks. However, some struggle with higher torque demands and their runtimes can be underwhelming. Corded impact guns often outcompete their cordless impact gun rivals. In many cases, although a battery impact wrench may be a good choice for a home garage or the job site, most automotive and engineering professionals choose an air tool, perhaps in part because a compressor is usually available.
Drive size describes the size of the socket that the impact wrench uses. Most measure either ⅜ inch or ½ inch. If you already own impact-compatible sockets, this is important. Adapters are available, but using one is not an ideal solution. If buying both an air impact wrench and sockets, a ½-inch drive model is generally the more powerful option.
Removing lug nuts requires around 100 ft-lbs of torque, so it’s a good idea to have an impact wrench that offers at least 150 ft-lbs. While some electric impact tools might struggle to achieve this, most air impact wrenches can do so comfortably. Never put lug nuts back on with an air impact wrench, because you can easily overtighten them or strip the threads. Use a manual torque wrench to set them to the tightness recommended by the vehicle manufacturer.
Each tool has its own demands. Pneumatic air wrenches need anywhere from 80 to 150 PSI, so it’s a figure that should be checked like air consumption.
Meet the Tester
Tony Carrick is a freelance writer specializing in home improvement, landscaping, technology, home security, and design. His articles have been featured on such sites as Popular Mechanics, Futurism, SFGate, Pro Tools Review, and more. Tony has conducted rigorous product testing on everything from power tools to home security systems to backyard grills. With each review, his goal is to help readers determine whether a product meets their needs and if it is or isn’t worth its price tag.
Additional research provided by Bob Beacham.
The post The Best Air Impact Wrenches of 2025 for Tough Jobs, Tested appeared first on Bob Vila.
]]>Presidents’ Day sales are live, and this holiday marks a great time to buy larger appliances, power tools, and home essentials like generators.
Generators and power stations are designed to power electronics, appliances, and other home gadgets in the event of a power outage.
For a limited time, you can save $400 off one of our favorite generators. The DuroMax XP13000EH Dual Fuel Portable Generator is available at Amazon for $1,099. This generator boasts 13,000 watts of power and can serve as a home back-up energy source. It’s equipped to handle powering large appliances and is equipped with never-flat tires for ultimate portability.
In addition to the DuroMax, we found some huge discounts on top brands like Ryobi, DuroMax, Jackery, and more. See our favorite deals below.
EcoFlow Portable Power Station Delta 2 Max at Amazon for $1,099 (save $800)

Prime members can save a whopping $800 on the EcoFlow Delta 2 Max. This portable generator features six 120-volt AC outlets, 2 USB-A, 2 USB fast charge, 2 USB-C, one 12-volt car outlet, and 2 barrel ports. While it may look like a large power station, it has the ability to serve as a whole-home back-up, and can power a refrigerator for up to 14 hours. You can read our results when we tested this generator for efficiency ad overall power.
Ryobi 6,500-Watt Gas Portable Generator at The Home Depot for $799 (save $100)
The Ryobi 6500-watt generator features a dependable engine, a rugged hand truck frame with 10-inch wheels, and a carbon monoxide sensor with automatic safety shutoff. The gas tank holds 6 gallons, which is enough to keep it running for up to 10 hours.
During testing, the Ryobi was able to easily handle couple of portable saws, a router, and work lights—plugged into the 120-volt 20-amp duplex outlets—for several hours without interruption.
Anker SOLIX F3800 Portable Power Station at Amazon for $2,598 (save $1,400)
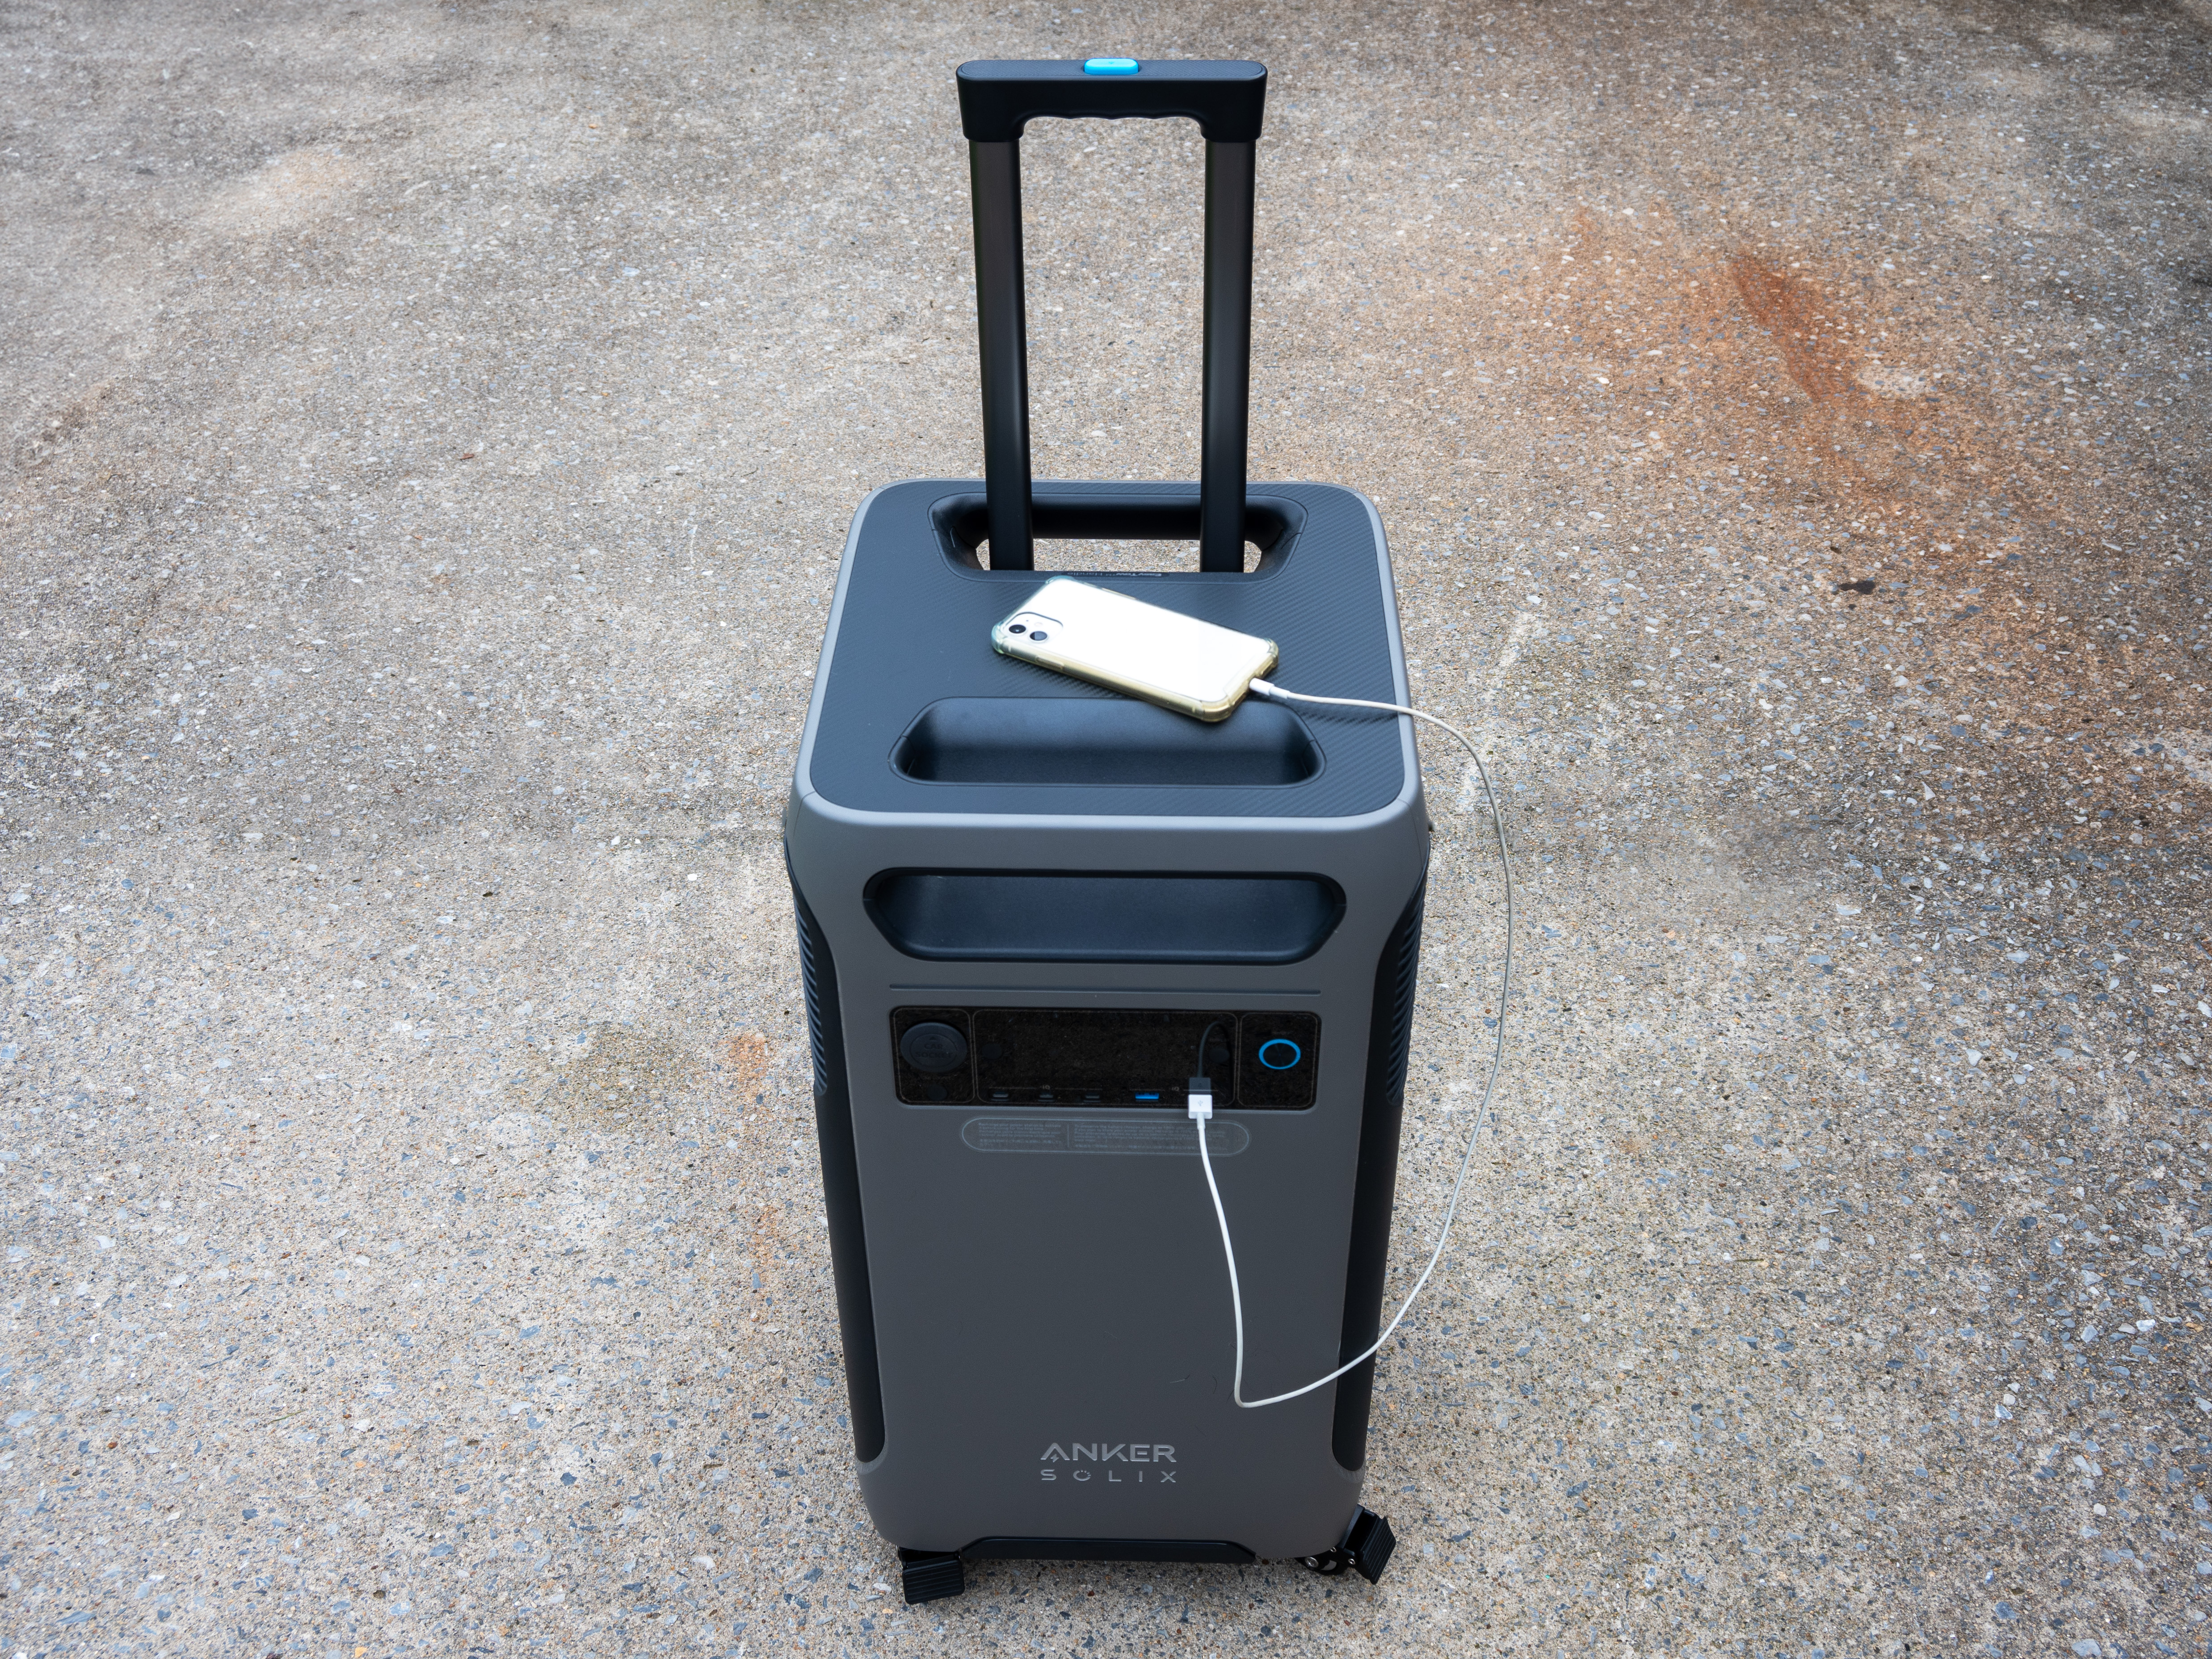

The Anker Solix F3800 bridges the gap between whole-home backup power and portable power stations. This powerful generator features 6,000 running watts with options for expandability up to 26,880 watt-hours making it ideal for extended power outages. This unit surpassed our expectations during testing as it easily handled a window air conditioner, a full-size refrigerator, a microwave, three table lamps, a Wi-Fi router, and a television for 2 hours without any issue. It also has incredible recharging times. When plugged into a wall outlet, the unit fully recharged from 15 percent in less than 2.5 hours.
Westinghouse 12,500-Watt Dual-Fuel Portable Generator at Walmart for $1,049 (save $350)

The Westinghouse WGen9500DF is a dual-fuel powerhouse that features up to 12,500 peak watts and reliable 9,500 running watts. It offers a variety of outlet options, three start-up options, and a dependable 457cc 4-stroke OHV engine.
Wen 11,000-Watt 120V/240V Dual Fuel Portable Generator at Amazon for $789.99 (save $115)
The Wen 11,000-watt dual-fuel generator boasts an output of up to 8,300 running watts on gas and up to 7,500 running watts on propane. What we loved about this generator is the ability to simply flip a switch to change between gasoline or electric power. This generator was among the most powerful we tested.
DuroMax XP13000EH Dual Fuel Portable Generator at Amazon for $1099 (save $400)

There’s no denying DuroMax makes incredible generators. The XP13000EH features 13,000 watts of power and is built to withstand any elements. It includes a push button start and a handy front-facing interface for quick access to controls. It can also be home-backup ready with its 50-amp outlet.
EcoFlow Portable Power Station Delta 3 Plus at Amazon for $629 (save $270)


The EcoFlow Delta 3 Plus is a game-changer when it comes to portable power stations and back-up solutions. It boasts a plug-and-play model, numerous charging options, and the option to add more battery storage as needed. It supports 120-volt and 240-volt AC charging, high- and low-voltage solar charging, car charging, and combination charging through AC and solar ports. We put this generator through extensive testing and rated it 4.8 out of 5. See our full review.
EcoFlow Portable Power Station River 3 at Amazon for $159 (save $100)


Another Prime member-exclusive discount, the EcoFlow River 3 has a 245-watt hour capacity and 300-watt maximum output. This makes the River 3 ideal for charging handheld electronics and powering small appliances. The River 3 is compact and portable. It can also recharge in under 45 minutes. While this power station may not be able to power larger appliances, it is ideal for quick power outages or keeping electronics charged and ready to use.
The post EcoFlow’s Rugged Solar Generator Is $800 Off Exclusively for Prime Members Right Now appeared first on Bob Vila.
]]>Any day I can score a power tool deal is a good day–and Presidents’ Day is packed with them. Right now, Lowe’s has a killer price on the Bosch Profactor 18V 7-¼-inch Cordless Circular Saw for just $99 (that’s $130 off!) This circular saw is already in my cart. You’d better hurry if you want to snag the same deal.
Bosch isn’t the only big-name toolmaker dropping deals. Right now, The Home Depot has the DeWalt MAX XR Router for just $299.99 (Save $50!). This high-end router was a BobVila.com Tool of The Year winner and is the lowest price I’ve seen. Don’t wait–this one is a steal!
And that’s just the start–I’ve scoured the web to track down the best power tool out there. Keep scrolling for the top discounts and my must-have picks!
My Favorite Presidents’ Day Power Tool Deals
Ryobi 18V Compression Drive Cordless 3/8-in. Crown Stapler at The Home Depot for $49.97 (Save $29.03)

A solid stapler is a must for DIYer’s and the Ryobi ONE+ is a steal right now at The Home Depot. It’s cordless, so no compressor is needed, and it’s an excellent pick for light-duty construction, upholstery, or tacking insulation.
Bosch Profactor 18V 7-¼-in. Cordless Circular Saw at Lowes for $99 (Save $130)

Circular saws are a must-have for any DIYer. They’re portable, versatile, and made for all kinds of cuts. Right now, this Bosch Circular Saw is a steal at $99.
DeWalt 20V MAX 4-½-in. Angle Grinder at Amazon for $91.73 (Save $57.27)
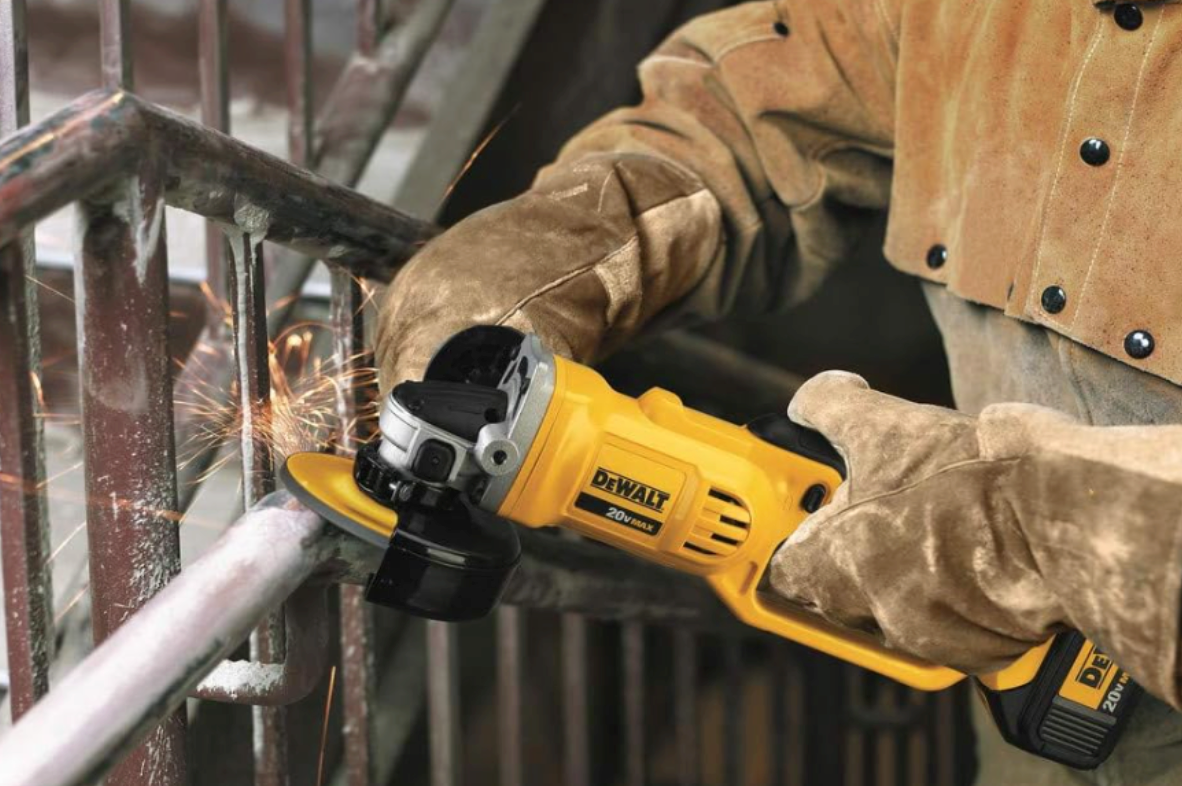
It’s hard to bean an angle grinder for down-and-dirty DIY tasks–whether you’re cutting metal, grinding welds, sharpening tools, or prepping surfaces, the DeWalt 4-½-inch angle grinder will get the job done. At this price, I’m thinking of buying two!
Project Source 3-Gallon 110 PSI Pancake Air Compressor at Lowe’s for $49.98 (Save $30)
An air compressor for under $50? Almost unheard of–but Lowes has one! The Project Source 3-gallon model is perfect for brad nailing, tire-inflating, or power stapling.
DeWalt 10-in 15-Amp Portable Jobsite Table Saw w/ Rolling Stand at Lowe’s for $549 (Save $100)
This powerful DeWalt table saw took top honors in our tested lineup of the best table saws. It features a versatile 10-inch blade, and offers all the power and performance DeWalt is known for. This is the lowest price I’ve seen on this model.
Bosch 18V Cordless Brushless Jigsaw at Lowes for $79 (Save $80)
You may not use a jigsaw every day, but when you need to make curved cuts or intricate shapes, it’s a game changer. The Bosch 18V cordless jigsaw is 50% off right now at Lowes, so if you’re into woodworking, don’t miss this one.
More Great Presidents’ Day Power Tool Deals
| DeWalt Tools & Accessories for up to $80 off | |
| Bosch 18V Impact Driver/Wrench Kit for $79 (was $179) | |
| Craftsman 20V Impact Wrench Kit for $159 (was $229) | |
| Bosch 12V Max Drill/Driver for $119 (was $189) | |
| DeWalt 20V Max Reciprocating Saw $99 (was $139) | |
| Ryobi ONE+ Random Orbit Sander for $49.97 (was $59.97) | |
| DeWalt 20V Max Drill/Driver Kit for $96.79 (was $117.32) | |
| 700W HVLP Electric Spray Paint Gun for $29.99 (was $59.99) |
Find the Best Power Tools for Your Project
Still searching for the perfect tool? Our expert-tested guides break down what to look for when shopping for power tools. We share shopping tops and out top tool recommendations to help
- The Best Circular Saws
- The Best Air Compressors
- The Best Angle Grinders
- The Best Impact Drivers
- The Best Table Saws
- The Best Jigsaws
- The Best Reciprocating Saws
- The Best Staple Guns
- The Best Cordless Drills
- The Best Paint Sprayers
- BobVila.com Tool of the Year Winners
The post Presidents’ Day Power Tool Deals Are Here and I’ve Already Added This $99 Circular Saw to My Cart appeared first on Bob Vila.
]]>Punxsutawney Phil may have called for more winter, but spring is right around the corner—and Presidents’ Day is the perfect time to score great deals on outdoor tools and equipment. I can’t stop adding deals to my online shopping cart—like this heavy-duty collapsible utility wagon for sale on Amazon for $69.99. That’s more than half off, and a dependable garden cart is a must-have for anyone who gardens or landscapes.
Then, I came across some big-ticket items that I may have to splurge on, like the Worx Landroid Robotic Lawn Mower now just $719 at Lowe’s (a $480 savings). The Landroid earned our top spot in a hands-on test of robotic lawn mowers. With robot mowers trending, now’s the perfect time to pick up a proven winner at a steep discount.
That’s just the beginning: I’ve uncovered some incredible Presidents’ Day deals on outdoor tools and equipment. Now’s the perfect opportunity to grab them ahead of the busy spring season. Scroll down for the hottest sales and my top picks.
My Favorite Presidents’ Day Deals
Ego Power+ 21-inch 56V Cordless Snow Blower at Amazon for $599 (Save $150)
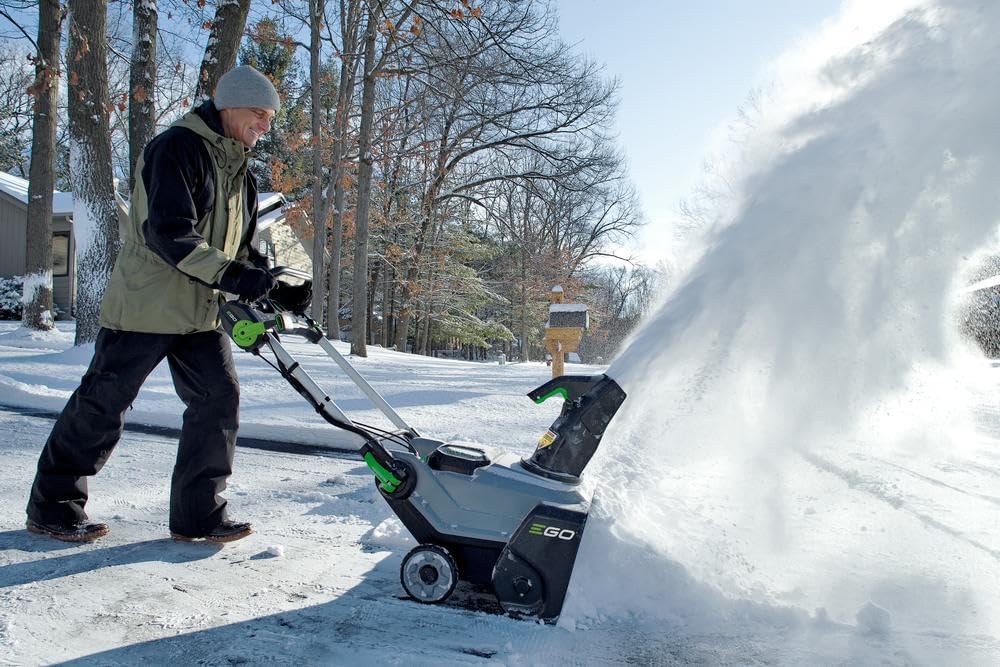
Tired of shoveling snow? Now’s your chance to get an Ego electric snow blower at a great price. This single-stage model is battery-powered for convenience and clears a wide 21-inch path. The steel auger helps this machine plow through heavy snow and ice.
Karcher K5 2500 PSI Electric Pressure Washer at Lowe’s for $379 (Save $120)
An electric pressure washer gets sidewalks, driveways, siding, and even patio furniture clean without scrubbing. This corded Karcher model comes with three spray tips, a surface cleaner, and pressure control—and at this low price, it’s a steal.
Makita 18V Cordless String Trimmer at The Home Depot for $199 (Save $50)

A cordless string trimmer is the easiest way to keep your yard looking its best. This Makita trimmer features a high-efficiency motor and variable speed control. Now is your time to score Makita’s high-quality trimmer at a great price.
Ryobi 80V ZTR Riding Mower at The Home Depot for $3,999 (Save $1,000)
If you have a large lawn, you know how much time mowing can take—time you spend on other activities. The answer is a riding lawn mower, and this zero-turn-radius model from Ryobi makes it effortless to navigate around trees and fences.
BigBear Tornadic Gas Chipper/Shredder at The Home Depot for $2,199 (Save $300)
Serious yard work calls for serious tools, and the BigBear Power Tornadic wood chipper/shredder is at the top of my wish list for an outdoor tool upgrade. I’ve had my eye on this baby for months, and at this price, it just might be time to pull the trigger.
More Great Presidents’ Day Tool Deals
- Outdoor Tools and accessories at Lowe’s: starting at $23
- Green Machine 62V Cordless Lawn Mower at The Home Depot: now $549 (was $649)
- Worx Power Share 5-Inch Pruning Saw at Lowe’s: now $99 (was $159)
- Senix 21-Inch Gas Self-Propelled Mower at Lowe’s: now $399 (was $449)
- Worx Power Share 20V Battery Pole Saw at Lowe’s: now $129 (was $169)
- CountyLine 25-Ton Gas Log Splitter at Tractor Supply: now $999.99 (was $1,299.99)
- Firewood Rack Outdoor Log Holder at Amazon: now $13.99 (was $27.99)
- ProRun 20V Cordless Chainsaw at Lowe’s: now $99 (was $129)
- YardMax 24-inch 2-Stage Snow Blower at Tractor Supply: now $539.99 (was $899.99)
Find the Best Outdoor Tools for Your Yard
Still searching for the perfect tool? Our expert-tested guides break down what to look for in outdoor equipment and we share shopping tips and top product recommendations to help you make the best choice.
- The Best Garden Carts
- The Best Robotic Lawn Mowers
- The Best Snow Blowers
- The Best Electric Pressure Washers
- The Best Cordless String Trimmers
- The Best Riding Lawn Mowers
- The Best Log Splitters
- The Best Wood Chippers
The post Presidents’ Day Outdoor Tool Sales You Can’t Ignore—These Are My Top Picks appeared first on Bob Vila.
]]>If there’s one thing I’ve learned, the best time to buy appliances is when yours are approaching—but not quite at—the ends of their lifespans. This gives you time to review newer options on the market and the advantage of shopping major sales. And right now, Lowe’s announced its Presidents’ Day Sale 2025 early, which includes up to 40 percent off major appliances. I found massive markdowns on refrigerators, washers, and even countertop appliances. I couldn’t resist buying the Frigidaire Bullet Ice Maker for $89. I saved $40, and now I won’t run out of ice when friends come over!
Lowe’s Presidents’ Day Sale runs from February 6 to 19. The sale is packed with major appliance deals—but it gets even better. Right now, you’ll save an extra 10 percent when you spend $699 on any combination of appliances, making this the best time to score the lowest prices of the year on refrigerators, washers and dryers, ranges, microwaves, and more! Your dream kitchen awaits.
And, for the best shot at big savings now and all year long at Lowe’s, consider becoming a MyLowe’s Rewards member. Signing up for MyLowe’s Rewards is quick, easy, and, best of all, free.
Our Top 5 Appliance Picks from Lowe’s Presidents’ Day Sale
GE French Door Refrigerator with Ice/Water Dispenser at Lowes for $1,499 (Save $900)
With fingerprint-resistant stainless steel, an internal water and ice dispenser, and a spacious 27 cu.ft., it’s a family-friendly upgrade at a price you won’t want to miss.
GE Profile All-In-One Washer Dryer Combo at Lowes for $1,798 (Save $801)
GE incorporates ventless heat pump technology (for energy savings) into this 4.6 cu. ft. capacity washer and dryer combo that completes a large load in just 2 hours! But hurry: This deal ends February 19.
Bosch 500 Series Super Quiet Smart Dishwasher at Lowes for $999 (Save $250)
Bosch makes amazing dishwashers—I know because I own one, and I love it! This 500 Series Bosch dishwasher is Energy Star certified and whisper-quiet at just 38 dB.
GE 30-Inch 5-Burner Glass Top Double-Oven Range at Lowes for $1,199 (Save $350)
Looking for double-oven convenience in a single electric range? This GE model delivers—and it’s a steal at this price! Cook multiple dishes simultaneously with its sleek glass 5-burner top, air fry capabilities, and convection technology.
Frigidaire Gallery 1.9-Cu Ft 1000W Over-the-Range Microwave at Lowes for $329 (Save $200)

This Frigidaire microwave is peak convenience. It features sensor cooking for optimal results, an easy-wipe interior, and a sleek, fingerprint-resistant finish.
Looking for more options?
Lowe’s Presidents’ Day sales only happen once a year. Sleep in, and these deals could sell out or end. If you’ve considered upgrading your appliances, now’s the time to do it. Shop with the confidence that you’re choosing the right brand and model, and check out our comprehensive buying guides for shopping tips and recommendations first.
- The Best Refrigerator Brands
- The Best Electric Ranges
- The Best Dishwashers
- The Best Washing Machine Brands
- The Best Washers and Dryers
- The Best Microwave Ovens
- The Best Air Fryer Toaster Ovens
The post 5 Major Appliance Deals You Don’t Want to Miss at Lowe’s Presidents’ Day Sale appeared first on Bob Vila.
]]>I’ve had the Wad-Free tangle preventer for over a year, and I used it to wash our household sheets a collective four to six times each month during that time. Featured on Shark Tank, this simple yet clever tool gained attention for preventing the annoyance and wasted time caused by tangled and twisted sheets. While it took me a few tries to get the hang of installing it, I think those initial efforts—and the couple of minutes it adds to laundry day—are worth it.
Rating: 4.5/5
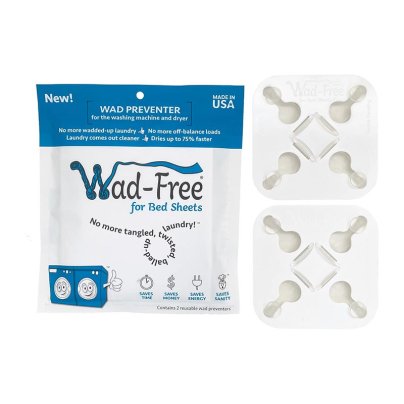
Buy Wad-Free for Bed Sheets Wad Preventer
At first glance, the Wad-Free doesn’t look like much. It comes with two 4-inch by 4-inch plastic squares (enough for a set of sheets), each with four plastic slots with tabs that attach to the corners of a bed sheet. To use it, cover each tab with a different sheet corner, slide the tabs to lock everything in place, and wash and dry as normal. The device keeps the corners separated so the sheets don’t end up in a tightly tangled ball that doesn’t get fully clean or stays damp in the middle no matter how many times it’s fluffed and re-dried.
Simple enough, right? Yes, but also no. The first handful of times I used the Wad-Free I had to watch how-to videos to get the installation process down. The process is easy once you’ve got it, but it’s not intuitive. Even once I thought I had it, I didn’t always cover the tabs with enough fabric to stay put during washing and drying, causing the fabric to fall out and ball up. Now, I can attach each square to each sheet automatically and in a matter of minutes.
Here’s my process:
- Toss one Wad-Free on the flat sheet while it’s still on the bed, insert all four corners, and set aside.
- Pull the corners of the fitted sheet off the mattress and insert those into the other unit.
- Place both sheets in the wash and set to a delicate or normal cycle with no more than medium spin speed.
- Wash and dry, leaving the Wad-Free installed for both processes.


When the bed sheets come out of the dryer, the corners may be crinkled from the tight grip of the tabs. If this bothers you, simply remove the Wad-Free a few minutes before the sheets are dry to knock those wrinkles out.
The best part of using the Wad-Free wad preventer is that I never open my washer or dryer door to find a tangled ball of sheets—even when I throw a few towels or T-shirts in with the load. As long as I secure each sheet corner sufficiently, the small plastic squares stay in place and stand up to hot water as well as high drying heat. Even after dozens of trips through my washer and dryer, my squares look identical to when I first opened the package.
Everyone in our family has the percale version of these Brooklinen sheets, and my wad preventers have never damaged them. However, Wad-Free is not for use with silk, rayon, bamboo, eucalyptus, or beechwood sheets. The squares themselves are made from non-toxic materials and free of latex, PVC, BPA, and phthalates, and the company also makes a Wad-Free for blankets and duvet covers.
At just under $20 per set, the highly-durable Wad-Free bed sheet wad preventer gets sheets cleaner (since soap and water can better reach all parts) and dries sheets up to 75 percent faster. It stops sheets from becoming tangled and prevents loads from becoming unbalanced. Yes, it takes a little practice to get used to installing them, and yes, the process adds a few minutes to washing your sheets. But for the annoyance and energy it saves? Totally worth it.
Where to Buy Wad-Free for Bed Sheets Wad Preventer
Get the Wad-Free for Bed Sheets Wad Preventer at:
The post I Washed Over 50 Sets of Sheets With Wad-Free and My Opinion Hasn’t Changed appeared first on Bob Vila.
]]>I’ve never been able to carry a full sheet of drywall alone—until now. Even with a helper, it was always awkward. And plate glass? Let’s just say my wallet took a hit after a costly mishap.
Rating: 4.5/5
DeWalt Grabo Lifter
The first time I saw a DeWalt Grabo, I was intrigued—but skeptical. I’d used glass suction cups before, and they only worked on perfectly smooth, impermeable surfaces.There was no way the Grabo could grip drywall or plywood, or so I thought. I was wrong.
After loading a DeWalt PowerStack battery into the Grabo, I set it on my kitchen counter and pressed the suction button. Instantly, the rubber seal compressed, gripping the countertop like a vise. Within seconds, it was locked tight—and no matter how hard I yanked, it wouldn’t budge. That was impressive, but how would it fare on other flat surfaces? I headed outside to test.
Over the next few weeks, I used the Grabo on virtually every hard flat surface I could find, including drywall panels, plywood, steel plates, and more. I discovered that the Grabo worked even on slightly porous surfaces like concrete pavers. It dawned on me that I’d been lifting things the hard way for years.
That’s when I decided I needed another one—for large, two-person tasks, like carrying heavy marble or travertine slabs. I bought a second DeWalt Grabo Suction Lifter.
So, how does it work? Pressing the suction button activates an internal vacuum that removes the air between the tool and the surface. A dense foam ring around the base compresses, forming a rock-solid seal. I could actually see the Grabo sink down as the suction kicked in. When the (negative) pressure between the tool and the surface reached about -12.1 PSI, the vacuum shut off, but the suction remained.
On semi-porous materials, such as concrete pavers, the suction began to drop slowly after the vacuum shut off, but I could still lift and carry the items. When the suction dropped to around -8.4 PSI, the vacuum automatically kicked back on to increase the suction again. The time it takes for the suction to drop depends on the material being carried. When I tested the Grabo on a clean mirror, the suction barely dropped at all—not enough for the tool to kick back on.


One of my favorite features on the Grabo is its safety button, which prevents accidental activation. DeWalt added a tiny release lever next to the suction start button, which I had to push before I could fully press the start button to activate suction. It only took a few tries before I could do it by feel, but that extra step adds a simple and critical layer of safety.
Like any power tool, the Grabo Suction Lifter may need occasional maintenance. It comes with extra vacuum filters for the small intake holes on the base, and the dense foam seal is also replaceable. Most retailers sell this as a “tool only,” which means you’ll need to buy a separate battery if you don’t have other DeWalt 20V tools. But at $249.00, it’s well worth it for anyone who regularly lifts and hauls panels, glass, or other unwieldy items with smooth surfaces.
Now, I can’t imagine lifting without it.
Where to Buy the Dewalt Grabo:
Meet the Tester
Glenda Taylor is a contractor, product tester, and writer focusing primarily on construction, DIY tools, and home appliances.
The post I Never Thought I Needed a Suction Lifter—But Once I Tried It—I Had to Have Another One appeared first on Bob Vila.
]]>A couple of months ago I got the Dewalt 735 Planer to help expedite board prep for woodworking projects. I wanted the flexibility to use wood from a variety of sources, but flattening boards and matching thicknesses has never been my favorite part of a project. Sanded “project” lumber is prohibitively expensive and limited in scope. Hand planing is slow, and router planing requires a clunky jig. After years of workarounds, I finally splurged on the right tool for the job.
As a brand, DeWalt enjoys broad-based customer satisfaction across its array of power tool offerings, and I’ve had positive experiences with the DeWalt jobsite table saw and router I’ve been using the past few years. After initially testing it in combination with a Rikon 8-inch jointer, I’ve been using the 13-inch planer to clean up edge-glued panels, and for dimensioning a couple of log-to-lumber milling projects in my workshop. In this DeWalt planer review, I’ll share my observations after two months using the DeWalt DW735, including the pros and cons that I’ve experienced, and why I’m confident that I made the right choice.
Rating: 4.7/5

DeWalt Planer DW735
| DeWalt Planer DW735 Specs | |
| Motor | 15-amp |
| Cutterhead | Three-knife, 10,000 RPM |
| Maximum width | 13 inches |
| Maximum thickness | 6 inches |
| Feed rate | Two-speed 196 CPI or 79 CPI |
Testing the DeWalt Planer DW735
Store-bought lumber is milled within a fairly wide error-tolerance range that can leave woodworking projects looking rough unless you take the time to match the pieces. The usual way to match boards is by using a jointer to remove cupping and warping, which creates one flat face, then planing the other face down to a set thickness. Alternatively, both of these functions can be completed using only a planer with the help of a shop-built planing sled—an effective option for boards that are too wide for the jointer. The planer smooths the surface, but more importantly, it evens out the board thickness while also making it possible to match thicknesses from one board to the next. I’ve tested this planer both ways.
Over the past couple of months I’ve used the DeWalt 735 Planer with and without the jointer as project circumstances have dictated. I used it while preparing boards for glue-ups, and for final surfacing after gluing. When I wanted to make lumber from an oak log, I used a sled with the planer to flatten the surfaces, then matched thicknesses of the rough-cut boards. I’ve logged about 12 hours on the planer so far, which has been enough time to know that this is exactly the tool I was looking for and that I’m glad I fought the urge to buy a cheaper model. The heavy build and powerful motor give it ample stability and steady cutting power. The thickness selector makes it easy to avoid over-planing while precisely matching boards, and the finished pieces come out with very little snipe or chip-out.
| What We Like | What We Don’t Like |
| Automatic carriage lock | Larger than other bench planers, very heavy |
| Fan-assisted dust port with impeller | Requires dust collection add-ons |
| Material removal gauge for quick set up | |
| Heavy-duty height adjustment system |
Helpful Features Boost Productivity and Minimize Mistakes

This model has been around long enough to become “exhibit A” when woodworkers need a point of reference with regard to thickness planers. It accepts workpieces up to 13 inches wide and 6 inches thick, and is capable of removing up to ⅛ inch layers per pass. Powered by a 15 amp motor, the cutter rotates at 10,000 revolutions per minute (RPM), while the two-speed rollers feed at either 14 or 26 feet per minute. The three-knife cutterhead extends production time between blade replacements up to 30 percent compared to 2-knife models. The two-speed gearbox allows the operator to choose either faster planing at 79 cuts per inch (CPI) or a smoother finish at 196 CPI.
A few key features set DW735 apart from other planers on the market. First off, it weighs a hefty 92 pounds, which is up to 40 pounds heavier than other popular models. The extra weight hints at better-than-average durability, and more importantly the weight boosts working stability. Another unique feature that I haven’t seen anywhere else is the fan-assisted dust port. Unlike other planers that require an external dust collection vacuum to pull the chips away, this machine is equipped with an impeller and fan that grinds up the shavings and blows them out—all the way across the shop, if not attached to a collection bag.
One of the handiest features is the material removal gauge. It helps when setting up the first pass on a face-jointed rough board. I can place the board beneath the spring-loaded gauge and crank the carriage down until the gauge needle indicates the amount of material I want to remove, then turn on the motor and plane as normal. The planer also has several automatic thickness settings that, when selected, will prevent accidentally making the board too thin.
Hard to Lift, Easy to Operate
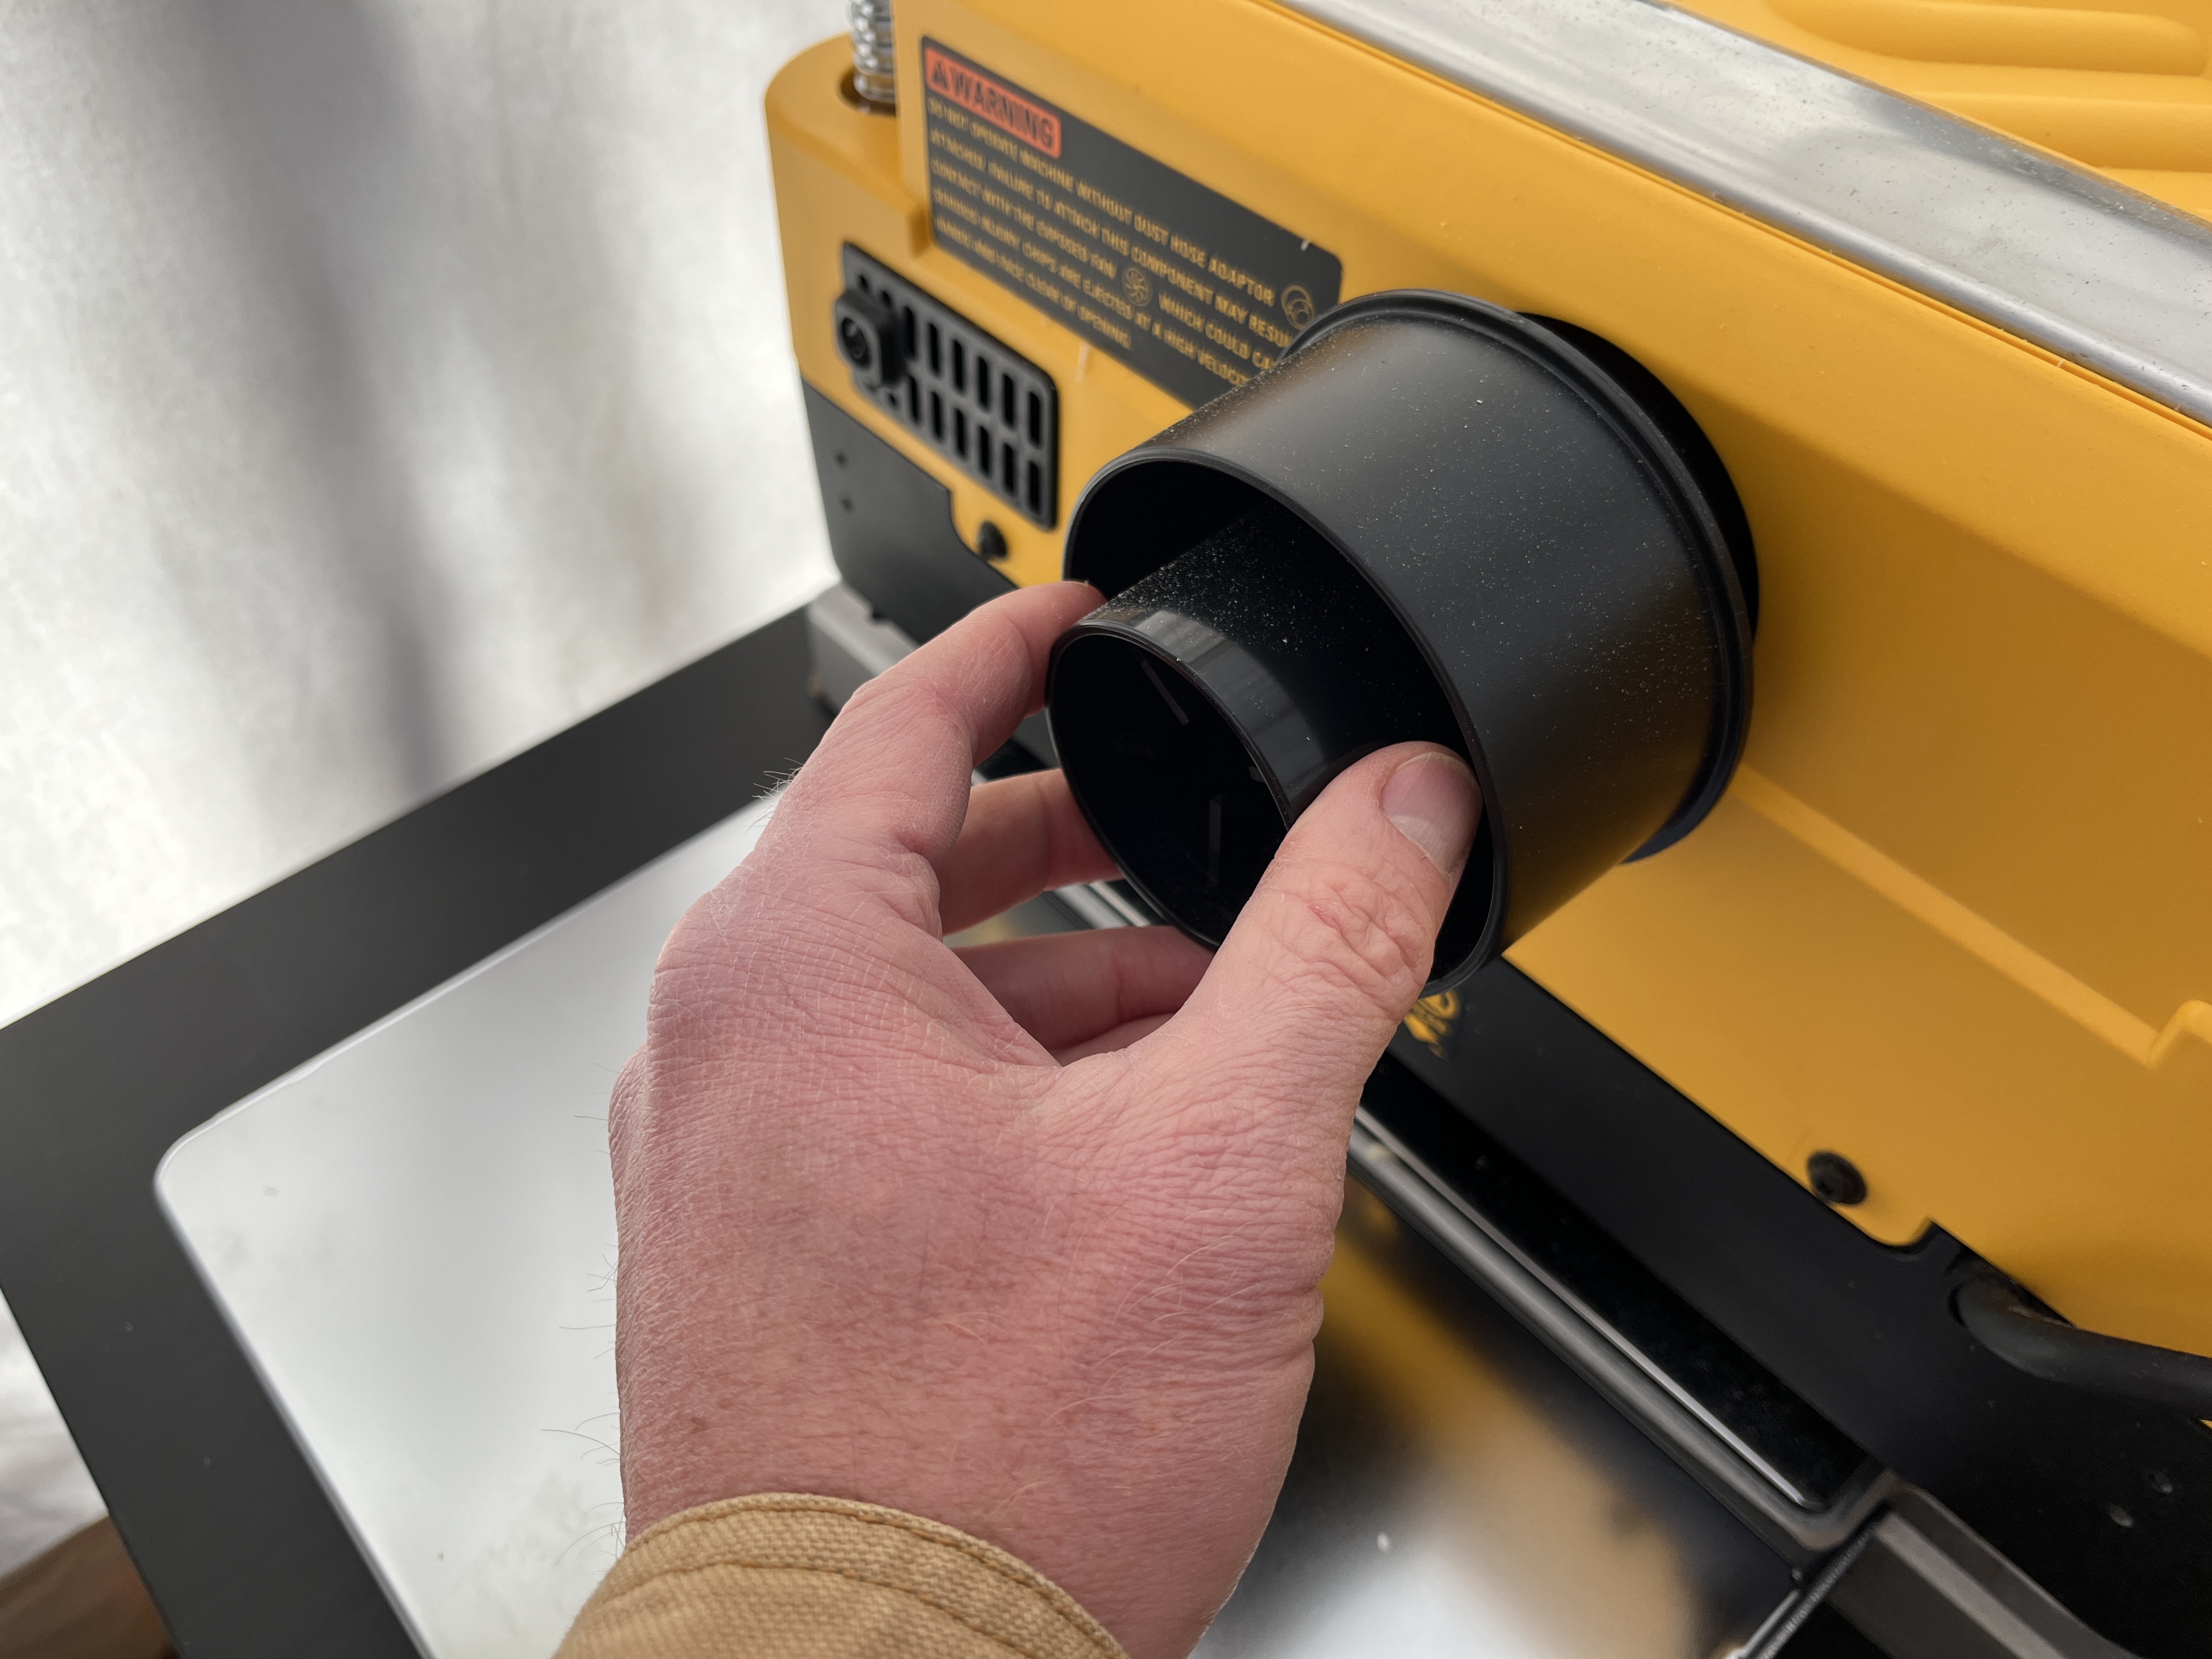
I had minimal experience with thickness planers before I got the DeWalt DW735. I had borrowed one a couple of times, but was not proficient. I spent the evening after it arrived setting it up and reading the owner’s manual to make sure I wouldn’t break anything or get injured. Turns out, the biggest risk was that I might throw my back out trying to move it. I recommend getting a helper any time you need to pick this machine up. For shop use, a dedicated planer stand would be a smart addition.
It only took about 15 minutes to set up the planer and assemble the infeed and outfeed tables. I actually purchased the DW735X kit, which is the same machine as the DW735 but includes the infeed/outfeed tables, dust port adapter, and an extra set of knives. The unit is pretty much plug-and-play, but opting for the tool-only unit will require just a bit more setup.
After adjusting the carriage height for my plank, I flipped the switch and sent the piece through. I decided to test the planer outdoors since I don’t have a dust collection system, and I’m glad I did. When I ran the first test piece through I was amazed to see the wood shavings blown up to 20 feet away. The noise level was much louder than I anticipated, so I put on a set of over-ear hearing protectors and kept working. I experimented with different removal thicknesses, tried out the material removal gauge, the thickness selector, and the different feed speeds on a pile of pine and hardwood scrap. Everything worked as expected and there was basically zero learning curve.
Plenty of Cutting Power, Silky Smooth Finish, Consistently Accurate
So far I have used the DeWalt Planer DW735 on store-bought poplar and yellow pine lumber, blanks split from an oak log, and various cutoffs and reclaimed boards. I mostly work with pieces that are less than 4 feet long. It has delivered excellent results on everything I have fed it. Neither the feed rate nor the cutting speed seems to be affected by the hardness of the wood. Hardwood, softwood, fresh and sappy or old and dried boards, the finished faces always come out clean and smooth. Thickness accuracy has been pretty much perfect too, although it does produce a bit of snipe.
Snipe is a ubiquitous issue with benchtop planers. The snipe section averages about 15 thousandths of an inch, measured with a digital caliper, and runs about 3 inches back from the board end. Raising the infeed-outfeed tables a bit has helped, but the best solution I found was to either run longer boards and cut off the snipe, or send a sacrificial board through just ahead of the good board.
The DW735 has a maximum planing depth of ⅛ inch. I usually plane no more than 1/16 inch at a time, often as little as 1/32 inch. The owner’s manual cautions against planing the maximum depth on 13-inch wide boards due to the strain it would place on the motor. In order to provide a full review, I did test the maximum depth on 8-inch-wide lumber. On the nearly flat surface, the full-depth cut seemed (audibly) to strain the motor some, but it did not affect the feed rate or the appearance of the finished surface.
Why I Think the DeWalt DW735 Planer Is Worth Every Penny

I am a firm believer in “buy it once, use it forever,” and the DeWalt DW735 feels like that kind of tool. Based on 2 months of fairly intensive hobby-level use, it has done everything I’ve needed exceedingly well. The blades have remained sharp, the cutter and carriage structure is perfectly sturdy and still exactly square with the feed table. The adjustment mechanisms are dead-on reliable. Just as importantly, it comes from a highly-regarded, time-tested brand that also has an excellent track record for product support. When I eventually need replacement blades, I don’t have to worry whether or not I’ll be able to get them. I think that the price is fair for that level of performance and peace of mind.
Buy the DeWalt 735 Planer on:
- Amazon for $599.00
- Lowe’s for $599.00
- The Home Depot for $599.00
- Rockler for $599.00 (with extra knives and infeed/outfeed table)
- Byrd Tool for $1,695 (with Shelix helical 40-insert cutterhead upgrade)
Product Comparisons
| DeWalt Planer DW735 | Grizzly Planer G0940 | Hercules Portable Planer | Craftsman Benchtop Planer | Oliver Machinery 10045 Planer | |
| Motor | 15-amp | 15-amp | 15-amp | 15-amp | 15-amp |
| Cutterhead | Three-knife, 10,000 RPM | 30-insert helical, 8,500 RPM | Three-knife, 9,700 RPM | Two-knife, 8,000 RPM | 36-insert helical, 10,000 RPM |
| Maximum width | 13 inches | 13 inches | 12.5 inches | 12.25 inches | 13 inches |
| Maximum thickness | 6 inches | 6 inches | 6 inches | 6 inches | 6 inches |
| Feed rate | Two-speed 14 FPM or 26 FPM | 25 FPM | 25.3 FPM | 26.2 FPM | Two-speed 17 FPM or 26 FPM |
| Price | $599.00 | $870.00 | $399.99 | $349.00 | $999.99 |
So, is the DeWalt Planer DW735 right for you?
A power planer can be a big help in the wood shop. Flattening and choosing custom-thickness for rough-cut boards is far less expensive than buying sanded-four-sides (S4S) project lumber at a retail store. Your shop-planed boards will be more consistent than those at the store, and it gives the option to use wood from other sources, like local sawmills or your own logs. A planer also allows for flattening multiple-board panels after gluing them together.
Not every workshop needs a thickness planer. Other workarounds can suffice until buying one is necessary or fits into the budget. If it’s time to buy a benchtop planer, the DeWalt 735 is one of the best options available. The DW735 is not the cheapest or most expensive option, but it offers outstanding performance for the price, and is backed by a support network that offers replacement knives and other parts and accessories to keep it in top condition. You’ll get the best value from the DW735X kit, which includes the infeed/outfeed tables, or for the smoothest possible finish and extra-long cutter life, it is available with the Byrd Tools Shelix upgrade cutterhead pre-installed.
Meet the Tester
Mark Wolfe is a writer, product tester and serial DIYer who lives in an older home. When he isn’t writing, he spends his time upgrading, repairing, and replacing anything and everything in his home, yard, and garden. He tests and writes reviews about hand and power tools, lawn care and home repair products, and outdoor living goods.
The post In Just 2 Months, This Tool Has Transformed My Workshop appeared first on Bob Vila.
]]>Although best known for its DIYer-friendly electric power tools, Ryobi actually makes a pretty diverse portfolio of products. Over the years, the brand ventured into the world of vacuums with its cordless stick, handheld, and wet/dry vac (which we tested and consider one of the better compact wet/dry vacs). Now, this March 2025, Ryobi will expand its cleaning line even more to include its new and improved handheld pool vacuum.
Powered by the brand’s flagship 18V One+ battery system, the handheld pool vacuum boasts a hose-free design, which means no more fighting with bulky and tangled hoses. The vacuum, instead, suctions everything into the removable debris tank. If you’re like me and have experienced frustration over tangled hoses while cleaning a pool, that’s quite a helpful upgrade! For greater reach, the handheld vacuum can also be used with a standard pool pole. The vacuum has an IPX8 rating and is submersible up to 13 feet. With a suction power of 13 gallons per minute and a wide inlet, this powerful handheld vacuum will make quick work of dirt and debris, including leaves. The large 1.7-liter tank will also allow pool owners to clean more before having to empty the tank.


The Ryobi 18V One+ pool vacuum will be available for $149 (tool only) or $179 (as a kit with 18V lithium battery) exclusively at The Home Depot.
Ryobi wading into the waters of pool and hot tub cleaning is a pleasant surprise. Although, honestly, I’m not too shocked by the launch after having seen Ryobi launch everything from power scrubbers to coolers in recent years. It’s clear that Ryobi is on a mission to make its impressive rechargeable batteries even more versatile and useful for the average homeowner by adding these outdoor, cleaning, and even recreational gadgets to the collection. The flagship One+ line includes more than 300 handy products that can run on 18V One+ batteries! So if you don’t already have a collection, maybe this is your sign to start one.
The post This Major Power Tool Brand Wants to Help You Clean Your Pool appeared first on Bob Vila.
]]>The post Improve the Look and Health of Your Grass With One of These Effective Organic Lawn Fertilizers appeared first on Bob Vila.
]]>Along with mowing and watering, applying organic lawn fertilizers is an important part of creating a lush, healthy lawn. But while keeping your grass the right height and ensuring it gets enough to drink are relatively simple, choosing the proper natural lawn fertilizer is much more complicated. Factors like soil acidity, grass type, and time of year necessitate being somewhat selective about the lawn care products you choose.
To aid you in your efforts, we reached out to a lawn care expert for advice and researched dozens of good fertilizers before choosing the versatile and nonburning The Andersons Innova 7-1-2 Organic Fertilizer as our top pick. Still, depending on the season or specific species of grass you have, another pick might be more appropriate. Read on for our reviews of some of the best organic lawn fertilizers and helpful tips for selecting the right one.
- BEST OVERALL: The Andersons Innova 7-1-2 Organic Fertilizer
↓ Jump to Review - BEST BANG FOR THE BUCK: Jonathan Green Organic Lawn Food
↓ Jump to Review - BEST FOR P & K DEFICIENCY: Scotts Natural Lawn Food
↓ Jump to Review - BEST FOR N DEFICIENCY: Urban Farm Fertilizers 13-1-2 Liquid Lawn Fertilizer
↓ Jump to Review - BEST WITH NO PHOSPHORUS: Espoma Organic Lawn Food Spring Lawn Booster
↓ Jump to Review - BEST FOR DARK-GREEN LAWN: Milorganite 6-4-0 Slow-Release Nitrogen Fertilizer
↓ Jump to Review - BEST FOR FALL: Espoma Organic Lawn Food Fall Winterizer
↓ Jump to Review - BEST ORGANIC LIQUID: GS Plant Foods Organic Liquid Kelp Seaweed Fertilizer
↓ Jump to Review
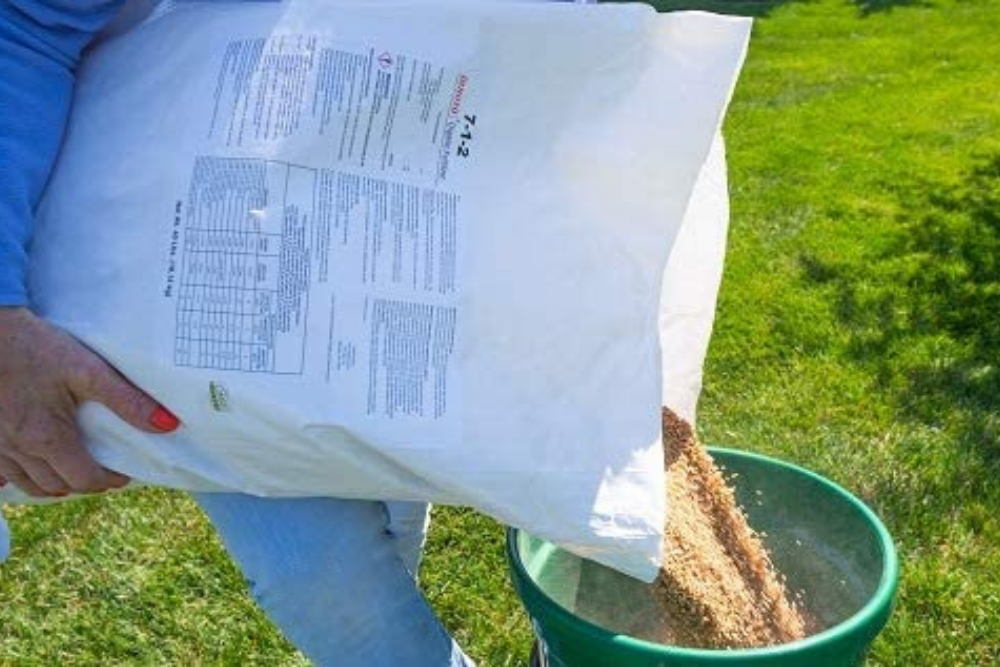
Before You Buy Organic Lawn Fertilizer
Choosing the best organic grass fertilizer requires an understanding of the lawn’s current condition. Is it generally healthy and simply needs regular feeding? Or does it display a nutrient deficiency of some kind? The type of grass will also determine which fertilizer to use. For example, fertilizers for St. Augustine grass will deliver different levels of nutrients than those for Bermuda grass.
Before buying and applying fertilizer, it’s smart to perform a soil test to identify your soil’s pH and nutrient content. These results will help you determine which organic natural fertilizer to apply as part of your personal DIY lawn-care program.
Organic Lawn Fertilizers Comparison Chart
| Product Name | NPK Ratio | Quantity | Coverage |
| The Andersons Innova 7-1-2 Organic Fertilizer | 7-1-2 | 40 pounds | 5,600 square feet |
| Jonathan Green Organic Lawn Food | 10-0-1 | 17 or 51 pounds | 5,000 or 15,000 square feet |
| Scotts Natural Lawn Food | 11-2-2 | 29.1 pounds | 4,000 square feet |
| Urban Farm Fertilizers 13-1-2 Liquid Lawn Fertilizer | 13-1-2 | 1 gallon (makes 256 gallons) | Up to 60,000 square feet |
| Espoma Organic Lawn Food Spring Lawn Booster | 8-0-0 | 30 pounds | 5,000 square feet |
| Milorganite 6-4-0 Slow-Release Nitrogen Fertilizer | 6-4-0 | 36 pounds | 2,500 square feet |
| Espoma Organic Lawn Food Fall Winterizer | 8-0-5 | 30 pounds | 5,000 square feet |
| GS Plant Foods Organic Liquid Kelp Seaweed Fertilizer | 0.3-0-0.6 | 1, 5, 55, or 275 gallon(s) | 1,000 square feet per gallon |
Our Top Picks
Each organic lawn treatment on our list of top picks is made from quality ingredients and provides essential nutrients for growing new grass or helping an existing lawn thrive.
Best Overall
The Andersons Innova 7-1-2 Organic Fertilizer

What We Like
- Minimal dust granules
- Suitable for many types of grass
- Formula won’t cause fertilizer burn
What We Don’t Like
- Only comes in 40-pound bags
Specs
- NPK ratio: 7-1-2
- Quantity: 40 pounds
- Coverage: 5,600 square feet
The Andersons Innova organic fertilizer is a slow-release formula that earned our top spot for its versatile 7-1-2 NPK ratio and amino acids that provide extended feeding without burning. It supplies a high percentage of highly digestible carbon to support beneficial soil microbes for a healthier growing environment. The OMRI (Organic Materials Review Institute)-listed fertilizer contains no biosolids, manure, composted waste products, or animal parts, making it an especially eco-friendly option. We also appreciate how little dust is produced during application, minimizing respiratory irritation that causes coughing and sneezing.
But more than our own comfort, we love this formula for what it does for our lawn. Even with accidental overapplication, it doesn’t cause turf burn and is safe to use adjacent to sensitive waterways and around kids and pets. Though this is an excellent all-around fertilizer for lawn grass, it only comes in 40-pound bags that cover up to 5,600 square feet each, which might be excessive for some.
Get The Andersons organic lawn fertilizer at Amazon.
Best Bang for the Buck
Jonathan Green Organic Lawn Food
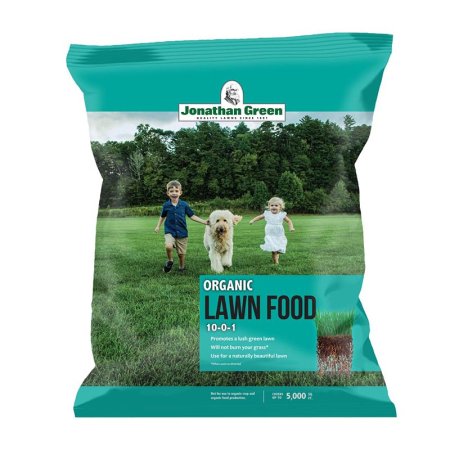
What We Like
- Child- and pet-friendly lawn fertilizer
- Grass treatments last up to 10 weeks
- Plant- and animal-derived ingredients for added versatility
What We Don’t Like
- Not suitable for lawns requiring potassium
Specs
- NPK ratio: 10-0-1
- Quantity: 17 or 51 pounds
- Coverage: 5,000 or 15,000 square feet
Jonathan Green’s organic lawn care fertilizer food is a granular fertilizer made with a complex of plant and animal proteins, including feather meal, soybean meal, molasses, and wheat middlings. The 10-0-1 NPK slow-release formula delivers a boost of nitrogen plus iron to grow dark green grass for up to 10 weeks.
One of the things we like best about this budget-friendly pick is its safety profile. Unlike synthetic fertilizers, this product poses no risk of burning the grass, even if overapplied. Kids and pets can play on it immediately, and it can be used for both cold- and warm-season grasses and applied during spring, summer, or fall. The Jonathan Green fertilizer comes in two sizes: a 17-pound bag for up to 5,000 square feet of coverage and a 51-pound bag that feeds up to 15,000 square feet of lawn.
Get the Jonathan Green organic lawn fertilizer at Amazon, Walmart, or Johnathan Green.
Best for P & K Deficiency
Scotts Natural Lawn Food
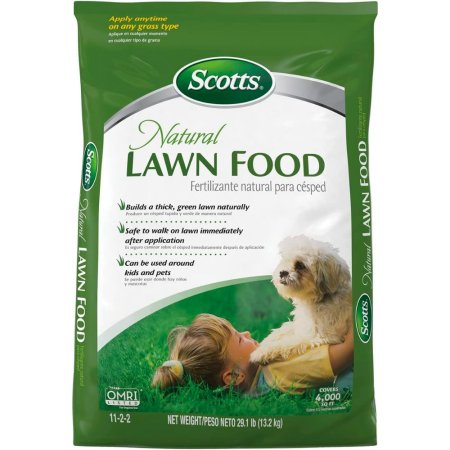
What We Like
- Gentle enough for freshly seeded or sodded grass
- OMRI-listed and comes from natural sources
- Lawn is safe immediately after application
What We Don’t Like
- Relatively limited coverage area
Specs
- NPK ratio: 11-2-2
- Quantity: 29.1 pounds
- Coverage: 4,000 square feet
New and struggling lawns sometimes require a bit more phosphorus and potassium to boost root development and ensure drought tolerance, and with its 11-2-2 NPK content, the Scotts natural lawn food offers both. Made from natural sources like bone meal, blood meal, and meat meal, the formula is excellent for maintaining lawns across seasons and is suitable for all grass types, including zoysia grass.
The manufacturer recommends feeding up to four times through the growing season at 6- to 8-week intervals, and you should start seeing results within those first few weeks. Since the 29.1-pound bag only covers 4,000 square feet, you’ll probably need a few packages to make it through the year.
Get the Scotts organic lawn fertilizer at Amazon, The Home Depot, or Scotts.
Best for N Deficiency
Urban Farm Fertilizers 13-1-2 Liquid Lawn Fertilizer

What We Like
- Concentrated formula covers up to 60,000 square feet
- Iron helps produce deep green grass
- Includes animal- and plant-based ingredients
What We Don’t Like
- Recommended application frequency is 2 to 3 times per month
Specs
- NPK ratio: 13-1-2
- Quantity: 1 gallon (makes 256 gallons)
- Coverage: Up to 60,000 square feet
This super-concentrated liquid lawn fertilizer from Urban Farm Fertilizers boasts 13 percent nitrogen plus iron to help the grass grow and turn deep green at the beginning of spring. This innovative option goes beyond traditional picks by incorporating a blend of hydroponic-grade nutrients, mycorrhizae, humic acid, bacteria, enzymes, and minerals. Its 13-1- NPK content promotes rapid greening and growth for nutrient-deficient lawns.
The ingredients in this combination organic fertilizer come from bat guano, sea kelp, worm casings, and more, creating a concentrated formula that makes up 256 gallons of fertilizer to feed up to 60,000 square feet. However, the manufacturer does recommend you apply it two to three times each month, so you may end up needing more than one bottle to make it through the season. For best results, apply in the evening using a boom sprayer or hose. Dilution instructions for each option are on the back of the bottle.
Get the Urban Farm Fertilizers organic lawn fertilizer at Amazon, Walmart, or The Urban Farm.
Best with No Phosphorus
Espoma Organic Lawn Food Spring Lawn Booster
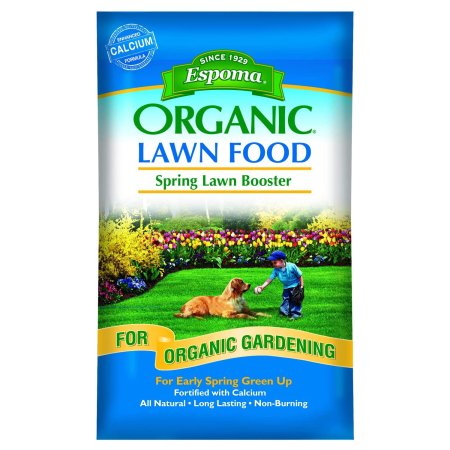
What We Like
- Includes calcium and sulfur for improved grass health
- Promotes disease resistance
- Made from feather meal, pasteurized poultry manure, and gypsum
What We Don’t Like
- Not suitable for lawns requiring potassium or phosphorus
Specs
- NPK ratio: 8-0-0
- Quantity: 30 pounds
- Coverage: 5,000 square feet
This lawn fertilizer for spring uses a moderate dose of slow-release nitrogen and a boost of calcium for deep greening and healthy growth with limited nutrient application. It has an NPK ratio of 8-0-0, 3 percent calcium, and 1 percent sulfur, and is made from feather meal, pasteurized poultry manure, and gypsum. Available in 30-pound bags, it can feed up to 5,000 square feet of lawn.
We love this pick for its ability to provide a sustained supply of nitrogen over time. This allows it to encourage the growth of thicker, greener grass and reduces the frequency of mowing required. It also won’t cause turf burn and is safe for people and pets. You can apply it to newly seeded and sodded areas in early spring to get a good crop of green grass growing.
Get the Espoma spring organic lawn fertilizer at Amazon or Walmart.
Best for Dark-Green Lawn
Milorganite 6-4-0 Slow-Release Nitrogen Fertilizer
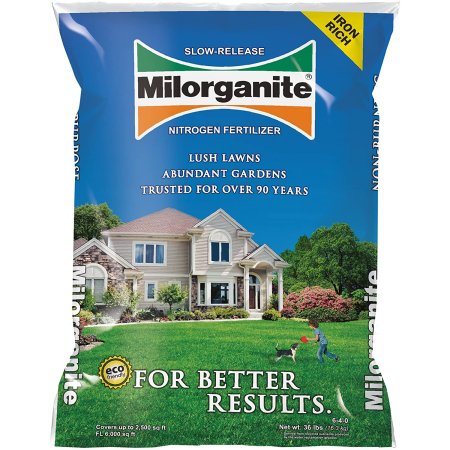
What We Like
- Fortified with iron for a dark green lawn
- Feeds for up to 10 weeks
- Helps establish a healthy room system
What We Don’t Like
- Limited coverage area of 2,500 square feet
Specs
- NPK ratio: 6-4-0
- Quantity: 36 pounds
- Coverage: 2,500 square feet
In the early 1900s, the City of Milwaukee began reclaiming its wastewater on a massive scale and using it to make for-profit products. The name Milorganite comes from Milwaukee organic Nitrogen (nite), and the brand’s 6-4-0 slow-release nitrogen granular has had a consistent spot in the sheds of many home and professional landscapers throughout the many decades since its creation. Made from nutrient-rich heat-dried microbes that have digested the organic matter in wastewater, the resulting product is 85 percent organic matter. It encourages deep root development and can create healthy grass growth for up to 10 weeks after application.
In addition to nitrogen and phosphorus, this fertilizer contains 2.5 percent iron to encourage vibrantly green grass. As one of the most versatile picks on our list, it also makes a great garden fertilizer safe for flowers, vegetables, shrubs, and trees. As much as we love this pick and the story behind it, a 36-pound bag only feeds 2,500 square feet, so you’ll probably want to buy more than one bag.
Get the Milorganite organic lawn fertilizer at Amazon, Ace Hardware, The Home Depot, Walmart, or Target.
Best for Fall
Espoma Organic Lawn Food Fall Winterizer
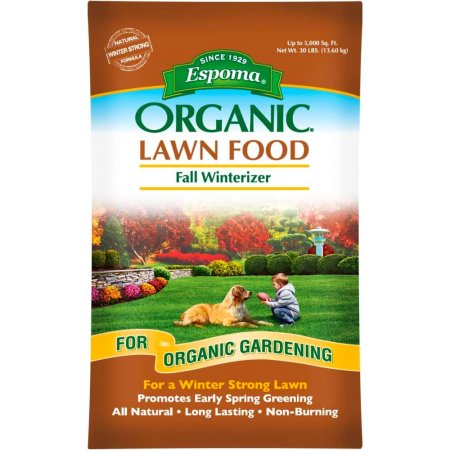
What We Like
- Specifically formulated for winterizing lawns
- Works well as a Bermuda grass fertilizer
- Nonburning, even if overapplied
What We Don’t Like
- Not good for lawns needing phosphorus
Specs
- NPK ratio: 8-0-5
- Quantity: 30 pounds
- Coverage: 5,000 square feet
Looking for a way to prepare a lawn for a harsh winter and promote healthy spring growth? This 8-0-5 fertilizer from Espoma is designed to be used between September and November. It has extra potassium that helps lawns recover from summer stress while enhancing winter hardiness.
This slow-release formula is made from a blend of high-quality natural and organic ingredients, ensuring consistency and quality in every application. It’s nonburning, guaranteeing overfertilization isn’t an issue, and it’s suitable for all lawn types, including those that have recently been seeded or sodded. It is, however, best to apply this product to a dry lawn that has recently been mowed. A 30-pound bag will feed up to 5,000 feet.
Get the Espoma fall organic lawn fertilizer at Amazon or Walmart.
Best Organic Liquid
GS Plant Foods Organic Liquid Kelp Seaweed Fertilizer
What We Like
- OMRI-listed for organic food production
- Helps prevent having a drought-stressed lawn
- Works with other fertilizers for enhanced performance
What We Don’t Like
- Smell can be offputting, especially if used indoors
Specs
- NPK ratio: 0.3-0-0.6
- Quantity: 1, 5, 55, or 275 gallon(s)
- Coverage: 1,000 square feet per gallon
This organic kelp fertilizer from GS Plant Foods is dependent on one hero ingredient: Ascophyllum nodosum extract. Touted as one of nature’s miracle plant foods, the seaweed fortifies plants of all types, making it suitable for everything from lawns to flower beds, vegetable gardens, and houseplants. So long as its strong smell doesn’t bother you, you can even use it to extend the life of cut flowers.
The product comes in a 1-gallon bottle and is designed to be diluted with water at a ratio of 1 ounce of fertilizer to 1 gallon of water. The NPK ratio is 0.3-0-0.6, so nutrient levels are low, allowing this product to be combined with other types of fertilizers if desired. It also contains trace amounts of sulfur, magnesium, calcium, sodium, boron, iron, manganese, copper, zinc, and other carbohydrates and should be applied when temperatures are low to encourage nutrient uptake.
Get the GS Plant Foods organic lawn fertilizer at Amazon or GS Plant Foods.
Or, DIY Your Own Organic Lawn Fertilizer
While there are plenty of commercially produced organic lawn fertilizers on the market, it’s also possible to make a homemade fertilizer for lawns that delivers excellent results. A good fertilizer for grass should be about 50 percent organic matter and plant-based material, such as composted manure, garden clippings, decomposed leaves, sphagnum peat moss, sawdust, wood chips, or even seaweed. The other half of the fertilizer blend should contain slow-release sources of nitrogen such as blood meal, fish meal, cottonseed meal, feather meal, kelp meal, or soybean meal.
Once you have gathered the necessary materials for the homemade lawn fertilizer mix, start blending them in equal parts in a bucket or large container. Make sure to mix them thoroughly so it’s easy to apply everything evenly on your lawn.
Jump to Our Top Picks
Our Verdict
We love The Andersons Innova 7-1-2 Organic Fertilizer for its versatility and quality organic formula. Other popular lawn fertilizers, such as Scotts Turf Builder, Pennington UltraGreen Weed & Feed, and Spectracide Weed & Feed, are effective but do not meet our sustainability guidelines. We cannot recommend them in our list of the best organic lawn fertilizers due to their potentially harmful ingredients and negative impact on the environment.
How We Chose the Best Organic Lawn Fertilizers
We created this guide by drawing on our extensive experience covering home and garden products and comprehensive product research. We considered dozens of fertilizer options, primarily focusing on the following considerations before making our recommendations:
- Organic vs. inorganic: We only considered organic fertilizers for this guide since they are capable of top-notch performance without negative environmental impact.
- NPK ratio: Since different lawns have different macronutrient needs, we included formulations with various NPK (nitrogen/phosphorus/potassium) ratios.
- Value: Plant fertilizers vary widely in type and quantity. We ensured that each recommended product offered excellent value, regardless of the format.
What to Consider When Choosing the Best Organic Lawn Fertilizer
When choosing between the best organic lawn fertilizers on our list, consider type, ease of application, and the desired effect.
Type
Organic fertilizer ingredients fall into three types: animal-based, plant-based, and mineral-based. However, most products contain a combination of these types to deliver the best possible balance of major and minor nutrients. Some products may only offer a single ingredient or a blend of ingredients from a single type.
Animal-based fertilizers include blood meal, bone meal, feather meal, fish meal, and various manures. These products slowly break down over time, providing lawns and garden plants with season-long benefits.
Plant-based fertilizer ingredients include alfalfa meal, cottonseed meal, kelp meal, soybean meal, and compost. Soil microbes convert these materials into plant food much more quickly than animal products. They provide an immediate impact, often within days or weeks after application.
Mineral-based fertilizer ingredients like sulfur, dolomitic limestone, gypsum, greensand, and rock phosphate are naturally occurring concentrated forms of plant-food elements. They boost trace nutrient levels and eliminate deficiencies in the soil.
Liquid vs. Granular
Organic fertilizers, both liquid and granular, work with the naturally occurring microbes in the soil. When the fertilizer is applied to the soil, bacteria and fungi consume the natural ingredients and release the nutrients at a measured rate and in a form that is readily available to plants.
The difference between liquid and dry organic fertilizers is in the rate at which the soil consumes them. Dry granular formulations, which are applied using a fertilizer spreader, break down slowly and feed lawns over weeks or months. Liquid organic fertilizers deliver a quick boost of nutrients and work faster due to their minute particle size and embedded moisture.
NPK Ratio
Three elements make up the major nutrients that lawns and plants need for lush, green growth:
- Nitrogen (N) promotes green color and leafy growth.
- Phosphorus (P) stimulates deep root development.
- Potassium (K) boosts vigor and disease resistance.
Nitrogen is quite volatile. The amount not used by the lawn dissipates and must be regularly replenished. Phosphorus and potassium persist in the soil, so they are not required in such large quantities. On average, organic lawn fertilizer offers two to three times or more N compared to how much P and K are in the mix.
NPK ratios on fertilizer labels show the amount of each element present in the product as a percentage of the total weight, always in the order N-P-K. For instance, a product with a ratio of 11-2-2 contains 11 percent N, 2 percent P, and 2 percent K. Other ingredients and any additional nutrients will also be listed on the label.
Desired Effect
After a soil test (see the tips for using organic lawn fertilizer section below), it’s essential to factor the condition of the lawn into the fertilizer choice. Phosphorus is already sufficiently present in the soil in many areas. If your soil test shows levels are already high enough, you can help prevent pollution by not adding more.
If the grass is robust with dense foliage and deep green color, choose a fertilizer with a moderate to high amount of nitrogen (10 percent or greater) and little to no phosphorus and potassium. As the lawn approaches the dormant season in late summer and fall, apply fertilizer with a lower nitrogen ratio and slightly more potassium.
If your lawn is yellow or remains dull even when all three major nutrients are properly supplied, your grass may be deficient in iron. For a deeper green, choose a lawn fertilizer with supplemental iron.
Tips for Using Organic Lawn Fertilizer
There’s more to an effective organic lawn fertility program than simply applying fertilizer on a timed schedule. Don’t waste time and money by blindly applying fertilizer. First, test the soil, either with an over-the-counter testing kit from a local garden center or by sending a sample to your state’s Cooperative Extension Service for analysis. Then, use the results to map out a plan of action.
The first step should be to adjust the pH of the soil as indicated by test results. Establish the proper soil pH, between 5.8 and 7.2 depending on the grass species, to ensure that the grass can efficiently pull nutrients out of the soil. Lime raises the pH, while sulfur and aluminum sulfate lower it. Once the acidity is ideal, proceed with the necessary fertilizer application—and remember to mulch grass clippings.
- Use soil test results to determine fertility needs.
- Apply lime as necessary to maintain the proper soil pH and maximize fertilizer efficiency.
- Mulch grass clippings and leave them on the lawn to reduce fertilizer requirements by as much as 30 percent.
FAQs
The best organic fertilizer can help keep lawns vigorous and healthy. For more information on using fertilizers, check out the answers to these frequently asked questions.
Before purchasing a fertilizer, buy an over-the-counter soil test kit or send a soil sample to your county’s Cooperative Extension Service for analysis. Use the soil test results to guide fertilizer choice and application.
Grass will take up fertilizer throughout the growing season. The best times to apply it are when active growth begins in spring and again in midsummer as well as prior to winter to increase hardiness.
While organics are typically labeled as “nonburning,” excess fertilizer is a source of pollution. Follow soil test results and the instructions on the label of the specific product you are using.
Generally speaking, it’s unlikely you will cause fertilizer burn with an organic fertilizer. However, applying excess product is bad for the environment and your wallet.
The disadvantages of organic fertilizer are that it may cost more yet have lower levels of nutrients. Still, organic fertilizer has advantages like helping create healthier soil and providing nutrients at a more consistent rate.
The frequency with which you should apply organic fertilizer to your lawn depends on the product you’re using and the conditions of the soil. Generally speaking, however, you will need to fertilize anywhere from a few times a month to once every few months. To get the best results for your lawn, perform a soil test and follow the manufacturer’s instructions.
We spoke to Ryan Farley, the CEO of LawnStarter, an online marketplace that links you up with affordable lawn care services in your area, and he had this to say: “I tend to recommend fertilizing in the late afternoon or even a bit before sunset to avoid the hottest part of the day and give your fertilizer a chance to get into your soil overnight.”
While organic lawn fertilizer starts to get to work as soon as it’s applied, it will likely be at least a few days or even a couple of weeks before you start to notice its effects.
The post Improve the Look and Health of Your Grass With One of These Effective Organic Lawn Fertilizers appeared first on Bob Vila.
]]>Presidents’ Day sales tend to focus on the upcoming milder weather, but many of us continue to deal with snow and ice throughout much of February and into March. However, as the winter season starts to wind down, it’s a great time to score deep discounts on snow blowers or other snow removal tools.
While scouring for the best Presidents’ Day sales, we discovered one of our favorite snow blowers, the Ego Power+ SNT2112 21-inch cordless snow blower on sale for $599.99 (save 20%). The Ego Power+ snow blower features a 21-inch clearing width with a steel auger making it a powerhouse when chomping through snow and ice. The chute throws snow up to 40 feet ensuring a clean and clear path.
After testing this snow blower in heavy Colorado snow, we rated it a 9.5/10. We really loved that the machine was easy to maneuver and the handle-mounted chute was a cinch to control. Our editor was a first-time user, and she had no problem using this snow blower.
Even better, the Ego Power+ 21-inch snow blower comes with two 5.0Ah batteries and dual-port charger so you’ll be powered up any time snowy weather hits. Don’t wait, this deal won’t last long.
The post Last Chance: Score 20% Off Our Favorite Ego Snow Blower appeared first on Bob Vila.
]]>The post The Best Fertilizers for Palm Trees appeared first on Bob Vila.
]]>Palm trees are notorious for the tropical touch they add to a garden landscape. Though easy to maintain once established, they require adequate sunlight, water, and the proper fertilizer. If these needs aren’t met, a palm tree’s fronds will begin to curl or yellow.
Gardeners can keep fronds lush and green by supplying a fertilizer with a healthy dose of nitrogen and potassium, and a low amount of phosphorus. Palm trees also benefit from micronutrients such as manganese, magnesium, and iron. Our favorite is the Miracle-Gro Shake ’N Feed thanks to its easy to use and long-lasting formula. There are many options to weed through, but we’ve done the work and found some of the best fertilizers for palm trees.
- BEST OVERALL: Miracle-Gro Shake ’N Feed Palm Plant Food
- BEST BANG FOR THE BUCK: Miracle-Gro Palm Tree Food
- BEST SPIKES: Jobe’s Fern and Palm Plant Food Container Spikes
- BEST ORGANIC: Dr. Earth Organic and Natural Exotic Blend
- BEST GRANULATED: Jobe’s Organics Palm Granular Plant Food
- BEST WATER-SOLUBLE: JR Peters Jack’s Classic Palm Food 16-5-25
- HONORABLE MENTION: Carl Pool Palm Food 12-4-12

Product Comparison
| Type | NPK Ratio | Product Size | |
| Miracle-Gro Shake ’N Feed Palm Plant Food | Granular | 8-2-12 | 4.5 pounds |
| Miracle-Gro Palm Tree Food | Granular | 8-4-8 | 20 pounds |
| Jobe’s Fern and Palm Plant Food Container Spikes | Spikes | 16-2-6 | 30 spikes |
| Dr. Earth Organic and Natural Exotic Blend | Dry organic matter | 5-4-6 | 4 pounds |
| Jobe’s Organics Palm Granular Plant Food | Granular | 4-2-4 | 4 pounds |
| JR Peters Jack’s Classic Palm Food 16-5-25 | Water-soluble | 16-5-25 | 1.5 pounds |
| Carl Pool Palm Food 12-4-12 | Granular | 12-4-12 | 4 pounds |
Our Top Picks
What is the best palm tree fertilizer? Let’s look at some of the best food for palm trees. When used as directed, these products will help palm trees thrive.
Best Overall
Miracle-Gro Shake ’N Feed Palm Plant Food
What We Like
- Easy to apply
- Contains the proper micro- and macronutrients
- Reapply as little as every 3 months
- Works for container-grown and in-ground trees
What We Don’t Like
- Overuse can lead to plant burns
Gardeners looking for a product with the right blend of nutrients in an easy-to-use bottle will appreciate Miracle-Gro Shake ’N Feed Palm Plant Food. It provides an NPK of 8-2-12 with magnesium, manganese, and iron to support fronds so they won’t yellow or curl.
Miracle-Gro Shake ’N Feed comes in a convenient container with a spout. To use the product, shake it around the drip line of the palm tree, lightly work it into the soil, and then water. Gardeners can use this product every 3 months.
This fertilizer works for palms in the ground or container-grown varieties. The only downside is that it can potentially cause plant burns if overused.
Product Specs
- Type: Granular
- NPK ratio: 8-2-12
- Product size: 4.5 pounds
Get the Miracle-Gro Shake ’N Feed fertilizer for palm trees at Amazon, Lowe’s or Tractor Supply Co.
Best Bang for the Buck
Miracle-Gro Palm Tree Food

What We Like
- 1 bag provides 15 feedings
- Contains necessary nutrients for a healthy tree and fronds
- Inexpensive
- Easy to use
What We Don’t Like
- Need to apply more frequently compared to other fertilizers
While moderately priced palm tree foods are abundant, Miracle-Gro’s Palm Tree Food is especially great for budget-conscious palm tree lovers. This fertilizer delivers approximately 15 feedings to a palm tree. Since it needs reapplication only every 6 weeks, one bag lasts a long time.
The Miracle-Gro Palm Tree Food packs an NPK ratio of 8-4-8 and contains manganese, magnesium, and iron. It’s easy to use: Apply the fertilizer evenly to the soil under the palm’s branches, and lightly work it in the ground.
Product Specs
- Type: Granular
- NPK ratio: 8-4-8
- Product size: 20 pounds
Get the Miracle-Gro Tree Food fertilizer for palm trees at Lowe’s or Tractor Supply Co.
Best Spikes
Jobe’s Fern and Palm Plant Food Container Spikes

What We Like
- Easy-to-use spikes
- Lasts for 2 months
- Eliminates mess and fertilizer runoff
What We Don’t Like
- Suitable only for container-grown palm trees
Jobe’s Fern and Palm Plant Food Spikes are hard to beat for gardeners with container-grown palm trees. They are easy to use, release nutrients slowly, and have an NPK ratio of 16-2-6.
To use Jobe’s plant food, insert the spikes in the palm tree’s pot between the tree trunk and the edge of the container. The number of spikes inserted depends on the container size, ranging from two to six. Replenish spikes every 2 months.
Jobe’s also makes a fertilizer spike for palm trees planted in the ground. These spikes have a slightly different NPK ratio, are larger, and should be used only twice per year.
Product Specs
- Type: Spikes
- NPK ratio: 16-2-6
- Product size: 30 spikes
Get the Jobe’s fertilizer for palm trees on Amazon.
Best Organic
Dr. Earth Organic and Natural Exotic Blend
What We Like
- Organic and non-GMO
- Contains microbes to improve soil health
- Gentle 5-4-6 formula won’t burn plants
- Easy to apply
What We Don’t Like
- May have a slightly unpleasant smell
Dr. Earth packs a great mix of nutrients and microbes for gardeners who are more interested in organic products. The formula features an NPK ratio of 5-4-6 with sulfur and magnesium. This fertilizer is ideal for palm trees, plumeria, hibiscus, and other tropical plants.
For planted palm trees, apply this fertilizer every 2 months—use ½ to ¾ cups of fertilizer for every foot of tree height. Mix the fertilizer into the ground under the tree’s drip line. Fertilize container-grown palms every 2 months by adding 2 tablespoons of fertilizer for every 6 inches of pot diameter.
Product Specs
- Type: Dry organic matter
- NPK ratio: 5-4-6
- Product size: 4 pounds
Get the Dr. Earth fertilizer for palm trees on Amazon.
Best Granulated
Jobe’s Organics Palm Granular Plant Food
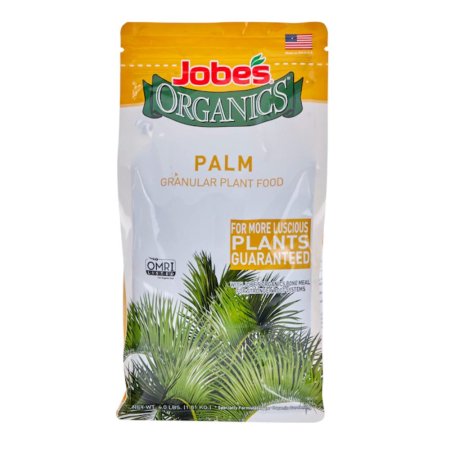
What We Like
- Organic fertilizer with environmentally friendly ingredients
- Gentle NPK won’t burn palm trees
- Easy to use for planted and container-grown palms
- Contains a mix of microorganisms for soil health
What We Don’t Like
- Large trees require a lot of fertilizer
- May have an unpleasant, organic smell
Jobe’s Organics Palm Granular Plant Food provides the ideal NPK ratio and can boost soil health. This fertilizer contains Jobe’s Biozome, a unique blend of bacteria, fungi, and archaea, encouraging palm trees to absorb nutrients more quickly. It has an NPK ratio of 4-2-4.
To use this fertilizer, gardeners need to measure their palm tree’s longest frond. For example, a tree with a 2-foot frond will need 1 cup of fertilizer, while a tree with a 6-foot frond will need 11 cups of fertilizer. Gardeners should evenly work the correct amount into the soil under the tree’s canopy. This fertilizer also works for container-grown palm trees.
Product Specs
- Type: Granular
- NPK ratio: 4-2-4
- Product size: 4 pounds
Get the Jobe’s Organics fertilizer for palm trees at Amazon.
Best Water-Soluble
JR Peters Jack’s Classic Palm Food 16-5-25
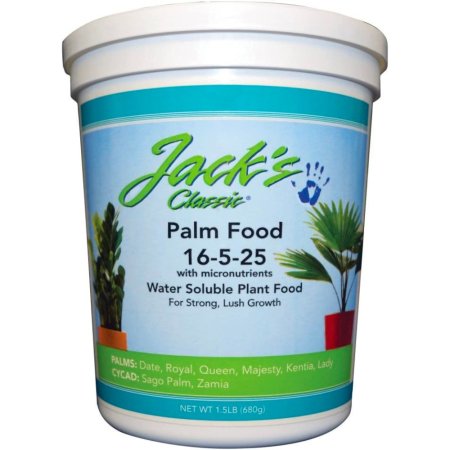
What We Like
- Fast delivery of nutrients
- Easy-to-mix powder
- Contains macro- and micronutrients
What We Don’t Like
- Easy to overuse
- Needs to be reapplied every 7 to 10 days
JR Peters Jack’s Classic Palm Food mixes with water and goes around the palm’s base to deliver nutrients quickly. The NPK of this fertilizer is 16-5-25. It also contains micronutrients such as magnesium and sulfur.
Gardeners can apply Jack’s Classic Palm Food every 7 to 10 days during the growing season. It’s ideal for the following palm varieties: Date, Royal, Queen, Majesty, Kentia, and Lady.
Since this fertilizer is highly concentrated, take care not to overuse it. Using too much product or applying it too often can cause adverse effects such as burnt or yellowing fronds.
Product Specs
- Type: Water-soluble
- NPK ratio: 16-5-25
- Product size: 1.5 pounds
Get JR Peters fertilizer for palm trees on Amazon.
Honorable Mention
Carl Pool Palm Food 12-4-12
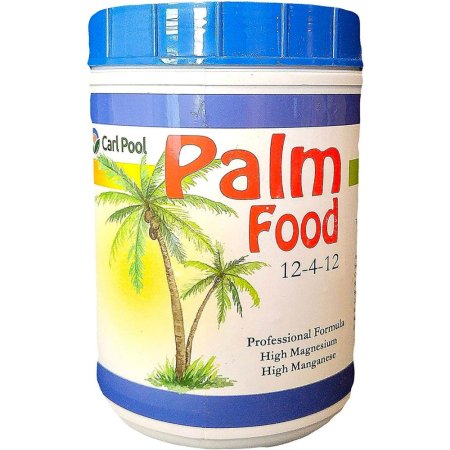
What We Like
- Contains 7 beneficial micronutrients
- Lasts up to 4 months
- Works for landscaped and container-grown palms
- Simple application
What We Don’t Like
- Can get expensive for fertilizing large palm trees
Carl Pool Palm Food 12-4-12 is one of the best fertilizers for palm trees because it’s versatile and long lasting. This granular fertilizer is a slow-release formula, leaching nutrients into the soil for up to 4 months. It contains an NPK of 12-4-12 with seven added micronutrients, including manganese, magnesium, and iron.
Planted palms will need 1 cup of fertilizer per 3 feet of tree, not to exceed 3 cups. Spread the fertilizer across the soil at the tree’s drip line. Potted palms receive amounts based on container size, with doses ranging from a ½ teaspoon to ⅜ cup.
Product Specs
- Type: Granular
- NPK ratio: 12-4-12
- Product size: 4 pounds
Get the Carl Pool fertilizer for palm trees on Amazon.
Our Verdict
The best fertilizer for palm trees provides the nutrients palms need but meets a gardener’s needs for cost, convenience, and personal preference. Our top pick for the best palm fertilizer is Miracle-Gro Shake ’N Feed fertilizer for palm trees. It’s easy to use; contains the ideal NPK ratio; and contains manganese, magnesium, and iron for healthy palm fronds. Our budget pick, Miracle-Gro Tree Food fertilizer for palm trees, provides one palm tree with an average of 15 feedings and needs to be reapplied only every 6 weeks.
How We Chose the Best Fertilizers for Palm Trees
Palm trees are finicky when they don’t receive proper nutrients, causing their fronds to yellow and curl. We considered their unique nutrient needs and looked for fertilizers with higher ratios of nitrogen and potassium rather than phosphorus. This balance of macronutrients helps a palm tree maintain lush green fronds and supports growth.
Once we found products with the proper macronutrient blend, we looked for micronutrient content, ease of use, and price. Next, we narrowed our choices by searching for the best palm tree food in several categories based on price and type of fertilizer. And since palms can grow in containers or in the ground, we looked for options that work in both scenarios.
What to Consider When Choosing the Best Fertilizer for Palm Trees
Palm trees require a unique blend of macronutrients and micronutrients to thrive. Gardeners can provide these nutrients through granular, water-soluble, or spike fertilizers. These fertilizers deliver nutrients to the soil, which palm trees can absorb through their root system. Here’s what to look for when choosing the best palm fertilizer.
Type
There are a few forms of palm tree fertilizer, with liquid, water-soluble, granular, and spike being the most common. The difference between them is how they’re applied and how long they work.
- Liquid: Liquid fertilizer comes premixed in concentrated or ready-to-pour containers. Users must dilute concentrated liquid fertilizer with water before adding it to the plant’s soil.
- Water-soluble: Water-soluble fertilizers are highly concentrated and come in a fine powder. The powder is added to water to dissolve before use.
- Granular: Granular fertilizers come in hard pellets that gardeners can work into the soil. Granular fertilizer is typically a slow-release type, providing nutrients to the plant for a longer time than liquid or water-soluble products do.
- Spikes: For gardeners who like to “set it and forget it,” spike fertilizer is the way to go. Place these fertilizer sticks in damp soil around the base of the tree to release nutrients slowly into the soil.
NPK Ratio
Like humans and animals, plants need proper nutrition, and each species has its own requirements. The three macronutrients plants need are nitrogen (N), phosphorous (P), and potassium (K), also known as NPK. Nitrogen helps plants and trees grow green, lush foliage. Phosphorus helps establish a root system and encourages bloom growth in flowering varieties, and potassium improves a plant’s overall health.
On a fertilizer package, these nutrients are listed similarly to this: 10-30-10. Each number represents how much of each nutrient the fertilizer contains, always in the same order (nitrogen-phosphorus-potassium). In this example, the fertilizer has 10 percent nitrogen, 30 percent phosphorus, and 10 percent potassium.
The best food for palm trees is a fertilizer that has a low middle, or phosphorus, number. In addition, the best fertilizer for palms will contain potassium levels equal to or greater than its nitrogen levels. Palm trees also benefit from micronutrients such as magnesium, manganese, and iron.
Organic vs. Inorganic
Aside from the form of fertilizer, gardeners can choose between organic and inorganic products. Though both can deliver the same or similar nutrients to a palm, they have distinctive differences.
Organic fertilizers contain natural ingredients such as minerals from plants, rocks, and animals. These fertilizers are easy for a plant to use and can deliver microorganisms to improve soil quality over time. Most organic fertilizers are nontoxic, making them a top pick for gardeners who have kids and pets.
Inorganic (synthetic, man-made) fertilizers also contain some natural ingredients, such as minerals, that are combined with chemicals to create a highly concentrated product. Because of this process, inorganic fertilizers are less expensive and deliver nutrients quickly. However, they do not last long in the soil or improve its health. They also add to pollution of water bodies and are not as eco-friendly as organic fertilizers, so the best palm tree fertilizer option might depend on personal preference.
Tips for Fertilizing Palm Trees
Though palm trees are a relatively low-maintenance plant, they require ample sunlight, water, and the right fertilizer. Palm trees can be planted in the ground or grown in containers. Gardeners who live in areas with colder winters can choose hardy palms that can handle temperatures as low as 10 degrees Fahrenheit or keep their palms in pots, bringing them inside during the winter.
To get the most benefit out of palm tree fertilizer, follow these tips:
- For outdoor palms, fertilize only during the growing season, which is March through October
- Stop fertilizing 2 months before your area’s average frost date
- To prevent potassium deficiencies that can cause fronds to turn yellow, use a fertilizer with potassium equal to or higher than nitrogen.
For indoor palm trees, use a potting soil developed for palms, place your plant in bright light, and water when the soil is dry. After about a month of having the palm indoors, fertilize it following the directions on the product package.
FAQs
Palm trees can be grown anywhere—the key is to pick a suitable variety based on the climate. For example, gardeners who live in areas with cold winters can choose hardy palms, while those who live in warmer regions can grow most types of palm trees. Here are some common palm tree fertilizer questions and their answers to help palm tree growers.
Q. Do palm plants require fertilizers?
Palm trees require fertilizer to keep their fronds from curling and turning yellow. These plants need a low amount of phosphorus compared to the amounts needed for nitrogen and potassium.
Q. Can I use homemade fertilizer for a palm tree?
Many homemade palm tree fertilizer recipes incorporate ingredients such as bone meal, kelp, bat guano, and eggshells. Making your own plant food can provide necessary nutrients if it is customized to a palm tree’s needs.
Q. What kind of fertilizer should I use for palm trees?
Use a fertilizer with low phosphorus and a potassium level equal to or higher than the nitrogen level. Gardeners can choose between granular fertilizer, spikes, and water-soluble powders. If possible, select a fertilizer that also has the key micronutrients of magnesium, manganese, and iron.
Q. How much fertilizer do palm trees need?
The amount of fertilizer a palm needs depends on the tree’s size and the fertilizer type. Slow-release fertilizers can last up to 4 months between applications.
Q. Are coffee grounds good for palm trees?
Coffee grounds increase the soil’s acidity level, which may be beneficial for palms that prefer a higher acidity. However, some palms do better in pH-neutral soil.
Q. Will vinegar kill palm trees?
Vinegar can kill palm trees when repeatedly applied to the root system. Some gardeners use vinegar as a nontoxic way to kill unwanted trees.
The post The Best Fertilizers for Palm Trees appeared first on Bob Vila.
]]>The post The Best Fertilizers for Gardenias appeared first on Bob Vila.
]]>Those who live in temperate climates—typically where winter temps don’t drop below 10 degrees Fahrenheit—may be interested in growing gardenias in their garden. These are shrubs known for their soft, large, typically white blossoms that give off a heady aroma. While the gardenia (Gardenia jasminoides) isn’t difficult to grow, it has a few soil requirements. In addition to choosing the right type of soil for gardenias—well-draining and amended with organic matter, such as mulch or dry leaves—the plant stands a better chance of developing healthy roots and producing blooms if it receives regular fertilizer feedings.
But don’t just grab the first package of all-purpose plant food you see off the shelf at the garden center. It might boost the gardenia bush’s foliar growth, but it might not encourage blooming. The best plant food for gardenias should be formulated to provide the nutrients acid-loving plants need for optimal results. Our favorite is Scotts Miracle-Gro Miracid Plant Food because it dissolves quickly and has added minerals. Ahead, learn what to look for when shopping for the best fertilizer for gardenias and find out why the following products fit the bill.
- BEST OVERALL: Scotts Miracle-Gro Miracid Plant Food
- BEST BANG FOR THE BUCK: Perfect Plants Gardenia Liquid Fertilizer
- BEST ACIDIFIER: Jobe’s Organics Soil Acidifier Fertilizer
- BEST WITH MICROBES: Dr. Earth Organic Acid Lovers Fertilizer
- BEST WATER-SOLUBLE: Miracle-Gro Water Soluble Azalea, Camellia Plant Food
- BEST SPIKES: Jobe’s Azalea, Camellia & Rhododendron Fertilizer
- ALSO CONSIDER: Down to Earth All Natural Acid Mix Fertilizer

Product Comparison
| NPK Analysis | Fertilizer Type | Added Ingredients | |
| Scotts Miracle-Gro Miracid Plant Food | 30-10-10 | Water-soluble | Trace minerals |
| Perfect Plants Gardenia Liquid Fertilizer | 9-3-6 | Liquid | Sulfur, magnesium, copper, iron, manganese, and molybdenum |
| Jobe’s Organics Soil Acidifier Fertilizer | Not applicable | Granules | None (sulfur only) |
| Dr. Earth Organic Acid Lovers Fertilizer | 3-4-3 | Granule | Land plants, ocean plants, fish, fish bones, and mined minerals |
| Miracle-Gro Water Soluble Azalea, Camellia Plant Food | 30-30-10 | Water soluble | Iron, boron, copper, manganese, molybdenum, zinc, and boric acid |
| Jobe’s Azalea, Camellia & Rhododendron Fertilizer | 9-8-7 | Spikes | None listed |
| Down to Earth All Natural Acid Mix Fertilizer | 4-3-6 | Time-release granules | Trace minerals, calcium, magnesium, and sulfur |
Our Top Picks
To earn a spot in this lineup, the following fertilizers had to contain ingredient formulations that offered the vital nutrients that gardenias need for healthy growth and abundant blossom development. The NPK analysis varies from product to product, and some contain no NPK components at all. Still, each is designed to benefit gardenias and other acid-loving plants.
Best Overall
Scotts Miracle-Gro Miracid Plant Food
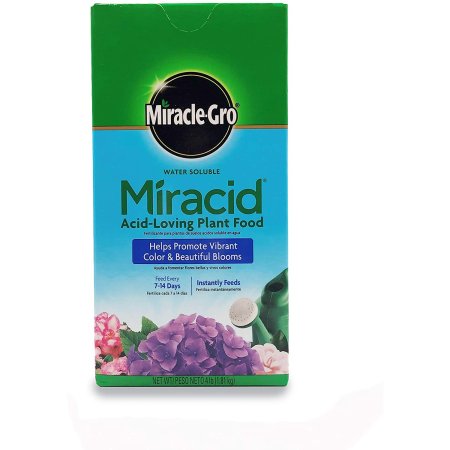
Pros
- Dissolves quickly in water
- Nitrogen sources help acidify soil
- Added minerals
Cons
- Requires frequent feedings
Product Specs
- NPK analysis: 30-10-10
- Fertilizer type: Water-soluble
- Added ingredients: Trace minerals
From one of the top names in gardening aids, the best overall pick for feeding gardenias is Scotts Miracle-Gro Miracid Acid-Loving Plant Food. This water-soluble fertilizer is designed to be mixed with water and poured over foliage or around the base of the plant. It can also be used in a garden hose dispenser and sprayed over plants on a broader scale. The granules dissolve rapidly and provide a quick boost for the plant.
Miracid features an NPK analysis of 30-10-10, with its nitrogen sourced from ammonium and urea, both of which help acidify the soil. Trace minerals are also included, with boron, copper, iron, and zinc rounding out the nutrient quotient. Miracle-Gro recommends feeding when the gardenia is first transplanted and every 7 to 14 days after that during its growing season.
Get the Scotts Miracle-Gro Miracid on Amazon or at Ace Hardware.
Best Bang For The Buck
Perfect Plants Gardenia Liquid Fertilizer
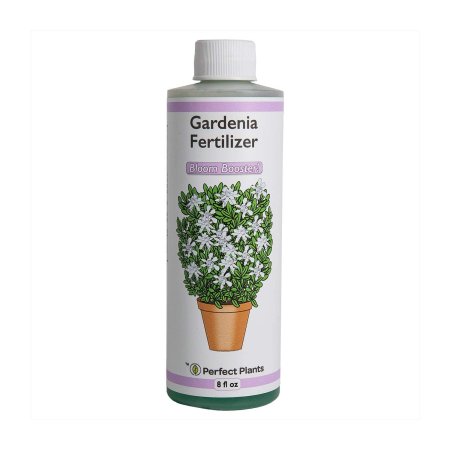
Pros
- Up to 48 feedings
- Affordable
- Added nutrients
Cons
- Requires frequent feedings
Product Specs
- NPK analysis: 9-3-6
- Fertilizer type: Liquid
- Added ingredients: Sulfur, magnesium, copper, iron, manganese, and molybdenum
Those who want to keep gardenias healthy and happy on a budget should check out Perfect Plants Gardenia Fertilizer, since a single 8-ounce bottle will last for the entire growing season. Just a teaspoon of this concentrated liquid mixed into a gallon of water can feed one or more gardenia plants weekly or every other week.
This fertilizer has an NPK analysis of 9-3-6, making it well suited for healthy foliage and abundant blossoms on acid-loving gardenias. Other beneficial ingredients include sulfur, magnesium, copper, iron, manganese, and molybdenum—all nutrients ideal for gardenias and other acid-loving plants.
Get the Perfect Plants Gardenia Fertilizer on Amazon.
Best Acidifier
Jobe’s Organics Soil Acidifier Fertilizer
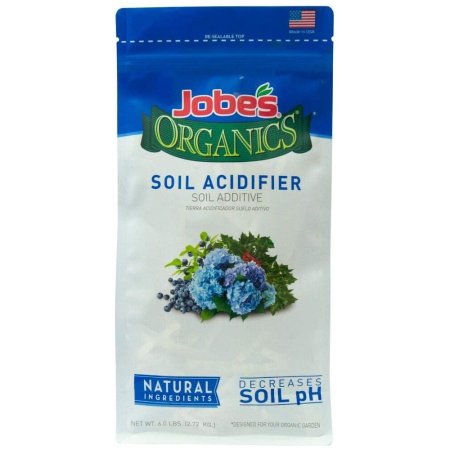
Pros
- Reduces pH in soil
- Requires only two to three yearly doses
- Easy-to-use granules
Cons
- Contains no other nutrients
Product Specs
- NPK analysis: Not applicable
- Fertilizer type: Granules
- Added ingredients: None (sulfur only)
Rather than struggle with overly alkaline soil, consider feeding with Jobe’s Organics Soil Acidifier, which can help create the ideal pH for gardenias to thrive. This granular product contains no nitrogen, phosphorus, or potassium. Instead, the formula features 100 percent sulfur—an excellent soil acidifier—sourced from elemental sulfur and gypsum.
For best results, test the soil before applying Jobe’s acidifier and then follow the directions for sprinkling the granules around the plant base (how much to use depends on plant size). Work the granules into the soil and water well. Reapply the acidifier two or three times per year to maintain an optimal pH balance. Tip: This product does not contain other nutrients, so consider feeding with other fertilizers described in this guide to boost healthy gardenia growth.
Get the Jobe’s Organics Soil Acidifier on Amazon.
Best With Microbes
Dr. Earth Organic Acid Lovers Fertilizer
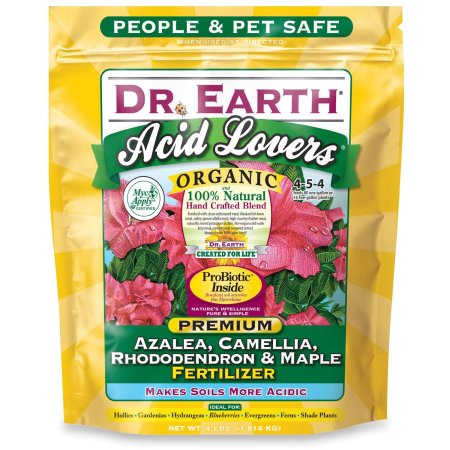
Pros
- Reduces soil alkalinity
- Time-release granules
- All natural
Cons
- Slight objectionable smell
Product Specs
- NPK analysis: 3-4-3
- Fertilizer type: Granule
- Added ingredients: All-natural ingredients sourced from land plants, ocean plants, fish, fish bones, and mined minerals
Dr. Earth’s Acid Lovers Organic Fertilizer goes a long way toward helping maintain the acidic soil gardenias prefer. It also helps improve soil quality by adding probiotic microbes: tiny microorganisms that add organic content and boost soil’s structure. The ingredients in Dr. Earth are 100 percent natural and designed to encourage abundant blooming.
Among the included microbes are eight strains of ecto and endo mycorrhizae (mushroom-based components) that help plant roots withstand the slight drought conditions that can occur if a watering is inadvertently missed. The granules should be spread around the base, worked into the top inch or so of soil, and then watered thoroughly. For the best results, reapply Dr. Earth every 6 weeks.
Get the Dr. Earth’s Acid Lovers Organic Fertilizer on Amazon or at Ace Hardware.
Best Water-Soluble
Miracle-Gro Water Soluble Azalea, Camellia Plant Food

Pros
- Dissolves rapidly
- Offers instant boost of nutrients
- Acidifies soil
Cons
- Requires frequent application
Product Specs
- NPK analysis: 30-30-10
- Fertilizer type: Water soluble
- Added ingredients: Iron, boron, copper, manganese, molybdenum, zinc, and boric acid
This water-soluble Miracle-Gro fertilizer dissolves instantly in water to provide an immediate boost of nutrients for gardenias and other acid-loving plants, including azalea, camellia, and hydrangea. It features an NPK analysis of 30-30-10 for lush leaf growth, abundant bloom production, and healthy root development.
In addition, Miracle-Gro added trace minerals to assist in acidifying the soil for even better growth. The product can be mixed with water in a watering can and applied to foliage or poured directly around the plant’s base; it can be used in a garden hose dispenser for spraying large areas. Recommended application is every 7 to 14 days.
Get the Miracle-Gro Azalea and Camellia Plant Food on Amazon or The Home Depot.
Best Spikes
Jobe’s Azalea, Camellia & Rhododendron Fertilizer
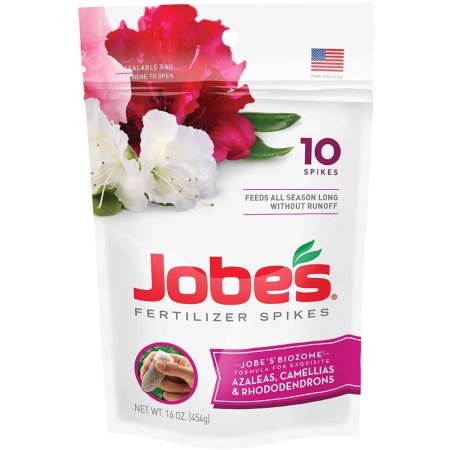
Pros
- Time-release feeding
- Feeds up to 8 weeks
- Simple to use
Cons
- Animals may dig them up
Product Specs
- NPK analysis: 9-8-7
- Fertilizer type: Spikes
- Added ingredients: None listed
Those looking for a fertilizer that suits gardenias and other acid-loving shrubs but doesn’t require frequent feeding may find Jobe’s Fertilizer Spikes to be just the ticket. This product contains an NPK analysis of 9-8-7 combined in tightly compressed spikes that dissolve gradually to provide a long-term, continuous supply of nutrients.
Push the spikes about an inch beneath the surface of the soil around the base of the plant (the number of spikes depends on plant size, so follow package directions) and water thoroughly. Jobe’s spikes will continue to feed gardenias, azaleas, and similar flowering shrubs for 8 weeks.
Get the Jobe’s Fertilizer Spikes on Amazon or True Value.
Also Consider
Down to Earth All Natural Acid Mix Fertilizer
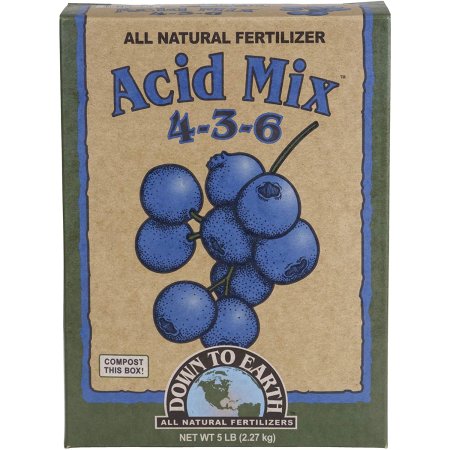
Pros
- Acidifies soil
- Requires only three feedings per year
- Improves soil content
Cons
- Pricey
Product Specs
- NPK analysis: 4-3-6
- Fertilizer type: Time-release granules
- Added ingredients: Trace minerals, calcium, magnesium, and sulfur
Down to Earth All Natural Acid Fertilizer is designed to feed acid-loving plants the nutrients they need while improving soil content in the process. The fertilizer has an NPK analysis of 4-3-6 and also provides trace minerals, calcium, magnesium, and sulfur to help acidify the soil and encourage nutrient uptake in the roots. Down to Earth has also amended its product with leonardite, a natural, mineral-based soil conditioner.
The manufacturer recommends applying these time-release granules in early spring, again in summer when blooms first appear, and once more in fall to promote root development and increase the plant’s resistance to winter temperatures.
Get the Down to Earth All Natural Acid Fertilizer on Amazon or at Walmart.
Our Verdict
While any of the fertilizers in this lineup are beneficial for feeding gardenias, Scotts Miracle-Gro Miracid Plant Food is an excellent choice for helping maintain the acidic soil gardenias prefer. For a budget-friendly fertilizer that goes a long way, we like Perfect Plants Gardenia Fertilizer; it comes in a concentrated liquid that makes up to 48 gallons.
What to Consider When Choosing the Best Fertilizer for Gardenias
The best food for gardenias is easily absorbed by the plant’s roots. It boosts both overall plant growth and blossom production, and it should encourage robust root development. Beneficial products are available in several types and formulations.
Types of Fertilizer
Today’s fertilizers come in various types, and some are better suited to specific growing conditions than others.
- Granular: Designed for gradual release, granular fertilizers resemble tiny pellets or grains of sand. They’re designed to be mixed into the top inch or so of the soil, where they gradually dissolve, providing the plants with a continuous supply of food for several weeks, depending on brand.
- Liquid: Liquid fertilizer comes in two forms: ready-to-use sprays for application directly on foliage or in concentrated form that’s mixed with water and sprinkled on the leaves or poured near the plant’s base. Plants absorb liquid fertilizers quickly—so they’re good for a quick boost—but they also drain out of the soil quickly, so they should be applied frequently, some even weekly.
- Spikes: Like granules, spikes provide time-released feedings. They’re inserted below the soil level near the plant base to feed the plant for up to 6 months.
- Water-soluble: This type of fertilizer comes in a grainy or powdery form that dissolves rapidly in water. It can be applied via a garden hose dispenser or mixed with water in a watering can and then poured over the plant or soil.
Soil Acidity and NPK Ratio
Understanding soil and fertilizer nutrient values helps gardeners achieve success. The pH scale measures soil acidity, running from 0 to 14, with 7 considered neutral. Numbers below 7 are progressively more acidic, and those higher than 7 are more alkaline. Gardenias grow best in soil with a pH content on the acidic side, ranging from about 5 to 6.5 on the pH scale.
Fertilizers today are identified by the amount of nitrogen (N), phosphorus (P), and potassium (K) they contain by content. For example, a fertilizer with an NPK analysis of 3-3-3 contains equal amounts of each nutrient. These three primary nutrients are designed to boost different parts of plant growth.
- Nitrogen: Responsible for boosting leaf development.
- Phosphorus: Encourages root development and flower production.
- Potassium: Helps ensure root uptake of nutrients and overall plant function.
Fertilizers made for gardenias may have an NPK analysis that’s higher in nitrogen, but nutrient levels vary from product to product, depending on other ingredients in the mix. Some of the best fertilizers for gardenias don’t contain any nitrogen, phosphorus, or potassium at all. Some include components such as sulfur or iron sulfate instead, which increases acidity in the soil and encourages the plant to absorb nutrients better.
The NPK ratio doesn’t tell the whole story when it comes to feeding gardenias; the nutrient source plays a role here as well. For example, the nitrogen found in fertilizer can come from dozens of sources, but if it’s sourced from nitrate (a salt of nitric acid) it will be of less benefit to acid-loving plants than if it’s sourced from ammonium (ammonia combined with a hydrogen ion).
Fortunately, you don’t need a degree in chemistry to choose the best fertilizer for gardenia plants. Instead, look for a fertilizer labeled for “acid-loving plants” or an “acidic fertilizer,” which will gear it toward other acid-loving plants, such as rhododendrons, azaleas, or blueberries. A fertilizer formulated for any acid-loving plant will be beneficial for gardenias.
However, gardenia enthusiasts shouldn’t expect acid-loving fertilizer alone to correct soil that’s too alkaline—it simply cannot do the trick. Instead, test soil before planting via an inexpensive pH test kit (available online and from garden centers). The tests come with suggestions for correcting pH balance, such as adding decomposed compost to the soil to increase acidity. When the soil is in the correct pH range, it’s time to plant gardenias.
Soil Type
Soil is one thing gardenias are especially picky about. These bushy plants like moisture, but they don’t like wet feet, meaning their roots can’t tolerate standing water. Planting gardenias in a raised flower bed can solve drainage problems, but the soil must also be light and resist compaction.
Clay-based soils are thick and heavy and do not permit gardenia roots to develop freely. Soils that are high in decomposed organic matter, such as compost and dried leaves, are lighter in weight, and the decomposed matter also helps raise the acidity level.
While there is not one specific best soil brand for gardenias, those looking to grow gardenias in containers should opt for a commercial potting soil containing peat moss, sand, and perlite—ingredients that encourage drainage while retaining adequate nutrients and moisture.
How We Chose the Best Fertilizer for Gardenias
To arrive at this lineup of the best fertilizers for gardenias, we extensively researched dozens of popular products. We eliminated any fertilizers not explicitly designed for acid-loving plants. Brand reputation was considered—for example, Miracle-Gro, a nationally known manufacturer with an excellent reputation for producing top-quality gardening products and aids. But startup and niche manufacturers weren’t eliminated if their products met the qualifications for being suitable for acid-loving plants. Finally, we looked at the product’s track record as cited by other gardeners who used it.
FAQs
Just a few open gardenia blossoms are sufficient for filling the air with a heady aroma, so it’s no surprise that gardeners and landscapers in moderate climates love growing this bushy plant. Still, gardenias require acidic growing conditions, and using the right fertilizer will help maintain that pH balance. Newbies to growing gardenias are likely to have some questions, the most common of which are answered below.
Q. When should I fertilize gardenias?
While manufacturer recommendations may vary, in general, feed gardenias from March to October but don’t feed during the plant’s resting season from November to February.
Q. How often should I fertilize gardenias?
This depends on the type of fertilizer, so follow manufacturer instructions. You may need to feed every week or so with liquid fertilizer or every few months with spikes.
Q. How do I fix yellow leaves on my gardenia plant?
Yellow leaves may be a sign of poorly draining soil. Consider amending the soil to increase drainage by adding sand, peat moss, or perlite.
Q. How often should I put coffee grounds on my gardenia?
Like Epsom salt, coffee grounds are acidic and can be used occasionally to supplement a good acid-loving fertilizer. Don’t overuse them, however—once a month is probably fine.
Q. Can I use Miracle Grow on gardenias?
Since so many people are familiar with the manufacturer yet err on the name, we kept the common misspelling in this question so folks can find the answer! And the answer is: Yes, our Best Overall pick for a gardenia fertilizer is Miracle-Gro Miracid Acid-Loving Plant Food.
The post The Best Fertilizers for Gardenias appeared first on Bob Vila.
]]>The post The Best Rooting Hormones appeared first on Bob Vila.
]]>Gardeners use multiple methods for growing new plants, including starting them from seeds, bulbs, and rhizomes. However, when the goal is to produce a plant identical to an existing plant, taking a cutting is usually the simplest way. A cutting is a 4- to 8-inch section of stem taken from a healthy plant and then put in water or a growing medium to root. Using cuttings to propagate plants is suitable for many types of plants, including some species of trees and bushes, but it’s especially well suited to the indoor gardening plants that tend to grow well from cuttings. Even those who aren’t familiar with advanced gardening concepts and are just trying to clone a favorite plant from a planter can often be successful with cuttings.
Cuttings from some plants, such as ivy and Dieffenbachia, root easily in plain water. Others need a little encouragement, and that’s where rooting hormone comes in. Rooting hormones are chemicals that stimulate the growth of new roots on cuttings. For example, the odds of growing a plant from a cutting taken from a cascading plant in a hanging planter increase when a rooting hormone is used. Finding the best rooting hormone is somewhat a matter of personal preference because most rooting hormone products are very similar.
Ahead, learn what to look for in a rooting hormone product and find out why the following are among the top choices of home gardeners. Our favorite is Clonex’s HydroDynamic Rooting Gel thanks to its ready-to-use formula and suitability for different types of cuttings. Each of the top picks below was selected after an in-depth review of the market and thorough product vetting.
- BEST OVERALL: Clonex HydroDynamics Rooting Gel
- RUNNER UP: Hormex Rooting Hormone Powder #3
- BEST BANG FOR THE BUCK: Bonide Bontone II Rooting Powder
- BEST POWDER: Garden Safe TakeRoot Rooting Hormone
- BEST LIQUID: Bonide Root & Grow Concentrate
- BEST GEL: Midas Hydro IBA Rooting Hormone Gel
- BEST CONCENTRATE: Hormex Vitamin B1 Rooting Hormone Concentrate
- ALSO CONSIDER: Hormex Rooting Hormone Powder #8

Product Comparison
| Type | Active Ingredients | Quantity | |
| Clonex HydroDynamics Rooting Gel | Gel | IBA | 3.4 fluid ounces |
| Hormex Rooting Hormone Powder #3 | Powder | IBA | 0.75 ounces |
| Bonide Bontone II Rooting Powder | Powder | IBA | 1.25 ounces |
| Garden Safe TakeRoot Rooting Hormone | Powder | IBA | 2-ounce container |
| Bonide Root & Grow Concentrate | Liquid | IBA and fertilizer | 1 quart |
| Midas Hydro IBA Rooting Hormone Gel | Gel | IBA | 4 ounces |
| Hormex Vitamin B1 Rooting Hormone Concentrate | Liquid | NAA | 4 fluid ounces |
| Hormex Rooting Hormone Powder #8 | Powder | IBA | 0.75 ounces |
Our Top Picks
To qualify as a top pick, a rooting hormone should be simple to apply, the instructions should be easy to understand, and the product should contain either IBA or NAA (see the Ingredients section below for more information) to promote root growth. The following five products feature different types of rooting hormone—including liquid, powder, and gel—but all are top performers popular with experienced gardeners. Any one of the products in the lineup will be an asset for propagating plants from cuttings.
Best Overall
Clonex HydroDynamics Rooting Gel

What We Like
- Gel formula seals cut tissue around stem
- Suitable for starting a variety of cuttings
- Requires no mixing, and there’s or mess
What We Don’t Like
- Gel can loosen and become watery if not stored correctly
Product Specs
- Type: Gel
- Active ingredients: IBA
- Quantity: 3.4 fluid ounces
Looking for the sticking power of an easy-to-use gel? Consider this option from Clonex that contains the active ingredient IBA for stimulating root growth. The gel seals the cut tissue around the stem, helping to protect it from rot while encouraging strong root development. The gel is suitable for use on different types of cuttings, including flowering species, woody plants, and fruit tree cuttings, among others.
The jar contains 3.4 fluid ounces, plenty for rooting dozens of cuttings. There’s no mixing or mess, just dip the stem in the gel and insert it into a moist growing medium.
Get the Clonex HydroDynamics rooting hormone at Amazon or Tractor Supply Co.
Runner Up
Hormex Rooting Hormone Powder #3

What We Like
- Comes in powder form that can bolster sagging cuttings
- Contains no added chemicals, dyes, or preservatives
- Can also boost root growth in transplants
What We Don’t Like
- Adheres better when dipping a cutting in water first
Product Specs
- Type: Powder
- Active ingredients: IBA
- Quantity: 0.75 ounces
To propagate new cuttings, consider this rooting powder from Hormex that helps prevent stem rot while stimulating new root development. The powder, which can also help strengthen and bolster sagging cuttings, is suitable for use on most plants that can be propagated from cuttings.
The active ingredient is IDA. The Hormex powder does not contain added chemicals, dyes, or preservatives, making it desirable for use on vegetables and fruit plants used in food production. In addition to treating cuttings, it is also beneficial for helping transplants adapt to a new location. Hormex #3 comes in a ¾-ounce jar.
Get the Hormex #3 rooting hormone at Amazon, Grow Generation, or Hormex.
Best Bang For The Buck
Bonide 925 Bontone Rooting Powder
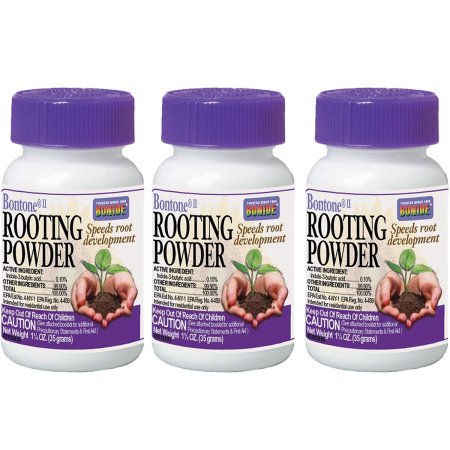
What We Like
- Can be used for many cutting types
- Also boosts growth of seeds and bulbs
- Can ease transplant shock
- Promotes healthy root production
What We Don’t Like
- Works best if cutting is dipped in water first
Product Specs
- Type: Powder
- Active ingredients: IBA
- Quantity: 1.25 ounces
Bonide’s rooting powder is well suited for helping establish healthy, robust roots on stem cuttings, but it’s also useful for encouraging strong growth when planting seeds and bulbs. The active ingredient, IBA, stimulates root growth on most cuttings, including softwoods, hardwoods, vegetables, and flowering varieties.
It comes in powder form and can also be used to coat seeds and bulbs by sprinkling it directly on them before planting. When transplanting a plant to a new location, users can also mix a teaspoon, or so, of the powder in the growing medium to reduce transplant shock and help the plant adapt. Each jar contains 1.25 ounces, enough for a few dozen cuttings or transplants.
Get the Bonide rooting hormone at Amazon,The Home Depot, or Walmart.
Best Powder
Garden Safe TakeRoot Rooting Hormone
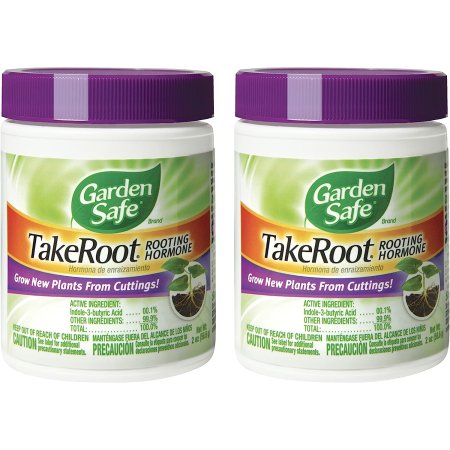
What We Like
- Suitable for use in gardens, greenhouses, and residential areas
- Stimulates at the root
- Easy to use and more affordable than other powders
What We Don’t Like
- Low concentration formula
Product Specs
- Type: Powder
- Active ingredients: IBA
- Quantity: 2-ounce container
For a concentrate that can help your plants grow strong, look no further than the Garden Safe TakeRoot Rooting Hormone. This pick comes in a low-concentrate, powdered form that stimulates plant cuttings at the root.
This easy-to-use powdered formula is made with indole-3-butyric acid, a compound that is naturally occurring in plants. This ingredient is safe to use on African violets, roses, and other plants that are grown in residential, greenhouse, and garden spaces. It should be noted that the roots should be moistened before applying the hormone.
Get the Garden Safe rooting hormone at Amazon (2 pack) or Lowe’s.
Best Liquid
Bonide Root & Grow Concentrate
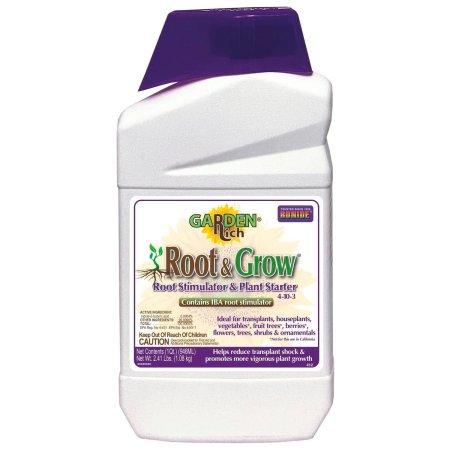
What We Like
- Helps promote root growth and boost plant growth
- Makes up to 9 gallons of fertilizer/growth hormone
- All-in-one fertilizer/rooting hormone
What We Don’t Like
- Contains a smaller amount of IBA
Product Specs
- Type: Liquid
- Active ingredients: IBA and fertilizer
- Quantity: 1 quart
Bonide Root & Grow concentrate is a 4-10-3 (4 percent nitrogen, 10 percent phosphate, and 3 percent potash) fertilizer with IBA growth hormone. It helps reduce transplant shock and promotes vigorous plant growth. The 1-quart concentrate will make up to 9 gallons of fertilizer/rooting stimulator. It instantly mixes with water, and the diluted solution is applied directly onto the soil and roots.
The rooting hormone fertilizer combo works on all types of plants, including vegetables, trees, shrubs, and houseplants. It’s designed to be used while seeding or on transplants to help stimulate early root formation. It also works well as a rooting hormone for plant cuttings due to the IBA growth hormone in the mix. It mixes at a ratio of 3½ tablespoons per gallon of water—so a quart can last an entire growing season. The Bonide Root & Grow concentrate is perfect for gardeners who want an all-in-one product that will give their plants a boost at planting time.
Get the Bonide Root & Grow rooting hormone at Amazon, Ace Hardware, or The Home Depot (128 ounces).
Best Gel
Midas Hydro IBA Rooting Hormone Gel

What We Like
- Concentrated formula can help reduce cloning time
- Gel is easier to use than powder products
- Large 4-ounce container
What We Don’t Like
- Used gel should not be poured back into the container for future use
Product Specs
- Type: Gel
- Active ingredients: IBA
- Quantity: 4 ounces
Packed in a convenient 4-ounce container, this cutting-edge rooting hormone gel from Midas Hydro is formulated with a high concentration of indole-3-butyric acid, the active ingredient known for its powerful rooting properties. The strong IBA formula gel can help reduce cloning time, enabling gardeners to achieve stronger and healthier roots in no time. Whether you prefer water propagation, general hydroponics, or other methods, Midas Hydro rooting gel is compatible with various techniques, providing versatility and ease of use.
For users who dislike the mess involved with rooting powder, a gel option may be a cleaner and more user-friendly choice. Note that used gel cannot be reused, though, so users may go through it quicker than they anticipate.
Get the Midas Hydro rooting hormone at Amazon, Walmart, Etsy, or Midas Hydro.
Best Concentrate
Hormex Vitamin B1 Rooting Hormone Concentrate
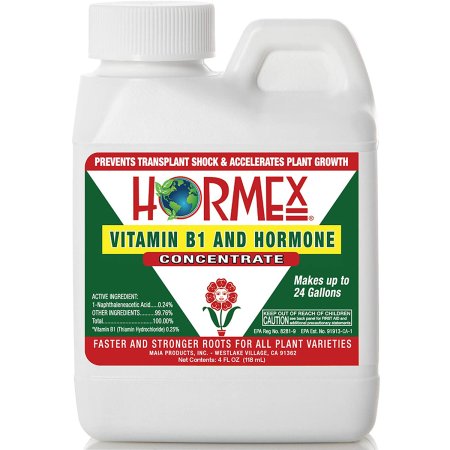
What We Like
- Affordable concentrated liquid
- Includes vitamin B1 to add nutrients
- Can also be diluted for use on transplants
What We Don’t Like
- Strong concentrate might require mixing with water
- NAA is a synthetic chemical
Product Specs
- Type: Liquid
- Active ingredients: NAA
- Quantity: 4 fluid ounces
Also from Hormex, this rooting hormone features the active ingredient NAA and comes in a concentrated liquid form that will treat dozens of cuttings. To use, dip a fresh cutting into the undiluted rooting hormone and insert the cutting in a moist growing medium. For an added root-boosting effect, mix 1 teaspoon of Hormex concentrate in 1 gallon of water and use the solution to saturate the soil around the new cutting.
When transplanting newly rooted plants, use the same liquid solution for watering to reduce transplant shock. The inclusion of Vitamin B in the Hormex product adds a vital nutrient to the soil for robust plant growth. Best of all, the rooting hormone is available at an attractive price point.
Get the Hormex Vitamin B1 rooting hormone at Amazon or Hormex.
Also Consider
Hormex Rooting Hormone Powder #8
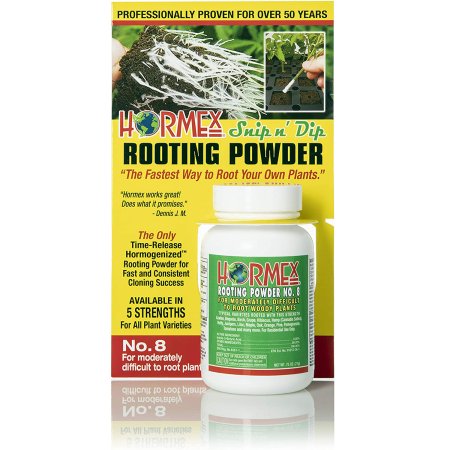
What We Like
- Suitable for cuttings from most plants
- Package contains plenty of powder
- Free of dyes and preservatives
What We Don’t Like
- Requires dipping a cutting in water before dipping in powder
Product Specs
- Type: Powder
- Active ingredients: IBA
- Quantity: 0.75 ounces
For quick rooting of most cuttings, opt for a rooting hormone like this one that contains the active chemical IBA. Suitable for use in most plants, including greenwood and softwood cuttings, this Hormex option is formulated to promote the development of healthy roots. The product comes in powder form for easy application.
A single jar contains 0.75 ounces of powder—plenty for rooting dozens of cuttings. For best results, take cuttings only from the current season’s growth from a healthy mother plant. Dip the end of the cutting in water before dipping it in the powdered rooting hormone.
Get the Hormex #8 rooting hormone at Amazon or Hormex.
Jump to Our Top Picks
How We Chose the Best Rooting Hormones
Use of a rooting hormone can help gardeners duplicate favorite plants from cuttings. Although most rooting products are similar, we looked at types and some features of products to help buyers choose based on personal preference. This list includes liquid, gel, and powder formulas and a choice of the two most common active ingredients. We also considered application methods and ease of use.
What to Consider When Choosing a Rooting Hormone
Rooting hormone products are relatively inexpensive and range from around $13 for a bottle that will treat up to 50 cuttings to $25 (or more) for a large container that will treat more than 100 cuttings. The most significant difference is in the type of product and whether it contains added ingredients, such as nutrients or fertilizers intended to help the plant grow and thrive once the cutting develops roots.
Form
Rooting hormone products come in three main types: liquid, gel, and powder. No matter the type, all three are used in a similar manner: the gardener dips the end of the cutting in the hormone product and then puts the cutting in a moist, growing medium.
- Liquid: Bottles of liquid rooting hormone come in either ready-to-use formulations or concentrated formulations that require mixing with water. Some gardeners feel liquid offers the best coverage since it can seep into tiny pores in the cutting.
- Gel: This rooting hormone adheres well to cuttings and provides a slightly thicker coating of the hormone than liquid varieties, which may offer more root-boosting stimulus.
- Powder: One of the most common types of root hormone products available, powder is simple to use and offers a thick layer of root-stimulating chemical. Before dipping the cutting in the powder, many gardeners will dip the cutting in water, so the root hormone adheres better.
Ingredients
The majority of rooting hormone products on the market today contain one of two common chemicals, IBA or NAA, both of which are synthetic forms of natural plant hormones known to stimulate root growth.
- Indole-3-butyric acid (IBA): A chemical form of the plant hormone, auxin, IBA triggers root growth and is found in many commercial rooting hormone products of all types.
- Naphthaleneacetic acid (NAA): Similar to IBA, NAA is a synthetic chemical formulation that stimulates root growth and retards rotting. It is often found in all three types of rooting products.
- Added nutrients: While IBA and NAA are the active ingredients in rooting compounds, some products contain additional nutrients, such as nitrogen, to boost leafy green growth or have various vitamins to help bolster floral production. These added ingredients can be helpful, but some gardeners prefer to use only rooting compound, so they can add the exact nutrients they choose to the soil later.
Application
The information necessary for plant propagation in cuttings is available in gardening books, but, for the most part, the process is straightforward and simple enough for even newbie gardeners. The following offers an idea of the basic techniques used for taking cuttings and applying rooting hormone. Before proceeding, do a little research on the intended plant. While cuttings can successfully propagate many plants, others require different methods. Some cuttings should be from greenwood (new, supple growth), while others should be taken from the older, hardwood portions of a stem. Knowing the best method of propagation for a specific plant will increase the odds of success.
- Take a 4- to 8-inch stem cutting from a healthy plant.
- Strip all but one or two top leaves from the stem.
- Bruise the end of the stem by slightly crushing it or take a sharp knife and scrape away some of the stem’s outer covering. This step helps the rooting hormone penetrate more efficiently.
- Dip about 2 inches of the stem in the rooting compound. If you’re using a powdered mixture, dip the cutting in water first, so the powder adheres well.
- With a pencil or stick, make a hole about 2 inches deep in the growing medium and insert the treated end of the cutting.
- Press the growing medium around the cutting and cover the whole pot or tray with plastic to keep moisture in while the cutting takes root. By keeping the cutting in an enclosed container, the soil will stay moist, which is a requirement for roots to develop. Alternately, consider starting the cutting in a self-watering planter where it will receive a consistent amount of moisture.
FAQs
The application of rooting hormone increases the odds of success when propagating with cuttings. The product stimulates root growth and reduces the risk of stem rot. For gardeners new to the product, a few questions are to be expected.
Q. How does a rooting hormone work?
A rooting hormone stimulates root growth at the cut end of a stem.
Q. Is rooting hormone necessary for cuttings?
Not always, but it’s handy to have around. Some plants, especially indoor plants, can root in just plain water.
Q. How long will my rooting hormone take to work?
Depending on the plant, roots should start to develop within two to six weeks. Research the plant you’re trying to propagate for a specific timeline.
Q. Do rooting hormone solutions work for hydroponic plants?
Rooting hormones are often used in hydroponic systems to stimulate plant growth.
The post The Best Rooting Hormones appeared first on Bob Vila.
]]>The post The Best Fertilizers for Hydrangeas appeared first on Bob Vila.
]]>A perennial favorite in the landscape, hydrangea is hardy in a wide range of growing zones and is a relatively easy keeper. While hydrangeas vary in form, color, and bloom time, they are known for the large flower heads that cover the plants—so large, in fact, the blooms often weigh down the stems. Once established, the hydrangea is one of the summer season’s most impressive shrubs, but it needs fertilizer to reach its full potential.
The best fertilizer for hydrangea plants should contain a blend of nutrients to encourage healthy root and branch development while boosting the color, size, and quantity of flower heads. Don’t just grab a package of garden fertilizer off the shelf, though.
We recommend Espoma Organic Holly-Tone 4-3-4 as our top pick for its versatility, organic formulation, and availability. There are other common hydrangea fertilizer options on the market, including Miracle-Gro Acid-Loving Plant Food and JR Peters Jacks Classic Blossom Booster Fertilizer. However, they do not meet our sustainability guidelines and are not recommended in our top picks due to their potentially harmful ingredients and negative impact on the environment.
Learn what to look for when choosing a fertilizer for hydrangeas, and find out why the following products can help this impressive plant become a focal point in the landscape.
- BEST OVERALL: Espoma Organic Holly-Tone 4-3-4
- RUNNER-UP: Down to Earth All Natural Acid Mix Fertilizer
- BEST BANG FOR THE BUCK: Miracle-Gro Performance Organics Blooms Plant Nutrition
- BEST FOR BLUE: Dr. Earth Acid Lovers Organic Acid Fertilizer
- MOST VERSATILE: Dr. Earth GL61100518430 Fertilizer
- BEST ACIDIFIER: Espoma Organic Soil Acidifier

Before You Buy a Fertilizer for Hydrangeas
Before buying fertilizer for hydrangeas, it’s important to perform a soil test to determine the soil’s pH level and check for nutrient deficiencies. Hydrangea blooms will vary in color based on the acidity of the soil, and if the pH level is too high or too low, it can affect the plant’s ability to absorb essential nutrients from the soil. A soil test can also reveal if the soil lacks certain nutrients, such as nitrogen, phosphorus, or potassium, which can affect the plant’s growth and overall health. Knowing the soil’s pH level and nutrient content enables shoppers to choose the appropriate fertilizer and make any necessary amendments to ensure hydrangeas thrive.
Product Comparison
| Type | NPK Ratio | Quantity | |
| Espoma Organic Holly-Tone 4-3-4 | Granular fertilizer | 4-3-4 | Two 4-pound bags |
| Down to Earth All Natural Acid Mix Fertilizer | Liquid fertilizer | 4-3-6 | 5 pounds |
| Miracle-Gro Performance Organics Blooms Plant Nutrition | Water-soluble fertilizer | 8-8-8 | 1 pound |
| Dr. Earth Acid Lovers Organic Acid Fertilizer | Granular fertilizer | 3-4-3 | 4 pounds |
| Dr. Earth GL61100518430 Fertilizer | Granular | 3-9-4 | Two 4 pound bags |
| Espoma Organic Soil Acidifier | Soil acidifier | N/A | 6 pounds |
Our Top Picks
The best fertilizer for hydrangeas will vary depending on the gardener’s goals for this spectacular shrub. Any one of the following fertilizers is well suited for use on hydrangeas, but keep in mind that more is not necessarily better when it comes to fertilizing plants. Follow application instructions carefully. Do not overfeed hydrangeas; rather, err on the side of too little rather than too much and use fertilizer in combination with other soil amendments and an optimal growing location.
Best Overall
Espoma Organic Holly-Tone 4-3-4
What We Like
- Suitable for a wide variety of acid-loving plants
- Plants only need to be fertilized twice a year
- Available from major retailers at an affordable price
What We Don’t Like
- Might need extra applications on alkaline soil
- Smaller box than expected
Product Specs
- Type: Granular fertilizer
- NPK Ratio: 4-3-4
- Quantity: Two 4-pound bags
The best overall pick is an acid-based fertilizer from a well-known and respected manufacturer in the gardening industry. A granular plant food designed for hydrangeas and other plants that prefer slightly acidic soil, this fertilizer comes in a 4-pound bag of granules. It features a 4-3-4 N-P-K ratio to help hydrangeas get off to a robust start in spring and grow vigorously throughout the summer.
The plant food’s acid formulation gently reduces the soil’s pH level, increasing the chance the hydrangea flowers will be a deep pink, purple, or blue tone. Along with hydrangeas, this fertilizer works well for holly, azaleas, rhododendrons, blueberries, evergreens, strawberries, camellias, and other plants that thrive in acidic soils.
Get the Espoma Organic Holly-Tone 4-3-4 at Amazon or The Home Depot.
Runner-Up
Down to Earth All Natural Acid Mix Fertilizer
What We Like
- Suitable for a wide variety of acid-loving plants
- Contains macro-nutrients as well as magnesium and calcium
- Encourages colorful blooms
What We Don’t Like
- Must be applied monthly for the best results
Product Specs
- Type: Liquid fertilizer
- NPK Ratio: 4-3-6
- Quantity: 5 pounds
This acidic, granular fertilizer comes in a 5-pound bag and is suitable for use on many types of flowers and plants. One application will provide hydrangeas with a steady 4-3-6 N-P-K diet for about a month. In addition to the N-P-K nutrients, the fertilizer contains additional beneficial ingredients like calcium and magnesium as well as sulfur, which helps to make the soil more acidic.
Designed to encourage large, bountiful blooms, this fertilizer should be spread around the base of the plant at a ratio of 1 pound per 1 inch of trunk diameter. Along with hydrangeas, it’s a great pick for feeding rhododendrons, azaleas, camellias, evergreens, blueberries, raspberries, and strawberries.
Get the Down to Earth All Natural Acid Mix Fertilizer at Amazon.
Best Bang For The Buck
Miracle-Gro Performance Organics Blooms Nutrition

What We Like
- Includes both macro- and micro-nutrients
- Suitable for a variety of flowering plants
- Water-soluble fertilizers are easy to apply evenly
What We Don’t Like
- Must be applied weekly for the best results
Product Specs
- Type: Water-soluble fertilizer
- NPK Ratio: 8-8-8
- Quantity: 1 pound
There’s no need to spend a bundle on plant food. This affordable option features an 8-8-8 N-P-K formulation that promotes more blooms per shrub, along with vibrant flower heads. This is an all-purpose blossom booster that’s suitable for use on a wide variety of perennial and annual blooming plants, including hydrangeas.
It provides various minerals, including copper, calcium, and iron, to supplement common nutrient deficiencies. The water-soluble formulation should be applied every 7 days throughout the growing season for the biggest, brightest blooms and healthiest plants.
Get the Miracle-Gro Performance Organics Blooms Plant Nutrition at Amazon, Lowe’s, or The Home Depot (2.5 pounds).
Best For Blue
Dr. Earth Acid Lovers Organic Acid Fertilizer
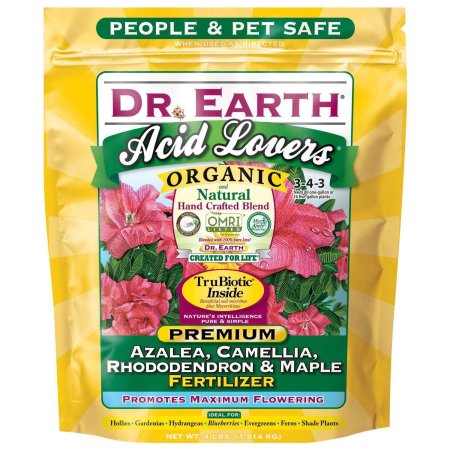
What We Like
- Continuously feeds acid-loving plants for months
- Contains macro-nutrients, probiotics, and microbes
- Encourages vibrant blue blooms
What We Don’t Like
- Strong smell; could attract dogs or insects
Product Specs
- Type: Granular fertilizer
- NPK Ratio: 3-4-3
- Quantity: 4 pounds
Dr. Earth’s acid fertilizer contains only natural ingredients, including alfalfa meal, bone meal, and kelp meal, in a 3-4-3 N-P-K formulation. In addition to nutrients, it contains select strains of probiotics that improve soil health and increase plant performance. Some of its ingredients are designed to reduce the soil’s pH level, too, making the product suitable for use on all acid-loving plants and increasing the chances that hydrangeas will produce blue flowers.
For the best results, apply in mid-to-early spring and then every 60 days afterward. The granules should be mixed with the soil and watered well.
Get the Dr. Earth Acid Lovers Organic Acid Fertilizer at Amazon or The Home Depot.
Most Versatile
Dr. Earth GL61100518430 Fertilizer
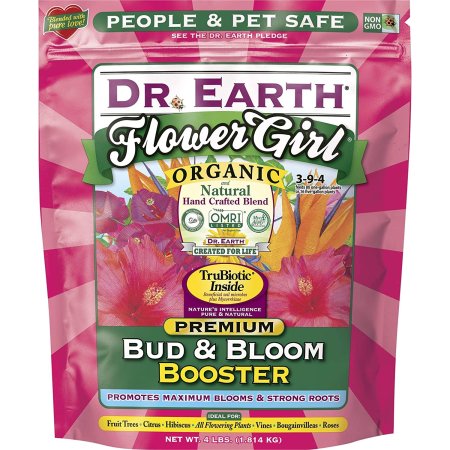
What We Like
- Suitable for use on a variety of plants, trees, and shrubs
- Supplemented with probiotics for optimal overall plant health
- GMO-free formula
What We Don’t Like
- May encourage gnat infestations
Product Specs
- Type: Granular
- NPK ratio: 3-9-4
- Quantity: Two 4 pound bags
Dr. Earth Flower Girl has a 3-9-4 NPK analysis and includes additional probiotics to boost overall plant health, making it a great option for feeding bulbs, tubers, corms, and rhizomes. It contains eight strains of ecto- and endomycorrhizae, which work together to increase drought tolerance and provide enhanced nutrient availability.
The 4-pound bag of granules is designed to provide slow-release nutrients for several months after the initial application. The formula includes ingredients like fish bone meal, alfalfa meal, feather meal, soft rock phosphate, and mined potassium sulfate, and is GMO-free. It’s free of chicken manure and sewage sludge.
Get the Dr. Earth GL61100518430 Fertilizer at Amazon or The Home Depot.
Best Acidifier
Espoma Organic Soil Acidifier
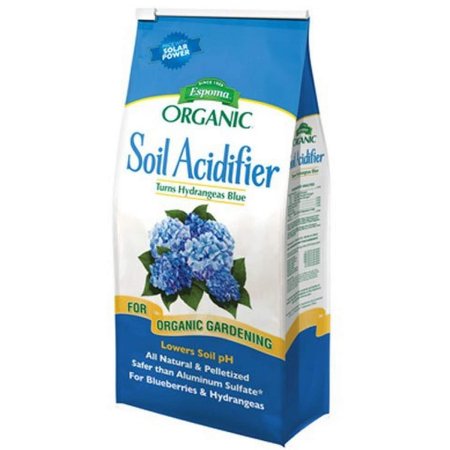
What We Like
- Amends soil for acid-loving plants; creates blue blooms
- Doesn’t conflict with other fertilizers
- Only needs to be applied every 60 days
What We Don’t Like
- Does not provide plant nutrients
Product Specs
- Type: Soil acidifier
- NPK Ratio: N/A
- Quantity: 6 pounds
Gardeners and landscapers looking to create highly desirable blue flower heads need look no further than this soil acidifier from Espoma Soil. While not a strict fertilizer in the common sense—Espoma does not come with an N-P-K ratio—the product does contain elemental sulfur and gypsum that act together to lower the soil’s pH level, encouraging blue hydrangea blooms. For the best results, apply Espoma granules around the plant’s base in early spring before flowerhead buds develop and reapply every 60 days.
It comes in a 6-pound bag and is suitable for use on hydrangeas and other acid-loving plants. Be aware that pH levels adjust gradually. Depending on the soil’s current pH level, two or more applications may be necessary before the acidity is low enough to produce blue flower heads. This product can be used in conjunction with an all-purpose fertilizer to encourage robust plant health as well as blue flower heads.
Get the Espoma Soil Acidifier at Amazon or The Home Depot.
Or, DIY Your Own Fertilizer for Hydrangeas
One of the most effective and sustainable ways to make fertilizer for hydrangeas is by making compost from household scraps. Composting is a process of breaking down organic materials, such as fruit and vegetable scraps, leaves, and grass clippings, into nutrient-rich soil amendments that can be used to fertilize plants.
Start by collecting organic materials that are rich in nutrients, such as banana peels, eggshells, coffee grounds, and fish emulsion. Add them to an outdoor compost bin and mix in leaves and grass clippings.
Once the compost bin includes a good mix of materials, add some water and turn the compost pile regularly to provide oxygen and ensure even decomposition. As the compost breaks down, it will transform into a nutrient-rich soil amendment that can be added to the soil around the hydrangeas.
Not only is making compost a great way to provide hydrangeas with natural and healthy fertilizers, but it also helps to reduce waste and minimize environmental impact.
Jump to our Top Picks
How We Chose the Best Fertilizers for Hydrangeas
To keep hydrangeas growing and blooming bountifully, you need a fertilizer or soil amender that’s made specifically for these acid-loving plants. Our recommendations include a variety of options to help improve the health and beauty of these plants. We’ve selected traditional water-soluble fertilizers that help stimulate root growth, granular fertilizers, and soil amenders that help increase the soil’s acidity to achieve blue flowers.
To qualify as a top pick, a fertilizer should provide the nutrients hydrangeas need for developing strong branches, healthy foliage, and beautiful blooms. Our favorite options effectively increase the bloom rate of hydrangeas, and gardeners can choose between organic and non-organic products.
What to Consider When Choosing a Fertilizer for Hydrangeas
Like all plants, hydrangeas draw nutrients from water, sunlight, air, and soil, but not all soil contains the nutrients necessary for robust growth and flower development. That’s where hydrangea fertilizer can help. The best fertilizer for any individual hydrangea plant will depend on the gardener’s preferred method of delivering the fertilizer to the soil, and the condition of the existing soil.
Type
Hydrangea fertilizers come in three primary forms: liquid, granule, and compressed spikes. All three offer slightly different benefits.
- Liquid: Available as either a concentrate for diluting with water or a ready-to-use product, liquid fertilizers are quickly absorbed by the plant’s roots and leaves for a fast boost of nutrients. Depending on the product, liquid fertilizers are either sprayed on the plant’s foliage or poured around the plant’s base.
- Granules: One of the most common forms of fertilizers, granule fertilizers can either be dissolved in water and poured on the soil or sprinkled around the plant’s base. Time-release granules, which have a polymer coating, should be worked into the soil around the hydrangeas’ base with gardening tools. They dissolve slowly and offer the plant a long-term supply of nutrients.
- Spike: Like time-release granules, gardeners often use spikes if they’re looking for a long-term plant food. This fertilizer is compressed and shaped into hardened spikes that the gardener pushes into the soil around the plant’s base. Over the course of 2 or 3 months, the spikes slowly dissolve and provide nutrients for the plants.
Organic vs. Inorganic Fertilizers
Fertilizers are made up of either organic or inorganic ingredients.
- Inorganic: This type of fertilizer contains chemical and synthetic nutrients. It has been formulated in a laboratory to produce specific growing results, such as larger or more abundant blooms or an increased acidity level, which is desirable when growing hydrangeas. Inorganic fertilizers may also include time-released ingredients that dissolve slowly and feed the plant over a period of weeks or months. We’ve opted to exclude inorganic fertilizers from our recommendations because of their potentially negative impact on the environment.
- Organic: Many gardeners prefer using only natural fertilizers that contain ingredients such as earthworm castings, poultry manure, or compost. Organic fertilizers contain no chemicals, and they may not be as strong as inorganic fertilizers. They may, however, help increase soil health in addition to providing nutritional value. For example, compost doesn’t just provide the plant with essential nutrients; it also helps heavy clay soil drain better.
N-P-K Ratio
Commercial fertilizers are labeled by the amounts of nitrogen (N), phosphorus (P), and potassium (K) they contain by weight, which appears on the package as the N-P-K ratio. Hydrangeas will benefit from an all-purpose, balanced fertilizer, such as a 10-10-10 N-P-K, that contains equal amounts of each nutrient. A balanced fertilizer will encourage healthy foliage as well as bountiful blooms. For gardeners explicitly seeking to increase the blooms’ quantity and size, a fertilizer with a higher concentration of phosphorus (the middle number), such as a 10-20-10 N-P-K, may be beneficial.
Plant Needs
The hydrangea will tolerate partial sun, but it prefers a mostly shady spot in the yard. When possible, locate the shrub where it will not receive direct sun in the late afternoon in hot climates. Morning sun is usually acceptable and well tolerated. In northern climes where afternoon temps are moderate, some hydrangeas will also thrive if they receive some early afternoon sun. It’s the combination of hot temperatures and blazing sun that can take a toll on these spectacular shrubs. Hydrangeas like a permanent spot in the landscape, so planting them in pots or grow bags might not allow the shrubs to reach their full potential.
Soil Condition
Well-drained soil that’s high in organic matter is optimal for growing hydrangeas. Heavy, clay-type soil and sandy soil will benefit from additional organic matter, such as compost or dried leaves. By adding organic matter, the gardener will increase drainage and enhance the soil’s phosphorus level, which is favorable to producing colorful hydrangea blooms. Before amending soil, it’s a good idea to take a sample of the existing soil to a local extension office for testing. The test results will include recommendations for creating healthy, balanced soil.
Color and pH
White hydrangea species produce only white flower heads, but an interesting thing happens to colored hydrangeas when the gardener alters the soil’s pH level. The more acidic the soil’s pH, the more likely it is that the hydrangea flowers will be blue. The pH scale ranges from 0 to 14, with 7 considered neutral. Levels higher than 7 are considered alkaline, while levels lower than 7 are considered acidic. The greater the pH variation, the more pronounced the hydrangea color change.
- Neutral: At a neutral soil pH level, around 7, colored hydrangea will produce flowers in shades of pink to deep pink.
- Alkaline: At pH levels higher than 7, hydrangea flowers are a light, clear pink hue.
- Slightly acidic: When the soil’s pH is around 6, the blooms take on a dark pink or even slightly red or purple hue.
- Strongly acidic: When the soil’s pH level is lower than 6, hydrangea blooms tend to turn blue. This is the most desirable color for many gardeners, who regularly amend the soil to achieve beautiful blue flower heads.
When shopping for hydrangea fertilizers, you may notice that a good number of them are called acidic fertilizers. In addition to the product’s N-P-K nutrients, acidic fertilizers contain pH-changing additives, such as sulfur or aluminum sulfate. For those who strive for blue flower heads, it’s worthwhile to purchase a pH soil tester to monitor the soil’s pH level.
FAQs
Hydrangeas grow in most regions of the country and are prized for their spectacular blooms, so it’s natural to have a few questions about how to make the most of these eye-catching shrubs.
Q. When do hydrangeas start to bloom?
In warm climates, hydrangeas start to bloom in early summer. In northern climes, they bloom in mid-summer.
Q. What is the best time to fertilize hydrangeas?
It depends on the type of fertilizer. It’s a good idea to give hydrangeas a first feeding in mid-to-late spring. After that, apply additional fertilizer at intervals recommended by the manufacturer. Time-released fertilizers might need to be applied only once every 3 months, while other types should be applied every 1 to 2 weeks.
Q. How do I fertilize hydrangeas?
It’s essential to follow the directions on the product label. Liquids can be diluted and poured around the plant’s base or sprinkled on the foliage, while granules are often worked into the top inch or so of the soil. Fertilizer spikes are inserted near the base of the plant and pushed beneath the soil’s surface.
The post The Best Fertilizers for Hydrangeas appeared first on Bob Vila.
]]>The post Use Your Lawn Mower Year-Round With This Handy Attachment appeared first on Bob Vila.
]]>Best Overall

Husqvarna E-Lift 50" 2-Stage Snow Thrower Attachment
Best Bang for the Buck

Husqvarna Manual 42" 2-Stage Snow Thrower Attachment
Best for Large Driveways
NorTrac 3-Pt. 72-76" Snow Blower Attachment
Lawn mower snow blower combos offer a practical way for homeowners to get more out of their equipment, allowing them to cut grass in warmer months and add an attachment to blow snow in the winter season. But since this type of driveway- and lawn-maintenance equipment isn’t exactly cheap, it’s smart to spend time researching their key features to ensure you buy the right one for your needs.
To simplify this process, we reviewed five excellent models and consulted a snow-removal expert for additional insights. Based on our efforts, we selected the Husqvarna E-Lift 50″ 2-Stage Snow Thrower Attachment as our top pick for its electric lift, toolless hookup and removal, and easily adjustable deflector and chute. Keep reading to compare our picks for the best lawn mower snow blower combos and learn which features matter most when choosing between them.
- BEST OVERALL: Husqvarna E-Lift 50″ 2-Stage Snow Thrower Attachment
↓Jump to Review - BEST BANG FOR THE BUCK: Husqvarna Manual 42″ 2-Stage Snow Thrower Attachment
↓Jump to Review - BEST FOR LARGE DRIVEWAYS: NorTrac 3-Pt. 72-76″ Snow Blower Attachment
↓Jump to Review - BEST ELECTRIC LIFT: Husqvarna E-Lift 42″ Snow Blower Attachment
↓Jump to Review - ALSO CONSIDER: NorTrac 3-Pt. 50-54″ Snow Blower Attachment
↓Jump to Review
Before You Buy a Lawn Mower Snow Blower Combo
Lawn mower snow blower combos are essentially large snow plow blades that turn a riding mower into a snow plow. Folks in warmer climates and areas that only get a small amount of snow can likely skip them in favor of a simple shovel or cordless snow blower. On the other hand, those who have large properties and see significant snowfall each year (and already own a garden tractor) may find that these attachments make their lives much easier.
Still, since these units are typically several feet wide, weigh hundreds of pounds, and cost over $2,000, users will want to carefully consider compatibility, ease of attachment and removal, and storage space as part of the purchasing process. Also, if you don’t already own a riding mower, this will increase the cost, though you may be able to get a good deal on a used riding mower. Still, be careful the attachment you choose will work with your mower, as small lawn tractors may not have enough oomph to support them or may lose traction if the machine is too front-heavy. Also, some lawn mower snow blower combos are only compatible with mowers of the same brand.
When it comes time to add the attachment to your mower, you will need to be knowledgeable and strong enough to remove the mower’s deck assembly and replace it with a pulley system that operates the snow blower. To make the installation and removal process easier, you may want to look for a model that runs off of your tractor’s power take-off (PTO) system.
| Product Name | Stage | Clearing Capacity | Compatibility |
| Husqvarna E-Lift 50″ 2-Stage Snow Thrower Attachment | 2-stage | 50 inches | Fits all Husqvarna lawn tractors |
| Husqvarna Manual 42″ 2-Stage Snow Thrower Attachment | 2-stage | 42 inches | Fits all Husqvarna lawn tractors |
| NorTrac 3-Pt. 72-76″ Snow Blower Attachment | 2-stage | 72 to 76 inches | 35- to 50-hp lawn tractors, category 1 hitch |
| Husqvarna E-Lift 42″ Snow Blower Attachment | 2-stage | 42 inches | Fits all 2006 and newer Husqvarna tractors |
| NorTrac 3-Pt. 50-54″ Snow Blower Attachment | 2-stage | 50 to 54 inches | 16- to 35-hp lawn tractors, category 1 hitch |

Our Top Picks
Each riding mower snow thrower attachment that made our list is one of the best options available to turn your lawn tractor into a snow plow.
Best Overall
Husqvarna E-Lift 50" 2-Stage Snow Thrower Attachment
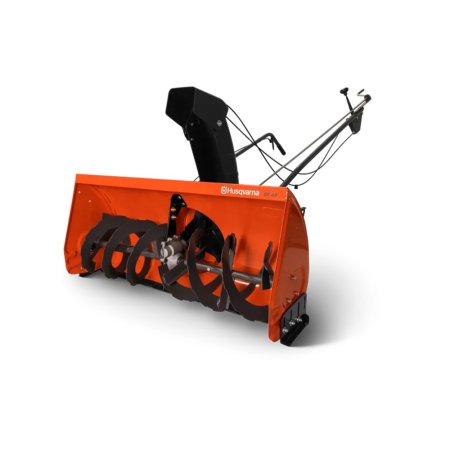
What We Like
- Replaceable wear plate and skid shoes
- Toolless hookup and removal (after initial installation)
- Deflector and chute angle adjust from the seat
What We Don’t Like
- Wheel weights and chains recommended
Specs
- Stage 2-stage
- Clearing capacity: 50 inches
- Compatibility Fits all Husqvarna lawn tractors
Folks looking for a lawn mower snow blower combo with all the features should check out Husqvarna’s E-Lift Snow Thrower Attachment. This snow blower has a 50-inch clearing capacity, which is enough for the typical Folks looking for a lawn mower snow blower combo with all the features should check out Husqvarna’s E-Lift 2-stage snow thrower attachment. This riding snow thrower has a 50-inch clearing capacity that’s more than enough for the typical driveway as well as a two-stage setup that allows it to handle heavy, deep snow.
This lawn tractor with snow blower attachment got the award for best overall since it has a few extra features that make it especially desirable. Once initially installed, it can be hooked up or removed without tools. Users can raise and lower the snow blower and adjust the chute angle and deflector right from the seat. It’s also compatible with most Husqvarna models, though the manufacturer recommends adding wheel weights and chains to maintain traction.
Get the Husqvarna 50″ lawn mower snow blower combo at Lowe’s or Husqvarna.
Best Bang for the Buck
Husqvarna Manual 42" 2-Stage Snow Thrower Attachment
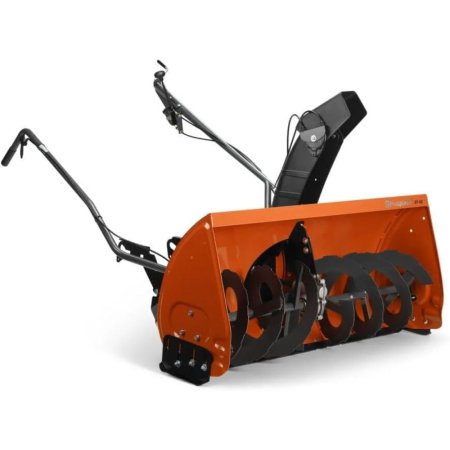
What We Like
- Works as a snow blower for gravel driveways
- 180-degree adjustable chute
- Toolless attachment and removal after initial installation
What We Don’t Like
- Manual lift
- Initial installation is easier with at least 2 people
Specs
- Stage 2-stage
- Clearing capacity 42 inches
- Compatibility Fits all Husqvarna lawn tractors
The Husqvarna 42-inch manual lift snow thrower attachment is a two-stage option with a universal-fit design that works with all of the brand’s lawn tractors. It features a manual lift system, two 12-inch diameter serrated input augers that efficiently pull in snow, and a high-speed impeller that launches precipitation through the poly chute.
Like our top pick, this model offers toolless attachment and removal after the initial installation of mounting brackets and pulley frame brackets. You can adjust the 180-degree chute and control the deflector from the seat, and the machine also features replaceable wear plates and skid shoes for long-lasting use. For best results, Husqvarna recommends adding wheel weights and chains.
Get the Husqvarna manual lawn mower snow blower combo at Amazon, Lowe’s, Walmart, or Husqvarna.
Best for Large Driveways
NorTrac 3-Pt. 72-76" Snow Blower Attachment
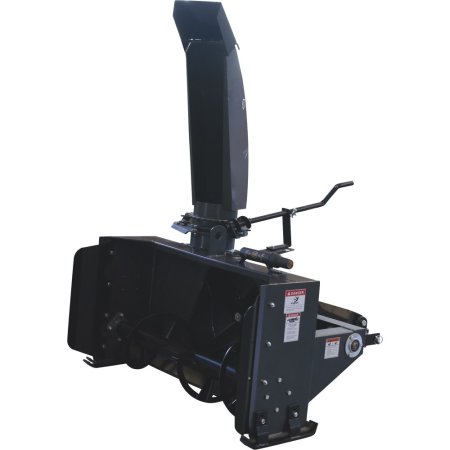
What We Like
- Attaches to a 3-point hitch system on larger tractors
- Uses power take-off system instead of a pulley
- Massive clearing capacity up to 76 inches
What We Don’t Like
- Attaches to back of tractor
- Manual chute adjustment
Specs
- Stage 2-stage
- Clearing capacity 72 to 76 inches
- Compatibility 35- to 50-hp lawn tractors, category 1 hitch
Those looking to clear long or wide driveways with as few passes as possible might consider NorTrac’s 3-Point Snow Blower. This model attaches to heavy-duty tractors with a three-point hitch system, getting Those looking to clear long or wide driveways with as few passes as possible will want to consider this 3-point snow blower from NorTrac. Its 72-inch blower and bolt-on 4-inch wing kit can clear a path up to 76 inches wide and throw it 40 feet. It’s designed to fit lawn tractors with 35-to 50-horsepower (hp) engines and category 1 hitches and uses the tractor’s power take-off system to make installation and removal quick and easy. The two-stage system also features a chute that rotates up to 340 degrees, though you must adjust it manually unless you buy and install the optional hydraulic kit.
One of the best things about this model is its versatility, as it will work with a range of tractor sizes. It also has adjustable skid shoes for precise height control and heavy-duty steel construction that stands up to harsh winter conditions. We also really like that it’s powered by the tractor’s PTO rather than a pulley system. If there’s a downside, it’s that it attaches to reach hitch, which could make use uncomfortable during extended jobs.
Get the NorTrac 72-76″ lawn mower snow blower combo at Northern Tool + Equipment.
Best Electric Lift
Husqvarna E-Lift 42" Snow Blower Attachment
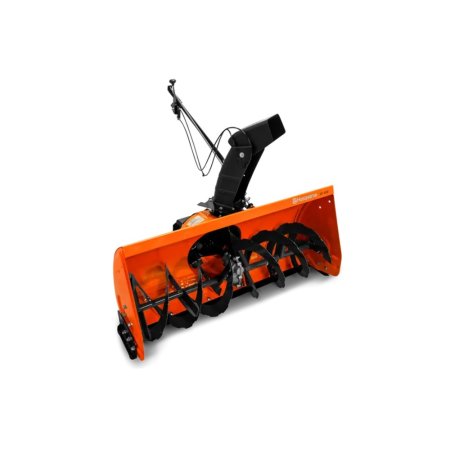
What We Like
- Electric lift system, chute, and angle adjustments
- 42-inch clearing capacity
- Toolless hookup and removal
What We Don’t Like
- Requires wheel weights and chain
- Only compatible with Husqvarna lawn tractors
Specs
- Stage 2-stage
- Clearing capacity 42 inches
- Compatibility Fits all 2006 and newer Husqvarna tractors
This 42-inch lawn mower with snow blower combo features an innovative electric lift mechanism that allows you to lift and lower the snow blower with just a push of a button directly from your seat. Not only that, its 12-inch dual serrated augers and 180-degree rotating chute also use electric adjustment, adding to user convenience and efficiency.
Beyond its electric lift, this tractor with snow blower also features a two-stage design with high-speed impeller to pull snow in and propel it quickly through the durable poly chute. It fits all Husqvarna lawn tractors made in 2006 or later, and after its initial installation, you can attach and remove it without needing tools. Like the other models we recommend from this brand, the manufacturer recommends you add wheel weights and chains for optimal performance.
Get the Husqvarna electric lift lawn mower snow blower combo at Lowe’s or Husqvarna.
Also Consider
NorTrac 3-Pt. 50-54" Snow Blower Attachment

What We Like
- Versatile compact tractor snow blower
- Clears snow up to 20 inches deep
- Scraping edge is replaceable
What We Don’t Like
- Only throws snow about 20 feet
- Automatic chute adjustment requires additional purchase
Specs
- Stage 2-stage
- Clearing capacity 50 to 54 inches
- Compatibility 16- to 35-hp lawn tractors, category 1 hitch
If you liked the features offered by our pick for large driveways but need a more compact package, this model is worth considering. With a clearing width of up to 54 inches (including the bolt-on 4-inch wing kit), this model still moves plenty of snow with each pass. Similar to the other NorTrac model we love, it is compatible with a wide range of lawn tractors with category 1 three-point hitches and 16- to 35-horsepower engines.
While we wish the 340-degree adjustable chute wasn’t manual-only without an additional purchase, we like that the attachment is powered by the tractor’s PTO rather than a pulley. Also, it only throws snow about 20 feet, but that’s likely sufficient for residential and light commercial use. Its body, auger, and discharge chute are made of steel for durability, and it has heavy-duty adjustable rear skid shoes and a replaceable scraping edge.
Get the NorTrac 50-54″ lawn mower snow blower combo at Amazon or Northern Tool + Equipment.
Jump to Our Top Picks
How We Chose the Best Lawn Mower Snow Blower Combos
To choose the best lawn mower snow blower combos, we began by drawing on our expertise regarding lawn mowers and snow blowers. We identified which features are absolutely essential for using a tractor with a snow blower and conducted thorough product research to find models that fit those criteria. With a pool of eligible models to choose from, we compared features, performance, price, and overall value, eliminating options that didn’t stack up. In the end, the only models we picked are the ones we’d actually buy for ourselves.
You may have noticed that no all-in-one versions of a riding lawn mower with snow blower made our list. The current options on the market are either incredibly expensive or don’t offer enough power to be worth their price. For now, we think most DIYers will be better off choosing one of the best lawn tractors first and adding a compatible snow blower attachment second rather than ending up disappointed with an all-in-one machine.
What to Consider When Choosing a Lawn Mower Snow Blower Combo
Because they are undoubtedly one of the best tools for conquering snow and ice, lawn mower snow blowers come at a premium price. Purchasing one is a big decision that requires careful thought and research. However, when it comes to making quick and easy work of year-round maintenance tasks like lawn mowing and snow removal, they are nearly impossible to beat. To help you make a smart selection, we’ve outlined the features that matter most below.
Number of Stages
Like traditional snow blowers, lawn tractor with snow blower combos come in a few different types, also known as stages. The stages refer to how the machine scoops and discharges the snow.
Single-stage snow blowers, or snow throwers, have an auger that grabs snow and pushes it out of the chute. They’re the most limited in the distance they can throw and the height of the snow they can handle.
Two-stage snow blowers have both an auger as well as an additional impeller. As the auger collects the snow and funnels it toward the chute, the impeller forces it out. These snow blowers can throw snow up to 50 feet or farther, especially when users lubricate the chute using a nonstick snow blower spray.
Three-stage snow blowers have an auger, an impeller, and an additional grinder that shreds chunks of ice. They can throw snow extremely far but are often limited to commercial use since they’re so expensive.
Compatibility and Horsepower
When choosing a riding lawn mower snow blower combo, compatibility with your lawn mower is essential. Smaller mowers may lack the power and traction necessary to maximize efficacy, and not all brands of attachments are compatible with all brands of mowers.
To ensure compatibility, you may want to start by looking for a lawn mower snow blower combo that’s made specifically for the lawn mower’s model number. You can generally find this information on the manufacturer’s website, or you can call or email them for help. You’ll also want to make sure your garden tractor has sufficient horsepower (generally 16 hp or more) and may want either four-wheel drive or a set of tire chains.
Clearing Capacity
Lawn mower snow blower combo attachments come in various clearing capacities, which are the widths of the snow they can remove with each pass. Choosing the right size depends on the area that needs to be cleared and the power of the tractor.
For standard driveway snow removals, a 40- to 50-inch riding lawn mower with a snow blower should do the trick. This size snow blower doesn’t require a large, heavy-duty machine and can clear most driveways in three or four passes.
For larger driveways and parking areas, a 50- to 60-inch lawn mower snow blower attachment will usually fit the bill. These require a bigger tractor but fewer passes to clear wider areas.
For very long driveways or large parking lots, a 60-inch or larger lawn mower snow blower combination will be ideal. Rather than needing you to make four passes to clear a given area, a snow blower with a wider clearing capacity may do it in two—half the amount of time. However, these machines require large tractors with 25 to 50 hp.
Ease of Use
Certain additional features may make some lawn mower snow blower combos easier to use than others. While these features are more about convenience than performance, finishing a big job quicker and with a bit more comfort can be a big deal on a cold day.
- Electric lift systems: these allow you to raise and lower the snow blower from the seat rather than forcing you to get off the machine and find the right height manually
- Adjustable chutes and deflectors: these allow you to change the angle of the discharge chute as you work, helping you blow snow in the direction you intend
- Adjustable skid shoes and replaceable wear plates: these allow the snow blower to move along the ground without damaging the blade
When we asked Francisco Fuenmayor, insured handyman and snow-removal expert at LocalProBook, which of these features he thinks makes the biggest difference during big jobs, he said, “An electric lift system is a game-changer, especially if you have back issues or are frequently adjusting the height of the snow blower. It saves a ton of effort compared to manually lifting and lowering the attachment.”
The Advantages of Owning a Lawn Mower Snow Blower Combo
Even with a traditional snow blower, removing snow from a long driveway can be exhausting. A lawn mower snow blower attachment makes the job easier by allowing you to sit down and steer instead of pushing a heavy machine. Combo units also have more power than standard snow blowers, enabling them to remove more snow without bogging down. Some models can handle more than 20 inches at a time.
In addition to power, lawn mower snow blower combos offer greater versatility. Unlike snow plows, they can navigate walkways and sidewalks, making them ideal for snow removal across an entire property.
Lawn mower snow blowers are:
- Easier to use than traditional snow blowers
- Better for removing larger amounts of snow
- More versatile than plows or snow blowers alone
FAQs
The following section aims to answer any questions you may still have, covering topics like how deep snow combination machines can handle and whether lawn mowers and snow blowers use the same type of gas.
Most riding snow blowers for residential use are just large snow blower attachments installed on compact garden tractors. While there are a few actual riding snow blowers available, we didn’t include any on our list as they are incredibly expensive and yet offer enough power to make them worth their price.
Yes, lawn mower snow blowers work. Unlike electric snow blowers, which use batteries or outlet power, or traditional snow blowers with gas engines, lawn mower snow blowers run off the tractor’s engine. They essentially turn lawn tractors into sit-down snow blowers, making these tools useful year-round.
Yes, you can turn your existing lawn mower into a snow blower if your mower has enough power and you can find a compatible snow blower. See the Compatibility and Horsepower section above for additional information.
Some zero-turn mowers have snow blower attachments, but it’s important to check that they’re compatible before purchasing one.
Two-stage snow blowers have an auger that scoops now and an impeller that throws it. Single-stage snow blowers, on the other hand, scoop and throw snow using power from their augers alone. Since two-stage machines can throw snow and ice further than single-stage models, they generally come at a higher price.
You can maintain a lawn mower snow blower combo by following the same general steps found in our guide on how to maintain a snow blower. It’s also a good idea to refer to the owner’s manuals for both parts of your unit for additional recommendations.
Yes, most gas snow blowers and lawn mowers will work with unleaded gas that has an octane rating of 87 or higher or an ethanol-gas blend with less than 10 percent ethanol (E10). Still, you should always check your owner’s manual to see if your equipment has specific fuel requirements.
The depth of snow a snow blower can handle will vary based on which type of snow blower it is as well as its size. The clearing depth offered by your machine could be anywhere from 5 or 6 inches for a single-stage machine all the way up to 20 inches or more for a lawn mower snow blower.
The post Use Your Lawn Mower Year-Round With This Handy Attachment appeared first on Bob Vila.
]]>No other clothing has the ability to make or break your day like work boots. A sorry pair of boots can make your feet hurt, your back ache, and let your socks get wet, all before lunchtime. But the right ones let you focus on the job and leave you feeling good at the end of the day. While durability, comfort, and safety are absolute requirements for good boots, there are plenty of types and styles to choose from. I’ve always worn lace-up boots but recently tried out a pair of Tecovas western work boots.
I’ve been wearing Tecovas Long Haul waterproof square composite toe work boots for weekend home repairs and chores for the past couple of months. I am a writer, and I never was a cowboy, but I spent 25 years working in construction, landscaping, and plant nurseries, so I recognize good boots when I wear them. These Long Haul work boots are the real deal. Unlike traditional western boots, they include comfort and safety features to cushion and protect feet in harsh working conditions. I’ve worn them indoors and out, in wet and dry weather, on pavement, mud and everything in between. At my part time wear rate, they’ll probably last a decade or more.


Before I sing the full praise of these boots, I’ll admit that pull on work boots are not ideal for every job. I do not like wearing them when I know I’ll be piling up the mileage, which is the reason I always opted for snug-fitting laceups for landscape maintenance and retail nursery work. The rigid sole and raised heel are not conducive to fast-paced walking. But pull ons are great when you are constantly climbing in and out of a truck, tractor seat, or heavy equipment because there’s no risk of laces getting caught on a step, track, bucket, or implement. For the same reason, they make a ton of sense for shop work and for some construction jobs.
I’m not usually big on ordering boots online because I don’t like the hassle of exchanges in the case of a poor fit. I was relieved when they came true to size, and pleased with the initial quality and craftsmanship. They feature a stylish waterproof cowhide upper that fits like a glove, and have a 12-inch shaft with metal pull holes. The traditional leather outer boot encases a lightweight square composite safety toe and breathable waterproof bootie. They also include removable cushioned insoles and fiberglass shanks for all day comfort and support on any walking surface. The dual density synthetic outsole is slip resistant and oil resistant with a muckoff tread. Made in Vietnam, Tecovas Long Haul boots meet ASTM standards for slip resistance, electrical hazard protection, and safety toe. My size 13 pair weighs 2 pounds 14 ounces per boot.
Rating: 4/5

Tecovas Long Haul Work Boots
My work includes standing and walking around on hard surfaces in the shop and driveway, climbing ladders, and working on grass, bare dirt, or mud in the yard and garden. The elevated heel, rigid sole, and Goodyear welt on these boots provides sure footing in all of those conditions. I usually just brush off any loose dirt, but when they get muddy I hose them off. My feet stay dry but the outer leather does get damp, so I stuff them with paper to retain their shape as they dry out. I have not used leather conditioner or applied oil yet, but they are probably due.
For me, comfort matters above all else when it comes to boots, and my Long Haul boots are comfortable. It started with a proper fit and they have broken in perfectly. I’ve worn them most of the work I do in all kinds of weather, including hard rain and temperatures as low as 15 degrees, and my feet have always stayed warm and dry. They’re tough enough to protect my feet during storm clean up work and I feel perfectly secure wearing them on a ladder. They have the safety features that I need for most of my projects, and look great, but because I still crank out 5 miles on yard work days, they won’t completely replace my lace up boots.
Where to Buy the Tecovas Long Haul Work Boots
Get the Tecovas Long Haul Waterproof Square Composite Toe Work Boots at:
The post These Western Work Boots Are Awesome, But Do They Replace Traditional Lace-Up Boots? appeared first on Bob Vila.
]]>The post The Best Backpack Sprayers for Easier Yard Work appeared first on Bob Vila.
]]>Built for comfort and ease of use, the backpack sprayer is becoming a go-to tool for gardeners, landscapers, and pest-control professionals—as well as home dwellers who simply want to enjoy a weed- and insect-free outdoor space. A backpack sprayer’s ergonomic design features adjustable shoulder straps and a spray wand, allowing you to carry fertilizer, herbicide, pesticide, or other liquids on your back rather than hauling around a heavy metal cart or handheld manual sprayer.
We tested and reviewed a variety of outstanding backpack sprayers. We also spoke to Tim Sherrer, owner of Expest Exterminating based in Snellville, Georgia, who shared his pest control expertise. Preview our top picks below, and then keep reading to learn how these tools work, features to consider, and how to pick the best model for your space and style. Later on, check out our reviews of the best backpack sprayers for lawn and garden maintenance.
- BEST OVERALL MANUAL: Field King Max 190348 Backpack Sprayer
↓ Jump to Review - BEST OVERALL MOTORIZED: Field King 190515 Battery-Powered Backpack Sprayer
↓ Jump to Review - BEST BANG FOR THE BUCK: Chapin 61800 4-Gallon Manual Backpack Sprayer
↓ Jump to Review - UPGRADE PICK: My4Sons M4 4-Gallon Battery-Powered Backpack Sprayer
↓ Jump to Review - BEST PROFESSIONAL: PetraTools HD5000 Battery-Powered Backpack Sprayer
↓ Jump to Review - BEST HOBBYIST: Chapin 61900 4-Gallon Manual Backpack Sprayer
↓ Jump to Review - ALSO CONSIDER MANUAL: Solo 425 4-Gallon Backpack Sprayer
↓ Jump to Review - ALSO CONSIDER MOTORIZED: PetraTools HD4000 4-Gallon Backpack Sprayer
↓ Jump to Review
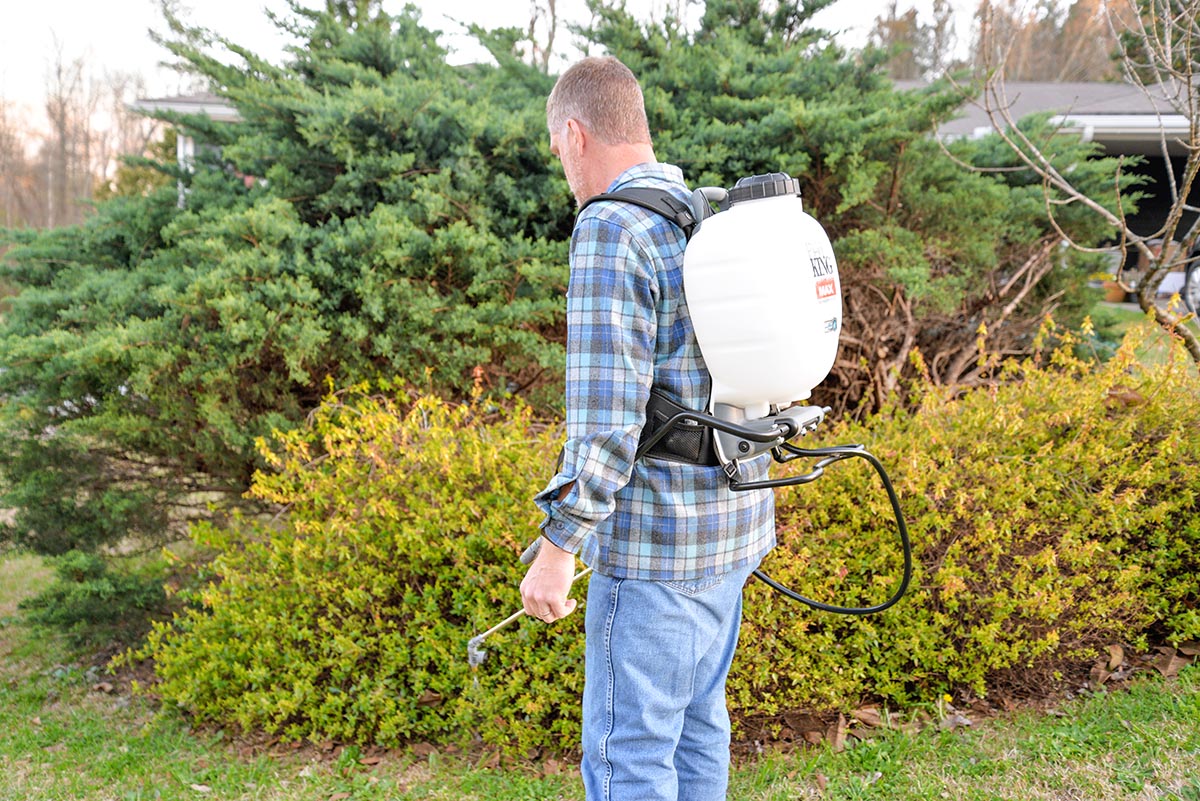
How We Tested the Best Backpack Sprayers
We considered these backpack sprayers from a home-dweller’s perspective. Although several of our picks offer truly professional-level performance and durability, our testing criteria centered on basic functionality, ease of use, operator comfort, and overall value.
To gauge mobility and operational comfort, we filled each sprayer to capacity with plain water and walked a spray route: putting on and taking off the backpack, walking between house and foundation plants, opening and closing a gate, uphill and downhill, and over small obstacles. Scoring favored sprayers that stayed most secure with less “slosh” and that generally felt most comfortable.
We then pressurized each sprayer, either by switching it on or by manually pumping and tried each nozzle. We noted ease and comfort of operation, speed of attaining initial pressure, motor noise, and drips from spray tips after releasing the spray trigger. The best backpack sprayers were easy to operate, versatile, fast, quiet, and drip-free.
| Testing Stats | |
| Products tested | 8 |
| Hours spent testing | 4 to 6 hours |
| Tests performed | 6 |
| Price range | $150 to $200 |
Our Top Picks
We tried each of the following sprayers in our backyard testing program. Read on to learn their individual features and benefits, how each one performed, and why we included them in this lineup of the best backpack sprayers.
Best Overall Manual
Field King Max 190348 Backpack Sprayer
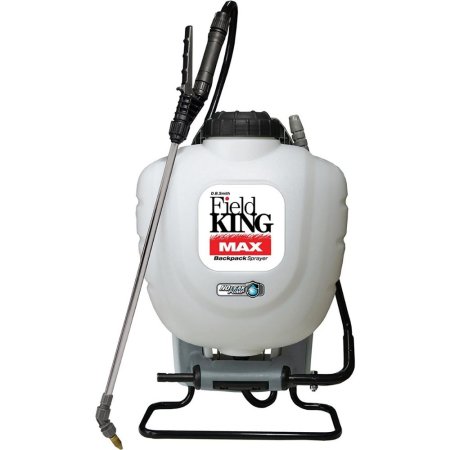
What We Like
- Very comfortable harness system can be worn for long periods of time
- 4 interchangeable nozzles included with purchase to satisfy multiple users’ preferences
- High maximum psi of 150; suitable for small- to large-scale spreading
What We Don’t Like
- Manual operation increases user fatigue over extended periods of use
Specs
- Pressure: 150 pounds per square inch (psi)
- Tank capacity: 4 gallons
- Type: Manual
Our Ratings: Ease of Use 4/5; Comfort 5/5; Functionality 4/5; Durability 5/5; Value 4.7/5
If you’re looking for excellent performance with long-lasting comfort, the manual Field King Max 190348 is bound to deliver on both fronts. It features a 150 max psi— adequate power for most applications—and an internal pump design to contain leaks within the tank.
There are four nozzles: one for stream-to-cone spray patterns, one for a wide flat fan spray pattern, one for a narrow flat fan spray pattern, and one for a foaming spray. While a bit of muscle is required for operation, we found the Field King Max to be the best manual backpack sprayer we tested, largely due to its harness system. It isn’t especially well padded, but it includes a hip belt, sternum strap, and wide shoulder straps that did not dig into the shoulders during testing. It also had the least amount of drip after releasing the spray trigger, when compared with the other manual sprayers.
Get the Field King 190348 backpack sprayer at Amazon, Northern Tool + Equipment, or Gemplers.
Best Overall Motorized
Field King 190515 Battery-Powered Backpack Sprayer
What We Like
- Powered by rechargeable 20V lithium-ion battery for long usage times
- Padded shoulder straps and hip belt keep the unit in place comfortably; most comfortable battery-powered sprayer tested
- No drips when the spray trigger is released; no wasted product
What We Don’t Like
- Low psi limits this option’s uses; may not be ideal for some tasks
- Battery must be removed for charging
Specs
- Pressure: 40 psi
- Tank capacity: 4 gallons
- Type: Battery-powered
Our Ratings: Ease of Use 4.3/5; Comfort 5/5; Functionality 5/5; Durability 4/5; Value 4.7/5
With a 4-gallon tank and a 4-hour battery charge, the Field King 190515 backpack sprayer is ideal for an enthusiastic amateur landscaper. It features a fully padded harness to cushion your shoulders against muscle strain, a preset rating of 40 psi that users can increase if necessary, and a lockable shutoff on the wand to help reduce hand fatigue. A built-in carry handle and wand storage make transportation simple.
In our tests, the Field King 190515 was the most comfortable to carry battery-powered backpack sprayer, thanks to a generous amount of padding in the shoulder straps and hip belt. At 40 psi, it offered the lowest pressure rating, but that was still plenty of pressure to apply a variety of spray patterns, from a fine mist to a coarse shower of heavier droplets. The lithium-ion battery saves significant weight compared to the lead acid batteries in other sprayers, and the price is comparatively affordable. Good performance and excellent value.
Get the Field King 190515 backpack sprayer at Amazon or Forestry Suppliers.
Best Bang for the Buck
Chapin 61800 4-Gallon Manual Backpack Sprayer
What We Like
- Adjustable brass spray nozzle accommodates users during multiple tasks
- Great price for this sprayer’s quality; can last for years of use
- Clean, efficient operation for weeds, fertilizer, and pest control
What We Don’t Like
- Minimal harness support and padding; may dig into the user if worn for extended periods
- Manual operation can increase user fatigue; may not be ideal for some users
Specs
- Pressure: 60 psi
- Tank capacity: 4 gallons
- Type: Manual
Our Ratings: Ease of Use 4/5; Comfort 3/5; Functionality 4/5; Durability 3/5; Value 4/5
Users are unlikely to make a mess when filling the tank of this affordable backpack sprayer, thanks to a large 5-inch-diameter opening that helps prevent spills. It weighs about 9 pounds when the tank is empty and comes with adjustable padded shoulder straps to help support the tank when it’s full. The adjustable brass spray nozzle allows users to change the spray pattern from a fine mist to a coarse stream. This backpack sprayer from Chapin has a maximum psi of 60, and it requires manual pumping to keep the sprayer pressurized while in use.
When we tested this sprayer, it became apparent that Chapin saved costs on the harness system to preserve tank and pump quality at a bargain price. The manual pump and tank system proved easy to use and was efficiently designed. The spray tip dripped only slightly after the trigger was released. The bare-bones harness system, which consisted of thinly padded shoulder straps and a minimal lumbar pad at the base of the tank, was fine for limited work with a partially filled tank but was not comfortable for extended use.
Get the Chapin 61800 backpack sprayer at Amazon or Gemplers.
Upgrade Pick
My4Sons M4 4-Gallon Battery-Powered Backpack Sprayer
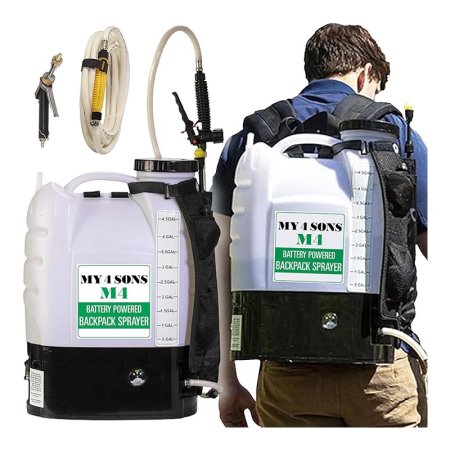
What We Like
- Accessible variable pressure switch can adjust the pressure of the product
- Automatically maintains psi between 40 and 60 for pest control, fertilizers, and weeds
- Excellent shoulder-strap padding supports the users’ back and hips while in use
- Sprays up to 30 feet; suitable for large-scale product applications
What We Don’t Like
- Heavier than the other battery-powered sprayers; may wear on some users
- Cannot be used if the battery isn’t charged
Specs
- Pressure: 60 psi
- Tank capacity: 4 gallons
- Type: Battery-powered
Our Ratings: Ease of Use 4.3/5; Comfort 5/5; Functionality 5/5; Durability 5/5; Value 4.3/5
This backpack sprayer from My4Sons is a premium product that comes at a premium price. It includes such impressive features as a variable pressure switch that allows the user to adjust the output pressure to the optimal level. It also boasts a variety of nozzles so users can switch between them, depending on the job and personal preference.
The battery-powered backpack sprayer has a motorized pump that works continuously to keep the pressure inside the sprayer between 40 and 60 psi. When used with the right nozzle and held at the right angle, this pressure allows the unit to spray up to 30 feet in a horizontal direction. Just keep in mind that even if the 4-gallon tank is filled and ready to go, the sprayer will not run unless the battery is charged.
In testing, we really liked the build of this My4Sons sprayer. The combination of a low-profile tank and thick padded shoulder straps provides excellent comfort, balance, and maneuverability. The powerful pump brought the tank up to pressure in a matter of seconds and ran quieter than other motorized sprayers tested. Pressure was excellent and no drips, and we felt it was definitely worth the added cost for those who use a sprayer frequently.
Get the My4Sons backpack sprayer at Amazon.
Best Professional
PetraTools HD5000 Battery-Powered Backpack Sprayer
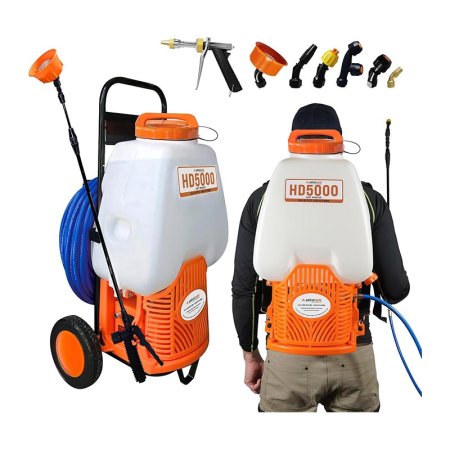
What We Like
- High-volume tank is suitable for large-scale product applications; perfect for weeding, fertilizing, and pest control
- Converts from backpack to cart for increased portability and mobility
- Variable pressure switch can adjust the output level of the product for added versatility
- Includes 4-foot and 100-foot spray hoses depending upon the application area
What We Don’t Like
- Oversize tank can be cumbersome in backpack mode
- Cannot be used if the battery isn’t charged
Specs
- Pressure: 80 psi
- Tank capacity: 6.5 gallons
- Type: Battery-powered
Our Ratings: Ease of Use 5/5; Comfort 4/5; Functionality 4/5; Durability 5/5; Value 4/5
Professionals in the market for a new backpack sprayer may appreciate the PetraTools backpack sprayer’s 6.5-gallon tank and its rugged steel cart for hauling the unit from the vehicle to the work site. It features a 100-foot hose for treating large areas without moving the sprayer from the cart.
This battery-powered sprayer provides a base setting of 70 psi that can be increased to suit user needs—a great versatility factor when working on a variety of yards over the course of a long day.
This convertible backpack/cart sprayer offers excellent versatility for intensive spraying in a compact area or dispersed use over a larger area. In testing we found that the 6.5-gallon spray tank is too heavy to completely fill for backpack mode but a good size for the cart. The conversion from backpack to cart mode was quick and uncomplicated. The pump offers ample pressure to apply common lawn and garden chemicals, and the wand operated drip-free.
Get the PetraTools backpack sprayer at Amazon.
Best Hobbyist
Chapin 61900 4-Gallon Manual Backpack Sprayer

What We Like
- Wand-mounted pressure gauge monitors spray pressure
- Multiple spray tips included for various spray patterns
- 3-stage filtration system resists clogging
What We Don’t Like
- Steel spray wand may not be appropriate for use with some chemicals
- Manual operation can increase user fatigue
Specs
- Pressure: 60 psi
- Tank capacity: 4 gallons
- Type: Manual
Our Ratings: Ease of Use 4/5; Comfort 4/5; Functionality 4/5; Durability 4/5; Value 4.3/5
For versatility and safety, the Chapin 61900 sprayer can handle some of the most volatile fertilizers, weed killers, and pest control treatments in use today. It features Viton seals, which are specially manufactured to be chemically resistant, and a three-stage filtration system to prevent clogging.
A wand-mounted pressure gauge and a control flow valve both assure the user that the spray and pressure levels are consistent, while three different nozzles are included for direct stream, fan spray, and foaming applications. Great for home use or for industry professionals who need a single sprayer suited for multiple applications.
In our tests, the Chapin 61900 proved comfortable and capable as well as affordable. The wide shoulder straps and hip belt provided good comfort and excellent stability. The built-in pressure gauge gave a sure indication of adequate operating pressure, which the other manual sprayers tested did not offer. For just a few dollars more than our budget pick, the price appears to be a bargain for this upgraded sprayer.
Get the Chapin 61900 backpack sprayer at Amazon.
Also Consider Manual
Solo 425 4-Gallon Backpack Sprayer

What We Like
- Comfortable padded straps can support the back and hips of the user
- Collapsible carry handle provides added versatility and maneuverability
- 5 spray tips included with purchase depending on the application type
- Four pressure settings integrated; suitable for small- to large-scale applications
What We Don’t Like
- No padding in the lumbar area or on the hip belt; may not be ideal for some users
Specs
- Pressure: 60 psi
- Tank capacity: 4 gallons
- Type: Manual
Our Ratings: Ease of Use 4/5; Comfort 3/5; Functionality 4/5; Durability 4/5; Value 4/5
Gardeners looking for a durable sprayer for regular or intermittent use should consider the Solo backpack sprayer. It offers reliable operation and quality components, like a manual diaphragm pump that produces up to 60 psi, a full array of five spray nozzles for customized applications, an unbreakable wand, and padded shoulder straps. This sprayer is suitable for use with liquid concentrates, wettable powders, and bleach solutions that could damage other sprayers.
In our tests, this Solo sprayer came up to full pressure quickly and produced an excellent spray pattern with no drips. It was comfortable and easy to carry when half full, but at capacity, the shoulder straps dug in a bit too much for comfort. The plastic spray wand provided some flexibility and, as required equipment for use with bleach solutions and certain other chemicals, makes a good all-purpose applicator.
Get the Solo backpack sprayer at Ace Hardware, The Home Depot, Northern Tool + Equipment, or Gemplers.
Also Consider Motorized
PetraTools HD4000 4-Gallon Backpack Sprayer
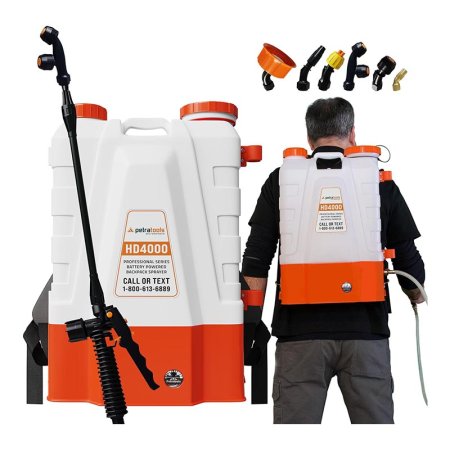
What We Like
- Adjustable pressure output depending upon the application type and size
- Automatic pump to maintain 70 psi while spraying
- Low-profile tank is easier to carry that some comparable options
- Well-padded shoulder straps are comfortable for the user
What We Don’t Like
- Thin nylon waist belt does not relieve shoulder pressure
- No padding in the lumbar area; may not be ideal for those with back problems
Specs
- Pressure: 70 psi
- Tank capacity: 4 gallons
- Type: Battery-powered
Our Ratings: Ease of Use 4.7/5; Comfort 4/5; Functionality 4/5; Durability 5/5; Value 4.3/5
Capable of operating for up to 8 hours on a single battery charge while maintaining a constant pressure of 70 psi, this PetraTools backpack sprayer is an excellent choice for anyone with a lot of ground to cover.
The 4-gallon tank can handle large yards without frequent refills, and it’s translucent, so users can see how much liquid is left at any time. With padded straps for added comfort and a wide-mouth tank lid to offset spills, this motorized backpack sprayer will keep the operator working comfortably all day long.
We really liked this PetraTools sprayer’s low-profile tank and padded shoulder straps. It felt comfortable and well balanced for limited use. Unfortunately, the thin nylon waist belt only provides lateral stabilization without relieving weight from the shoulders, which makes it less than ideal for extended use. The pump worked quickly and was fairly quiet—nearly on the level of our upgrade pick and for about $80 less.
Get the PetraTools backpack sprayer at Amazon.
Jump to Our Top Picks
What to Consider When Choosing a Backpack Sprayer
Before opting for the first hobbyist or professional backpack sprayer you see, take some time to familiarize yourself with the various product factors likely to lead you to the right decision. Consider the pressure (psi), tank capacity, the type of liquid delivery system, and the type of pump that pressurizes the backpack sprayer.
Pressure
Pounds per square inch (psi) is the unit of measure identifying the amount of pressure a backpack herbicide sprayer can propel through its nozzle. The average for a backpack sprayer is around 70 psi, but smaller models can use as little as 40 psi, and a commercial backpack sprayer may use as much as 150 psi.
Pressure is important to ensure that a backpack sprayer operates effectively. Too little pressure will produce an uneven spray that reduces the effectiveness of its contents, while too much will prove excessive for a smaller yard.
If you have a large yard with many hard-to-reach spots, or you are a professional who works in many different-size spaces, a sprayer with a psi rating of 70 or above is your best bet. For those with average-size or smaller yards, a moderate rating between 40 and 70 psi is more than enough to spray your space.
Piston vs. Diaphragm
Backpack sprayers generally come in one of two types of liquid delivery systems: piston pump and diaphragm pump.
- A piston pump works by drawing liquid from the tank into an enclosed chamber on the upstroke and pushing the liquid out through the outlet valve or nozzle on the downstroke. Piston pump sprayers are more popular with the average home dweller because of their simple design, easy accessibility for repairs, and beneficial psi ratings.
- A diaphragm pump is designed for the safety of professionals who use potent pest control and weed killer chemicals. It is a sealed system that works by moving liquid from one side of a chamber to the other with a diaphragm so that one side is always full and one side is always empty. The diaphragm pump cannot produce the same pressure as the piston pump but is better suited to pros because it’s made of more chemically resistant materials.
Manual vs. Motorized
Backpack sprayers use an internal pump to draw liquid out of the chamber, through a hose, and out through a wand and nozzle. This pump can be operated manually, or an electric backpack sprayer will often use a motorized system—the pricier option.
Manual backpack sprayers operate via a hand pump attached to the backpack chamber. Pumping manually for an extended period can cause muscle fatigue and pain, so while this style of sprayer is fine for smaller yards, once-per-season jobs, and the average home dweller, it’s less suited to professionals who have to spray for hours at a time. Manual backpack sprayers cost as little as $40 to as much as $150, on average.
Motorized backpack sprayers are powered either by battery or gas, with a battery backpack sprayer offering more versatility and a simpler setup. A motorized sprayer automatically pumps the liquid from the backpack chamber to the wand, requiring no physical work by the user. Intended for large projects and long workdays, a motorized sprayer (which can run between about $100 and $500) is a better choice for the busy professional who’ll rely on it daily.
That said, Sherrer explains, “Most homeowners can use a backpack sprayer with a hand pump for effective results.” A motorized option may only be worth the jump in price for those looking for a more heavy-duty option to use more often.
Tank Capacity
Sprayers are available in a tank capacity range between 2 and 7 gallons. Carry smaller-capacity sprayers with a handle, and tote the largest tanks with a wheeled cart. A 4-gallon backpack sprayer is considered to be about average in size.
Sprayers that fall between these two size extremes are true backpack sprayers—light enough to carry on your back but too heavy to lug around by hand. For typical jobs, such as fertilizing a lawn or spraying an insect infestation, a 4-gallon tank can do the trick for a yard between 5,000 and 10,000 square feet.
Additional Features
Backpack sprayers may include a variety of features, such as a built-in gauge to monitor the pressure of the unit while in use, extra padding in the shoulder straps for added comfort, a foaming nozzle, and a foldaway pump handle that won’t get in the way while spraying. Larger models may offer an extended hose and wheeled cart that can be used for more complex yards and heavier tanks.
“Some backpack sprayers are designed with detachable and changeable nozzles,” Sherrer says. “Some nozzles produce a pin stream, which is useful when spraying in cracks and crevices or when a precise application is needed. Fan spray nozzles are useful when applied over a larger area.” He also adds that “the ability to adjust the application flow will make any sprayer more versatile and effective.”
Tips for Using a Backpack Sprayer
Backpack sprayers are helpful tools for quickly and efficiently treating the yard and garden with liquid fertilizers, herbicides, and insecticides. But to ensure against over- or under-spraying an area, it’s important to keep the same walking speed and distance from the target during use.
Additionally, users should ensure that the backpack sprayer is properly pressurized at all times so that it’s easier to maintain an even spraying pressure. By taking the time to balance the pressure, the same amount of solution will be applied to each area of the yard and garden.
Before starting to use a backpack sprayer, adjust the shoulder straps so that the unit fits properly. You don’t want to have to deal with a shifting tank of fertilizer, water, or pesticide while working because it will take extra effort to control the moving weight, increasing fatigue.
In general, remember to:
- Maintain a uniform walking speed.
- Balance the spraying pressure.
- Adjust the straps before use for a secure fit.
FAQs
Buying and using a backpack sprayer brings up several questions. We’ve answered some of the common questions below.
You can fill a backpack sprayer with almost any liquid solution that has a similar consistency to water. This includes insecticide, herbicide, and liquid fertilizers. Just make sure the solution isn’t too corrosive or volatile, as these dangerous substances might eat through the walls of the sprayer.
Backpack sprayers are safe to use as long as they are filled with suitable solutions and proper precautions are taken to protect the eyes, skin, and respiratory system during use. The reason for the added personal protection is that when the liquid sprays from the backpack, some might get caught in the wind and blow back toward the user. While this wouldn’t matter much with water, it could be hazardous when the sprayer is filled with pesticide or herbicide.
The maximum distance that a sprayer can spray a liquid solution is determined by the maximum psi of the unit, the type of nozzle, the wind direction, the force of the wind, and the angle of the spray wand. On average, a backpack sprayer can spray up to about 10 to 20 feet, though there are models that can reach over 30 feet.
To clean a backpack sprayer after using it to apply a volatile chemical like herbicide or pesticide, follow these simple steps:
Responsibly empty any excess solution from the sprayer tank and add about half a tank of water.
Flush the sprayer system by using the sprayer until the tank is empty again.
Fill the tank half full with water again, this time adding any cleaning agents or neutralizing solutions that can help to remove remnants of the herbicide or pesticide solution.
Open all recirculation lines and any other hoses on the backpack sprayer.
Shake or agitate the unit to ensure the cleaning solution reaches every inch of the backpack sprayer.
Fill the tank to the top with water, and agitate again before emptying the sprayer.
Refill the sprayer with water to rinse out any remaining cleaning solution.
The post The Best Backpack Sprayers for Easier Yard Work appeared first on Bob Vila.
]]>The post We Tested 2025’s Best Single-Stage Snow Blowers and Found 9 Top Models You Can Rely On appeared first on Bob Vila.
]]>Single-stage snow blowers are compact and lightweight, offering an affordable and highly maneuverable alternative to full-size machines while still eliminating the back-breaking work of shoveling. But when gas, cordless, and corded options can cost between $100 and $1000, it’s hard to know how much you need to spend to get a model you can rely on. That’s why we researched dozens of popular options before testing nine you can trust to clear your driveways and walkways.
After using these tools in a variety of snowy conditions and reaching out to an expert for their opinions, we selected the Snow Joe 24V-X2-SB18 48V Ionmax Snow Blower as our best overall electric model and the Troy-Bilt Squall 208E 21″ Snow Blower as the top gas option. Both machines offer consistent performance and impressive clearing abilities. By reading through the pros and cons of the snow blowers on our list and familiarizing yourself with the features of these machines that matter most, you will be well positioned to choose one of the best single-stage snow blowers for your property.
- BEST OVERALL ELECTRIC: Snow Joe 24V-X2-SB18 48V Ionmax Snow Blower
↓ Jump to Review - BEST OVERALL GAS: Troy-Bilt Squall 208E 21″ Snow Blower
↓ Jump to Review - BEST BANG FOR THE BUCK: Greenworks 13-Amp 20″ Corded Snow Thrower
↓ Jump to Review - UPGRADE PICK: Ego Power+ Peak Power 21″ Snow Blower
↓ Jump to Review - BEST LIGHT-DUTY: Wen 5664 Snow Blaster 18″ Electric Snow Thrower
↓ Jump to Review - BEST MEDIUM-DUTY: DeWalt 21″ 60V MAX Single-Stage Snow Blower Kit
↓ Jump to Review - BEST HEAVY-DUTY: Ryobi 40V HP Brushless 21″ Whisper Snow Blower
↓ Jump to Review - BEST SELF-PROPELLED: Toro Power Clear 721 E 21″ Gas Snow Blower
↓ Jump to Review - BEST BATTERY LIFE: Greenworks 60V 22″ Single-Stage Snow Blower
↓ Jump to Review
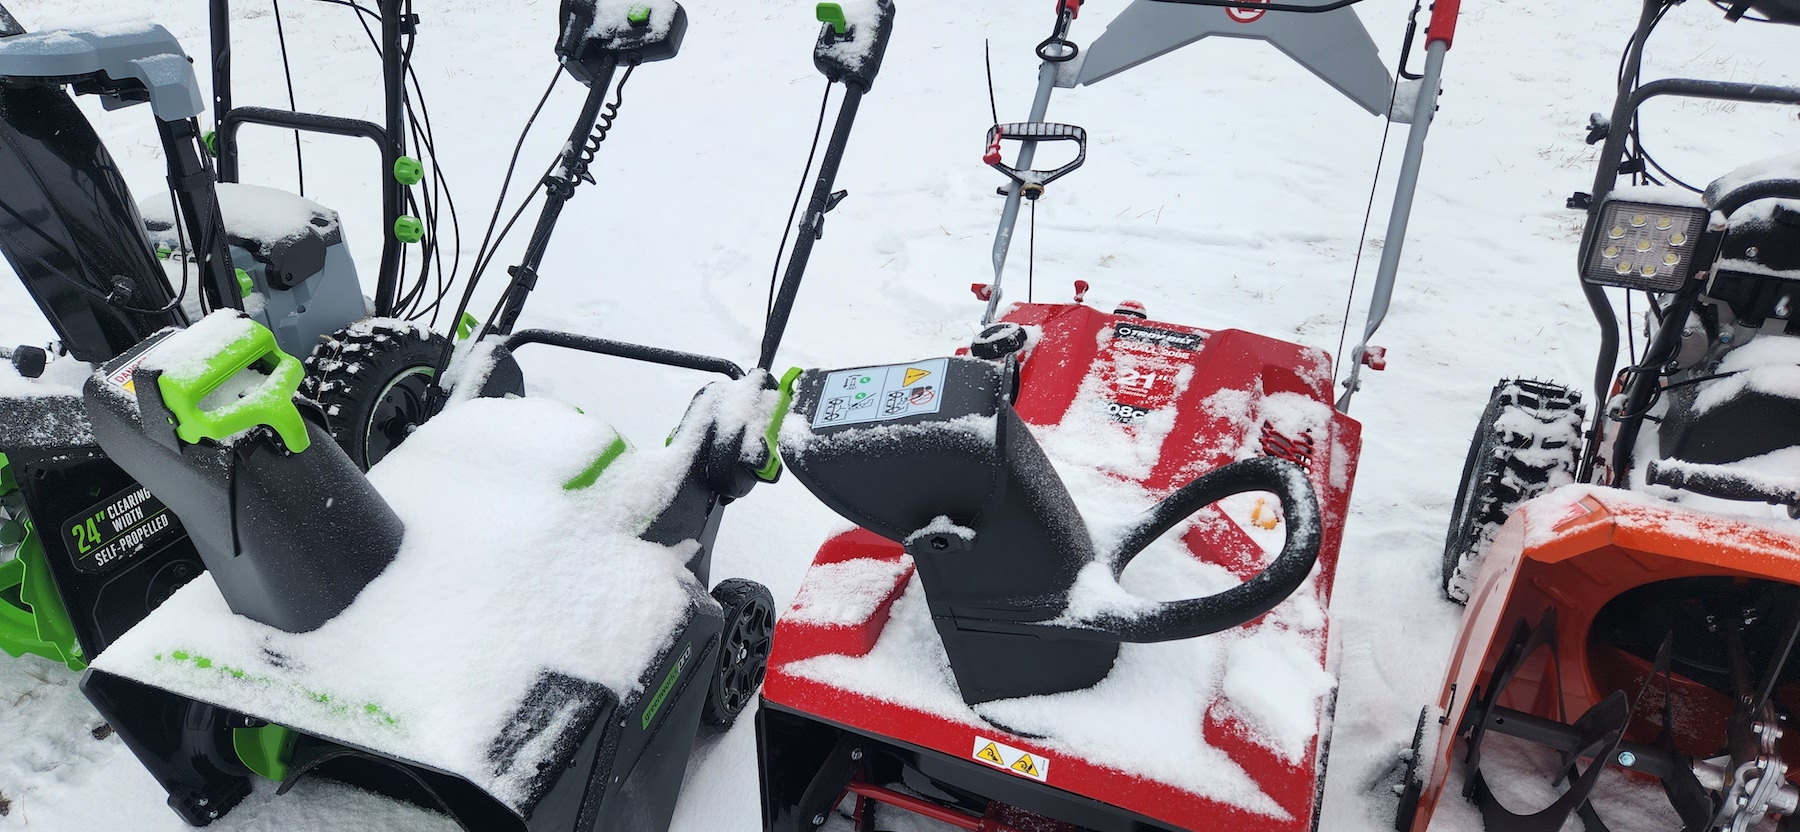
Before You Buy a Single-Stage Snow Blower
Compared to traditional two-stage machines, single-stage snow blowers are lighter, more mobile, and better suited to light- to moderate-duty jobs. For folks who regularly get severe storms with several feet of heavy snow at a time, these machines might be underpowered.
However, if you’re looking for a good snow blower that can clear smaller amounts of snow on average-size driveways and walkways, a single-stage model will be a relatively cheap snow blower that still offers plenty of convenience power.
Single-Stage Snow Blowers Comparison Chart
| Product Name | Type | Weight | Clearing Width |
| Snow Joe 24V-X2-SB18 48V Ionmax Snow Blower | Cordless electric | 37.5 pounds | 18 inches |
| Troy-Bilt Squall 208E 21″ Snow Blower | Gas | 100 pounds | 21 inches |
| Greenworks 13-Amp 20″ Corded Snow Thrower | Cordless electric | 50.6 pounds | 21 inches |
| Ego Power+ Peak Power 21″ Snow Blower | Corded electric | 32 pounds | 18 inches |
| Wen 5664 Snow Blaster 18″ Electric Snow Thrower | Cordless electric | 59 pounds | 21 inches |
| DeWalt 21″ 60V MAX Single-Stage Snow Blower Kit | Cordless electric | 52 pounds | 21 inches |
| Ryobi 40V HP Brushless 21″ Whisper Snow Blower | Gas | 84 pounds | 21 inches |
| Toro Power Clear 721 E 21″ Gas Snow Blower | Cordless electric | 65.5 pounds | 22 inches |
| Greenworks 60V 22″ Single-Stage Snow Blower | Corded electric | 32 pounds | 20 inches |
Our Top Picks
Just ahead are some of the best single-stage snow blowers in a variety of categories, all tested in tough conditions. Each of these snow blowers are capable of clearing driveways and sidewalks after moderate snow events.
Best Overall Electric
Snow Joe 24V-X2-SB18 48V Ionmax Snow Blower
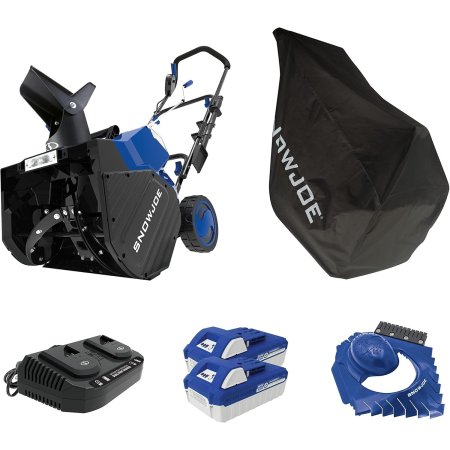
What We Like
- Two 24-volt batteries; 40 minutes of runtime each
- Quadruple-bladed steel auger cuts 10 inches deep
- Moves up to 10 tons of snow per charge
- 180-degree adjustable snow chute
What We Don’t Like
- Plastic blade can chip on hard gravel or debris
Specs
- Type Cordless electric
- Weight 37.5 pounds
- Clearing width 18 inches
This Bob Vila Approved product carries our brand’s highest level of recommendation.
Bob Vila Approved recognizes the household and DIY products that impressed us most in our real-world testing and that exemplify core values of the Bob Vila brand, including craftsmanship, innovation, and value for the dollar. Winners of this designation come recommended by our professional review team and are personally approved by Bob Vila.
This battery-powered snow blower from Snow Joe is made to rival the power of a standard two-stage snow blower. Equipped with two rechargeable 24-volt (V) batteries, it offers up to 80 minutes of runtime and can throw up to 10 tons of snow per charge. Its 18-inch auger is rubber tipped, can cut a 10-inch-deep path, and works noticeably faster than other models. In some instances, it also threw snow farther than the 20-foot mark claimed by the manufacturer.
We chose this Snow Joe cordless snow blower as the best electric snow blower because it’s very functional, moderately priced, and a solid, consistent performer in a variety of conditions. At a relatively light weight of 37.5 pounds, it’s plenty easy to push around and manage. It also has a nice set of LED headlights to increase visibility in dark conditions.
Shoppers seeking an economical single-stage snow blower with plenty of power, simple operational features, and great performance won’t be disappointed.
What our tester says: “We were so impressed by how quickly the batteries on this Snow Joe charged. But they also lasted long enough for us to make it through full snow-clearing sessions during testing, which is a big part of why this model was a clear favorite.”—Zach Lazzari, Product Reviews tester and writer
Read our full review: Snow Joe 24V-X2-SB18 48V Ionmax Snow Blower
Get the Snow Joe single-stage snow blower at Amazon (with cover and scraper), Walmart, Best Buy, or Blain’s Farm & Fleet.
Best Overall Gas
Troy-Bilt Squall 208E 21" Snow Blower
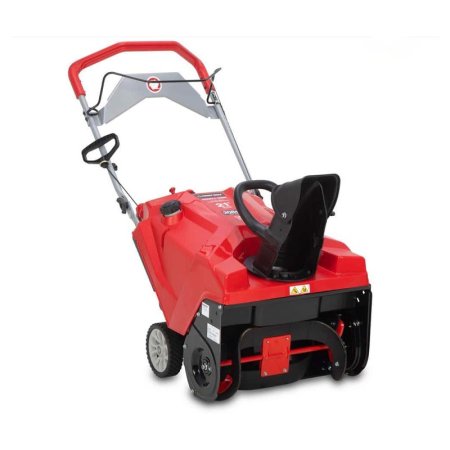
What We Like
- Easy to start, runs efficiently, and is impressively quiet
- Auger throws snow with remarkable force
- Fairly affordable for a high-quality gas-powered snow blower
What We Don’t Like
- Wheels may be too small for deep snow
Specs
- Type Gas
- Weight 100 pounds
- Clearing width 21 inches
The Squall is a smooth-running unit with an efficient 208 cubic centimeter (cc) 4-stroke engine, meaning it doesn’t require users to mix oil and gas as with a 2-stroke machine. Its user-friendly design features an easily accessible gas-fill neck and an oil fill that doesn’t require any manipulation of the machine or leveling. The unit’s electric start performed flawlessly, repeatedly firing up on the first push.
During testing, we really appreciated how quiet the engine ran and how easy it was to push this snow blower around, especially considering how loud and heavy gas models can be. We were impressed with the auger’s ability to virtually vacuum up snow before projecting it through the chute at high speeds. While its standard-size half-gallon fuel tank may seem small, the machine’s efficiency allowed us to clear multiple properties without needing to refill. The 100-pound machine pushed along easily, even though its wheels are smaller than is ideal for deep snow. Overall, however, this gas snow blower is perfect for moderate storms and snow loads under 12 inches.
What our tester says: “We tested several gas models that performed exceptionally well, so assigning this award wasn’t easy. Ultimately, the Troy-Bilt Squall took the top prize, but we think shoppers will also want to take a hard look at the Toro self-propelled model. Both snow blower brands excel in the gas snow blower design with reliable engines and smooth functionality.”—Zach Lazzari, Product Reviews tester and writer
Get the Troy-Bilt single-stage snow blower at The Home Depot, Walmart, or Northern Tool + Equipment.
Best Bang For The Buck
Greenworks 13-Amp 20" Corded Snow Thrower

What We Like
- Clears a 20-inch swath of snow with each pass
- Discharge chute throws snow up to 20 feet
- Rubber auger blades don’t damage pavement
- Attractive and affordable price point
What We Don’t Like
- Corded operation can be inconvenient
- Requires an extension cord, which is not included
Specs
- Type Corded electric
- Weight 32 pounds
- Clearing width 20 inches
At just 32 pounds, this corded electric Greenworks 20-inch snow thrower is almost a mini snow blower, yet our tests proved it’s powerful enough for clearing snow up to 12 inches deep on small driveways, walkways, and decks. Though the manufacturer doesn’t advise operating it in heavy snow, we did try to tackle some deeper snow and found the ramping-up technique quite effective. The unit put out consistent power without requiring us to stop and recharge a battery. Of course, that meant we always had to be within access to an outlet, which generally involved using an outdoor-rated extension cord we had on hand.
While this model does have a clip that helps secure its cord to prevent it from accidentally unplugging, it was sometimes still challenging to wrangle the long cord in areas with multiple obstacles. Still, there’s a lot to like about using this unit to remove snow: its push-button start is convenient, and controlling the chute is simple via a lever located just below the handle. Although our model did not include LED lights, Greenworks makes a version with the option, which would make nighttime snow removal much easier.
Get the Greenworks 20-inch single-stage snow blower at Walmart.
Upgrade Pick
Ego Power+ Peak Power 21" Snow Blower
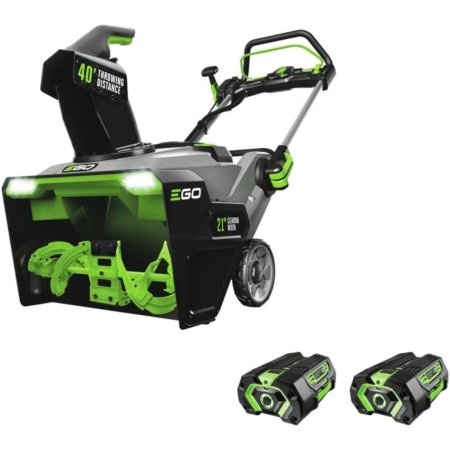
What We Don’t Like
- Large wheels make it easy to push
- Throws snow up to 40 feet for clearing large driveways
- Handles can fold for easy storage
- Extended battery life provides plenty of working time
What We Like
- Can be challenging to push up hills
Specs
- Type Cordless electric
- Weight 50.6 pounds
- Clearing width 21 inches
For those looking to invest in a machine with some unique features, the Ego Power+ cordless snow blower could be just the ticket. This model can throw snow up to 40 feet, far exceeding many single-stage units. That impressive distance, along with the adjustable discharge chute and steel auger, makes plowing large snow piles easy—even in icy conditions.
This Ego snow blower features a 21-inch capacity, which is a bit larger than most comparable models. It comes with two 56-volt 5.0 amp hour (Ah) batteries that can power the brushless motor long enough to clear snow off a 12-car driveway. The adjustable throttle also allows the user to regulate the power and battery as needed. This unit even has a folding handle with quick-release levers that make it easy to store. The only downside to this Ego is that it is on the heavier side, but the extended battery life is definitely a plus that cannot be ignored.
What our tester says: “During testing, this model performed exceedingly well. It was easy to operate and push, even over less-than-smooth terrain. We also enjoyed the folding handle with quick-release levers, as it made storing this model a breeze.”—Zach Lazzari, Product Reviews tester and writer
Read our full review: Ego Power+ Peak Power 21″ Snow Blower
Get the Ego Power+ single-stage snow blower at Amazon, Lowe’s, Ace Hardware, or Walmart.
Best Light-Duty
Wen 5664 Snow Blaster 18" Electric Snow Thrower
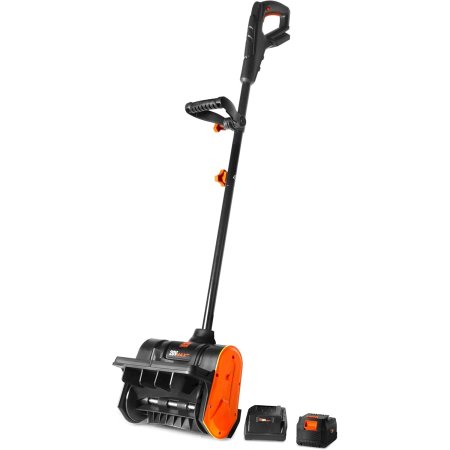
What We Like
- Lightweight, portable snow blower
- 13.5-amp motor clears snow up to 7.8 inches deep
- Can move up to 490 pounds of snow per minute
What We Don’t Like
- Requires some assembly and an extension cord
- Not designed for deep snow removal
Specs
- Type Corded electric
- Weight 32 pounds
- Clearing width 18 inches
This 13.5-amp electric blower by Wen is a lightweight, 32-pound machine designed for use in small areas. It can clear an 18-inch swath of light to medium snow accumulation up to 7.8 inches deep and features a 180-degree rotating chute that’s easy to adjust with minimal effort. Despite its compact and simple design, we found it to be a powerful and effective tool for removing light snowfall as well as wet snow (if we gave it a little extra push).
This Wen requires a cord to function, so it’s best in areas with convenient access to electricity—we found it most useful on our front steps and deck. The plastic auger worked surprisingly fast, and the throwing distance was more than ample for those spaces. We also liked that this unit has a folding handle that makes it easy to transport and store.
Get the Wen single-stage snow blower at Amazon or Wen.
Best Medium-Duty
DeWalt 21" 60V MAX Single-Stage Snow Blower Kit
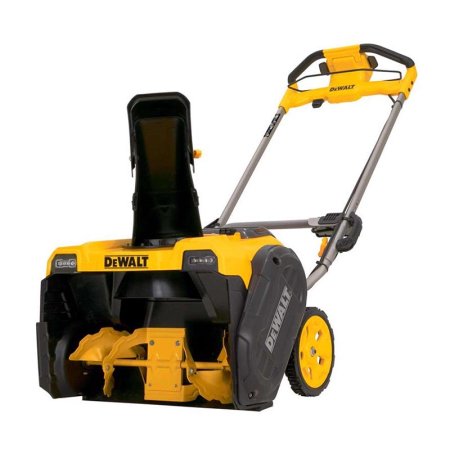
What We Like
- Impressive 21-inch clearing path
- Steel auger is tough enough for hard, icy snow
- Electric controls enable quick throwing-direction changes
What We Don’t Like
- Auger angle control requires manual adjustment
Specs
- Type Cordless electric
- Weight 59 pounds
- Clearing width 21 inches
With this medium-duty model, DeWalt introduces some great features into the electric snow blower market. It’s one of the few single-stage options available that has a steel auger, making it great for chopping through ice and wet snow. It also offers an impressive 21-inch width so users can process more snow in less time, and its batteries provide about 40 minutes of continuous runtime.
During testing, the DeWalt worked through light snow with no resistance, and once conditions iced up, it continued to do really well. We had to use a bit more effort as the snow got heavier, but the auger was more than capable and still threw snow reasonably far. We were also impressed by how easy it was to change throwing directions via this machine’s electric tab-style buttons. If you need a snow blower that’s a bit more powerful than a light-duty model but not as heavy-duty as a two-stage machine, the DeWalt is a great choice.
Get the DeWalt single-stage snow blower at Tractor Supply Co., Ace Hardware or The Home Depot.
Best Heavy-Duty
Ryobi 40V HP Brushless 21" Whisper Snow Blower
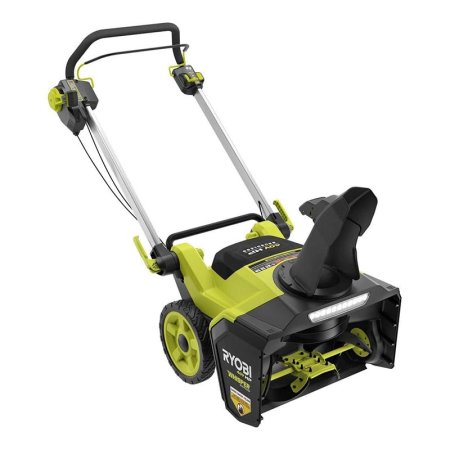
What We Like
- 21-inch clearing width and 13-inch clearing depth
- Variable-speed auger throws snow more than 35 feet
- Whisper-quiet operation and LED light bar
- Handle-mount controls are comfortable and easy to use
What We Don’t Like
- Not a self-propelled option
- Plastic tires aren’t as durable as rubber ones
Specs
- Type Cordless electric
- Weight 52 pounds
- Clearing width 21 inches
With its multiple batteries and 40 minutes of runtime, this Ryobi snow blower boasts plenty of long-lasting power and excellent snow-blowing capabilities. The 40V brushless single-stage unit comes with a push-button start, a variable-speed rubber-metal auger (the center shaft of the auger is metal while the blades are rubber), and handle-mount control for an overall ergonomic design.
This Ryobi has a 21-inch clearing width, a 13-inch clearing depth, and a 1.4-watt LED light bar. It comes with dual 7.5Ah batteries as well as a charger. Want more? It also has whisper-quiet operation (purportedly 84 percent quieter than other snow blowers) and launches snow over 35 feet.
During testing in a huge storm event in the Sierra Nevada mountains, this model really stood out. The batteries charged quickly, and it was capable of churning through heavy snow with minimal force. The charging port does only accept one battery at a time, but for most users, this is still a high-performance machine that will get the job done.
Get the Ryobi single-stage snow blower at The Home Depot.
Best Self-Propelled
Toro Power Clear 721 E 21" Gas Snow Blower

What We Like
- Self-propelled 212cc 4-cycle overhead valve engine
- Throws snow up to 35 feet
- 210-degree chute features a locking deflector
- Folds for compact storage
What We Don’t Like
- For use on paved surfaces only
- Heavy compared to similar models
Specs
- Type Gas
- Weight 84 pounds
- Clearing width 21 inches
Those wanting to quickly remove snow without having to push a heavy snow-removal tool can rely on the Toro Power Clear 721 E. This self-propelled snow blower has an electric start and comes with Curve Technology that easily shreds through snow. Its auger is durable and strong, making this unit a candidate for pushing the limits of single-stage capabilities. The locking deflector on the 210-degree chute allows users to direct where the snow goes after it has been picked up.
This Toro nearly snagged the best overall gas model, and it’s certainly one of the best and most powerful single-stage snow blowers we tested. The gas motor is powerful, efficient, and even relatively quiet. Though it’s not on par with electric models for reduced noise, the trade-off is that users won’t even need to wait for this machine to recharge. The fact that the Toro is self-propelled is a major bonus, as this will save users the effort of pushing through difficult snow. The only downside is that changing chute angles and throwing directions is done manually. It’s a quick process, but there are no controls within reach of the handle area.
Get the Toro 721 E single-stage snow blower at Lowe’s, Tractor Supply Co., Ace Hardware, or The Home Depot.
Best Battery Life
Greenworks 60V 22" Single-Stage Snow Blower
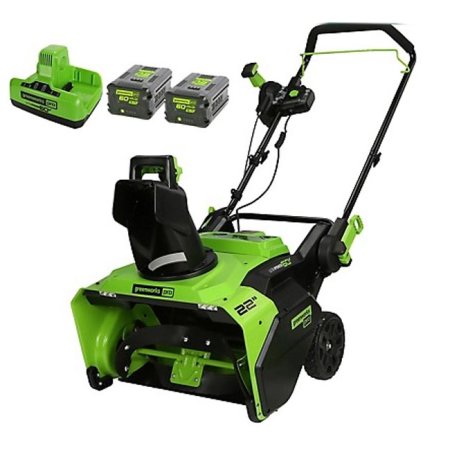
What We Like
- 2 powerful 5.0Ah batteries and a dual port charger
- Runs for up to 60 minutes; recharges in about 45
- Folding handle enables easy transport and storage
- LED headlights enhance visibility during heavy storms
What We Don’t Like
- Not self-propelled
Specs
- Type Cordless electric
- Weight 65.5 pounds
- Clearing width 22 inches
While battery-powered tools offer the convenience of cordless operation and minimal maintenance requirements, the compromise in power and runtime can make them impractical. Not so with this snow blower from Greenworks. The 60-volt, 22-inch model doesn’t look especially beefy, but its two 5.0Ah batteries really pack a punch. They deliver exceptional power and longer runtimes so users can work up to an hour to get big jobs done.
It’s hard to overstate the benefits of more battery power. We found the battery life to be a huge bonus during bigger storms and when the neighbors needed a hand with snow removal. The dual charging port also offers simultaneous or alternate charging for near-continuous use.
Outside of the batteries, this unit also performed as well as any of those tested. It has great auger speed and throwing distance as it zipped right along, clearing a wide 22-inch path. It’s not self-propelled, but otherwise, we had zero complaints about the quality of this machine.
Get the Greenworks 22-inch single-stage snow blower at Tractor Supply Co. or Walmart.
Jump to Our Top Picks
How We Tested the Best Single-Stage Snow Blowers
We tested a range of electric and gas single-stage snow blowers in a series of Montana and Sierra Nevada storms. We evaluated each unit’s ease of assembly and functionality on concrete as well as light gravel, if applicable. We looked at overall performance, auger quality and speed, snow-throwing distance, battery life, and build quality.
Since the storms during our tests delivered everything from a few inches of powder to a foot of heavy snow alongside temperatures as low as -10 degrees Fahrenheit, we got a great idea of how well these machines’ batteries and gas motors could hold up in difficult conditions. After rating each unit based on the above factors, we assigned awards to worthy models.
What to Consider When Choosing a Single-Stage Snow Blower
According to Wes Bollingmo, Channel & Product Support Manager at Toro, one of the most important things to consider when choosing a snow blower is its type, and that doesn’t mean gas or electric. Wes says, “While fuel types do matter in the buying process, it’s much more important to ensure you have the proper type of snow blower: single-stage, in-line two-stage, or two-stage.” After that, you can look into things like power source, clearing width and depth, ease of use, and additional features.
Type/Power Source
The best snow blowers come in corded electric, battery-powered, and gas-powered varieties.
- Electric snow blowers are typically designed to clear light snow up to about 8 inches deep. They must be plugged into an outlet with an extension cord, limiting their performance slightly and making them best for minimal snowfall levels and relatively short sidewalks and driveways. Since they’re lightweight enough to lift and move, they’re also handy for clearing snow from decks and steps.
- Cordless snow blowers are convenient battery-powered machines ideal for light to medium snowfall and spaces that can be cleared in 30 to 40 minutes. To extend this runtime, some models come with a spare battery that users can swap in if needed. Generally speaking, single-stage cordless models are lighter and more compact than gas units.
- Gas-powered snow blowers boast more power than electric and battery blowers and don’t restrict their operators to the length of an extension cord. They can clear away deep and heavy snow all along the driveway and then continue down the sidewalk and clear the neighbor’s drive as well. They’re generally more expensive and louder tools and also require more snow blower maintenance to stay operational across seasons.
Toro’s Wes Bollingmo does point out, however, that the power difference between gas and electric machines is becoming less substantial over time. “Thanks to recent technological advances, today’s battery-powered snow blowers offer performance comparable to gas models, making fuel type less of a deciding factor than in years past,” he says. Still, since power source can impact ease of use, it remains a relevant consideration.
Weight
Weight plays a significant role in how easy it is to push or turn a snow blower. Though a large snow blower can clear a driveway in fewer passes than a small snow blower, bigger machines are harder to maneuver.
Most single-stage gas snow blowers weigh at least 80 to 100 pounds, while corded and cordless blowers weigh closer to 30 to 60 pounds. Those needing something lighter may want to consider a handheld snow blower, snow thrower, or electric shovel snow blower.
Clearing Width and Depth
Before choosing the best single-stage snow blower, it’s important to consider the width and depth of snow the machine can clear with each pass. Most single-stage machines can clear paths between 15 and 22 inches wide—and the wider the path, the faster you’re finished.
Intake height determines the depth of snow each tool can remove with each pass, and most single-stage snow blowers have an intake depth between 7 and 12 inches. A good rule of thumb is to choose a snow blower with an intake depth 2 inches higher than your area’s average snowfall.
Wheels, Tracks, and Terrain Type
Wheeled snow blowers feature two large rear wheels that drive the machine forward, while tracked models have tracks similar to those found on a military tank.
- Tracked snow blowers provide significantly better traction in the snow, making them better able to climb steep slopes without slipping backward. Most tracked models are two- or three-stage snow blowers, as single-stage models typically don’t produce enough power to drive the tracks. They also operate more closely to the surface, leaving a thinner layer of snow and ice on a driveway or sidewalk than wheeled models.
- Wheeled snow blowers are easier to turn since tracked models don’t pivot. Wheel sizes for single-stage snow blowers range from 6 to 8 inches. Larger wheels perform better in deeper snow, while smaller wheels are easier to maneuver. While wheeled blowers are generally faster than tracked models, some higher-end tracked blowers offer faster speed and turn-on-a-dime technology that makes them comparable in speed and maneuverability.
Terrain type will influence which of these design options is best for a specific user. Paved surfaces, such as driveways and sidewalks, are best suited for wheeled snow blowers. Tracked snow blowers are better suited for unpaved surfaces. Grade also has a significant impact; steep driveways require a snow blower with good traction and enough power to pull it up a snow-covered slope.
Speed Control
Speed control in a snow blower can refer to both the speed at which you can move the machine as well as the speed of the auger. Gas snow blowers can be quite heavy, so many shoppers prefer self-propelled models to make pushing them faster and easier. Battery-powered blowers are generally lighter and feature digital drive systems that help optimize output without unnecessary effort.
Blowers with variable-speed augers can be useful for adapting to different types of snow. If the snowfall is nice and light, increasing the speed at which the snow is scooped and thrown through the chute will make it easier to move the machine. For heavy, packed snow, you will need to slow the blower to give the machine time to discharge it without clogging.
Chute Control
The chute, a curved, hollow tube that extends from the back of the intake on a snow blower, provides a route for the snow to be thrown from the machine. On most blowers, a manual crank or lever lets users change the angle and direction of the snow being displaced.
Premium snow blowers, however, have auto-rotating chutes that users turn by pushing a button near the handle, which doesn’t require the machine to be stopped. The angle on some chutes also can be changed to allow the snow blower to throw snow even further.
Additional Features
Single-stage snow blowers often boast some extra features to improve ease of use.
- Electric start is a useful feature for gas snow blowers. This typically involves a push-button ignition that replaces the standard pull start and choke.
- Heated handles may seem luxurious, but personal safety is an important part of working outdoors in freezing temperatures. The heat generated by the handles helps keep the user’s fingers warm in the cold air and makes it easier to hold and control the snow blower.
- Drift cutters help clear deep drifts of snow. The cutter’s metal housing collects and pushes snow down into the auger for removal.
- Headlights make it easier and safer to clear snow at night or in dim lighting.
- Automatic safety shutoffs turn off the snow blower when the user releases the handle.
We asked Corey Welch, founder and CEO of Mow & Snow, an on-demand snow removal and lawn care company in Canada, which of these features he appreciates most on a snow blower. He said, “Headlights are a game-changer for early mornings or late evenings, and heated handles are a luxury that keeps your hands from freezing during long jobs.” Anyone looking to increase comfort and ease of use will want to look for a model with these features.
FAQs
If you still have questions about single-stage snow blowers, we suggest you refer to the answers to common FAQs below before putting on your work boots and heading outside.
The biggest difference between a single-stage vs. a two-stage snow blower is power. Most single-stage snow blowers can handle a maximum of 7 to 12 inches of snow, whereas two-stage snow blowers can tackle up to 2 feet. The “stage” term refers to how each blower removes snow.
A single-stage snow blower has an auger that both gathers and blows away the snow. A two-stage snow blower, in comparison, has an auger that sucks up the snow and an impeller that launches it into the air. In addition to being able to remove deeper snow, two-stage snow blowers also have larger intakes that range in width from 20 to 36 inches.
The length of the extension cord depends on the gauge of the power cable. A 12-gauge cord will work up to 100 feet, while a slimmer 14-gauge cord only extends about 50 feet.
Getting a snow blower started depends on its power source. Keep these tips in mind for electric and gas-powered machines:
– Corded electric: Plug the unit into an outlet and press the start button. These models take their power from an AC power source, so there are no issues with low-temperature start-ups.
– Cordless electric: Some electric snow blowers will not start if the battery is too cold. It’s a good idea to store lithium-ion batteries at room temperature to prevent this issue.
– Gas-powered: Gas snow blowers with a pull-start motor may be challenging to start in low temperatures. Make sure to use lightweight motor oil, such as 5W-30, which is designed to operate at low temperatures.
Periodically changing the fuel filter ensures contaminants won’t find their way inside the engine and negatively impact performance. The fuel filter is usually located between the fuel pump and fuel tank.
Change the filter by removing the two hoses that connect to it, making sure to keep the hoses pointing upward to prevent fuel from leaking out of the tank. Install the new filter by attaching the hoses to the line leading from the fuel tank and the line leading to the engine.
A single-stage snow blower might use gas, corded electricity, or a battery as its fuel.
Yes, single-stage snow blowers are good, though they aren’t right for everyone. If you live in an area with light to medium amounts of snowfall and don’t have an especially large property, a single-stage snow blower can provide effective performance and affordability.
The augers on single-stage snow blowers are designed to clear snow down to the ground, so using them on grass is not recommended. They may damage your lawn or even pick up debris that can damage your machine.
Meet the Testers
Zach Lazzari is a freelance writer splitting time between the great outdoors, travel, and DIY projects ranging from camper builds to home renovations and maintenance. His home base in Montana is the perfect testing grounds for winter products and snow equipment. With over a decade of professional writing experience, he also covers a variety of other projects and maintenance topics for Bobvila.com.
Tom Scalisi is a full-time DIY and construction writer for many of the largest websites in the industry, including BobVila.com, This Old House, Family Handyman, and Forbes. He also owns and operates a pest control blog called RiddaBugs.com.
Additional research provided by Tony Carrick.
The post We Tested 2025’s Best Single-Stage Snow Blowers and Found 9 Top Models You Can Rely On appeared first on Bob Vila.
]]>The post 2025’s Best Metal-Cutting Saws Can Slice Through Brass, Aluminum, Copper, and More appeared first on Bob Vila.
]]>It’s an understatement to say that sawing through metal by hand is hard work, but there’s no need to break a sweat when today’s powered metal-cutting saws make quick work of the task. Sure, a hacksaw can tackle occasional small jobs, but for larger pieces, or if you cut metal on a regular basis, a power tool is a more sensible solution.
However, the wide variety of metal-cutting chop saws, band saws, and circular saws on the market makes it challenging to find the right tool. We evaluated some of the top options and rounded up those that we feel stand out from the rest of the bunch, such as our favorite: DeWalt’s DW872, a versatile workhorse that’s priced fairly and built to last. It also has the best 14-inch carbide metal-cutting blade for general-purpose use we found. But we also liked other metal-cutting saws for other reasons, such as the Wen 94396, which we’ve tested first-hand in the past. In this guide, we’ll help clarify the options available, discuss the key technical features of each type, and offer our suggestions for the best metal-cutting saws on the market.
- BEST OVERALL: DeWalt DW872 14″ Multi-Cutter Saw
↓ Jump to Review - RUNNER-UP: Makita LC1230 12″ Metal Cutting Saw
↓ Jump to Review - BEST BANG FOR THE BUCK: Porter-Cable PCE700 14″ Chop Saw
↓ Jump to Review - BEST DIY: Evolution RAGE4 Multi-Material Cutting Chop Saw
↓ Jump to Review - BEST PORTABLE: Wen 94396 5” Handheld Portable Band Saw for Metal
↓ Jump to Review - BEST CIRCULAR: Milwaukee M18 Fuel Metal Cutting Circular Saw
↓ Jump to Review - BEST HEAVY-DUTY: Shop Fox W1715 ¾ HP Metal Cutting Bandsaw
↓ Jump to Review

Metal Cutting Saw Comparison Chart
| Product Name | Power | Speed | Weight |
| DeWalt DW872 | 15 amps (corded) | 1,300 RPM | 50.7 pounds |
| Makita LC1230 | 15 amps (corded) | 1,700 RPM | 42.5 pounds |
| Porter-Cable PCE7014″ | 15 amps (corded) | 3,800 RPM | 32 pounds |
| Evolution RAGE4 | 10 amps (corded) | 4,200 RPM | 20.1 pounds |
| Wen 94396 | 10 amps (corded); 20-volt cordless also available | Variable: 60 to 420 FPM | 14.5 pounds |
| Milwaukee M18 | 18-volt cordless | 3,900 RPM | 5.9 pounds |
| Shop Fox W1715 | ¾ horsepower, single phase (uses standard 110-volt outlet) | 78, 108, or 180 FPM | 139 pounds |
Our Top Picks
Now that you’ve learned about the differences in the types of metal-cutting tools and their features, it’s time to check out some of the best models on the market.
Best Overall
DeWalt DW872 14" Multi-Cutter Saw
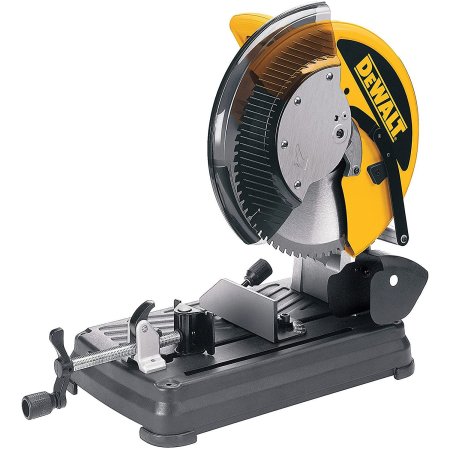
What We Like
- Renowned DeWalt quality
- 70-tooth carbide-tipped blade
- Minimal heat buildup
What We Don’t Like
- Premium price
- No chip collection
Specs
- Power: 15 amps (corded)
- Speed: 1,300 RPM
- Weight: 50.7 pounds
The DeWalt DW872 is a frequent favorite in independent reviews of the best chop saw for metal. The powerful 15A (amp) motor combines with a 70-tooth carbide-tipped blade to provide fast, clean cutting of steel, aluminum, copper, and other metals, as well as plastics, composites, and wood.
The DW872 has a class-leading cutting capacity of up to 5-3/16-inch diameter in solid bar or 6½ inches by 4½ inches in rectangular stock. Users can create bevels of up to 45 degrees using the adjustable fence, and the clamp has a quick-release lever.
At just over 50 pounds, the chop saw is fairly portable while also being sturdy, though the pressed-steel base isn’t quite as rigid as some cast versions. The blade guard is plastic. There is neither a chip tray nor a spark deflector, but since the DeWalt produces very few sparks, this isn’t really an issue.
Get the DeWalt metal-cutting saw at Amazon, The Home Depot, or Acme Tools.
Runner-up
Makita LC1230 12" Metal Cutting Saw
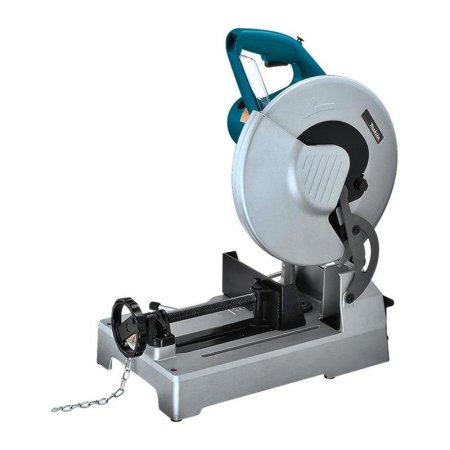
What We Like
- Rigid, durable build
- 60-tooth carbide-tipped blade
- Safety goggles included
What We Don’t Like
- Ineffective chip tray
- Expensive for DIY users
Specs
- Power: 15 amps (corded)
- Speed: 1,300 RPM
- Weight: 50.7 pounds
Another popular, high-performance choice, this Makita model offers proven durability, competitive performance, and rapid adjustment. It has a blade slightly smaller than the DeWalt, with a maximum cut of 4½ inches. However, the 60 carbide-tipped teeth provide fast cutting and a smooth finish through a wide variety of metals. The base is a solid aluminum casting, and the blade guard is steel, although it produces very few sparks.
While several chop saws have a quick-release clamp for fast, repetitive cutting, the Makita also boasts a quick-release fence for rapid setting of different angles. Quick-and-easy blade changing requires a socket wrench, but it’s included. A pair of safety goggles also comes with the saw. Although a chip tray is provided, it catches very little. The Makita chop saw makes a useful light- to medium-duty tool, but for DIY users, it’s a significant investment.
Get the Makita metal-cutting saw at Amazon, The Home Depot, or Acme Tools.
Best Bang for the Buck
Porter-Cable PCE700 14" Chop Saw
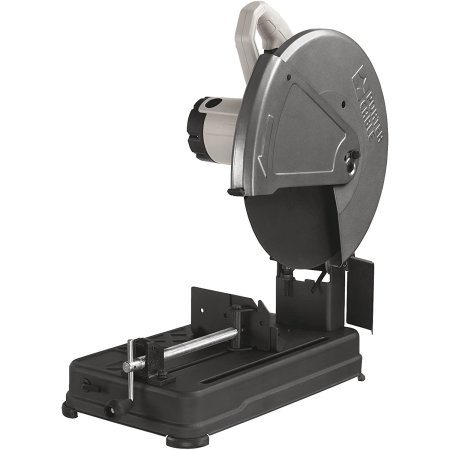
What We Like
- Sturdy, reliable build
- Comparatively lightweight
- Great cost value
What We Don’t Like
- Abrasive wheel could be better
- Lacks precision
Specs
- Power: 15 amps (corded)
- Speed: 3,800 RPM
- Weight: 32 pounds
At first glance, it was difficult for us to understand why the Porter-Cable chop saw is so affordable. Its overall construction is sturdy, and it has a powerful 15A motor. It features an adjustable fence for cutting angles at up to 45 degrees and a quick-release clamp. The spark deflector protects the user and provides a clear view of the cut line.
The big difference in this chop saw is its abrasive wheel. While it runs at 3,800 RPM (revolutions per minute), the actual cutting speed is considerably slower than with a toothed blade. Additionally, while replacement wheels are a fraction of the cost of a tungsten carbide blade, they wear out much more quickly. So while the maximum cut is stated at 5 inches, it quickly reduces with regular use. Abrasive wheels also produce a lot of sparks. Still, we think this chop saw’s humble price makes it a worthy option for home welders and engineers who don’t need high precision.
Get the Porter-Cable metal-cutting saw at Amazon, The Home Depot, or Acme Tools.
Best DIY
Evolution RAGE4 Multi-Material Cutting Chop Saw
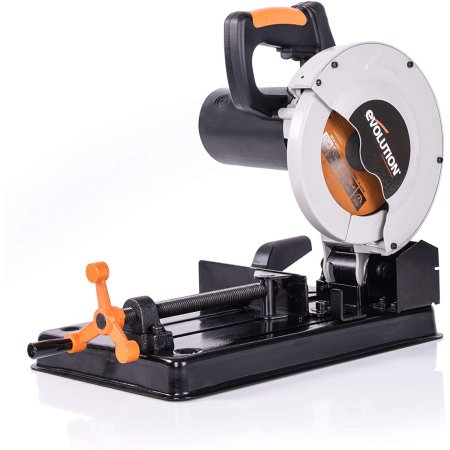
What We Like
- Very versatile blade
- Light and portable
- Relatively inexpensive considering its quality
What We Don’t Like
- Light-duty only
- Modest capacity
Specs
- Power: 10 amps (corded)
- Speed: 4,200 RPM
- Weight: 20.1 pounds
DIYers in the market for a multipurpose saw may wish to check out the Evolution RAGE4. Lightweight and affordable, it’s a well-made, sturdy tool with an adjustable fence and quick-release clamp. The 10A motor isn’t as powerful as some, but it’s a good match for the 7¼-inch tungsten-tipped blade.
Thanks to its remarkable versatility, the blade is the star here. It can make accurate cuts in ferrous and nonferrous metals, plastic, PVC, composites, and wood. The maximum thickness in steel plate is only ¼ inch, but it can saw through a box section up to 5 inches across.
The saw generates very little heat and few sparks. Weighing just 20.1 pounds, it’s highly portable and easy to store, making it a good choice for a small workshop with limited space.
Get the Evolution RAGE4 metal-cutting saw at Amazon, The Home Depot, or Tractor Supply Co.
Best Portable
Wen 94396 5” Handheld Portable Band Saw for Metal
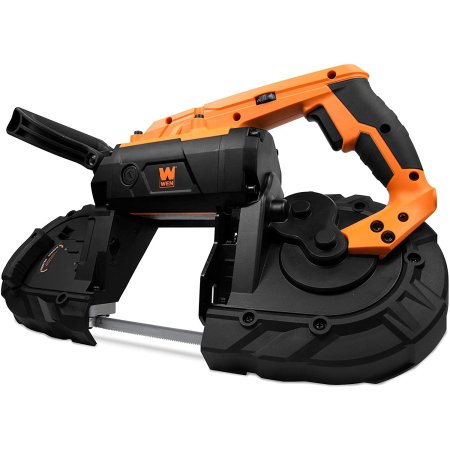
What We Like
- Variable speed function
- Very maneuverable
- Useful stand included
What We Don’t Like
- A lot of plastic
- May suffer occasional breakdowns
Specs
- Power: 10 amps (corded); 20-volt cordless also available
- Speed: 60 to 420 feet per minute (FPM)
- Weight: 14.5 pounds
Wen has a reputation for producing durable tools at competitive prices, and we think this handheld portable band saw is a good example. It boasts a reliable 10A motor that drives a 10/14-TPI variable pitch blade suitable for a variety of materials. Users can adjust the speed, so the feed rate can be optimized for metals ranging from aluminum to cast iron. It can complete a maximum cut of 5 inches.
The ball-bearing guides help ensure smooth cutting, and an external lever simplifies blade tensioning. A rubberized grip offers room for a gloved hand, and an auxiliary handle at the front provides a sure hold.
At under 15 pounds, it’s light, but that’s because it contains quite a lot of plastic. Although the saw isn’t fragile, it might suffer damage in tough jobsite environments. Reports also exist of occasional breakdowns, though these seem to be isolated incidents rather than a common problem.
What our tester says: Glenda Taylor, a Bob Vila staff writer and product tester, notes in the Best Portable Band Saws that she “tested the Wen by cutting angle iron, steel, PVC, and conduit. It sliced through all of them like butter. With a cutting capacity of 5 inches by 5 inches, this is a deep-throat band saw that will cut through sizable items, and because it’s corded, it won’t lose power as long as an outlet is nearby.”
Get the Wen metal-cutting saw at Amazon, The Home Depot, or Walmart.
Best Circular
Milwaukee M18 Fuel Metal Cutting Circular Saw
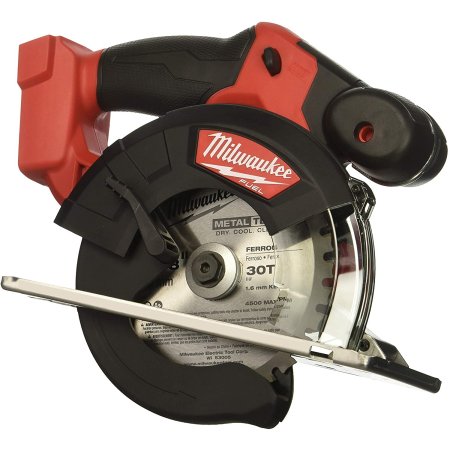
What We Like
- Efficient brushless motor
- Very light and compact
- Good battery life
What We Don’t Like
- Battery and charger are extra
- Pricier than most
Specs
- Power: 18-volt cordless
- Speed: 3,900 RPM
- Weight: 5.9 pounds
Milwaukee makes the cut with its M18 Fuel circular saw, a versatile tool popular with jobsite welders, installation contractors, and sheet-metal workers. It uses a powerful brushless motor that features RedLink Plus electronics to maximize battery life. Unlike brushed motors, brushless versions are maintenance-free.
The Milwaukee M18 has the best metal-cutting circular saw blade we’ve seen, with 30 carbide-tipped teeth ideal for tackling angle iron, rebar, sheet steel, and EMT (electrical conduit), among other metals. A wide stainless steel shoe (base plate) provides stability when sawing, and a clear guard offers good cut-line visibility. Its 5.9-pound weight makes it very manageable.
We found it difficult to find fault with the Milwaukee M18 Fuel metal-cutting circular saw for the most part, but it is expensive, and a battery and charger are not included.
Get the Milwaukee metal-cutting saw at Amazon, The Home Depot, or Acme Tools.
Best Heavy-Duty
Shop Fox W1715 ¾ HP Metal Cutting Bandsaw
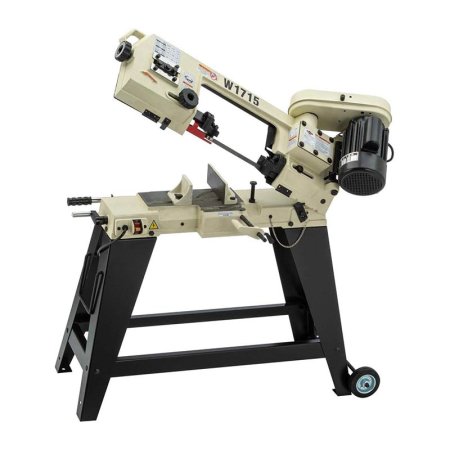
What We Like
- Horizontal and vertical cutting ability
- Competitively priced considering all it offers
- Wheels and handle for mobility
What We Don’t Like
- 2-person assembly recommended
- Significant investment
Specs
- Power: ¾ horsepower, single phase (uses standard 110-volt outlet)
- Speed: 78, 108, or 180 FPM
- Weight: 139 pounds
Shop Fox produces affordable heavy-duty machinery aimed at home and small workshop users. The Shop Fox W1715 metal-cutting band saw has a powerful ¾-horsepower motor with three speed ranges, yet it plugs into a standard 110-volt outlet.
Thanks to the included vertical sawing attachment, the band saw can be used either horizontally or upright. Its maximum cut is a 4½-inch diameter in round stock or 6 inches by 4½ inches in rectangular. Adjustable clamps allow sawing at any angle. The saw shuts off automatically as soon as the cut is finished.
Some assembly is required, and since it weighs 122 pounds, I don’t suggest trying this alone—it’s a job for two people. Once assembly is complete, the wheels on the stand make it relatively easy to move around. Although the Shop Fox W1715 is a significant investment, it’s a good value when compared with similar rivals.
Get the Shop Fox metal-cutting saw at Amazon, The Home Depot, or Acme Tools.
How We Chose the Best Metal-Cutting Saws
As an engineer, I have extensive experience with metal-cutting saws and metal-cutting saw blades. The Bob Vila team also researched leading brands and the latest products to make sure we were aware of recent developments. While the technical aspects discussed here are clearly important, several other key factors impacted our choices.
- Type: Although lots of different types of metal-cutting saws are available and chop saws are popular among metal workers and welders, they aren’t the best metal-cutting saws to trim rebar set in concrete or saw through metal piping installed in a building. Our goal was to choose models that provide solutions for a variety of different users.
- Value: We tried to find metal-cutting saws for every budget, but we never base our choices on price alone. Each of these saws comes from a brand with an established reputation for reliability and durability to ensure long-term value.
What to Consider When Choosing the Best Metal-Cutting Saw
Finding the best saw for cutting metal isn’t as straightforward as it might seem. Different sizes, power options, and cutting capacities are available. Also, it’s important to consider how it will be used: Will the tool be stationary in a workshop, or do you need a portable saw? To get the right combination of both performance and value, take the following considerations into account.
Blade Type and Size
The two main types of tools for cutting metal are chop saws and band saws, and they have different types and sizes of blades.
- Chop saws, with a rise-and-fall action similar to a woodworking miter saw, have either a toothed blade or an abrasive wheel (often called a cut-off wheel). Most toothed blades have carbide-tipped teeth, which stay sharp longer. They outlast abrasive cut-off wheels, though the latter are considerably cheaper. The diameter of the blade or cut-off wheel can range from 7¼ inches to 16 inches. This size has a big impact on the maximum cutting thickness, though individual machine specifications should always be checked.
- Band saws, which range from handheld portable models to heavy-duty workshop tools, have a continuous steel ribbon with teeth along one edge. While the length of a band saw blade is fixed, both width and teeth per inch (TPI) can vary. Wider blades are stiffer and used for straight cutting, whereas thinner, more flexible blades can cut curves. A blade with fewer teeth cuts more quickly, while blades with more teeth can create a smoother finish.
Angled Cuts and Fence Adjustment
Chop saws get their name from the rise and fall of the blade. Unlike a woodworking miter saw, the blade cannot be rotated or tilted. Instead, a rotating fence is fitted, and the workpiece is clamped against it at the required angle.
Handheld metal-cutting band saws are typically used for making pipework or cutting rebar. In theory, they can cut at any angle, but their freehand nature can make it difficult to maintain accuracy. Workshop versions of this saw can offer great versatility, either with a rise-and-fall action similar to a chop saw or by using a flat table to support the workpiece, which is then fed into the blade.
Motor Power and Source
Since it’s the maximum available from a standard electrical outlet, corded motors are often restricted to 15A (amps) of power, so workshop models often have a motor of this size. More portable saws are usually pushed by 10A motors, which are, strictly speaking, less powerful but still able to deliver a good performance. Heavy-duty models are frequently assigned a horsepower rating rather than amps, and a dedicated circuit is sometimes required to run them.
The power for cordless metal-cutting saws is rated in volts (V) instead of amps, which describes the battery capacity. Light-duty 12V models are the smallest, 18V or 20V models are the most common, and powerful 36V tools are now available.
Vise Adjustment and Blade Change
Chop saws and workshop band saws feature a vise for securely clamping the work during cutting. Unlike a standard vise that has two jaws, most have a single jaw that closes against the fence. The distance the jaw can open defines the maximum size of workpiece that it can accommodate. Quick-release mechanisms are a convenient addition on many of these saws.
Changing blades is straightforward on chop saws, which usually have a way to prevent rotation while the main nut is loosened and a new blade is fitted. Band saws are a bit more involved because blade tension and tracking must be set, but it’s not a difficult task.
Safety
Chop saws invariably have blade guards that expose the minimum amount of blade necessary to cut metal while offering maximum protection for the operator. Spark deflectors are also common, but while they do a good job of suppressing most of the material thrown off, users should still wear safety goggles or glasses.
The design of a band saw makes it impractical to have a full blade guard, so a length of blade remains exposed at all times. Extra care must be taken when using these tools.
Trigger locks, another important safety feature, help prevent accidental operation. Some handheld metal-cutting saws have a soft start, which reduces the initial torque when the trigger is pulled, thus making them easier to control.
Portability
The ease of transporting a tool that cuts metal depends largely on the type of saw. Handheld band saws and metal-cutting circular saws, which are similar to their woodworking counterparts, are usually light and very portable.
Chop saws vary in weight, so we considered models that weigh from about 20 pounds to more than 50 pounds. That’s still fairly movable, but weight might be a factor if the tool must be taken to and from a jobsite every day.
Heavy-duty workshop band saws can weigh 100 pounds or more, so they aren’t typically considered portable. Some, however, have wheels to move them around if necessary.
Additional Features
Metal-cutting tools may have few design specs and extra features to make them easier and more convenient to use.
- The best metal chop saws have big handles that allow easy access for a gloved hand and are comfortable to use for long periods.
- A shaft lock allows blade changing with a single wrench.
- Some chop saws have chip trays to collect waste and make cleanup easier.
- Variable speed on band saws allows the user to match the cutting rate to the type of material for more efficient sawing.
- On cordless tools, a brushless motor offers greater battery efficiency than brushed motors.
- With a circular saw, it can be difficult to see where the blade is actually cutting, so some models have laser guides that project forward. More basic models simply contain a guide arrow on the bottom plate.
Safety Tips for Using Metal-Cutting Saws
Any saw that can cut metal has the potential to be dangerous, but taking a few simple precautions will help prevent accidents.
- Read the manufacturer’s instructions carefully. Electric saws for metal cutting can be quite dangerous, so make sure you understand how the machine works and how to turn it off quickly.
- Always wear protective goggles or safety glasses. Cutting metal with a saw is usually quite noisy, so wearing ear protection is also a good idea.
- Metal can sometimes get hot when being sawed, and cut edges can be sharp. Experts recommend that you wear strong, heat-resistant gloves.
- Make sure any guards are in place correctly. Although you may be tempted to remove them for a better view, don’t.
- Sparks are often generated when cutting metal. Make sure flammable liquids are well away from the work area.
- Securely clamp the item you plan to cut, and never lift a workpiece into a rotating saw blade. If the metal catches or is thrown out, it can cause serious injury. Band saws with vertical tables are an exception, as the workpiece cannot be pulled into the blade.
FAQs
The information in this guide provides a comprehensive explanation of the key features of the best metal-cutting saws. However, during our research, we came across some general questions, which we’ve presented alongside their answers below.
A hand saw for cutting metal is called a hacksaw. Powered saws are often called chop saws or cut-off saws, but metal-cutting band saws and metal-cutting circular saws also are available.
Because some saws are better at particular tasks than others, no single answer exists as to which saw is the best. This article considers the various features and offers a variety of solutions.
A cut-off saw usually has an abrasive disk rather than a toothed blade. It works similarly to an angle grinder, but it’s mounted on a sturdy base, which helps provide stability and improve both control and accuracy.
Each of the listed metal-cutting saws could be described as a cold-cut saw, because unlike metal-cutting lathes and mills, they don’t use lubricants. However, the term typically refers to chop saws, and the DeWalt and Makita are our favorites.
No. Saws designed for cutting wood might be able to cut soft metals like aluminum or brass, but cutting metal with a hand saw is no walk in the park. And if you expect your hand saw to double as a steel-cutting saw, forget about it. There are metal-cutting saws that are capable of doing it, but even then, manufacturers don’t recommend it because swarf (metal scraps) can damage the motor or other moving parts. It’s wise to follow manufacturers’ recommendations as to the capabilities of their machines.
It’s possible, but it depends on the type of saw and the blade fitted. Sawdust tends to clog metal-cutting band saw blades because they have lots of small teeth. Using a saw like the Evolution RAGE4 is a multipurpose solution. However, if you cut wood on a regular basis, a dedicated saw is usually a worthwhile investment.
The post 2025’s Best Metal-Cutting Saws Can Slice Through Brass, Aluminum, Copper, and More appeared first on Bob Vila.
]]>The post Our Favorite Electric Fireplace of 2025 Will Keep You Cozy All Winter Long appeared first on Bob Vila.
]]>If you long for the glowing warmth of a fire but could do without the usual maintenance, consider an electric fireplace. Unlike gas and wood fireplaces, an electric fireplace (or fake fireplace heater) can go in virtually any room, with no HVAC ventilation needed.
Our favorite electric fireplace is the PuraFlame Klaus 33″ Electric Fireplace Insert. It offers the look of a real fire with a resin log and features an adjustable thermostat and remote control. Thanks to its flat bottom, it’s easy to install and plugs into any 120-volt outlet for quick operation.
After hours of research and careful consideration, we also chose a number of other electric fireplaces to suit different needs. Keep reading to learn the most important shopping considerations, what our testers had to say about select models, and our top picks among the best electric fireplaces on the market.
- BEST OVERALL: PuraFlame Klaus 33″ Electric Fireplace Insert
↓ Jump to Review - BEST BANG FOR THE BUCK: Maxhonor Electric Fireplace Heater With Remote
↓ Jump to Review - UPGRADE PICK: Real Flame Callaway 63″ Grand Electric Fireplace
↓ Jump to Review - BEST STOVE: Duraflame 3D Infrared Electric Fireplace Stove
↓ Jump to Review - BEST MODERN: Valuxhome Recessed Wall-Mounted Electric Fireplace
↓ Jump to Review - BEST FREESTANDING: Jamfly Electric Fireplace Wooden Surround Firebox
↓ Jump to Review - MOST REALISTIC: PuraFlame 33″ Western Electric Fireplace Insert
↓ Jump to Review - BEST INSERT: ClassicFlame 23″ 3D Infrared Fireplace Insert
↓ Jump to Review - BEST TV STAND: Walker Edison Wren Classic 4 Cubby Fireplace TV Stand
↓ Jump to Review - BEST FAUX STONE: Winston Porter Ceonna 60.25” Electric Fireplace
↓ Jump to Review
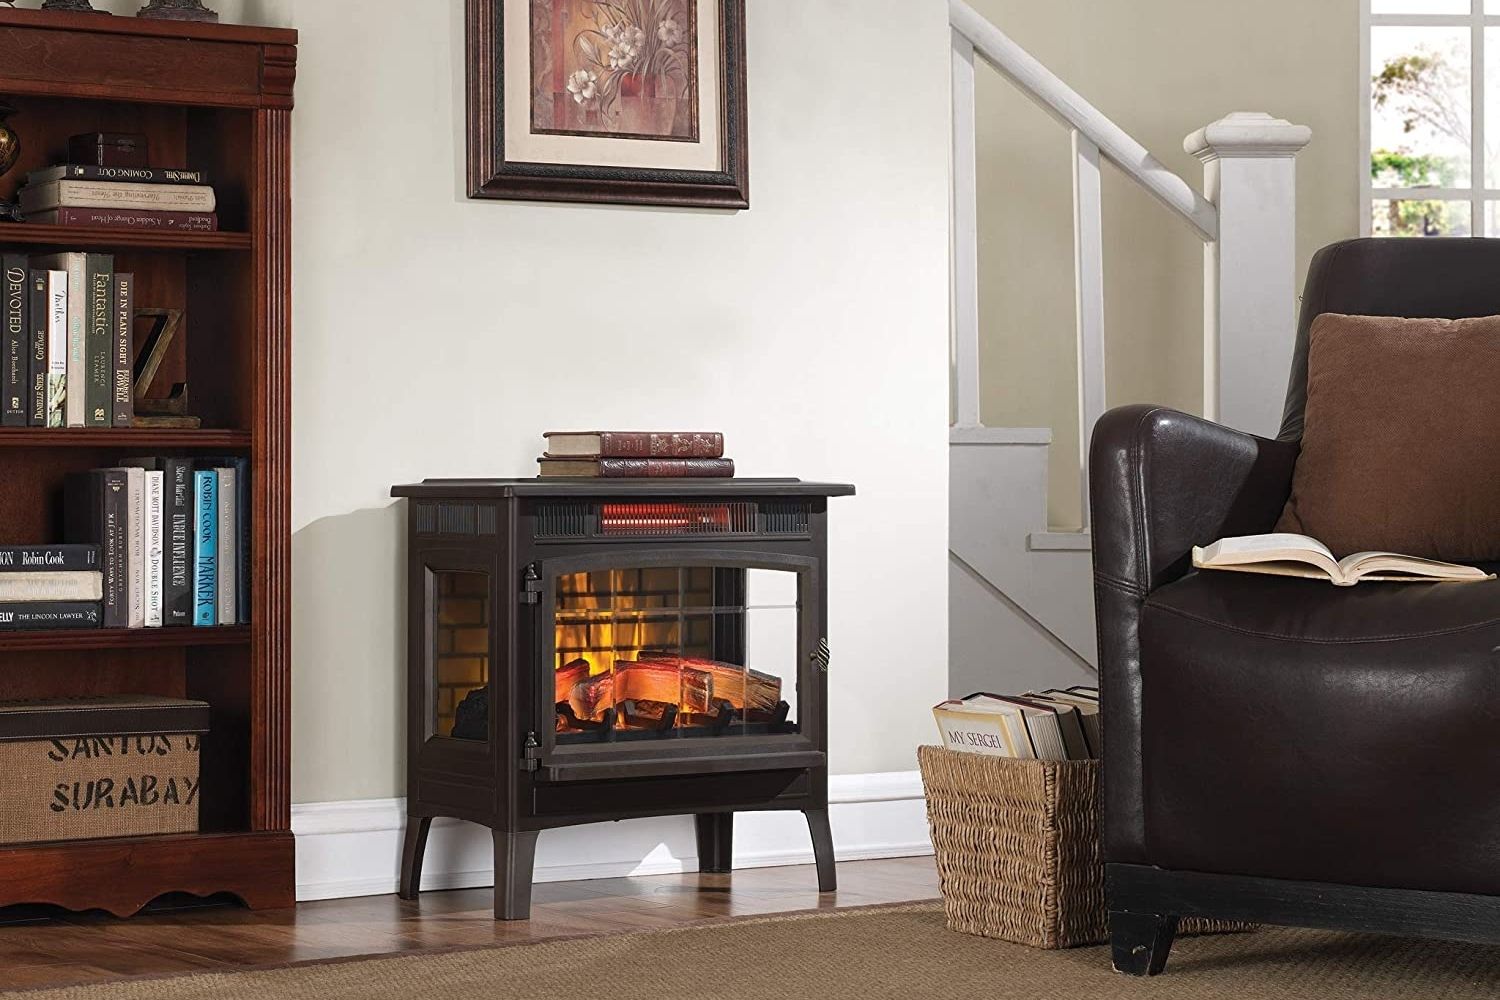
Electric Fireplace Comparison Chart
| Type | Size | Heating | |
| PuraFlame Klaus 33″ Electric Fireplace Insert | Recessed insert | 26.99 inches high by 35.04 inches wide by 8.78 inches deep | Fan heater |
| Maxhonor Electric Fireplace Heater With Remote | Recessed insert, wall-mounted hanging, or freestanding | 17 inches high by 30 inches wide by 4.1 inches deep | Infrared |
| Real Flame Callaway 63″ Grand Electric Fireplace | Mantel fireplace | 48.25 inches tall by 63 inches wide by 17.25 inches deep | Forced air |
| Duraflame 3D Infrared Electric Fireplace Stove | Stove | 23.4 inches high by 24 inches wide by 13.07 inches deep | Infrared quartz |
| Valuxhome Recessed Wall-Mounted Electric Fireplace | Recessed insert | 21.65 inches high by 60 inches wide by 5.5 inches deep | Fan heater |
| Jamfly Electric Fireplace Wooden Surround Firebox | Mantel fireplace | 41.33 inches high by 34.3 inches wide by 13.6 inches deep | Fan heater |
| PuraFlame 33″ Western Electric Fireplace Insert | Insert | 26.99 inches high by 35.04 inches wide by 8.78 inches deep | Fan heater |
| ClassicFlame 23″ 3D Infrared Fireplace Insert | Insert | 20 inches high by 23.6 inches wide by 8.5 inches deep | Infrared |
| Walker Edison Wren Classic 4 Cubby Fireplace TV Stand | TV stand | 25 inches high by 70 inches wide by 15.75 inches deep | Fan heater |
| Winston Porter Ceonna 60.25” Electric Fireplace | Freestanding | 35.25 inches high by 60.25 inches wide by 15.5 inches deep | Fan heater |
Our Top Picks
These top models include products we curated across categories to suit a variety of needs. Read on to discover some of the best electric fireplaces on the market today for producing heat and a relaxing atmosphere.
Best Overall
PuraFlame Klaus 33" Electric Fireplace Insert
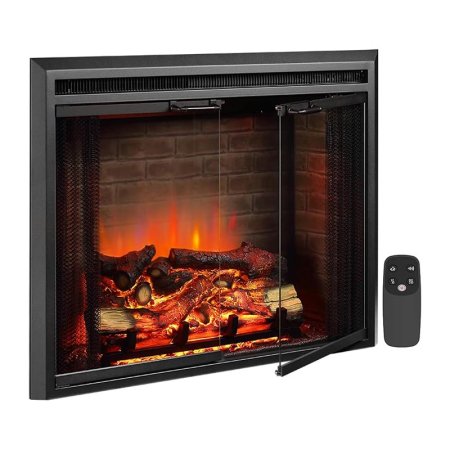
What We Like
- Multiple sizes available to fit in most hearths
- Remote control included
- Contemporary design with 3-sided interior brick wall
What We Don’t Like
- Crackling sound effect not very realistic
Specs
- Type: Recessed insert
- Size: 26.99 inches high by 35.04 inches wide by 8.78 inches deep
- Heating: Fan heater
The Klaus electric fireplace insert from PuraFlame adds a classic look to any home. It features logs that glow, flames that dance, and a fire that snaps. A three-sided interior brick wall adds to the realistic look and feel. The remote control offers easy operation and includes flame settings with variable intensity and brightness, plus the choice to go heatless for a crackling fire all year long.
With enough power to provide additional warmth in a 400-square-foot room, PuraFlame’s electric fireplace measures 26.99 inches high by 35.04 inches wide by 8.78 inches deep. A 7.5-inch resin log sits on the grate above an ember bed. We like that the flat bottom of the electric fireplace allows for installation directly on the floor for hearthless fireplaces. PuraFlame’s Klaus comes in three different sizes.
Get the PuraFlame electric fireplace at Amazon, Walmart, or The Home Depot.
Best Bang for the Buck
Maxhonor Electric Fireplace Heater With Remote
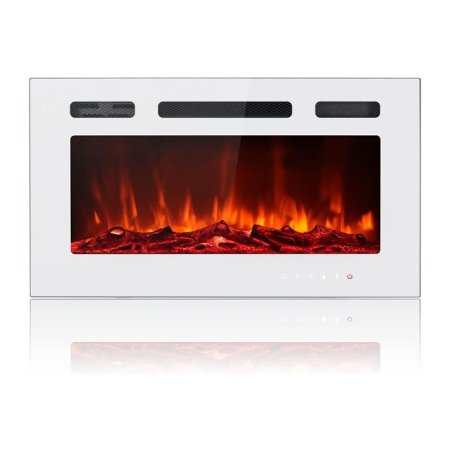
What We Like
- Versatile configuration with 3 installation options
- Features ultra-high definition full-screen glass
- Can warm up to 400 square feet
- Includes a remote and touch panel
What We Don’t Like
- Didn’t heat our room quickly
- May require a recessed outlet, depending on installation
Specs
- Type: Recessed insert, wall-mounted hanging, or freestanding
- Size: 17 inches high by 30 inches wide by 4.1 inches deep
- Heating: Infrared
This affordable electric fireplace from Maxhonor includes three installation options. It can be recessed into a wall, wall-mounted, or used as a freestanding heater, thanks to its inclusion of two installable legs. It plugs into a wall outlet, making for quick and easy operation.
The temperature settings range from 62°F to 82°F and can be adjusted via the included remote or from the touch panel on the bottom front of the fireplace. The fireplace features 12 flame color combinations and an alternating flame color setting. Users can also turn the flames off and simply enjoy the heat output. It is available in three widths: 30, 50, and 60 inches.
What our tester says: Glenda Taylor, a Bob Vila staff writer and product tester, notes in the Best Energy Efficient Space Heaters that “The glass screen remains cool to the touch, and heat exits through a panel near the top, making this space heater suitable for a home with small children—as long as the upper heat vent is above their reach.”
Get the Maxhonor electric fireplace at Amazon or Walmart (50-inch).
Upgrade Pick
Real Flame Callaway 63" Grand Electric Fireplace
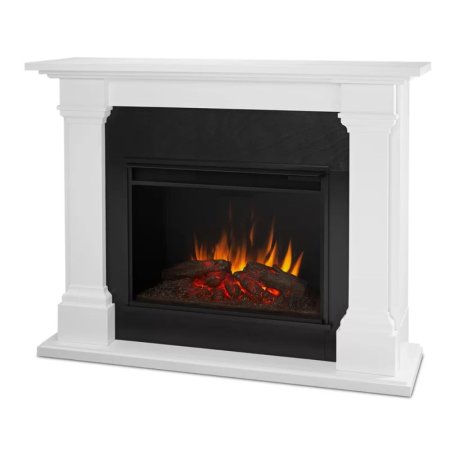
What We Like
- Includes mantel, firebox, adjustable thermostat, and remote control
- Can support decor or fixtures
- Comes with 6 operation settings
- Includes an instruction manual and accessories
What We Don’t Like
- Some users reports that some components break easily
Specs
- Type: Mantel fireplace
- Size: 48.25 inches tall by 63 inches wide by 17.25 inches deep
- Heating: Forced air
Feast your eyes on this beautiful piece of furniture and electric fireplace from Real Flame. This electric fireplace comes with a traditional fireplace mantel (in either white or chestnut oak), a firebox, an adjustable thermostat, and a remote control for a complete upgrade to a hearth.
This luxury pick can support up to 30 pounds of decor and fixtures, is easy to set up, creates heatless flames if desired, and has six operating settings ranging from 72 to 99 degrees Fahrenheit for ample adjustability. This model also has CSA certification (read more about this under the Safety section below), a wall anchor kit, and a timer for added ease of use and convenience.
Get the Real Flame electric fireplace at Wayfair, The Home Depot, Amazon, or Lowes.
Best Stove
Duraflame 3D Infrared Electric Fireplace Stove
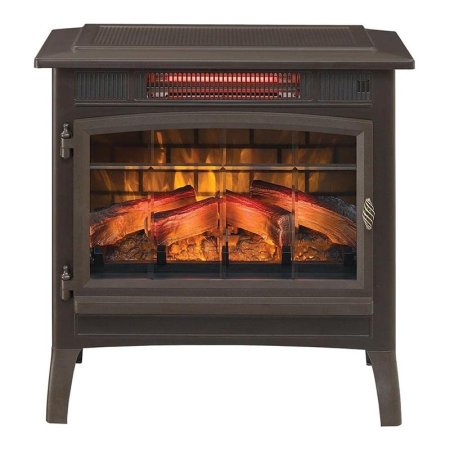
What We Like
- Adds rustic charm to the room
- Available in several color options
- Warms rooms up to 1,000 square feet
- Adjustable thermostat and remote control
What We Don’t Like
- Power cord comes out the top
Specs
- Type: Stove
- Size: 23.4 inches high by 24 inches wide by 13.07 inches deep
- Heating: Infrared quartz
For the traditional style of a wood-burning stove without any of the work, the Duraflame 3D infrared electric fireplace stove fits the bill. The 3D flames with five intensities mimic a real wood fire. And this little powerhouse can heat rooms up to 1,000 square feet.
This electric fireplace stove comes with an adjustable thermostat and remote control. There are nine color options available to suit most decor. This electric fireplace stove measures 23.4 inches high by 24 inches wide by 13.07 inches deep.
What our tester says: Michelle Larson, a Bob Vila staff writer and product tester, notes in the Best Electric Heaters, “I love that the stove’s digital control panel is hidden inside the door and that the fireplace comes with a remote control for easy operation…I chose this stove in a navy color that complements my space, but you can also get this faux wood burner in black, cinnamon, bronze, cream, or French gray.”
Get the Duraflame electric fireplace at Amazon, Wayfair, Target, or Walmart.
Best Modern
Valuxhome Recessed Wall-Mounted Electric Fireplace
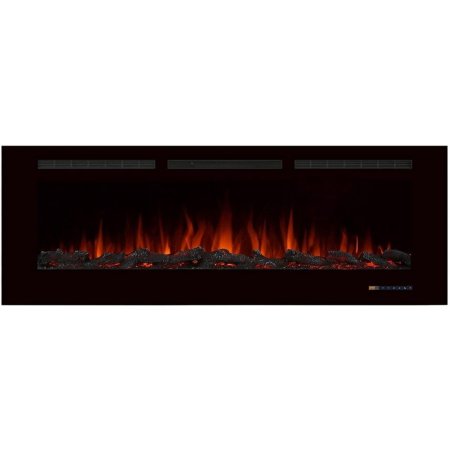
What We Like
- Multiple flame colors and fuel frame colors
- Various sizes available to fit in most hearths
- Fan heater operates quietly
What We Don’t Like
- Flame effect is not traditional or realistic
Specs
- Type: Recessed insert
- Size: 21.65 inches high by 60 inches wide by 5.5 inches deep
- Heating: Fan heater
For supplemental heat and a sleek look, it’s hard to beat the Valuxhome electric fireplace. A fan-type electric fireplace, it features high and low heat settings, a timer, and a remote control to heat rooms up to 400 square feet. The panel, which recesses into the wall to sit almost flush with the wall surface, measures 21.65 inches high by 60 inches wide by 5.5 inches deep.
Users can choose from three flame colors, three fuel bed colors, and five flame intensities to suit their preferences. Decorative logs and crystals create the look of burning embers. The metal and tempered-glass electric fireplace comes in 10 different sizes to suit many different spaces.
Get the Valuxhome electric fireplace at Amazon or The Home Depot.
Best Freestanding
Jamfly Electric Fireplace Wooden Surround Firebox
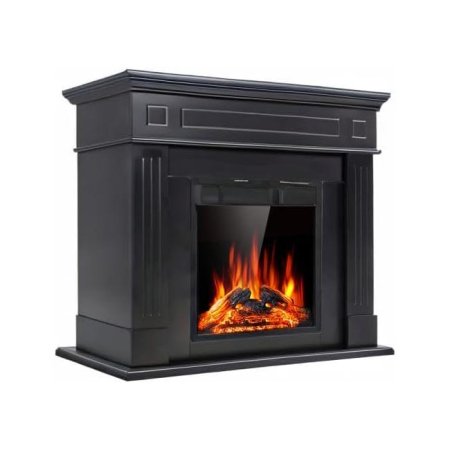
What We Like
- Supports TVs up to 48 inches
- Multiple color finishes available
- Easy to install compared to other options
What We Don’t Like
- Heater fan is quite loud
Specs
- Type: Mantel fireplace
- Size: 41.33 inches high by 34.3 inches wide by 13.6 inches deep
- Heating: Fan heater
Bring a classic look and feel to any room with this electric fireplace mantel from Jamfly. Its intricate details and craftsmanship add charm and character without the hassle of chimneys, firewood, and flames. It will supplement the heat in 400-square-foot apartments, condos, or rooms.
A realistic LED flame with three adjustable brightness modes produces a glowing ember bed with a 3D effect. Plus, this freestanding electric fireplace runs with or without heat.
This freestanding wood mantel can support a TV up to 48 inches. It measures 41.33 inches high by 34.3 inches wide by 13.6 inches deep.
Get the Jamfly electric fireplace at Amazon.
Most Realistic
PuraFlame 33" Western Electric Fireplace Insert
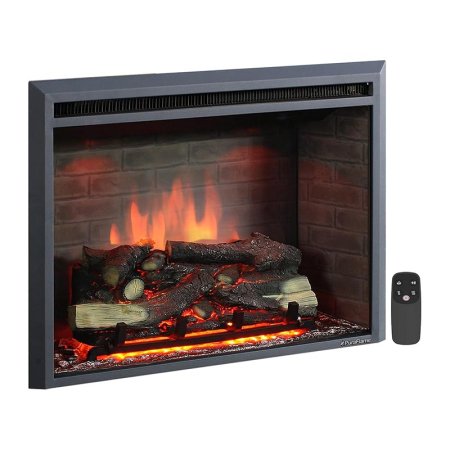
What We Like
- Classic-looking design and integrated crackling sounds
- 750 to 1,500 watts of heating power
- Comes with 3 flame effects
- Multiple sizes available
What We Don’t Like
- Some users have reported installation difficulties
Specs
- Type: Insert
- Size: 26.99 inches high by 35.04 inches wide by 8.78 inches deep
- Heating: Fan heater
Designed with metal and tempered glass, this black vent-free electric fireplace insert by PuraFlame can fit into many traditional fireplaces and recreate the look of a roaring fire without the worry about flame and ash. The fireplace offers 750 or 1,500 watts of heating power.
The remote allows for a quick-and-easy mood, including three flame effects and six unique crackling sounds for a more realistic experience. We appreciate that the LED technology provides vivid colors for the realistic log and grate. The fireplace can heat up to 400 square feet but is not designed to be a primary heat source.
Get the PuraFlame electric fireplace at Amazon or Walmart.
Best Insert
ClassicFlame 23" 3D Infrared Fireplace Insert
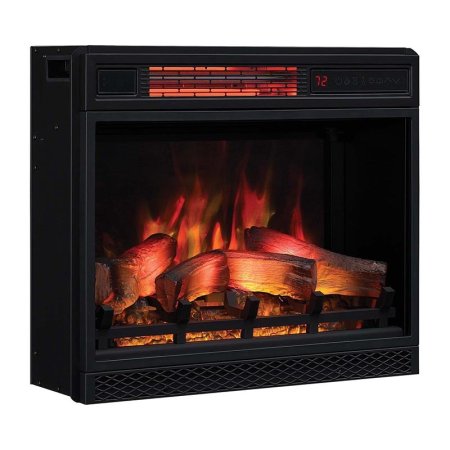
What We Like
- Energy-saving infrared technology
- Warms up to 1,000 square feet
- Easy-to-read digital thermostat
- 3D flame for added realism
What We Don’t Like
- Only offers a single power setting
- No timer function
Specs
- Type: Insert
- Size: 20 inches high by 23.6 inches wide by 8.5 inches deep
- Heating: Infrared
Many electric fireplaces use a standard heating element plus a barely audible fan to gently push warm air into the room. However, the ClassicFlame fireplace insert uses infrared technology, which doesn’t heat the air; instead, it heats the people within the space.
This infrared heater makes for very low energy consumption, and the sensation that the room heats up more quickly. The manufacturer rates this model to heat up to 1,000 square feet.
A digital thermostat offers precise control over output. The 3D flame and log effect can be set for color, brightness, and speed, with 125 total variations. Safer Plug technology switches off the ClassicFlame fireplace if it detects overheating.
Get the ClassicFlame electric fireplace at Amazon, Target, or The Home Depot.
Best Tv Stand
Walker Edison Wren Classic 4 Cubby Fireplace TV Stand

What We Like
- Multiple colors and sizes to choose from
- Great for large TVs
- Adjustable shelves support up to 30 pounds
What We Don’t Like
- Heater lacks power compared to many electric fireplaces
Specs
- Type: TV stand
- Size: 25 inches high by 70 inches wide by 15.75 inches deep
- Heating: Fan heater
Binge-watch by the fire with Walker Edison’s electric fireplace TV stand. It accommodates TVs weighing up to 150 pounds and 80 inches wide. Two adjustable shelves on either side of the fireplace support up to 30 pounds of books, picture frames, and decorative objects.
The fireplace display and heat operate separately. The heat provides supplemental warmth to rooms up to 400 square feet. This fireplace TV stand measures 25 inches high by 70 inches wide by 15.75 inches deep. It comes in 16 different colors and several styles.
Get the Walker Edison electric fireplace at Amazon or The Home Depot.
Best Faux Stone
Winston Porter Ceonna 60.25” Electric Fireplace

What We Like
- Realistic stacked stone look
- Firebox glass remains cool to the touch
- Can help warm up to 400 square feet
- Mantel supports up to 85 pounds of weight
What We Don’t Like
- Some assembly required
Specs
- Type: Freestanding
- Size: 35.25 inches high by 60.25 inches wide by 15.5 inches deep
- Heating: Fan heater
Add the elegant look of a stone surround fireplace to any room with this model from Winston Porter. Available in two colors (white and whiskey maple), this 60.25-inch wide fireplace has a sturdy mantel that can support up to 85 pounds, ideal for adding picture frames or even a TV.
The fireplace features see-through glass and adjustable flickering flames to help warm spaces up to 400 square feet. The included remote control allows you to adjust the thermostat and flames from anywhere in the room. Anti-tipping hardware is included.
Get the Winston Porter electric fireplace at Wayfair.
Jump to Our Top Picks
How We Chose the Best Electric Fireplaces
An electric fireplace can easily add ambience and warmth to a room or a household without the associated fireplace installation costs of a real wood or gas-burning fireplace. When gathering our top picks for this list, we included models with realistic flames and sounds so you can feel like you’re sitting by a real fire, allowing you to relax and soak up the heat. The many stunning fireplace options we looked at accommodate most size and style needs and preferences for heat, realism, and other extra features.
Aware of the many types of electric fireplaces available, we included multiple options for each style to appeal to a wide range of shopper preferences. Our recommendations offer choices for recessed inserts, mantels, stoves, TV stands, and wall-mounted fireplaces in various styles, from traditional to contemporary.
What to Consider When Choosing an Electric Fireplace
Various factors go into choosing the best electric fireplace for a given space and situation. You might simply be looking for aesthetics and something that feels homey, or you might prefer the look of a fireplace and the warmth of an electric heater.
How an electric fireplace will be used and where it will go will help narrow the selection to the style best suited to an individual user’s needs. For instance, will it go in the living room under a wall-mounted TV, or will it add ambience in the dining room? The buyer’s skill level for installation or assembly is also important, along with any extra features and how realistic it needs to look.
The following considerations will help guide your decision on what makes the best electric fireplace for your particular home.
Type
Easy installation is a big selling point when it comes to electric fireplaces. Most simply plug into a wall outlet. The caveat, however, is that electric fireplaces that produce heat require a dedicated outlet. Due to power strip safety precautions, electric fireplaces can’t plug into an extension cord or surge protector. But many of the best electric fireplace models require very little else in the way of installation.
- A wall-mounted electric fireplace resembles a flat-screen TV and can hang via brackets (usually included). These models have a sleek, minimalist aesthetic most suitable for modern interiors. Like recessed models, they’re often made of durable fiberglass or metal.
- Recessed fireplaces/inserts fit into a wall cavity, where the surface of a fireplace insert is flush with the wall. Unlike wall-mounted models, this type of fireplace comes in various modern and vintage styles and is best suited for DIY fireplaces.
- Mantel fireplaces often mimic the look of a traditional fireplace and are constructed from wood, stone, or a combination of the two. These classic freestanding models are available in many styles besides traditional, including modern, rustic, and farmhouse. Some mantel fireplaces offer shelf storage and come in corner configurations as well.
- Stove fireplaces offer the antique look of a wood-burning stove. These exclusively metal models often emit more heat than other fireplace types. They fit in well with rustic and farmhouse decor.
- TV stand fireplaces are similar to entertainment consoles, with a television placed on top. Many models feature shelving that frames the fireplace. Available in multiple styles, they’re often made of wood or particleboard (a cheaper material consisting of wood and resin).
Size and Placement
You’ll likely know where you’d like to place an electric fireplace, and it’s important to note that not every model fits every room. Sleek wall-mounted ones, for example, look better in bedrooms and dining rooms.
The planned location and type of fireplace will help determine the right size. It’s vital to get the exact measurements of the space where the electric fireplace will sit or hang, along with the size of the room. For instance, converting a conventional fireplace into an electric fireplace requires the precise measurements of the existing fireplace in order to find the best electric fireplace insert for the job.
The size of the room also makes a difference if the fireplace is meant to heat the room. In this case, it’s essential to ensure that the electric fireplace isn’t too small or too large for the room. Something big enough to heat a 1,200-square-foot room for a space that’s only 450 square feet might be overkill.
Heating Options
A handful of today’s electric fireplaces are purely for looks; they produce a visual fire effect but no heat. Most models, though, generate warmth in much the same way a space heater does. Some come with thermostats to maintain a steady temperature in the room, while others feature basic heat-level settings.
All the best electric fireplace heater options offer the illusion of flickering flames, but heat options come in three basic types:
- Fan-type electric: Many of the electric fireplaces on the market today are fan-type models that heat a room by blowing air over a series of hot coils and out one or more vents located along the bottom or sides of the unit. Fan-type fireplaces offer supplemental heat for rooms up to 450 square feet in size.
- Infrared: Rather than heat the air, infrared fireplaces heat the objects in the room. Like the rays of the sun, infrared heat is heated light, warming whatever it shines upon. Infrared fireplaces can heat rooms up to 1,000 square feet, but the user must be in the direct line of its rays to feel the warmth.
- Convection: Electric convection fireplaces allow air to circulate naturally. Cool air enters through a vent near the bottom, flows upward over the heated ceramic plates, and then flows out through an upper vent and into the room. Some convection fireplaces come with a fan to help direct the flow of air. These can heat rooms up to 600 square feet. Electric convection fireplaces without fans heat a smaller area near the fireplace itself and are best suited to rooms without drafts.
Keep in mind that electric fireplaces shouldn’t be the room’s only heat source. They cannot replace central heating or an electric wall heater, for example.
Realism
Advances in LED light technology in combination with small rolling mirrors create the illusion of genuine flames in modern electric fireplaces. Some models include molded fake logs and embers that glow to enhance the effect. The most realistic electric fireplaces and realistic-looking features tend to be more expensive, but not always.
However, not everyone prioritizes realism in an electric fireplace. Some units offer color selection for the flames, such as gold to match holiday decor, green for a spring look, or even purple or pink flames to match the room’s decor or set a certain mood.
Safety
Electric fireplaces don’t burn wood, create smoke, or have actual flames, all of which make them safer than the real thing. Moreover, the glass on most electric fireplaces doesn’t even get hot to the touch, making them safe for children and pets. Unlike their conventional counterparts, electric fireplaces can sit safely on carpet or against a wall. They also pose no risk of carbon monoxide exposure.
In addition, electric fireplaces go through tests and inspections during production and come with safety features like automatic shutoffs set to a predetermined time or heat level. Additional safety features may include a Canadian Standards Association (CSA) seal. This certification ensures that the fireplace meets specific safety standards and regulations, giving users peace of mind knowing that the product has undergone rigorous testing and evaluation.
A few tips to avoid electric fireplace mistakes that could affect safey: Follow the manufacturer’s installation instructions, don’t use extension cords or power strips, don’t place objects on the intake fans or heaters, keep them dry, and keep small children and pets away.
Additional Features
While electric fireplaces are pretty straightforward, some include a few fun bells and whistles, such as:
- Remote and touch-screen controls
- Programmable timers that turn the fireplace off after the user falls asleep, or turn it on before they wake up in the morning
- Night-light features that emit a soft glow
- Bluetooth speakers that can play crackling fire sounds or seasonal tunes
Installation
The difficulty of the installation depends on the type of electric fireplace, but it should be relatively easy for a person with the right skill set. Cutting into the wall and installing a recessed or see-through fireplace requires the user to have some framing skills. A wall-hanging unit will require hand tools, like a drill and a lever, and enough know-how to anchor the wall bracket securely.
Some mantels require assembly while others don’t, and the same goes for TV stands. No matter what type of fireplace it is, make sure to follow the installation instructions carefully and ask for help if something is unclear.
The Advantages of Owning an Electric Fireplace
Many people love the idea of a fireplace in the living room, dining room, or bedroom. They provide a warm place to cuddle up with a good book or the latest movie. Not everyone is keen on the mess, work, and upkeep that come along with all that charm, though. Cleaning up ashes, stocking firewood, and maintaining the chimney are chores. Electric fireplaces relieve those burdens.
Some other benefits of electric fireplaces include:
- Easy installation
- No chimney required
- A choice of styles, including mantel, insert, TV stand, wall-mounted, and electric fireplace stove
- No fireplace tools required
- Compatible with any room
- Modern features such as colored LED lights
- Some come with crackling sounds and other features that provide a more realistic experience
FAQs
For more information about the best electric fireplaces, check out these answers to some of the most common questions. If additional concerns arise, contact the manufacturer.
Yes, some give off supplemental heat. They are not intended to be a room’s only heat source, though.
Yes. An average electric fireplace uses about 1,500 watts of power. When used strictly for ambience, the cost can range from $0.003 to $0.03 per hour. When you add heat, the cost can range from $0.09 per hour for medium heat and $0.18 an hour for maximum heat.
Yes, you can plug one into a dedicated wall outlet. Do not plug one into an extension cord or power strip.
Yes, you can.
Electric fireplaces don’t produce real fire. There are no flames, only LED lights. They don’t produce toxic byproducts either. If you follow the instructions, an electric fireplace should not cause a fire. However, ignoring instructions, such as using an extension cord, can cause fires.
Why Trust Bob Vila
Bob Vila has been America’s Handyman since 1979. As the host of beloved and groundbreaking TV series including “This Old House” and “Bob Vila’s Home Again,” he popularized and became synonymous with “do-it-yourself” home improvement.
Over the course of his decades-long career, Bob Vila has helped millions of people build, renovate, repair, and live better each day—a tradition that continues today with expert yet accessible home advice. The Bob Vila team distills need-to-know information into project tutorials, maintenance guides, tool 101s, and more. These home and garden experts then thoroughly research, vet, and recommend products that support homeowners, renters, DIYers, and professionals in their to-do lists.
The post Our Favorite Electric Fireplace of 2025 Will Keep You Cozy All Winter Long appeared first on Bob Vila.
]]>The post The Best Water-Saving Shower Heads of 2025 to Add to Your Bathroom appeared first on Bob Vila.
]]>Water-saving shower heads are not just environmentally sound choices but also budget-friendly ones. The average American family uses 40 gallons of water each day just from showering. According to the Environmental Protection Agency, these families could save 2,700 gallons of water per year by switching to a certified low-flow shower head for the tub or shower.
Low-flow fixtures are designed to efficiently use a smaller volume of water, either by aerating the water steam or using a high-speed oscillation stream. After reviewing dozens of highly-rated models and testing a select few, our top pick is the Kohler Forté 1.75 GPM Shower Head, thanks to its aerating technology, three settings, and multiple finishes.
We also asked Danny Pen, President of New Era Plumbing & HVAC in Dracut, Massachusetts, for his expert opinion on what consumers should look for in low-flow shower heads. Read on to discover some of the best water-saving shower heads on today’s market and key shopping considerations.
- BEST OVERALL: Kohler Forté 1.75 GPM Shower Head
↓ Jump to Review - RUNNER-UP: Lokby 1.8 GPM Handheld Shower Head
↓ Jump to Review - BEST BANG FOR THE BUCK: High Sierra’s 1.5 GPM Fixed Shower Head
↓ Jump to Review - UPGRADE PICK: Pulse ShowerSpas 1.8 GPM Kauai III Shower Head
↓ Jump to Review - BEST HANDHELD: Moen Engage Magnetix 1.75 GPM Handheld Shower Head
↓ Jump to Review - BEST COMBINATION: Delta Faucet In2ition 1.75 GPM 2-in-1 Shower Head
↓ Jump to Review - BEST SPRAY SETTINGS: Moen Attract Magnetix 1.75 GPM Showerhead Combo
↓ Jump to Review - BEST HIGH-PRESSURE: Waterpik BodyWand 1.8 GPM Shower Head
↓ Jump to Review
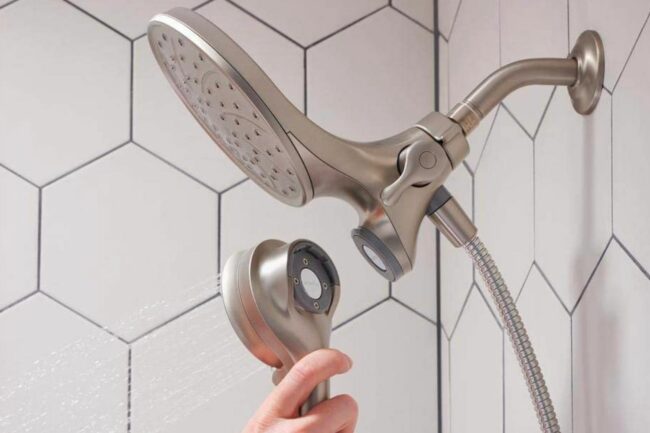
| Type | Flow Rate | Spray Settings | |
| Kohler Forté 1.75 GPM Shower Head | Fixed | 1.75 GPM | 3 |
| Lokby 1.8 GPM Handheld Shower Head | Handheld | 1.8 GPM | 6 |
| High Sierra’s 1.5 GPM Fixed Shower Head | Fixed | 1.25, 1.5, 1.8, or 2 GPM | 1 |
| Pulse ShowerSpas 1.8 GPM Kauai III Shower Head | Combination | 1.8 or 2.5 GPM | 5 |
| Moen Engage Magnetix 1.75 GPM Handheld Shower Head | Combination | 1.75 GPM | 6 |
| Delta Faucet In2ition 1.75 GPM 2-in-1 Shower Head | Combination | 1.75 GPM | 5 |
| Moen Attract Magnetix 1.75 GPM Showerhead Combo | Combination | 1.75 GPM | 1 rain shower option; 6 additional handheld settings |
| Waterpik BodyWand 1.8 GPM Shower Head | Combination | 1.8 GPM | 7 |
Our Top Picks
Our recommendations for the best shower heads for water conservation consider flow rate, spray settings, style, and additional features—and of course, manufacturer reputation and overall product quality.
Best Overall
Kohler Forté 1.75 GPM Shower Head

Pros
- Sleek, modern look; available in several finishes
- Aerating technology incorporates air into the water flow
- Great for low water pressure
- Has 3 flow settings
Cons
- Plastic parts may impact long-term durability
Specs
- Type: Fixed
- Flow rate: 1.75 GPM
- Spray settings: 3
The Kohler Forté is an aerating shower head that incorporates 2 liters of air per minute into the water flow, which results in fuller water droplets that replicate the feeling of being caught in a powerful rainstorm. Because of its low 1.75-GPM (gallons per minute) flow rate, the Forté standard shower head can even be used in states with particularly tight water restrictions, such as California.
We appreciate the three flow settings on the shower head, which include full coverage, pulsating massage, and silk spray—each provide a unique sensation, and it’s easy to switch between settings by maneuvering the head’s thumb tab. It is available in a standard polished chrome finish as well as a few other finish options. Installation is a breeze because its washers come pre-installed, meaning the shower head can be up and running in minutes.
Get the Kohler water-saving shower head at Amazon, The Home Depot, Wayfair, or Kohler.
Runner-up
Lokby 1.8 GPM Handheld Shower Head
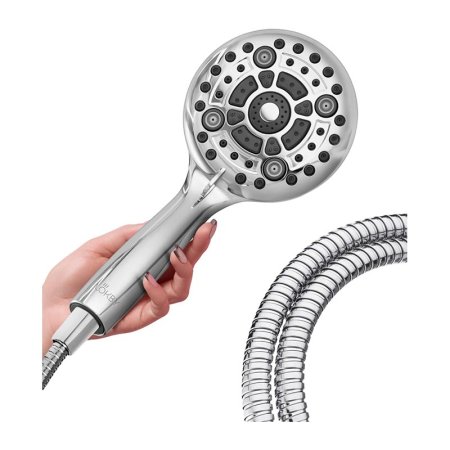
Pros
- Compressing silicone nozzles allow for excellent water pressure
- Adjustable shower head with 6 spray functions
- Features a 59-inch shower hose and button control
- Comes in multiple color options
Cons
- Some users have reported poor water pressure
Specs
- Type: Handheld
- Flow rate: 1.8 GPM
- Spray settings: 6
Anyone who wants to save on water consumption while enjoying a spa-like shower will want to take a good look at this model from Lokby. This option has compressing nozzles on its 5-inch head that increase the water pressure to provide up to 1.8 GPMs of water. It has over six spray modes including massage, rain, power rain, mist, and rain plus mist to accommodate virtually any user’s preference. This Lokby shower head also has a 59-inch hose, which is perfect for bathing children as well as pets.
For added user-friendliness, this shower head has a button for turning the flow on and off. Need more? The Lokby shower head has silicone jets to resist any material buildup and is easy to install with the included bracket that has a 60-degree pivot, making this unit function as a fixed or handheld shower head.
What our tester says: Kristen Mosier, a Bob Vila product tester and staff writer, notes in The Best Handheld Shower Heads that “this shower head is an excellent option for bathing young children. A convenient off button lets the operator turn the shower off from the head, while silicone jets keep this shower head functioning properly by resisting buildup from hard water. It was easy to install and features a bracket that attaches to the spigot with a 60-degree pivot.”
Get the Lokby water-saving shower head at Amazon or Walmart.
Best Bang for the Buck
High Sierra's 1.5 GPM Fixed Shower Head

Pros
- Surprisingly powerful spray emitted
- Features durable, contemporary design
- 4 flow rate options available
Cons
- Only has 1 spray setting
Specs
- Type: Fixed
- Flow rate: 1.25, 1.5, 1.8, or 2 GPM
- Spray settings: 1
High Sierra’s fixed shower head produces a surprisingly powerful spray despite its affordable price. This low-flow model is available in four flow rate options (1.25, 1.5, 1.8, or 2 GPM), which allows households to choose the best option depending on their home’s water pressure.
Because all of this fixture’s parts are made from metal, it should be fairly durable and long lasting. One of the High Sierra’s only disadvantages is that it only has one spray setting, and it may be too powerful for some users (or for bathing young children). It’s available in polished chrome, nickel, oil-rubbed bronze, and polished brass finishes.
What our tester says: Shannon Lee, a Bob Vila writer and product tester, notes in the Best High-Pressure Shower Heads, “The patented nozzle delivers a robust and full spray of large water drops for a powerful experience and minimal water usage. I found the installation to be a snap—no surprise, considering the simplicity.”
Get the High Sierra water-saving shower head at Amazon, The Home Depot, Walmart, or High Sierra.
Upgrade Pick
Pulse ShowerSpas 1.8 GPM Kauai III Shower Head
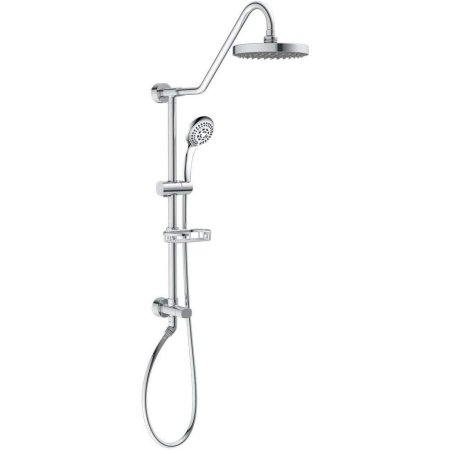
Pros
- Includes a rainfall shower head and handheld head
- High-quality and durable materials all come pre-plumbed
- Heads can be used simultaneously or separately
- Available in multiple finishes
Cons
- More pricey than other options
Specs
- Type: Combination
- Flow rate: 1.8 or 2.5 GPM
- Spray settings: 5
There are many water-saving shower heads on the market, but most don’t come with the bells and whistles one may want for a luxurious shower experience. The Kauai III shower system from Pulse ShowerSpas, however, has both an 8-inch rain shower head and a multifunctional handheld head, which can be used together or separately. The hand shower has jet, wide, massage, and combination spray modes. What’s most impressive is that this fixture uses only 1.8 GPM. This shower is also available with a 2.5 GPM flow rate.
Though the design may look complex and difficult to install, this shower head with hose comes pre-plumbed so it’s possible to install without remodeling the entire shower. Along with chrome, the Kauai III dual shower head is also available in brushed gold, oil-rubbed bronze, matte black, and brushed nickel finishes.
Get the Pulse ShowerSpas water-saving shower head at The Home Depot, Amazon, Wayfair, Walmart, or Pulse ShowerSpas.
Best Handheld
Moen Engage Magnetix 1.75 GPM Handheld Shower Head
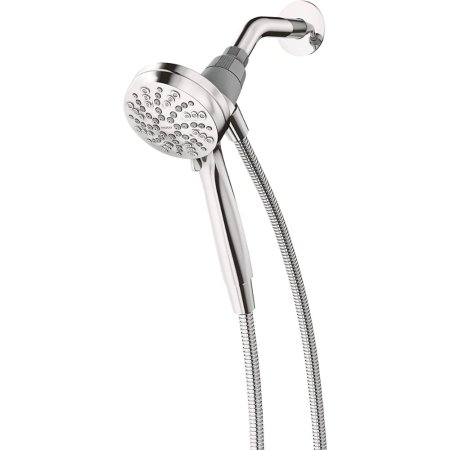
Pros
- Americans with Disabilities Act (ADA) compliant
- Easy to use and store
- Has 6 spray settings
Cons
- Pressure can be low when using certain settings
Specs
- Type: Combination
- Flow rate: 1.75 GPM
- Spray settings: 6
Handheld shower heads are a great choice for those with limited mobility, and this model from Moen complies with ADA specifications. With the Engage magnetic shower head docking system, gone are the days of trying to hook the shower head back on its dock while rinsing shampoo. Clicking the Moen’s head with hose attachment back into its magnetic base is super easy and requires minimal manual dexterity.
We like this shower head’s impressive settings, including downpour, relaxing massage, regular massage, soothing massage, and rinse. With a 1.75 GPM flow rate, it complies with U.S. federal and state regulations. Because it only comes in brushed nickel and chrome finishes, it probably isn’t the best choice for those who want to coordinate with black, brass, or white fixtures in the bathroom.
Get the Moen Engage water-saving shower head at Amazon, Lowe’s, or Target.
Best Combination
Delta Faucet In2ition 1.75 GPM 2-in-1 Shower Head

Pros
- Features a handy pause function
- Available in 3 finishes
- Detachable handheld sprayer has a magnetic connector
Cons
- Some users have reported manufacturing defects
Specs
- Type: Combination
- Flow rate: 1.75 GPM
- Spray settings: 5
Finding a high-quality, water-saving combination shower head isn’t easy because lower-flow water pressure feels even lower when the water is diverted between two heads. This Delta In2ition chrome shower head, however, provides a satisfying sensory experience using just 1.75 gallons of water per minute.
The handheld and fixed shower heads can be used simultaneously as one docked unit or separately, and the handheld piece is easily clicked into place using a magnetic connector. Spray settings include full body spray and full spray with massage as well as fast or slow massage. The fixture also has a pause function, which comes in handy when bathing kids or pets.
In addition to a chrome finish, Delta’s combination shower head is also available in spotshield brushed nickel and Venetian bronze.
Get the Delta Faucet water-saving shower head at Amazon, Lowe’s, or The Home Depot.
Best Spray Settings
Moen Attract Magnetix 1.75 GPM Showerhead Combo
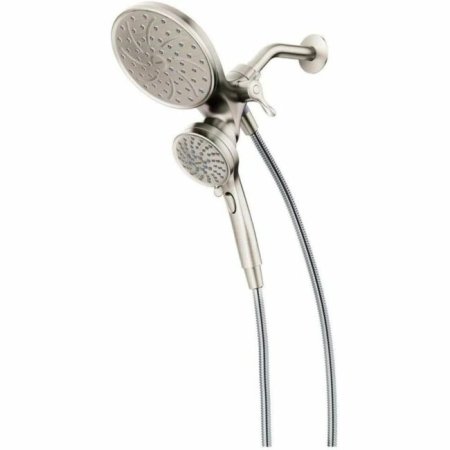
Pros
- Has a magnetic handheld and rain shower head
- Provides ample coverage
- Available in 4 finishes
Cons
- Reported issues regarding the handheld showerhead’s locking system
Specs
- Type: Combination
- Flow rate: 1.75 GPM
- Spray settings: 1 rain shower option; 6 additional handheld settings
Just because a shower head saves on water doesn’t mean that it can’t provide high pressure. For those who love high water pressure in their shower, the Moen Attract rain shower combo delivers. This model has a rain shower function and a handheld option that provides six different spray patterns.
The magnetic docking system on the handheld unit keeps the head in place when not in use and is easy to take on and off the dock. Plus, the handheld shower head comes with a pause button to cease the 1.75 GPM spray. The 6.75-inch rain shower head as well as the 3.75-inch handheld head are wide enough for ample coverage in the shower.
Get the Moen Attract water-saving shower head at The Home Depot, Amazon, or Moen.
Best High-Pressure
Waterpik BodyWand 1.8 GPM Shower Head
Pros
- Dual shower head construction accommodates multiple washing purposes
- Easy-to-clean construction
- Soft comb, gentle rinse, and scalp massage functions
Cons
- Some parts can squeak when moved
Specs
- Type: Combination
- Flow rate: 1.8 GPM
- Spray settings: 7
The Waterpik BodyWand with PowerPulse massage option uses 1.8 GPM and offers seven different spray settings.
Rinse out shampoo and conditioner by using the body wand, which has soft comb and gentle rinse settings, then finish the hair regimen by engaging the scalp massage function. The rain shower head has four settings that will satisfy most sensory whims, from a gentle misting shower to powerful, pulsing massages—or a setting somewhere in the middle. Thanks to the fixture’s diverter, users can use the wand and rain shower head together or separately.
Get the Waterpik water-saving shower head at Amazon, Ace Hardware, Target, or Bed Bath & Beyond.
Jump to Our Top Picks
How We Chose the Best Water-Saving Shower Heads
The best water-saving shower heads save on the bills while not skimping too much on water pressure. No one wants a disappointing shower that can’t provide a relaxing blast of water. As such, we have gathered our top picks in this category to provide shoppers with a range of options to choose from according to their preferences.
When curating our list of shower heads for water conservation, we looked at shower head types—such as fixed, handheld, and combination heads—and suggested our top picks in each category, which will ensure users get the best experience, no matter what type of head they’re looking for.
We made sure that our list includes only products that boast high-quality and durable materials, are easy to install and maintain, and have the ability to both save water and still provide a decent shower experience.
What to Consider When Choosing a Water-Saving Shower Head
A quality, water-conserving shower head should use less than 2 gallons of water per minute but still produce a powerful stream of water. It should be easy to install, and complement your bathroom’s decor.
According to Pen, these bathroom fixtures not only save you money, but can protect your plumbing. “Lower water usage means your water heater cycles less frequently, reducing wear and extending its lifespan. But, you need to choose it wisely: cheap models can lead to uneven spray patterns or quicker mineral buildup,” he says.
Keep reading to learn about some of the most important qualities to consider when shopping for the best water-saving shower head.
Type
Though it’s easy to assume that all shower heads work the same, several characteristics can affect their functionality. Shower heads generally fit into one of three categories, each with its own advantages.
- Fixed shower heads are mounted to the wall and vary in size and shape. They are usually the most affordable type of shower head, but they may or may not have adjustable spray settings. One type of fixed shower head is the rain shower head, which has a larger head than most and produces a gentle, sprinkling flow of water.
- Handheld shower heads are attached to the wall via a mounting bracket. This type of detachable shower head has a long, flexible hose that can be unhooked from the wall and grasped in the hand, so the bather can direct water where they want it. When the head is kept in the bracket it functions as a fixed, hands-free shower head. Handheld shower heads are particularly useful for those with limited mobility, or those who want flexibility while bathing kids or pets. The price of handheld shower heads is usually higher than that of their fixed-head counterparts.
- Combination, or 3-way shower heads, have both a fixed and a handheld shower head. A 3-way diverter allows each of the two heads to be used simultaneously or independently. Because of water-flow rate regulations, however, water pressure is reduced when both heads are used at the same time.
Material
Most shower heads have both metal and plastic parts. Those made from stainless steel or solid brass are the most durable and resist rusting and corrosion; fixtures with a lot of plastic parts are typically lower-end models. When shopping for water-saving shower heads, keep an eye out for those that have solid brass or stainless steel connectors because these materials will hold up better over time. The one part of a shower head where plastic is preferred to metal is the nozzle. Silicone nozzles require little to no maintenance and do not clog as easily as metal nozzles.
Whether your shower fixture contains silicone or stainless steel parts, it’s important to note that the materials the fixture is made of aren’t always obvious. Because metal and plastic parts can be finished with decorative coatings to complement various bathroom decor styles, plastic parts might look like chrome or brass parts like antique black. Be sure to research each model carefully to know what kind of quality you are getting.
Type
When it comes to water conservation, there are two main types of shower heads: aerating and laminar-flow. Though each uses less water than a regular shower head, they compensate for the reduced water pressure in different ways.
- Aerating shower heads mix water and air to mimic the sensation of higher water pressure. Most low-flow shower heads on the market use this method to conserve water. One disadvantage of an aerating shower head is the aeration process cools water slightly before it hits your skin, so bathers may end up taking hotter showers—and paying more to heat the water—than they would otherwise.
- Laminar-flow shower heads use individual streams of water. They can be more expensive than aerating shower heads, but they’re ideal for use in humid climates because they create less steam and mist.
Flow Rate
While standard shower heads are mandated by the U.S. Department of Energy to produce no more than 2.5 gallons of water per minute (GPM), low-flow shower heads are allowed to produce a maximum of 2 GPM. Products labeled with the Environmental Protection Agency’s WaterSense logo are certified to use less than 2 GPM.
The flow rates of most shower heads that limit water usage range from 1.5 to 2 GPM. Before you run out and buy the lowest-flow shower head you can find, however, think first about your home’s water pressure. The Environmental Protection Agency flow rates assume a water pressure of 80 pounds per square inch (PSI). If the water pressure in your home is lower than that, a low-flow shower head may not be the best option for you. Residences with water pressure issues might benefit from a high-flow shower head for low water pressure instead.
Spray Settings
Most shower heads on the market feature a variety of spray settings that emit water in different patterns. These settings can be changed by an adjustment ring or lever on the edge of the shower head.
- A massage or pulse setting eases muscle pain and tension.
- A low-pressure spray function is gentle and safe to use when bathing infants.
- A strong spray is useful for rinsing out shampoo and conditioner.
- A pause setting on handheld shower heads is useful when cleaning the shower, or when bathing children or pets.
- A combination setting mixes several spray patterns at once.
Aesthetic
Shower heads come in a wide variety of different finishes. While the most basic models are only available with a stainless steel finish, many manufacturers make fixtures in oil-rubbed bronze, polished brass, chrome, brushed nickel, matte black, and other finishes. There are advantages and disadvantages to the various finishes too: shower faucets and fixtures with matte finishes are less likely to show water stains and fingerprints, while metals with high-shine finishes tend to be more durable over time. Most buyers want their bathroom fixtures to match and will choose a shower head that matches the tub and sink faucets, drawer pulls, and towel racks.
Installation
Though the idea of replacing or installing a shower head may sound intimidating, it’s actually an easy DIY project that requires fairly basic tools. A wrench, plumber’s tape and screwdriver is all you need to install most shower heads on the market; they don’t require drilling or installing mounting equipment.
Installing a low-pressure shower head is really no different from installing a standard shower head. Because the size of shower spigots is standardized to 1/2 inch, compatibility between models should not be an issue.
If you’re after an easy shower head installation, Pen recommends paying attention to the connector. “Look for metal connectors, because they are more durable and with them you will not have a problem of cross-threading during installation,” he advises.
FAQs
Here are answers to some frequently asked questions about water-saving shower heads.
According to the EPA, the average family saves 2,700 gallons of water per year by using a WaterSense-certified low-flow shower head.
While shower heads with a larger surface area don’t necessarily use more water, they do result in the sensation of lower water pressure. That’s because the same quantity of water is spread out among a greater number of individual nozzles.
A leaking shower head can be fixed using one of several techniques. A good place to start is by removing the head and soaking it in vinegar to remove hard water deposits, and replacing washers and seals that appear to be worn.
The main disadvantage to water-saving shower heads is that not all models provide adequate pressure.
No, it’s not recommended to use a water-saving shower head in an electric shower.
Water-savings shower heads cost anywhere from about $20 to $300.
Why Trust Bob Vila
Bob Vila has been America’s Handyman since 1979. As the host of beloved and groundbreaking TV series including “This Old House” and “Bob Vila’s Home Again,” he popularized and became synonymous with “do-it-yourself” home improvement.
Over the course of his decades-long career, Bob Vila has helped millions of people build, renovate, repair, and live better each day—a tradition that continues today with expert yet accessible home advice. The Bob Vila team distills need-to-know information into project tutorials, maintenance guides, tool 101s, and more. These home and garden experts then thoroughly research, vet, and recommend products that support homeowners, renters, DIYers, and professionals in their to-do lists.
The post The Best Water-Saving Shower Heads of 2025 to Add to Your Bathroom appeared first on Bob Vila.
]]>The post Testing the Best Shower Heads for Low Water Pressure in 2025 appeared first on Bob Vila.
]]>Few things can transform your daily routine like finding the perfect shower head for low water pressure. If you’ve ever endured a shower that feels more like a drizzle, you know how frustrating it can be. Fortunately, today’s shower head technology has come a long way, offering clever solutions that boost water pressure without increasing water usage. Whether you’re dealing with an older plumbing system, water-saving restrictions, or just want to elevate your shower game, the right shower head can make all the difference.
After testing a variety of models, we discovered some real standouts. Our favorite was the Speakman S-2005-HB, a budget-friendly option that surprised us with its size, power, and performance. This shower head delivered a truly invigorating spray that turned even the weakest water flow into a spa-like experience—all without breaking the bank. But it’s not the only option worth considering. From handheld models to rain-style heads, there’s something on our list for everyone. We even included a few units that we didn’t test ourselves, but that we think are excellent choices to add to our lineup nonetheless.
In the sections ahead, we’ll share the results of our hands-on testing, along with our top picks for the best shower heads for low water pressure, so stick around for some practical shopping tips to help you find the perfect match for your bathroom needs.
- BEST OVERALL: Speakman Hotel S-2005-HB Shower Head
↓ Jump to Review - BEST BANG FOR THE BUCK: SparkPod Power Pressure Shower Head
↓ Jump to Review - BEST DESIGN: The Jolie Skin Co Filtered Shower Head
↓ Jump to Review - BEST WITH FILTER: Afina A-01 Filtered Shower Head
↓ Jump to Review - BEST RAIN: Grohe Euphoria Rain Shower Head
↓ Jump to Review - BEST HANDHELD: H02ME High-Pressure Handheld Shower Head
↓ Jump to Review - BEST CEILING MOUNT: SR Sunrise Ceiling Mount Shower System
↓ Jump to Review

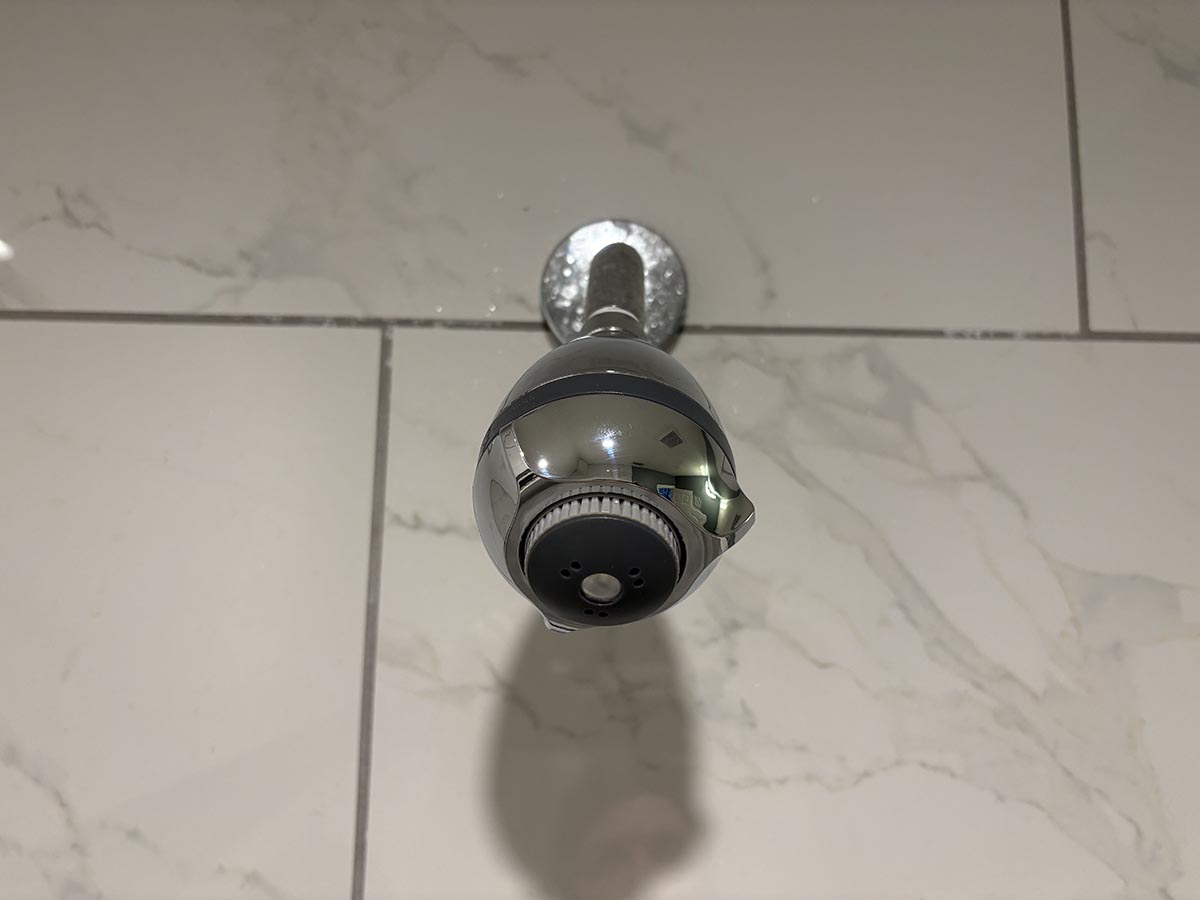
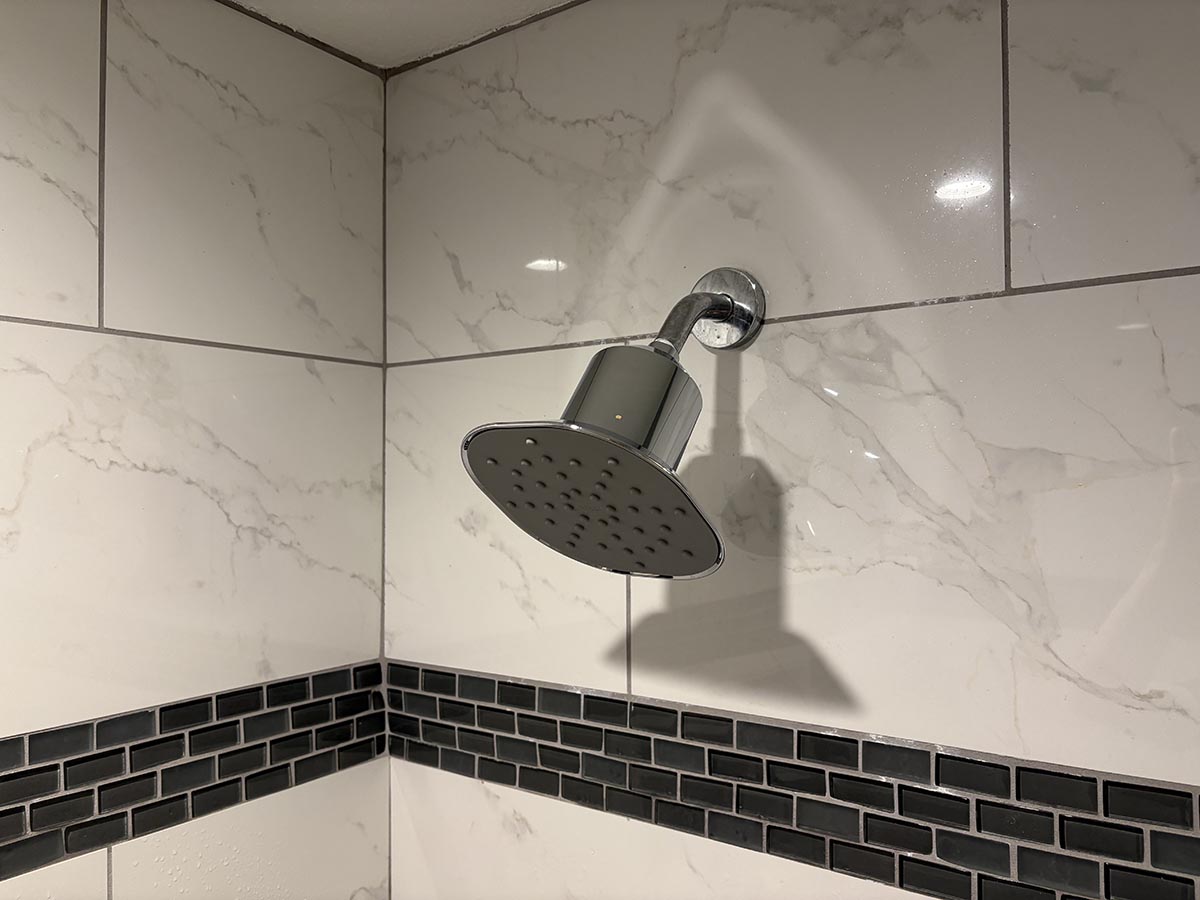
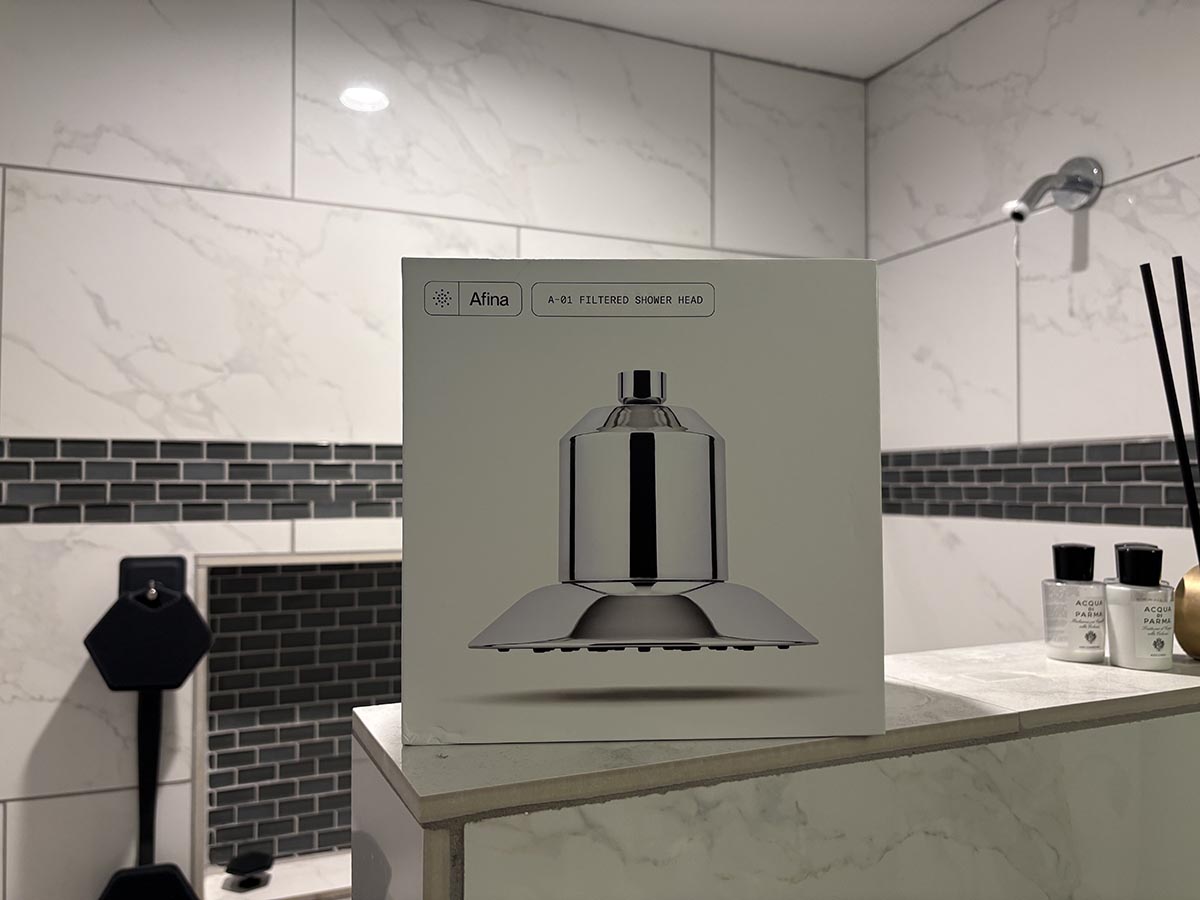

Product Comparison
| Material | Spray Settings | Installation | |
| Speakman Hotel S-2005-HB Shower Head | Plastic | Intense, massage, and combination | Easy |
| SparkPod Power Pressure Shower Head | Plastic (ABS) | Rain, pulsating massage, rain massage | Easy |
| The Jolie Skin Co Filtered Shower Head | Plastic (ABS) | Only one (rain) | Easy |
| Afina A-01 Filtered Shower Head | Metal with chrome finish | Three | Easy |
| Grohe Euphoria Rain Shower Head | Plastic with chrome electroplated finish | Only one | Easy |
| H02ME High-Pressure Handheld Shower Head | Stainless steel hose with plastic head | Powerful rain, massage, or mixed | Medium |
| SR Sunrise Ceiling Mount Shower System | Brass and stainless steel | Rain shower head with additional handheld | Difficult (professional required) |
Our Top Picks
We tested the best shower heads for low water pressure, and the following models stood out from the competition. From budget-friendly powerhouses to sleek rain-style designs, these picks will upgrade your shower game.
Best Overall
Speakman Hotel S-2005-HB Shower Head
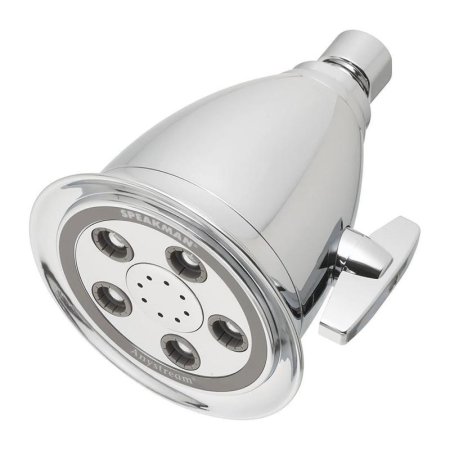
What We Like
- Powerful massage spray, best in our testing
- Smooth and easy-to-use spray adjuster
- Budget-friendly without sacrificing quality
- Quick installation with included plumber’s tape
What We Don’t Like
- Limited to three spray settings
Specs
- Material: Plastic
- Spray settings: Intense, massage, and combination
- Installation: Easy
Our Ratings: Installation 5/5; Appearance 4/5; Performance 5/5; Design 4.5/5; Value 5/5
When we first took the Speakman Hotel S-2005-HB out of the box, we were surprised by its size—it’s bigger than we expected, but not in a bad way. Installing it was a breeze thanks to the thoughtful inclusion of a roll of plumber’s tape (a handy touch, especially since many shower heads don’t come with this). Within minutes, it was up and running, ready to transform our lackluster water pressure into something impressive.
The standout feature for us was the spray adjuster. It has a smooth, weighty feel that suggests quality, and its design makes switching between the three spray settings effortless. The massage spray, in particular, was a game-changer. It is incredibly powerful—by far the strongest spray we tested—and it’s perfect for rinsing out shampoo thoroughly or working out muscle tension after a long day. If you’re someone who craves a high-pressure spray, this one delivers in spades.
What we love most about the S-2005-HB is its simplicity. There are no unnecessary bells and whistles; it’s just a straightforward shower head that does its job exceptionally well. Despite its budget-friendly price, it doesn’t look or feel cheap, and it outperformed competitors that cost more than ten times as much.
What our tester says: “For anyone looking to improve shower water pressure, this shower head is an absolute steal. It’s proof that you don’t need to spend a fortune to get a powerful, satisfying shower. I’m officially a huge fan.”—Paul Rankin, Product Reviews writer and tester
Get the Speakman shower head at Amazon, Lowe’s, The Home Depot, or Build with Ferguson.
Best Bang for the Buck
SparkPod Power Pressure Shower Head
What We Like
- Noticeable improvement in shower water pressure
- Easy installation with included plumber’s tape
- Simple spray adjustment by rotating the head
- Durable high-quality plastic at a budget price
What We Don’t Like
- Limited to basic spray settings
- Plastic construction may not appeal to everyone
Specs
- Material: Plastic (ABS)
- Spray settings: Rain, pulsating massage, rain massage
- Installation: Easy
Our Ratings: Installation 5/5; Appearance 4/5; Performance 4.5/5; Design 4/5; Value 4.5/5
The SparkPod is another shower head that’s quick and easy to install thanks to the included roll of plumber’s tape—always a nice bonus. Despite its affordable price, the outer shell is made of high-quality plastic that feels sturdy and durable, not flimsy or cheap. It’s a great example of a product that balances cost-effectiveness with solid performance.
What stood out most to us was the noticeable boost in water pressure it provided. The spray settings were simple to switch between by rotating the base of the head, making it an easy-to-use option for anyone. If you’re dealing with low water pressure and want a no-fuss solution, the SparkPod is a straightforward, budget-friendly choice that delivers a satisfying shower experience.
Get the Sparkpod shower head on Amazon or SparkPod.
Best Design
The Jolie Skin Co Filtered Shower Head
What We Like
- Sleek, modern design elevates bathroom aesthetics
- Maintains strong water pressure despite filtration
- Gentle yet effective rainfall-style spray
- High-quality construction built to last
What We Don’t Like
- Higher price compared to other shower heads
- Limited spray settings for customization
Specs
- Material: Plastic (ABS)
- Spray settings: Only one (rain)
- Installation: Easy
Our Ratings: Installation 5/5; Appearance 5/5; Performance 4/5; Design 5/5; Value 4/5
The Jolie shower head is as stylish as it is functional, earning our top spot for design. Right out of the box, its sleek, modern aesthetic stood out, but what impressed us most was how well it maintained a consistent water pressure. Many filtered shower heads tend to reduce pressure, but the Jolie delivered a steady, rainfall-style spray that felt both powerful and relaxing. It’s a great option for anyone dealing with low water pressure but still wanting a luxurious shower experience.
While its filtration capabilities are a bonus, the real standout feature is how well it balances form and function. The gentle yet effective spray provides excellent coverage, and the water pressure felt consistent even in a home with typically lackluster pressure. This design makes the Jolie ideal for those who want to upgrade their bathroom’s style without sacrificing performance.
Though it’s priced on the higher end, the Jolie’s high-quality build, modern design, and impressive performance make it worth the investment. If you’re looking for a shower head that combines powerful water pressure with eye-catching aesthetics, the Jolie is a clear winner.
Read our full review: Jolie Shower Head Review
Get the Jolie filtered shower head on Amazon or Jolie Skin Co.
BEST RAIN
Grohe Euphoria Rain Shower Head

What We Like
- Large surface area gives a wide spray
- Attractive design
- Decent price for the size
What We Don’t Like
- Doesn’t really improve water pressure
Specs
- Material: Metal with chrome finish
- Spray settings: Three
- Installation: Easy
Our Ratings: Installation 4.5/5; Appearance 5/5; Performance 4/5; Design 5/5; Value 4/5
Grohe’s Euphoria rain shower head is a sleek and stylish upgrade for any modern bathroom. With its large 10-inch diameter, it delivers a true rain shower experience, covering you in a relaxing cascade of water. It’s available in chrome, matte black, and brushed nickel finishes, so you can match it to your existing fixtures, and it even comes with an optional extension arm if your current setup needs a little extra reach.
Installation was incredibly easy—we simply screwed it on with some of the included plumber’s tape, and it was good to go. The build quality is noticeably premium, and switching between spray settings is smooth and effortless. However, one thing to note is that this shower head seems to reduce water pressure rather than improve it. Our home’s water pressure is decent, but this model really needs high pressure to perform at its best. If you’re specifically looking to boost low water pressure, this may not be the right fit. But if you have solid pressure and want a luxurious rain shower feel, this one is worth considering.
Get the Grohe Euphoria shower head at Amazon, The Home Depot, Lowe’s, or Build with Ferguson.
Best with Filter
Afina A-01 Filtered Shower Head
What We Like
- Elegant design and large shower head size
- Boosts water pressure noticeably during showers
- Comes with three filters and replacement discount
- Includes wrench, instructions, and plumber’s tape
What We Don’t Like
- Lacks intense spray settings for deeper cleaning
- Spray settings feel fairly standard, not innovative
Specs
- Material: Plastic with chrome electroplated finish
- Spray settings: Only one
- Installation: Easy
Our Ratings: Installation 5/5; Appearance 5/5; Performance 4/5; Design 4.7/5; Value 5/5
We were immediately impressed by the Afina filtered shower head, which was one of the most stylish options we tested. It arrived in a sleek, well-designed box, and the shower head itself is quite large, making it a statement piece in the bathroom. Installation was a breeze thanks to the included wrench, detailed instructions, and a generous roll of plumber’s tape. Afina even threw in three filters to keep it going strong for months, plus a 50% discount coupon for a replacement filter, which is a thoughtful touch. Afina recommends replacing the filter every 90 days.
When it came to performance, the Afina delivered a noticeable boost in water pressure, even with our whole-house water filter already in place. There’s only one spray setting, and it’s pretty straighforward—don’t expect an ultra-pressurized massage setting like our top pick. Still, the spray was consistent and comfortable, making it a solid choice for everyday use.
Overall, the Afina combines good performance with plenty of thoughtful extras, from the spare filters to the handy tools and discounts. If you’re looking for a stylish filtered shower head with practical features and solid pressure, this one checks a lot of boxes.
What our tester says: “For folks living in low water-pressure households who also want filtered shower water, the Afina should be their go-to option. It looks great, and the company makes it easy—and affordable—to replace its filters every 3 months.”—Paul Rankin, Product Reviews writer and tester
Get the Afina filtered shower head on Amazon or Afina.
More Great Options
While we didn’t test these shower heads ourselves, they come highly recommended for their performance and features, making them worthy contenders for tackling low water pressure.
Best Handheld
H02ME High-Pressure Handheld Shower Head

What We Like
- Ergonomic handle is comfortable to use
- Long, flexible hose provides plenty of reach
- Sturdy chrome-plated plastic and steel build
What We Don’t Like
- Slightly heavy compared to other options
Specs
- Material: Stainless steel hose with plastic head
- Spray settings: Powerful rain, massage, or mixed
- Installation: Medium
Using handheld shower heads with low pressure can produce a disappointing trickle that defeats the point of having a handheld model, but the HO2ME shower head with sprayer offers a solution with its turbocharging head. This internal structure compresses the water coming out of the nozzle, resulting in better pressure.
Its soft neoprene nozzles prevent buildup from hard water, and with its long ergonomic handle, the handheld unit fits comfortably in the hand for easy rinsing and washing. The durable stainless steel hose with brass fitting resists corrosion and wear.
This detachable shower head easily snaps on and off a bracket that connects near the water supply line, while a 79-inch-long hose provides enough slack for bathing a small child or rinsing those hard-to-reach spots. The large knob can toggle through three settings, including powerful rain, massage, and a combination “powerful massage” mode.
Get the H02ME shower head with hose on Amazon or Walmart.
Best Ceiling Mount
SR Sunrise Ceiling Mount Shower System
What We Like
- Broad water coverage
- Includes handheld unit
- Durable brass-and-steel build
- Ultramodern design
What We Don’t Like
- Design is not adjustable
- Professional installation recommended
Specs
- Material: Brass and stainless steel
- Spray settings: Rain shower head with additional handheld
- Installation: Difficult (professional required)
The luxury Sun Rise multi-head shower head offers a modern look and versatility, with a fixed head, a handheld unit, and even a valve body and trim. The large fixed shower head is 12 inches by 12 inches, creating a full rainfall experience. While this large fixture might seem like a luxury reserved for those with good water pressure, it’s not. This model features a high-pressure design that draws air into the valve to increase pressure.
The handheld unit attaches to the wall, providing a good option for rinsing conditioners out of hair. The valve body, shower arms, and handheld and fixed shower heads all sport a modern square look. All-metal construction and brass internal parts add durability, while the stainless steel housing with a brushed-nickel finish creates an elegant look. With its valve body and ceiling-mount shower head, installation for this set requires a professional.
Get the SR Sunrise adjustable shower head at Amazon or SR Sunrise.
Jump to Our Top Picks
How We Chose and Tested the Best Shower Heads for Low Water Pressure
To select our top shower heads, we started by researching more than 20 products from well-known and emerging brands. We focused on models that promised easy installation, strong water pressure, thoughtful design, and excellent overall value. We also carefully evaluated each product’s appearance, build quality, and extra features, such as adjustable spray settings and filtration systems.
All testing was conducted in the same bathroom to ensure consistent comparisons of water pressure and performance. We installed each shower head by following the manufacturer’s instructions and then tested each for at least one week. During testing, we assessed the ease of installation, the smoothness and functionality of spray adjustments, and overall water pressure and spray quality. We also considered the design and how well the product balanced form with function. Finally, we factored in value—examining whether each shower head’s price matched its performance and features.
Our picks represent the best combination of design, performance, and value across all the products we tested.
| Testing Stats | |
| Products tested | 5 |
| Time spent testing | 1 month |
| Tests performed | 3 to 4 |
| Price range | $20 to $200 |
What to Consider When Choosing a Shower Head For Low Water Pressure
Read on to learn about what factors to consider when picking the best shower head for a home with water-pressure problems. Considerations involve the shower head’s materials, spray settings, and efficiency, as well as style or taste.
Types of Shower Heads for Low Water Pressure
There are two main types of shower head: fixed and handheld. Fixed shower heads attach directly to the shower supply line. They can support a wide variety of shower head shapes but have limited mobility. Handheld shower heads detach from a water supply line, adding versatility for rinsing hair, massaging sore muscle groups, or even bathing the family dog. Ahead, learn more about the two kinds of shower heads.
Fixed
A fixed shower head mounts directly to the shower faucet that extends from the wall. These types have a threaded opening that screws onto the arm either by hand or with a plumber’s crescent wrench. A ball joint between the head and arm allows the user to aim the water to meet different desired angles or water-flow needs.
Most fixed shower heads have a knob or dial that makes it easy to switch between different spray patterns. Fixed models also come in various shapes, sizes, and finishes to meet a broad range of tastes.
Handheld
Handheld shower heads use a long hose, with one end attaching to a fixed head with a long handle and the other end connecting to the shower arm that extends from the wall. The end that attaches to the shower arm typically has a clip fixture that holds the head in place. When resting in the clip, the handheld type functions much like a fixed shower head. Unlike a fixed one, however, the handheld type can be slipped out of the clip fixture when you want to use it for more targeted spraying.
Like fixed shower heads, handheld models have multiple spray settings and come in various designs and finishes. They are good options for parents needing to bathe young children or pets, for those with mobility issues, or for rinsing hair and washing up with a more precise stream.
Material
Most shower heads are made of a combination of metal, brass, and plastic. The internal parts typically consist of brass, which is highly resistant to corrosion and won’t rust. In most cases, the outer housing consists of either plastic or metal.
While metal might seem like the more durable of the two, keep in mind that metal is more susceptible to water damage in the form of corrosion or rust than plastic is. That said, plastic is more likely to break if handled roughly. Metal finishes such as rubbed bronze and nickel are popular material options and hold up well in a wet environment.
Most shower heads feature neoprene nozzles, which are easier to clean and do a better job of resisting hard-water buildup than metal or plastic nozzles.
Style
Shower heads come in various shapes and sizes, including standard, rain, and handheld.
- A standard style has a shape similar to a doorknob, with a broad face full of small nozzles from which water flows. The head mounts to the wall and sprays water at a downward angle. This type of head usually has a knob or dial to adjust the spray type.
- Rain shower heads have a much broader round or square head that can be as big as 18 inches in diameter. They typically have long arms that allow the user to position them directly above one’s head. This large profile and overhead positioning mimic the feel of rainfall. A rain shower head provides more coverage than a standard one but at lower water pressure.
- Handheld shower heads attach to a clip for removal and handheld use. They have a hose that is 5 to 6 feet long, capable of providing enough slack to let the user rinse their hair, apply high-intensity spray jets to sore muscles, or bathe a young child. The ability to fix these models in place or use them by hand makes them extra versatile.
Pressure
To get around issues of low water pressure, manufacturers have come up with multiple ways to create pressure in the shower head. One of the most innovative designs involves aeration, which draws in air from the surrounding environment to add pressure inside the head. This results in greater water pressure, albeit with a flow pattern more akin to mist than a true water stream.
Other manufacturers use a series of plungers and channels inside the head that compress water flow to increase pressure. Some shower heads feature creative nozzle designs, using different spray patterns that feel intense even while using less water.
Spray Settings
Like standard types, low-pressure shower heads come with a wide range of settings that let the user adjust the water output for relaxation, massage, or hair rinsing. Common settings include rainfall, high-pressure jet, and blast, as well as a gentle spray setting and a fire-hose-like drench option.
Basic models offer only one or two settings, though higher-end products can include up to six different flow patterns. Manufacturers may equip their shower heads with spray patterns that increase the intensity of the water for low water pressure.
Efficiency
The maximum flow rate for shower heads in the United States is 2.5 gallons per minute (GPM) at a water pressure of 80 psi. However, the Environmental Protection Agency recommends that homes use products with a lower flow of 1.8 GPM. Some states, such as California, limit the maximum flow of shower heads to 1.8 GPM.
These lower-flow shower heads are the best option for those living in homes with low water pressure. Although this type of shower head uses less water, manufacturers use innovative designs that increase water pressure, making the user feel like more water is flowing. Shower heads that use less than 2 GPM have a WaterSense label from the EPA.
Filter
Often, older homes or those on well water have water pressure problems. These homes can have older pipes or hard water that is more likely to leave mineral and sediment deposits inside a shower head, inhibiting the water flow and reducing already low water pressure to little more than a trickle.
A good low-water-pressure shower head will have a replaceable or cleanable filter that removes these sediments before they can enter the head’s inner workings, ensuring a steady flow of water.
A separate filter canister between the shower head and arm goes a step further. These filters remove additional impurities, like chlorine and heavy metals, that can damage skin and hair.
Aesthetic
The best shower heads for low water pressure are offered in different finish options to match the user’s decor. These finishes typically include brushed nickel, chrome-plated, silver, and stylized rubbed bronze and black finishes. Shapes also vary. Rainfall types, for example, have a wide diameter and can come in round form or a more modern square shape.
Rainfall heads can reach as much as 18 inches wide, making them a more conspicuous feature in the bathroom. Compact shower heads can be as small as 3 inches in diameter. These minimalist choices offer a more streamlined look with simple lines and understated designs.
Installation
Installing a shower head is one of the easiest bathroom upgrades one can undertake. DIYers typically can remove the old fixture and install a new one in about 15 minutes with just one or two simple tools. Installation typically involves unscrewing the old shower head from the supply line by hand or with a wrench and screwing on a new one. The required tools usually include a crescent wrench and plumber’s tape.
Rain shower heads that extend from the ceiling of the shower typically require custom plumbing that only a professional is qualified to handle.
FAQs
For those still wondering about how low-pressure shower heads work, read on for answers to some of the most common questions.
There are a few reasons why the water coming from a shower head is closer to a trickle than a stream. In older homes, there could be a buildup of sediment in the pipes, hampering the flow of water. The head could also be clogged with residue from hard water, negatively impacting flow. Showering during peak-use periods in a city can also reduce pressure.
Yes. A high-pressure shower head increases water pressure by aerating the water or compressing it in the head before forcing it out of the jets.
A rain shower head has a significantly larger diameter—up to 1 foot or more—than a standard head. While standard shower heads mount so that they spray at an angle, rain shower heads mount above so that they spray straight down, simulating rainfall.
No. As all shower heads must comply with the 2.5 GPM restriction, rain types do not use more water than standard shower heads. Since rain shower heads are wider, they distribute the same amount of water across more nozzles, which reduces water pressure compared to standard shower heads.
Not necessarily. A well-designed large shower head can still deliver strong water pressure, especially if your home’s water pressure is adequate.
Most shower heads fit standard plumbing, but it’s wise to check compatibility with your shower arm size and water pressure.
Yes, most shower heads are designed for DIY installation and come with clear instructions, often requiring no special tools. You usually just need to screw on the new shower head after applying a few rolls of plumber’s tape.
Meet the Tester
Paul Rankin is a seasoned product reviewer with extensive experience in home improvement and bathroom accessories. His approach to reviews is detailed, thorough, and user-focused, ensuring readers get honest, actionable insights.
Additional research provided by Tony Carrick.
The post Testing the Best Shower Heads for Low Water Pressure in 2025 appeared first on Bob Vila.
]]>The post Can a Sink Be Too Loud? Our Favorite Farmhouse Sink Features Extra Padding to Dampen Sounds appeared first on Bob Vila.
]]>Best Overall
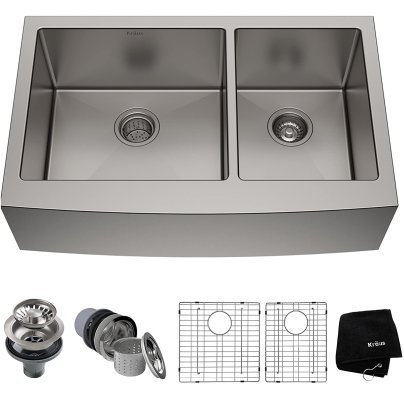
Kraus 33-Inch Standart Pro Stainless Steel Sink
Best Bang for the Buck

Comllen Commercial 33-Inch 304 Farmhouse Sink
Upgrade Pick
Birch Lane 33-Inch Marisol Fireclay Farmhouse Sink
Farmhouse sinks are characterized by their exposed apron front, which juts out slightly from the cabinet. They blend practical design and beauty, instantly adding style to a kitchen. These sinks are hard-working kitchen appliances, often larger and deeper than run-of-the-mill kitchen sinks, with more space for rinsing produce and washing dishes.
There are many farmhouse kitchen sinks on the market in a wide range of sizes and materials, which can make it hard to narrow down the best options. To save you the headache, we spent hours researching the top models from popular retailers, evaluating features and materials, and combing through ratings and user reviews. Our top pick is the Kraus 33-Inch Standart Pro Stainless Steel Sink. This heavy-duty sink features stainless steel construction, a double basin design, and unique NoiseDefend soundproofing technology.
We also had an interior designer weigh in on what kind of kitchens these sinks are best suited for (hint: it’s not just farmhouse-style kitchens) and the difference in materials. Read on for shopping tips and our list of the best farmhouse sinks.
- BEST OVERALL: Kraus 33-Inch Standart Pro Stainless Steel Sink
↓ Jump to Review - BEST BANG FOR THE BUCK: Comllen Commercial 33-Inch 304 Farmhouse Sink
↓ Jump to Review - UPGRADE PICK: Birch Lane 33-Inch Marisol Fireclay Farmhouse Sink
↓ Jump to Review - MOST DURABLE: Sarlai 30-Inch Fireclay Farmhouse Sink
↓ Jump to Review - BEST WORKSTATION: Ruvati 36-Inch Verona Farmhouse Kitchen Sink
↓ Jump to Review - BEST IN BLACK: Ruvati 33-Inch Gunmetal Stainless Steel Kitchen Sink
↓ Jump to Review - BEST DOUBLE-BASIN: Zuhne 33-Inch Turin Double-Basin Farmhouse Sink
↓ Jump to Review - BEST FIRECLAY: Bocchi 30-Inch Classico Apron Front Fireclay Sink
↓ Jump to Review - BEST CERAMIC: DeerValley 33-Inch Double-Basin Farmhouse Sink
↓ Jump to Review - BEST COPPER: Birch Lane Single Bowl Copper 33-Inch Farmhouse Sink
↓ Jump to Review
| Style | Material | Dimensions | |
| Kraus 33-Inch Standart Pro Stainless Steel Sink | Double-bowl apron | Stainless steel | 32.87 inches long by 20.75 inches wide by 10 inches deep (other sizes available) |
| Comllen Commercial 33-Inch 304 Farmhouse Sink | Single-bowl apron | Stainless steel | 33 inches long by 21 inches wide by 10 inches deep |
| Birch Lane 33-Inch Marisol Fireclay Farmhouse Sink | Double-bowl apron | Fireclay | 33.25 inches long by 18 inches wide by 10 inches deep |
| Sarlai 30-Inch Fireclay Farmhouse Sink | Single-bowl apron | Fireclay porcelain | 30 inches long by 21 inches wide by 10 inches deep (other sizes available) |
| Ruvati 36-Inch Verona Farmhouse Kitchen Sink | Single-bowl apron | Stainless steel | 36 inches long by 22 inches wide by 10 inches deep (other sizes available) |
| Ruvati 33-Inch Gunmetal Stainless Steel Kitchen Sink | Single-bowl apron | Stainless steel | 33 inches long by 22 inches wide by 9 inches deep (other sizes available) |
| Zuhne 33-Inch Turin Double-Basin Farmhouse Sink | Double-bowl apron | Stainless steel | 33 inches long by 21 inches wide by 10 inches deep (other sizes available) |
| Bocchi 30-Inch Classico Apron Front Fireclay Sink | Single-bowl apron | Fireclay | 30 inches long by 18 inches wide by 10 inches deep (other sizes available) |
| DeerValley 33-Inch Double-Basin Farmhouse Sink | Double-bowl apron | Ceramic | 33 ¼ inches long by 17 15/16 inches wide by 10 inches deep |
| Birch Lane Single Bowl Copper 33-Inch Farmhouse Sink | Single-bowl apron | Copper | 33 inches long by 22 inches wide by 9 inches deep |
Our Top Picks
The following are the top picks for the best farmhouse sinks for a kitchen. These recommendations were selected because of their style, quality construction, capacity, and other helpful features.
Best Overall
Kraus 33-Inch Standart Pro Stainless Steel Sink
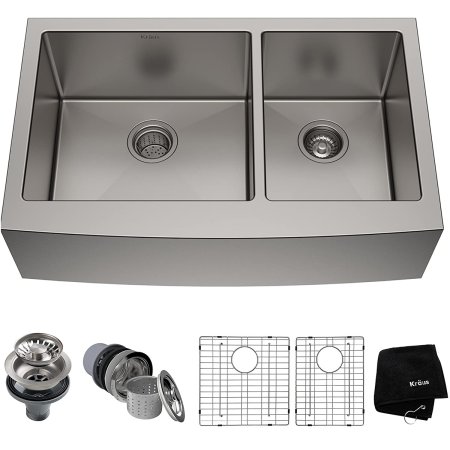
What We Like
- Useful double-basin design
- Durable stainless steel construction
- Features soundproofing technology
- Includes multiple accessories
What We Don’t Like
- Finish may dull over time
Specs
- Style: Double-bowl apron
- Material: Stainless steel
- Dimensions: 32.87 inches long by 20.75 inches wide by 10 inches deep (other sizes available)
Featuring a heavy-duty stainless steel build and a stylish satin finish, this Kraus Standart Pro farmhouse sink is elegant and durable with resistance to corrosion, rust, and dents. We like that its rounded corners maximize the space, and its gently sloped bottom optimizes draining while keeping glassware safely upright.
This stainless steel farmhouse sink features two basins. The larger bowl is convenient for washing and rinsing, while the narrower bowl is better suited for drying dishes or piling dirty utensils. Even better: You can choose the placement of the large bowl—on the right or the left—for a sink specifically tailored to your individual needs and situations.
Boasting NoiseDefend soundproofing technology, its extra-thick padding and nontoxic undercoating reduce condensation, absorb vibration, and dampen sounds. The cherry on top is that this model offers several useful accessories such as protective stainless steel grids, a three-piece basket strainer set, and a kitchen towel.
Get the Kraus farmhouse sink at Amazon, The Home Depot, or Lowes.
Best Bang for the Buck
Comllen Commercial 33-Inch 304 Farmhouse Sink
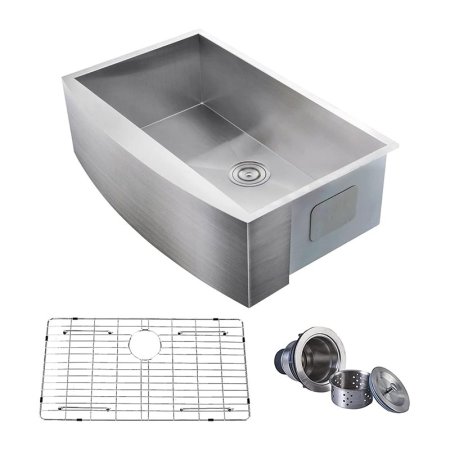
What We Like
- Scratch-resistant finish provides long-term durability
- Stainless steel construction is easy to clean
- Features soundproofing technology
What We Don’t Like
- Only 1 basin; may get cluttered quickly
Specs
- Style: Single-bowl apron
- Material: Stainless steel
- Dimensions: 33 inches long by 21 inches wide by 10 inches deep
With this Comllen Commercial farmhouse sink, there’s no need to break the bank to attain a durable and classy design for a modern-looking kitchen. Made of sturdy stainless steel with a satin brushed-nickel finish, it resists scratches, corrosion, and stains. Even if it does scratch, the brushed finish will conveniently mask it.
With its 33-inch length and a standard 3.5-inch drain opening that fits most garbage disposal systems, this farmhouse sink is suitable for cabinets measuring 33 inches long and up. The single-bowl sink is 10 inches deep, and this open design ultimately leads to the sink having a more spacious appearance.
Thick rubber dampening pads and a stone guard undercoating minimize the noise of dropping dishes into the sink. Gently rounded corners add to its style while also facilitating cleanup.
Get the Comllen farmhouse sink at Amazon.
Upgrade Pick
Birch Lane 33-Inch Marisol Fireclay Farmhouse Sink

What We Like
- Scratch-, chip-, and heat-resistant fireclay construction
- Versatile double-bowl design
- Includes drain assembly, basket strainers, and dual-bottom grids
- Comes in multiple color options
What We Don’t Like
- Heavy; may take multiple people to install
Specs
- Style: Double-bowl apron
- Material: Fireclay
- Dimensions: 33.25 inches long by 18 inches wide by 10 inches deep
Unique and useful, the Birch Lane double-bowl farmhouse sink is large enough for heavy-duty kitchen tasks while remaining classic in style. Made with dual 50/50 bowls, this model is perfect for handling multiple tasks at the same time, and the scratch- and heat-resistant and antibacterial fireclay construction is durable enough to last for years.
This flat apron design also comes in bluff gray and white to match current kitchen fixtures, while the stainless steel basket strainers and bottom grid are perfect for drying dishes and keeping debris out of the drain. Finally, this Birch Lane model comes with drain assembly.
Get the Birch Lane farmhouse sink at Wayfair or Birch Lane.
Most Durable
Sarlai 30-Inch Fireclay Farmhouse Sink
What We Like
- Multiple sizes available
- Nonporous finish blocks stains and odors
- Features soundproofing technology
What We Don’t Like
- Only 1 basin
Specs
- Style: Single-bowl apron
- Material: Fireclay porcelain
- Dimensions: 30 inches long by 21 inches wide by 10 inches deep (other sizes available)
This white farmhouse sink by Sarlai is made of special white clay, fired at 2,200 degrees Fahrenheit for extreme strength and durability. It is resistant to heat, chipping, scratching, and discoloration. The nonporous glossy finish absorbs neither odors nor stains, ensuring that it is durable and easy to clean. Soapy water is all it takes to remove residue and blemishes.
At 10 inches deep, this single-bowl farmhouse sink is available in a wide variety of dimensions—from 24 to 36 inches long and 18 to 21 inches wide, ideal for those searching for a small farmhouse sink. It utilizes sound-dampening materials to minimize sound and vibration. As for looks, the curved apron front, curved corners, and smooth lines expertly blend a classic aesthetic with modern practicality for the best of both worlds.
Get the Sarlai farmhouse sink at Amazon.
Best Workstation
Ruvati 36-Inch Verona Farmhouse Kitchen Sink
What We Like
- Durable stainless steel construction resists damage
- Brushed finish conceals scratches and scuffs
- Comes with multiple food-prep accessories
What We Don’t Like
- Single basin design
Specs
- Style: Single-bowl apron
- Material: Stainless steel
- Dimensions: 36 inches long by 22 inches wide by 10 inches deep (other sizes available)
The Verona by Ruvati is ideal for kitchens with limited counter space. It features an all-in-one design that includes a sink, a hardwood cutting board, a colander, a roll-up drying rack, a bottom rinse grid, and a basket strainer. An optional mixing bowl and butcher block can be purchased separately. The built-in accessories conveniently slide on the integrated tracks for tailoring the work space to each day’s specific needs.
Made of sturdy stainless steel, the sink is durable and easy to clean, while the brushed finish can conceal scratches better than a satin finish. The sloped bottom allows for complete and swift water drainage, and the thick rubber padding minimizes noise and reduces condensation.
At 36 inches long and 10 inches deep, this workstation fits cabinets measuring at least 39 inches long. The same manufacturer also sells this model in 27-inch, 30-inch, and 33-inch-long sizes.
Get the Ruvati Verona farmhouse sink at Amazon, The Home Depot, Lowes, or Appliances Connection.
Best in Black
Ruvati 33-Inch Gunmetal Stainless Steel Kitchen Sink
What We Like
- Unique black finish adds a touch of luxury
- Durable stainless steel construction
- Rust-, tarnish-, fingerprint-, and stain-resistant
- Multiple sizes available
What We Don’t Like
- Only 1 basin
- Slightly shallow depth compared to similar models
Specs
- Style: Single-bowl apron
- Material: Stainless steel
- Dimensions: 33 inches long by 22 inches wide by 9 inches deep (other sizes available)
Neither white nor metal colored, this stainless steel sink by Ruvati bears a matte-black gunmetal finish that looks both sleek and modern. It is rust-, tarnish-, peeling-, fingerprint-, and stain-resistant, and its thick rubber NoiseDefend padding ensures a quiet experience. A stainless steel bottom protective grid comes with the sink—both to protect the sink’s bottom and to act as a drying rack.
With a standard 3.5-inch drain opening and sizes ranging from 30 to 36 inches long, this farmhouse sink pairs well with most kitchen cabinets. The matching basket strainer will not, however, work with a garbage-disposal unit. If you have a garbage disposal—or intend to purchase one—a matching garbage disposal flange sells separately. At 9 inches deep, this sink is slightly less spacious than the norm, but the compact design could very well prove advantageous for cramped kitchens or smaller cabinets.
Get the Ruvati gunmetal farmhouse sink at Amazon, The Home Depot, Lowes, or Appliances Connection.
Best Double-Basin
Zuhne 33-Inch Turin Double-Basin Farmhouse Sink
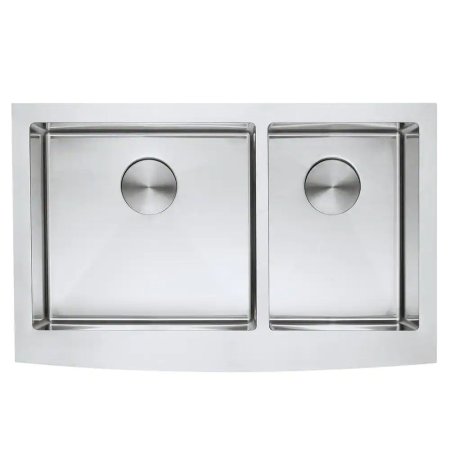
What We Like
- Double-basin design can tackle multiple cleaning tasks
- Durable stainless steel construction resists scratches and scuffs
- Soundproofing technology prevents added noise while doing dishes
- Multiple sizes available
What We Don’t Like
- Only 1 basin orientation available
Specs
- Style: Double-bowl apron
- Material: Stainless steel
- Dimensions: 33 inches long by 21 inches wide by 10 inches deep (other sizes available)
This double-basin farmhouse sink by Zuhne is made of rust-resistant stainless steel and features lead-free parts that are certified to U.S. and Canada codes. With two bowls—larger on the left and narrower on the right—it allows for compartmentalizing dishes and tasks when washing plates, rinsing produce, soaking utensils, and other kitchen activities.
A gentle wipe down will suffice to keep the sink sparkling. Its natural brushed finish masks scratches, and the sloped base ensures fast draining and drying. Noise and thermal insulation are also integrated into the design to cancel noise and vibration, as well as to prevent condensation.
Ten inches deep, this sink is available in either 33- or 36-inch lengths, matching cabinet sizes of 36 inches long and up. It includes a host of versatile accessories, including a scratch-protector grid, a sponge holder, a colander set, and two drain strainers.
Get the Zuhne farmhouse sink at The Home Depot, Amazon, or Wayfair.
Best Fireclay
Bocchi 30-Inch Classico Apron Front Fireclay Sink
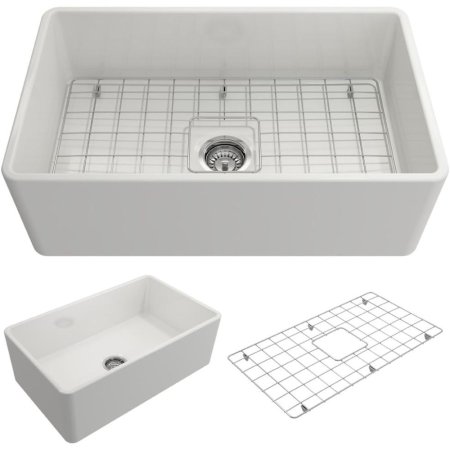
What We Like
- Fireclay is scratch-, chip-, and stain-resistant
- UV-resistant; suitable for both indoor and outdoor use
- Proprietary glazing provides a long-term, high-gloss finish
- Comes in multiple sizes and colorways
What We Don’t Like
- Shorter width compared to some other farmhouse sinks
Specs
- Style: Single-bowl apron
- Material: Fireclay
- Dimensions: 30 inches long by 18 inches wide by 10 inches deep (other sizes available)
Fireclay farmhouse sinks are durable enough to withstand long-term use while providing antibacterial qualities for ample cleanliness. For the best option in this category, rely on the Bocchi Classico farmhouse apron front fireclay sink. Made with 100 percent natural and organic fireclay, this ultraviolet (UV)-resistant single-bowl sink has proprietary glazing for a smooth, high-gloss look, and the nonporous surface is easy to clean after every use.
This model comes with a large stainless steel sink grid for drying dishes and has integrated sound-dampening technology to prevent loud banging while doing dishes. Plus, this pick comes with a basket strainer for keeping debris out of the drain and is garbage-disposal compatible. Finally, this model comes in multiple sizes and colorways to suit a given user’s kitchen.
Get the Bocchi farmhouse sink at Amazon, The Home Depot, or Walmart.
Best Ceramic
DeerValley 33-Inch Double-Basin Farmhouse Sink
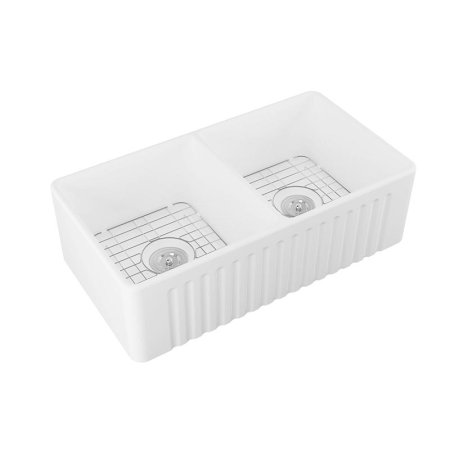
What We Like
- Made from durable scratch- and heat-resistant ceramic
- Reversible; features a fluted and solid side
- Includes 2 sink grids and 2 basket strainers
What We Don’t Like
- Some users report chipping
Specs
- Style: Double-bowl apron
- Material: Ceramic
- Dimensions: 33 ¼ inches long by 17 15/16 inches wide by 10 inches deep
A ceramic or porcelain farmhouse sink can add style to your kitchen without breaking the bank, and this option from DeerValley is one of our favorites. It features a 50/50 split double basin (ideal for washing dishes) and comes with two basket strainers and two sink grids.
This double farmhouse sink is reversible. It features a fluted side for a country or vintage flair and a smooth side for a more modern look. Upon installation, users can decide which side they’d like on display. While ceramic is more prone to chip than other types of sink materials, this model is made from a naturally durable ceramic and has a crack and scratch-resistant surface.
Get the DeerValley farmhouse sink at Wayfair or The Home Depot.
Best Copper
Birch Lane Single Bowl Copper 33-Inch Farmhouse Sink
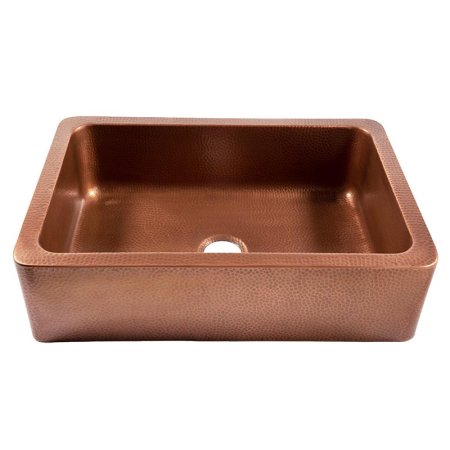
What We Like
- Features a hand-hammered antique copper finish
- Made from 16-gauge copper
- Has sound-dampening properties
What We Don’t Like
- Copper requires extra cleaning and maintenance
- Pricey compared to stainless steel or ceramic options
Specs
- Style: Single-bowl apron
- Material: Copper
- Dimensions: 33 inches long by 22 inches wide by 9 inches deep
Those seeking a vintage farmhouse sink may want to consider copper, which develops a natural patina with time. This under-mount single-basin sink from Birch Lane features a hand-hammered antique finish. It’s constructed of 16-gauge copper and has a sound-dampening finish that will keep your kitchen quiet even as dishes hit the sink.
At 33 inches long and 19 inches wide, this copper farmhouse sink offers plenty of space for completing daily kitchen chores. Just keep in mind that copper tarnishes, so those who don’t like the look of a natural patina will need to spend extra time on the maintenance and cleaning of this sink.
Get the Birch Lane farmhouse sink at Wayfair or Birch Lane.
Jump to Our Top Picks
How We Chose the Best Farmhouse Sinks
These recommendations for the best farmhouse kitchen sinks cover a variety of types and styles to best suit multiple needs. Our curated selection was developed based on extensive product research among some of the top kitchen sink brands. While choosing a kitchen sink is largely a choice based on style and aesthetics, we still weighed a number of practical considerations when making our recommendations.
We included farmhouse sinks of different sizes to fit a variety of kitchen and cabinet profiles. We narrowed our selection to sinks made with high-quality materials like stainless steel and ceramic. We gave preference to models that included additional accessories to save shoppers money down the line.
What to Consider When Choosing a Farmhouse Sink
While it’s easy to assume that all farmhouse sinks for kitchens offer similar performance, a number of factors affect their functionality. Keep reading to learn about several of the most important features to consider when choosing the best farmhouse-style sink for a kitchen remodel.
Kitchen Sink Materials
According to Artem Kropovinsky, interior designer and founder of Arsight Studio based in New York City, New York, thanks to the many materials that farmhouse or apron sinks come in, they aren’t limited to use only in farmhouse-style kitchens. “A farmhouse sink remains functional even in kitchens beyond the farmhouse design,” he said. “The variety of materials allows farmhouse sinks to match contemporary, industrial and traditional styles.”
Modern sink materials have made their mark on kitchen sinks, and shoppers can find a wide variety of choices available at an equally wide range of price points. Choices encompass metals, stone, ceramics, and various man-made materials.
Stainless Steel
Stainless steel is the single most popular material used in kitchen sinks. Stainless steel sinks are lightweight, inexpensive, durable, low maintenance, and can fit into both traditional and contemporary decorating environments.
The thickness of stainless steel sinks is known as the gauge; higher gauges are thinner, and lower-gauge sinks are thicker and more expensive. There are different finishes available, including shiny mirror finishes and satin lustrous looks. But, like all other sink materials, stainless steel isn’t without flaws. “Stainless steel is great for easy cleaning but displays water spots and scratches on the surface,” advised Kropovinsky.
Granite and Quartz
Granite, quartz, and granite composite are extremely popular choices, although natural granite sinks are among some of the most expensive. Granite and quartz are natural stones and feature a pleasing, varied appearance due to the different minerals that make up the stone. They’re often found together in nature and are also often combined in kitchen sinks and countertops.
The two stones are extremely durable but can chip, crack, or scratch if mistreated. Granite composite combines the beauty of natural stone with a percentage of resin—typically 95 percent stone to 5 percent resin. The added resin makes the sink harder and more durable so it can resist chips, scratches, and cracks.
Cast Iron
Cast iron covered in a thick enamel coating was formerly the de rigueur construction of choice for kitchen sinks, but it has slipped a bit in popularity as other materials have become trendy.
Cast-iron farmhouse sinks are coated with enamel, and they are heavy, durable, easy to clean, and can last a lifetime. The enamel in cast-iron sinks can be tinted virtually any color to match your personal decor. Lighter-colored enamels might stain, but they typically clean up easily with nonabrasive commercial stain removers.
Fireclay and Vitreous China
Fireclay and vitreous china are types of ceramics made from clay and “fired” at high temperatures. Fireclay farmhouse sinks typically have a more rustic appearance. They are durable and easy to clean; however, they can be prone to chipping and also may be fairly heavy. Vitreous china was once used primarily in bathroom sinks but is now being used for kitchen sinks as well.
Copper
Copper is a beautiful metal that can be hammered or molded with a variety of designs, making it a lovely addition to many decorating styles. Copper also is naturally antimicrobial, so it is becoming a popular choice among health-conscious consumers.
Since copper is a pricey alternative, this metal is more often used for smaller accessory sinks, such as those on a bar or island location. Copper requires some extra TLC to keep it looking good. The material will oxidize over time, and it therefore needs special cleansers and waxes to maintain its shine.
Solid Surface
Solid-surface materials include acrylic, polyester, and fiberglass. These sinks are typically made from resins or epoxy to emulate the look of natural stone. Solid-surface sinks are extremely durable and resistant to scratches and chipping; if the surface becomes marred, you can often buff it to remove the scratch. The materials are prone to staining, however, and can be damaged from high heat.
Concrete
Concrete is an up-and-coming material for kitchen sinks and combines many of the attributes of granite without the high price tag. Contractors can pour concrete on site, so the sink can be a custom size and shape. Consumers also can find precast varieties. Concrete is very heavy, however, and might require special cabinetry. It is also prone to staining.
Style
There are many different styles and configuration combinations of kitchen sinks; each has its own benefits, though there is no one-size-fits-all solution. Some of the most common styles for farmhouse sinks include:
- Double-basin/bowl: Many families prefer a sink with two bowls: one for hot sudsy water and the other for rinsing, or one for soaking encrusted pots and pans and the other for doing a regular washup. One of the most interesting new developments in double-basin sinks is the double-bowl low-divide sink, which offers the benefit of two basins but can also accommodate pots with long handles.
- Single-basin/bowl: Single-basin sinks are the most common and least expensive configuration and offer the advantage of accommodating large pots, pans, and platters, all of which might require soaking prior to scrubbing.
- Drainboard: Another old-time classic that’s becoming trendy again are sinks with built-in drainboards, which allow you to prep vegetables and let them drain without messing up the counter. The drainboard also provides space to drain pots, pans, and utensils. The only downside is that a farmhouse sink with drainboard attached takes up valuable counter space, and therefore, what users gain in versatility they lose in real estate.
- Workstation: The term “workstation sink” often refers to sinks that come with a variety of accessories that allow you to convert the sink area into food preparation and serving space. These accessories can include cutting boards, colanders, drying trays, warming racks, and similar items that enhance the versatility of the sink area without using additional counter space.
Size
Before you begin shopping for kitchen farmhouse sinks, first consider what size sink you need. Whether you’re simply replacing your existing sink or doing a complete kitchen renovation, it’s important to take precise measurements.
Apron front sink sizes vary widely, with widths ranging from 20 inches long to as much as 60 inches long. The most common size, however, measures approximately 33 inches long by 21 inches wide. Farmhouse sinks are characterized by their deep bowls, which typically have depths of about 10 inches. If you’re replacing your current sink but don’t plan on changing the cabinetry, consider a retrofitted farmhouse sink, which retains its depth but has a shorter apron.
Drop-in vs. Under-Mount
Farmhouse sinks typically come in one of two styles: under-mount and drop-in sinks.
- Drop-in sinks—also known as top-mount sinks—have long been the most common on the market. The top-mount farmhouse sink fits into a precut hole in the countertop and is easy for professionals—or even experienced DIYers—to install. The sinks have a lip around their perimeter that secures to the counter.
- Under-mount sinks attach to the bottom of the countertop. Their installation requires heavy-duty clips and caulking or an alternative adhesive. Because they are flush with the counter, it’s easy to scrape dirt and leftover food scraps into them. Undermount kitchen sinks are only compatible with waterproof countertop materials.
Color
The most popular material also dictates the most popular color in kitchen sinks: stainless steel. Stainless steel fixtures and appliances continue to reign supreme in kitchen design, although natural stone finishes, such as granite and quartz in darker shades, have been trending upward in recent years.
White, off-white, beige, and sand remain the most popular shades in fireclay, china, or enamel-coated cast-iron sinks since these versatile neutrals blend in well with many decorating schemes. In recent years, choices of deeper shades such as black and navy blue are surging.
Included Fixtures
Farmhouse sinks generally sell as stand-alone pieces without any additional fixtures like a farmhouse sink faucet or built-in soap dispenser. Many include special grids or strainers or offer included or optional accessories for food prep, as described above.
Installation
Installing a kitchen sink is an advanced project that requires skill and specific equipment and typically necessitates professional help. Installation requirements and steps vary based on whether you’re simply replacing your existing sink or doing a complete kitchen remodel.
That being said, most farmhouse sinks have similar installation requirements, so this shouldn’t be a major consideration when choosing between different models. While drop-in sinks are slightly easier to install than under-mount sinks, both styles require a professional unless the buyer is an experienced DIYer.
FAQs
Whether you are planning an entire gut rehab project, building new from scratch, or simply looking to spruce up your existing kitchen, one small change—a new sink—can make a big difference. Farmhouse sinks are typically easy to maintain, especially when you keep these facts in mind.
While the two terms are often used interchangeably, there is one key difference between farmhouse sinks and apron-front sinks. Both refer to deep-cut sinks, but the fronts of apron sinks are always exposed. This means that many popular farmhouse sinks are also apron sinks.
Kitchen sinks typically come in stainless steel, granite, cast iron coated with enamel, fireclay, or man-made composites. Stainless steel is the most popular material due to its contemporary look and durability. Plus, it’s easy to clean a stainless steel sink. However, the best material for your kitchen depends on style, budget, and personal preferences.
Stainless steel is probably the most durable material, followed by natural granite, quartz, and cast iron. However, one of the more popular materials that has emerged in the last few years is fireclay, which is heat-, stain-, and chip-resistant while also providing antibacterial qualities for long-term cleanliness.
Natural stones such as granite and quartz are extremely hard and durable; therefore, they do not scratch easily. Plus, this material is also capable of resisting heat, stains, and chips for long periods of time.
Stainless steel is by far the easiest to clean and the most durable material. Stainless steel resists staining, chips, rust, and mineral deposits and can be wiped down with a damp cloth or cleaned with a commercial stainless steel cleanser.
With today’s modern materials and construction methods, most kitchen sinks will last roughly 20 to 30 years under normal use and care. However, some of the materials that are being used for kitchen sinks like granite, fireclay, and stone can last up to 50 years.
The post Can a Sink Be Too Loud? Our Favorite Farmhouse Sink Features Extra Padding to Dampen Sounds appeared first on Bob Vila.
]]>The post This DIY Lighting Solution is Perfect for Closets and Other Dark Spaces appeared first on Bob Vila.
]]>Exceptional closet organization and storage is all well and good, but without proper lighting, the simple task of finding an article of clothing can become a major inconvenience.
Ross Kesterson, a general contractor and VP of Restore Pros in Northeast Georgia, says, “Lighting can take a closet (or any space) to the next level—if done properly. There are ways to backlight a space to make it more intimate and upscale.” He also explains that overhead lighting can be chosen to make sure that you see the clothing color correctly. “Have you ever gotten ready and then went outside and the colors look terrible together? Well, lighting can make or break those situations!” he says.
After reviewing dozens of brands and styles, our favorite closet lighting option is the Lithonia Lighting LED Flush Mount Closet Light. It’s easy to install, features Energy-Star-certified lightbulbs, and has motion-sensing capabilities. Read below for insights on a few select tested models and a list of the best closet lighting options organized by category.
- BEST OVERALL: Lithonia Lighting LED Flush Mount Closet Light
↓ Jump to Review - BEST BANG FOR THE BUCK: Brilliant Evolution Wireless LED Puck Light 3-Pack
↓ Jump to Review - UPGRADE PICK: Willa Arlo Interiors Theodora 4 Flush Mount Light
↓ Jump to Review - BEST STRIP: LepoTec Wireless Rechargeable Under Cabinet Lights
↓ Jump to Review - BEST RECESSED: Sunco 4-Inch Recessed LED Retrofit Lighting
↓ Jump to Review - BEST TRACK: Globe Electric 6-Light S-Shape Track Lighting
↓ Jump to Review - BEST DIMMABLE: Light Blue USA LED Flush Mount Dimmable Ceiling Light
↓ Jump to Review - BEST WIRELESS: Mcgor Rechargeable LED Under Cabinet Lights
↓ Jump to Review - BEST MOTION SENSOR: Youtob Motion Sensor LED Ceiling Light
↓ Jump to Review - BEST PLUG-IN: Govee RGB 32.8-Foot LED Strip Lights
↓ Jump to Review

| Type | Bulb Type | Brightness | Wireless | |
| Lithonia Lighting LED Flush Mount Closet Light | Motion sensor | LED | 925 lumens | No |
| Brilliant Evolution Wireless LED Puck Light 3-Pack | Wireless | LED | 55 lumens | Yes |
| Willa Arlo Interiors Theodora 4 Flush Mount Light | Flush mount | N/A | N/A | No |
| LepoTec Wireless Rechargeable Under Cabinet Lights | Strip | LED | 350 lumens | Yes |
| Sunco 4-Inch Recessed LED Retrofit Lighting | Recessed | LED | 660 lumens | No |
| Globe Electric 6-Light S-Shape Track Lighting | Track | N/A | N/A | No |
| Light Blue USA LED Flush Mount Dimmable Ceiling Light | Flush mount | LED | 1,200 lumens | No |
| Mcgor Rechargeable LED Under Cabinet Lights | Strip | LED | 180 lumens | Yes |
| Youtob Motion Sensor LED Ceiling Light | Motion sensor | LED | 1,500 lumens | No |
| Govee RGB 32.8-Foot LED Strip Lights | Strip | LED | Not specified | Corded electric |
Our Top Picks
Whether shoppers want hardwired lights or decorative stick-on strip lighting, we have them covered with these top cloest lighting choices.
Best Overall
Lithonia Lighting LED Flush Mount Closet Light
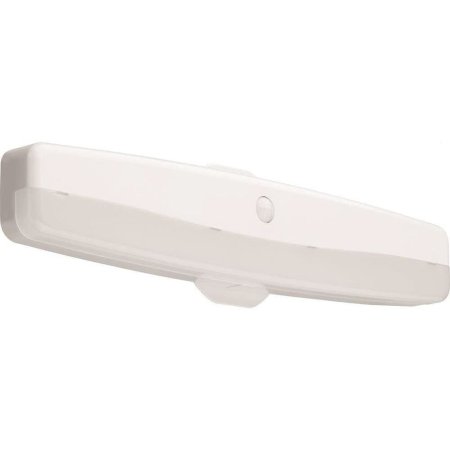
What We Like
- Boasts an Energy Star certification
- Offers 50,000 hours of use
- Includes mounting hardware and a clear installation guide
What We Don’t Like
- Possible issues with the motion sensor’s responsiveness
- The integrated motion sensor cannot be disabled
Specs
- Type: Motion sensor
- Bulb type: LED
- Brightness: 925 lumens
- Wireless: No
Made from durable painted steel, this LED flush-mount light by Lithonia is easy to install and low on power consumption. Its LED bulbs are Energy Star certified and emit 4000 kelvins of cool-ish white at 925 lumens. Buyers can expect a long lifespan of about 50,000 hours to help reduce their carbon footprint even further.
We like that this closet light has a passive infrared (PIR) motion sensor that turns on the second it detects movement and automatically switches off after 30 seconds of inactivity. Included with the light are mounting hardware and an easy-to-understand installation guide for DIYers; it’s available in three lengths, with or without a pull-chain switch.
Get the Lithonia Lighting closet lighting at Amazon and The Home Depot.
Best Bang for the Buck
Brilliant Evolution Wireless LED Puck Light 3-Pack
What We Like
- Includes 3 closet lighting units
- Suited for illuminating small closets or compact areas
- Long battery life
What We Don’t Like
- Front-focused beam design not ideal for angled application
- AA batteries necessary for operation (not included)
Specs
- Type: Wireless
- Bulb type: LED
- Brightness: 55 lumens
- Wireless: Yes
Brilliant Evolution’s wireless LED puck lights are easy to install and won’t break. This three-pack of lights does not require any hardwiring or hardware. The adhesive on the backs of the lights is designed to stick to walls and other home surfaces. AA batteries power the lights and last for about 100 hours before they need to be replaced, which is longer than most other wireless puck lights.
These LED lights have a push-button on/off switch and a warm-white glow of 55 lumens at 3000 kelvins. Though these lights have ease of installation and wireless construction going for them, the lights’ beam is front focused, and it doesn’t work well when angled. These work best in a smaller walk-in closet or wardrobe.
Get the Brilliant Evolution closet lighting at Amazon, The Home Depot, or Walmart.
Upgrade Pick
Willa Arlo Interiors Theodora 4 Flush Mount Light
What We Like
- Combines K9 crystal with a drum-shaped metal frame
- Resilient against rust, corrosion, and fading
- Compatible with dimmer switches
What We Don’t Like
- Bulbs and dimmer switch not included
Specs
- Type: Flush mount
- Bulb type: N/A
- Brightness: N/A
- Wireless: No
Closet lighting tends to be largely functional, but in bigger walk-in closets, a statement light fixture can completely change the aesthetic of the space. This crystal flush-mount ceiling light from Wayfair is sure to bring a touch of elegance to the closet with its sparkling finish and classic drum-shaped design. It’s made using K9 transparent crystal, which refracts light for a stunning visual effect.
This fixture is compatible with dimmer switches and requires four E12 bulbs, which are not included in the package. It requires hard wiring, so it’s best for closets that are already equipped with the necessary electrical capabilities.
Get the Willa Arlo closet lighting at Wayfair.
Best Strip
LepoTec Wireless Rechargeable Under Cabinet Lights
What We Like
- Features side-emission design for bright lighting without glare
- Versatile installation options
- Two energy-efficient modes
What We Don’t Like
- May require frequent recharging
Specs
- Type: Strip
- Bulb type: LED
- Brightness: 350 lumens
- Wireless: Yes
This two-pack of strip lights from LepoTec features 54 tiny LED lights and uses a unique system with side-emitting bulbs that refract light through a reflector to create bright illumination of up to 350 lumens per fixture, all while casting a soft and gentle light. It’s wireless, featuring a USB rechargeable battery, so it doesn’t require hardwiring.
The light has three operational modes: always on, off, and motion sensor. The motion sensor can detect movement within a 10-foot/120-degree range and turns off after 20 seconds of no activity. The 2,500 milliamp hour (mAh) rechargeable battery lasts for about 3 hours in “on” mode and 2 to 4 weeks when used in “sensor” mode, depending on how often you use your closet.
What our tester says: Michelle Larson, a Bob Vila staff writer and product tester, notes in the Best Under-Cabinet Lighting that “dual-attachment options make the LepoTec highly portable and easy to remove for charging. I was able to take mine down and have it fully charged via USB in under an hour.”
Get the LepoTec closet lighting at Amazon, Wayfair, or LepoTec.
Best Recessed
Sunco 4-Inch Recessed LED Retrofit Lighting
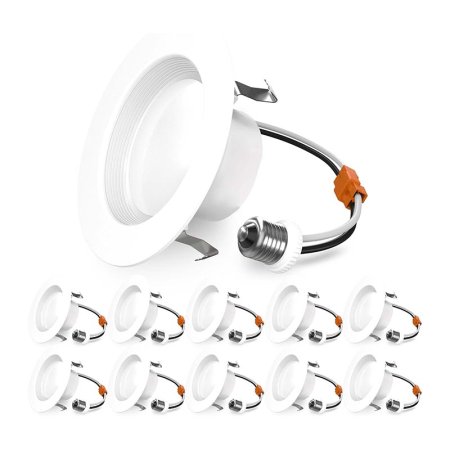
What We Like
- Offers adjustable brightness levels
- Baffle trim diffuses light, creating a softer effect
- Energy Star certification ensures reduced energy consumption
- Over 35,000 hours of use per light
What We Don’t Like
- Higher price point than other options
Specs
- Type: Recessed
- Bulb type: LED
- Brightness: 660 lumens
- Wireless: No
Sunco’s 10-pack of recessed LED downlights is one of the best closet lighting systems for a larger walk-in closet that requires more than one light fixture. These LEDs have a baffle trim that diffuses light and creates a softer and more pleasant viewing experience. Their 90-degree flood beams can illuminate wide areas.
These 10-watt Energy Star LED lights are equivalent to 60-watt incandescents and shine with a 3000 kelvin warm-white tone. These Suncos are also dimmable, have a lifespan of about 35,000 hours, and come with a 7-year warranty.
Get the Sunco closet lighting at Amazon or Sunco.
Best Track
Globe Electric 6-Light S-Shape Track Lighting
What We Like
- Dimmer switch compatibility
- Multiple sizes available
- Comes with all required mounting hardware
What We Don’t Like
- Size may be too large for smaller closets
Specs
- Type: Track
- Bulb type: N/A
- Brightness: N/A
- Wireless: No
An excellent choice for walk-in closets, Globe Electric’s track lighting is an upscale system that illuminates a wardrobe with style. It features six light bulbs that can be adjusted in any direction, which gives buyers more flexibility than most closet lights. This fixture uses six 50-watt MR16 light bulbs that are not included but are easy enough to find at a hardware store.
The track lighting system is compatible with Globe Electric’s dimmer switch (sold separately). Though it requires hardwiring, the fixture comes with all necessary mounting hardware. It’s available with three, four, or six track heads.
Get the Globe Electric closet lighting at Amazon or The Home Depot.
Best Dimmable
Light Blue USA LED Flush Mount Dimmable Ceiling Light
What We Like
- Can be used with a dimmer switch
- Offers multiple finishes and lighting tones
- Highly energy efficient
What We Don’t Like
- Installation requires hardwiring
Specs
- Type: Flush mount
- Bulb type: LED
- Brightness: 1,200 lumens
- Wireless: No
Light Blue USA’s dimmable LED ceiling light works well in larger walk-in closets, and its minimalist brushed-nickel exterior looks great with almost any style of décor. The fixture is available in three lighting tone options (warm, cool, or daylight) to suit various preferences. It uses 15-watt LED light bulbs, which are long lasting and energy efficient. This fixture requires a hardwire installation and can be paired with an LED dimmer switch.
Get the Light Blue USA closet lighting at Amazon or Walmart.
Best Wireless
Mcgor Rechargeable LED Under Cabinet Lights

What We Like
- Features motion sensor for automatic lighting
- Dimmable with 5 brightness levels
- Installs via strong built-in magnets or adhesive plate
What We Don’t Like
- May not be bright enough for some spaces
- Frequent recharging may be necessary
Specs
- Type: Strip
- Bulb type: LED
- Brightness: 180 lumens
- Wireless: Yes
This two-pack of motion sensor strip lights can detect movement in extremely low-light conditions and offers an always-on mode for more prolonged tasks. What sets these strip lights apart from many others on the market is that they’re dimmable, with five brightness levels available for optimal versatility.
These lights are USB-C rechargeable, equipped with an 1800mAh battery that lasts for 6 hours in always-on mode at full brightness or 7 to 30 days in motion-sensor mode. It’s important to note, however, that a USB wall adapter is not included. Users have a couple of options for installation, since the lights come with built-in magnets or adhesive metal plates that are more suitable for nonmetal surfaces. This makes the lights easy to remove and reattach for recharging.
What our tester says: Michelle Larson, a Bob Vila staff writer and product tester, notes in the Best Under-Cabinet Lighting, “Something about this two-pack of lights makes them look a little sleeker than the rest. When tested side by side with other motion-sensing lights, these MCGOR lights reacted the quickest and most consistently.”
Get the Mcgor closet lighting at Amazon.
Best Motion Sensor
Youtob Motion Sensor LED Ceiling Light

What We Like
- Motion sensor has a 16-foot detection range
- 3 distinct lighting modes
- Priced affordably, offering great value for its features
What We Don’t Like
- Non-dimmable design limits lighting flexibility
- Requires professional hardwiring for installation
Specs
- Type: Motion sensor
- Bulb type: LED
- Brightness: 1,500 lumens
- Wireless: No
Youtob’s motion-sensing LED ceiling light is a great option for those seeking a bright 1,500-lumen LED that turns on automatically when needed. Its motion sensor can detect movement up to 16 feet away and switches off after 30 or 180 seconds of inactivity. It has two modes, daylight mode and night mode, so users can choose if they’d like the lights to turn on during the day and night, or only at night. The tone of the light can be changed to 3000, 4000, or 5000 kelvins with the push of a button.
Though this LED light needs to be hardwired, Youtob has made the installation fairly painless. The light comes with the required mounting hardware, a mounting bracket, and an installation guide to make the process quick and easy. Youtob offers an 18-month money-back guarantee if consumers have any problems with its product.
Get the Youtob closet lighting at Amazon or Walmart.
Best Plug-in
Govee RGB 32.8-Foot LED Strip Lights

What We Like
- Installs via a strong adhesive backing
- Dozens of light color choices, including natural lighting
- Integrates with the Govee app for easy control
What We Don’t Like
- Removal may damage to the wall
Specs
- Type: Strip
- Bulb type: LED
- Brightness: Not specified
- Wireless: Corded electric
Those looking for a simple, reliable way to illuminate their closets without hardwiring a fixture may want to check out these Govee strip lights. Compatible with Google Home and Alexa, these strip lights contain 300 LEDs and several natural lighting modes to brighten a space. A simple voice command can turn them on and change their colors and brightness level.
These closet lights are installed using a self-adhesive backing and supplied clips. Once attached to the wall or ceiling, simply plug them in and connect them to the Govee app. They also have some fun extra features, such as music sync, which enables the lights to “dance” along with any chosen song.
What our tester says: Stacey L. Nash, a Bob Vila staff writer and product tester, notes in the Best LED Light Strips, “I was impressed by how well these programmable LED lights connected to the app for choosing scheduling and lighting options, including manual preferences or preset colors based on seasons, moods, holidays, or special occasions.”
Get the Govee closet lighting at Amazon.
Jump to Our Top Picks
How We Chose the Best Closet Lighting
We researched the most sought-after lighting options in their respective categories and discovered that the best options are determined by their type, brightness, ease of installation, and other special features included by top brands. While we took the aesthetics of the light fixture into consideration, Kesterson recommends making functionality the top priority: “If it doesn’t function, it doesn’t matter if it’s pretty.”
While searching for the best closet lighting ideas available, the most popular types among users were the motion-sensing, recessed, wireless, strip, and track lighting with LED bulbs. Our top picks come with 55 to 1,500 lumens of light, and select picks include automatic shutoff, remote controls, or multiple finishes and light tones.
While some of these closet lighting ideas require hardwiring, many can be recharged or rely on batteries for power. Plus, those that are battery-powered or rechargeable offer up to 50,000 hours of use.
What to Consider When Choosing Closet Lighting
Closet organization is a great first step to a well-functioning closet, but the right type of light is a necessity. Important things to consider while shopping for the best closet lighting are the closet’s layout and square footage, personal style, and the type of light to cast in the space. The closet lights’ color temperature and brightness, for example, can affect how clothing looks.
Type
The most common types of lighting used in closets are strip lighting, recessed lighting, and track lighting. Each option has a different type of light bulb and different types of mounts. Of these different types, some have a motion sensor for automatic turn-on or are wireless and battery-powered for easy installation.
Strip Lighting
Strip lights are flexible cords or strips of tiny LED lights that are usually attached to a wall or other surface with a strong adhesive backing. There is no hardwiring required for strip lighting—just plug them in and use them. These lights are great for lighting up small, dark spaces because the strip is so compact. Many strip lights come with remote controls that allow users to change the color and pattern of the lights, creating a more varied illumination for those seeking to liven up their closet space.
Recessed Lighting
Recessed lighting fits inside a cutout in the ceiling and sits flush with drywall once the lighting is hardwired and installed. These lights are usually round and measure from 3 to 12 inches in diameter. When using recessed fixtures to illuminate a wardrobe, buyers will usually get better coverage by installing a series of small recessed lights rather than a couple of big ones.
As is the case with any electrical fixtures installed in a closet, follow good fire-safety precautions and install recessed lights only if a clearance of at least 6 inches between the lights and clothing (or other items stored in the closet) can be maintained.
Track Lighting
With a track lighting system, individual light bulbs are mounted on a metal bar, or track. What’s nice about track lights is users can swivel the light bulbs and spotlight specific areas of their closet. Track lighting works best for walk-in closets because larger closets usually have enough ceiling clearance to avoid a fire hazard. These lights are also relatively easy to install because they require just one hardwiring point, rather than multiple points (as with recessed lighting).
Motion Sensor Lighting
Motion sensor lights are designed to turn on automatically when they detect movement within their sensor range. There are two common types of motion sensors: active ultrasound and PIR, which uses ultrasonic waves to detect movement. PIR relies on changes in infrared energy, or body heat, to detect motion and trigger the light. Motion sensor closet lighting is convenient because it doesn’t require a light switch.
Wireless Lighting
It isn’t always possible or feasible to cut into ceilings and walls to install new closet lighting. Wireless closet lighting is a terrific option in these situations because it doesn’t require electrical hardwiring. Instead, wireless lights are battery-powered, usually with AA or AAA batteries. Some wireless lights are even rechargeable.
To recharge a wireless light, plug it into a standard USB port or phone charger using the accompanying charging cable. Wireless lights are usually mounted onto surfaces with magnetic strips or strong adhesives made for walls. Most wireless lights will run for 3 to 5 hours of continuous use, or 1 to 2 months of sporadic use.
Closet Space and Features
Not all types of closet lighting can be used in all closets. As with any electrical wiring or device, fire safety is critical. Many wired lighting fixtures require a minimum clearance of 6 to 12 inches between a light source and a surface. Most municipalities follow National Electric Code guidelines, which stipulate that closet lights should be recessed, or surface mounted without exposed bulbs, unless the closet is a walk-in space.
In other words, the size and layout of the closet has everything to do with the kind of lighting that can be used in the space. It’s always best to contact a local municipality to see what the exact building codes are in a particular area.
Material
The materials that closet lighting is made of is another important consideration and will vary depending on the type of lighting. For example, frames for track lighting are usually made of metal. These frames, or tracks, come in a variety of finishes to match different décor styles. Recessed lights, on the other hand, are often framed in rings of white plastic resin or silver metal.
Fluorescent vs. LED
When researching the best closet lighting, shoppers may come across the terms “fluorescent” and “LED” and wonder, what is the difference?
- Fluorescent lighting is a gas-discharge lamp that requires an electrical charge to start up. It may produce a buzzing sound with age. Fluorescent bulbs have been a reliable source of bright light for years and are more efficient than incandescent bulbs.
- Light-emitting diodes, or LED lighting, is solely electrical. Compared with fluorescent lights, LED lighting is brighter, has a longer lifespan, turns on faster, and does not require the careful handling that mercury-based fluorescent lights do. LED lighting is also more energy efficient because it uses less wattage to produce equal or brighter light than a fluorescent or incandescent bulb of higher wattage. LED lights are typically the top choice for closet lighting.
Brightness and Color Temperature
The brightness and color temperature of new closet lighting are essential shopping considerations because they dictate how well a bulb illuminates the space. Watts, the amount of energy a bulb uses, and lumens, which measure brightness, are two important measurements to be aware of.
A small 30- to 80-square-foot space is best illuminated with an LED closet light system of 7 to 15 watts, or 500 to 1,000 lumens of light. (A 15-watt LED bulb is about as bright as a 25-watt fluorescent bulb or a 75-watt incandescent bulb. All three produce about 800 lumens of light, but the LED consumes the least energy.) Larger closets may require additional light fixtures or higher-wattage bulbs.
The color temperature, or tone, of a light bulb is measured in kelvins. A lower rating of 2000 to 4000 kelvins produces a warm yellowish tone; cooler white tones are found in the 4500 to 6000-plus kelvins range. Warmer lights are softer and easier on the eyes, but cool-toned lighting may help users distinguish clothing colors more easily.
Aesthetic
A closet lighting’s design aesthetic is probably more exciting to shop for than the bulb tone. Though most closet lights are trimmed in simple white tones so they’ll blend in with drywall, other light fixtures are available in black, silver, bronze, or other trim colors.
Shoppers may also want to take their home’s design or style into account when selecting closet lighting and go with an industrial, vintage, or contemporary modern fixture to match the home’s décor. Of course, the fixtures that are best for a particular closet depend on its size. Shoppers have more flexibility to choose a bigger or more ornate closet light if their closet is a walk-in rather than a standard 6-foot-long by 4-foot-wide storage area.
Wired vs. Wireless
Whether consumers select a hardwired or wireless closet light depends on their closet’s attributes and their willingness to put time and expense into a closet-light installation. Installing a new hardwired light usually involves cutting and splicing wires, cutting out drywall, and drilling and mounting hardware to fit a fixture. These tasks require electrical expertise and are best done by a professional electrician. If buyers plan to install their new closet lights themselves, they will want to turn off all electrical power sources and follow safety guidelines.
If there’s a need for a closet light that’s easier to install, consider a plug-in electric light or a battery-powered wireless light. Most wireless lights run off AA or AAA batteries that last for a couple of months. Some wireless lights these days have rechargeable batteries, so users don’t have to worry about purchasing new ones every time the light’s battery dies. Most rechargeable batteries can be juiced up using a simple USB charger.
FAQs
Finding the best closet lighting requires a lot of attention to detail. Here are answers to some of the most common questions about closet lighting.
It is possible to install recessed lighting in a closet, but it will require some hardwiring. Generally speaking, this should only be undertaken by a professional electrician to ensure safety and compliance with local building codes. Check these codes for specific requirements because they often dictate precise distances for clearance between lights and stored items to prevent fire hazards. Opt for energy-efficient low-heat LED bulbs, especially in confined spaces.
The ideal lumen count depends on the closet’s size and the type of lighting you’re using. For a standard 20- to 50-square-foot closet, 500 to 1,000 lumens should suffice. This range ensures adequate illumination without being overly harsh.
The amount of lighting your closet needs depends on its dimensions and your personal preference for how bright you want the lights to be. You can quickly calculate the recommended number of lumens for a space by multiplying the square footage by your desired lumens/square foot (this figure is sometimes called “foot-candles”), or how intense a light source is. For a closet, 20 to 30 or more lumens per square foot is recommended. The calculation for a 10-foot-long by 7-foot-wide walk-in closet, therefore, is 70 square feet x 20 lumens/square foot. This closet needs at least 1,400 lumens.
It depends on the type of closet light you choose and your closet’s layout. Installing a light fixture can be as simple as removing an adhesive backing on the fixture, or as complex as cutting drywall and hardwiring electrical units. If you have no experience installing light fixtures, it’s probably best to hire a professional.
Why Trust Bob Vila
Bob Vila has been America’s Handyman since 1979. As the host of beloved and groundbreaking TV series including “This Old House” and “Bob Vila’s Home Again,” he popularized and became synonymous with “do-it-yourself” home improvement.
Over the course of his decades-long career, Bob Vila has helped millions of people build, renovate, repair, and live better each day—a tradition that continues today with expert yet accessible home advice. The Bob Vila team distills need-to-know information into project tutorials, maintenance guides, tool 101s, and more. These home and garden experts then thoroughly research, vet, and recommend products that support homeowners, renters, DIYers, and professionals in their to-do lists.
The post This DIY Lighting Solution is Perfect for Closets and Other Dark Spaces appeared first on Bob Vila.
]]>The post The Best Garden Fertilizers, Vetted appeared first on Bob Vila.
]]>Garden plants need nutrients to grow and remain healthy. Adequate soil fertility is as important to plants as a healthy diet is to animals and people. Experienced gardeners know the necessity of understanding soil nutrients so they can use them at the optimal time and in the right proportion with the best fertilizer to supplement the soil.
Choosing a fertilizer can be downright overwhelming because there are so many types and options available. Our favorite is Jobe’s All-Purpose Granular Fertilizer, because of its fast-acting, balanced, multipurpose formula that works for many different types of plants. Read on for tips and suggestions to help when shopping, and don’t miss our roundup of all our favorite picks among the best garden fertilizers available.
- BEST OVERALL: Jobe’s Organics All Purpose Granular Fertilizer
- BEST BANG FOR THE BUCK: Burpee Natural Organic All-Purpose Plant Food
- BEST ORGANIC: Sunday All-Purpose Plant Food Mix
- BEST LIQUID: GS Plant Foods Organic Fish and Kelp Blend
- BEST FOR VEGETABLES: Dr. Earth Organic and Natural Home Grown Fertilizer
- BEST FOR FLOWERS: Jobe’s Organics Annuals and Perennials Plant Food
- BEST PLANT STARTER: Espoma Organic Bio-Tone Starter Plus Fertilizer
- BEST ACIDIC: Dr. Earth Organic and Natural Acid-Lovers Fertilizer

Before You Buy Garden Fertilizer
Choosing the right garden fertilizer is highly dependent on the types of plants being fed. Before buying garden fertilizer, take stock of the plants in the garden and research their individual nutritional needs. Flowers have different nutritional needs than vegetables, and seedlings have different nutritional needs than mature plants.
Before buying and applying a garden fertilizer, consider performing a soil test to determine the soil’s pH level and nutrient content. Use these test results to determine which type of fertilizer is the best fit.
Product Comparison
| Type | NPK Ratio | Quantity | |
| Jobe’s Organics All Purpose Granular Fertilizer | Granular | 4-4-4 | 16 pounds |
| Burpee Natural Organic All-Purpose Plant Food | Granular | 4-4-4 | 4 pounds |
| Sunday All-Purpose Plant Food Mix | Granular | 6-3-7 | 4 pounds |
| GS Plant Foods Organic Fish and Kelp Blend | Liquid | 2-3-1 | 32 fluid ounces |
| Dr. Earth Organic and Natural Home Grown Fertilizer | Granular | 4-6-3 | 4 pounds |
| Jobe’s Organics Annuals and Perennials Plant Food | Granular | 3-5-4 | 4 pounds |
| Espoma Organic Bio-Tone Starter Plus Fertilizer | Granular | 4-3-3 | 4 pounds |
| Dr. Earth Organic and Natural Acid-Lovers Fertilizer | Granular | 3-4-3 | 4 pounds |
Our Top Picks
Organic fertilizers are the safest and most versatile for most landscapes and home gardens. They are unlikely to harm plants from accidental overapplications, are generally people- and pet-safe, and pose a lower risk for water pollution when used according to directions. That said, be sure to feed plants consistently for the best results.
Best Overall
Jobe’s Organics All Purpose Granular Fertilizer
What We Like
- Contains bacteria and fungi for soil health
- Increases root mass and promotes healthy plant growth
- Fast-acting, balanced, multipurpose formula
What We Don’t Like
- Needs to be applied every 4 to 8 weeks
- Can have a strong smell, attracting dogs
Product Specs
- Type: Granular
- NPK ratio: 4-4-4
- Quantity: 16 pounds
This all-purpose fertilizer includes a combination of healthy bacteria, mycorrhizal fungi (fungi that form a symbiotic association with plants), and archaea (a microorganism that aggressively breaks down material). It checks the boxes for most basic plant needs, plus it is Organic Materials Review Institute (OMRI) listed for organic gardening by the USDA, which means it’s 100 percent organic and made with all-natural ingredients.
The blend of beneficial microorganisms in the fertilizer helps to improve soil quality, increases root mass, and promotes plant growth. The nitrogen-phosphorus-potassium (NPK) ratio is 4-4-4, which makes it a suitable fertilizer for flowers, a vegetable garden, shrubs, trees, and houseplants.
Get the Jobe’s Organics all-purpose garden fertilizer at Amazon or The Home Depot.
Best Bang For The Buck
Burpee Natural Organic All-Purpose Plant Food
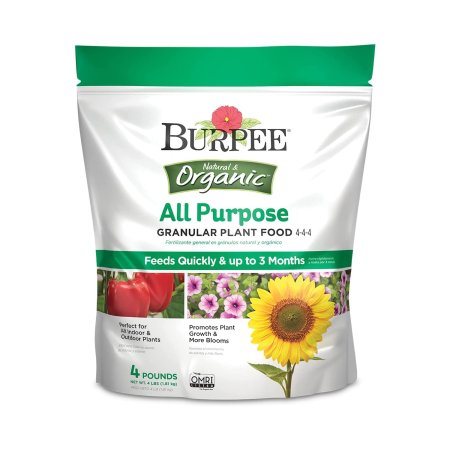
What We Like
- Also contains micronutrients and beneficial microbes
- Has received an OMRI label for organic use
- Fine granular texture, making it easy to spread
What We Don’t Like
- Isn’t as readily available from major retailers
Product Specs
- Type: Granular
- NPK ratio: 4-4-4
- Quantity: 4 pounds
Burpee natural organic all-purpose plant food offers great value for a product that is effective and only contains organic ingredients. This fertilizer contains a balanced 4-4-4 formula of macronutrients as well as calcium, minor nutrients, and beneficial microbes. While some nutrients are released immediately, this is a slow-release product that feeds plants for up to 3 months. This versatile formula is suitable for seed starting, bedding plants, vegetable gardens, trees, shrubs, and container gardening, according to the manufacturer.
It comes in a 4-pound resealable bag that’s easy to store between feeding sessions. The product has been certified organic and given an OMRI label for organic gardening.
Get the Burpee garden fertilizer at Amazon or Burpee.
Best Organic
Sunday All-Purpose Plant Food Mix
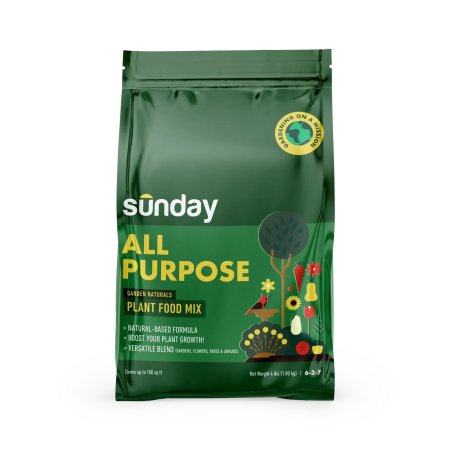
What We Like
- Suitable for both outdoor and indoor plants
- Offers higher nutrient levels than many competing products
- Turkey litter and feather meal improve soil health slowly over time
What We Don’t Like
- Should be applied every 4 to 6 weeks, which is more often than other options
Product Specs
- Type: Granular
- NPK ratio: 6-3-7
- Quantity: 4 pounds
Sunday is known for its all-natural plant care products, and the all-purpose plant food mix is a star performer. According to the manufacturer, it’s a good choice for new or established flowers, vegetable gardens, trees, and shrubs.
Organic fertilizers typically have lower nutrient levels than inorganic formulas, but this product has an NPK ratio of 6-3-7, providing higher levels of nitrogen and potassium than many other organic fertilizers on the market. The fertilizer contains ingredients like turkey litter and feather meal to improve soil health.
While it needs to be applied every 4 to 6 weeks, the amount of fertilizer needed during each application is much less than for other products on this list. It’s also suitable for both indoor and outdoor plants, making it a versatile pick for those with a variety of plants to feed.
Get the Sunday garden fertilizer at Sunday.
Best Liquid
GS Plant Foods Organic Fish and Kelp Blend

What We Like
- Liquid formulas provide immediate absorption
- Suitable for most plant types, and can be used on both plants and flowers
- Made from a renewable raw material
What We Don’t Like
- The smaller container comes at a high price per ounce
Product Specs
- Type: Liquid
- NPK ratio: 2-3-1
- Quantity: 32 fluid ounces
Water-soluble fertilizers penetrate the soil, and foliage absorbs them immediately, giving the plants fast access to nutrients. Fish emulsion and kelp are excellent natural sources of nitrogen, phosphorus, and potassium—the three nutrients that help plants thrive. GS Plant Foods’ organic liquid fish and kelp blend delivers these nutrients in a 2-3-1 NPK ratio, so it is safe for any type of plant and serves as a compost enhancer.
Although liquid fertilizers do not tend to last as long as granular fertilizers, they typically come in concentrated forms that need to be diluted before applying. Organic liquid fish and kelp blend comes in a 1-quart, 1-gallon, 5-gallon, or 55-gallon container. It’s compliant for use in organic gardening and OMRI listed for organic use.
Get the GS Plant Foods garden fertilizer at Amazon.
Best For Vegetables
Dr. Earth Organic and Natural Home Grown Fertilizer
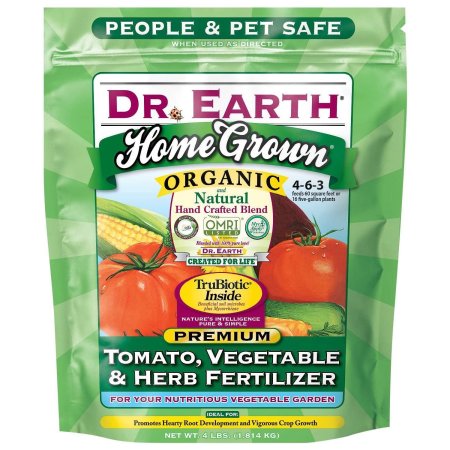
What We Like
- Contains organic and feed-grade ingredients
- The formula includes both essential nutrients and trace elements
- Designed to be used as a starter, a top dressing, or a compost tea
What We Don’t Like
- Primarily used for vegetable growth; not suitable for all plant types
- The powder form must be worked into soil
- Dogs may be attracted to the food-grade ingredients
Product Specs
- Type: Granular
- NPK ratio: 4-6-3
- Quantity: 4 pounds
Made from human- and feed-grade ingredients, Dr. Earth fertilizer is enriched with multiminerals, proteins, carbohydrates, humic acids, and trace elements that promote the healthiest soils. It’s versatile, too. Use Dr. Earth as a starter fertilizer during initial planting and transplanting and regularly as a top dressing or in compost tea.
Dr. Earth fertilizer contains no synthetic chemicals, chicken manure, or toxic ingredients, so it’s safe for pets and people. This fertilizer is sustainably made in the United States and carries the OMRI seal.
Get the Dr. Earth Home Grown garden fertilizer at Amazon or Target.
Best For Flowers
Jobe’s Organics Annuals and Perennials Plant Food

What We Like
- Improves soil condition over time
- Pet- and people-friendly
- Balanced formula for flowering plants
What We Don’t Like
- Strong smell of manure
Product Specs
- Type: Granular
- NPK ratio: 3-5-4
- Quantity: 4 pounds
Featuring Biozome with archaea (Jobe’s proprietary microbe package), this fertilizer rapidly breaks down nutrients in the soil for faster results and improves soil condition over time by increasing microorganism activity for a healthier, living soil. Made from all-natural materials and certified for organic use, this fertilizer is pet- and people-friendly, will not cause fertilizer burn, and is safe for the environment.
The fertilizer analysis for this Jobe’s product is 3-5-4, which makes it a good source of nutrients for most annual and perennial plants. Use the granular formula on flowering plants such as impatiens, begonias, marigolds, zinnias, blue minks, lilies, daylilies, peonies, ferns, and more.
Get the Jobe’s Organics annuals and perennials garden fertilizer at Amazon or Ace Hardware.
Best Plant Starter
Espoma Organic Bio-tone Starter Plus Fertilizer
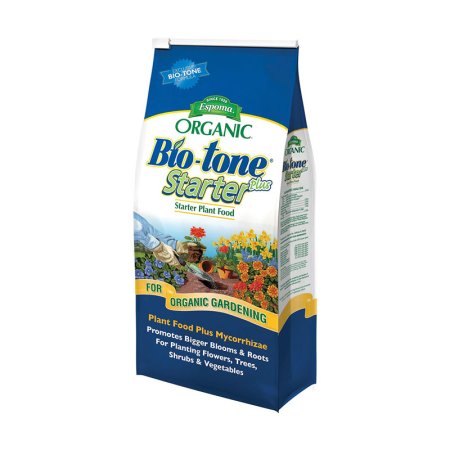
What We Like
- Designed to promote root growth
- Contains beneficial fungi along with key macronutrients
- Ideal for starting a wide variety of plants
What We Don’t Like
- Works best when placed in the hole at planting
Product Specs
- Type: Granular
- NPK ratio: 4-3-3
- Quantity: 4 pounds
Specially enhanced with beneficial bacteria and starter cultures of seven different beneficial mycorrhizal fungi, Espoma Organic Bio-tone Starter Plus fertilizer promotes maximum root development directly after transplanting. Mycorrhizal fungi work symbiotically with the root system of the plants to greatly increase the amount of water and nutrients a plant can use.
Use of Bio-tone Starter Plus during planting will help seedlings develop a healthy colony of mycorrhizal fungi so the plants will settle into their new homes more quickly and thrive in the long run. With an NPK ratio of 4-3-3, Bio-tone Starter Plus is a good all-purpose starter fertilizer that gardeners can use in garden beds for all types of plants.
Get the Espoma fertilizer at Amazon or Ace Hardware.
Best Acidic
Dr. Earth Organic and Natural Acid Lovers Fertilizer
What We Like
- Helps lower soil pH
- Assists plants with absorbing nutrients efficiently
- Designed for fast release
What We Don’t Like
- Strong smell
- Isn’t suitable for products requiring alkaline soil
- Has a Proposition 65 warning
Product Specs
- Type: Granular
- NPK ratio: 3-4-3
- Quantity: 4 pounds
Some plants need a little acidity to look their best. Acid fertilizers lower soil pH to free up and help plants access nutrients rendered unavailable in high-pH soils. Dr. Earth Organic and Natural Acid Lovers fertilizer is ideal for hollies, gardenias, hydrangeas, blueberries, evergreens, ferns, shade plants, azaleas, camellias, rhododendrons, and maples. It temporarily lowers pH values in the soil, allowing the plants to absorb the nutrients they need to promote healthier foliage and bigger blooms.
This fertilizer is specially designed to release a portion of nutrients quickly and provide continuous feeding for several months of long-lasting results. It’s also safe for people and pets when used as directed.
Get the Dr. Earth Natural Acid Lovers garden fertilizer at Amazon or The Home Depot.
Or, DIY Your Own Garden Fertilizer
Compost can provide beneficial microbes and nutrients for plants. It can be made easily at home with vegetable scraps and yard clippings. Ingredients like coffee grounds, banana peels, and other kitchen scraps all make excellent natural fertilizers. Compost should make up about half of the total volume of the fertilizer blend.
Bone meal provides phosphorus, which encourages root growth, flower production, and better fruit yields. This organic material also helps plants resist disease and increases the number of beneficial microorganisms in the soil. Bone meal should make up one quarter of the total volume of the fertilizer blend.
Kelp meal is full of trace minerals like calcium, iron, zinc, magnesium, and boron that help keep plants healthy. Kelp meal can help promote microbial activity in the soil as well as improve its structure. This organic material should make up one eighth of the total volume of the fertilizer blend, too.
Fish emulsion is a great source of nitrogen, which helps plants produce the protein needed for photosynthesis, flowering, and fruiting. Fish emulsion also contains other essential minerals like potassium, calcium, and magnesium that allow plants to thrive even when conditions are unfavorable. This organic material should also make up one eighth of the total volume of the fertilizer blend.
Jump to Our Top Picks
How We Chose the Best Garden Fertilizers
Garden fertilizers can give new plants a boost and feed plants throughout their growing season. We looked at fertilizer types and common plant needs to come up with this carefully curated list of some of the best garden fertilizers.
We considered more than 20 garden fertilizer options, and we weighed a number of practical considerations. We analyzed the nutrient ratios, the purpose of various products, and the quantity of fertilizer in packages before making our recommendations.
The list includes multipurpose formulas and a few designed for specific garden uses.
- Organic vs. inorganic: We only considered organic fertilizers for this guide since they are capable of top-notch performance without causing any negative environmental impact.
- Type: We considered both liquid and granular formulas for our recommendations since both fertilizer types offer unique benefits.
- Value: Since fertilizers vary in type and quantity, it can be hard to determine a product’s value. We ensured that each recommended product offered excellent value, regardless of the format.
Our Verdict
We recommend Jobe’s Organics all-purpose garden fertilizer as our top pick for its organic formulation, fast-acting results, and ready availability. There are other common garden fertilizer options, including Miracle-Gro Shake ‘N Feed All Purpose Plant Food and JR Peters All Purpose Fertilizer. However, they do not meet our sustainability guidelines and are not recommended in our top picks due to their potentially harmful ingredients and negative impact on the environment.
Types of Garden Fertilizers
Fertilizer comes in three basic forms: granules, liquid, and stakes. Each type of fertilizer can be classified as either organic or inorganic.
Granule Fertilizers
Gardeners apply fertilizer granules by either mixing them into the soil at planting time or by “top dressing.” Top dressing simply means sprinkling the granules on the soil surface over the plant’s root zone. Granular fertilizers are available in either slow-release or quick-release formulas.
- Slow-release fertilizers provide a steady flow of nutrients for an extended time, up to a full growing season. These fertilizers comprise organic or inorganic ingredients. Soil microbes break down organic slow-release fertilizer and make it available for plants to use. Manufacturers coat inorganic slow-release fertilizer pellets to slowly dissolve as water moves through the soil.
- Quick-release fertilizer is inorganic. It should dissolve fully into the soil within just a few weeks, giving plants a quick burst of nutrients.
Liquid Fertilizers
Liquid fertilizers include ready-to-mix dry granules and liquid concentrates. They can consist of either organic or inorganic ingredients. Water-soluble fertilizers can soak the roots, or in some instances, spray right onto plant foliage. These formulas are available to the plant immediately.
Fertilizer Spikes
Fertilizer spikes also come in either organic or inorganic formulas. They act similarly to slow-release fertilizers. Calculate the number of spikes needed for a plant based on plant size and manufacturer directions. Space the spikes evenly around the edge of the plant’s root zone and push them into the soil.
Organic vs. Inorganic Fertilizers
There are two major differences between organic and inorganic fertilizers: ingredients and the way nutrients become available to the plant.
- Organic fertilizers add vital organic matter to the soil and work with the living microorganisms in the soil to feed plants. These fertilizers come from plant and animal sources: composted chicken manure, bone meal, blood meal, alfalfa meal, cottonseed meal, and kelp meal.
- Inorganic fertilizers are highly concentrated and feed plants directly. Manufacturers make inorganic, or synthetic, fertilizers from the synthesized chemicals of nitrogen, phosphorus, and potassium, sometimes as byproducts of other industrial processes.
What to Consider When Choosing Garden Fertilizer
NPK Ratios
It is usually best to begin with a soil test to determine the natural fertility of a garden soil before applying fertilizer. Contact the local Cooperative Extension Service to submit a soil sample for testing. The results will show which nutrients the soil might lack, so those nutrients can be provided in the form of fertilizer.
The major nutrients in fertilizer are nitrogen, phosphorus, and potassium. Fertilizer products list these elements on the bag as a ratio such as 10-10-10 or 4-3-4. The package listing always appears in the order NPK.
Determining the right ratio for a garden depends on what the specific plants need.
- Nitrogen supports foliage plants’ growth. High-nitrogen fertilizer is useful to help grass start growing in spring or to help leafy greens produce a heavy yield.
- Phosphorus helps plants establish roots, produce flowers, and develop fruit. High-phosphorus fertilizer is useful as a starter fertilizer or to spruce up annual flower beds.
- Potassium is an important element for rigid stems and overall plant health. Potassium helps plants get through drought and other growing stresses.
Plant Needs
Different kinds of plants, and plants at various stages of life, have different nutrient requirements. Flowering and fruiting plants need plant food with higher phosphorus content, while plants grown for foliage need more nitrogen.
Planting a new flower, vegetable, or herb bed? Use a starter fertilizer to help the young plants become established in their new home.
Do the azaleas, camellias, gardenias, or blueberries look weak and puny? Perk them up with a fertilizer specifically formulated for acid-loving plants.
Quantity
Regular fertilizer applications keep plants vigorous and productive. How often fertilizer should be applied depends on the soil type and whether the plants are in raised beds or containers. Most plants growing in porous, well-drained soil or in containers need more frequent feeding, about every 3 to 4 weeks throughout the growing season. Plants growing in clay soils typically require less fertilizer. One application every 4 to 6 weeks after planting is usually enough.
Typically, granular fertilizer will go further than a liquid fertilizer. To determine how much fertilizer is needed, look at how much area one bag or bottle covers and divide that by the square footage of the garden beds. The result will indicate how much fertilizer will get the plants through the growing season.
FAQs
Q. When should I fertilize my garden?
The best time to fertilize outdoor plants is when they are placed in the ground, beginning with added compost or a starter fertilizer. After that, plants need nutrients during their peak growing season, typically spring through summer. When choosing a long-acting or continuous feeder, you can apply it less often.
Q. What is the best fertilizer for vegetables?
Vegetables need a good start since they typically have a short, one-time growing season. Start them out with a boost of nutrients and good soil, and then apply a balanced fertilizer for vegetables and herbs like Dr. Earth Home Grown garden fertilizer for tomato, vegetable, and herb gardens.
Q. What is the best fertilizer for garden plants?
The best fertilizer depends on the plants. Lawn fertilizers, for example, differ from vegetable fertilizers. Many native plants need little to no fertilizer, assuming they are growing in decent soils. But flowering plants often need a boost so the plant can stay healthy plus send extra energy into producing lots of large, colorful flowers. Try Jobe’s Organics all-purpose garden fertilizer for beautiful blooms.
Q. When should I apply 10-10-10 fertilizer to my vegetable garden?
Apply most balanced (10-10-10) fertilizers monthly during the growing season to boost the health of perennial plants. But be sure to check the package directions, since some fertilizers have slow-release formulas that last longer.
Q. How do you naturally fertilize soil?
Nutrient-rich soil is the best type for gardens, and keeping soil balanced and with plenty of humus is preferred by many gardeners over adding fertilizer regularly. Get healthy soil with annual additions of organic compost such as manure, homemade compost from kitchen scraps, and even leaves or grass clippings. Mix up the ingredients for the best effect, and use organic fertilizer as needed.
Q. Are eggshells good for fertilizer?
Ground-up eggshells can add some calcium and other nutrients. They won’t necessarily provide all nutrients that all plants need, and they break down slowly, so effects are not immediate. Still, adding them can be part of any effort to maintain soil health; they do not contain enough of any ingredient to harm plants.
The post The Best Garden Fertilizers, Vetted appeared first on Bob Vila.
]]>The post Keep Your Home and Family Safe With One of Our Favorite Smoke Detectors appeared first on Bob Vila.
]]>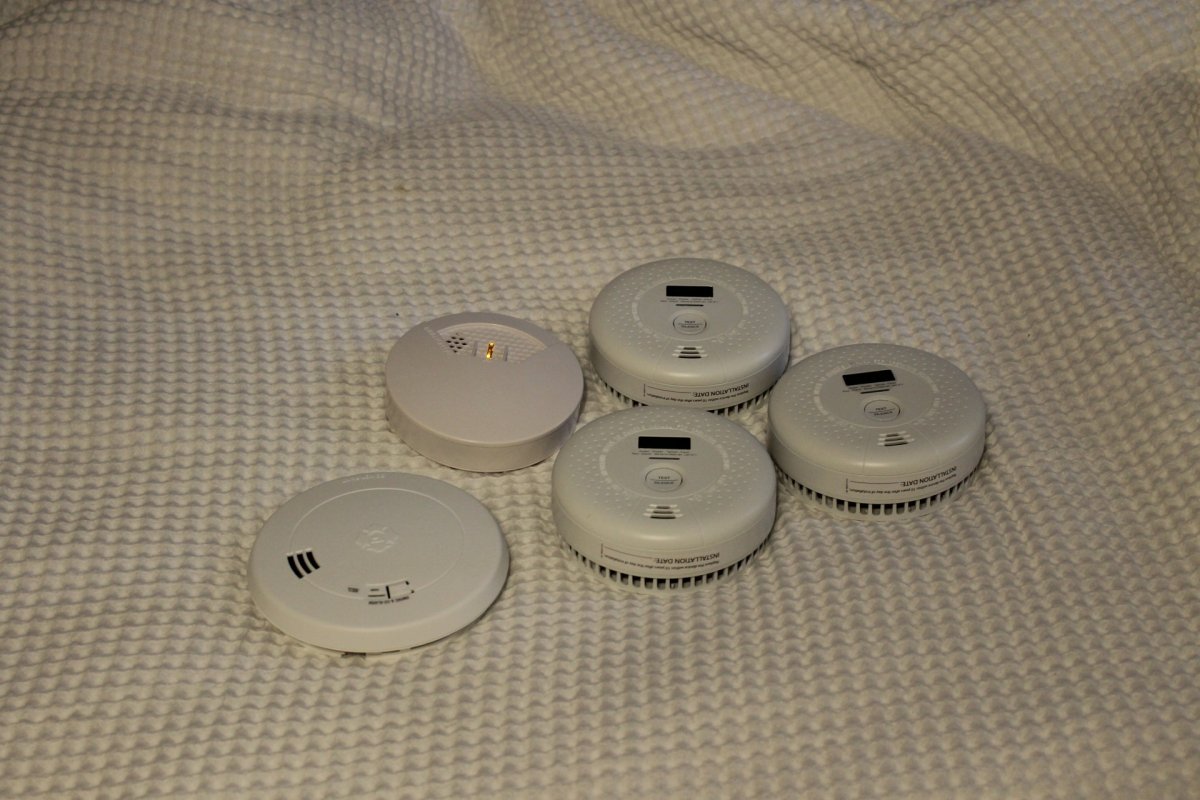
Smoke detectors are a lot like income taxes: they need to be dealt with once a year, not a whole lot of people understand them, and issues with either can be particularly, well, alarming. Simple yet necessary heroes of home safety and security, smoke detectors tend to be forgotten until they go off (a good thing) or fail to function in an emergency (a potential tragedy). A well-functioning, high-quality smoke detector is essential for every household, so we researched more than 20 top models and put 15 to the test.
Our favorite was the X-Sense SC07 Wireless Smoke & Carbon Monoxide Alarm. It monitors for smoke and carbon monoxide and has a large digital display showing the carbon monoxide parts per million. We also appreciated the slim, sleek design.
The National Fire Protection Association recommends at least one smoke detector for each floor of a home, as well as one in every bedroom. It’s important to become familiar with the types of detectors, how they operate, and some of the finer points of fire alarm technology. Read on to learn what you should look for in a smoke alarm and how we tested and selected the best smoke detectors.
- BEST OVERALL: X-Sense SC07 Wireless Smoke & Carbon Monoxide Alarm
↓ Jump to Review - BEST BANG FOR THE BUCK: Kidde i9050 Battery-Operated Smoke Alarm
↓ Jump to Review - BEST IN TECH: Google S3003LWES Nest Protect Smoke and CO Detector
↓ Jump to Review - BEST INTERCONNECTED: X-Sense Interconnected Wireless Smoke and CO Detector
↓ Jump to Review - BEST VOICE ALARM: First Alert SMCO210V Smoke & Carbon Monoxide Alarm
↓ Jump to Review - HONORABLE MENTION: SimpliSafe Wireless Smoke Detector
↓ Jump to Review - ALSO CONSIDER: First Alert Z-Wave Smoke & Carbon Monoxide Alarm
↓ Jump to Review

Smoke Detectors Comparison Chart
| Product | Type | Interconnect | CO Detection |
| X-Sense SC07 Wireless Smoke & Carbon Monoxide Alarm | Photoelectric (smoke) and electrochemical (CO) | No | Yes |
| Kidde i9050 Battery-Operated Smoke Alarm | Ionization | No | No |
| Google S3003LWES Nest Protect Smoke and CO Detector | Split-sensor, which acts as both photoelectric and ionization | Yes | Yes |
| X-Sense Interconnected Wireless Smoke and CO Detector | Photoelectric (smoke) and electrochemical (CO) | Yes | Yes |
| First Alert SMCO210V Smoke & Carbon Monoxide Alarm | Electrochemical and photoelectric | No | Yes |
| SimpliSafe Wireless Smoke Detector | Photoelectric | Yes, via SimpliSafe base station | No |
| First Alert Z-Wave Smoke & Carbon Monoxide Alarm | Combination photoelectric smoke and electrochemical CO | Yes, via Ring hub | Yes |
Our Top Picks
These top picks include photoelectric, ionization, and dual-sensor smoke detectors to suit a variety of different needs. All are high-quality models currently on the market that we’ve tested ourselves.
Note: All of the following products feature battery operation, making them very easy to install. They’re also all Underwriters Laboratories (UL) listed for safety.
Best Overall
X-Sense SC07 Wireless Smoke & Carbon Monoxide Alarm
What We Like
- Features a smoke and carbon monoxide sensor
- Digital display shows carbon monoxide parts per million (ppm)
- Sleek, modern design
What We Don’t Like
- Has a sometimes-faulty activation switch
Specs
- Type Photoelectric (smoke) and electrochemical (CO)
- Interconnect No
- CO detection Yes
Our Ratings: Installation and Setup 5/5; Functionality 4/5; Value 4.3/5
The X-Sense SC07 combo alarm is a two-way player that would benefit many homeowners. This model features a photoelectric sensor that detects smoke particles and an electrochemical sensor that detects the presence of carbon monoxide. It also has a digital display that shows the carbon monoxide parts per million (ppm) in the air as well as the battery’s status. This lends a sleek design that will easily fit in with modern spaces.
The real star of the show is the display, which clearly indicates the level of carbon monoxide in the air when it’s more than 30 ppm (if it’s under that amount, it registers as 0). While a sensor capable of reading lower levels would be better, we still find this reassuring.
We’re not, however, a big fan of this model’s activation switch. While it worked perfectly on the model we tested, we have broken that switch on previously tested X-Sense models, so we would still caution users to be very gentle with it. Otherwise, we felt this was the best overall smoke detector. Plus, an interconnected version is available.
What our tester says: “This device triggered within 10 seconds during testing—an impressively fast response—though it did take a while to silence.”—Tom Scalisi, Product Reviews tester and writer
Get the X-Sense SC07 smoke detector at Amazon or X-Sense.
Best Bang For The Buck
Kidde i9050 Battery-Operated Smoke Alarm
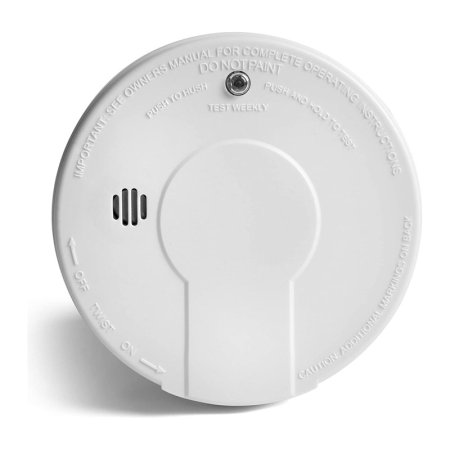
What We Like
- Affordable price point
- Loud alarm is audible throughout the home
- One of the easiest models to silence
What We Don’t Like
- 10 seconds slower to alert than other devices
Specs
- Type Ionization
- Interconnect No
- CO detection No
Our Ratings: Installation and Setup 3/5; Functionality 4/5; Value 4.3/5
A hardwired, Wi-Fi, or interconnected fire alarm system can be expensive, but thanks to the affordable price of the Kidde i9050, users can equip their entire home with smoke detectors without zeroing out their bank accounts. Powered by a 9-volt battery, this basic ionization-style model is hardly a high-tech option, but it’s a reliable choice for smoke detection.
Considering the budget-friendly price, we were skeptical about how well this alarm would perform during testing. While it did perform roughly 10 seconds slower than other devices, its alarm sounded within 25 seconds, and the siren was loud. Also, we were able to silence this alarm much faster than devices that cost four times the price. It truly offers the best value for dollar of any detector on the list, though it doesn’t offer many special features.
Get the Kidde i9050 smoke alarm at Amazon or Walmart.
Best in Tech
Google S3003LWES Nest Protect Smoke and CO Detector
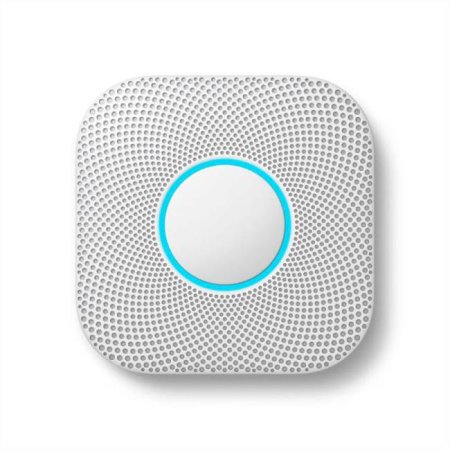
What We Like
- Crystal-clear voice alerts
- Reports to a phone app
- Better looking than other detectors
- Dual-sensor smoke alarm
What We Don’t Like
- Tricky to connect the device to the app
- Must keep app updated
Specs
- Type Split-sensor, which acts as both photoelectric and ionization
- Interconnect Yes
- CO detection Yes
Our Ratings: Installation and Setup 2/5; Functionality 5/5; Value 4.7/5
Equipped with the latest technology, Google’s Nest Protect smoke and carbon monoxide alarm ties into existing hardwired systems and features Wi-Fi communication. Users can program the alarm so it will indicate the location in the home where an alarm is being triggered via both the Nest app and the built-in speaker. It uses dual-sensor technology to detect both smoldering burns and flaming fires.
In our tests, we found the Nest Protect’s voice activation to be clear and the alarm to be fast. We also liked the appearance of this Wi-Fi smoke detector and appreciated that the baseplate offers quite a bit of rotational adjustment to ensure that it is straight when installed. Connecting the detector to the Nest app took a couple of tries, though.
There’s a larger caveat regarding this smart smoke alarm and similar models that work with smart-home systems: Their compatibility with those systems depends on app updates, which means users must remember to keep up-to-date on apps. If the app is an old version, the detectors might fail to communicate with a smartphone or central monitoring service.
Get the Google smoke detector at Amazon, The Home Depot, or Best Buy.
Best Interconnected
X-Sense Interconnected Wireless Smoke and CO Detector
What We Like
- Crystal-clear voice alerts
- Reports to a phone app
- Better looking than other detectors
- Dual-sensor smoke alarm
What We Don’t Like
- Tricky to connect the device to the app
- Must keep app updated
Specs
- Type Split-sensor, which acts as both photoelectric and ionization
- Interconnect Yes
- CO detection Yes
Our Ratings: Installation and Setup 5/5; Functionality 3.3/5; Value 5/5
Interconnected smoke detectors communicate with each other through a wireless signal; once one goes off, they all go off. Connecting them can sometimes be confusing, so we appreciated this three-pack from X-Sense that came interconnected—no app or Wi-Fi needed. Activation was as simple as installing the mount on the wall and attaching the smoke detectors by turning them clockwise.
These X-Sense detectors alert to smoke and dangerous levels of carbon monoxide. The digital display shows the CO levels in ppm and along with the battery level. Fortunately, these smoke detectors each come with a sealed lithium-ion battery that lasts up to ten years and the unit will notify when the battery life has ended, so you won’t have to worry about replacing batteries.
Through testing, we discovered one downside to these smoke alarms: They didn’t alert when we tested them with canned synthetic smoke. Instead, we had to set them off by blowing out a candle, which we held about three feet away. We had installed one of these smoke detectors in our basement, one on our first floor, and another on our second floor. When we set off the alarm on the first floor, all three smoke detectors loudly alerted us. Silencing them was as easy as pressing a button on the alerted detector.
Get the X-Sense interconnected smoke detectors at Amazon.
Best Voice Alarm
First Alert SMCO210V Smoke & Carbon Monoxide Alarm
What We Like
- Comes with a 10-year sealed battery
- Features a loud alarm and voice alerts
- Attractive, slim design
What We Don’t Like
- Test/silence button is very stiff
Specs
- Type Electrochemical and photoelectric
- Interconnect No
- CO detection Yes
Our Ratings: Installation and Setup 5/5; Functionality 4.3/5; Value 4/5
In addition to a loud beeping alarm, First Alert’s SMCO210V smoke and carbon monoxide detector is equipped with voice alerts that relay the location and type of alarm (smoke or CO). This smoke detector has a simple interface with one test/silence button, and programming its location took us less than two minutes. We also appreciated the sealed battery, which lasts up to ten years before the unit needs replacement.
This First Alert smoke detector was one of the loudest we tested. We put it in an upstairs hallway and could hear the beeping alarm from our basement, two floors below. When sprayed with our test can of synthetic smoke, the alarm alerted in less than 15 seconds.
There was only one thing we didn’t like: The test/silence button was very hard to push. It took us a few tries to silence the alarm after we set it off, simply due to the stiffness of the button.
What our tester says: “This smoke and carbon monoxide detector was one of my favorites. The alarm was loud and the voice alerts were clear, letting me know the location and type of threat.”—Katie Barton, Product Reviews tester and writer
Get the First Alert SMCO210V smoke detector at Amazon, Target, Walmart, or First Alert.
Honorable Mention
SimpliSafe Wireless Smoke Detector
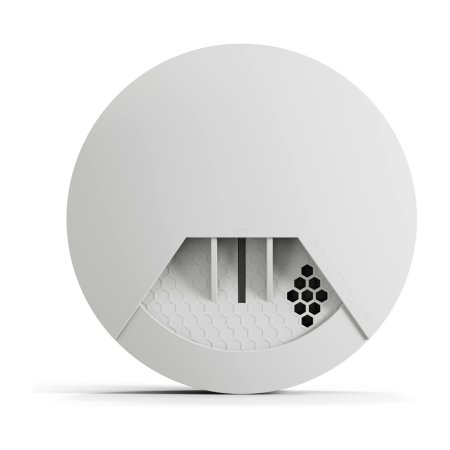
What We Like
- Easy-to-use interface
- Quick to silence
- Compatible with SimpliSafe app and monitoring plan
What We Don’t Like
- Smoke alarm could be louder
Specs
- Type Photoelectric
- Interconnect Yes, via SimpliSafe base station
- CO detection No
Our Ratings: Installation and Setup 5/5; Functionality 4/5; Value 4/5
The SimpliSafe wireless smoke detector can be used in two ways. First, it can be used as a standalone smoke detector without owning other SimpliSafe products. It’s easy to set up, and during testing, the alarm sounded when synthetic smoke was sprayed nearby without having it connected to any other SimpliSafe products. Second, SimpliSafe users can connect it to their app and base station.
When connected to a SimpliSafe system, this smoke detector sends real-time alerts through the app and triggers the base station alarm. With optional SimpliSafe monitoring, fire rescue can be dispatched even if the user is away from the home.
Unfortunately, this model doesn’t monitor CO levels like many similarly priced smoke detectors. We also thought its alarm was a little on the quiet side. Still, it’s a good fit for those who already utilize SimpliSafe security products.
Get the SimpliSafe smoke detector at Amazon or Best Buy.
Also Consider
First Alert Z-Wave Smoke & Carbon Monoxide Alarm
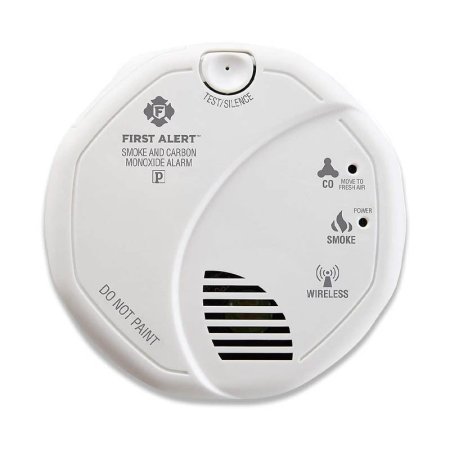
What We Like
- Easy to install
- Loud enough to hear throughout the home
- Fastest activation of our test group
What We Don’t Like
- Requires Ring hub for full features and connectivity
Specs
- Type Combination photoelectric smoke and electrochemical CO
- Interconnect Yes, via Ring hub
- CO detection Yes
Our Ratings: Installation and Setup 4/5; Functionality 3.7/5; Value 4.3/5
For those who want to set up their own interconnected system that they can access from a phone and other devices, First Alert’s Z-Wave smoke detector and carbon monoxide alarm is worth considering. This combination smoke detector interfaces with the Ring Alarm hub and app, offering users real-time alerts wherever they have internet service. This unit features a photoelectric smoke sensor and an electrochemical carbon monoxide detector to alert under a variety of conditions.
Like most First Alert devices, the Z-Wave alarm was very easy to install. The audible alarm was very loud and activated faster than it took to reach for our stopwatch. The only issues we experienced when testing were its refusal to silence (a common problem with First Alert), and, obviously, if you don’t have a hub, this will only work as a basic combination detector.
Get the First Alert Z-Wave smoke detector at Amazon, Lowe’s, or Bed Bath & Beyond.
ALSO TESTED
A smoke detector should be easy to use, loud enough to alert household residents, and quick to alert in the case of smoke or detected carbon monoxide. Unfortunately, not all of the smoke detectors we tested met these thresholds.
- The Ring Alarm Smoke & CO Listener is a nice idea in theory, but we didn’t find it practical for the average homeowner.
- The Kidde P4010LDCS-W Smoke Alarm was impossible to set up. It’s designed to link to the Kidde app via Bluetooth but would not register on any of the devices that we tried.
- First Alert’s Hardwired LED Strobe Light Smoke Alarm was a big disappointment, especially for the cost. Despite numerous attempts, we couldn’t get the strobe to light.
Jump to Our Top Picks
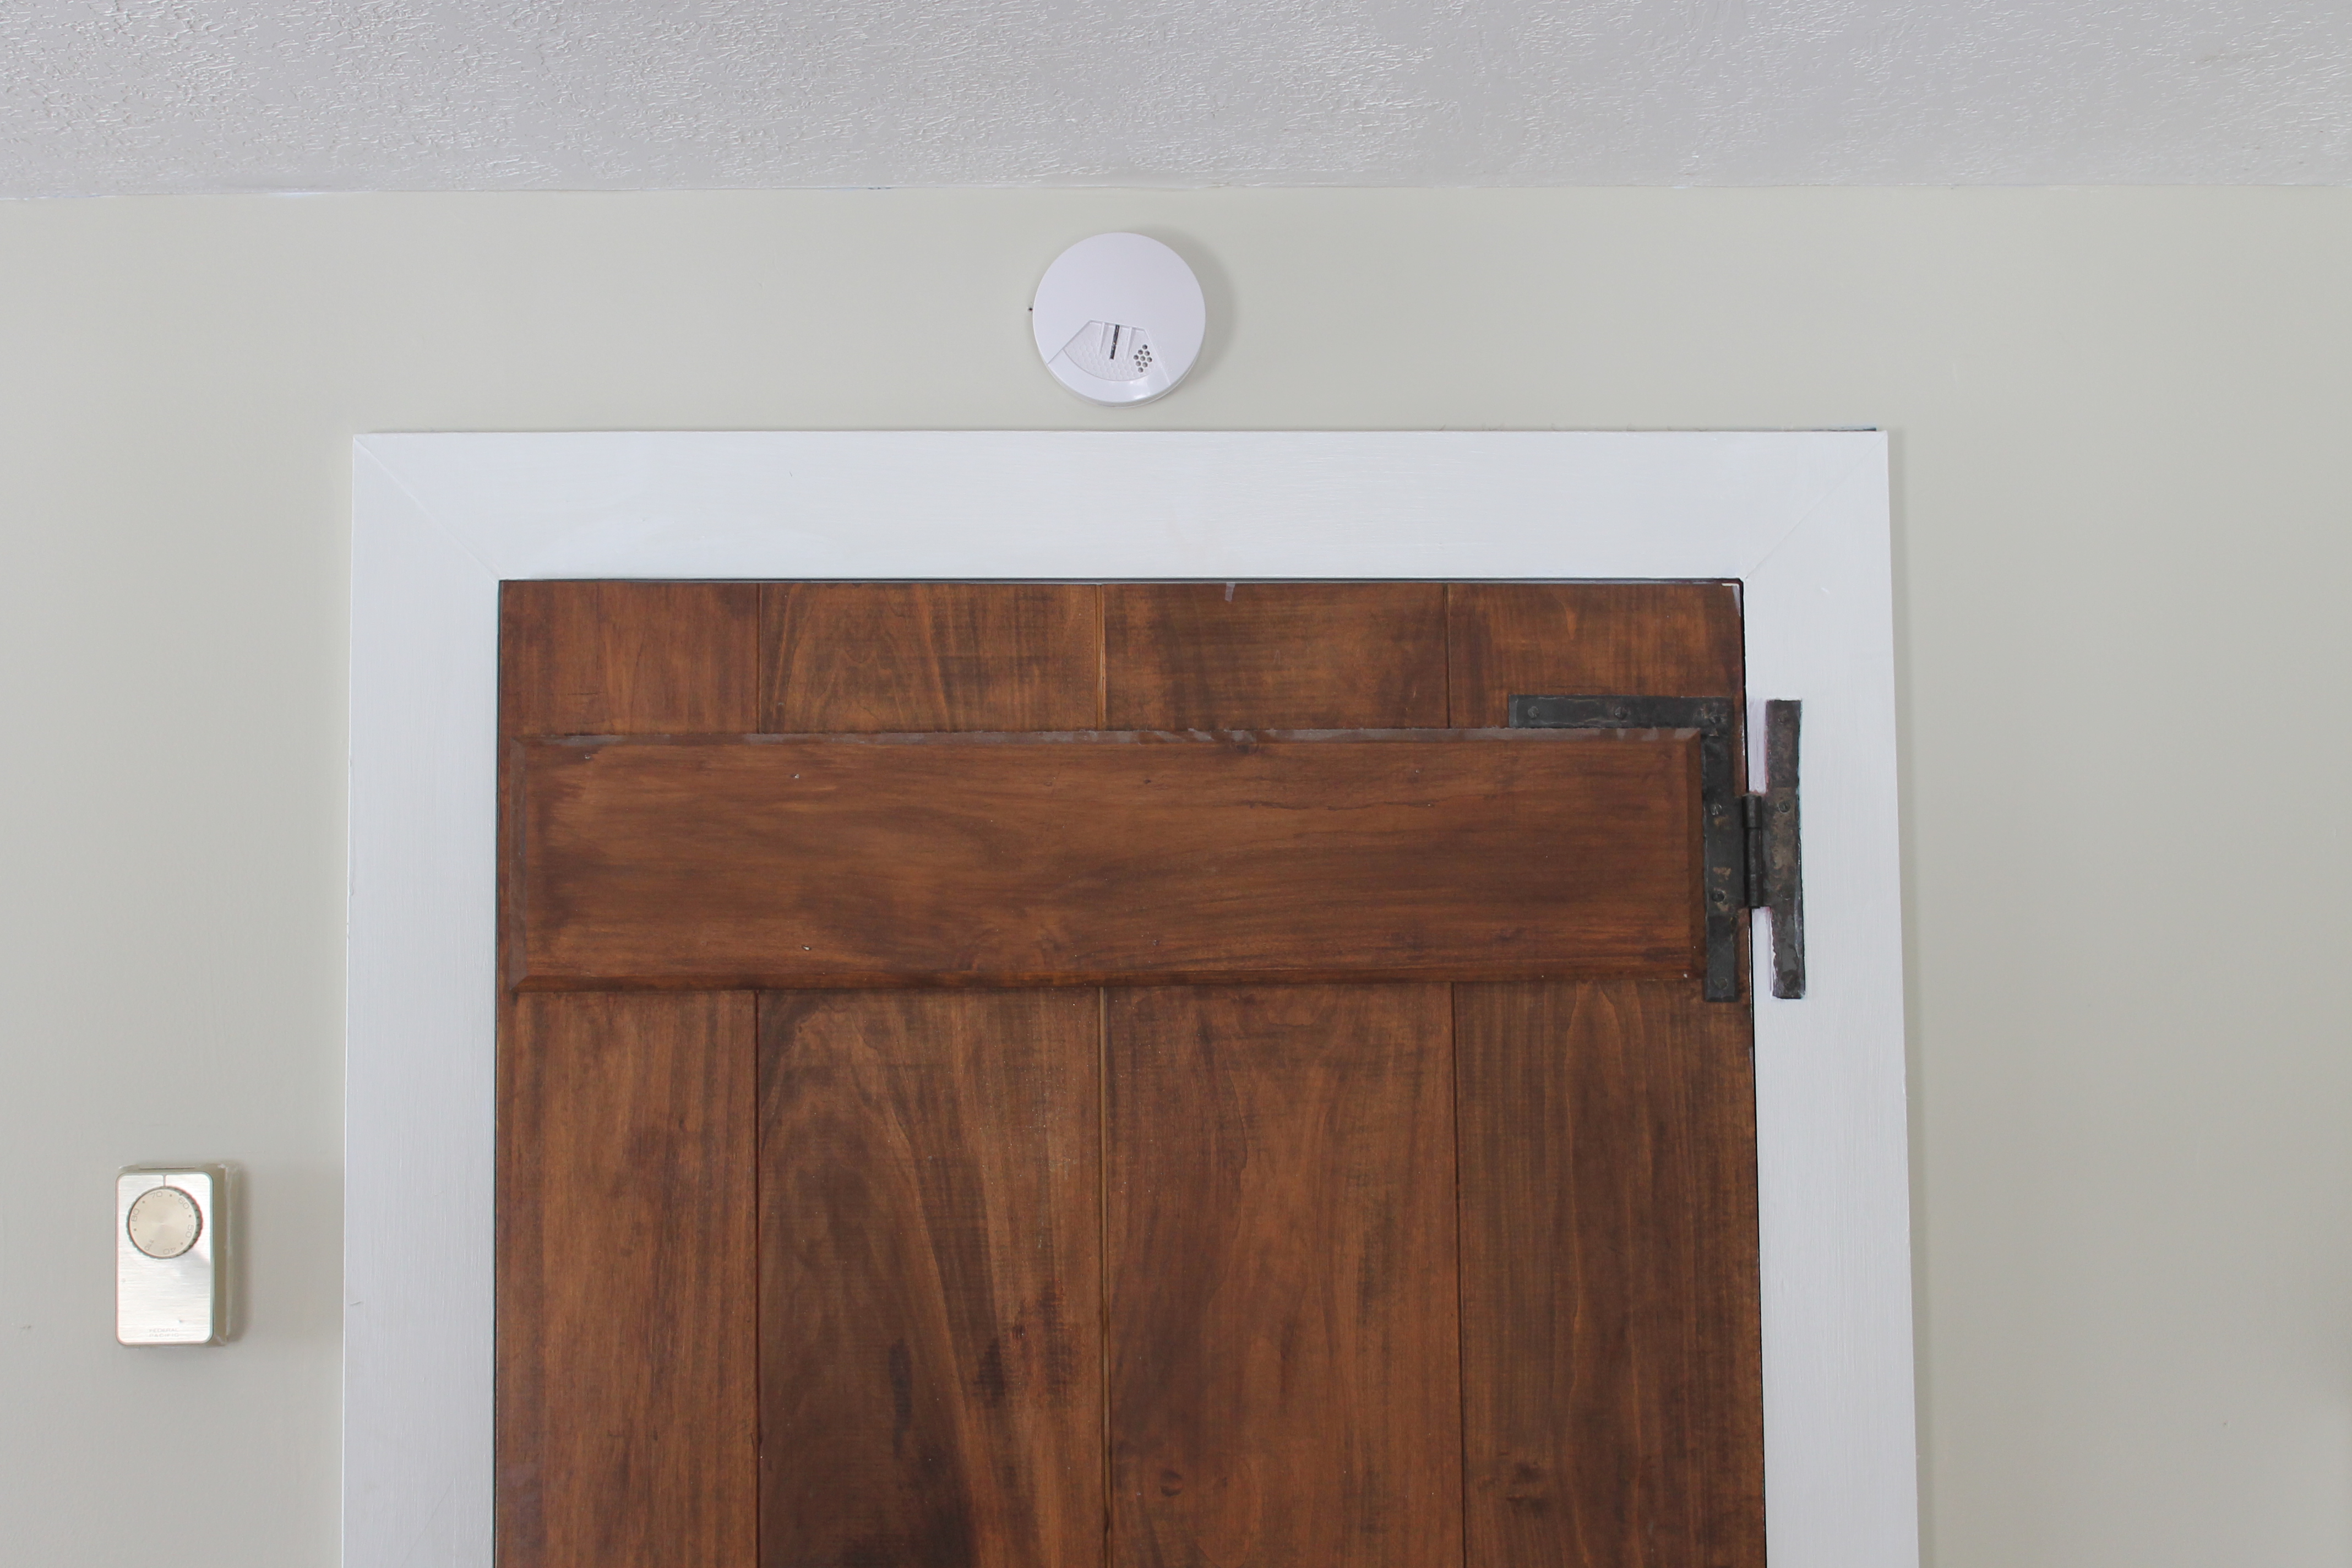
How We Tested the Best Smoke Detectors
| Products tested | 15 |
| Time spent testing | 3 weeks |
| Tests performed | 4 |
| Price range | $20 to $150 |
While pressing the “test” button is a perfectly fine way for folks to perform once-a-month testing on a smoke detector, a simple button test cannot tell the whole story of how well a unit will perform. A lot more went into our testing, including nearly a decade of experience working with commercial fire alarms.
After researching more than 20 top-rated smoke detector models, we chose 15 to test, not all of which made our final list. We installed each of these units individually, according to the directions, to determine how easy they were to set up. We also tested each device by spraying two puffs of canned synthetic smoke—the same type used when testing fire alarms professionally. We timed each to get a solid sense of how long activation took, and then we compared the results.
We used a standardized rubric to keep track of our testing results, rating each smoke detector on a scale of 1-5 based on installation, setup, functionality, and value metrics. At the end of testing, we tallied these results to find the winners.
| Installation and Setup | Functionality | Value | |
| X-Sense SC07 Wireless Smoke & Carbon Monoxide Alarm | 5/5 | 4/5 | 4.3/5 |
| Kidde i9050 Battery-Operated Smoke Alarm | 3/5 | 4/5 | 4.3/5 |
| Google S3003LWES Nest Protect Smoke and CO Detector | 2/5 | 5/5 | 4.7/5 |
| X-Sense Interconnected Wireless Smoke and CO Detector | 5/5 | 3.3/5 | 5/5 |
| First Alert SMCO210V Smoke & Carbon Monoxide Alarm | 5/5 | 4.3/5 | 4/5 |
| SimpliSafe Wireless Smoke Detector | 5/5 | 4/5 | 4/5 |
| First Alert Z-Wave Smoke & Carbon Monoxide Alarm | 4/5 | 3.7/5 | 4.3/5 |
What to Consider When Choosing a Smoke Detector
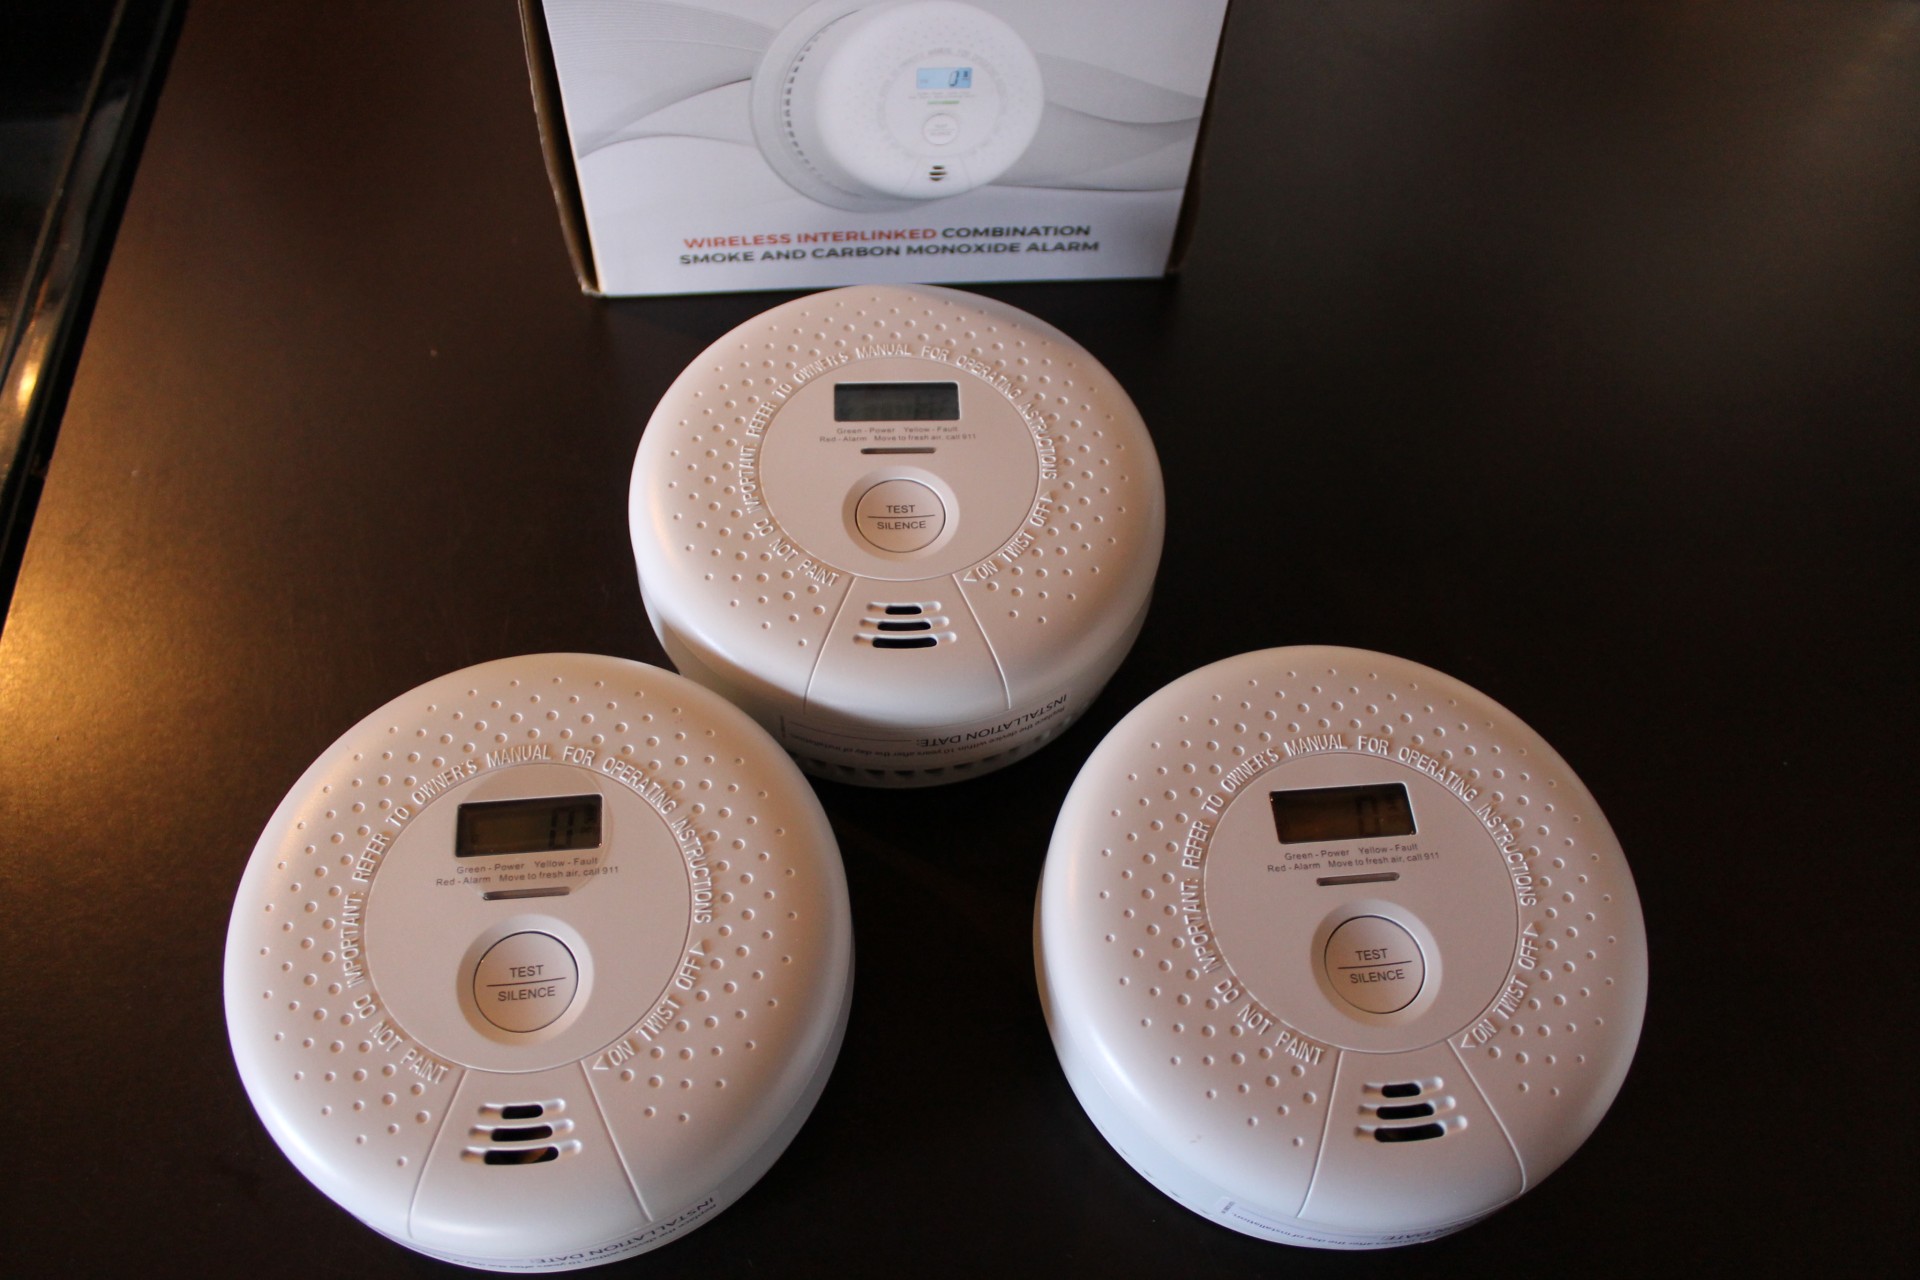
Even if tested annually, a smoke detector has an operational lifespan of only 10 years. Any model older than that should be replaced, regardless of its working condition. To help make an informed decision, learn about the following key features that pop up when considering the wide range of models currently on the market.
Types of Smoke Detectors
There are three main smoke sensor types: photoelectric, ionization, and dual sensor. While they all do the same job, they go about it differently.
Photoelectric
The chamber of a photoelectric smoke detector contains an LED light, which shoots a beam across the chamber, and a sensor that sits approximately 90 degrees from the LED. Under normal conditions, the sensor can’t “see” the LED beam, but when smoke enters the chamber, the light reflects off smoke particulates, and the sensor detects the beam.
The instant the sensor detects the beam, the alarm activates. Photoelectric smoke detectors are most effective at detecting smoldering burns—barely burning fires that can, frighteningly, smolder for days before becoming a bigger issue.
Ionization
Though these detectors employ radioactive materials, alpha rays, and other seemingly sci-fi–inspired technology, they operate in a fairly simple way. A chamber fills with tiny particles called ions, which are held in place by electrical charges. A sensor in the chamber knows how many ions are contained within. When smoke enters the chamber, it removes some of the ions, affecting the sensor’s count and sounding the alarm.
Ionization smoke detectors are most effective against fires that are actively flaming.
Dual Sensor
Just as the category name suggests, these detectors use both types of sensors. There’s no winner in a race against photoelectric and ionization detectors, and they each have their own strengths. The use of both sensor types means faster detection of threats across the range of different materials that could be burning.
Hardwired vs. Battery Operated
Battery-operated models, which tend to cost less, are usually stand-alone detectors. This means an activated smoke detector cannot alarm a monitoring system or other sensors in the home; only the detector in the smoky area will sound an alarm. The exception would be battery-operated models that are part of a home security system.
Hardwired smoke detectors connect directly to the home’s electrical system. When one detector sounds an alarm, typically, all of the detectors follow suit. While this may make it harder to pinpoint the unit that actually detected the potential fire, it alerts everyone in the house to danger.
Most residential hardwired home safety systems use battery backups, so even if the power goes out, the home will still have some fire safety protection—and that’s the best of both worlds. In commercial applications, things work a bit differently in that the fire alarm panel will rely on the batteries to keep the alarm system live until the generators kick on or the power comes back.
Interconnectivity
Briefly touched upon above, interconnectivity refers to smoke detectors’ ability to “talk” to each other, alerting the entire system to potential danger. For example, if there were an electrical fire within the car in an attached garage sensed by an interconnected detector, the entire system throughout the house would activate immediately.
Fires can double in size every 60 seconds, so if residents were to be sleeping on the other side of the house, they might not hear a stand-alone detector activate in the garage. Interconnected detectors would make them aware of the threat—hopefully before it’s too late to react.
Carbon Monoxide
In a similar circumstance, a car left running in the garage can produce fatal levels of carbon monoxide (CO), which could prove particularly dangerous to folks sleeping in a bedroom above. Smoke detectors with carbon monoxide sensors add another level of safety. While all homes should have carbon monoxide alarms, homes with gas or oil heat and hot water are particularly vulnerable to carbon monoxide buildup. If you don’t have a plug-in CO detector, a dual smoke detector with a built-in carbon monoxide detector is a wise purchase.
Monitoring
Interconnected detectors are often part of a monitored home security system. The great benefit of these systems is they can alert the local fire department, even if no one is at home to make the emergency call. A carbon monoxide issue could render those inside unable to call the fire department, so the monitoring company can make that call, possibly saving lives.
UL Listing
Quality smoke detectors are UL listed. This certification ensures that the detectors meet Underwriters Laboratories’ (UL) stringent testing requirements. Given the importance of purchasing the best smoke detector system that a household can afford, it’s not worth the risk to install anything that isn’t UL listed.
Smart Features
For those interested in the latest fire safety technology, some good smoke alarms do boast smart features. Many of these smart smoke detectors not only communicate with an overseeing alarm system but also with users’ phones through Wi-Fi. Some models even allow users to employ any TV remote to mute an activated detector.
FAQs
Now that you know a bit more about the best smoke detectors, some questions may still pop up. Here are answers to some of the most frequently asked questions, so check below for the information that will clarify your queries.
The U.S. Fire Administration states that you should test your smoke detectors monthly and replace the batteries at least once a year, unless the unit has a sealed battery—but if that’s the case, it’s still important to test the unit.
The National Fire Protection Association recommends that homes should have smoke detectors installed in every bedroom, a common area outside the sleeping area, and on every level (including the basement and attic). Placing a detector in the garage is also a good idea.
Smart smoke detectors provide a bit of extra awareness, particularly if no one is at home when the problem occurs. However, they’re not necessarily better than standard units. Some would suggest that the best option is to have a wired smoke alarm connected to a central monitoring service.
Most smoke detectors feature dual-purpose test and “hush” buttons that will allow the user to test their detector’s functionality but also stop it from sounding an alarm. However, if your smoke detector is simply beeping, it probably just needs a battery change or may be indicating that the unit’s lifespan has ended.
It’s recommended that 9-volt smoke detector batteries be changed yearly. However, lithium and sealed lithium batteries may last 5 to 10 years, depending on the type. Smoke detector beeping indicates that it’s time to change replaceable batteries or replace units with sealed batteries.
Use a can of compressed air to blow dust out of a smoke detector’s vents and away from the sensor. If you don’t have compressed air, use a vacuum to suction the dust. Then, wipe the outside of the detector with a dry dusting rag.
Put smoke detectors on the ceiling or high up on the wall, within 12 inches of the ceiling. Heat and smoke rise, so placing them lower could cause them to fail to detect a problem.
Hardwired smoke detectors run off electricity rather than batteries, relying on battery backups when the power goes out. They also often communicate with each other, meaning when one alarm sounds, they all do. Because of these features, many consider them better than standalone battery-operated smoke detectors.
Meet the Testers
Katie Barton is a home improvement writer with over ten years of experience. She extensively tests products to help readers find the best value and features for their money.
Tom Scalisi is a full-time DIY and construction writer for many of the largest websites in the industry. He spent years in the fire safety industry, both installing and testing commercial fire alarm and suppression systems.
The post Keep Your Home and Family Safe With One of Our Favorite Smoke Detectors appeared first on Bob Vila.
]]>One of the risks that accompanies any hobby is the temptation to buy shiny new gear, and with wood carving, that means knives. I started whittling with a cheap pocket knife when I was 10 years old. That knife was sufficient for turning big sticks into little sticks, but as my skills improved, I learned about real wood carving knives, with their small fixed blades and large comfortable handles. Trying one for the first time was a revelation. My hands didn’t hurt after 20 minutes and I was able to add details that were previously almost impossible.
Flexcut has spent the past few years designing its Pro Series of wood carving knives that fed my temptation by promising even better control, precision, and comfort. I got the 3-piece Pro Set that includes a 1 ⅝-inch carving knife, 1 ⅜-inch detail knife, and 1-inch chip carving knife. I’ve been using them for a couple of months now, and while I’m not ready to give up my old whittling knives, I really like the new features.
Our Rating: 4.5/5
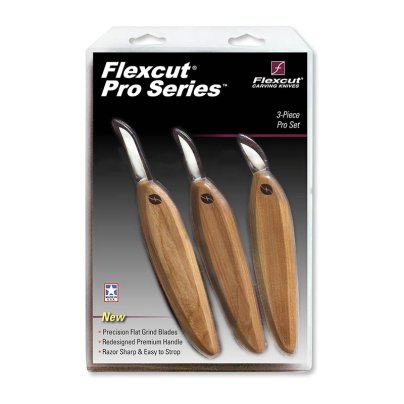
Flexcut Pro Series 3-Piece Pro Set
Pro Series knives use the same durable heat treated 1095 spring steel blade material that the brand has been using for years, but with a true flat grind blade and an open space between the heel of the blade and the choil. No need to break out the knife sharpener. These were razor sharp, mirror polished, and ready to work right out of the package. The steel held its edge in all types of wood like earlier models, but the redesign makes the blades lighter without sacrificing strength, and they were easier to strop than traditional Scandi-ground blades.
The handles got a makeover too. The unvarnished cherrywood handles are straighter at the butt and feature flat sidewalls, subtly angled corners, and a slight downward curve toward the blade spine. They feel good. I don’t miss the tapered and curved butt end on older models, and my big hands don’t tire or get sore after a couple of hours whittling hardwood.
Flexcut Pro knives are really great, but sometimes I prefer working with a narrower point or a curved edge, neither of which is available in the Pro Series, and let’s face it, old habits are hard to break. For no-particular-reason I sometimes feel like using a particular knife, even though it may not be technically the “best” tool for the job. I am happily adding the Pro Series into my whittling rotation, and I know I’ll use them often. Time will tell if one of them becomes my next habit.


Where to Buy the Flexcut Pro Series Carving Knives
Get the Flexcut Pro Series 3-Piece Pro Set at:
The post These New Carving Knives Have Earned a Spot in My Arsenal of Tools appeared first on Bob Vila.
]]>The post 8 Paint Primers That Provide a Blank Slate For Painting appeared first on Bob Vila.
]]>Whether you’re painting the living room or a patio table, applying a prep coat of primer to the surface can improve adherence, prevent peeling, and reduce the number of coats needed to finish the job. While all primers contain more resins and less pigment than paint, formulas vary from product to product. We tested some of the most popular options to find out which primer works best for different situations. Our number one pick is Rust-Oleum’s Zinsser Bulls Eye with its low odor and ability to work on multiple surfaces.
The right primer for your project depends on the environment you’ll be working in, the surface you’ll be painting, and your preferences for the time frame of the job and its final look. Read on to find out what makes a quality paint primer and why the below options rank as our top favorites among the best paint primers we tested.
- BEST OVERALL: Rust-Oleum Zinsser Bulls Eye 1-2-3 Water-Base Primer
- BEST BANG FOR THE BUCK: Kilz Original Interior Primer
- BEST ALL-PURPOSE: Kilz 2 All-Purpose Interior/Exterior Primer
- BEST FOR METAL: Rust-Oleum Clean Metal Primer
- BEST FOR GLOSSY SURFACES: Kilz Adhesion Interior/Exterior Primer
- BEST FOR ODOR BLOCKING: Kilz Restoration Interior Primer
- BEST FOR EXTERIOR: Kilz 3 Premium Interior/Exterior Primer
- BEST FOR INTERIOR WALLS: Sherwin-Williams SuperPaint Interior Acrylic Latex
Product Comparison
| Interior/Exterior | Recoat Time | Base Material | |
| Rust-Oleum Zinsser Bulls Eye 1-2-3 Water-Base Primer | Both | 1 hour | Water-based acrylic |
| Kilz Original Interior Primer | Interior | 2 hours or less | Oil |
| Kilz 2 All-Purpose Interior/Exterior Primer | Both | 1 hour | Water |
| Rust-Oleum Clean Metal Primer | Both | 24 hours | Oil |
| Kilz Adhesion Interior/Exterior Primer | Both | 1 hour | Water |
| Kilz Restoration Interior Primer | Interior | 1 hour | Water |
| Kilz 3 Premium Interior/Exterior Primer | Both | 1 hour | Latex |
| Sherwin-Williams SuperPaint Interior Acrylic Latex | Interior | 1 hour | Latex |
Our Top Picks
We spent hours narrowing the paint primer market and testing the top-rated products. One or more of these recommendations for the best paint primer may suit your specific needs.
Best Overall
Rust-Oleum Zinsser Bulls Eye 1-2-3 Water-Base Primer

What We Like
- Low-VOC and low-odor formula
- Mold- and mildew-resistant
- Works on multiple surface types
What We Don’t Like
- Thin viscosity; second coat may be required for proper coverage
Product Specs
- Interior/exterior: Both
- Recoat time: 1 hour
- Base material: Water-based acrylic
Rust-Oleum is well known for its protective paints and coatings. Its Zinsser Bulls Eye 1-2-3 water-base primer is an all-purpose primer-sealer that sticks to various surfaces without sanding and works with any top coat. The brand is regarded as one of the top producers of rust-preventive paints.
The primer is low odor, low in volatile organic compounds (VOCs), and provides excellent coverage on interior and exterior surfaces. It’s made from water-based acrylic and is designed to resist blistering, peeling, and mold and mildew growth. The primer is tintable and available in white or gray. It’s also available in spray-paint form.
We tested this primer on multiple surfaces, including drywall, wood, metal, and plastic. It readily stuck to all of those surfaces and provided a textured finished surface that easily held onto a top coat of paint. The primer did not completely block the water stain on drywall, but we expected that—most white primers do not. We thought the paint was thin and needed two coats on all surfaces to ensure an even, smooth top coat. Overall, we liked this primer’s versatility of use on multiple surfaces, making it our top choice.
Get the Rust-Oleum Zinsser paint primer at Amazon or Ace Hardware.
Best Bang for the Buck
Kilz Original Interior Primer

What We Like
- Effectively blocks stains and odors
- Applies smoothly and evenly
- Lower-VOC formula
What We Don’t Like
- Strong odor
Product Specs
- Interior/exterior: Interior
- Recoat time: 2 hours or less
- Base material: Oil
Kilz is a trusted paint brand, especially for primers. Kilz Original interior primer is the company’s flagship primer designed to block most heavy interior stains on wood, drywall, plaster, paneling, wallpaper, masonry, brick, and painted metal. It also works on properly prepared glossy surfaces.
The primer is oil-based but can be used as a base coat for latex and oil paints. Kilz is our go-to primer for tough stains in our household. Previously, we had only used the spray-can version but found that the can version works just as well. We tested the primer on water stains on our drywall and as a base coat on various materials, including wood, brick, and metal. The primer adhered well to porous surfaces, but we did need to sand the metal before priming.
The white primer paint did a decent job blocking light-colored stains. However, in our experience with trying to hide stubborn stains on drywall, the primer works best at hiding stains when tinted gray.
Although it is available in a lower-VOC formula, it is not low VOC and the odor was strong. We recommend using a respirator or working in a well-ventilated area when using this primer. Overall, Kilz Original is a solid performer, and we highly recommend it for any ventilated interior primer application.
Get the Kilz Original paint primer at Ace Hardware.
Best All-Purpose
Kilz 2 All-Purpose Interior/Exterior Primer
What We Like
- Minimal odor
- Mildew-resistant finish
- Easy soap-and-water cleanup
- Low-VOC formula
What We Don’t Like
- Only blocks light to medium stains
Product Specs
- Interior/exterior: Both
- Recoat time: 1 hour
- Base material: Water
Kilz 2 all-purpose interior/exterior primer is a general-purpose primer well suited for use on various DIY projects. This water-based primer has a drastically lower VOC content than the Original Kilz Primer, and it works under or over water-based or oil-based paints. It blocks light to medium stains and mild odors, and it leaves a mildew-resistant finish.
Kilz 2 all-purpose primer works well for general-purpose priming and sealing needs. In testing, it left a smooth base coat on drywall and bare wood. It did a moderate job blocking dark stains on walls, but it effectively blocked lighter stains like pencil marks, minor scuffs, and markers. We recommend using Kilz 2 for priming old walls before repainting or for any exterior surface as a base coat for exterior paint. It’s also handy to use a primer for craft painting projects.
Get the Kilz 2 paint primer at Lowe’s, Ace Hardware, or The Home Depot.
Best for Metal
Rust-Oleum Clean Metal Primer
What We Like
- Prevents rust from growing in some areas
- Suitable for both indoor and outdoor use
- Weather- and corrosion-resistant
What We Don’t Like
- Metal surfaces should be sanded beforehand
Product Specs
- Interior/exterior: Both
- Recoat time: 24 hours
- Base material: Oil
Rust-Oleum Clean Metal primer is formulated to cover lightly rusted metals as well as bare and previously painted metals. It’s weather- and corrosion-resistant and bonds tightly to exterior/interior surfaces like wood, metal, concrete, and masonry.
This primer is designed primarily for use on metal, but it works well on other surfaces. It did a good job blocking rust stains on a metal bench we refinished, and it provided a smooth surface for a top coat. The only real drawback of this primer was that the smooth surfaces required prep work before use—smooth, hard, or glossy finishes need sanding for the primer to adhere. However, after applying onto sanded metal, it did form a durable finish, and the top coat went on beautifully.
Get the Rust-Oleum metal paint primer at Amazon, Ace Hardware, or The Home Depot.
Best for Glossy Surfaces
Kilz Adhesion Interior/Exterior Primer
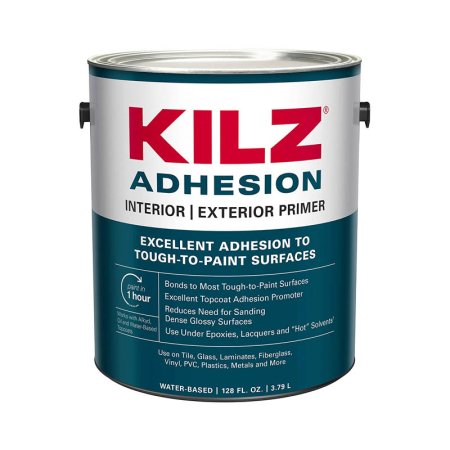
What We Like
- Bonds to glossy surfaces without sanding
- Can be used on products containing xylene or other solvents
- Easy soap-and-water cleanup after use
What We Don’t Like
- Not for wet floors or horizontal surfaces
Product Specs
- Interior/exterior: Both
- Recoat time: 1 hour
- Base material: Water
Kilz Adhesion interior/exterior primer is formulated to bond to various tough-to-paint surfaces such as PVC, vinyl, glass, tile, and glazed brick. The water-based primer offers the same stain- and odor-blocking properties as the other Kilz primers. Unlike the other primers in the Kilz line, Adhesion does not require sanding a glossy surface before primer application.
Since this primer is virtually identical in its stain and odor properties to the others in the Kilz lines, we primarily tested its ability to stick to slick surfaces. We applied the primer to plastic, metals, and glazed ceramic. We did not sand the surface before application. It did adhere to the surfaces pretty well, but we did find that applying the primer in thin, multiple layers produced better results. Although it took at least two coats, we prefer to paint two coats rather than sanding the entire surface first.
Get the Kilz Adhesion paint primer at Amazon.
Best for Odor Blocking
Kilz Restoration Interior Primer

What We Like
- Minimal odor and low-VOC formula
- Easy soap-and-water cleanup
- Provides a smooth finish
What We Don’t Like
- Does not block or cover heavy or prominent stains
Product Specs
- Interior/exterior: Interior
- Recoat time: 1 hour
- Base material: Water
Water, mold, and rust stains are tough to cover, but odors are even harder to conceal. Smoke, pet urine, and food odors often require using an oil-based or shellac-based primer to seal them into the surface before painting. However, Kilz Restoration interior primer offers the same performance as oil-based primers but with the easy cleanup convenience of water-based paint.
Like the other primers offered by Kilz, this primer did an adequate job of covering most light to medium stains. However, Kilz Restoration shines as an odor blocker. We tested this primer drywall in a room where smokers previously resided. The primer went on smoothly and sealed in the odor. Once the top coat was applied, there was no hint of the smell. It did a moderate job concealing old water stains, but we expected that.
Since this primer is mainly formulated for odor blocking, we suggest only using this primer for that purpose. Kilz Original primer is a better stain blocker.
Get the Kilz Restoration paint primer at Amazon, Ace Hardware, or The Home Depot.
Best for Exterior
Kilz 3 Premium Interior/Exterior Primer
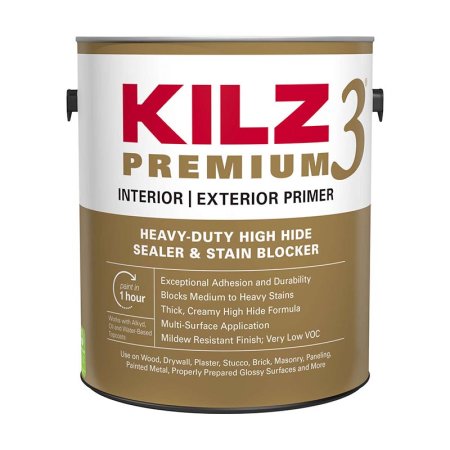
What We Like
- Blocks most medium to heavy stains
- No-VOC formula
- Great in moisture-prone areas
What We Don’t Like
- Not meant for applying to glossy surfaces
Product Specs
- Interior/exterior: Both
- Recoat time: 1 hour
- Base material: Latex
Kilz 3 Premium interior/exterior primer is formulated to minimize problems caused by color changes, minor stains, surface textures, and porosity differences. This primer offers excellent adhesion, a mildew-resistant coating, and seals interior and exterior surfaces for a uniform finish.
In testing, we found that this primer did an excellent job sealing new wood framing on our covered deck. It left an ultrasmooth finish, and the top coat went on smoothly. The primed and painted wood has been through a few rainstorms and high humidity conditions for a few weeks, and the surface still looks amazing.
As a stain blocker, it did a decent job covering up an older painted surface with minor mold and dirt discoloration. The only con we found with this primer was that it’s not made to adhere to glossy surfaces without preparation. However, it’s an excellent primer for exterior use because it sticks readily to plaster, paneling, masonry, brick, and painted metal without issue.
Get the Kilz 3 Premium paint primer at Lowe’s, Ace Hardware, or The Home Depot.
Best for Interior Walls
Sherwin-Williams SuperPaint Interior Acrylic Latex
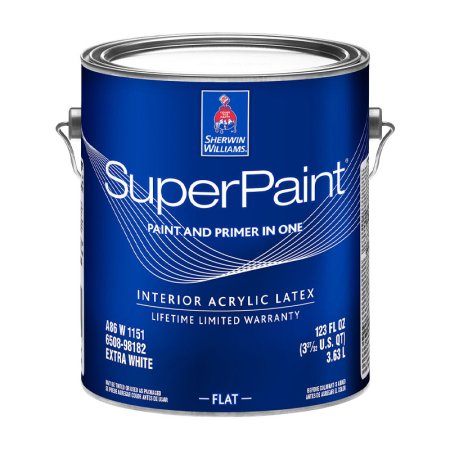
What We Like
- Thick paint goes on smoothly
- Can also be used on ceilings
- Tintable in Sherwin-Williams’ full color options
- Low-VOC formula
What We Don’t Like
- Expensive compared to similar options
Product Specs
- Interior/exterior: Interior
- Recoat time: 1 hour
- Base material: Latex
Sherwin-Williams SuperPaint is the brand’s paint-and-primer combo available in interior and exterior formulations. The interior version is designed for one coat coverage on drywall, trim, and ceilings. SuperPaint creates a lasting finish and a surface that holds up to scrubbing.
We have used SuperPaint as our primary wall paint for years. It’s thicker than most interior paints, which allows it to cover in fewer coats than cheaper paints. The flat finish is perfect for ceilings, too. We could achieve solid coverage on walls in two coats, even over darker paint. Although we were able to cover a similar color wall in one coat in the past, we think it looks better with two coats of paint. The only con we have with this paint is that it’s expensive. However, Sherwin-Williams often offers promos that can help offset the cost.
Get the Sherwin-Williams paint primer at Sherwin-Williams.
Jump to Our Top Picks
How We Tested the Best Paint Primers
We tested each paint primer according to established rubrics, including how easy it was to apply, how well it adhered to various surfaces, and its stain- and odor-blocking abilities. We rated each primer based on these rubrics on a scale between 0 and 4 to determine a score. Lastly, we tested the primer’s durability and how attractive the final finish appeared on each surface.
We applied each primer to metal, masonry, drywall, and wood surfaces. The drywall surfaces included water stains, mildew, and lingering smoke odors. We applied two coats of primer to each surface and allowed it to dry for an hour, and then followed up with a flat white top coat to determine if there was any bleedthrough of stains and to judge the smoothness of the top coat.
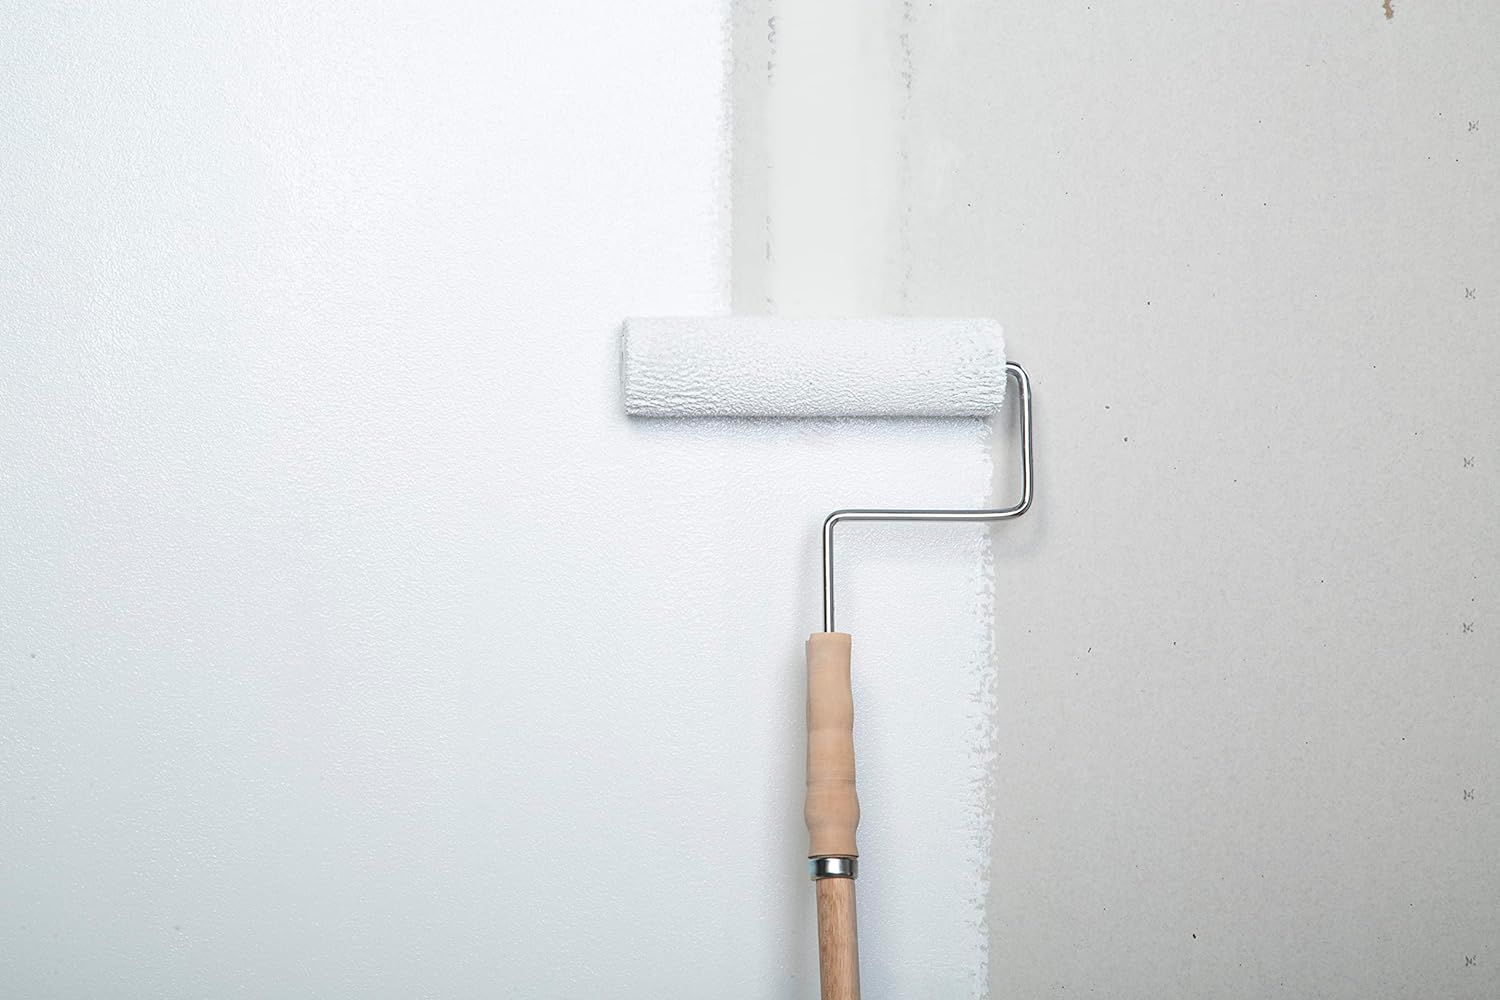
What to Consider When Choosing a Paint Primer
When choosing a primer for your project, there are several features to consider. The best paint primer options efficiently cover multiple surfaces, block stains, and ensure an even, smooth top coat. Here are more details about important features to consider when choosing a paint primer.
Project Environment
Paint primers come in three formulas: interior/exterior, exterior, and interior.
Interior/exterior primers are suited for indoor and outdoor use, while exterior primers are designed for outdoor use only. Both contain additives that stave off UV-related fading and moisture-related mold issues; they also add flexibility to withstand frequent outdoor temperature changes, preventing the paint from peeling or cracking.
Interior primers, formulated without exterior additives, are only suitable for indoor use. Interior/exterior primer is the best bet for doing a range of painting jobs, indoors and out. Plus, choosing a primer that works inside and outside saves on the costs of buying separate interior and exterior products.
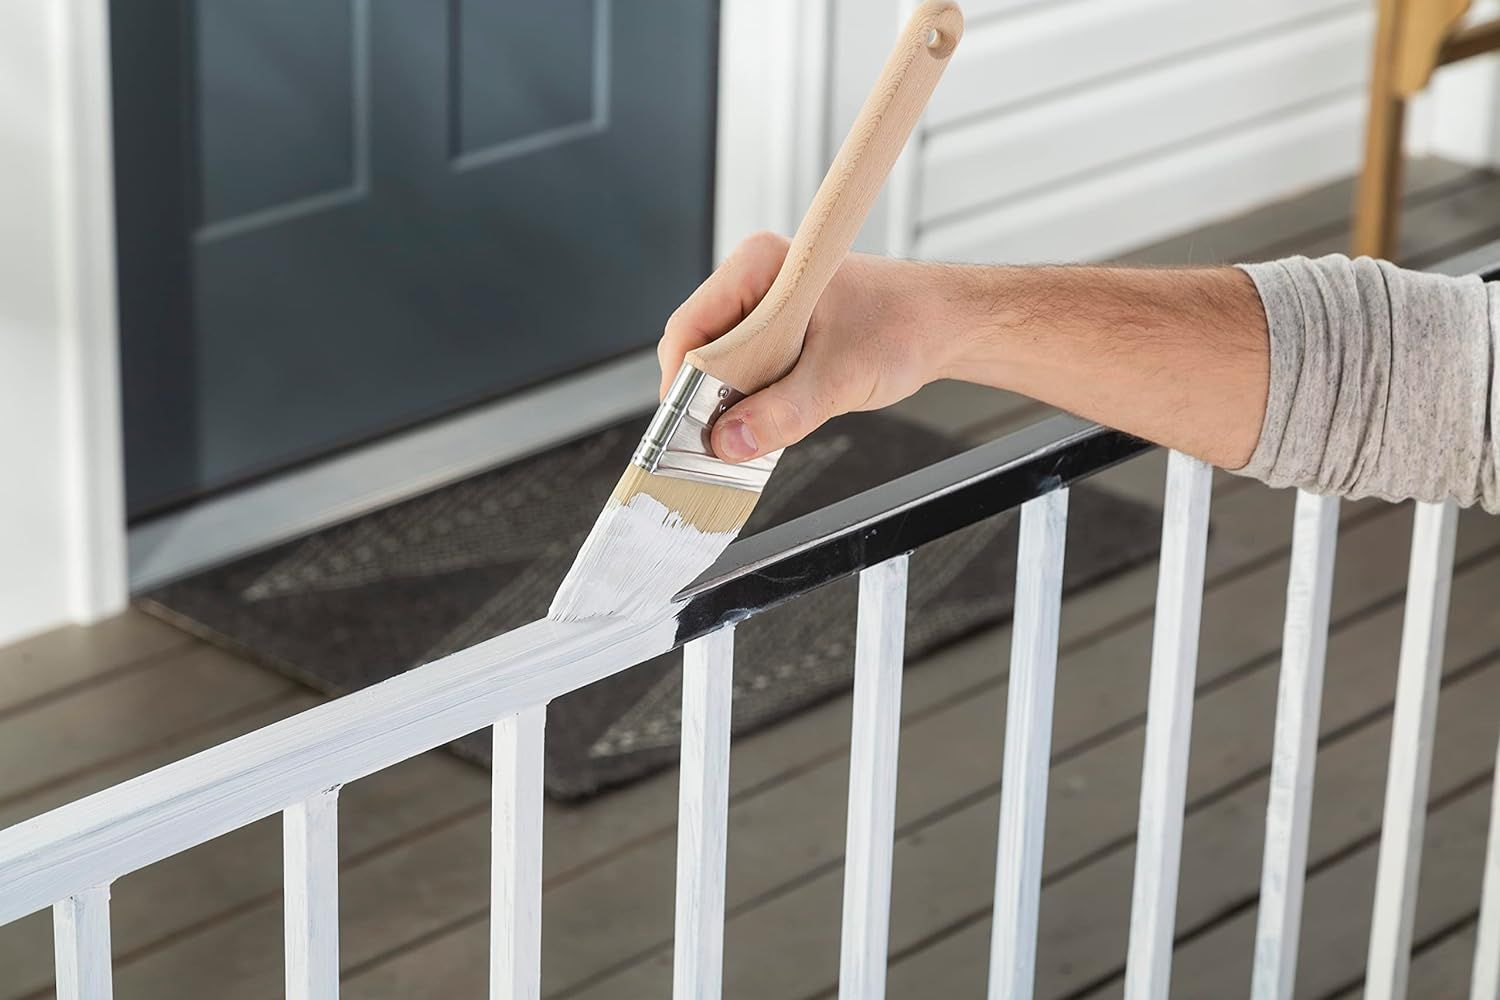
Surface
Each type of primer may adhere better to different surfaces. The following details the best primer type for common household surfaces:
- Bare wood: Apply an oil-based or latex primer to wood that has never been stained or painted to help seal the porous surface. Keep in mind that oil-based primers tend to emit more VOCs (smelly pollutants) than do latex primers.
- Drywall: Apply a latex primer to drywall, as an oil-based primer can raise the grain and make the surface look uneven.
- Stain-prone surfaces: Use a stain-blocking primer on stained wood, bare wood with high tannin content that can bleed out (e.g., cedar or redwood), interior walls with water or smoke stains, or cabinets/trim with grease stains. It will cover stains and keep them from bleeding into and discoloring top coats.
- Choose latex stain-blocking primer if the stains are solvent-based (e.g., crayons or grease).
- Choose an oil-based stain-blocking primer if the stain is water-based (e.g., water-based wood stain, smoke, or tannin).
- Painted wood: An oil-based primer is usually best for painted wood that shows chalking (a chalky powder on the surface as the paint binder degrades) or chipping; it will dry into a denser, smoother foundation to minimize these imperfections.
- Metal: Choose a rust-resistant oil-based primer on metals such as aluminum to avoid the formation of rust, which the water in latex primer can promote.
- Glossy surfaces: Bonding primer, formulated to stick to glossy surfaces, is a must for the slick likes of glass, plastic, or glazed tile.
Dedicated Primer vs. Paint-and-Primer in One
Self-priming paints—also known as paint-and-primer combo products—let users prime and paint a surface in a single step. But these two-in-one products are only recommended if all of the following are true:
- You’re not painting bare or stained wood.
- Your painting surface has no stains or signs of peeling.
- You’re repainting a previously painted surface in the same color or going from a lighter to a darker paint color.
Choose separate paint and primer to improve paint adhesion in the following situations:
- You’re painting bare or stained wood.
- You’re painting over a surface that has stains or is peeling.
- You’re switching from a darker to a lighter paint color.
- You want to use a paint with a different base than that of the primer. For example, use an oil-based primer with a latex paint to take advantage of the rot resistance of the oil primer and the lower VOCs and faster drying of the latex paint.
- You want to cover an old oil-based paint coat with a latex paint coat. An intervening layer of a dedicated primer is needed for optimal adhesion of the latex paint.
Tintability
Primer usually comes in white or gray. Use either color as is without tinting it or have the primer tinted to a hue that’s slightly lighter than the top coat. Tinting primer, which requires buying a primer labeled “tintable,” generally achieves a deeper, richer, and more uniform final color but is particularly recommended in the following situations:
- You’re changing the color from darker to lighter. The tinted primer reduces the number of paint coats needed to hide the darker base coat.
- For stubborn stains, like water or mildew, a tinted primer is necessary to block the stain effectively from bleeding through, especially when there is a light-color top coat.
- You’re changing from a lighter to a dramatically darker color, e.g., light blue to black. The tinted primer ensures that even if the top coat is uneven, no patches of white or gray primer will show through it.
Dry Time
Pay attention to the “dry-to-recoat” time specified on the primer packaging—an indication of when the primer is dry enough to be recoated either with another coat of primer or with paint. In general, latex primers have a shorter dry-to-recoat time of no more than 1 hour, whereas oil-based primers need 1 to 3 hours before they can be recoated.
FAQs
Water-based primer is best for walls and ceilings. Oil-based primer is primarily used for doors, windows, metal, woodwork, or over tough stains in well-ventilated areas.
Paint with primer is best for previously painted walls. Primers are recommended for use on any surface that has not been previously painted.
No, but using a paint primer does reduce the amount of top coat paint needed, and it protects and seals the surface.
Meet the Tester
Debbie Wolfe is a photographer, author, and freelance writer in various niches. She has contributed hundreds of home, garden, and crafting articles and DIY tutorials for leading media outlets and retailers, including HGTV, Real Simple, Forbes Advisor, The Spruce, The Home Depot, Walmart, and Mother Earth News. She is the author of two DIY books: Do-It-Yourself Garden Projects and Crafts and Crafting with Herbs from Skyhorse Publishing. Her testing approach is straightforward and budget-minded.
Additional research provided by Manasa Reddigari.
The post 8 Paint Primers That Provide a Blank Slate For Painting appeared first on Bob Vila.
]]>The post Keep Your Snow Blower Running Efficiently With These High-Quality Oil Options appeared first on Bob Vila.
]]>High-quality oil for snow blowers helps keep your gas snow blower in peak condition, making starting and running it easier and smoother so you can clear wet winter weather quickly. However, knowing which oil type is best for your machine can be a challenge, so we researched dozens of popular snow blower lubricant options and reached out to an expert for their insights on choosing the right one.
Based on our efforts, we learned that the best-performing oil should flow easily through a snow blower engine, even in the coldest temperatures, without leaving deposits and grime. That’s why we chose the Pennzoil Platinum Full Synthetic 5W-30 Motor Oil as our top pick: This synthetic engine oil offers excellent performance in extreme cold and washes away dirt as it flows through, helping extend the life of snow-blowing tools season after season.
Read on to learn more about the features that make a motor or car oil appropriate for a snow blower, and see the rest of the best oils for snow blowers on the market today.
- BEST OVERALL: Pennzoil Platinum Full Synthetic 5W-30 Motor Oil
↓ Jump to Review - RUNNER-UP: Briggs & Stratton 5W-30 Synthetic Engine Oil
↓ Jump to Review - BEST BANG FOR THE BUCK: Valvoline Advanced Full Synthetic SAE 5W-30 Motor Oil
↓ Jump to Review - BEST FOR SMALL ENGINES: Briggs & Stratton 5W-30 Low-Temp Small Engine Oil
↓ Jump to Review - BEST FOR 2-CYCLE ENGINES: Klotz TechniPlate 2-Stroke Snowmobile Oil
↓ Jump to Review - MOST VERSATILE: Castrol GTX High-Mileage 5W-30 Motor Oil
↓ Jump to Review

Best Oils for Snow Blowers Comparison Chart
| Product Name | Volume | Configuration | Type |
| Pennzoil Platinum Full Synthetic 5W-30 Motor Oil | 1 quart | 5W-30 | Synthetic |
| Briggs & Stratton 5W-30 Synthetic Engine Oil | 1 quart | 5W-30 | Synthetic |
| Valvoline Advanced Full Synthetic SAE 5W-30 Motor Oil | 1 quart | 5W-30 | Synthetic |
| Briggs & Stratton 5W-30 Low-Temp Small Engine Oil | 1 quart | 5W-30 | Synthetic |
| Klotz TechniPlate 2-Stroke Snowmobile Oil | 4 quarts | TC-W3 | Synthetic |
| Castrol GTX High-Mileage 5W-30 Motor Oil | 5 quarts | 5W-30 | Synthetic |
Our Top Picks
Our top picks feature oils specially formulated for cold weather, and many also have additives that help keep snow blower engines free of harmful dirt and deposits. Any of the following recommended products will help keep your snow blower running smoothly.
Best Overall
Pennzoil Platinum Full Synthetic 5W-30 Motor Oil
What We Like
- Suitable for snow blowers and car engines
- 5-quart size has 2 handles for controlled pouring
- Protects for long periods of time
What We Don’t Like
- Oil losses can occur with intense friction
Specs
- Volume: 1 quart (other sizes available)
- Configuration: 5W-30
- Type: Synthetic
Seasonal machines, such as snow blowers, often sit idle for months before they are needed, which allows time for impurities and gunk to build up. However, Pennzoil’s Platinum motor oil washes dirt and deposits out of the engine as it passes through, helping to extend the life of the machine while ensuring it starts when the next snowfall arrives. As a fully synthetic clear 5W-30 oil made from natural gas, this pick can keep your snow blower engine up to 45 percent cleaner than standard oils.
Pennzoil Platinum comes in 1-quart, 5-quart, and 55-gallon bottles, and buying a larger volume might be smart since it also works in car engines. Another thing we really like about this product is the 5-quart bottle has handles on both the top and the side, making it much easier to pour without making a mess.
Get the Pennzoil oil for snow blowers at Lowe’s, Ace Hardware, The Home Depot, Walmart, or Blain’s Farm & Fleet.
Runner-up
Briggs & Stratton Synthetic Small Engine Motor Oil
What We Like
- Helps maintain a clean engine
- Suitable for use in other garden equipment
- Enables a smoother snow blower start
What We Don’t Like
- More expensive than similar options
Specs
- Volume: 1 quart
- Configuration: 5W-30
- Type: Synthetic
This Briggs & Stratton 5W-30 small engine oil is well suited to snow blowers—its use makes starting engines in cold temperatures easier while also minimizing oil consumption. As a synthetic oil, it lasts longer (up to 5,000 hours in a snow blower) and stays thinner at lower temperatures than conventional oils.
With a high-temperature viscosity rating of 30, this oil is also a good option for other 4-cycle small engines that operate in hot temperatures, including lawn mowers. The 1-quart bottle has convenient measurements on the side that allow the user to see exactly how much snow blower oil is left.
Get the Briggs & Stratton synthetic oil for snow blowers at Amazon (2-pack), Walmart, or Briggs & Stratton.
Best Bang for the Buck
Valvoline Advanced Full Synthetic SAE 5W-30 Motor Oil
What We Like
- Provides excellent wear protection
- Slightly more budget-friendly than competitors
- Configured specifically for cold conditions
What We Don’t Like
- Bottle may leak if stored incorrectly
Specs
- Volume: 1 quart
- Configuration: 5W-30
- Type: Synthetic
Valvoline 5W-30 weight motor oil is a synthetic formula with additives that provide 50 percent more wear protection than standard motor oils. The included detergents flush sludge and harmful deposits from the engine, which is significant for small 4-cycle engines that are used only when it snows.
This snow blower oil’s low cold operating viscosity is ideal for winter-use tools, while its 30-weight high-temperature viscosity rating also makes it suitable for warm-weather machines like lawn mowers. This Valvoline product comes in a 1-quart bottle, but a 5-quart bottle with a pour spout is also available.
Get the Valvoline oil for snow blowers at Amazon (6-pack), Lowe’s, Walmart, or Tractor Supply Co.
Best for Small Engines
Briggs & Stratton 5W-30 Low-Temp Small Engine Oil
What We Like
- Ideal for use in cold temperatures
- From a brand known for high-quality products
- Specially suited for small engines
What We Don’t Like
- Quite pricey compared to similar products
Specs
- Volume: 1 quart
- Configuration: 5W-30
- Type: Synthetic
Made by one of the best-known names in small engines, this Briggs & Stratton 4-cycle oil is specially formulated for use in small engines. The synthetic formula comes in a 1-quart container with a handy gauge on the side that allows users to see how much oil is left in the bottle.
With its 5W rating, this snow blower engine oil works well in machines operating at temperatures below 50 degrees Fahrenheit. It also has a high-temperature viscosity of 30, making it suitable for use in warmer-weather motors like power washers or lawn mowers.
Get the Briggs & Stratton 4-cycle oil for snow blowers at Amazon or Briggs & Stratton.
Best for 2-Cycle Engines
Klotz TechniPlate 2-Stroke Snowmobile Oil
What We Like
- Made for temperatures as low as -48 degrees Fahrenheit
- ISO-EGD compliant for engine protection
- Formula helps extend engine life
What We Don’t Like
- Reports of leaky packaging
Specs
- Volume: 4 quarts
- Configuration: TC-W3
- Type: Synthetic
Made for cold temperatures as low as -48 degrees Fahrenheit, the Klotz TechniPlate Snowmobile oil is designed for with 2-cycle engines like those in ATVs, motorcycles, race cars, and, of course, snow blowers. It works with stock engines or modified ones made by all leading manufacturers, including Ski-Doo, Arctic Cat, Polaris, and Yamaha as well as C-TEC and E-TEC engines.
This clean-burning synthetic formula is TC-W3 certified and ISO-EGD compliant for reliability and efficiency. It’s made to improve throttle response and prevent plug fouling and can be used as an injection oil by pouring it directly into the tank or as a pre-mix product by blending it with gasoline.
Get the Klotz oil for snow blowers at Amazon or Klotz.
Most Versatile
Castrol GTX High Mileage 5W-30 Motor Oil

What We Like
- Provides immediate engine protection on startup
- Lasts for extended periods and still look clean
- Suitable for both cold and hot weather
What We Don’t Like
- Bottle shape is awkward for filling a snow blower
Specs
- Volume: 5 quarts
- Configuration: 5W-30
- Type: Synthetic
With technology designed to protect engines and improve performance, this 5W-30 Castrol GTX motor oil features Castrol’s sludge and wear protection additive. It prevents buildup, extending the life of engines both large and small.
Castrol GTX also makes it easier to get a pull-start engine running, and once you start your snow blower’s engine, the oil quickly coats it to provide immediate protection. Additionally, this option features the optimal 5W oil rating for winter use and a 30 high-temperature viscosity rating for hot weather.
Get the Castrol oil for snow blowers at Amazon, Lowe’s, Tractor Supply Co. (1 quart), The Home Depot (1 quart), or Walmart (1 quart).
Jump to Our Top Picks
How We Chose the Best Oils for Snow Blowers
To provide shoppers with a list of top picks for snow thrower and snow blower oils, we primarily considered oil type and viscosity.
Oil type: Synthetic oil is the best choice for snow blower motors because it can handle lower temperatures and resist breakdown better than conventional oil.
Viscosity: Our recommendations are all variations of 5W-30, which is the ideal oil viscosity for snow blowers. The products we selected include budget-friendly versions for occasional use and heavier-duty options that come at a slightly higher price point. Most of the picks on our list are also versatile enough for other home and garden equipment and suitable for both cold and hot weather conditions.
What to Consider When Choosing Oil for a Snow Blower
The right oil can make the difference between a snow blower not starting because it has a gummed-up engine and one that kicks on without issue. Ahead, learn how viscosity, snow blower oil type, and other factors affect engine performance in a snow blower.
Type
Gas-powered snow blowers use 4-cycle engine oil, a type of oil for snow blower engines that uses separate tanks for gas and oil, much like car engines. The gas fuels the engine, while the oil lubricates it.
Smaller engines, such as those on chainsaws, have 2-cycle engines. This type of small engine uses an oil and gas mixture that goes into one tank. Don’t use 2-cycle engine oil in a snow blower, as it will not properly lubricate the engine and will damage it. The motors on electric snow blowers don’t require engine oil.
Identifying the right type of engine oil is easy. The oil container has “4-cycle” or “2-cycle” clearly printed on the label. Although some 4-cycle engine oils are labeled for “small engines,” they are actually the same oil commonly used in cars and trucks.
Viscosity
Viscosity refers to the thickness of the oil. Higher viscosity oil is better at protecting and lubricating engines at high temperatures and peak load (high RPMs). Oil with a low viscosity remains thinner at lower temperatures, promoting better flow through the engine, making it easier to start and more efficient to run.
Viscosity is based on a scale created by SAE International, formerly known as the Society of Automotive Engineers (SAE). Motor oil has two viscosity ratings:
- The first rating—the “W” (for “winter”) after the number—represents the cold temperature viscosity. For example, an oil rated 5W flows better at lower temperatures than a 10W oil.
- The second number indicates the high-temperature viscosity. For example, an oil with a high-temperature viscosity of 30 stays thicker at higher temperatures.
Since snow blowers operate exclusively in cold weather, they typically use SAE 5W-30 weight oil, which ensures the engine will start at low temperatures. Make sure to check the maintenance section of your operating manual for the proper snow blower oil weight for your machine.
Synthetic vs. Standard
Not all 5W-30 engine oils are the same. Some engine oils are synthetic, which means they use higher-quality base oils than conventional oils. Synthetic lubricants can generally withstand higher temperatures and resist breakdown better. This means synthetic oil in a snow blower will last at least 50 percent longer than conventional oil, so you’ll probably need to perform less frequent snow blower maintenance.
Many synthetic oils also contain additives to help improve engine performance and extend engine life. Additives include detergents that flush grime and buildup and chemicals that coat engine parts to enhance lubrication.
For these reasons, synthetic oils are generally more expensive, often costing several times more than conventional oils. Still, proper maintenance of a quality snow blower will likely run you less than the cost of snow removal if you live in an area with relatively frequent snowfalls.
Versatility
The 4-cycle engine oil that snow blowers use is the same oil used in any 4-cycle engine, which means it’s also an appropriate oil for lawn mowers, power washers, and even cars and trucks. 5W-30 oil provides adequate protection during both cold and warm weather.
Engine oil generally comes in 1-quart bottles, which is ideal for snow blowers since they hold about that much. It also comes in 5-quart containers and large, multi-gallon drums, but since its shelf life is generally around 5 years, it’s important not to buy more than you need. To store 5W-30 oil, keep it tightly sealed in a cool, dry environment.
FAQs
Even though you now know a fair bit about oil for snow blowers, you may still have additional questions. For details on deciding which type of oil in a snow blower is best to use and how often to replace it, read answers to some frequently asked questions below.
Yes, synthetic options are likely the best oils for snow blowers. Synthetic oils are refined to run cleaner, leaving fewer deposits in the engine. Many also include additives that clean grime and sludge from the engine to improve performance.
Yes. Snow blowers, like cars, are 4-cycle engines, so they use the same type of motor oil. Use a motor oil weight with a low-temperature viscosity rating, such as 5W-30, since snow blowers must run during cold weather.
Snow blowers operate in frigid temperatures, so the most important factor to consider is viscosity. Use motor oil with a low-temperature viscosity rating, such as 5W-30, to ensure the snow blower starts easily and runs smoothly.
Adding too much oil to a snow blower, or any 4-cycle engine, will cause the oil to rise and come in contact with other moving parts around the engine, aerating the oil and creating a huge mess.
According to Christ Urato, owner-operator of Urato Landscaping, LLC, you should perform a snow blower oil change “after the first 5 hours of use for new snow blowers, then every 20 to 50 hours of operation or once per season, depending on usage.”
A well-maintained snow blower should last around 10 to 15 years, but actual lifespan will depend on build quality and frequency of use. Performing regular maintenance tasks and avoiding common snow blower mistakes will help your machine last as long as possible.
“Yes, running it dry prevents stale fuel from gumming up the carburetor and causing maintenance issues,” says Chris Urato, a landscaper and snow-removal provider from Goshen, New York.
If you have a gas snow blower, you can give it 2 to 5 minutes before use so oil has time to run through the engine and lubricate it. If you have a battery-powered blower, there’s no need to let it warm up.
The post Keep Your Snow Blower Running Efficiently With These High-Quality Oil Options appeared first on Bob Vila.
]]>The post We Cleared Nearly 400 Feet of Pavement to Find the 10 Best Snow Blowers appeared first on Bob Vila.
]]>When snowflakes start to fall, it can be tempting to run out and buy the first snow blower that fits your budget. After all, these specialized tools make it much easier to tackle tough snow-clearing tasks. However, it’s worth taking a little time to learn which machine will work best for your climate and specific driveway and walkways rather than snapping up the first one you see. To help make the process much quicker, we used over 35 top models to remove snow and ice from hundreds of feet of pavement and gravel.
Our top pick? The Troy-Bilt 2890 Storm Tracker—a powerful machine with excellent traction, a wide clearing path, and an easy-to-maneuver touch-sensitive steering system. Depending on how much snow you typically receive and whether your property is flat or sloped, this may or may not be the ideal model for you. Keep reading to learn more about all of the best snow blowers that made our list and get helpful insights from an expert in the snow blower industry.
- BEST OVERALL: Troy-Bilt 2890 Storm Tracker Snow Blower
↓ Jump to Review - BEST BANG FOR THE BUCK: PowerSmart Two-Stage Gas Snow Blower
↓ Jump to Review - UPGRADE PICK: Cub Cadet 2X 30″ Max Snow Blower
↓ Jump to Review - BEST BATTERY: Ego Power+ 24″ Snow Blower With Peak Power
↓ Jump to Review - BEST SINGLE-STAGE ELECTRIC: Snow Joe 48V 18″ Ionmax Single-Stage Snow Blower
↓ Jump to Review - BEST TWO-STAGE ELECTRIC: Toro 24″ Power Max e24 60V Two-Stage Snow Blower
↓ Jump to Review - BEST HEAVY-DUTY: Toro Power Max HD 828 OAE Two-Stage Gas Snow Blower
↓ Jump to Review - MOST VERSATILE: Ryobi 40V HP Two-Stage Self-Propelled Snow Blower Kit
↓ Jump to Review - ALSO CONSIDER: Troy-Bilt Storm 2600 Two-Stage Snow Blower
↓ Jump to Review
Snow Blower Comparison Chart
| Product Name | Type | Width | Self-Propelled |
| Troy-Bilt 2890 Storm Tracker Snow Blower | 2-stage | 28 inches | Yes |
| PowerSmart Two-Stage Gas Snow Blower | 2-stage | 24 inches | Yes |
| Cub Cadet 2X 30″ Max Snow Blower | 2-stage | 30 inches | Yes |
| Ego Power+ 24″ Snow Blower With Peak Power | 2-stage | 24 inches | Yes |
| Snow Joe 48V 18″ Ionmax Single-Stage Snow Blower | Single-stage | 18 inches | No |
| Toro 24″ Power Max e24 60V Two-Stage Snow Blower | 2-inches | 24 inches | Yes |
| Toro Power Max HD 828 OAE Two-Stage Gas Snow Blower | 2-stage | 28 inches | Yes |
| Ryobi 40V HP Two-Stage Self-Propelled Snow Blower Kit | 2-stage | 22 inches | Yes |
| Troy-Bilt Storm 2600 Two-Stage Snow Blower | 2-stage | 26 inches | Yes |
Our Top Picks
To help you select the right snow blower, each of the following reviews details important aspects like fuel source, surface compatibility, clearing width and depth, and ease of use. They also discuss unique insights gained from our hands-on tests so you can find the best fit.
Best Overall
Troy-Bilt 2890 Storm Tracker Snow Blower
What We Like
- Excellent traction on loose and icy surfaces
- Broad 28-inch-wide swath
- Touch N’ Turn power steering
What We Don’t Like
- Track system makes it more expensive
Specs
- Type: 2-stage
- Width: 28 inches
- Self-propelled: Yes
The Troy-Bilt Storm Tracker makes clearing snow on paved, gravel, or dirt surfaces easier than ever. With its 28-inch clearing width, powerful auger and drive system, and tracks for superior traction, this machine is an absolute beast in big storms. The 272 (cubic centimeter) cc motor has plenty of power for big jobs, and the many drive settings allow for perfect speed control. The pull-cord start required only one or two pulls, and the electric start fired immediately.
During our tests on loose substrate, this snow blower with tracks maintained excellent surface contact and pushed forward with ease. The same was true on icy surfaces. It has adjustable skids to set the lower blade height, and its settings adjust even further with a lever that quickly raises or lowers the blade. When working through gravel and rocky areas, this user-friendly system was a huge benefit.
What our tester says: “Even on ice, the tracks maintained traction, and having multiple speed settings helped me find the right pace to keep moving forward. I was able to crawl, hit a moderate speed, or move quickly. I also really like this unit’s extras, like heated grips, trigger turn tabs on the handle, and easy chute controls.”—Zach Lazzari, Product Reviews tester and writer
Read our full review: Troy-Bilt 2890 Storm Tracker Snow Blower
Get the Troy-Bilt 2890 snow blower at The Home Depot, Walmart, Northern Tool + Equipment, or Troy-Bilt.
Best Bang for the Buck
PowerSmart Two-Stage Gas Snow Blower
What We Like
- Great price compared with other 2-stage models
- Powerful enough to clear large driveways
- Self-propelled design easily clears snow up to 10 inches
- 180-degree adjustable chute and push-button electric start
What We Don’t Like
- Narrower intake means more passes
- Reduced traction on steep inclines and ice
Specs
- Type: 2-stage
- Width: 24 inches
- Self-propelled: Yes
Budget-minded shoppers will want to take a close look at the PowerSmart two-stage snow blower, a model that offers many desirable features found in higher-end models at a more modest price. While it may not be the best choice for especially extreme conditions, it’s plenty capable of clearing the occasional big storm and all light-to-medium snow loads.
With an intake height of 20 inches and a high-speed impeller that works well in dense snow, this machine performs well in dense snow. It also excels on uneven surfaces and inclines, thanks to a quality drive system that includes reverse options. During testing its 208cc engine ran smoothly, and the electric star made it easy to fire up eerie time. Once we were clearing, it even threw snow through the adjustable chute with power that matched models costing twice as much.
This model stands out as one of only a few low-cost snow blowers deliver both powerful performance and user-friendly functionality. It’s only slightly more expensive than a heavy-duty electric snow shovel, yet it’s more than enough machine to clear the average driveway with ease.
Get the PowerSmart snow blower at Amazon or PowerSmart.
Upgrade Pick
Cub Cadet 2X 30" Max Snow Blower
What We Like
- Powerful 357cc gas engine
- Heavy-duty construction
- Power steering for easy maneuvering
- Cozy hand warmers in the grips
What We Don’t Like
- Not a budget-friendly model
Specs
- Type: 2-stage
- Width: 30 inches
- Self-propelled: Yes
For those with consistently high snow removal needs, Cub Cadet’s 2X 30-inch gas-powered snow blower might be the answer. Equipped with a 357c engine, a two-stage removal system, and self-propelled wheels, this large model is built to power through heavy snow with minimal effort. Its heavy-duty construction features a rotating steel chute with easy-access angle controls built into the top panel, plus onboard headlights for safety and visibility during snowy nights or early mornings.
Yes, the Cub Cadet is expensive—but during testing, it proved its worth. We pushed it through our heaviest snowdrifts and banks, and it powered through without hesitation. Its power steering and 16-inch knobby tires made it easy to maneuver (even in deep snow), and the large engine delivered power far beyond every other model we tested. We also really like the heated hand grips, but who wouldn’t? If you need a capable snow blower for big jobs and deep snow, the Cub Cadet is an excellent option.
Get the Cub Cadet snow blower at The Home Depot or Cub Cadet.
Best Battery
Ego Power+ 24" Snow Blower With Peak Power
What We Like
- Electric motor is powerful yet quiet
- Throws snow up to 50 feet
- User-friendly operation
What We Don’t Like
- Can stall if overloaded too quickly
Specs
- Type: 2-stage
- Width: 24 inches
- Self-propelled: Yes
Whether snow is piling up on a sidewalk, patio, or even a gravel driveway, this battery-powered snow blower is powerful enough to push through. We were initially skeptical about its capabilities, but its two-stage system had no problem scooping and throwing snow up to 50 feet, and the self-propelled wheels made it incredibly easy to maneuver. The batteries on this unit provide enough power for up to 135 minutes before needing recharging, providing ample time for most jobs. While it weighs more than many other electric models, the powerful drive system handles the extra pounds easily. It also has a generous 200-degree adjustable chute and bright onboard headlights for increased safety and visibility.
As much as we liked this model, operating it took a little getting used to since the throttle and auger controls are reversed from normal. Once we got the hang of it, we found adjusting the throttle from “eco” to “turbo” allowed it to handle everything we threw at it. Still, running it on eco mode generally provided enough power for standard clearing and also helped maximize runtime. While we did experience a stall when we buried the auger in extremely heavy snow too quickly, this wasn’t an issue when we ran things at low speed.
What our tester says: “We’re big fans of this Ego electric snow blower. It’s so much quieter than gas snow blowers, and we thought it was incredibly easy to use. It also throws snow so far that you almost have to be careful where you aim it.”—Zach Lazzari, Product Reviews tester and writer
Get the Ego snow blower at Amazon, Lowe’s, Ace Hardware, or Northern Tool + Equipment.
Best Single-Stage Electric
Snow Joe 48V 18" Ionmax Single-Stage Snow Blower
What We Like
- Includes 2 rechargeable 24-volt batteries
- Quadruple-bladed steel auger
- Moves up to 10 tons of snow per charge
- 180-degree adjustable snow chute
What We Don’t Like
- Plastic blade may chip on hard objects
Specs
- Type: Single-stage
- Width: 18 inches
- Self-propelled: No
If you’re seeking an economical single-stage snow blower with plenty of power, simple operational features, and great performance, this could be the model for you. Powered by two rechargeable 24-vot batteries, this Snow Joe delivers up to 40 minutes of runtime to move more than 10 tons of snow per charge.
Weighing just 39 pounds, this cordless snow blower is easy to push around and manage. While it doesn’t have a drive or propulsion system, the 18-inch rubber-tipped auger helps it move forward while working through snow. This large auger also aids it in cutting a10-inch-deep path noticeably faster than some other models we tested. It throws snow well past the 20-foot mark claimed by the manufacturer and has a helpful set of LED headlights to increase visibility in dark conditions.
As an affordable, electric single-stage model, the Snow Joe proved functional and consistent in a variety of conditions. The batteries also charged quickly (about 2 hours), making it possible to get back up and running without long delays. We didn’t need to wait through a recharge during testing, however, because the batteries lasted through each full session.
Get the Snow Joe snow blower at Amazon, Lowe’s, Walmart, Best Buy, or Snow Joe.
Best Two-Stage Electric
Toro 24" Power Max e24 60V Two-Stage Snow Blower
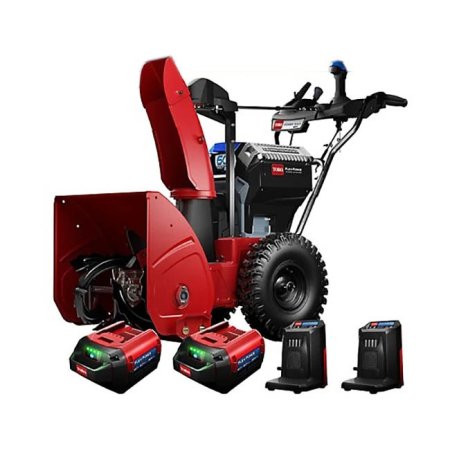
What We Like
- Consistent performance and features
- Auger doesn’t use shear pins
- Reliable performance and control
What We Don’t Like
- Requires long battery recharging between uses
Specs
- Type: 2-stage
- Width: 24 inches
- Self-propelled: Yes
Though it’s electric, this model’s body, auger, and overall design are an exact match to the gas-powered models in the Toro lineup. Other than its quiet and fume-free battery operation, it features the same exceptional controls, durable steel auger, and great features and functions of the gas versions. It delivers an equally reliable performance and impressive ability to churn through snow yet doesn’t require the same amount of maintenance as a gas machine.
During testing, we ran this unit for over 30 minutes using just one battery. Adding a second battery provides over an hour of runtime, and adding a third extends its capabilities even more. Generally speaking, its features are similar to many of the other good electric snow blower options available, but it does offer a couple of distinct advantages. First, its all-steel auger doesn’t require shear pins. Instead, it has integrated protections to prevent overloading and damaging the auger and mechanical components without requiring the replacement of broken pins. Second, the option to purchase a third battery for the tray makes this model among the longest-lasting electric snow-clearing machines on the market.
Get the Toro e24 snow blower at Tractor Supply Co. or Toro.
Best Heavy-Duty
Toro Power Max HD 828 OAE Two-Stage Gas Snow Blower
What We Like
- Cuts a broad swath
- Can handle deep snow and slick surfaces
- Has an adjustable steel chute
What We Don’t Like
- Must manually adjust skids
Specs
- Type: 2-stage
- Width: 28 inches
- Self-propelled: Yes
Thanks to its joystick-like controls, wide coverage, and ability to handle deeper snowfall than many other two-stage models, the Toro Power Max 828 OAE snow blower is ideal for climates with heavy snowfalls every winter. Its large intake sits above the ground, enabling use on gravel and uneven surfaces, and it has a broad 28-inch swath that can clear snow up to 21 inches deep and throw it an impressive 45 feet.
During testing, this model performed exceptionally well. Its Quick Stick controls and power steering made one-handed turning easy, and its knobby 16-inch tires provided ample traction in slick conditions. The anti-clogging system efficiently managed snow intake to prevent delays, and its LED headlight was helpful for nighttime snow blowing. It also has solid skids to adjust blade height above the ground, making it suitable for rough terrain.
What our tester says: “It’s hard to overstate how nice the joystick controls were for moving the chute throw direction and angle. Between the joystick and all its other features, this Toro was a very close second to our top pick, and it only lost out because it was pitted against a track system with height-adjustment control. Otherwise, this model is an absolute beast that can charge through the biggest storms.”—Zach Lazzari, Product Reviews tester and writer
Get the Toro 828 snow blower at Tractor Supply Co. or Toro.
Most Versatile
Ryobi 40V HP Two-Stage Self-Propelled Snow Blower Kit
What We Like
- Changes direction easily
- Plenty of power in deep snow
- Intuitive controls and powerful drive system
What We Don’t Like
- Batteries need recharging after 30 minutes
Specs
- Type: 2-stage
- Width: 22 inches
- Self-propelled: Yes
Driveways come in all shapes and sizes, and they don’t all call for an extra-large snow blower. With a 22-inch-wide cutting path, this small snow blower Ryobi may not be as big as some of the models we tested, but it still makes a substantial dent on each pass. The tires have great traction, and the machine also has a steel auger, speedy drive system, and skids for raising the blade over gravel.
In testing, the Ryobi’s ease of use and ability to maneuver in tight spaces were a bonus. It turned and pivoted without resistance, and the drive system was powerful enough that we didn’t need to push much. According to the manufacturer, the batteries last up to 30 minutes, but ours went even longer in light snow. For the average driveway, that’s more than sufficient to get the job done, but for wet and heavy snow or large properties, it may make sense to pick up an extra battery to avoid waiting for a recharge.
What our tester says: “This two-stage brushless snow blower was such a big surprise in our tests that we were reminded just how valuable hands-on testing is. It delivered a ton of power and an impressive overall performance that we just wouldn’t have believed had we not experienced it ourselves.”—Zach Lazzari, Product Reviews tester and writer
Get the Ryobi snow blower at The Home Depot.
Also Consider
Troy-Bilt Storm 2600 Two-Stage Snow Blower

What We Like
- Electric-start feature
- Chunky tires are great for uneven or slippery surfaces
- Easy to access chute control
What We Don’t Like
- Shorter snow discharge than some
Specs
- Type: 2-stage
- Width: 26 inches
- Self-propelled: Yes
Anyone on the hunt for an all-around capable snow blower may want to check out the Troy-Bilt Storm 26-inch snow blower. This gas-powered model can handle small properties while being heavy-duty enough to hold its own on large ones. It features two self-propelled drive wheels with big, chunky tires for plenty of surface grip. Also, the electric start makes firing it up a breeze.
Overall, we enjoyed using the Troy-Bilt Storm. We liked that the chunky tires offered plenty of grip—even on loose, grainy snow. We also liked that the chute controls, including angle and trajectory, were easily accessible from the control panel. While it doesn’t seem to throw snow as far as other models, it was very effective at removing plowed snow from the end of a driveway. Also, starting this model was very easy; it started on the first pull almost every time.
Get the Troy-Bilt 2600 snow blower at The Home Depot, Walmart, or Troy-Bilt.
Jump to Our Top Picks
How We Tested the Best Snow Blowers
Because we were testing some serious machines for this guide, we needed to wait for a real winter storm to try them out. Once 10 inches of heavy, wet snow was on the ground, we used these tools to clear two 75-foot-long, 4-car driveways, about 200 feet of sidewalk, several small walkways, and the plow-piled snow at the ends of both driveways. We also ran the snow blowers over a loose gravel driveway and a compact gravel road to test their abilities on challenging terrain.
We tested ease of use for pull-cord and electric starters and runtime for battery-powered models. We noted snow discharge range, maneuverability, power, control, and the value added by extra features like heated grips and LED lights. We gave points based on a rubric and assigned worthy machines relevant awards.
What to Consider When Choosing a Snow Blower
According to Wes Bollingmo, Channel & Product Support Manager at the well-respected outdoor tool company Toro, asking yourself a few simple questions is a great way to go about choosing a snow blower.
“The key to finding the ‘best’ snow blower for any homeowner is assessing your space. Ask yourself: How large is the area you need to clear? What type of surface do you need to clear? What kind of slope does your driveway have? How much snow typically falls? These answers should narrow down your search better than just looking at a price tag,” he says.
Types of Snow Blowers
Many people first think about snow blowers in terms of how wide a path they can clear, which is important—especially for large properties. However, perhaps a higher priority is choosing the type of snow blower best suited to the snow typical to your region and the surfaces you intend to use it on. Understanding terms like “single-stage,” “two-stage,” or “three-stage” is key to ensuring you choose the right machine for your needs.
Single-Stage Snow Blowers
Single-stage snow blowers, also called “snow throwers,” use a simple yet effective design. They have a horizontal auger at the front that rotates rapidly, generating sufficient force to scoop up snow and toss it through the chute. Most single-stage blowers can clear an 18- to 21-inch swath of light, fluffy snow, and they’re available in both gas and electric models.
While single-stage snow blowers work well for smaller spaces, their design has limitations. They generally do not generate sufficient power to blow the snow more than 15 to 20 feet away, meaning they aren’t ideal for wide driveways. Also, their auger blades skim the ground during operation, which makes them effective for clearing flat paved areas but poor snow blowers for gravel driveways since they tend to pick up small rocks and toss them out the chute.
Two-Stage Snow Blowers
Two-stage snow blowers feature a powerful impeller fan that works in combination with an auger to draw in snow and forcefully throw it out the chute. Depending on the power of the fan on a particular model and the weight of the snow, a two-stage snow blower can shoot snow over 35 feet.
In addition to handling fluffy snow, two-stage blowers can also handle wet snow and clear swaths ranging from approximately 20 inches to 30 inches (or more). Unlike their single-stage counterparts, two-stage snow blowers are suitable for use on gravel driveways because their auger blades don’t touch the ground.
Three-Stage Snow Blowers
Three-stage snow blowers are the big boys in the snow removal world. In addition to an auger and impeller fan, they feature an accelerator that grinds chunks of ice and powerfully expels snow and slush from the chute. It’s not unusual for a three-stage blower to throw lightweight snow a distance of more than 40 feet.
These muscle-bound machines can clear paths as wide as 30 inches depending on the specific model. For those with truly heavy-duty snow removal needs, a three-stage blower might be the machine for the job. While these models are often very expensive, buying a three-stage snow blower may be more economical than paying the cost of snow removal for large properties that get a lot of heavy snow.
Terrain Type
Removing snow from flat sidewalks and driveways is a straightforward process with most snow blowers, but trying to push a heavy snow blower up an incline can be a workout for even the most physically fit.
If there’s a slope to maneuver, consider buying a self-propelled snow blower. With this snow blower type, the wheels pull the machine forward, so all that’s necessary is to guide the machine and follow along. If a gravel driveway needs to be cleared, make sure the machine is a two-stage or three-stage snow blower to prevent throwing rocks.
Fuel
Like most outdoor-maintenance machines, snow blowers might run on electricity, gas, or diesel. Each option has its benefits and drawbacks.
- Electric-powered snow blowers are typically small, affordable single-stage machines intended to clear light snow up to about 12 inches deep. They need to be plugged into an outlet with an extension cord. This limits their performance and range, making them best suited for those who receive minimal snowfall and have relatively short sidewalks and driveways.
Electric-powered snow blowers are also handy for clearing snow from decks and steps because they’re lightweight enough to lift and move. A bonus: These machines don’t create fumes and don’t raise concerns about where to store fuel.
- Gas- and diesel-powered snow blowers boast a lot more power than electric blowers, and they don’t restrict their operators to the length of an extension cord. With a blower like this, it’s possible to clear deep and heavy snow all along a driveway and then continue down the sidewalk to clear a neighbor’s drive as well.
- Battery-operated cordless snow blowers are relatively new to the snow removal market and quite promising. They benefit from fume-free operation like electric blowers, but they don’t need an extension cord. That said, their runtime is usually limited to around 30 to 40 minutes before the high-capacity battery needs recharging. However, in many cases, they can continue past 30 minutes if the user swaps in a spare battery.
Clearing Width
Single-stage snow blowers (also known as “snow throwers”) are designed to remove snow in swath widths ranging from around 18 inches to 21 inches. Two-stage snow blowers will clear snow in a swath up to 30 inches wide, and three-stage snow blowers stay consistent at 30 inches wide, though they move faster thanks to their accelerators.
Weight
Corded electric snow blowers are typically the lightest, generally weighing between 26 to 38 pounds, followed by cordless snow blowers at anywhere from 30 to 69 pounds. Gas-powered snow blowers are in the heaviest category and can weigh 100 to 350 pounds or more.
Wheels vs. Tracks
Snow can be slippery, especially if it has a chance to melt slightly and then refreeze. This can make it hard for even self-propelled snow blowers to power through, but this is where track-drive snow blowers shine.
Instead of wheels that can lose traction when maneuvering through heavy or slippery snow, the tracks on a track-drive model dig in and help pull the machine along. Another difference is in price: A gas-powered snow blower runs an average of $500 to $2,000, with track-drive blowers in the upper end of that range and extending beyond.
Additional Features
Some of the best snow blowers include extra features that make the work easier and more comfortable. Accessories designed to elevate the experience of using a snow blower include:
- Heated handles to keep cold hands warm in frigid temps
- Lights, which enable snow clearing to begin before dawn or after dark
- Speed controls to adjust how quickly the self-propelled wheels turn
- Automatic safety shutoff for when the handles get released to prevent a loss of control
- Electric starters, which allow for pull-free starts and less strain
FAQs
We’ve covered a lot of information about the best snow blowers, but to avoid making common snow blower mistakes, it’s smart to review the answers to the following frequently asked questions before making a final decision.
The terms “snow blower” and “snow thrower” are used interchangeably, but there are some technical differences. While both clear away snow, a snow thrower is a single-stage machine, and a snow blower can be a single-stage, two-stage, or three-stage machine. Generally speaking, snow blowers clear a wider swath and are better suited for heavier snow, while snow throwers work best on light snow.
A good snow removal tip is to use a snow blower just after the snow has stopped falling when it’s still light and fluffy. Make uniform passes down and back on the sidewalk or driveway, adjusting the discharge chute as necessary to toss the snow off the surface.
You may have to pull a manual recoil cord to start a gas snow blower, although many have a push-button start these days. Cordless and electric models start at the push of a button.
Since a dirty carburetor can keep a gas-powered snow blower from starting or cause it to emit dirty, smoky exhaust, cleaning your carburetor is a proper part of snow blower maintenance. A carburetor cleaner will dissolve the gunk and debris so your machine will run more smoothly. To clean the carburetor, you’ll need to remove its cover, a process which may be different depending on the make and model. Consult your owner’s manual to find out how to reach the carburetor.
The best spot to store a snow blower is in a garage or storage shed during the summer and when it’s not in use. If you don’t have the extra space, you can store it outside under a waterproof tarp.
The number of years a snow blower should last will depend on its build quality, frequency of use, and quality of maintenance and care. Generally speaking, most machines should last between 10 to 15 years or longer. If your snow blower won’t start or you’re having other issues well before this time, check your owner’s manual for troubleshooting tips or contact the manufacturer to see if it’s still under warranty.
While you can pick up one of the best cheap snow blowers for less than $500, you may need to spend a bit more if you get a lot of wet, heavy snow or have a large property. The models on this list cost between $400 and $1900, and there’s a strong chance one of them will be ideal for your needs.
The best time to buy a snow blower will vary depending on your priorities. If getting the exact model you want matters most, starting to shop as early as May is smart since inventory levels will be high. If you’re looking for the best price, however, months further into winter like January or February may be best. You can check out our tips on how to remove snow from a driveway without a shovel if you don’t want to buy anything until the unit you have your eye on goes on sale.
Meet the Tester
Zach Lazzari is a freelance writer splitting time between the great outdoors, travel, and DIY projects ranging from camper builds to home renovations and maintenance. His home base in Montana is the perfect testing ground for winter products and snow equipment. With over a decade of professional writing experience, he also covers a variety of other projects and maintenance topics for BobVila.com.
Additional research provided by Glenda Taylor and Tom Scalisi.
The post We Cleared Nearly 400 Feet of Pavement to Find the 10 Best Snow Blowers appeared first on Bob Vila.
]]>The post Our Favorite Garage Floor Coating Cures in 24 Hours appeared first on Bob Vila.
]]>A quality garage floor coating offers several valuable benefits. It’s particularly good at protecting a concrete floor, which otherwise can flake and crack. Some coatings provide added grip, making the garage floor safer. It can also make the floor easier to clean and improve appearance, which may increase the value of your home.
The challenge is choosing the right garage floor coating to complement how you use the space. Several types are available, from easy-to-apply latex floor paint to more DIY-intensive epoxy kits. To help you find the best option for your space, we researched dozens of highly rated garage floor coverings and compiled a list of the best. Our favorite is the Rust-Oleum RockSolid Garage Floor Coating due to its extreme durability and wide range of color choices.
We also interviewed Dan Thrasher, CEO of Hello Garage, headquartered in Papillion, Nebraska, for his expert insight on choosing and applying a long-lasting floor finish. Read on for a curated list of the best garage floor coatings, as well as key shopping insights.
- BEST OVERALL: Rust-Oleum RockSolid Garage Floor Coating
↓ Jump to Review - BEST BANG FOR THE BUCK: Kilz 1-Part Epoxy Concrete & Garage Floor Paint
↓ Jump to Review - BEST POLYUREA: Master Protective Coatings Polyaspartic Floor Coating
↓ Jump to Review - BEST EPOXY: Rust-Oleum EpoxyShield Garage Floor Coating Kit
↓ Jump to Review - BEST LATEX: Drylok Low Sheen Latex Concrete Floor Paint
↓ Jump to Review - BEST NONSLIP: Rust Bullet DuraGrade Concrete Coating
↓ Jump to Review - BEST SEALER: Seal-Krete Clear-Seal Concrete Protective Sealer
↓ Jump to Review
| Type | Coverage | Ease of Application | |
| Rust-Oleum RockSolid Garage Floor Coating | Unique combination of epoxy, polyurea, and urethane | 450 to 500 square feet | Moderate |
| Kilz 1-Part Epoxy Concrete & Garage Floor Paint | Epoxy acrylic | 300 to 500 square feet | Easy |
| Master Protective Coatings Polyaspartic Floor Coating | Polyaspartic polyurea | Up to 200 square feet per gallon | Moderate |
| Rust-Oleum EpoxyShield Garage Floor Coating Kit | 2-part epoxy | 200 to 250 square feet | Moderate |
| Drylok Low Sheen Latex Concrete Floor Paint | Latex with ceramic additives | 300 to 400 square feet | Easy |
| Rust Bullet DuraGrade Concrete Coating | Polyurethane | Up to 350 square feet | Easy |
| Seal-Krete Clear-Seal Concrete Protective Sealer | Acrylic with urethane | Up to 300 square feet | Easy |
Our Top Picks
We thoroughly researched the following best garage floor coatings on the market for DIY application. Each of these recommendations has been assigned a category so that you’ll have quick and easy access to information relevant to your needs.
Best Overall
Rust-Oleum RockSolid Garage Floor Coating
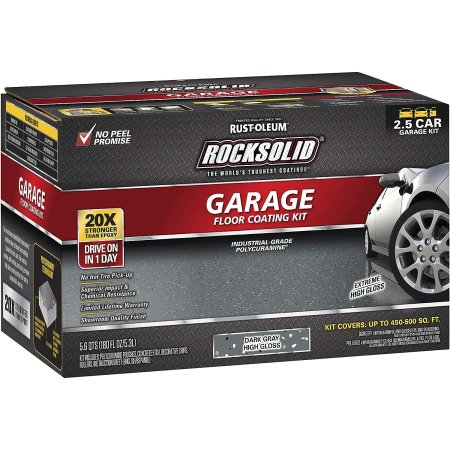
What We Like
- Self-leveling formula is 20 times tougher than epoxy
- Low-odor and eco-friendly coating
- Vehicle-ready in 24 hours
- 6 high-gloss colors available
What We Don’t Like
- Pricey compared to other options
- Some buyers report patchy results
Specs
- Type Unique combination of epoxy, polyurea, and urethane
- Coverage 450 to 500 square feet
- Ease of application Moderate
Rust-Oleum claims its RockSolid garage floor coating is 20 times tougher than epoxy alone. It uses a proprietary combination of epoxy, polyurea, and urethane called Polycuramine. In addition to durability, the polyurea and urethane elements make it one of the best crack sealers we found. It comes in easy-to-mix burst pouches, is available in six high-gloss colors, and includes decorative chips (though their use is optional).
We like that Rust-Oleum RockSolid is self-leveling with low odor and low VOCs. You can walk on it in around 8 to 10 hours, and it can be driven on in 24 hours. Once cured, it’s resistant to oils, fuels, and most chemicals.
While this is probably the most durable DIY garage floor coating, careful preparation is a must. Complaints are rare, but this product is comparatively expensive, and some buyers felt the number of feet of coverage wasn’t as high as advertised.
Get the Rust-Oleum RockSolid garage floor coating at Amazon, The Home Depot, Walmart, or Menards.
Best Bang For The Buck
Kilz 1-Part Epoxy Concentrate & Garage Floor Paint

What We Like
- Water-based product has low environmental impact
- Comes at a budget-friendly price
- Helps prevent concrete from cracking, peeling, or blistering
- Can be applied indoors or outdoors
What We Don’t Like
- One week drying time before vehicle traffic
- Must wait 30 days before cleaning
Specs
- Type Epoxy acrylic
- Coverage 300 to 500 square feet
- Ease of application Easy
Kilz single-part epoxy garage floor paint is as easy to use as ordinary household paint but is tougher thKilz single-part epoxy paint for garage floors is as easy to use as ordinary household paint but is tougher thanks to the addition of epoxy. Apply it straight from the can using a brush, pad, roller, or spray gun. It’s water-based, so cleanup just requires soap and water. The basic color range is limited to white and two grays.
Kilz epoxy acrylic can be walked on in 24 hours but should be left a week for tire traffic. While it isn’t as hard-wearing as two-part epoxy, it does offer good scuff resistance and helps stop common problems with concrete like cracking, peeling, and flaking. Given the very competitive price, it is an ideal floor coating for low-use garages.
What our tester says: Glenda Taylor, a Bob Vila staff writer and product tester, notes in the Best Concrete Paint that “this concrete floor paint from Kilz applies as easily as latex paint (no mixing here) but has the high-durability characteristics of an epoxy product. It withstood both water and abrasion resistance testing.”
Get the Kilz garage floor coating at Amazon, Lowe’s, or Walmart.
Best Polyurea
Master Protective Coatings Polyaspartic Floor Coating
What We Don’t Like
- Recommended for high-use garage floors
- Crystal-clear finish won’t yellow over time
- Offers excellent adhesion to surfaces
- Provides unrivaled chemical and abrasion resistance
What We Don’t Like
- Requires time-consuming preparation
- Contains toxic, solvent-based ingredients
Specs
- Type Polyaspartic polyurea
- Coverage Up to 200 square feet per gallon
- Ease of application Moderate
Polyaspartic polyurea combinations are widely acknowledged as the toughest of garage floor coatings. However, complex application requirements mean that they are usually only available to professional installers. The Master Protective Coatings (MPC) two-part formula is one of few offered to DIY users. It is known for excellent adhesion to a variety of surface materials and creates an extremely hard-wearing barrier that is resistant to most oils, fuels, and chemicals. The finish is clear, high gloss, and does not fade or go cloudy.
Coverage will vary depending on the surface and is unlikely to exceed 200 square feet per gallon. This makes MPC polyaspartic polyurea quite an expensive option. While the application itself is not difficult, careful preparation of the floor is necessary, and once the two parts are mixed, it only remains workable for an hour. Both parts are solvent-based and contain toxic ingredients.
Get the Master Protective Coatings garage floor coating at Amazon.
Best Epoxy
Rust-Oleum EpoxyShield Garage Floor Coating Kit
What We Like
- Provides a long-lasting, hard-wearing surface
- High resistance to abrasion, gasoline, antifreeze, and more
- Can be applied with a brush or roller
What We Don’t Like
- Curing may be slow
- Some buyers reported parts failed to mix properly
Specs
- Type 2-part epoxy
- Coverage 200 to 250 square feet
- Ease of application Moderate
TTwo-part garage floor epoxy is a popular choice for concrete flooring thanks to its toughness and affordability. Rust-Oleum’s EpoxyShield provides a high-gloss finish, is available in three colors, and can be enhanced with the included decorative chips if desired. Once fully cured, which takes around 3 days, the surface is resistant to abrasion, motor oils, gasoline, antifreeze, and salt. It also helps prevent concrete from cracking.
Rust-Oleum EpoxyShield is water-based, so cleanup is easy. It’s both low odor and low VOC; however, the packaging warns that it can burn eyes and skin, so care is needed. Working time is around 2 hours when mixed (depending on ambient temperature), so it’s more forgiving than some, though it’s still important to follow instructions carefully.
Get the Rust-Oleum EpoxyShield garage floor coating at Amazon, The Home Depot, Ace Hardware, or Walmart.
Best Latex
Drylok Low Sheen Latex Concrete Floor Paint

What We Like
- All-in-1 concrete primer and paint with low-VOC formula
- Creates a low-glare, anti-slip surface
- Ceramics added for improved wear resistance
- Offered in a variety of colors
What We Don’t Like
- Periodic recoating will be necessary
Specs
- Type Latex with ceramic additives
- Coverage 300 to 400 square feet
- Ease of application Easy
Most people know latex paint as a decorative wall covering. The paint can be attractive but is not durable enough for floors. Drylok’s latex concrete floor paint overcomes the problem with what the company calls a ceramic x-linking formula, providing added toughness. It is ready to use straight from the can, doesn’t need a primer, and is easy to apply with a brush or roller.
This multisurface coating is suitable for concrete, brick or block patios, and even wooden steps. It can be used indoors or out. The finish is non-reflective and also nonslip for added safety. It is dry enough for foot traffic after 24 hours but requires 5 days before it is ready for vehicle use.
Get the Drylok garage floor coating at The Home Depot or Walmart (2-pack).
Best Nonslip
Rust Bullet DuraGrade Concrete Coating
What We Like
- Hard-wearing coating, cures in 72 hours
- Anti-skid layer as an extra for maximum safety
- High resistance to impact, cracking, and abrasion
- Available in 18 colors, plus optional flakes
What We Don’t Like
- One of the more expensive coatings
- Can thicken dramatically if stored too long
Specs
- Type Polyurethane
- Coverage Up to 350 square feet
- Ease of application Easy
Slippery garage flooring can be a real danger for people who work in the space regularly. While several of the best garage floor coatings have nonslip properties, Rust Bullet is the only one that offers a specific anti-skid layer that can be added on top of the base polyurethane. It does involve extra cost, but it’s a relatively modest sum to ensure safety in a workshop or hobby area.
Rust Bullet DuraGrade can be applied directly to concrete and has excellent adhesion. It is scratch-, chip-, chemical-, impact-, abrasion-, and ultraviolet-resistant with low VOCs. No priming or etching is necessary, and it is easy to apply using a brush, roller, or spray equipment. There are 18 colors to choose from, and decorative chips can be added (though a clear top coat would then need to be applied).
Get the Rust Bullet garage floor coating at Amazon, Lowe’s, or Walmart.
Best Sealer
Seal-Krete Clear-Seal Concrete Protective Sealer

What We Like
- Creates a protective waterproof barrier
- Works on painted, stained, or bare concrete surfaces
- Water-based low-VOC acrylic fortified with urethane
- UV-, weather-, and chemical-resistant formula
What We Don’t Like
- Works on most but not all surfaces
- Some buyers experienced poor results
Specs
- Type Acrylic with urethane
- Coverage Up to 300 square feet
- Ease of application: Easy
One of the easiest and quickest ways to protect a garage floor is by using a sealer. Seal-Krete Clear-Seal penetrates the surface to help prevent flaking and peeling, plus it dries to provide a waterproof, stain-resistant barrier. It goes on milky and dries clear, enhancing the color of the underlying surface material. We appreciate that satin, low gloss, and gloss finishes are available and that it can be used on painted, stained, or bare concrete. Two coats may be necessary for optimal protection.
The low-VOC water-based nonyellowing formula has urethane added for greater durability. It is resistant to moisture, ultraviolet light, oil, salt, and chlorine, so Seal-Krete Clear-Seal can be used for the garage as well as outside on paths, patios, and pool surrounds.
Get the Seal-Krete garage floor coating at Amazon, Lowe’s, The Home Depot, Walmart, or Ace Hardware.
Jump to Our Top Picks
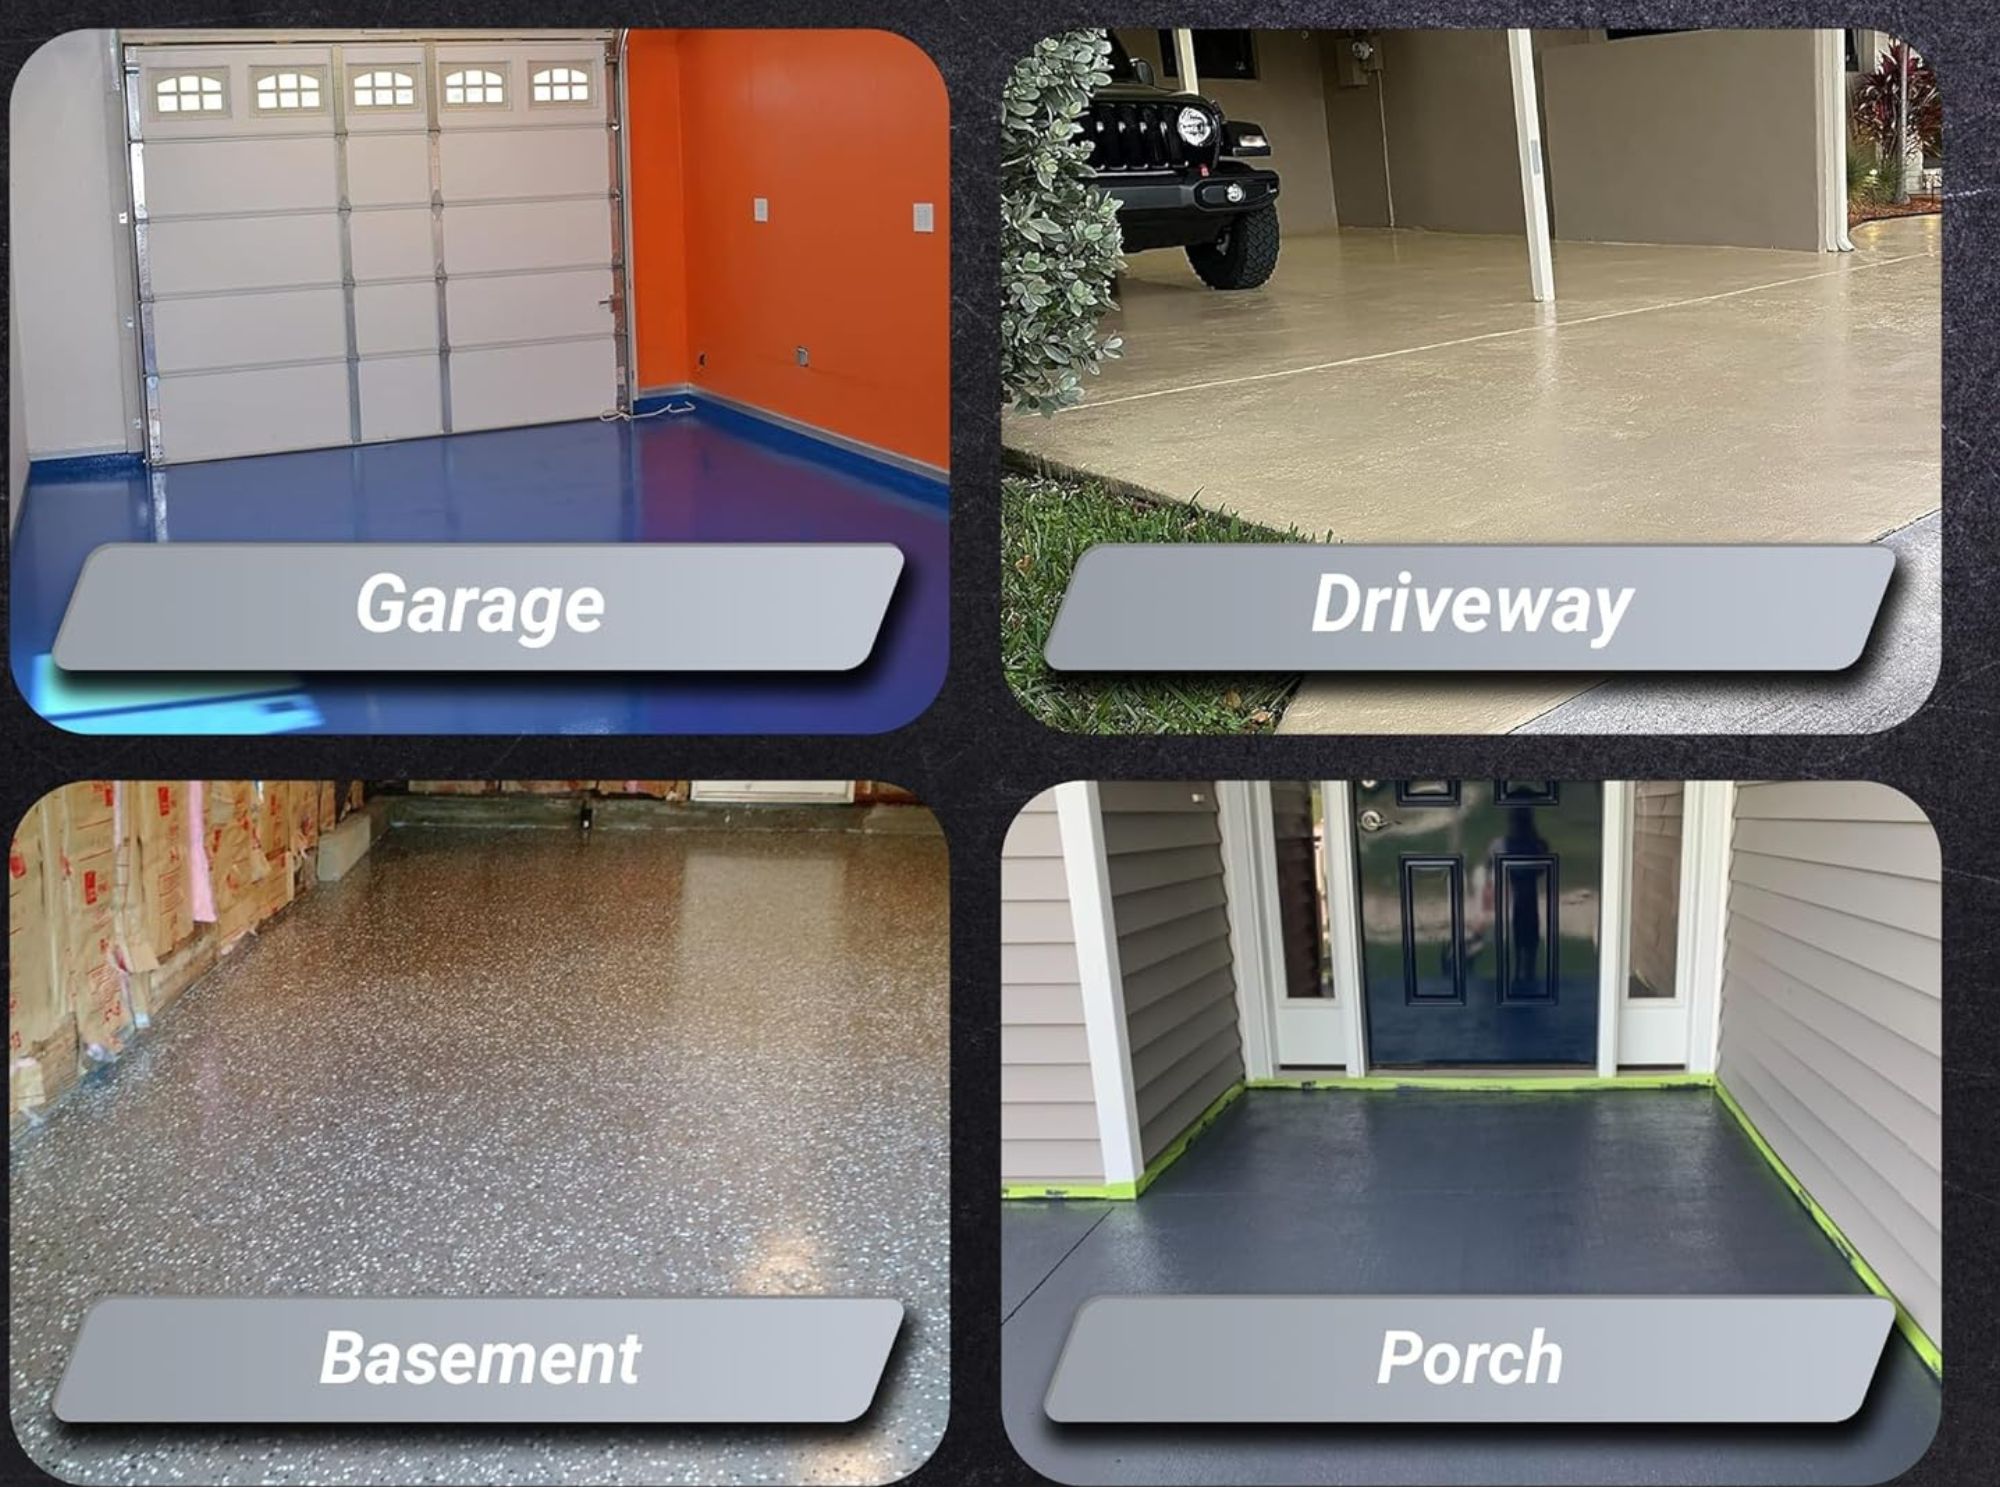
How We Chose the Best Garage Floor Coatings
People use their garages for many purposes. While some simply park their vehicles inside, others turn them into workshops, hobby or craft spaces, or dance or exercise studios.
During our research, we wanted to ensure we provided garage floor options for every purpose and budget. In collating this list, we looked at chemical composition, ease of application, coverage, durability, and color options. Price is always a major factor, but value for money isn’t just about low cost; the finish also needs to be hard-wearing.
Sustainability also had an impact. Where possible, we chose eco-friendly water-based products, though unfortunately, some of the toughest options are still solvent-based. In this case, we looked for low volatile organic compound (VOC) levels and low odor to maximize user safety.
What to Consider When Choosing a Garage Floor Coating
Garage floor coatings have many benefits. “The first is enhanced durability, your floor will be protected from wear and tear from vehicles and surface deterioration,” advises Thrasher. A good garage floor coating can also protect your concrete floor from stains, make it easier to clean, and improve the look of the space. However, not all coatings offer the same protection.
Different types of garage floor coatings have different chemical properties. It’s worth looking into the practicalities of applying them, how long they might be expected to last, each garage floor coating cost, and what they will look like before making a decision.
Ease of Application
Latex is the easiest to apply covering for garage floors. It’s very safe, has a low odor, is fast drying, and is easy to clean up. Most can be applied with a brush, roller, or spray gun and can be used straight from the can without a primer. Acrylic is similar, though it often takes longer to dry.
The unique polyurethane formula used by Rust Bullet is also easy to use, though it may require several coats and takes around 72 hours to fully cure. The term “cure” is used rather than “dry” because drying simply involves the evaporation of water, whereas curing means the product solidifies.
Epoxies are two-part products that need to be mixed before use. It’s important to follow instructions carefully for optimal results. Epoxy garage floor coatings take longer to cure, typically 7 days or more. Some are quite challenging to use, so it may be worth calling in the pros. Polyurea and polyaspartic coatings are not normally recommended for DIY use, though the occasional exception does exist.
As always, it’s vital to read instructions. Some of these products are flammable or produce noxious vapors. They may also be toxic. It’s advisable to wear eye protection and not to leave skin exposed.
Durability and Longevity
It’s important to consider how you use the garage while in the process of choosing the best garage floor covering. If you only use the garage for parking or storage, latex or acrylic coatings may suit your needs. The floor will probably have to be repainted every couple of years, but the job can be done in a day.
Spaces that are used frequently need tougher garage floor protection options, and epoxy is the most popular in terms of price and performance. It is resistant to oil, fuel, and many other chemicals and is usually easy to keep clean. While longevity will always vary depending on wear rates, it is reasonable to expect a garage floor epoxy coating to last 10 years.
Polyurea and polyaspartic coatings are super tough. In addition to the properties offered by epoxy, these are also impact-resistant. When installed properly, they can last 20 years or more in even the harshest environments.
Appearance
While gray and white are perhaps the most common choices for garage floors, today’s high-performance coatings are available in a wide range of colors as well as matte, satin, or high-gloss finishes. There are also optional “inclusions” (such as flakes) that can result in a very attractive surface.
Concrete sealers are often clear. Latex and acrylic usually come in fairly muted colors and a matte finish. The appearance options get more interesting with Rust Bullet’s polyurethane and with many epoxies. Bright colors are available, and chips can be added to give a high-quality Terraza-like appearance. Some have an inherently anti-skid surface for added safety, or they can be added as a top coat.
Types of Garage Floor Coatings
Understanding the performance of each finish type is a key aspect of finding the most suitable floor covering for garage floors. Some types are more hard-wearing than others, which will be important for those who use their garage frequently. For those who just want to smarten the place up, a finish that is cheaper and easier to apply may be a better choice.
Epoxy
Epoxy is one of the most popular choices for garage floor coatings. These are usually two-part products that need to be mixed before use. One-part epoxy also exists, but it is actually latex or acrylic paint with a small amount of epoxy resin added. The latter is easy to use and often very affordable, but it is nowhere near as durable.
Two-part epoxy is good at filling minor cracks and, once fully cured, can be extremely tough. “Do-it-yourself kits for epoxy floors are available at big box stores,” says Thrasher. “Most do-it-yourselfers could handle this type of installation because they offer a chemical etch to prep the floor.” However, some of the hardest-wearing types can be challenging to apply, so it may be worth contacting a professional epoxy garage floor installer if you aren’t confident in your abilities.
Polyurea
Technically speaking, polyurea is an elastomer made by combining isocyanate and amine (an ammonia derivative). In basic terms, it is a kind of polyurethane, a varied group of plastics known for toughness and elasticity. One of polyurea’s common uses is for making truck-bed liners.
Polyurea is resistant to water and most chemical spills. It cures reasonably quickly, creating a very hard-wearing barrier, and is a favorite in commercial situations. However, polyurea garage floor coatings are usually expensive and almost invariably require professional application. As a result, they are not something generally available to typical customers. That said, polyurea is sometimes combined with epoxy for DIY use.
Polyaspartic
Polyaspartic coating is an aliphatic (carbon-based) polyurea. Its main benefits are that it can be applied over a much wider temperature range (in some cases from -30 degrees Fahrenheit up to 140 degrees Fahrenheit), and it is usually more forgiving to work with than polyurea, which tends to dry and cure very quickly. Additionally, polyaspartic is unaffected by any moisture within concrete garage floors. According to Thrasher, it’s among the best choices for reducing cracks and hot tire pickup but requires proper floor preparation for adhesion.
A polyaspartic coating is usually crystal clear and won’t yellow over time. It adheres to concrete well and will penetrate deep cracks, though it shouldn’t be considered a concrete crack filler repair product. It has high stain and chemical resistance and high heat tolerance, too.
As with polyurea, polyaspartic coating costs are high and should be applied by a suitably experienced contractor.
Latex and Acrylic
Most people will be familiar with latex and acrylic as a decorative product for walls. These concrete floor paint finishes are usually water-based and, as a result, can be a more environmentally friendly option. Cleanup is easier than mineral or spirit-based alternatives. Generally speaking, concrete and garage floor paint are less expensive than other types of coatings.
Latex dries fast and is easy to apply, but it’s probably the least durable of these products and won’t prevent a concrete garage floor from cracking. Acrylic is equally user-friendly and a little tougher, with a higher percentage of epoxy that provides a degree of elasticity. However, it is more expensive than latex. Both are worth considering as a quick fix, though not for garages that are used for workshop or hobby purposes.
Cementitious Urethane
As you might guess from the name, cementitious urethane’s main components are cement and liquid urethane (a type of polymer). Water, aggregates, and a variety of other compounds may be added, though it’s usually necessary to look at technical specifications to find out which. It is self-leveling, creates a seamless surface that is stain- and chemical-resistant, and is easy to clean. However, it is expensive, needs to be installed professionally, and is more suitable for commercial applications.
Urethane is sometimes used in other formulations that are not cementitious, and these are perfectly OK for garage floors. Performance is similar to that of epoxy.
FAQs
We’ve provided comprehensive information to help you choose the best garage floor coatings for your space. A few questions that come up regularly are answered below.
The best color for a garage floor will often depend on how it is used. Dark colors hide dirt well. Bright colors reflect light better, so they are a good choice if the garage is used for work or hobbies. Neutral grays are a popular compromise. Leading brands of garage floor coatings often offer several alternatives, so it shouldn’t be difficult to find the color that meets your needs.
There are a number of garage floor paints available, and they are easy to apply with reasonably fast drying times. Painting a garage floor can be a good idea when it’s only used for parking vehicles, bicycles, or lawnmowers, but if it doubles as a workshop, something more durable may be preferred.
Polyurea and polyaspartic products generally offer the strongest garage floor finishes, but they are expensive and difficult to apply. It’s usually a job for a professional installer, which adds to the cost. Rust-Oleum RockSolid garage floor coating combines polyurea with urethane and epoxy, providing hard-wearing results from a coating suitable for DIY application.
The cheapest way to seal a garage floor is with an epoxy acrylic like Kilz garage floor coating or a concrete sealer like Seal-Krete garage floor coating. They are easy to use and deliver good all-around performance. However, there is a limit to their durability, and they may have to be applied more frequently than other products.
Garage floor coatings can improve the aesthetics and cleanability of your concrete floor. Some even have anti-slip properties, making the garage a safer place to work. Whether a garage floor coating is worth it depends on how often you use your garage, your budget, and your preferences.
Why Trust Bob Vila
Bob Vila has been America’s Handyman since 1979. As the host of beloved and groundbreaking TV series including “This Old House” and “Bob Vila’s Home Again,” he popularized and became synonymous with “do-it-yourself” home improvement.
Over the course of his decades-long career, Bob Vila has helped millions of people build, renovate, repair, and live better each day—a tradition that continues today with expert yet accessible home advice. The Bob Vila team distills need-to-know information into project tutorials, maintenance guides, tool 101s, and more. These home and garden experts then thoroughly research, vet, and recommend products that support homeowners, renters, DIYers, and professionals in their to-do lists.
The post Our Favorite Garage Floor Coating Cures in 24 Hours appeared first on Bob Vila.
]]>Drywall is light, affordable, and relatively easy to cut, hang, and repair when you have the necessary tools and supplies, such as drywall tape, drywall screws, and drywall saws. A handheld drywall saw or jab saw has a long, narrow blade with large teeth and a sharp tip specifically designed for cutting into drywall. These tools are affordable and easy to use, making them a great option for any DIYer’s tool box.
Trying to take on a drywall installation or repair project completely unprepared can lead to a difficult, time-consuming mess. Like all tools, you will want to find a drywall saw that is durable, accurate, and effective so that you can accomplish any drywall cutting tasks with relative ease. Take a look at this list of the best drywall saws to find a product that is suitable for your next home renovation or drywall repair project.
Best Overall
DeWalt DWHT20540 Jab Saw
Pros
- Comfortable contoured handle improves ease of use
- Aggressive tooth pattern increases cutting efficiency
- Useful for cutting drywall, plastic, and other soft building materials
- Durable, induction-hardened teeth stay sharp for longer
Cons
- Not suited for large, clean cuts
- Teeth may tear soft-sided tool bags
Specs
- Blade material Carbon steel
- Number of teeth 8 TPI
- Blade length 6 inches
One of the top considerations for every DIYer selecting a quality drywall saw is the design of the handle. This DeWalt drywall saw features a comfortable, padded grip with a contoured handle that minimizes hand fatigue so you can work for longer periods without worrying about your hand cramping up. Additionally, the aggressive tooth pattern makes it easier for the blade to slice through the drywall, reducing the amount of power it takes to control the tool.
At 6 inches in length, the blade of this DeWalt drywall saw is long enough to pierce through several sheets of drywall and make accurate cutouts for ceiling lights, electrical outlets, pipes, cables, or any other objects that might protrude. It can also be used for cutting plastic and other soft building materials thanks to the highly durable, induction-hardened teeth. Just make sure to store the drywall saw in a solid plastic or metal toolbox that can withstand wear and tear from the sharp teeth.
What our tester says: “The tip of the saw penetrates drywall easily, and the long triple-ground saw teeth cut into drywall cleanly without tearing the paper at the edges of the cut. I also found the cushioned handle comfortable, which made it easy for me to control the blade for straight or curved cutting.” -Mark Wolfe, Product Reviews tester and writer
Get the DeWalt Drywall Saw at Amazon, Home Depot, or Ace Hardware.
More Drywall Saws Worth Your Money

Whether for making cutouts in the ceiling for new lights or cutting out damaged patches of drywall for minor repairs, these quality drywall saws come highly recommended. Choose the tooth pattern and blade design that suits your next project, or opt for one of the folding drywall saws to make tool storage easier.
- Goldblatt Folding Jab Saw, available at Amazon, Floor & Decor, or Walmart.
- Irwin Tools ProTouch Jab Saw, available at Amazon, Lowes, or Walmart.
- Klein Tools Folding Jab Saw, available at Amazon, Lowes, or Acme Tools.
- Shark RockEater Drywall Saw, available at Amazon, Sharp Corp., or Hardware World.
- Great Neck Double Edged Drywall Saw, available at Amazon, AutoZone, or Hardware World.
How We Chose the Best Drywall Saws
In order to select the best drywall saws for this list, we researched and reviewed a wide range of products from the top tool manufacturing brands. From a pool of over 30 potential options we narrowed our choices based on durability, blade design, blade material, size, weight, and any additional features, such as a folding blade that would make it easier to store the drywall saw.
We aimed to choose a variety of blade styles and drywall saw designs to provide a diverse selection of top tools for this list. The price of each saw also influenced our assessment, though the most important factor we considered was the overall quality of each drywall saw. With this in mind, we eliminated products with weak blades, uncomfortable handles, and low durability until only the best drywall saws remained.
FAQs
Before starting the search for the best hand saw to cut drywall, it’s worth finding out as much as possible about drywall saws and the right methods for cutting drywall. Otherwise, you may invest in a drywall or wallboard cutting tool that isn’t suitable for the project or that can only be used for certain aspects of the job, like an adjustable drywall hole saw. Check out this list of frequently asked questions about drywall and drywall saws to round out your understanding.
Whether you need a special blade or not depends on the type of saw. When selecting a tool for cutting drywall it’s important to make sure the drywall cutting tool is equipped with a drywall blade for the best results. A utility knife is a common tool to cut drywall that can be used with the standard blade to make long, straight cuts. Similarly, drywall saws already have a specially designed blade for small, accurate cuts, though when paired with a drywall cutting blade, some of the best oscillating tools can also be used to make clean square cuts for those who prefer an electric drywall saw.
Rotary tools equipped with drywall cutting bits can be some of the best tools to cut drywall. Jesse Andrews, owner of New England Home Pros, says “an electric rotary tool like the Dremel, paired with a drywall bit, offers superior speed and control for large-scale projects or intricate patterns.” You can also choose between a jigsaw vs reciprocating saw if you are looking for an alternative power drywall cutter.
Jesse Andrews, owner of New England Home Pros, explains that “drywall and Sheetrock are terms often used interchangeably, though Sheetrock is a brand.” This means that while all Sheetrock is drywall, only some drywall should be considered Sheetrock. Other drywall products may be made using a different chemical composition and can range from low to high quality, but when you are cutting Sheetrock you know that this material is made with a specific formula and is widely considered to be a high-quality product.
Part of learning how to cut drywall is understanding which side of the material to cut. Typically, drywall will have a light finished side and a dark paper side. Jesse Andrews, owner of New England Home Pros, says “when cutting, start on the finished side for cleaner, more professional-looking results.”
The post This Tool is a Must-Have for DIY Renovation Projects appeared first on Bob Vila.
]]>The post Soak Off a Stressful Day in One of The Best Freestanding Tubs of 2025 appeared first on Bob Vila.
]]>Sure, a shower provides an efficient, refreshing way to get clean, but when it comes to real relaxation, it’s hard to beat a warm soak in a freestanding tub. All tubs are nice, but a freestanding tub is typically spacious and can serve as a bathroom focal point that’s as striking to look at as it is comfortable to loll in.
These tubs come in different shapes, sizes, and styles to suit a host of bathroom decor preferences. To find the best, we combed through dozens of user reviews and compared prices, features, and construction. After careful consideration, our top choice is the Empava 67-Inch Freestanding Soaking Bathtub. It offers plenty of leg room and depth for optimal relaxation and is made from lightweight but durable acrylic.
We also interviewed a plumbing expert for insight on choosing the right tub material and size, as this will vary based on a bathroom’s setup. Read on for the features to consider when shopping for one of these beautiful bath upgrades as well as our lineup of the best freestanding tubs.
- BEST OVERALL: Empava 67-Inch Freestanding Soaking Bathtub
↓ Jump to Review - BEST BANG FOR THE BUCK: Vanity Art 67-Inch Freestanding Bathtub
↓ Jump to Review - BEST WHIRLPOOL: Woodbridge Venezia 71-Inch Whirlpool Bathtub
↓ Jump to Review - BEST FOR TWO: Anzzi Lusso 75.5-Inch Man-Made Stone Bathtub
↓ Jump to Review - BEST CLAW-FOOT: AKDY Fiberglass Single Slipper Clawfoot Bathtub
↓ Jump to Review - BEST SMALL: Woodbridge 54-Inch Acrylic Soaking Tub
↓ Jump to Review - BEST LARGE: Woodbridge B1701 Acrylic Freestanding Soaking Bathtub
↓ Jump to Review - BEST RECTANGULAR: Vanity Art 59-Inch Freestanding Soaking Bathtub
↓ Jump to Review

| Style | Material | Dimensions | |
| Empava 67-Inch Freestanding Soaking Bathtub | Double slipper | Acrylic | 67 inches long by 29.5 inches wide by 26.5 inches tall |
| Vanity Art 67-Inch Freestanding Bathtub | Soaking tub | Acrylic | 67 inches long by 32.3 inches wide by 23 inches tall |
| Woodbridge Venezia 71-Inch Whirlpool Bathtub | Double slipper | Acrylic | 71 inches long by 31.5 inches wide by 29 inches tall |
| Anzzi Lusso 75.5-Inch Man-Made Stone Bathtub | Soaking tub | Man-made stone | 75.5 inches long by 40.5 inches wide by 23 inches tall |
| AKDY Fiberglass Single Slipper Clawfoot Bathtub | Single slipper | Acrylic | 59.8 inches long by 28 inches wide by 30.3 inches tall |
| Woodbridge 54-Inch Acrylic Soaking Tub | Single slipper | Acrylic | 54 inches long by 28.4 inches wide by 28.8 inches tall |
| Woodbridge B1701 Acrylic Freestanding Soaking Bathtub | Soaking tub | Acrylic | 71 inches long by 31.5 inches wide by 22.9 inches tall |
| Vanity Art 59-Inch Freestanding Soaking Bathtub | Soaking tub | Acrylic | 59 inches long by 29.5 inches wide by 23.6 inches tall |
Our Top Picks
Consider these top freestanding tubs selected from a range of options for their size, style, material construction, faucet compatibility, and overall value.
Best Overall
Empava 67-Inch Freestanding Soaking Bathtub
What We Like
- Features a built-in overflow system and pop-up drain
- Luxurious double-slipper design
- Double-walled construction helps keep water warm
- Deep 15-inch soaking depth
What We Don’t Like
- A freestanding or wall-mounted faucet is necessary
Specs
- Style: Double slipper
- Material: Acrylic
- Dimensions: 67 inches long by 29.5 inches wide by 26.5 inches tall
Update the bathroom with this attractive double-slipper freestanding tub by Empava. The acrylic construction is lightweight yet durable, so bathers can enjoy years of relaxing soaks. We like that it features a built-in overflow system, a pop-up drain for easy filling and emptying, and double-walled fiberglass reinforcement to retain water temperature. All of these features and the smooth, luxurious design and finish come at a fairly affordable price.
This contemporary freestanding tub measures 67 inches long by 29.5 inches wide by 26.5 inches tall, with a soaking depth of 15 inches for full-body immersion. Installing this tub requires a freestanding or wall-mounted faucet since the tub does not have a tap deck for faucet installation.
Get the Empava 67-inch freestanding tub at Amazon, The Home Depot, or Walmart.
Best Bang for the Buck
Vanity Art 67-Inch Freestanding Bathtub
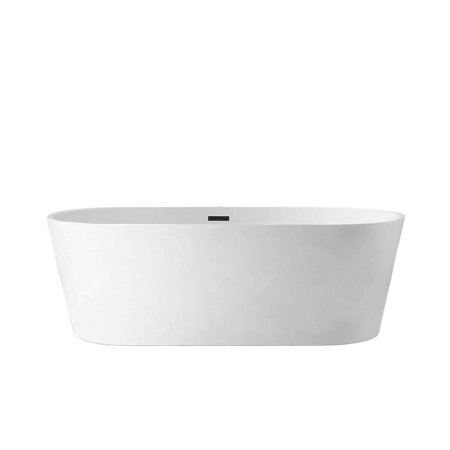
What We Like
- Long, 67-inch length
- Features a self-leveling base for stability
- Drain and overflow plate available in several finishes
- Competitively priced compared to similar options
What We Don’t Like
- Requires a freestanding or wall-mounted faucet
Specs
- Style: Soaking tub
- Material: Acrylic
- Dimensions: 67 inches long by 32.3 inches wide by 23 inches tall
A freestanding tub needn’t break the bank. Those looking for a competitively priced option that still delivers on quality and style will appreciate this Vanity Art tub. At 67 inches long and with a soaking depth of 16 inches, this tub provides plenty of space to stretch out and relax. Its contemporary design works with a number of bathroom styles, and its drain and overflow plate come in several popular finish options.
The Vanity Art tub is made of 100% glossy acrylic and reinforced with fiberglass, making it durable and easy to clean. Its self-leveling base provides stability on uneven floors. This tub doesn’t have a tap deck, so a wall-mounted or freestanding faucet is required.
Get the Vanity Art freestanding tub at Wayfair, Amazon, The Home Depot, or Lowes.
Best Whirlpool
Woodbridge Venezia 71-Inch Whirlpool Bathtub
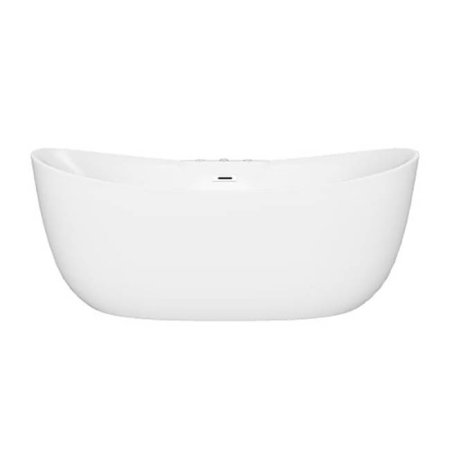
What We Like
- Adjustable back and foot massage jets
- Constructed with fiberglass reinforcement
- Bubbler jets provide a gentle air massage
- Stain-resistant exterior for easy cleaning
What We Don’t Like
- Lacks built-in faucet
Specs
- Style: Double slipper
- Material: Acrylic
- Dimensions: 71 inches long by 31.5 inches wide by 29 inches tall
This luxurious jetted tub features six adjustable body-massage jets and 10 bubbler jets to enhance bather comfort, soothe muscle aches, and relieve joint pain. It’s made of lightweight acrylic reinforced with fiberglass to improve heat retention and increase durability.
This stand alone tub has a stain-resistant exterior that is easy to keep clean with regular maintenance and care. Bathers can control the bubbler jets, massage jets, and the underwater chromotherapy light with the controls on the side of the tub. Just keep in mind that this freestanding jetted tub does require a freestanding or wall-mounted faucet or filler.
Get the Woodbridge Venezia freestanding tub at Lowe’s, The Home Depot, or Woodbridge Bath.
Best for Two
Anzzi Lusso 75.5-Inch Man-Made Stone Bathtub
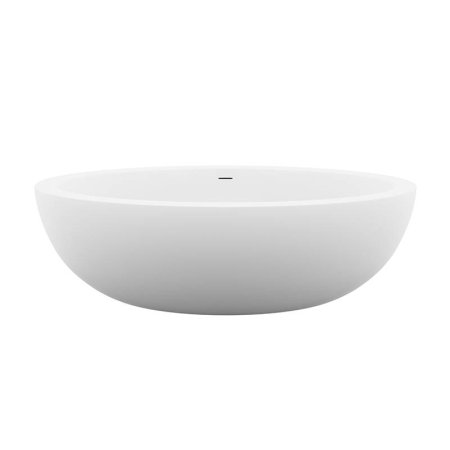
What We Like
- 2-person freestanding tub with wider design
- Built-in overflow system and a convenient pop-up drain
- Offers an impressive 15.5-inch depth
- Resistant to discoloration and unsightly stains
What We Don’t Like
- Heavy, requiring reinforcing of the floor before installation
Specs
- Style: Soaking tub
- Material: Man-made stone
- Dimensions: 75.5 inches long by 40.5 inches wide by 23 inches tall
Composed of rugged man-made stone, this freestanding soaker is as durable as it is indulgent. The tub measures 75.5 inches long by 40.5 inches wide by 23 inches tall and has a 15.5-inch soaking depth, allowing two bathers to immerse completely. The high-end material is resistant to discoloration and staining.
The freestanding bathtub doesn’t have a tap deck, so you’ll want to invest in a freestanding or wall-mounted faucet or filler. Additionally, the tub weighs 363 pounds empty, so with water and two bathers added to the equation, it’s very heavy—reinforcing the bathroom floor before installation is recommended.
Get the Anzzi freestanding tub at Wayfair, The Home Depot, or Luxe Bathroom Vanities.
Best Claw-Foot
AKDY Fiberglass Single Slipper Clawfoot Bathtub
What We Like
- Heavy-duty acrylic and fiberglass construction
- Double-walled design effectively maintains water temperature
- Glossy tub with chrome claw-foot finish
What We Don’t Like
- Might not suit a more modern bathroom
Specs
- Style: Single slipper
- Material: Acrylic
- Dimensions: 59.8 inches long by 28 inches wide by 30.3 inches tall
Claw-foot tubs exude a sense of timeless luxury, and this model from AKDY makes a perfect addition when adding a touch of glam to a space. Constructed from acrylic and reinforced with fiberglass, it promises durability along with its appealing aesthetics. The tub features an ergonomic backrest for the ultimate in comfort and relaxation.
The tub’s glossy finish and chrome-finished claw feet add an opulent touch, while its double-walled structure retains warmth. Designed for easy maintenance, its surface resists regular wear and tear like chipping and discoloration. It’s ready for seamless integration with most tub fillers.
Get the AKDY freestanding tub at Lowe’s, The Home Depot, or Wayfair.
Best Small
Woodbridge 54-Inch Acrylic Soaking Tub
What We Like
- Compact design allows for use in smaller spaces
- Reinforced with fiberglass
- Drain and overflow system available in several finishes
What We Don’t Like
- May feel cramped for some users
- Necessitates a separate freestanding or wall-mounted faucet
Specs
- Style: Single slipper
- Material: Acrylic
- Dimensions: 54 inches long by 28.4 inches wide by 28.8 inches tall
Smaller bathrooms can have the pleasure and presence of a stand-alone tub with this acrylic model from Woodbridge. The compact bathtub measures just 54 inches long by 28.4 inches wide by 28.8 inches tall. Its single-slipper design is ideal for bathers who prefer to sit against the raised wall as they soak.
The tub requires a freestanding or wall-mounted faucet because it lacks a tap deck. It has a built-in overflow system and a pop-up drain available in brushed nickel, brushed gold, chrome, matte black, or oil-rubbed bronze to suit other bathroom fixtures.
Get the Woodbridge 54-inch freestanding tub at Amazon, Lowe’s, or Woodbridge Bath.
Best Large
Woodbridge B1701 Acrylic Freestanding Soaking Bathtub

What We Like
- Durable acrylic and fiberglass composition ensures longevity
- Slip-resistant bottom adheres to ASTM safety standards
- Generous size holds up 65 gallons of water
What We Don’t Like
- May not suit compact bathroom layouts
Specs
- Style: Soaking tub
- Material: Acrylic
- Dimensions: 71 inches long by 31.5 inches wide by 22.9 inches tall
Those looking for a large freestanding tub that they can really lounge in will appreciate the size of this model from Woodbridge. Measuring 71 inches long, it allows you to stretch out, and its long oval shape complements the body’s natural curves for added comfort. A stainless steel bracket at the base supports up to 1,000 pounds, making it one of the sturdiest options on the market.
We appreciate that this tub boasts a slip-resistant bottom, adhering to American Society for Testing and Materials (ASTM) safety standards and ensures no discoloration, maintaining its pristine look over time. Complete with essential drain assembly and overflow drain, this model offers plenty of features in a large soaking tub.
Get the Woodbridge B1701 freestanding tub at Wayfair, Amazon, or Woodbridge.
Best Rectangular
Vanity Art 59-Inch Freestanding Soaking Bathtub

What We Like
- Rectangular design suits modern bathroom styles
- Acrylic construction is reinforced with fiberglass for durability
- Stain- and mildew-resistant finish supports easy cleaning
- Integrated pop-up drain and overflow assembly add convenience
What We Don’t Like
- Doesn’t have a tap deck for faucet installation
Specs
- Style: Soaking tub
- Material: Acrylic
- Dimensions: 59 inches long by 29.5 inches wide by 23.6 inches tall
The rectangular shape of this freestanding soaking tub by Vanity Art is an appealing option to give a bathroom a modern update. The acrylic material is reinforced with fiberglass to help maintain bathwater temperature. Nonporous acrylic is also resistant to mold, mildew, stains, and discoloration.
This modern freestanding tub measures just 59 inches long by 29.5 inches wide by 23.6 inches tall, making it a good choice for average-size bathrooms. It features an integrated pop-up drain and overflow assembly system but lacks a tap deck for faucet installation; a freestanding or wall-mounted faucet must be purchased separately.
Get the Vanity Art freestanding tub at The Home Depot, Wayfair, or Lowes.
Jump to Our Top Picks
How We Chose the Best Freestanding Tubs
The best bathtubs offer a touch of luxury and relaxation as well as practicality. In this guide, we feature the best freestanding bathtubs for a variety of lifestyles, focusing on key factors like dimensions, weight, style, material construction, and special features. Size was a key consideration, since even folks with small bathrooms might want a freestanding tub, while those with ample square footage may go with a supersize soaker that allows couples to bathe together.
Any roundup of the best whirlpool tubs, soaker tubs, and standard freestanding tubs should consider the material and style of each model. This guide includes options for reclining and sitting comfortably. Beneficial bells and whistles like massage jets, bubblers, and built-in overflow systems were certainly a plus. We also sought to find tubs for all budgets.
What to Consider When Choosing a Freestanding Tub
Top-rated freestanding tubs typically require a substantial investment, so it’s smart to understand what you’re paying for! Key product factors to keep in mind include size, style, and material. It’s also wise to become aware of the best freestanding tub brands before choosing a soaker for a renovation project.
Size
Bigger can be better when it comes to the best large soaking tubs—as long as the chosen model will fit in the bathroom. Shoppers will want to take precise measurements of the bathroom’s square footage and the area they hope to allocate to the new stand-alone tub.
Then, once you settle on a bathtub size, comfort should be a priority. You’ll want to consider the length, width, and depth of the tub as well as your body size and weight to ensure that you’ll be able to enjoy the soak fully. Couples should note that freestanding tubs are also available in sizes for two people to bathe together. Some folks find that a flat-bottom tub doesn’t feel as good as one with a contoured bottom.
While assessing sizes to choose a bathtub, remember that the larger the tub, the more water it will take to fill it. According to Justin Cornforth, owner of Ace Home Co. in Williamston, South Carolina, water pressure and water heater capacity must be considered. “If you want a giant tub that will make your bathroom look luxurious, don’t forget that it will take forever to fill (and probably it will cool down before you’re even submerged),” he says. “Therefore, before making the decision regarding sizes, check the capacity of your water heater and consider a tub that holds heat well.”
If shoppers are trying to conserve water and keep bills low, then a somewhat smaller, shallower version of the best freestanding tubs might be a good compromise.
Style
When it comes to stand alone options, there are several types of bathtubs, including single-ended, single-slipper, double-ended, double-slipper, pedestal, claw-foot, and Japanese soaking tubs.
- Single-ended tubs have one sloped, rounded end—ideal for reclining against—and one straight, squared-off end for drain and faucet installation.
- Single-slipper tubs are similar to single-ended tubs, except one end is elevated instead of sloped. The elevated portion provides back support for users who prefer to sit up in the tub.
- Doubled-ended tubs have two sloped ends for comfortable bathing at either side. The walls are not elevated as on a slipper tub, encouraging the bather to lay back.
- Double-slipper tubs are raised on both ends and are typically big enough to accommodate two users facing each other. These tubs have a low point in the center for the drain, while the faucet is typically centered on one side.
- Pedestal tubs, also called skirted tubs, rest on top of a plinth or pedestal. Most single-ended, double-ended, single-slipper, and double-slipper tubs are pedestal tubs.
- Claw-foot tubs are a classic option still somewhat popular today. The tub is supported by four or more feet—sometimes shaped like an animal’s paws resting atop a ball—instead of sitting on a pedestal base. The caution with a claw-foot model is that if the tub is very heavy, the feet can damage floor tiles.
- Japanese soaking tubs are made for small spaces. They typically have the shortest length but make up for it with the height of the tub. Bathers sit instead of recline, allowing them to submerge in water up to their shoulders.
Material
The best material for freestanding tub construction is typically acrylic because it’s lightweight, affordable, easy to find, and an easy-to-clean bathtub material. However, stand-alone tubs made of cast iron, resin, copper, stainless steel, or stone are also available.
A cast-iron tub is incredibly durable, but it may require buyers to reinforce flooring due to the heavy weight, advises Cornforth.“Old houses or second-floor bathrooms in newer houses, or even some slab foundations, might not be ready for that much weight. And we are talking not only about the tub weight (which in cast iron case is around 250-500 pounds), but the weight of water and a person (or persons) inside,” he says “If you’re set on cast iron, have a pro check your joists and consider adding support or opt for acrylic or stone resin tubs, they won’t need such structural reinforcements.”
Resin tubs are heavier than acrylic but not as weighty as cast iron. Copper, stainless steel, and stone tubs offer a unique look, but shoppers will pay a premium price for such a high-end model. Another uncommon option is wood, typically oak or cedar, which gives the bathroom a natural look and is an environmentally friendly choice.
Faucet
When shoppers are considering which freestanding tub is right for their bathroom, they’ll want to factor in where the faucet or filler will be installed. Bathtubs with a rolled rim or rolled top do not typically have faucet drillings, so it’s necessary to find the best freestanding tub faucet or wall-mounted tub faucet for a given bathroom aesthetic that is compatible with the tub.
The best freestanding tub filler options are typically installed to one side of the tub, close enough for the faucet to hang over the edge. Deck-mounted tub faucets require the bathtub to have a tap deck where the faucet can be secured. There are tubs with predrilled tap decks, but in many models, the holes must be drilled by the owner or a professional plumber in order to install a deck-mounted faucet.
Additional Features
Freestanding tub manufacturers all compete to make the best bathtubs for their clientele, but when products are relatively similar, additional features help entice shoppers. These bells and whistles include tub caddies, foot coasters, bubblers, and whirlpool massage systems.
- Tub caddies are water-resistant trays or tabletops that can rest across the tub to hold candles, books, bath products, or even a glass of wine.
- Foot coasters are small circular pads designed to sit under each foot of a claw-foot bathtub to protect the floor.
- Bubblers are small air jets typically located at the bottom of the tub. A freestanding bathtub with jets can help soothe aching muscles and increase circulation.
- Whirlpool massage systems offer deep, therapeutic massages intended to activate the lymphatic system, increase circulation, and provide relief from muscle aches and joint pain.
Tips for Installing Freestanding Tubs
Installing a freestanding tub can be a project for a DIYer with some plumbing experience, especially for those trying to mitigate the costs of replacing a bathtub. The first step is taking precise measurements of the area where the tub will be installed. Make sure the tub of choice will fit in the space available. Cast-iron, stone, and metal freestanding tubs can be quite heavy, so if installing one on an upper floor, note the weight of the model and consider reinforcing the floor.
Unless the new tub can fit exactly over the location of the drain used for the removed tub, shoppers will need to install a new drain line through the floor that lines up with the drain in the tub. (You may also want to consider adding bathtub insulation underneath for better heat retention.) Slide the tub into position and use a pencil or another erasable writing tool to trace the outline; this can help you visualize the exact position of the bathtub when installing the drain.
Finish the installation by applying silicone caulk for showers and bathtubs to the feet on a claw-foot tub or to the base on a pedestal tub. This bead of silicone helps to prevent the tub from shifting or moving on the floor.
- Take accurate measurements of the size and weight before installation.
- Use a pencil to outline the position of the tub to help line up the drain.
- Apply silicone tub and tile caulking around the base or feet to prevent shifting.
FAQs
Those who want more info about freestanding bathtubs may find it here among the answers to commonly asked questions.
The first factor to consider is the size of the tub compared to the bathers and to the square footage of the bathroom. Factor in the overall weight of the tub in case the floor requires reinforcement. You’ll also want to consider style, material, and faucet installation.
The most popular material for a freestanding bathtub is acrylic because it’s lightweight, easy to maintain, compatible with most bathtub cleaners, and relatively inexpensive. However, a cast-iron tub has superior durability and longevity.
The general rule is to allow for 6 inches around the tub, though a tub with a rolled rim or rolled top will also need enough space to install a freestanding faucet or filler.
A freestanding tub will not tip over unless someone is actively trying to tip it. However, the tub may shift or move, especially if it sits on an uneven surface. Those concerned about a shifting tub will want to ensure that the floor is level before installation. Once the tub is in place, you can apply a bead of silicone to the bottom of the feet or to the base to help prevent it from moving.
Freestanding tubs cost anywhere from $500 to several thousand dollars, depending on the size and material. What you should spend depends on your budget and preferences. You can find quality acrylic tubs for less than a thousand dollars.
A luxurious freestanding bathtub can make a bathroom more appealing, potentially increasing a home’s value.
A standard tub size is about 60 inches long, but freestanding tubs offer more leeway in terms of length, running from about 55 to 72 inches long. The ideal size depends on your bathroom layout, your height, and personal preferences.
Freestanding bathtubs can require a lot of hot water to fill, increasing utility bills. Some models are very heavy and may require reinforcement of the bathroom floor.
If there is plenty of space on all sides of the freestanding tub, it will be easy to clean around. Tubs close to walls or other obstacles will be more challenging to clean around.
Why Trust Bob Vila
Bob Vila has been America’s Handyman since 1979. As the host of beloved and groundbreaking TV series including “This Old House” and “Bob Vila’s Home Again,” he popularized and became synonymous with “do-it-yourself” home improvement.
Over the course of his decades-long career, Bob Vila has helped millions of people build, renovate, repair, and live better each day—a tradition that continues today with expert yet accessible home advice. The Bob Vila team distills need-to-know information into project tutorials, maintenance guides, tool 101s, and more. These home and garden experts then thoroughly research, vet, and recommend products that support homeowners, renters, DIYers, and professionals in their to-do lists.
The post Soak Off a Stressful Day in One of The Best Freestanding Tubs of 2025 appeared first on Bob Vila.
]]>The post Keep Shower Stains at Bay With the 5 Best Shower Squeegees Tested appeared first on Bob Vila.
]]>Fun to say and simple to use, squeegees are your shower’s best friend. By ridding your bathing area of excess moisture, the best shower squeegees can prevent mold, mildew, water spots, rust stains, bug infestations, and more. These cleaning gadgets have blades that slick water off of glass doors and tiled walls without scratching the surfaces.
Squeegees are traditionally made of stainless steel with rubberized blades. However, squeegees made of newer materials, like high-performance silicone, are game changers and safe for all surfaces. Save yourself time and energy on bathroom cleanup with one of these labor-saving selections that we tested. Our favorite of the bunch was the Gütewerk Shower Squeegee, with its ergonomic handle in a simple and modern design.
- BEST OVERALL: Gütewerk High Performance Shower Squeegee
- BEST BANG FOR THE BUCK: Foshio Rubber Shower Squeegee With Extra Blade
- BEST DOUBLE-SIDED: DSV Long-Handled Window and Shower Squeegee
- BEST FOR GLASS: Desired Tools All-Purpose Silicone Shower Squeegee
- BEST FOR TILE: Richmirth Silicone Shower Squeegee
Product Comparison
| Blade Width | Storage | Additional Features | |
| Gütewerk High Performance Shower Squeegee | 9 inches | Suction cup, hanger, and hook | Ergonomic handle |
| Foshio Rubber Shower Squeegee With Extra Blade | 5.11 inches | None | Replaceable blade |
| DSV Long-Handled Window and Shower Squeegee | 8 inches | Hanging hole | Telescoping handle, rotating head, double-sided |
| Desired Tools All-Purpose Silicone Shower Squeegee | 7.7 inches | Hanging hole | Soft padded handle |
| Richmirth Silicone Shower Squeegee | 9 inches | Hook | Non-scratching material |
Our Top Picks
From sleek silicone-coated squeegees to classic stainless steel, these top picks are some of the best in their category. In addition to testing these products for safety and versatility, we tested them for the most important result: a streak-free shower.
Best Overall
Gütewerk High Performance Shower Squeegee

What We Like
- Handle is both nonslip and ergonomic
- Multiple ways to store this squeegee
- Available in multiple colors
- Simple modern design
What We Don’t Like
- Blade is not replaceable
Product Specs
- Blade width: 9 inches
- Storage: Suction cup, hanger, and hook
- Additional features: Ergonomic handle
Cleaning in a rush or dealing with hard or mineralized water? The Gütewerk high-performance shower squeegee is an excellent choice. Minimalist and sleek in appearance, Gütewerk’s shower squeegee is pure streamlined functionality. With an ergonomic design unrivaled in comparable products, the Gütewerk squeegee fits comfortably in the hand. The stainless steel core is coated in high-performance food-grade silicone. This design ensures a nonslip grip and also prevents potential damage on the off chance the squeegee falls onto a hard surface.
The soft 9-inch silicone blade glides easily over glass, tile, wood, metal, and more, wicking away moisture and leaving a clean surface behind. We loved that it is comfortable to handle and compact in size, making it ideal for apartment storage. Just keep in mind that while the silicone blade slides fast and smoothly, moving the water down the glass, it didn’t necessarily collect water or dirt on the bottom as well as some other options on this list. If it is being used to get rid of dirt, especially on a windshield or mirror, it will likely need to be trailed with a microfiber cloth or rag.
This squeegee comes with a suction hook so that it can be hung easily in a shower stall. This stylish model is also useful for auto and general household cleanup.
Get the Gütewerk shower squeegee at Amazon.
Best Bang for the Buck
Foshio Rubber Shower Squeegee With Extra Blade
What We Like
- Thick and durable blade
- Removable and replaceable blade
- Compact design
- Great size for smaller spaces
What We Don’t Like
- Short blade width
- Handle is short, too
Product Specs
- Blade width: 5.11 inches
- Storage: None
- Additional features: Replaceable blade
This pint-size squeegee provides full-size results. A great choice for road trips, RVs, and keeping excess water off kitchen counters, mirrors, tub walls, and more, the Foshio squeegee easily fits inside a standard car’s glove box.
Well designed with a sturdy beveled rubber blade, Foshio’s portable shower squeegee also features a nonslip screw-in handle, making it an ergonomic choice that’s comfortable to use. Unlike softer silicone blades, Foshio’s blade is rigid and easily cleans glass and other polished surfaces. It can also be useful for removing dirt and soap scum without using too much extra elbow grease.
Because of its brightly colored blades, which are available in a variety of colors including blue, green, turquoise, and yellow, this squeegee is a fun option for kids’ bathrooms. While it could certainly be used in larger spaces, it’s a bit small and the job may take longer than anticipated.
The only issue we had during testing was swapping out the old blade for the additionally included blade; it’s not clear how to swap out the old one. Still, the blade is durable and the price is low enough to justify simply replacing it when necessary.
Get the Foshio shower squeegee at Amazon.
Best Double Sided
DSV Long-Handled Window and Shower Squeegee
What We Like
- Extendable handle
- Lightweight and easy to use
- Ideal for washing as well as drying
- Great for windows and other hard-surfaces
- Useful for tiles as well as grout
What We Don’t Like
- Can smell if left out wet
- Handle is a bit hard to unlock at first
Product Specs
- Blade width: 8 inches
- Storage: Hanging hole
- Additional features: Telescoping handle, rotating head, double-sided
There’s a reason that gas stations prefer dual-sided squeegees; wetness and gunk can be scraped off the windshield and then the other side can be used to dry the glass surface for a perfect, spotless shine. To achieve the same spotlessness at home, try DSV’s professional all-purpose window squeegee.
With an 8-inch soft rubber blade on one side and a nylon-netted sponge on the other, showers (and other hard surfaces) can be clean and dry in no time. The handle also telescopes, which we found made it easier to access hard-to-reach spots without a step stool. Great for larger showers, poolside cabanas, and bathing areas with lots of hard surfaces to keep clean and dry, the DSV can also be used in kitchens, for window washing, and to clean cars.
We found this squeegee made cleanup fast and easy, passing all of our tests with impressive scores. The mesh netting over the sponge was particularly helpful for lifting dirt and grime from tiles and grout, so it is truly a multiuse product. Use it to clean the bathtub, shower stalls, and even the sink.
Because it has such a long handle, we found it to be a smart choice for those days when we didn’t want to get on our hands and knees and scrub. While it is a bit pricier than other options, all of its features make it worth the extra cost.
Get the DSV shower squeegee at Amazon or Walmart.
Best For Glass
Desired Tools All-Purpose Silicone Shower Squeegee

What We Like
- Handle is very comfortable to use
- Extra blades included
- Compact and easy to store away
- Scratch-free materials good for ceramic, porcelain, and tile
What We Don’t Like
- The blade is relatively short
Product Specs
- Blade width: 7.7 inches
- Storage: Hanging hole
- Additional features: Soft padded handle
Cleaning glass isn’t easy. Fortunately, the Desired Tools all-purpose silicone shower squeegee makes it feel almost effortless. We found this was also one of the most maneuverable options on the list because of the foam grip. We were impressed at how well this squeegee passed every test, making it a fantastic tool for all types of surfaces whether it’s glass, tiles, or even mirrors.
Paired with the soft yet sturdy silicone blade that won’t scratch or damage shiny surfaces, the squeegee also has a comfy grip. While using it, we found the action of the blade to be so smooth that it only needed the smallest amount of elbow grease to clean shower doors, mirrors, and windows.
It wicks away even the smallest drops with precision, leaving a clean, dry surface behind. Best of all, this compact squeegee comes with two replacement blades, each nearly 8 inches in length, ensuring the glass will be clean and streak-free for a long time to come.
This compact squeegee is also smartly designed with a hole in the handle; it easily fits on an adhesive hook inside a cabinet, on a shower shelf, or on a hook affixed to the bathroom wall.
Get the Desired Tools shower squeegee at Amazon or Walmart.
Best For Tile
Richmirth Silicone Shower Squeegee
What We Like
- Won’t damage surfaces like porcelain, marble, or ceramic
- There are no seams that will collect dirt on the blade
- Multiple sizes available
What We Don’t Like
- The handle makes a squeaking sound
- Handle is quite short
Product Specs
- Blade width: 9 inches
- Storage: Hook
- Additional features: Non-scratching material
For tile that can potentially be scratched or damaged, a squeegee blade with an ultra-close yet gentle touch is best. We found that Richmirth’s 100 percent BPA-free silicone-based squeegee glides smoothly over tile without a hitch and can clean an entire shower wall in just four swipes.
The rubberized blade is flexible, which means it can handle rippled surfaces and grout lines with ease. Unlike stainless steel–handled squeegees, this one won’t damage tile made from stone, porcelain, ceramic; wood flooring; or tub surfaces if it is dropped. Richmirth’s squeegee also performs well in extreme weather conditions. Stash it in a glove box to remove excess moisture from the windshield on chilly winter days. In the bathroom, store it with the included silicone hook which fits snugly over shower doors that are 0.45- to 1-inch thick.
We were impressed at how well this squeegee performed on all of our tests. However, there is one minor caveat. We found the squeegee squeaks as it cleans, which could be potentially irritating to some users. However, it cleans everything incredibly well, especially tile and tile grout. It lifted soap scum off without using too much elbow grease.
Get the Richmirth shower squeegee at Amazon.
Jump to Our Top Picks
How We Tested the Best Shower Squeegees
Before deciding on our products to test, we interviewed some cleaning experts to see if they could offer us any insights to this relatively simple bathroom cleaning tool. We were surprised to learn from Aaron Christensen, the Vice President of Homeaglow, a home cleaning service that operates nationwide, that “shower squeegees are the most effective tool for controlling high germ areas” thanks to their ability to quickly wipe away standing water and grease from bathroom surfaces. Christensen also recommends rubber or silicone blades for best results. WIth this in mind, we set out to get our hands on a range of options to see how they stand up to real world testing.
After unboxing the products, we made sure each squeegee came with all of its included accessories such as extra blades and storage hooks. For squeegees with extension rods, we made sure the rods functioned properly.
We tested each squeegee on a shower door to remove water and then with a few sprays of glass cleaner. We took note of how each squeegee felt in the hand, its maneuverability, and how it functioned to remove the water. Did it require a lot of elbow grease? How easily did the blade pivot? Did the door appear to be cleaner after using the squeegee? Finally, we checked to see if each squeegee left streaks or residue. We repeated the same tests on a tiled wall, a mirror, and a car windshield.
We also spoke with Diana Ciechorska, the General Manager of Park Slope Cleaning in Brooklyn New York, who recommended shoppers think about their specific bathroom surfaces and purchase accordingly. “Match your squeegee to your surface. Soft blades for glass, tougher ones for tiles.” Our own research also found a deceptively wide range of features that shoppers may wish to consider before purchasing the right squeegee. Our extensive list of options comes with a range of useful features, including varying blade lengths and storage options, to suit a variety of user preferences. We also made sure to include several picks made from different materials, from soft and lightweight silicone to durable stainless steel.
We found longevity to be an issue with some squeegees on the market, so those on our list of recommendations are made from durable materials, and most even have the ability to replace the rubber blade to keep the squeegee in top condition for several years.
What to Consider When Choosing a Shower Squeegee
The modern household squeegee was patented in 1936, and the same basic design is still in use today. However, newer materials like silicone are replacing rubberized blades and becoming the squeegee of choice in many people’s showers, cars, and utility closets. Whichever squeegee style shoppers choose, they will want to figure out how they’ll use it and where they’ll hang it before they buy one.
Intended Use and Versatility
All squeegees have one main purpose: to rid hard surfaces of water and moisture. Beyond that, squeegees can be specialized for different types of surfaces, including walls, windows, and floors. On the whole, squeegees work best on smooth surfaces, like glass, fiberglass, and thermoformed acrylic tubs. They can also be used on rippled and tiled surfaces as long as the blade isn’t too stiff or sharp.
For walls, doors, countertops, and mirrors, short-handled squeegees work best. Long-handled models are designed for cleaning floors and washing upper-story windows. For an even drier, shinier shower, try a double-sided squeegee. Similar to those found at gas stations for cleaning windshields, these have both a soft buffing edge and stiff waterproof blade. Double-sided models are great for window washing and, of course, cleaning a car windshield.
Handle and Blade Type
Traditional squeegees have a plastic or stainless steel handle. Some brands have cushioned and ergonomic handles that are more comfortable to hold. Both sleek and functional, silicone-coated squeegees are growing in popularity. The blade—the part of the squeegee that glides over a surface and collects water—is made of either natural or synthetic rubber or silicone.
Rubber and silicone blades each have their benefits. Rubber is ultradurable though stiff, which is why rubber blades are the best choice for floors and smooth, flat surfaces. Silicone blades are softer and more flexible, enabling them to better maneuver over tiled and rippled surfaces. Silicone blades are also safe and effective on glass, tile, mirrors, and more. Count on a spotless finish every time.
Size and Weight
Squeegee blades usually range from 6 to 12 inches in length. Small handheld squeegees have relatively short handles (about 5.5 inches in length), which some folks may find difficult to grip. Models with longer handles (6.5 inches and up) are also available. In terms of weight, shower squeegees should be about half a pound, though some compact models are even lighter.
The best shower squeegee for a particular shopper is one that is heavy enough to provide firm contact with shower and bathroom surfaces but light enough to wield without causing strain. Stainless steel handles tend to be heavier, with plastic and silicone being lighter options. A silicone squeegee is a safe choice for tiled, wooden, and natural stone surfaces as it won’t accidentally cause chips, scratches, or damage if it’s dropped.
Mounting Type
Many shower squeegees come with suction-cup hooks or shower-door hooks so they can be mounted in the shower easily. Suction hooks are easy to install; simply moisten and then press against a clean, dry, smooth surface. On the downside, suction cups can lose their gripping power over time.
Hooks that hang over the shower door are durable and long lasting, but be sure to measure the hooks to make sure they fit the stall. Some squeegee brands provide several different types of mounting equipment as well as replacement blades in their packaging.
FAQs
Q. What are squeegees used for?
Squeegees are used to remove excess water and moisture from hard, flat surfaces.
Q. How do you use a shower squeegee?
Slide along a flat surface with even, firm pressure. Direct the collected water into the drain.
Q. When should you replace a shower squeegee?
Many squeegees have replaceable blades, so you can keep the handle and swap out the blade when it no longer collects water efficiently. Prevent blade mold and handle rust through proper care and by keeping your squeegee dry.
The post Keep Shower Stains at Bay With the 5 Best Shower Squeegees Tested appeared first on Bob Vila.
]]>The post We’ve Researched Over 20 Bench Sanders, But We Like These 7 the Best appeared first on Bob Vila.
]]>Best Overall

Ryobi BD4601G 4-Inch by 36-Inch Belt/Disc Sander
Best Bang for the Buck
Rikon Power Tools 50-151 Bench Sander
Best for Large Tasks
Wen 6502T 4-Inch by 36-Inch Belt and Disc Sander
Bench sanders are designed to smooth large surfaces quickly and easily, allowing you to finish a woodworking project faster. We researched more than 20 best-selling bench sanders and then tested the top five to see how well they performed in workshop sanding situations. And we found a favorite: the Ryobi BD4601G 4-Inch by 36-Inch Belt/Disc Sander, which offers a large flat sanding surface plus a 6-inch sanding disc. It excelled in our hands-on sanding tests.
If the Ryobi isn’t the right tool for you, no need to worry—we tested more top-rated models that provide additional sanding solutions for DIYers and pros. We also added three more models to our list, which, though we didn’t test them, grabbed our attention based on reviews and customer ratings. Among our lineup of the best bench sanders, you’ll find combo models and even a sander that comes with a grinding wheel.
- BEST OVERALL: Ryobi BD4601G 4-Inch by 36-Inch Belt/Disc Sander
↓ Jump to Review - BEST BANG FOR THE BUCK: Rikon Power Tools 50-151 Bench Sander
↓ Jump to Review - BEST FOR LARGE TASKS: Wen 6502T 4-Inch by 36-Inch Belt and Disc Sander
↓ Jump to Review - BEST UPGRADE PICK: Grizzly Industrial G0787 Horizontal/Vertical Belt Sander
↓ Jump to Review - BEST VERTICAL: Bucktool BG2600 Combo Belt Sander Bench Grinder
↓ Jump to Review - BEST FOR SHOP: Jet J-41002 Belt Grinder and Disc Sander
↓ Jump to Review - BEST COMBO SANDER: Rockwell RK7866 Shop Series Belt/Disc Combo Sander
↓ Jump to Review
Bench Sanders Comparison Chart
| Product | Type | Power | Dust Port? |
| Ryobi BD4601G Belt/Disc Sander | Belt and disc | 4.3 amps | Yes |
| Rikon 50-151 Bench Sander | Belt and disc | 0.33 hp | Yes |
| Wen 6502T Belt/Disc Sander | Belt and disc | ½ hp | Yes |
| Grizzly Industrial G0787 Sander | Belt and disc | 4.3 amps, ½ hp | Yes |
| Bucktool BG2600 Combo Sander | Belt and grinder | 3.5 amps | Yes |
| Jet J-41002 Belt/Disc Sander | Belt and disc | 6.2 amps, ¾ hp | Yes |
| Rockwell RK7866 Belt/Disc Sander | Belt and disc | 4.3 amps | Yes |

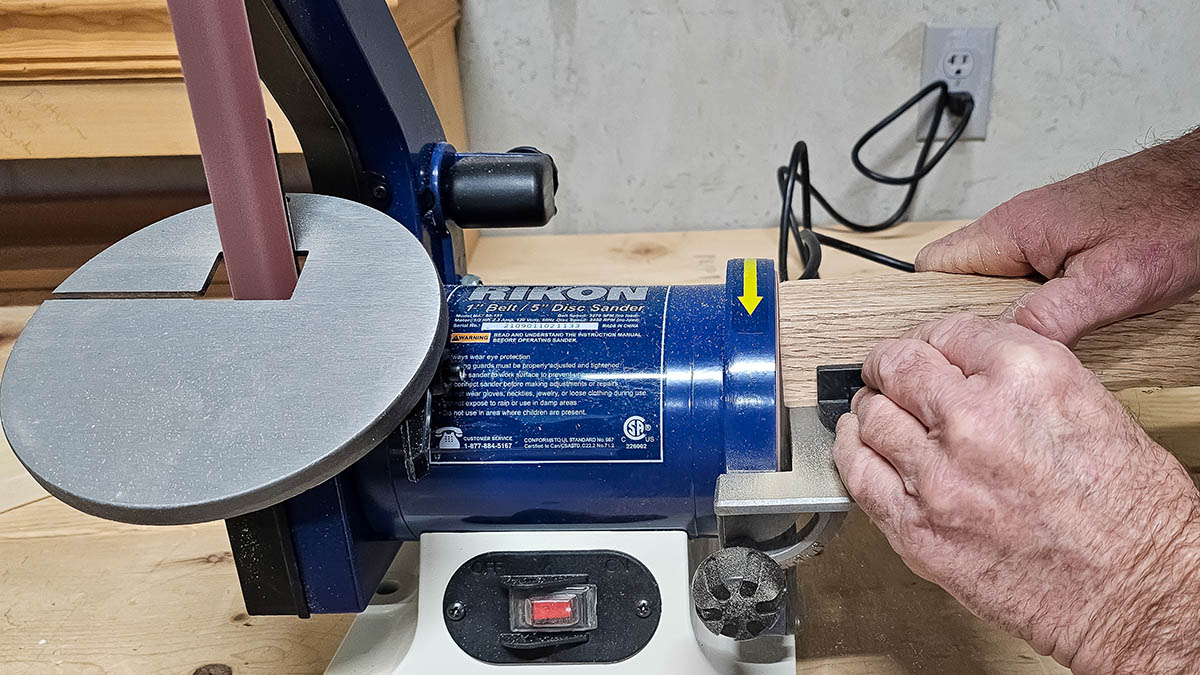
Our Top Picks
The following list of bench sanders has something for every woodworker. We chose models with wide belts for aggressive wood removal and some with narrow belts for finer detail work. Many include rotating discs and fences or miter gauges for precision work, and we’ve included high-quality models to fit various budgets. One is sure to be a good pick for your workshop.
Best Overall
Ryobi BD4601G 4-Inch by 36-Inch Belt/Disc Sander
What We Like
- Wide-profile belt for large sanding tasks
- Belt and disc sanding options
- Integrated dust port
- Miter gauge for sanding angles
What We Don’t Like
- Dust collection requires attaching a hose
Specs
- Type: Belt and disc sander
- Power: 4.3 amps
- Additional accessories: Integrated dust port, work table
Our Ratings: Ease of Use 4.8/5; Build Quality 5/5; Performance 5/5; Value 4.8/5
This pick can get a lot of sanding done in a hurry thanks to its 36-inch by 4-inch belt and the driving force of the powerful 4.3-amp motor. This impressive tabletop belt sander also has a 6-inch disc and an adjustable tool rest table that we used to smooth bevels and angles.
We especially liked its adjustable belt position, which allowed us to use the sander vertically or horizontally. That’s a definite perk when sanding various board configurations for the same project.
The integrated dust port on this benchtop sander can be connected to a collection bag or to a shop-type vacuum. We used it with and without an attached vacuum hose, and it significantly reduced the amount of airborne dust. The sanding disc table has a miter gauge to support material at a specific angle, and we found that very helpful for sanding consistent angles.
What our tester says: “I love how stable the Ryobi bench sander is. I tested it with and without it being bolted to the workbench, and although I’d always suggest bolting, the Ryobi didn’t walk or move when it wasn’t bolted.” —Glenda Taylor, Product Reviews tester and writer
Get the Ryobi bench sander at Amazon, The Home Depot or Walmart.
Best Bang for the Buck
Rikon Power Tools 50-151 Bench Sander

What We Like
- Budget-friendly price
- Compact size for small-scale DIY
- Sturdy tool rest table
- Built-in miter gauge
What We Don’t Like
- Not suitable for heavy-duty sanding
Specs
- Type: Belt and disc sander
- Power: 0.33 hp
- Additional accessories: Dust port, miter gauge
Our Ratings: Ease of Use 4.5/5; Build Quality 4/5; Performance 5/5; Value 5/5
With the Rikon 50-151 bench sander, users can enjoy the power of a bench sander without spending a lot of money. It features a narrow 1-inch by 30-inch sanding belt that performed well in our tests for smaller projects. It has a sturdy tool rest table that supported our workpieces while we sanded.
The Rikon also features a disc sander with a built-in miter gauge, which we used to sand consistent angles and square ends on both hardwood and softwood boards.
This is a light-duty sander, and we’d recommend it for small DIY and craft projects or repair work. It’s not big enough or powerful enough to handle large sanding projects, but it’s well worth the investment for those who work on many small-scale projects. We connected our shop vacuum to the dust port, which reduced airborne dust, but enough escaped that wearing a dust mask is a must.
Get the Rikon bench sander at Amazon or Walmart.
Best for Large Tasks
Wen 6502T 4-Inch by 36-Inch Belt and Disc Sander

What We Like
- Belt and disc sanding combo
- Quickly smooths rough wood
- Quick and easy sandpaper changes
- Smooth operation (no wobbling)
What We Don’t Like
- Requires vacuum for dust mitigation
Specs
- Type: Belt and disc sander
- Power: 4.3 amps
- Additional accessories: Miter gauge, dust port
Our Ratings: Ease of Use 4.5/5; Build Quality 5/5; Performance 5/5; Value 4.5/5
This Wen bench sander comes with two standard sanding tools—a 4-inch belt sander and a 6-inch disc sander—so it can handle a range of projects. It has a cast-iron base and weighs 37.6 pounds, which is heavy enough to prevent most wobbling during use, but we bolted it to our workbench anyway.
In our tests, the sanding belt did an excellent job of quickly smoothing out rough wood surfaces and removing extra material on both hardwood and softwood boards. The 6-inch disc features a large tool rest table and built-in miter gauge that we used to sand square board ends and angled ends.
The Wen bench sander is powered by a 4.3-amp motor and has a simple tension release lever for changing the sandpaper. The sanding belts on this sander are also designed for easy replacement. Its dust collection port doesn’t direct the flow of sawdust on its own, but when we connected it to our shop vacuum, it substantially reduced the amount of airborne dust.
Get the Wen 6502T bench sander at Amazon or The Home Depot.
Best Upgrade Pick
Grizzly Industrial G0787 Horizontal/Vertical Belt Sander
What We Like
- Multipurpose shop tool for sanding and grinding
- Lower risk of damage from heat buildup
- Sharpens material quickly
- Easy to adjust/change grit
What We Don’t Like
- 80-grit belt is not aggressive
- Requires practice to achieve precision
Specs
- Type: Belt grinder and sander
- Power: 4.3 amps, ½ hp
- Additional accessories: Built-in adjustable miter gauge, 2½-inch dust port, worktable angle scale
Our Ratings: Ease of Use 4/5; Build Quality 4.5/5; Performance 4/5; Value 5/5
The Grizzly Industrial horizontal/vertical belt sander works well on wood or metal projects, and we tested this one for sharpening mower blades. It packs a 4.3-amp single-phase motor that turns the belt at a rate of 1,900 feet per minute. The 90-degree adjustable belt platen and right-angle backstop allow vertical, diagonal, or horizontal sanding for optimal user comfort and control.
The 4-inch abrasive belt perfectly matched the width of the sharp edges on our 21.5-inch mower blades. We raised the belt arm to the vertical position, flipped the power switch, and braced the blade against the backstop as it contacted the belt. The moderately worn blade only needed a 12-second grind on each edge, while the severely worn blade required 27 seconds per edge. This would also be a good bench sander for large woodworking projects.
What our tester says: “I liked that the Grizzly belt sander gave the edge an evenly flat profile, and the included 80-grit belt left a smooth finish.” —Mark Wolfe, Product Reviews tester & writer
Get the Grizzly Industrial bench sander at Amazon, Tractor Supply Co., The Home Depot, or Grizzly Industrial.
More Great Options
While we didn’t test the following models in our workshops, they made our shortlist of bench grinders based on their standout reviews and ratings. Each offers a slightly different range of power and features in a range of budgets.
Best Vertical
Bucktool BG2600 Combo Belt Sander Bench Grinder

What We Like
- 42-inch belt adjusts from 0 to 90 degrees
- Horizontal and vertical sanding
- Brush wheel included
What We Don’t Like
- Bench sanding belt’s tension cannot be adjusted
Specs
- Type: Belt sander and disc grinder
- Power: 3.5 amps
- Additional accessories: Cast-iron base, eye shield, brass wheel
This Bucktool bench sander has a 2-inch by 42-inch belt sander that can be adjusted from 0 degrees to 90 degrees, so it can be set up to run horizontally or vertically, depending on needs. We really like the 6-inch bench grinder that can be used for sharpening, as well as the inclusion of a brush wheel for removing rust from tools.
This combination belt sander/bench grinder has a 3.5-amp motor and a cast-iron base for better support while working. For the most stable sanding results, we still recommend bolting the Bucktool to a workbench. The grinder also comes with an adjustable eye shield and a built-in LED light, which illuminates the work area while the wheel is in use.
This is one of the most versatile picks on our list because it sands, grinds, and brushes away rust.
Get the Bucktool bench sander at Amazon.
Best for Shop
Jet J-41002 Belt Grinder and Disc Sander
What We Like
- Suitable for multiple sanding tasks
- 3,100 surface feet per minute (SFPM)
- 3,450 revolutions per minute (RPM)
- Made of heavy-duty steel and cast iron
What We Don’t Like
- Heavy: may not be suitable for frequent transport
Specs
- Type: Belt grinder and disc sander
- Power: 6.2 amps, ¾ hp
- Additional accessories: 45-degree sanding table, miter gauge
Woodworkers in search of a highly functional combination belt and disc sander may want to check out this Jet model, which has a powerful 6.2-amp motor, one of the most powerful of any on our lineup. It drives the vertical 42-inch-long by 2-inch-wide belt sander at up to 3,100 SFPM and the 8-inch disc sander at up to 3,450 RPM, helping to ensure a smooth finish on woodworking projects.
The powerful motor and the heavy-duty steel and cast-iron construction add to the weight of this benchtop belt sander, sitting at a hefty 60 pounds, so it may not be a good choice for users who want to pack it up and take it to multiple jobsites. However, the 45-degree sanding table has a removable miter gauge to help users produce a smooth, accurate finish while sanding at an angle.
The only thing we would prefer on this model is a wider sanding belt. With the power this sander has, a 4-inch belt would make quick work of sanding large projects.
Get the Jet bench sander at Amazon, The Home Depot, or Walmart.
Best Combo Sander
Rockwell RK7866 Shop Series Belt/Disc Combo Sander

What We Like
- 6-inch disc sander
- Table adjusts from 0 to 45 degrees
- Offers horizontal and vertical sanding
- Built-in safety switch
- Dust collection port
What We Don’t Like
- Some users report poor construction
- Belt tends to strip out easily
Specs
- Type: Belt and disc sander
- Power: 4.3 amps, ½ hp
- Additional accessories: Adjustable table, dust port
This Rockwell belt/disc combo sander can get a lot of work done fast thanks to its wide belt sander and 4.3-amp (½ hp) motor. We like that it also has a 6-inch disc sander and an adjustable sanding table that can be set from 0 to 45 degrees for optimal material positioning. This belt sander can be adjusted from a horizontal position to a vertical sanding position.
The Rockwell has a safety switch to prevent accidental starts. For convenience, both the belt and disc sandpaper are easy to change. The Rockwell sander also comes with a dust collection system. It weighs 42 pounds, which we feel is heavy enough to reduce most of the vibration or movement associated with sanding, but we still recommend bolting it in a permanent spot on the workbench.
Get the Rockwell bench sander at Amazon, Lowe’s, or The Home Depot.
Jump to Our Top Picks
How We Chose and Tested the Best Bench Sanders
| Testing Stats | |
|---|---|
| Products tested | 5 |
| Time spent testing | 2 weeks |
| Tests performed | 4 |
| Price range | $60 to $350 |
We started by researching the best-selling bench sanders based on type, power, user-friendliness, and other special features included by top brands. We narrowed our list to eight and then selected the top five for hands-on testing. (We also tested the Wen HA5932 Portable Oscillating Spindle Sander, but went out of stock upon publication.)
In actual testing, we used the bench sanders in our workshops to perform various sanding tasks. We sanded hardwood and softwood, and we used the miter gauges available on some models to sand square ends and angles. We carefully noted the safety aspects of each of the sanders as well as beneficial features that made using the tools easier or more efficient.
We awarded points based on a rubric: the better a bench sander performed on a test or assessment, the higher the points. After testing, we averaged the points to determine our best overall pick and to categorize the other bench sanders by their best use.
What to Consider When Choosing a Bench Sander
There is a lot to consider when searching for the right sander. From the space available to the particular type of machine best suited to your needs, the following are some things to think about when looking for the best benchtop sanders for a workshop.
Type
Many different types of electrical sanders fall under the category of bench sander, giving tool users a range of options for their woodworking projects. Bench sander types include belt and disc, drum, and oscillating spindle sanders.
- A belt and disc sander is a combination bench sander that includes a horizontal or vertical belt sander and a disc sander. The benchtop belt sander is a great choice for DIYers who enjoy woodworking projects because it provides multiple methods for sanding, smoothing, and shaping woodworking pieces.
- Drum sanders have traditionally been large freestanding tools with impressive power, but recently manufacturers have started producing a type of benchtop drum sander that can sit on the worktable or workbench. Drum sanders are designed to smooth long boards, panels, or doors and are essentially large stationary belt sanders.
- Oscillating spindle sanders have a vertical spindle where the abrasive sleeves are installed. This spindle rotates and oscillates up and down simultaneously, helping to prevent any lines from forming in the wood or alternate material. The result is a smooth finish on curves, contours, and other irregular shapes.
Power
The amount of power a bench sander needs depends on how it will be used. Large projects benefit from a sander with a powerful motor that can rip through a lot of material in a short period of time. Smaller, delicate projects need a less powerful sander, as too much force can ruin a design or tear the material apart.
Additionally, a powerful sander is harder to control, which is not ideal when working with a small piece of wood. A bench sander with a ⅓ to ¾ hp motor—or about 1 to 5 amps—should be sufficient for most DIY sanding projects.
Adjustability
The best bench sanders for woodworking can be adjusted to customize motor speed, sanding angle, and sanding surface, which gives the tool the ability to handle a wider range of projects and materials. A bench sander with speed controls lets users throttle its power output.
The sanding angle on some belt sanders can be adjusted horizontally or vertically. There are also bench sanders that can be set to use a range of sandpaper types for smoothing materials other than wood.
Ease of Use
If the goal is to find a tool that’s easy to use, look for a sander with intuitive controls, clearly indicated measurements, and clear instructions for use. A bench sander needs to be heavy enough to remain steady as wood is pushed against it but light enough to move around as needed in the workshop. A tool in the weight range of 30 to 40 pounds is usually ideal. Even with sufficient heft, it’s helpful for a sander to have a nonslip base so that it remains stable on the workbench during use.
Make sure to choose the right kind of bench sander for the work that’s planned. For fine work, a bench sander with a spindle-sanding tool is the best bet. If a wide range of projects are planned, a sander with a belt sanding tool, disc sanders, or a grinding wheel may be the better choice.
Additional Features
Bench sanders can come with several different accessories or built-in features to help make it easier to control the sander and achieve the best finish possible on projects. Remember that these tools can be loud, so have hearing protection on hand.
- Safety: Staying safe is the first concern while using a bench sander, so some manufacturers have included a removable key to prevent the power from being turned on and a lockable power switch. Some models may come with a benchtop sanding bench guard or safety gear like gloves, safety glasses, hearing protection, or a dust mask.
- Bevel capacity: Beveling is the process of sanding or cutting a square edge to create a sloping one. Bench sanders can include a beveling device that controls the specific beveling range or beveling capacity, though this feature is more common on circular saws, miter saws, and table saws. Bench sanders tend to rely more on miter gauges for angled cuts.
- Miter gauge: Some bench sanders have a built-in slot that can be used to secure a miter gauge, which holds the material in place during sanding. This is especially useful for sanding on an angle because the miter gauge keeps the angle consistent.
- Dust collector: Bench sanders produce dust and debris that can become a safety hazard. Look for models with built-in dust collectors. When running, these collectors produce suction that pulls dust from the sandpaper into a dust collection bag. After the work is done, the dust can be easily emptied from the bag.
Tips for Using a Bench Sander
Safety is important when working with a bench sander. Personal protective equipment (PPE), including work gloves, safety glasses, hearing protection, and a dust mask, should be worn.
Using proper sanding techniques is crucial. Operate the sander with a slow, deliberate pace to avoid accidentally over-sanding the material. Like any benchtop power tool, a bench sander should be operated on a flat, stable surface so that it doesn’t slip, wobble, or fall over. To recap:
- Use PPE when operating a bench sander.
- Don’t force the wood against the sander; move slowly and deliberately.
- Place the bench sander on a sturdy, flat surface so that it won’t shift while running.
FAQs
With so many bench sander options and features, it’s understandable to have some lingering questions. If you still aren’t sure how to choose the best bench sander, the following helpful answers to common questions about bench sanders may help.
Bench sanders may have several different sanding tools built into them, including disc, spindle, and belt sanders. Each type of sanding tool on the bench sander has a different purpose. Disc sanders are good for sanding a lot of surface area in a hurry or stripping paint from old furniture.
Bench belt sanders can handle rough surfaces, and you can use them to round and shape wood. Spindle sanders are designed to produce a smooth finish on detailed edges and curves, so they’re good for fine carpentry and refinishing furniture.
Any equipment can be dangerous if users don’t follow instructions and take precautions. Be sure to read the manual thoroughly before using any bench sander, and wear PPE for protection in the case of an accident. A belt sander with disc-sanding capabilities may be more manageable for new users.
Belt-sanding machines have a horizontal or vertical adjustable belt of sandpaper that runs through the tool like a conveyor belt. Belt sanders can trim edges, level surfaces, and shape materials. Spindle sanders have a single vertical oscillating spindle with a piece of sandpaper wrapped around it. They’re good for shaping edges, adding curves, rounding work, and detailed work.
Bench grinders are more suitable for heavy-duty work and can cut, grind, and polish harder materials. Sanders, on the other hand, smooth and finish surfaces and are typically used on wood.
Bench sanders can handle a range of tasks, from smoothing long boards to beveling the edge of a dowel. They can handle big jobs or smaller jobs that would normally be done with a rasp or hand plane. The size of materials a bench sander can handle depends on the type of sanding tools it has and the size of the sanding surface.
Consider the types of projects you’ll be working on most often. Smaller sanders with smaller pads are best for light-duty projects. They are easier to maneuver and can handle more detailed work in tight spaces. Larger sanders, such as a 6-inch belt sander, will move over surfaces more quickly and are more appropriate for heavy-duty jobs.
It depends on the project. A sander is a better choice when working quickly on a heavy-duty project to achieve more even sanding. More delicate or intricate projects require more control over the sanding pressure, so in those cases hand sanding is the better choice.
Meet the Testers
Glenda Taylor is a contractor, product tester, and writer focusing primarily on construction and power tools. She tests a wide range of power tools as well as other home improvement, household, and lawn-and-garden products.
Mark Wolfe is an expert gardener, landscaper, avid DIYer, and power tool aficionado, as well as a seasoned product tester and writer for BobVila.com.
The post We’ve Researched Over 20 Bench Sanders, But We Like These 7 the Best appeared first on Bob Vila.
]]>The post This Simple Product Can Increase Your Wood Stove’s Efficiency appeared first on Bob Vila.
]]>A wood stove fan can help distribute the heat from a wood-burning stove, warming a room more efficiently than the stove can unassisted. These little fans typically use the heat generated by the stove to power their motors and don’t require any electricity or batteries to operate. There are numerous wood stove fans available, so to find the cream of the crop, we researched more than 20 models, comparing specs and reviewing dozens of customer reviews. We then tested four standout fans.
After testing, our top pick was the two-pack of Flanagan 5-Blade Fireplace Fans. These two fans quickly spun into action as our stove heated up, providing enough airflow to disperse hot air across the room.
We also enlisted the help of a wood stove and chimney expert, Tim Smith, owner of Albany, New York-based Actual Chimney Specialists. Read on to learn which of the best wood stove fans may be right for your home.
- BEST OVERALL: Flanagan 5-Blade Fireplace Fans
↓ Jump to Review - RUNNER UP: Voda 4-Blade Wood Stove Fan
↓ Jump to Review - BEST BANG FOR THE BUCK: Tomersun 3-Blade Heat-Powered Wood Stove Fan
↓ Jump to Review - BEST COMPACT: Galafire 4-Blade Heat-Powered Wood Stove Fan
↓ Jump to Review - MOST VERSATILE: Cwlakon Mounting Wood Stove Fan
↓ Jump to Review - HONORABLE MENTION: Hanaoyo 6-Blade Wood Stove Fan
↓ Jump to Review - ALSO CONSIDER: Tsendi 4-Blade Silent Operation Wood Stove Fan
↓ Jump to Review
Wood Stove Fans Comparison Chart
| Blades | Operating Temperature | Material | CFM | |
| Flanagan 5-Blade Fireplace Fans | 5 | 185 to 662 degrees Fahrenheit | Anodized aluminum | 164 to 194 |
| Voda 4-Blade Wood Stove Fan | 4 | 185 to 660 degrees Fahrenheit | Anodized aluminum | 240 |
| Tomersun 3-Blade Heat-Powered Wood Stove Fan | 3 | 176 to 653 degrees Fahrenheit | Anodized aluminum | 170 |
| Ecofan UltrAir Nickel Blade Wood Stove Fan | 2 | 212 to 650 degrees Fahrenheit | Nickel and anodized aluminum | 125 |
| Galafire 4-Blade Heat-Powered Wood Stove Fan | 4 | 122 to 662 degrees Fahrenheit | Anodized aluminum | 126 |
| Hanaoyo 6-Blade Wood Stove Fan | 6 | 131 to 653 degrees | Anodized aluminum | N/A |
| Cwlakon Mounting Wood Stove Fan | 4 | Max of 644 degrees Fahrenheit | Anodized aluminum | N/A |
| Tsendi 4-Blade Silent Operation Wood Stove Fan | 4 | 122 to 500 degrees | Anodized aluminum | N/A |
Our Top Picks
The products below were tested on a freestanding wood stove and rated based on their performance, durability, and value. Read on to learn how each model fared in our tests and find one right for you.
Best Overall
Flanagan 5-Blade Fireplace Fans
What We Like
- Includes two 5-blade fans
- Ideal for medium to large rooms
- Attractive price point
- Comes with a stove thermometer
What We Don’t Like
- Not suitable for built-in fireplaces
Specs
- Blades: 5
- Operating temperature: 185 to 662 degrees Fahrenheit
- Material: Anodized aluminum
- Cubic feet per minute (CFM): 164 to 194
Our Ratings: Performance 4.5/5; Durability 4.5/5; Value 4.3/5
Since wood stove fans are small, they don’t produce a ton of airflow. Utilizing two fans, one on each side of the stove, is a more efficient way to disperse heat, which is why our top pick is this affordably priced pack of two fans from Flanagan.
These heat-powered fans have five blades that begin spinning when surface temperatures reach around 130 degrees Fahrenheit. The blades spin faster as the stove heats up, with an operating range from 185 to 662 degrees Fahrenheit. If temperatures exceed 482 degrees Fahrenheit (the ideal operating temperature), the fan’s base will lift, protecting the motor from heat damage.
The Flanagan fans are smaller than some of the other models we tested, but their five blades spun fast, producing the most airflow. We placed one on each side of our wood stove and could feel a warm breeze when standing in front of them. We also appreciated that this two-pack included a wood stove thermometer, which allowed us to easily monitor our stove’s surface temperatures.
What our tester says: “The Flanagan wood stove fans were quick to power up, and their blades spun quickly, helping to move the heat from the top of the wood stove throughout the room. They did a better job of producing airflow than even the most expensive wood stove fan I tested.” —Katie Barton, Product Reviews tester and writer
Get the Flanagan wood stove fan at Amazon.
Runner up
Voda 4 Blades Wood Stove Fan
What We Like
- Available in two finishes
- Quick to power on
- Thermal safety feature protects the fan’s motor
What We Don’t Like
- Doesn’t deliver enough airflow for large spaces
Specs
- Blades: 4
- Operating temperature: 185 to 660 degrees Fahrenheit
- Material: Anodized aluminum
- Cubic feet per minute (CFM): 240
Our Ratings: Performance 4/5; Durability 4.5/5; Value 4/5
Powered entirely by heat, Voda’s four-bladed stove fan is durable and operates silently, making it one of the best ways to circulate air around the wood stove. It kicks on at temperatures as low as 185 degrees Fahrenheit and can withstand temperatures as high as 660 degrees Fahrenheit.
The Voda comes in black and gold finishes to complement different stoves and surroundings. We tested the black version, which was attractive and felt quality-built.
We used a stove thermometer during testing, and the Voda’s blades powered on when our stovetop’s temperature hit the low 100s Fahrenheit. The blades spun quicker as the stove heated up. This fan didn’t produce a lot of airflow, but enough that we could feel it from a few feet away. While it can help distribute air in rooms of all sizes, it’s best equipped to help warm a small room.
Get the Voda wood stove fan at Amazon or Walmart.
Best Bang for the Buck
Tomersun 3 Blades Heat-Powered Wood Stove Fan
What We Like
- Budget-friendly price point
- Whisper-quiet noise level
- Compact design fits on smaller wood stoves
What We Don’t Like
- Produces limited airflow
Specs
- Blades: 3
- Operating temperature: 176 to 653 degrees Fahrenheit
- Material: Anodized aluminum
- Cubic feet per minute (CFM): 170
Our Ratings: Performance 3.7/5; Durability 4/5; Value 4/5
With this pick, Tomersun offers an economical way to add a fan to a wood stove. As with other pricier stove fans, this one features whisper-quiet operation and is made from durable anodized aluminum. Its construction looked and felt similar to the other all-aluminum fans we tested, but at a lower cost.
The Tomersun has a built-in safety device that automatically elevates the front of the fan to protect the motor from damage if temperatures exceed 572 degrees Fahrenheit. Its operating range is 176 to 653 degrees Fahrenheit, although the blades began to spin when our stove’s surface temperature reached a little over 100 degrees Fahrenheit.
The Tomersun stove fan produces an airflow of between 150 and 170 CFM, which is adequate for circulating air through small spaces. Like the other fans we tested, we didn’t feel the airflow more than a few feet away from the fan. However, this choice is a good value for those looking for a wood-burning stove fan for a small space.
What our tester says: “I appreciate this fan’s durable construction and attractive price point. It would be ideal for circulating airflow in a small space.” —Katie Barton, Product Reviews tester and writer
Get the Tomersun wood stove fan at Amazon.
More Great Options
The following wood stove fans have garnered hundreds (or thousands) of positive user reviews. Their standout features and high customer satisfaction ratings have earned them a spot on our list.
Best Compact
Galafire 4-Blade Heat-Powered Wood Stove Fan
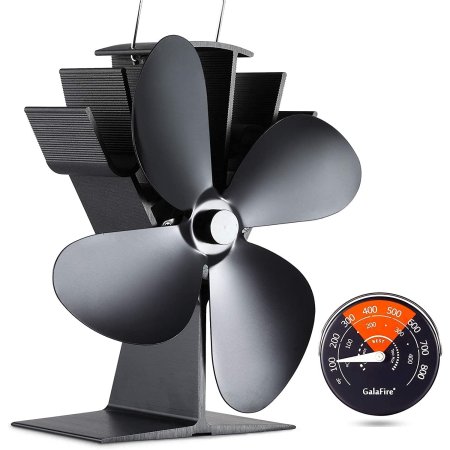
What We Like
- Compact size is ideal for smaller wood stoves
- Starts working at a low temperature
- Features an efficient four-blade design
What We Don’t Like
- May not deliver adequate airflow
Specs
- Blades: 4
- Operating temperature: 122 to 662 degrees Fahrenheit
- Material: Anodized aluminum
- Cubic feet per minute (CFM): 126
This small wood stove fan measures just over 7 inches tall, an ideal choice for more compact wood stoves. Its four-blade design makes it capable of pushing a lot of air. It also starts operating at the low temperature of just 122 degrees Fahrenheit, so it will start circulating air as the stove is just heating up. The Galafire also comes with a thermometer to help monitor the temperature of the wood stove.
Get the Galafire wood stove fan at Amazon.
Most Versatile
Cwlakon Mounting Wood Stove Fan

What We Like
- Attaches to some portable gas-powered space heaters
- Compact size is ideal for small wood stoves
- Suitable for outdoor use
What We Don’t Like
- Smaller size means less airflow produced
Specs
- Blades: 4
- Operating temperature: Max of 644 degrees Fahrenheit
- Material: Anodized aluminum
- Cubic feet per minute (CFM): N/A
This versatile four-bladed fan can be used for more than just a wood stove. That’s because it comes equipped with a slot on its base that allows users to secure it to the top of some space heaters. With its durable anodized aluminum construction, it’s also tough enough to survive outdoors, and it can endure being lugged around. Since it’s more compact than most wood stove fans, it’s easy to take on the road for camping trips or for use with a smaller wood stove.
Get the Cwlakon wood stove fan at Amazon.
Honorable Mention
Hanaoyo 6-Blade Wood Stove Fan
What We Like
- Features 6 fan blades
- Includes a magnetic stove thermometer
- Quiet operation
What We Don’t Like
- Some user complain about lack of air movement
Specs
- Blades: 6
- Operating temperature: 131 to 653 degrees Fahrenheit
- Material: Anodized aluminum
- Cubic feet per minute (CFM): N/A
This heat-powered stove fan kicks on when temperatures reach as low as 131 degrees Fahrenheit and continues to operate at temperatures as high as 653 degrees Fahrenheit. It’s made from lightweight anodized aluminum and features six blades for maximum airflow.
The Hanaoyo stove fan has built-in thermal protection. If the stove’s surface gets too hot, the base will lift, protecting the fan’s motor. It also comes with a magnetic wood stove thermometer. While many users praise this fan for circulating warm air from their stove, some complain that it’s not powerful enough for large spaces.
Get the Hanaoyo wood stove fan at Amazon.
Also Consider
Tsendi 4 Blades Silent Operation Wood Stove Fan
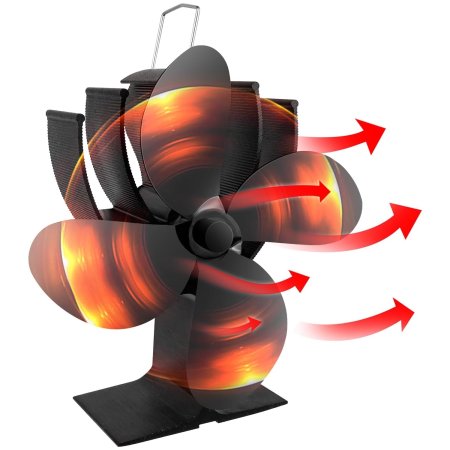
What We Like
- Good build quality with an affordable price tag
- Begins working at a low temperature
- Features lightweight anodized aluminum blades
What We Don’t Like
- Only produces enough airflow to fill smaller rooms
Specs
- Blades: 4
- Operating temperature: 122 to 500 degrees Fahrenheit
- Material: Anodized aluminum
- Cubic feet per minute (CFM): N/A
This wood stove fan is solidly built and produces good airflow, helping to distribute heat from a wood stove or pellet stove throughout the surrounding room. It’s made from durable anodized aluminum and has a low starting temperature of 122 degrees Fahrenheit, so it starts blowing air through the room while the stove is still heating up. Affordably priced, the Tsendi also comes with a stove thermometer that monitors the stove’s temperature.
Get the Tsendi wood stove fan at Amazon.
ALSO TESTED
We also tested the Ecofan UltrAir Nickel Blade Wood Stove Fan. Unfortunately, even though this stove fan was the most expensive and aesthetically pleasing, its two-blade design produced noticeably less circulation than fans with four or five blades. We couldn’t feel any circulation from this fan unless we stood directly in front of it.
Jump to Our Top Picks
How We Chose and Tested the Best Wood Stove Fans
| Testing Stats | |
|---|---|
| Products tested | 4 |
| Time spent testing | 3 weeks |
| Tests performed | 3 |
| Price range | $30 to $100 |
When selecting the best wood stove fans, we considered several factors. Since these fans are exposed to intense heat, we chose models made from durable, heat-resistant materials such as anodized aluminum. Other important features we looked for were safety mechanisms that protect the fan’s motor in case the stove exceeds the fan’s heat rating. Aesthetics were also a factor, given that wood or pellet stove fans are typically clearly visible.
We tested four fans, letting them run on our wood stove for 3 weeks. We evaluated how well each fan could move air through the room from short and long distances. To verify that they worked within their operating temperature range, we monitored our stovetop’s temperature using a wood stove thermometer. We also inspected the construction and let the fans run non-stop for several days to evaluate durability. We used a standardized rubric to award each fan ratings based on performance, durability, and value and tallied those scores at the end of testing to determine which fans were the best.
| Performance | Durability | Value | |
| Flanagan 5-Blade Fireplace Fans | 4.5/5 | 4.5/5 | 4.3/5 |
| Voda 4-Blade Wood Stove Fan | 4/5 | 4.5/5 | 4/5 |
| Tomersun 3-Blade Heat-Powered Wood Stove Fan | 3.7/5 | 4/5 | 4/5 |
| Ecofan UltrAir Nickel Blade Wood Stove Fan | 3.3/5 | 5/5 | 3/5 |
What to Consider When Choosing a Wood Stove Fan
While performing research, we asked chimney expert Tim Smith of Actual Chimney Specialists a variety of questions to find out what factors are most important when shopping for one of these wood stove accessories. If you’re heating with a wood stove, here’s what you need to know about wood stove fans.
Blades
The number and design of the blades impact how well a wood-burning stove fan can distribute air throughout the room. Typically, fans with four blades do a better job of circulating air than fans with two or three blades.
But while fans with more blades are tempting, Smith points out that fans made with fewer blades and lightweight materials will last longer and spring faster. “A lightweight material such as aluminum would be best so the fan blades will spin quickly without too much stress on the motor,” he says.
The blade design can also play a factor in how effectively the fan moves air. Some wood stove fans utilize curved or angled fan blades to blow air more efficiently.
CFM Rating
A fan’s CFM rating measures how much air a fan can move per minute. This measurement is important because it indicates how well the wood stove fan can blow air through a room. That being said, while many manufacturers list the CFM ratings of their wood stove fans, they’re not always accurate. Most wood stove fan CFM ratings hover around 130 CFM, which is about enough to circulate warm air through about 400 square feet of space. Also, keep in mind that since wood stove fans have motors that use the stove’s heat for power, the speed will partially depend on the temperature of the stove.
Operating Temperature
Smith says that when selecting a fan, it’s important to pay attention to the temperature range of the unit, including the minimum temperature that is required to start its motor and the maximum temperature it can endure without suffering damage.
“Wood stove fans that are specific to the appliance usually have a temperature switch or a snap disk that senses a specific temperature before it will send power to the fan,” Smith says. “The temperature [the fan starts at] is usually between 180 and 220 degrees Fahrenheit.”
As the temperature of the stove increases, the fan will continue to speed up until it hits an optimal temperature, which is usually between 450 and 500 degrees Fahrenheit. Most wood stove fans have safety features that will raise the base of the fan off of the stove when the wood stove’s temperature exceeds 600 degrees Fahrenheit. This is done to prevent a fan’s motor from overheating.
Since wood stove fans require a minimum level of heat to power on, they won’t work on electric fireplace heaters or standard built-in fireplaces.
Noise
Since wood stove fan motors are powered solely by heat from the stove, they tend to operate very quietly. Expect a wood stove fan to operate at decibel levels between 25 and 30, which is about the same noise level as a whisper. A fan’s build quality can also affect its noise level. Poorly-made wood stove fans may have loose parts that create rattling or clicking noises while the fan is operating.
Materials
Wood stove fans are usually made from anodized aluminum that can withstand temperatures of up to 600 degrees Fahrenheit. While virtually all wood stove fans are made from this material, more durably-built models use heavier-gauge aluminum than cheaper alternatives.
The Advantages of Using a Wood Stove Fan
A good thermal fan for wood stove use can improve its ability to distribute heat, making it more efficient at heating a home.
“The advantage of adding a wood stove fan is you will push more heat quicker and be able to heat a larger area in a much more efficient manner,” Smith says.
And since these fans use a motor powered by the heat of the stove, they don’t require electricity to function. Unlike fireplace insert blowers and other types of fans, wood stove fans make very little noise, so they don’t detract from the rustic appeal of a wood stove.
- Improves stove efficiency by helping to distribute warm air
- Doesn’t require any electricity or a battery to operate
- Operates very quietly
Safety Tips for Using Wood Stove Fans
While a heat fan for wood stovetops can help make a stove more efficient, it can also be a safety hazard. First, when positioning the fan on the stove, make sure it has enough clearance to accommodate the spinning blades. Wood stove fans can exceed 600 degrees Fahrenheit. And because the spinning fan blades are exposed on most models, they can cause injury to anyone who comes into contact with them. As such, it’s important to keep children and pets away from the fan. To reposition the fan during use, be wary of the blade and wear a stove glove to avoid getting burned. Also, use the handle on the top of the fan to move it.
- Make sure there is enough space around the fan to accommodate the blades
- Keep children and pets away from the fan
- Use an oven mitt and grab the fan’s handle to reposition it while it is in use
FAQs
Still have questions about how wood stove fans work and whether they’re right for your home? Read on for answers to some of the most common queries about these devices, including how long they last and where to position the fan on the stove.
Two stove fans are better than one when it comes to airflow. Most wood stove brands are large enough to accommodate two stove fans. Adding one on each side of the stovetop maximizes the circulation of warm air throughout the room.
Stove fans do make wood stoves more efficient. By circulating the warm air outward, preventing it from rising directly to the top of the room, stove fans decrease a wood stove’s heat loss, thus improving the stove’s ability to heat a room. And since the stove fan doesn’t use any electricity, there’s no additional cost to operate it.
Most wood stove fans have three or four blades. The more blades, the better the fan is able to disperse heat throughout a room, though the blade length and shape will also have an impact. More blades typically result in better performance, but a large number of blades also puts more drag on the motor, which can cause it to wear out more quickly.
Since heat rises, a wood stove fan placed on top of the stove can help push that rising heat across the room before it rises to the ceiling. However, wood stove fans are small, so they don’t provide much airflow. They also work best on freestanding wood stoves and may not work on all types of fireplaces.
With regular dusting, a wood stove fan can last for many years. Longevity will vary depending on the level of heat the fan is exposed to and its construction.
The best position for a wood stove fan is near the back or side of the stove but away from the chimney.
Meet the Tester
Katie Barton is a Bob Vila writer specializing in home-related topics. She has a wood stove in her garage, and a wood-burning fireplace insert in her home.
Additional research provided by Tony Carrick
The post This Simple Product Can Increase Your Wood Stove’s Efficiency appeared first on Bob Vila.
]]>An air compressor can make completing everyday tasks easier and more efficient. Whether you’re inflating a tire, blowing dust from tight spots, or powering a brad nailer or stapler, having one on hand makes it easier. The downside? They can be pricey.
When I saw Lowe’s was selling its Project Source 3-gallon Pancake Air Compressor for just $39.98, I thought it was too good to be true. But, it’s real, and it’s a steal! To snag this deal, you’ll need to be a MyLowe’s Rewards member—but don’t worry, signing up for MyLowe’s Rewards is quick, easy, and best of all, free! Once you’ve signed up and logged into your account, simply add this air compressor to your cart to see the Lowe’s Rewards Member Deal price.
As a general contractor, I’ve used dozens of air compressors, but pancake-style models are my favorites because they’re compact, lightweight, and easy to store. The Project Source air compressor offers a max 110 PSI, making it well-suited for powering multiple pneumatic tools, including finish nailers and airbrushes.
Get the Project Source 3-Gallon Pancake Air Compressor at Lowe’s for $39.98 (Save $40)

If the Project Source isn’t exactly what you’re looking for, we have you covered. We’ve tested various air compressors to determine the best models in all budgets. Check out our guides and reviews to find the best one for your project.
- The Best Home Air Compressors
- The Best Portable Air Compressors
- The Best Quiet Air Compressors
- Review of the Makita Mac2400 Air Compressor
- Review of California Air Tools 8010 Air Compressor
The post This Product Is a Game Changer for DIY Projects, and It’s On Sale for $40 appeared first on Bob Vila.
]]>The post The Best Seed Starting Mixes of 2025 for Successful Germination appeared first on Bob Vila.
]]>Seed starting mixes are clean and lightweight, offering an optimal foundation for seed germination. They come in various mediums, including loose grow mixes (similar to potting soil), expandable coconut coir bricks, or easy-to-transplant pellets.
Unlike regular garden soil, which can be too dense for tiny roots to expand, seed starting mixes are airy, providing the right environment for delicate roots to take hold. After researching more than 20 of the best grow mix options, our favorite is the Espoma Organic Seed Starter Premium Potting Soil Mix. It’s suitable for flowers and vegetables and is organic and non-compacting, encouraging the growth of healthy plants.
We also interviewed a horticulturist for expert opinion on the benefits and differences between each type of grow mix and how to incorporate them into your home gardening practices. Read on for some of the best seed starting mixes available today and some things to keep in mind while you shop.
- BEST OVERALL: Espoma Organic Seed Starter Premium Potting Soil Mix
↓ Jump to Review - RUNNER-UP: Hoffman Seed Starter Potting and Planting Soil
↓ Jump to Review - BEST BANG FOR THE BUCK: Miracle-Gro 8-Quart Seed Starting Potting Mix
↓ Jump to Review - BEST WINDOW KIT: Window Garden Mini Greenhouse Seed Starter Kit
↓ Jump to Review - BEST ORGANIC: Coast of Maine Sprout Island Organic Seed Starter
↓ Jump to Review - BEST COCONUT COIR: Burpee Organic Coconut Coir Seed Starting Mix
↓ Jump to Review - BEST STARTER PELLETS: Jiffy-7 36-Millimeter Peat Pellet Seed Starter Plugs
↓ Jump to Review - BEST PEAT-FREE: SpongEase Pro Coco Coir Brick
↓ Jump to Review
Before You Buy Seed Starting Mix
Before spring arrives, garden centers begin stocking large bags of growing medium, but don’t grab one without reading the label. Growing mixes come in various blends, some designed to amend outdoor garden beds, while others are for potted plants. Still others contain fertilizers for specific plants, such as “acid-loving” or “indoor.” Along with standard potting soil, most of these options are not suitable for starting seeds because they contain some contaminants. Choose a mix labeled for starting seeds to ensure it doesn’t contain traces of fungus or bacteria that could wipe out tiny seedlings.
| Ingredients | Quantity | Organic | |
| Espoma Organic Seed Starter Premium Potting Soil Mix | Sphagnum peat moss, perlite, limestone to adjust pH, and yucca extract | 8 or 16 quarts | Yes |
| Hoffman Seed Starter Potting and Planting Soil | Sphagnum peat moss, vermiculite, limestone, and a wetting agent | 4, 10, or 18 quarts | No |
| Miracle-Gro 8-Quart Seed Starting Potting Mix | Sphagnum peat moss, perlite, fertilizer, and a wetting agent | 8 quarts | No |
| Window Garden Mini Greenhouse Seed Starter Kit | 30- to 36-millimeter fiber soil | 3 trays with 10 cells each (30 cells total) | Unspecified |
| Coast of Maine Sprout Island Organic Seed Starter | Sphagnum peat moss; perlite, kelp meal, worm castings, lobster meal, dehydrated poultry manure, dolomitic lime, and well-aged compost | 8 or 16 quarts or 2 cubic feet | Yes |
| Burpee Organic Coconut Coir Seed Starting Mix | Compressed coir soil derived from coconut husks | 8 or 16 quarts | Yes |
| Jiffy-7 36-Millimeter Peat Pellet Seed Starter Plugs | Compressed peat moss | 50 pellets | Yes |
| SpongEase Pro Coco Coir Brick | Yes | 1 brick makes 2 gallons of soil | Yes |
Our Top Picks
Best Overall
Espoma Organic Seed Starter Premium Potting Soil Mix

What We Like
- All-natural potting mix for seedlings and root cuttings
- Helps improve moisture retention
- Noncompacting; intended to promote better root growth
- Suitable for vegetables and flowers
What We Don’t Like
- Some users report poor growth with certain plants
Specs
- Ingredients: Sphagnum peat moss, perlite, limestone to adjust pH, and yucca extract
- Quantity: 8 or 16 quarts
- Organic: Yes
Espoma’s organic seed starter mix contains all-natural ingredients, including sphagnum peat moss, peat humus (a decomposed ingredient from peat bogs), perlite, and Myco-tone, a proprietary blend of ingredients designed to help seedlings develop strong roots. This premium seed-starting mix retains moisture without compacting. Its all-natural formula helps when rooting cuttings, and it produces healthy plants with abundant blooms, making it well suited for both flowers and vegetables. This potting mix comes in an 8-quart or 16-quart bag.
Get the Espoma seed starting mix at Amazon, The Home Depot, TrueValue, or Walmart.
Runner-up
Hoffman Seed Starter Potting and Planting Soil
What We Like
- Lightweight, loose, and fertile soilless mix
- Specially formulated to promote seed germination
- Contains 6 components blended in proper proportions
- Also suitable for root cutting and transplanting
What We Don’t Like
- Takes some time to fully germinate some seeds
Specs
- Ingredients: Sphagnum peat moss, vermiculite, limestone, and a wetting agent
- Quantity: 4, 10, or 18 quarts
- Organic: No
This seed-starting mix from Hoffman, which comes in a 4-, 10-, or 18-quart bag, contains Canadian sphagnum peat moss, vermiculite, limestone (a pH adjuster), and a wetting agent. We like that this mix retains moisture while providing a light, airy growing medium that promotes seed germination and root development. Also use this seed-starting mix to root cuttings and in larger containers when transplanting seedlings. Ground limestone makes this mix work as a potting soil and for acid-loving plants, such as hydrangea or blueberries.
Get the Hoffman seed starting mix at Amazon, Kmart, or Walmart.
Best Bang for the Buck
Miracle-Gro 8-Quart Seed Starting Potting Mix
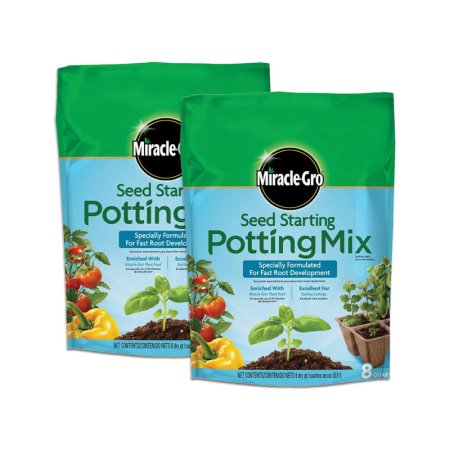
What We Like
- Enriched with Miracle-Gro Plant Food
- Formulated to boost root development
- Good choice when starting from seed
What We Don’t Like
- Intended for container use only
- Some users report a sour smell
Specs
- Ingredients: Sphagnum peat moss, perlite, fertilizer, and a wetting agent
- Quantity: 8 quarts
- Organic: No
From a manufacturer well-known in the gardening industry, this Miracle-Gro potting mix is specially formulated to boost root development. Miracle-Gro contains sphagnum peat moss, perlite, fertilizer, and a wetting agent. The mix helps retain moisture and drains well, and it won’t pack down.
The included fertilizer contains nitrogen, phosphate, and potash to help stimulate sprout growth, root development, and blooms. This Miracle-Gro product, which comes in an 8-quart bag, is suitable for starting root and leaf cuttings as well as starting seed trays. Also use it in larger containers when transplanting.
Get the Miracle-Gro seed starting mix at Amazon (2-pack), Ace Hardware, The Home Depot, Lowe’s (2-pack), or Tractor Supply Co.
Best Window Kit
Window Garden Mini Greenhouse Seed Starter Kit
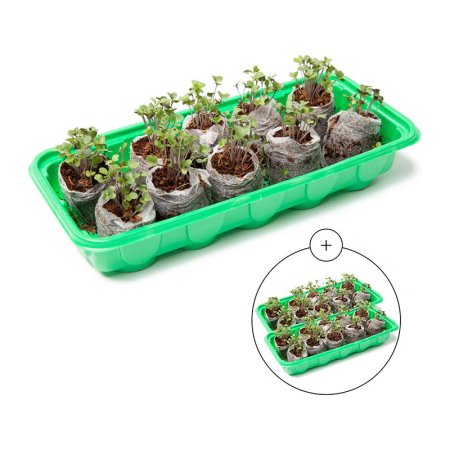
What We Like
- 3 mini greenhouses are reusable
- Offers a moist, warm environment for seed germination
- Creates a better root system
- Makes new plants easy to transplant
What We Don’t Like
- Pricey compared to other seed starter kits
- Seeds must be purchased separately
Specs
- Ingredients: 30- to 36-millimeter fiber soil
- Quantity: 3 trays with 10 cells each (30 cells total)
- Organic: Unspecified
This Window Garden seed-starting kit features three grow trays that are small enough to fit on a windowsill. Each tray comes with 10 compressed coconut coir grow pods. A clear dome sits atop each tray to act as a mini-greenhouse and help keep the pods from drying out.
Put the fiber soil pods in the bottoms of the trays and add warm water; the pods will expand and become light and fluffy. Each pod contains only organic coconut coir. When the seedlings are ready for transplanting to garden soil, insert the entire pod in the garden.
Get the Window Garden seed starting mix at Amazon, Target, Bed Bath & Beyond, or Walmart.
Best Organic
Coast of Maine Sprout Island Organic Seed Starter
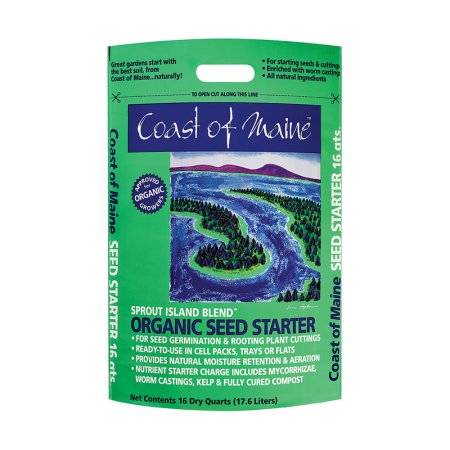
What We Like
- Designed specifically for germinating seeds and rooting cuttings
- All-natural fertilizer made with rich ingredients
- Provides ample drainage and water retention
What We Don’t Like
- Some users report poor consistency and mold
- Some say this mix attracts flies
Specs
- Ingredients: Sphagnum peat moss; perlite, kelp meal, worm castings, lobster meal, dehydrated poultry manure, dolomitic lime, and well-aged compost
- Quantity: 8 or 16 quarts or 2 cubic feet
- Organic: Yes
This Coast of Maine organic seed starting mix contains a blend of ingredients designed specifically for starting seeds and root cuttings, including sphagnum peat moss, perlite, aged compost, kelp meal, and worm castings. We appreciate that this mix also contains an all-natural fertilizer to encourage growth and help produce disease-resistant plants.
Coast of Maine seed starter is a lightweight, well-draining growing medium that won’t pack down, so tender seedling roots can develop. It retains moisture to help prevent roots from drying out. The mix comes in 8- and 16-quart bags. There’s also a 2-cubic-foot option.
Get the Coast of Maine seed starting mix at Amazon, The Home Depot, Target (2-pack), Ace Hardware, or Walmart.
Best Coconut Coir
Burpee Organic Coconut Coir Seed Starting Mix
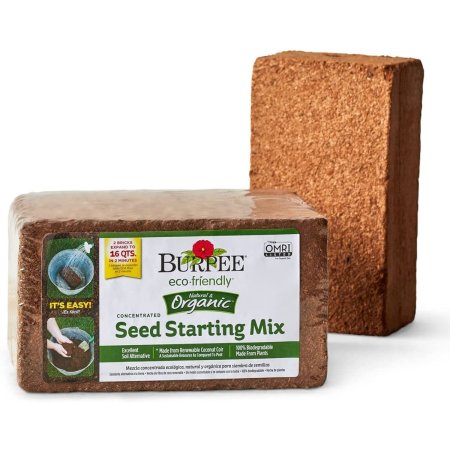
What We Like
- Compact size; easy to store
- Expands to 8 quarts of soil when watered
- Ideal for seed starting
- Balanced pH improves nutrient absorption by seedlings
What We Don’t Like
- Dries out faster than other mixes
Specs
- Ingredients: Compressed coir soil derived from coconut husks
- Quantity: 8 or 16 quarts
- Organic: Yes
The compressed coconut coir in this seed-starting mix comes as an 8-quart, 7.25- by- 6- by-4-inch compressed brick. Just add water and crumble it to obtain 8 quarts of seed-starting mix. The Burpee Organic Seed Starting Mix contains only coconut coir to help promote plant and root growth.
Once expanded with water, use the coir in any seed-starting container, by itself or in combination with potting soil to grow larger plants. The material retains moisture yet won’t pack down.
Get the Burpee seed starting mix at Amazon, The Home Depot, or Burpee (2-pack).
Best Starter Pellets
Jiffy-7 36-Millimeter Peat Pellet Seed Starter Plugs
What We Like
- 50 pellets included
- Pods are biodegradable
- Suitable for transporting
What We Don’t Like
- Some user reports of mold growth
Specs
- Ingredients: Compressed peat moss
- Quantity: 50 pellets
- Organic: Yes
These Jiffy-7 peat pellets arrive in small, compressed discs but expand into fluffy grow pods when immersed in water. This soilless seed starting mix contains only compressed peat moss—nothing else. The user places a pellet in the bottom of a plastic flat or tray and pours in warm water to trigger expansion. When the expansion is complete, the pellet measures 1.5 inches by 1.5 inches, just large enough to insert a seed or two in the top of the peat moss.
The peat moss is held in place with a thin biodegradable net, and gardeners place the entire unit in the soil when transplanting to the garden or a larger pot. Buyers receive 50 compressed peat pellets per package.
Get the Jiffy-7 seed starting mix at Amazon, Grower’s Solution, or Walmart.
Best Peat-Free
SpongEase Pro Coco Coir Brick

What We Like
- Compact and easy to store when not using
- More environmentally friendly than peat moss products
- Affordable; product makes 2 gallons of soil
What We Don’t Like
- Grittier texture than other coco coir products
Specs
- Ingredients: Coconut coir
- Quantity: 1 brick makes 2 gallons of soil
- Organic: Yes
The SpongEase Pro Coco Coir Brick squeezes nutrients down to a compact brick full of goodness. Made of raw coconut coir, this fibrous block expands to a light texture designed to aerate, retaining moisture. At the same time, it provides a nutritious boost for starting seeds.
Gardeners can rehydrate the entire block to create 2 gallons of soil or hydrate only the amount needed to fill their seedling starter trays. The compressed packaging stores easily and provides options for a wide range of gardening needs and uses. This organic and eco-friendly starting mix for seeds makes a good substitute for peat since coco coir saturates more quickly than peat moss, although it dries out more quickly, so be aware of this when using.
Get the SpongEase seed starting mix at Amazon or The Home Depot (3-pack).
Jump to Our Top Picks
How We Chose the Best Seed Starting Mixes
We researched the most sought-after seed starting mixes in their respective categories and discovered that the best options are determined by their ingredients, form, quantity provided, and other special features included by top brands.
While searching for the best seeding mix available, the most effective and popular types among users for outdoor and indoor plant growth were potting soil mixes, pods, and sponges. These mixes included coconut coir, sphagnum peat moss, perlite, fertilizer, wetting agents, and even compost. We looked for versatile mixes that would grow everything from flowers to tomatoes from seed.
The seeding mixes allow for drainage, water-retention, root cutting, and transplanting while young seeds begin to grow. Many come with large quantities of up to 16 quarts or 50 pods or sponges. Plus, the majority of these picks are 100 percent certified organic seed starters.
What to Consider When Choosing the Best Seed Starting Mix
Most seed-starting mixes are soilless, which means they contain no dirt. While established plants may thrive in real garden soil or potting soil, the delicate roots of just-sprouted seeds may find it challenging to do so.
“Seed mixes are designed to create the perfect environment for seeds to germinate and develop their first roots,” says Michael Clarke, horitculturist and founder of Yardwork, based in San Juan Capistrano, California. “Because regular garden soil can be too dense and not drain well, the newly formed roots can become compacted or damaged from mold growth. The mixes also need to be lightweight, drain well, and sterile, to give seeds the best chance to thrive without the competition of soil-borne diseases or pests which can be present in garden soils.”
Ingredients
Most seed-starting mixes contain one or more of the following ingredients:
- Sphagnum peat moss: The most common base ingredient in seed-starting mixes, sphagnum peat moss is the decomposed material of sphagnum moss, a moss that grows in peat bogs. After it’s sterilized and dehydrated, sphagnum peat moss provides an optimal base for seeds to sprout; it’s absorbent yet won’t pack down. Peat moss, also popular for compressing into small pods, is called “peat pellets,” which expand into fluffy grow mix for starting seeds when immersed in water.
- Coconut coir: Removed from the outside of coconuts during the harvest process, coir is the fibrous layer that surrounds a hard coconut shell. Formerly discarded as a waste product, coir is now valued for its ability to retain moisture without compacting, making it well suited as an ingredient in seed-starting mixes. Like sphagnum peat moss, coir can be dehydrated and compressed into plugs for rehydrating and starting seeds.
- Perlite: Perlite is a byproduct of volcanic glass that’s been heated to high temperatures, resulting in a product that resembles puffy white beads. Perlite retains a small amount of moisture, but its primary purpose is to keep the growing mix from compacting.
- Vermiculite: Almost as light as perlite but highly absorbent, vermiculite is a silica mineral that’s mined from the earth. It’s in potting soil and seed-starting mix to lighten the mixture and help retain moisture.
- Diatomaceous earth (DE): This powdery natural product in some seed-starting mixes helps kill insects. Diatomaceous earth contains the finely ground fossils of tiny aquatic organisms known as “diatoms.” When insects come into contact with DE, the powder sticks to their bodies and acts as a desiccant to dehydrate and kill them.
- Lime: Powdered lime is in some seed-starting mixes to help lower the pH level of the mix to around 6 to 6.5 on the pH scale. The pH scale ranges from 0 to 14, with 7 considered neutral. Higher numbers indicate greater alkaline content, and lower numbers indicate more acidic content. Most plants grow well in soil with a pH level of around 6.5 to 7.
- Wetting agent: Completely dry grow mix ingredients initially resist absorbing water, so some manufacturers include a wetting agent (surfactant) that helps the material absorb water. A wetting agent, such as powdered kelp, is needed the first time the material is moistened.
Organic vs. Non-Organic
When a starter soil for seeds is labeled “organic,” gardeners know that all its ingredients are natural and contain no chemicals or synthetic agents. Most seed-starting mixes contain most, if not all, natural ingredients, but the inclusion of synthetic fertilizers disqualifies it as organic. An organic seed-starting mix may be more important to those who produce edible vegetables rather than flowers or ornamental plants.
Sterilization
Manufacturers remove fungi and bacteria from seed-starting mix by heating it to over 200 degrees Fahrenheit for a period of time, usually at least 30 minutes, to destroy pathogens that might kill tender seedlings. Depending on the manufacturer, heat may be applied by forcing steam through the material or by submerging the mixture in water and heating the water. Sterilizing the mixture gives delicate seeds their best chance at survival.
Aeration and Moisture Retention
A seed-starting mix should retain its lightness and loft, even when wet. Not only do new roots need moisture to grow, but they also need oxygen. Manufacturers add perlite and vermiculite to aerate the mix. Starting seeds in compact or heavy garden soil usually results in poor germination rates. Optimal seed-starting mixes retain just enough moisture for the mixture to stay damp to the touch while still providing the aeration necessary for roots to develop.
pH Levels
If a seed-starting mix is labeled as having “balanced pH,” the pH should fall between 6.5 and 7. Adjusting the pH level of a seed-starting mix isn’t always essential, since the natural ingredients in most mixes fall within the correct pH levels. Monitoring pH is more important if the plant is grown hydroponically (in water). pH adjusting solutions, known as “pH UP” and “pH DOWN,” are available to mix with the water in a hydroponic system to help maintain a neutral pH level.
Tips for Using Seed-Starting Mix
The best time to start seeds indoors depends on the type of seed and your USDA growing zone. Use a seed-starting mix rather than soil or potting mix to increase seed germination and get tiny seedlings off to a healthy start. Employ these tips to simplify the process and increase success.
- “It’s best to moisten the mix before planting seeds. It should be damp, but not soaking wet, to prevent the seeds from drying out too quickly,” says Clarke.
- If the tap water is high in mineral content, consider using distilled water to avoid creating a high alkaline pH environment.
- Consider wearing a dust mask when working with a dry seed-starting mix since some contain powdery, fine elements that can become airborne.
Clarke also cautions against watering plants too frequently. “It’s best to use seed liners or trays containing drainage holes to prevent water from sitting at the bottom,” he says.
FAQs
By using a seed starting soil, you increase the chance of successfully growing from seeds to transplant to the garden later. Frequently asked questions about seed starter mixes appear below.
None, actually! Avoid planting seeds in natural soil; instead, opt for a commercial seed-starting mix for optimal germination and survival rates when starting seeds indoors. The best indoor seedling starter mix only needs three ingredients for seeds to germinate: sphagnum peat moss (or coco coir), perlite, and vermiculite.
Potting soil is denser and may contain larger bits of ingredients, such as twigs or clumps. Potting soil for indoor plants usually does not drain as well as starting mix and is packed with richer nutrients (which seeds don’t actually need to germinate)
Seed starting mix is very fine and contains no large pieces, drains well, and helps prevent compacting inside the small seed starting cells or containers.
No, once it’s been used, it’s no longer sterile. But you can sprinkle leftover mix on the garden or blend it into a potted plant to help lighten the soil.
No. Seed starting mixes don’t have expiration dates. However, users should take care when storing unused starting mix to prevent mold growth or bugs.
Seedlings should be kept in a seed-starting mix for about 3-4 weeks or until the roots develop and become visible at the bottom of the tray or soil block.
Whether or not you should cover a seed to help it germinate depends on the type of plant you’re growing. In general, covering seeds with a dome or plastic will keep them damp, helping them germinate faster. However, fungal infections can take hold if you keep germinated seeds covered too long.
Seed starting mix should be damp to the touch but not soaking wet.
Why Trust Bob Vila
Bob Vila has been America’s Handyman since 1979. As the host of beloved and groundbreaking TV series including “This Old House” and “Bob Vila’s Home Again,” he popularized and became synonymous with “do-it-yourself” home improvement.
Over the course of his decades-long career, Bob Vila has helped millions of people build, renovate, repair, and live better each day—a tradition that continues today with expert yet accessible home advice. The Bob Vila team distills need-to-know information into project tutorials, maintenance guides, tool 101s, and more. These home and garden experts then thoroughly research, vet, and recommend products that support homeowners, renters, DIYers, and professionals in their to-do lists.
The post The Best Seed Starting Mixes of 2025 for Successful Germination appeared first on Bob Vila.
]]>The post The 23 Best Organization Products Under $50 appeared first on Bob Vila.
]]>Keeping a home organized can feel like a constant battle. Whether you live alone, share a space with roommates, or have a large family, time and space constraints can make it difficult to stop the clutter from creeping in. The best organizing products make it possible to develop a solution to tame the clutter and find a spot to keep your items easily accessible without making more of a mess. Continue reading to learn more about some of the top organizing products for the kitchen, office, closet, bedroom, bathroom, garage, and car.
Best Kitchen Organizers

1. Food Storage Containers
The pantry is often one of the most disorganized spaces in a home. This set of 24 airtight food storage containers are one of the best home organization products to help you regain control of a cluttered pantry. The set includes four different container sizes (2.5 quarts, 1.8 quarts, 1.5 quarts, and 0.7 quarts) to hold snacks, cereal, pasta, baking necessities, tea bags, and more. The containers are stackable and come with reusable labels, making it easy to keep everything organized and easy to find.
Get the Vtopmart Airtight Food Storage Containers at Amazon for $36.99 (Save $5)

2. Refrigerator Organizer Bins
The refrigerator is another area of the kitchen that can often use some TLC when it comes to organization. These bins can hold fresh fruits and vegetables, condiments, snacks, soda cans, and other loose items that would otherwise get jumbled around in the fridge. Four medium and four large bins come in the set, providing plenty of space to store several items. The clear design makes it easy to see what is in each bin and helps prevent food waste. In addition to being used in the fridge, these clear bins can also help you keep the freezer, pantry, or countertops organized.
Get the Utopia Home Organizer Bins at Amazon for $16.99

3. Can Organizer
Canned soups, fruits, vegetables, and meats are a staple found in many pantries. However, when you have several cans in your pantry, it can be really difficult to find the one you need for a specific recipe—or to even know what you have when getting your grocery list ready. This can rack organizer has a three-tiered design to hold up to 36 cans. Customize the placement of the included plastic dividers to accommodate the cans in your pantry. If the space in your pantry allows, you can even purchase two sets of racks and stack them together to store up to 72 cans.
Get the Sagler Stackable Can Rack Organizer at Amazon for $19.99

4. Pots and Pans Organizer
Keep your pots and pans from taking over your cabinets with this organizer. It offers a customizable design to accommodate your specific storage and organization needs. Choose a horizontal layout to hold up to eight lids and frying pans, or opt for one of the two horizontal settings to hold larger cookware pieces.
Get the GeekDigg Pot Rack Organizer at Amazon for $23.99
5. Spice Organizer
This two-tiered spice organizer can hold up to 40 different seasonings and condiments, making it much easier to find exactly what you need for a specific recipe. There’s an adjustable top shelf and four different height settings to choose from, depending on the space in your cabinet and the height of your seasoning bottles. With the built-in lazy Susan, you can rotate the shelves 360-degrees to quickly grab the spice you want.
Get the Spice Spinner Two-Tiered Spice Organizer at Amazon for $19.99

6. Water Bottle Organizer
If you’re afraid all of your water bottles and tumblers are going to come crashing out of the kitchen cabinet every time you open it, consider picking up this water bottle organizer. It features four stacking trays, each with three deep wells to hold bottles of varying sizes. The organizer is made of shatter-resistant BPA-free plastic, so it’s built to last. In addition to helping you keep your cabinets organized, you can also place this product directly in the refrigerator to keep water bottles, sports drinks, and other beverages ready to go.
Get the ClearSpace Water Bottle Organizer at Amazon for $24.95
Best Office Organizers
7. Acrylic Desk Organizer
With the right home organization products, you can keep your pens, pencils, scissors, even craft supplies tidy on your desk. This clear acrylic desk organizer offers six compartments to corral your desk’s clutter, and spins 360 degrees on a lazy Susan so that you can see all with ease.
Get the Absonic Acrylic Pen Organizer at Amazon for $29.99

8. Desk Drawer Organizer
With 10-interlocking bins of varying sizes, this desk drawer organizer will help you neatly store pens, pencils, paperclips, scissors, staples, and other office essentials. The layout is completely customizable, allowing you to create a customized design based on your exact organizational needs and the dimensions of your desk drawer. The durable plastic bins are available in black or white and can also be used to organize bathroom drawers, junk drawers, and other problem areas in the home.
Get the Backerysupply Interlocking Desk Drawer Organizer at Amazon for $8.99

9. Cable Management Organizer
If you’ve had enough of the jumbled mess of cords and cables behind your computer, solve your problems with this handy organizer. This set of three cable holder clips can keep your charging cords, mouse cables, audio cables, Ethernet cables, and more from getting tangled or lost behind the desk. It’s made of 100 percent silicone construction to avoid interfering with any of your electronic devices. Plus, the base of the silicone strip has an adhesive to keep in place on a variety of surface types.
Get the Soulwit Cable Holder Clips at Amazon for $6.55
Best Closet and Bedroom Organizers

10. Over-the-Door Shoe Storage
Our favorite over-the-door shoe rack from testing is versatile in both how it hangs and what it can hold. Measuring 35.2 inches tall by 17 inches wide by 6.5 inches deep, these cubby-style shoe racks come in a two-pack that can either be hung separately or together. For added convenience, there are three hooks on the bottom where the racks can attach to each other to create one larger rack that holds 24 pairs of shoes. In testing, we found that each set had a row of deeper pockets that worked well for large or bulky shoes like trail runners and boots. Plus, the sturdy design can also hold toys, crafts, socks, clothes, tools, belts, or even cleaning products.
Get the StorageManiac over-the-door shoe rack on Amazon for $32.99

11. Drawer Organizer
With the best drawer organizers, finding clothing in your dressers is a lot easier. This set of four drawer dividers is perfect for clearing up space to keep underwear, socks, bras, and other delicate clothing items under control. Each bin offers cells of varying sizes to better accommodate each of your items. Choose from gray, dark gray, black, beige, brown, pink, and turquoise color options to better match your room’s decor and your preferences.
Get the SimpleHouseware Drawer Organizer at Amazon for $13.97

12. Hanging Closet Organizer
A hanging closet organizer allows you to maximize space in a tight closet and makes it easier to store bulkier items, such as sweaters, towels, and bedding. This organizer offers four shelves, a side pocket that will support up to 30 pounds, and hooks to hang it on a garment rod or to wire shelves. Made from a durable polyester canvas material, it’s also available in four different color options.
Get the StorageWords 3-Shelf Hanging Closet Organizer at Amazon for $26.99

13. Shoe Storage Boxes
These shoe storage boxes will keep your shoes dust-free in addition to keeping them organized and easy to find. The set includes 12 durable plastic shoe bins large enough to hold women’s size 10 shoes or men’s size 9 shoes. The bins are stackable and allow you to create a customized configuration based on the constraints of your space. Their clear front and side design makes it easy to quickly spot the pair of shoes you want, and the breathable back frame allows for enough airflow to keep them in good condition.
Get the Pinkpum Shoe Storage Boxes at Amazon for $29.99

14. Underbed Storage Bags
Store off-season clothes and extra linens under the bed with this three-pack of large storage bags. Each one has a clear top window, allowing you to easily verify the contents of each container. There’s 10 adhesive tags included for labeling the contents of each bag, and each bag is designed with a durable rip-resistant cloth, metal zippers, and reinforced handles. The set is available in gray,
Get the NestNeatly SmartCube Underbed Storage Bags at Amazon for $25.99
Best Bathroom Organizers

15. Shower Door Caddy
Keep shampoo, conditioner, body wash, and other bathing essentials organized with this shower caddy. It offers three spaced out shelves, making room to store taller or smaller bottles. Two integrated hooks can hold pumice stones, loofas, and other hanging items, and the caddy hangs over shower doors using the built-in hooks. As a bonus, they also double as towel hooks.
Get the mDesign Over Shower Door Caddy at Amazon for $39.99

16. Styling Tools Organizer
Blow dryers, hair straighteners, curling irons, brushes, and other hair care products can take up a lot of space under the cabinet or on a bathroom countertop. This is one of the best organization products to keep these tools out of the way, but also easy to access when needed. It can be mounted on the wall or hung over a cabinet or shower door using the removable hooks.
Get the Simple Houseware Cabinet/Wall-Mount Hair Dryer Organizer at Amazon for $16.87

17. Wall-Mounted Toothbrush Holder
Upgrade your bathroom experience with this sleek and stylish wall-mounted toothbrush holder. It has four hooks to hold both manual and electric toothbrushes, while keeping them covered and dust-free. This bathroom organizer offers additional storage space for tubes, bottles, hair care accessories and more with its flat top shelf and small drawer. Plus, an integrated toothpaste dispenser offers convenience and reduces waste by releasing the right amount of toothpaste.
Get the Showgoca Wall-Mounted Toothbrush Holder at Amazon for $17.99
Best Garage Organizers

18. Wall-Mount Tool Organizer
Don’t let shovels, rakes, brooms, and other tools prevent you from keeping a tidy garage. Keep these items off of the floor with this wall-mount tool organizer. The system includes four 16-inch segments, 20 hooks, and 20 pegs, allowing you to create a layout that will work with your space and storage needs. Each hook can support up to 15 pounds, and each peg can hold up to 5.5 pounds.
Get the Horusdy Adjustable Storage System at Amazon for $14.99

19. Magnetic Tool Holder
Mounting this magnetic tool holder above your garage workbench will help you keep screwdrivers, pliers, wrenches, and other tools within easy reach. The carbon steel magnetic bar can support up to 10 pounds, and packs of two or four magnetic bars are available to customize the length and layout based on your space.
Get the RamPro Magnetic Tool Holder Strip at Amazon for $27.99
20. 44-Drawer Plastic Storage Cabinet
Trying to find a place for small odds and ends like screws and batteries can be difficult; however, simple plastic storage cabinets like the ones from Akro-Mils can be an easy solution. There are numerous drawer options, ranging from 16 to 64 drawers, with additional drawer dividers included. They’re available in black, red, and yellow. The drawers are big enough to handle things like screws, drill bits, craft supplies, batteries, and other spare parts. The cabinet can be stacked and left freestanding or mounted for extra security.
Get the Akro-Mils Plastic Storage Cabinet at Amazon for $48.35
Best Car Organizers

21. Trunk Organizer
Whether you’re bringing home groceries, heading to the beach, or driving the kids back and forth between sports practices, a trunk organizer can help you maximize the space in your trunk and keep items from sliding around inside the car. This trunk organizer from Miu is expandable to meet your specific storage needs; it can be configured with one, two, or three compartments. When you need to transport something bulkier in your trunk, simply collapse the organizer to get it out of the way.
Get the Miu Color Car Trunk Organizer at Amazon for $19.99

22. Backseat Organizer
Clear backseat clutter with this organizer that attaches to the back of the front seats. It has eight elastic pockets of various sizes to hold books, toys, snacks, and more. The front center pocket is large enough to hold an 11-inch tablet, which is perfect for keeping your kids entertained on longer drives. Made with a heavy-duty scratch-proof and waterproof oxford fabric, it attaches to the front seats easily with adjustable straps and quick-release buckles.
Get the One Pix Backseat Car Organizers at Amazon for $9.99

23. Car Seat Gap Filler Organizer
The gap between the front seats and the center console is not only wasted space, but it often causes problems with cell phones, crumbs, or other items that drop down and are difficult to reach. This gap filler organizer fills in that otherwise wasted space and provides you with a few additional compartments to hold your phone, keys, coins, and other small items. It has an adaptive sponge mechanism that expands to create a secure fit, allowing this organizer to work with gaps of varying widths.
Get the Paffenery Car Seat Gap Filler Organizer at Amazon for $25.99
The prices listed here are accurate as of publication on February 3, 2025
The post The 23 Best Organization Products Under $50 appeared first on Bob Vila.
]]>