The post Satin vs. Semi-Gloss Paint: What’s the Difference? appeared first on Bob Vila.
]]>When you’re choosing fresh paint for your walls, after color, the next big decision is sheen. Light reflection on interior walls is an important part of the design and mood of a room. However, too much shine looks like wet paint, and a wall with too little shine can instead absorb light. Two middle-of-the-road options for paint finish—satin and semi-gloss—are quite popular for being neither too shiny nor too matte.
“Satin and semi-gloss each have their place in the home,” says Erika Woelfel, vice president of color and creative services at Behr. However, telling satin vs. semi-gloss apart can get somewhat tricky. Is semi-gloss shinier than satin? To answer, pay attention to the main ingredients: pigment, the powdery ingredient that gives paint its color; and resinous binder. The more resin a paint has, the shinier it is. That’s because it allows the paint to flow more and soaks up the powdery pigment well, making for a smooth consistency.
Semi-gloss, one step under high-gloss in terms of sheen, is shinier than satin because it has a higher percentage of resinous binder than pigment. Satin is shinier than eggshell and matte finishes for the same reason. Both semi-gloss and satin are available in traditional paint types including oil-based, latex, and low- or no-VOC (volatile organic compound) versions. However, the subtle differences in satin vs semi-gloss paint can make one a distinctly better fit for your project than another.
Satin Paint

Satin finish paint has a slight sheen, so it reflects light better than both eggshell and matte finish interior paints. But satin absorbs more light than semi-gloss paint, and thus is forgiving of pre-existing imperfections. So, with this in mind, what is satin paint used for? “A satin finish, like Behr Premium Plus Interior Satin Enamel, offers a soft, durable look that resists dirt—ideal for living rooms, hallways, and bedrooms,” says Woelfel.
If you’ve got dings and dents in your walls, cabinets, or soon-to-be-painted dresser, the flatter nature of satin will look better over pocks, divots, and scrapes since it draws the light in and tricks the eye into seeing a more even surface. If you want to deflect attention away from faults and blemishes without spending hours sanding them away, satin is the way to go.
That said, satin paint such as Benjamin Moore Regal Select Interior Paint in the satin/pearl finish is durable and somewhat light-reflective, so it works in areas where semi-gloss is too shiny. “It is perfect for adding a subtle contrast against walls painted in a matte or eggshell finish,” says David Underwood, associate technical project manager at Benjamin Moore.
Satin Paint Pros and Cons
| Pros | Cons |
| Covers dents and dings in the painted surface better than semi-gloss | Not as durable as semi-gloss |
| Light-reflective enough to brighten a small room | Lacks enough light reflectivity to highlight features like crown molding |
| Mutes glare | |
| Easy to clean |
When to Use Satin Paint
Use satin finish paint when you want to:
- Highlight a ceiling or other well-lit surface without creating too much glare
- Brighten up a hallway
- Cover living-area walls that have imperfections or require regular paint touch-ups
- Paint high-traffic areas
Semi-Gloss Paint
Semi-gloss paint’s higher percentage of resin compared to pigment results in a shinier, and therefore, more light-reflective finish than satin. When looking at the difference between gloss and semi-gloss paint on walls or trim, it’s the mirror-like finish of gloss that is a step up from the semi-gloss sheen.
“A semi-gloss finish is more luminous and perfectly suited to highlight architectural details of your home and create dimension on millwork, trim, wainscoting, and doors,” says Underwood. If used on living-area walls, semi-gloss paints like Benjamin Moore Advance Interior Paint create too much of a glare and can make paint colors appear darker. Factor that in when you’re making a final decision about which paint finish to use.
However, there are cases when semi-gloss is the best choice. “Semi-gloss, such as Behr Ultra Scuff Defense Interior Semi-Gloss Enamel, provides a higher sheen with added moisture-resistance, making it perfect for trim, doors, cabinets, and high-traffic spaces like kitchens and bathrooms,” says Woelfel.
Semi-Gloss Paint Pros and Cons
| Pros | Cons |
| Gives a polished, formal look | Highlights imperfections in the wall surface |
| Easy to clean | Must be applied in thin layers with a short-nap roller to avoid a bad paint job that shows brush marks |
| Moisture-resistant | Makes paint color appear darker |
| Durable |
When to Use Semi-Gloss Paint
Use semi-gloss when you want to:
- Increase the light reflection in a room
- Ensure ease of cleanup in bathrooms or kids’ rooms
- Repaint your garage doors for shine and easy cleanup
- Highlight millwork such as banisters, chair rails, or architectural features in old houses
- Create a durable surface on high-touch areas like baseboards, interior doors, or kitchen cabinets
- Reduce mildew and mold in high-moisture areas like basements or laundry rooms
Differences Between Satin and Semi-Gloss Paint
Sheen
Semi-gloss has more sheen than satin because of the higher resin-to-pigment ratio. But how will you tell the difference when you’re looking at a wall? You’ve likely seen shiny baseboard paint up against a more matte wall. That’s likely a semi-gloss finish because it’s the best paint for doors and trim when paired with satin. But if you’re looking at an existing paint job and wondering whether it’s satin or semi-gloss, try feeling it. Semi-gloss has a sort of plastic-like, sticky texture compared to the more matte satin finish, which feels much like the surface of an eggshell.
Maintenance
“For a balance of durability and aesthetics, satin works well in most spaces, while semi-gloss delivers extra protection where frequent cleaning is needed,” says Underwood. The higher the gloss, the easier the cleanup of messes like fingerprints and smudges. For objects and areas that get a lot of use and therefore require frequent wipe-downs—bathrooms, kitchens, playrooms, and kids’ bedrooms, semi-gloss is often the wiser option.
Because a semi-gloss painted surface is slicker, it’s more resistant to moisture and easier to go over with a damp cloth or special sprays designed for minor household disasters. While both are durable compared to eggshell or matte options, semi-gloss has a slight advantage thanks to the additional binders that give it both a higher sheen and more resistance to fading or grease stains.
Price
In general, the higher the gloss, the higher the price, but usually the difference is minor. “Both satin and semi-gloss finishes have a reflective quality and equivalent price point,” says Underwood. “The higher percentage of resinous binders in the semi-gloss can make it slightly more expensive than satin paints.” So, if you’re looking to save a little bit of money buying paint for the whole home interior, satin is the most budget-worthy option of the two that still offers a hint of sheen.
FAQs
Use semi-gloss paint for interior doors. This finish provides high-touch areas like doors with a durable finish that’s easy to maintain.
Baseboards should also be painted with semi-gloss paint, which is easy to wipe clean and can stand up to dings and scrapes..
If you want to add a bit of a sheen to your walls, then using a satin finish is the way to go. Satin is slightly light-reflective and can brighten a room. Semi-gloss can be too shiny, creating a glare in living areas.
The post Satin vs. Semi-Gloss Paint: What’s the Difference? appeared first on Bob Vila.
]]>The post Yes, Your Home Needs a Radon Test Kit — And These Are the Best appeared first on Bob Vila.
]]>Radon test kits detect the presence of radon gas, a byproduct of uranium decay in rock and soil. Radon can enter homes by seeping through cracks in the foundation, slowly accumulating until it reaches dangerous levels. Prolonged exposure to this harmful gas can cause health issues like headaches or even cancer.
Radon is tasteless, odorless, and colorless, making it undetectable without specialized radon testing equipment. These home technology tools can measure radon levels over a few days or months or provide continuous monitoring. Since no level of radon exposure is considered safe, knowing which radon sensor you can rely on is essential.
After tapping a home safety expert for insights and testing a few popular options, we chose the Airthings Corentium Home Radon Detector as the best radon test kit. It’s portable, has an easy-to-read screen, and takes multiple measurements to capture trends. Below, we detail what we like and don’t like about this product and the rest of our picks so you can choose one of the best radon test kits to keep your family safe.
- BEST OVERALL: Airthings Corentium Home Radon Detector
↓Jump to Review - BEST BANG FOR THE BUCK: First Alert RD1 Radon Test Kit
↓Jump to Review - UPGRADE PICK: Airthings Wave Plus Smart Radon Detector
↓Jump to Review - BEST SMART: Airthings View Plus Smart Air Quality & Radon Monitor
↓Jump to Review - BEST SHORT-TERM: AccuStar Short-Term Charcoal Canister Radon Test Kit
↓Jump to Review - BEST LONG-TERM: Ecosense RadonEye Radon Sensor & Detector
↓Jump to Review

Radon Test Kits Comparison Chart
| Product Name | Type | Results | Portability |
| Airthings Corentium Home Radon Detector | Battery-operated device | Instant on device | Portable |
| First Alert RD1 Radon Test Kit | 1-time test kit | Must be mailed to lab; results emailed 3 to 5 days after lab receipt | Portable |
| Airthings Wave Plus Smart Radon Detector | Battery-operated smart device | Instant in app and on device | Portable; mounts to wall or ceiling |
| Airthings View Plus Smart Air Quality & Radon Monitor | Battery- or USB-powered smart device | Instant in app and on device | Portable; mounts to wall |
| AccuStar Short-Term Charcoal Canister Radon Test Kit | 1-time test canister | Must be mailed to lab; results available next business day | Portable |
| Ecosense RadonEye Radon Sensor & Detector | Plug-in device | Instant in app and on device | Portable but requires outlet |
Our Top Picks
After researching dozens of radon test kits and testing a few as part of our guide on the best air quality monitors, we recommend the following six options for their ease of use, accuracy, and value.
Best Overall
Airthings Corentium Home Radon Detector

What We Like
- First results shown on screen within 24 hours
- Lightweight and portable
- Displays both long- and short-term readings
What We Don’t Like
- Some users’ units stopped working after a few years
Specs
- Type Battery-operated device
- Results Instant on device
- Portability Portable
The Corentium Home radon detector kit by Airthings is one of the first continuous radon test kits to use batteries, allowing you to take it into any space that needs testing. The clear digital display provides both long- and short-term radon levels, revealing daily fluctuations as well as overall averages. Once you’ve tested your home for at least 30 days, Airthings also makes it easy to generate a free self-inspection report through its website.
Though this portable radon detector does start delivering readings within 24 hours, the manufacturer recommends waiting at least 20 days before taking action if levels appear high. This ensures plenty of time for results to stabilize, so you know your readings are reliable. To test another area after your first test is complete, simply reset the unit and move it to a new location.
Get the Airthings Corentium Home radon test kit at Amazon, Ace Hardware, Walmart, or Airthings.
Best Bang for the Buck
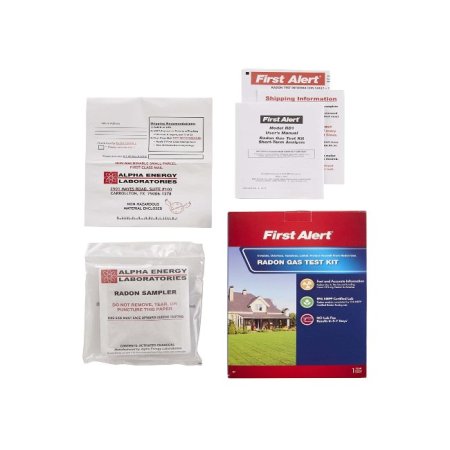
First Alert RD1 Radon Test Kit
What We Like
- Listed under the EPA’s Radon Gas Measurement Proficiency Program
- Low price includes lab fees in most states
- Results emailed 3 to 5 business days after receipt
What We Don’t Like
- Can only be used once
- User pays shipping costs
Specs
- Type 1-time test kit
- Results Must be mailed to lab; results emailed 3 to 5 days after lab receipt
- Portability Portable
The First Alert RD1 home radon test kit is a simple and effective way to detect dangerous radon gas in your home. It essentially functions as a disposable radon detector that you allow to sit for a few days and then send away for results. To use, simply open the sealed activated charcoal packet, place it in the lowest livable area of your home, and leave it. After 2 to 4 days, seal it up and send it to the lab. Within 3 to 5 days of lab receipt, you’ll receive the results by email.
Unlike most mail-in radon test kits, this simple charcoal option includes the laboratory fee for most states (excluding New Jersey), though you will need to pay for shipping. Still, its price and reliability are difficult to beat for those looking for a one-time, short-term test.
Get the First Alert radon test kit at Amazon, Lowe’s, or First Alert.
Upgrade Pick
Airthings Wave Plus Smart Radon Detector

What We Like
- Provides continuous results via Bluetooth
- Monitors radon, CO2, VOCs, humidity, temperature, and air pressure
- Visual indicator shows current air quality
What We Don’t Like
- Detailed results only available within Bluetooth range
Specs
- Type Battery-operated smart device
- Results Instant in app and on device
- Portability Portable; mounts to wall or ceiling
While the Airthings Wave Plus radon and air quality monitor is more expensive than our top two picks, it also tests a lot more than just radon. Once set up, this unit provides continuous readings for radon gas buildup, carbon dioxide (CO2), volatile organic compounds (VOCs), humidity, temperature, and air pressure.
The Wave Plus radon gas monitor runs on batteries and is easy to mount on a wall or ceiling. Its on-unit color-coded display indicates whether air quality is good (green), fair (yellow), or bad (red). For more detailed information, pair the unit with the Airthings app via Bluetooth for real-time reading and tips on how to improve indoor air quality. You can also see current and past readings on Airthings’ web dashboard.
What our tester says: “This Airthings monitor is quite an overachiever! As part of a larger test, we exposed it to a dish of oil-based stain for 2 hours. When we checked back in, the light was red (indicating hazardous air quality), and the app showed the volatile organic compound levels had spiked.”—Glenda Taylor, Product Reviews tester and writer
Get the Airthings Wave Plus radon test kit at Amazon or The Home Depot.
Best Smart
Airthings View Plus Smart Air Quality & Radon Monitor

What We Like
- Wi-Fi and Bluetooth connectivity; compatible with IFTTT, Homey, Google Assistant, and Amazon Alexa
- Detects a wide range of pollutants and irritants
- Data available on unit, app, and Airthings website
What We Don’t Like
- Requires 6 AA batteries
Specs
- Type Battery- or USB-powered smart device
- Results Instant in app and on device
- Portability Portable; mounts to wall
This smart monitor from Airthings makes it easy to check levels of radon, PM2.5 (particulate matter), CO2, temperature, VOCs, air pressure, and humidity. It also provides pollen forecasts so those with allergies can stay informed about outdoor conditions. As a continuous radon monitor, this unit has its own display showing current levels, and users can also check the app or Airthings website for long-term readings. It also features a visual indicator with green, yellow, and red status lights for at-a-glance monitoring.
The View Plus is compatible with IFTTT, Homey, Google Assistant, and Amazon Alexa and runs via batteries or the included USB-C cable. You can place it virtually anywhere indoors to test levels in multiple locations or mount it to the wall to ensure continually safe radon levels in a basement.
Get the Airthings View Plus radon test kit at Amazon or Airthings.
Best Short-Term
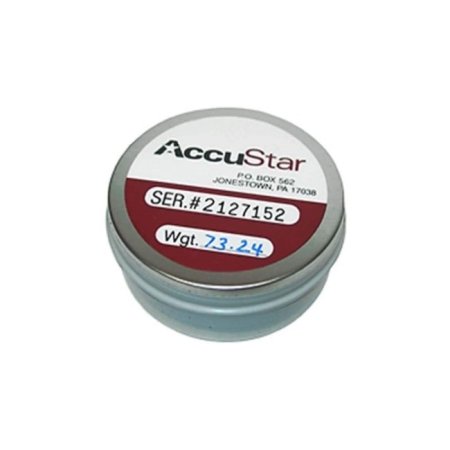
AccuStar Short-Term Charcoal Canister Radon Test Kit
What We Like
- Same-day results available if received by noon
- Easy to use; requires zero technological know-how
- Durable canister design keeps results safe
What We Don’t Like
- Doesn’t measure radon; only reports whether levels are under 4 pCi/L (picocuries per liter)
Specs
- Type 1-time test canister
- Results Must be mailed to lab; results available by next business day
- Portability Portable
This short-term test kit by AccuStar uses activated charcoal to absorb radon and its byproducts over a 48- to 96-hour period. Its easy-to-use design simply requires you to leave the unit undisturbed for a few days, mail it in, and wait for the results, which can arrive same-day if the canister is received by noon.
Though the cost of the AccuStar radon detection kit includes laboratory fees, you will need to pay to ship the unit in. The durable canister protects the test unit while in transit, ensuring your results remain accurate and safe from interference. This low-tech pick is perfect for those nervous about determining radon safe levels on their own and real estate agents testing radon in homes for clients.
Get the AccuStar radon test kit at Amazon, The Home Depot (2-pack), or AccuStar Labs.
Best Long-Term
Ecosense RadonEye Radon Sensor & Detector

What We Like
- First reading is 90 percent accurate and available in 10 minutes
- Results shown in app and on device
- Tracks short- and long-term readings and trends
What We Don’t Like
- Some reports of Bluetooth connectivity issues
Specs
- Type Plug-in device
- Results Instant in app and on device
- Portability Portable but requires outlet
The Ecosense RadonEye home radon detector takes 30 independent counts of pCi/L levels every hour, delivering the very first reading just 10 minutes after setup. To get started, simply plug in the electronic radon detector and leave it on a flat surface to allow it to begin collecting data.
Short-term results from this radon gas detector are displayed on the unit’s OLED screen and updated every 10 minutes. Additional hourly, monthly, and yearly data is available via Bluetooth connectivity on the RadonEye app. This pick’s continuous monitoring system not only provides an average reading over time, it also sounds an alarm if radon levels exceed 4 pCi/L.
Get the Ecosense radon test kit at Amazon, Walmart, or Ecosense.
Jump to Our Top Picks
How We Chose the Best Radon Test Kits

When gathering our list of recommendations, we primarily considered the most important aspects of radon home kits—accuracy and ease of use. We selected a variety of units that make it simple to test for radon, choosing a few one-time kits that need to be sent to a laboratory as well as several that offer instant access to results via the unit itself or an app.
Most picks on our list are battery-operated units, though some can also be powered using a standard plug or a USB cable. We also included one low-tech option that does not require power at all and simply needs to sit and absorb radon for a few days before being mailed in for reading. Finally, since the prices of radon detectors can vary greatly, we were careful to include picks at a range of costs since everyone needs to be able to afford to test for cancer-causing radon gas.
What to Consider When Choosing a Radon Test Kit
To select one of the best radon kits for your needs, it’s important to consider test type, accuracy, and ease of use and installation.
Types of Radon Test Kits
A radon test kit will use one of several methods to test the air in your home for elevated radon levels. Regardless of which type of radon monitor you choose, these helpful devices are the only way to determine your family members’ exposure to this harmful gas other than a professional radon inspection.
Short-Term Radon Test Kits
Radon kits for short-term use collect readings from your home over a 2- to 90-day period and must then be sent to a laboratory for the results to be read. The lab fees necessary for proper testing are likely included with your purchase, though shipping generally costs extra.
Because short-term radon test kits are the fastest and least expensive test option, real estate agents often use them to check for safe radon levels before selling a home. However, since radon levels fluctuate, short-term test kits are not the most accurate testing method. For definitive results, long-term testing is necessary.
Long-Term Radon Test Kits
As their name indicates, long-term radon test kits are designed to test levels of radon gas over a longer period, such as weeks, months, or years. Like short-term tests, some are single-use devices that must be sent to a laboratory to be read, though others have screens or Bluetooth connectivity that allows you to monitor levels yourself.
Since a long-term radon test kit collects a greater volume of data, periodic spikes that naturally occur are less likely to raise unnecessary alarms, which may happen with more limited readings. The downside of this type of detector is that it will typically be more expensive than a one-time use or short-term kit and may not be necessary if radon levels are consistently lower than 4 pCi/L.
Alpha-Track Radon Test Kits
The alpha-track radon test kit is a long-term test that measures levels of radon using polycarbonate plastic sheets placed in the lowest livable level of the home. If radon gas is present, it will emit alpha particles that create tracks on these sheets, with higher levels of gas producing greater numbers of tracks. Once the test kit has collected data for the suggested amount of time, it is sent in to be read. Generally speaking, alpha-track tests are more accurate than short-term test kits but don’t provide the ongoing measurements offered by long-term detectors.
Charcoal Radon Test Kits
Charcoal radon test kits are short-term options that work similarly to alpha-track units, though they use charcoal rather than polycarbonate plastic to measure levels. Generally speaking, they’re also cheaper and faster since they only monitor radon gas for between 2 and 90 days. For this reason, they are less accurate since they are susceptible to radon spikes and possible interference during shipping.
Digital Radon Test Kits
Digital radon test kits are also known as radon detectors, and they are the most expensive type of radon tester for home use. Most digital units can be mounted to the wall or ceiling or simply placed in the lowest level of the house.
However, installation requirements typically extend well beyond mounting, as most of these kits use Bluetooth connectivity to deliver detailed readings to an app. Some digital kits also offer recent readings directly on the test unit, though their screens aren’t often large enough to display the long-term data that makes digital tests so valuable. Further adding to their worth, many digital kits also test home air quality levels of humidity, carbon dioxide, volatile organic compounds, and more.
Accuracy
Accuracy is one of the most important factors to consider when choosing a radon test. Generally speaking, the longer a radon test kit collects data, the more accurate the results will be. This is because increased testing time allows you to determine average pCi/L levels without the influence of random positive or negative spikes.
Since short-term radon tests are susceptible to spikes in radon levels that can skew the average, they are considered the least accurate test option. Because they collect more data, long-term and continuous tests are the most accurate radon test kits available.
Ease of Use and Installation
Radon test kits are designed to be easy to use, both for the consumer’s benefit and to ensure accurate results. Passive radon test kits, like charcoal and alpha-track test kits, are easy to set up but must be sent to a lab for results.
On the other hand, active radon test kits, like digital radon detectors, are a bit more involved in setup but relatively easy to use after that. More advanced smart home-compatible detectors require additional technical know-how for ongoing use. It’s a good idea to consider your radon testing needs and comfort using technology before selecting a test kit.
FAQs
The following frequently asked questions section can help answer questions like “What is radon testing?” or “How much does a radon mitigation system cost?”.
Radon tests work by measuring the amount of radon in the air. Charcoal devices absorb radon, enabling lab techs to count radioactive particles to estimate levels. Alpha-track kits must also be read in labs, but they use a plastic film that produces marks when radon gas strikes it. Digital detectors have sensors that detect and count alpha particles before displaying them on the device or in an app.
Radon test kits are generally used by opening a sealed package and leaving the test kit exposed to the air for a certain amount of time. Some must be sent in to be read, while others provide measurements you can access yourself.
Radon levels should be placed on the lowest occupied level of the home. Most manufacturers recommend setting them on a surface a few feet off the floor or mounting them to a wall so they won’t be accidentally disturbed or knocked over by kids or pets.
If your home tests positive for high levels of radon, contact a qualified radon mitigation contractor. They can provide an estimate for installing a radon mitigation system that will continually remove excess radon from your home.
While buildings and homes on hillsides may be more likely to be affected by radon, any structure can be subject to radon contamination. Kevin Feak, Senior Fire Protection Engineer for the architecture and planning firm LaBella, says, “Radon is heavier than room air and will move to the lowest area. Areas below ground level, such as basements or crawl spaces, are at the highest risk.”
The Environmental Protection Agency (EPA) guide to radon recommends testing for radon at least every 2 years. The EPA also suggests testing if you renovate your home or are considering selling it, as you will need to provide test results to the buyer.
According to licensed Professional Engineer Kevin Feak, “The first step in determining your radon risk is to use the EPA’s Radon Zone Map. The second step is testing for radon with either a home test or calling a professional. Lastly, a mitigation system can be used to remove radon from your home or business.”
Different types of home radon test kits have different levels of reliability, with long-term tests being the most reliable and short-term tests being less reliable. Still, since short-term tests are typically less expensive, using them to perform more frequent tests over time can be an economical way to measure radon levels.
The post Yes, Your Home Needs a Radon Test Kit — And These Are the Best appeared first on Bob Vila.
]]>It’s easy to notice when it’s time to clean your deck surface, and many of us make sure to keep that backyard deck as tidy as our interior gathering spaces. But, it takes a bit of effort to dip down below the deck and consider maintaining the underside. Unlike the foundation walls of your home, the deck structure is typically uncovered and at the mercy of whatever severe weather is thrown at it. So, it’s a good idea to go under the deck to clean away the muck and check the soundness of the structure every spring. It’s an investment in your family’s safety, the deck’s appearance, and the longevity of your deck.
If you need a bit more motivation, consider this: About half of the 60 million decks in the U.S. need to be replaced or repaired, according to the North American Deck and Railing Association (NADRA), so there’s a good chance yours might be one of them. And the Consumer Product Safety Commission estimates 2,900 injuries and two deaths were caused by deck, balcony, or porch failures between 2016 and 2019. So with safety top of mind, here are the key deck features to clean and check.
Get a good look at the ledger board.
It’s usually easiest to use an electric pressure washer—like the Ryobi 40V 1500 PSI, which earned “best cordless” honors in our hands-on testing—to clean the underside of a deck. Since you are directing water up and around you while you are working underneath the deck, it’s best to start at the house and work your way out toward the yard. Plus, the connection between the deck and the house, called a ledger board, is the most common place that deck failures happen. By cleaning away any debris, you’ll be able to get a good look at the ledger connection to make sure it’s still sound and securely connected.
Remove mold and mildew from joists and under decking.
While the method for cleaning under a deck is similar to cleaning the decking on the surface, there are a few more things to consider. Mold and mildew fans out in the gaps between the decking boards and then it layers on the joists below. Use a deck cleaner or brightener with oxalic acid to remove mold and mildew while rejuvenating the natural color of the wood. As you’ll be working overhead with a chemical, make sure to wear a face shield, gloves, hat, and waterproof jacket to protect your skin and eyes.
The point isn’t to make the deck look like it was just built; it’s to get rid of mold, mildew, and dirt to reveal the deck surfaces so that you can get a good look at the structure and inspect its condition.

Check for any water issues.
If you have a shaded deck with lots of conifer trees around, the needles can collect between the decking boards and create an organic dam that makes it difficult to shed water. And then microbes gather and can rot decking. Blasting the collection of goo from below with a pressure washer can be easier than working from the top, if you have the room below the deck. While shooting water under the deck, you will also notice where water naturally pools, which can be a playground for insects. It’s a good idea to take care of that with improved drainage.
Bonus tip: Another source of potential water issues under a deck is a downspout extension that’s typically under there. They often fall apart and just gush water under your deck. Make sure to check whether your drainage system is connected and directing water properly.
Maintain the health of deck posts.
In addition to the ledger board, the deck posts are what keeps the deck off of the ground. While they may seem indestructible, they aren’t. Posts can start to grey from photodegradation and particulate matter in the air. It’s a good idea to clean them annually and check that they are still sound. Since posts are treated for ground contact, the chemicals can fade over time. When we resurface an older deck, we will often treat the posts with a preservative to lengthen the serviceability of the posts. It just takes a few minutes to insert the preservative into the posts.

Inspect areas that are always damp.
Before you turn on the pressure washer, you might notice that it’s a soggy mess underneath the deck. If it’s always damp underneath the deck, it’s a breeding ground for mold and mildew that can slowly eat away at your wood deck. Consider covering the ground with stones to help with drainage. For more serious drainage issues, you may need to install a more involved drainage system.
Scan for missing fasteners.
Sometimes fasteners become loose and some may even wiggle out over time. It seems like you would notice it, but if it’s under your deck and dirt has filled the fastener hole…you might not ever notice until you go underneath the deck to check. Clearing out dirt can reveal locations where you may need to replace or secure loose fasteners.

Watch for critter problems.
While you are under your deck, you may notice evidence of unwanted guests living there. If you have a dog, you might already know there’s an issue since dogs will react to critters and then scratch at the decking surface to try to get at them. The issue with critters is that they often dig near the foundation and then shoot a plume of dirt into the yard while they dig. The other issue is that animals can go under your deck to die, which is never a pleasant situation to add to a weekend chore list.
Add a few inches of gravel underneath the deck to make digging an unbearable task for critters, and add a critter wall around the perimeter of the deck to prevent most critters from accessing under there. Make at least one panel of the critter wall removable, so you can access under your deck when you need to clean it and check it again next year.
Tip: If cleaning the deck reveals deeper concerns and issues, stop using your deck until a local deck inspector can evaluate your deck’s health and develop a plan for making it safe for your family and friends.
The post Have You Ever Cleaned the Underside of Your Deck? appeared first on Bob Vila.
]]>The post This Cheap, Homemade De-icer Recipe Will Clear Your Frosty Windshield in Minutes appeared first on Bob Vila.
]]>Have you pulled out of your driveway lately with a frost-covered windshield, hoping that the defroster will kick in as you cruise out of your neighborhood? We’re all in a hurry to get to where we’re going, but for safety’s sake, take the time to properly de-ice your car’s windows. Clear visibility is important anytime you’re driving, but when snow and ice are involved, it’s best to be extra vigilant. This 3-ingredient de-icer recipe is super cheap, easy to make, and will get you on the road in no time.
Homemade De-Icer Recipe
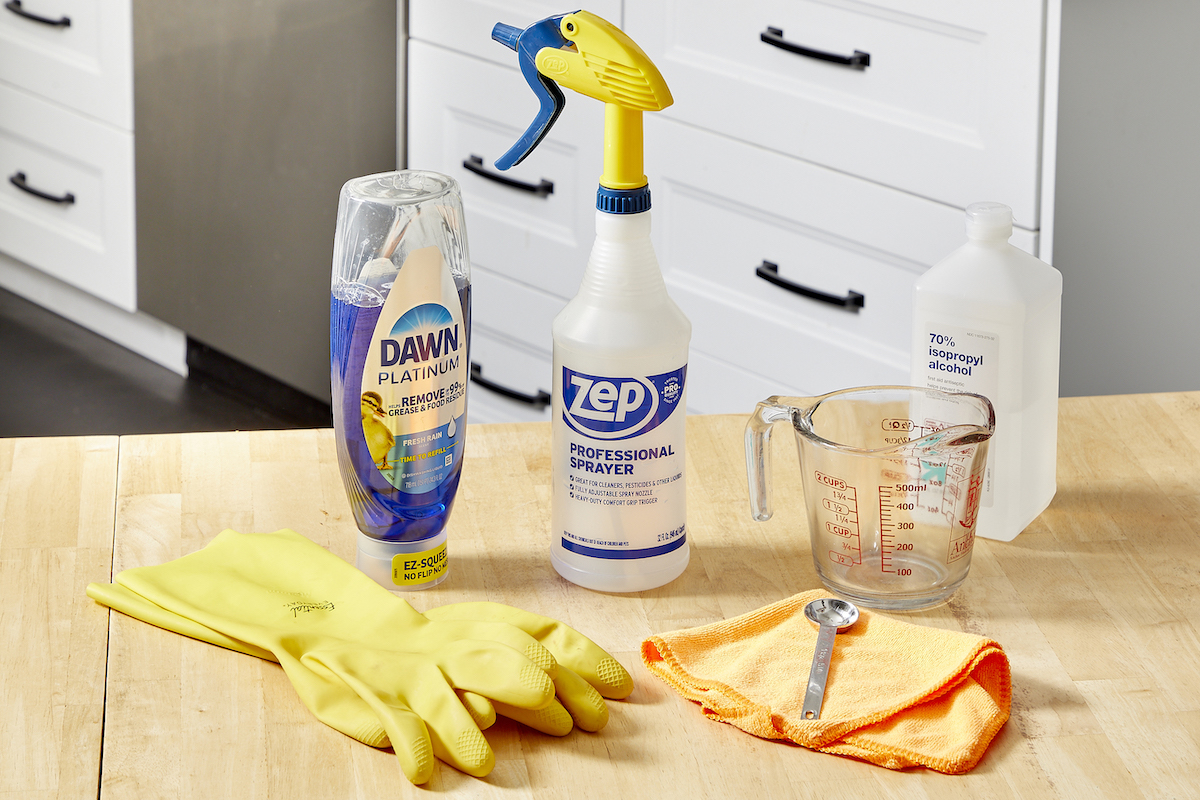
- 1 cup water
- 2 cups isopropyl alcohol
- 3/4 teaspoon dish soap
Combine all ingredients in a spray bottle and shake well.
Why this recipe works: This de-icer’s active ingredient is rubbing alcohol, which you can buy at drugstores for around $2.50 a pint. Also known as isopropyl and isopropanol, it has a freezing point of -128 degrees Fahrenheit, so it won’t refreeze once the windshield has been cleaned. Dish soap improves the spreadability of the mixture.
How to Use Homemade De-icer to Defrost Car Windows
This concoction is just as easy to apply to your car’s windows and windshield as it is to make. Keep a clean cloth handy to wipe excess spray off your windows; depending on how frosty your windows are, you might also need an ice scraper to coax the ice off the glass.
Step 1: Mix the de-icing solution.
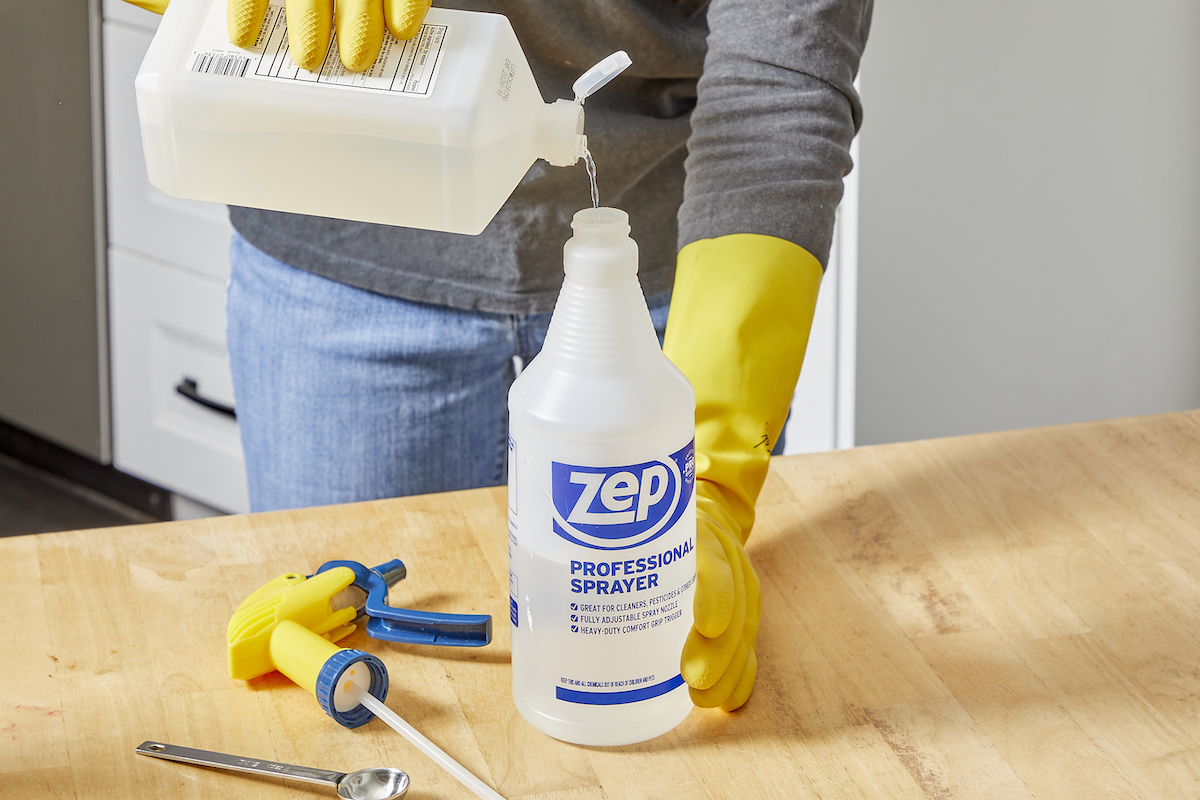
Fill a spray bottle with two parts rubbing alcohol to one part of water.

Add ½ teaspoon of liquid dish detergent for every 2 cups of solution. Shake well. Label your de-icer so you don’t get it mixed up with your other DIY cleaners.
Step 2: Coat the windshield and windows with spray.

Generously spray the mixture onto the icy windshield and windows. Wait a minute or so as it softens the ice, or melts it altogether.
PRO TIP
This homemade de-icer also works on frozen car door locks: Spray it on the lock, wait 10 to 20 seconds to melt the ice, insert your key, and your lock should move freely. (If you do this frequently in the winter, don’t forget to occasionally spray a little WD-40 or other lube into your lock, or on your key before inserting it into the lock, to keep the lock’s inner mechanisms functioning smoothly.)
Step 3: Scrape away excess ice.

For extra-heavy ice on windows, you may need to do a little scraping. If that’s the case, use an ice scraper or another implement to clear away the thicker patches.
Step 4: Wipe the windshield clean.
Turn your windshield wipers on and with a couple good swishes, your windshield should be de-iced, clean, clear, and ready for some driving! If you’ve applied your mixture to other windows, use a soft cloth to wipe them clean. While isopropyl alcohol that’s been diluted as recommended here will not damage car paint, wipe down any areas of your car’s body that may have been dripped on, just to be safe.
Step 5: Prevent future visibility problems.
To keep your windshield wiper lines clean and clear of ice, mix 1 cup isopropyl alcohol into ½ gallon of windshield wiper fluid and fill your under-the-hood reservoir. Alternatively, you can purchase a de-icing windshield wiper solution. Either will keep your glass ice-free when you need to clean your windshield of sandy, salty snow-splatter spat up from vehicles ahead of you on roadways, and will help keep streaks to a minimum. Keep this de-icer in your car, along with other winter emergency supplies, so you’ll always have a clear view!
The post This Cheap, Homemade De-icer Recipe Will Clear Your Frosty Windshield in Minutes appeared first on Bob Vila.
]]>The post How to Paint Behind a Toilet appeared first on Bob Vila.
]]>The cramped space behind the toilet is a difficult portion of the bathroom to maintain, posing a challenge when it comes time to dust and an even larger one when repainting. A toilet tank situated not quite flush against the wall leaves very little room to operate a brush or paint roller but just enough that it would be noticeable to leave the color unchanged while the rest of the room gets a refresh. Fortunately, DIY-inclined homeowners and renters have two easy options for how to paint behind a toilet, neither of which require moving the bulky ceramic out of the way.
- Option 1: Cover your toilet with a trash bag and line the floor with drop cloths so that you can work without fear of mess. This option is ideal when you are repainting your entire bathroom or the full wall where your toilet sits.
- Option 2: Enlist a specialty tool called the Paint Behind to slide into the narrow space behind a toilet and pad on paint. Use it together with Option 1 to ensure a complete and flawless paint job or alone as a “quick fix” to correct discoloration on the patch of wall directly behind the toilet.
Before you begin, make sure to select the right primer and paint. Bathrooms, of course, are exposed to a lot of moisture and humidity, so your paint choice should be designed to withstand the combination. Consider a paint with anti-microbial additives, like Benjamin Moore’s Aura Bath and Spa collection, or an interior paint with semi- or high-gloss finish—this sheen repels moistures better than matte paints. And don’t forget to start with a top-quality, moisture-resistant paint primer. The right primer will prevent peeling and water damage for years.
Tools & Materials
Bobvila.com may earn a commission from purchases made through these links.
OPTION 1: Cover the toilet with a trash bag, then brush freely.

When painting the entire bathroom, prep the toilet with a drop cloth before you start but save the actual painting of the tight space behind your toilet for last—it requires the most detailed attention.
Step 1: Ventilate the bathroom.
Bathrooms are often small, enclosed spaces with poor air circulation. Materials like shower curtains and towels that retain moisture also keep them consistently humid. To boost bathroom ventilation and minimize paint drying time, remove the shower curtain, floor rug, bath, and hand towels. If your bathroom has windows, make sure they are open. Run the ventilation fan or plug in a small circulating fan.
To prevent paint fumes inhalation, you may also wish you wear a painter’s mask.
Step 2: Clean and prepare the area behind the toilet.
Clean the walls, floor, wall, and toilet surfaces with a cellulose sponge dipped in a mixture of dish soap and water. This will help remove dust and dust and hair build-up. Dry the area thoroughly with terry cloths.
Next, cover the floor around the toilet with a tarp or plastic sheet secured with painter’s tape.
Then, cover the toilet with an extra-large plastic garbage bag. (Tip: You’ll find contractor clean-up bags at your local home improvement store in sizes of up to 50 gallons, and these resist accidental tearing.) Tape the bag in place around the toilet’s base. Take care to wrap any piping or trim that might be exposed with painter’s tape.

Tried-and-True Advice
“There’s no way to paint behind a toilet with it being a bit awkward. Removing the toilet is an option, but that adds a series of steps to the process that are difficult and best avoided unless you have plumbing skills. I find that removing the lid and covering the toilet with a trash bag is efficient, and it allows for full paint coverage when using narrow, spongy brushes. Look for long handle options to make the process easier.”
—Zach Lazzari, Contributing Writer
Step 3: Prime and paint the wall.
Start with one to two coats of primer to ensure the best paint adhesion. To reach behind the toilet and around pipes, you’ll want to do the following:
- Use a narrow paint roller to apply paint primer around the shape of the toilet, cutting in as best you can. Roll with the metal frame on the outside in order to get as close to the covered toilet tank as possible.
- Switch to a 3-inch-wide foam brush to paint behind the toilet. Carefully load one side of the foam brush with paint primer and, when you reach behind the toilet, keep the paint-covered side in direct contact with the wall. Apply in small strokes.
- Use a 1-inch-wide angled brush for detail work around the pipes.
Let the primer dry thoroughly before applying paint. (The paint’s drying time will depend on the temperature and humidity level in your bathroom, as well as the paint primer you choose; refer to the can for an estimated dry time between coats and before paint.)
After priming, clean your paint pan before pouring fresh paint into it. To apply your paint, follow the same tips. After the first coat, wait the amount of time recommended by the manufacturer (longer, if your bathroom is not well ventilated) so that the wall is completely dry before applying a top coat.
OPTION 2: Purchase a special painting tool to access the area behind a toilet tank.
Painting the wall behind the toilet tank can be less of a pain when you use a tool designed to fit the narrow gap between the toilet tank and wall. Sure, it may be that you only have a paint job like this once every five to 10 years (maybe more, if you are a renter who appreciates a fresh coat of paint when you move in and then often needs to repaint before you move out). There’s an innovative painting tool you can buy online to access hard-to-reach areas called the Paint Behind. It’s a flat, extendable-to-12-inches paint brush that can reach behind toilets, pipes, radiators, and other tight spots.
Step 1: Ventilate the bathroom, then prep for painting.
Proceed in establishing good bathroom ventilation and a clean slate for best adhesion, just as you would in Steps 1 and 2 of Option 1.
Clean the wall behind the toilet with a cellulose sponge dipped in a mixture of dish soap and water (you might also try dipping a microfiber cloth in the cleaning solution and wrapping it around the Paint Behind, and extending the tool to clean behind the tank). While the wall air dries, clean the stick and let it dry completely before painting.
Cover the bathroom floor with a drop cloth held in place with painter’s tape, but skip bagging the toilet. Keep a damp paper towel nearby to wipe up any marks.
Step 2: Dip the tool into primer, and glide it across the wall. Repeat the process with coats of paint.
Dip the Paint Behind’s applicator pad into the paint tray to get primer on pad. Then, glide the paint wand the wall behind the toilet, pressing firmly to make sure the entire paint-saturated surface meets the wall.
Apply two coats of primer this way, leaving time between them as recommended by the paint manufacturer. Then, clean the Paint Behind with water and let it dry. Repeat the process with two coats of paint using the Paint Behind.
The post How to Paint Behind a Toilet appeared first on Bob Vila.
]]>The post How to Remove Paint From Metal appeared first on Bob Vila.
]]>Metal furniture and home decor items can last a long time, but they start to lose their appeal when their original paint job is looking less than spectacular. The good news is that it’s possible to strip the paint from metal so you can apply a new coat of paint in your current color scheme.
While there are a range of shapes and sizes for household metal objects—from railings to side tables—there are several methods that can work to remove paint from them. Here are a few of the most effective ways of stripping paint from metal so it’s ready to be refreshed.
Project Overview
Working Time: 2+ hours
Total Time: 2+ hours
Skill Level: Beginner
Estimated Cost: $10 to $50
Before You Begin
Painted metal can range from cabinet hardware to a metal door, so preparing for the project will depend on the painted metal object. No matter the size, select an area that is well-ventilated. It’s just as important to protect yourself, so don your rubber gloves, safety glasses, long-sleeved shirt, shoes, and pants to cover your skin completely. Then, avoid inhalation of fumes from the chemicals by opening all windows and wearing a respirator.
Before you remove metal paint, prepare the work area by covering the work surface and surrounding ground with drop cloths. If you want to save money on supplies, recycled newspapers or unfolded cardboard boxes can substitute as surface protection against the chemical stripper you’ll be using—just make sure not to leave any gaps between pieces. Paint dust and flecks can be tough to chase around later.
7 Ways to Remove Paint From Metal
When considering which method to use to remove paint from your metal object, take note of the shape and size of the item. Some methods below are better suited for flat surfaces and others are best suited for small objects. No matter which you choose, make sure to protect your skin, eyes, and surrounding area from paint flecks and dust that could contain lead.
1. Paint Scraper
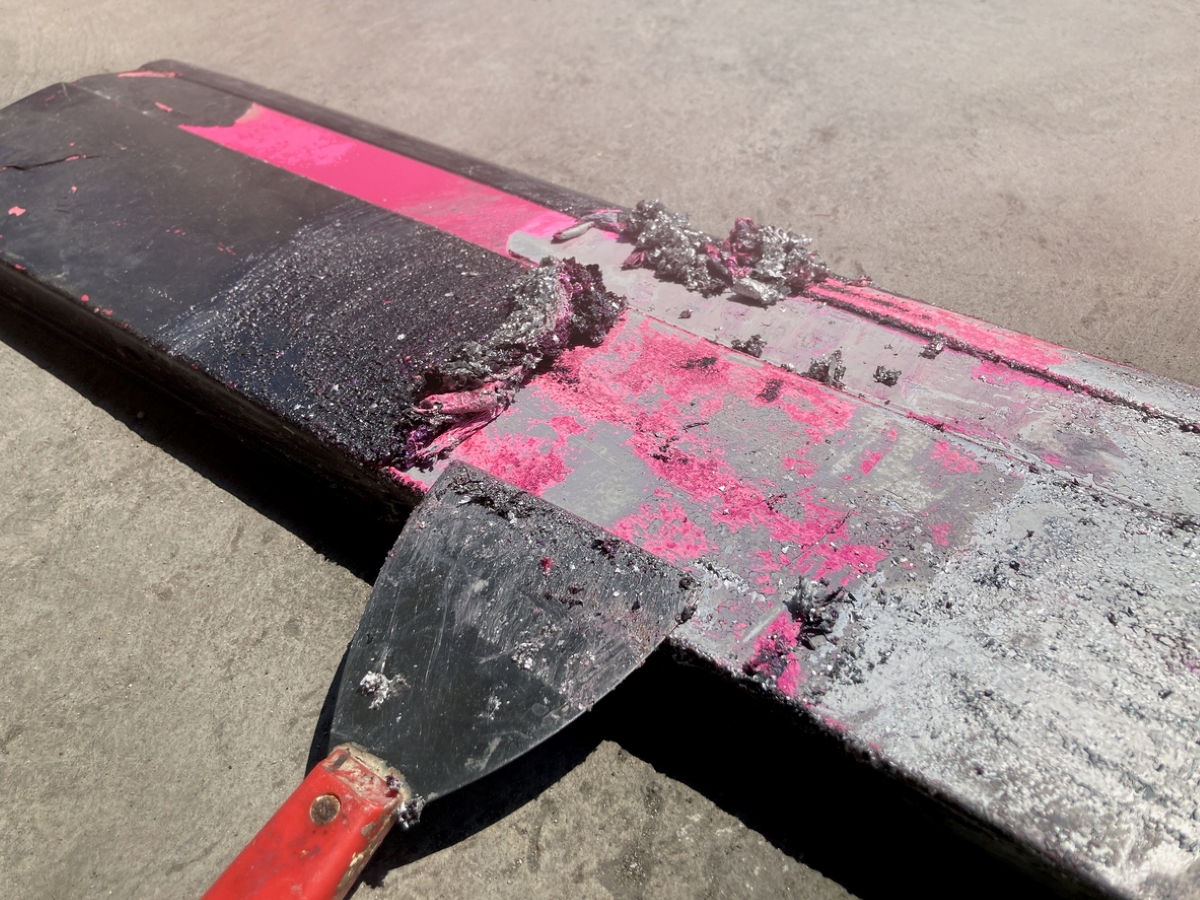
Scraping paint from metal with a paint scraper can be a useful method for removing flaking paint from flat metal surfaces. Be mindful that softer metals may scratch more easily, so it’s important to use a plastic scraper and a lighter touch when using this method. It’s likely that you won’t be able to remove all of the paint with just a scraper, so another method may need to be used to help finish the job.
SUPPLIES
Drop cloth
Paint scraper
Rubber gloves
Eye protection
Respirator mask
Cloth
- Lay out the drop cloth and don protective gloves, eye protection, and mask.
- Take the paint scraper at an acute angle to the surface and push the scraping edge along the surface.
- Repeat the scraping motion until all paint is removed.
- Wipe the surface clean with a cloth.
2. Boiling Water
While boiling water can be a helpful way to loosen paint from metal surfaces, it’s another paint remover for metal method that isn’t practical for larger surfaces. Make sure to always wear heat-resistant gloves when removing metal from boiling water.
SUPPLIES
Pot
Heat-resistant gloves
Paint scraper
Cloth
- Put on heat-resistant gloves and boil water in the pot.
- Either pour boiling water over the object or submerge it in the boiling water.
- After the paint begins to bubble on the metal surface, use a scraper to remove the paint.
- Wipe the surface of the object with a clean cloth.
Tried-and-True Advice
“In my experience, paint removal is sometimes the easiest part of the job. What nobody talks about is what to do with or how to manage the paint that comes off.
Take pressure washing, for example. Using an oscillating “turbo” type head, the water will blast into all kinds of nooks and crannies on a wrought iron railing or old table base and it’ll burst any loose paint off in seconds. And what happens next? The paint is dispersed all over everywhere for 10-15 feet around. It’ll pepper the driveway, the garage wall, the side of the house, whatever. It can be cleaned off, but now you have a second job.
Same with an angle grinder and flapper wheel. At 10,000-11,000-rpm for a 4 1/2-inch tool. That paint is a-flyin’. You’ll need a face shield at a minimum along with gloves, long sleeves and hearing protection (these are my favorite). The machine will murdilize the paint, turning it into a million pepper-sized pieces that’ll be hurled everywhere, including partially on you.
Chemical strippers are a challenge of a different sort. Paint is a solid before paint strippers are applied (this stuff is caustic—you’ll need glove and eye protection). Yes, strippers remove the paint, but before doing so, liquefy it, turning into a slurry-like sludge that gets everywhere. And, if you’re using it to remove many coats of paint, you may need multiple applications as it eats through however many layers it can eat through, then stops, leaving you with more paint to remove.
So, before stripping any finishes, figure out the reaction to the action first and decide which path is best for you, because you might just decide to find an old school dip-and-strip and let them handle it.”
—Mark Clement, Contributing Writer
3. Baking Soda or Vinegar

One way to ease paint from a metal surface is to use baking soda with boiling water. If you don’t have baking soda, white vinegar can be used in its place. While it’s an effective method for removing paint, it’s a process that’s best for smaller pieces.
SUPPLIES
- Add ¼ cup of baking soda to 1 quart of water in a disposable pot.
- Turn on the burner and bring the mixture to a boil.
- Place the painted metal object in the boiling water.
- After about 10 to 15 minutes, the paint will likely start to lift from the surface.
- Turn off the heat.
- Put on heat-resistant gloves and remove the object from the pot.
- With a stiff brush or scraper remove any remaining paint.
- Wipe the surface of the object with a clean cloth.
4. Heat Gun

Essentially, a heat gun will liquefy the paint on the surface enough so that it will be easier to scrape away with a paint scraper. Always start with the lowest setting and wear heat-resistant gloves.
SUPPLIES
Heat-resistant gloves
Eye protection
Heat gun
Wire brush
Cloth
- While wearing heat-resistant gloves and eye protection, turn on the heat gun to its lowest setting.
- Move the heat gun slowly across the surface.
- When the paint begins to crack and melt off the metal, use a wire brush or a paint scraper to remove the paint.
- Wait for the surface to cool and then wipe the metal surface with a clean cloth.
5. Drill

Sturdy and complicated surfaces like metal railings may require the flexibility offered by a drill with a wire wheel attachment to successfully remove paint. Wire wheels can be flat or brush-shaped, which offers the ability to attack both flat and spindly surfaces.
SUPPLIES
Drill
Wire wheel
Eye protection
Heat gun
Wire brush
Rubber gloves
Eye protection
Respirator mask
Cloth
- Put on eye protection, mask, and gloves.
- Attach the wire wheel to the drill.
- Turn on the drill at a low speed.
- Apply the wire wheel to the surface of the painted metal, and work the wheel over the surface to remove the paint.
- Wipe the debris off the surface with a cloth.
6. Angle Grinder

An angle grinder in combination with a flap disc (flapper wheel) can be a good choice if you know the paint is not lead-based and there is a lot of paint to remove from the metal surface. Grinders spin up to 10,000 rpm, so be careful while using one and wear a face shield and gloves to protect your eyes and skin from flecks.
SUPPLIES
Angler grinder
Flap disc (flapper wheel)
Eye protection
Heat gun
Wire brush
Rubber gloves
Eye protection
Respirator mask
Cloth
- Put on eye protection, mask, and gloves.
- Attach the flap disc to the angle grinder.
- Turn on the angle grinder and hold with two hands.
- Starting with a fine grit, apply the flap disc to the painted surface. Do not force the tool by pressing too hard.
- Increase the grit of the disc until the paint is gone.
7. Paint Stripper
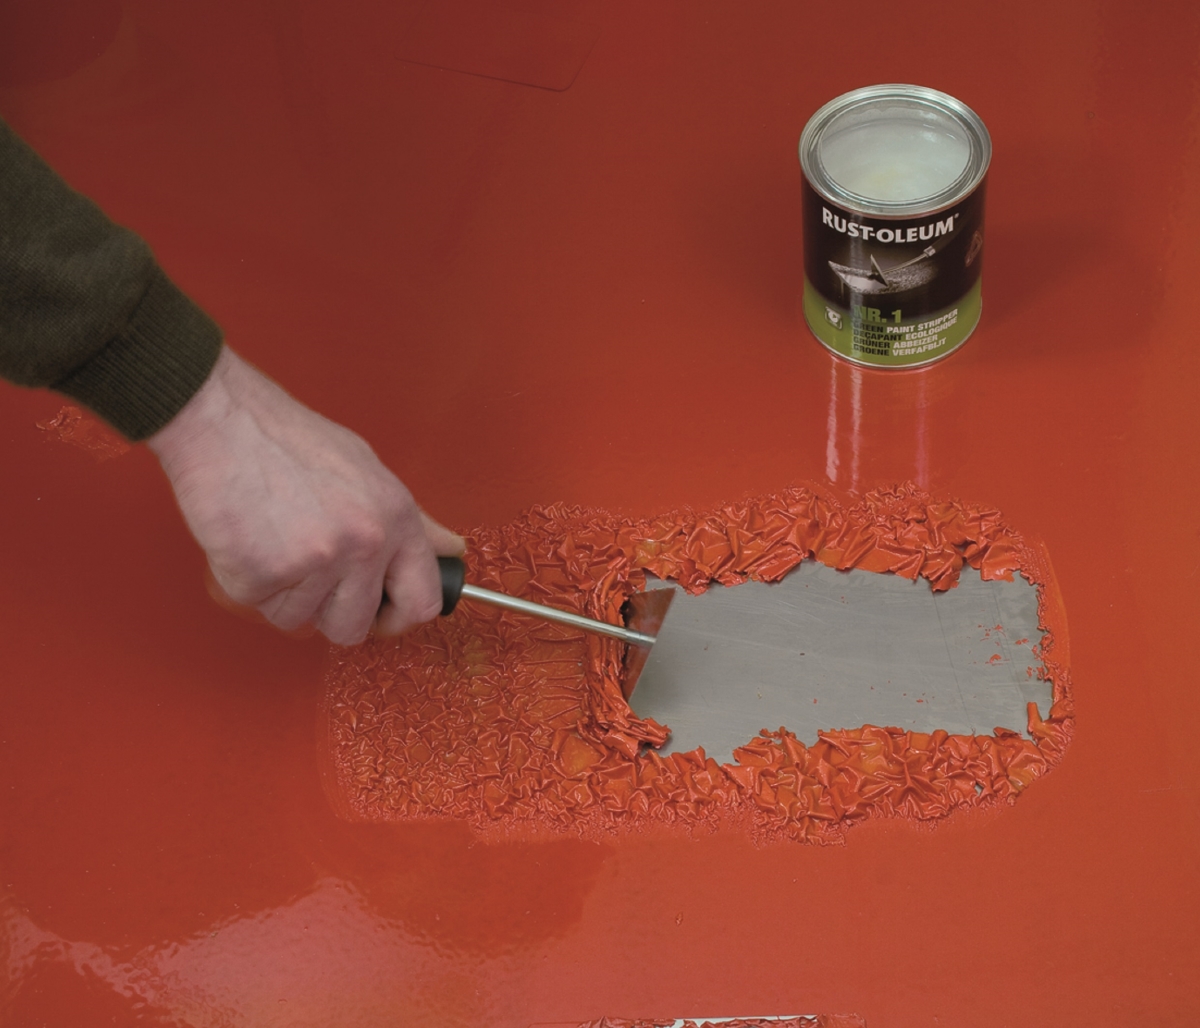
A seemingly easy way to remove paint is with a paint stripper. Older versions are notoriously odorous and not environmentally friendly. However, there are newer versions that are low-odor and made from more organic materials.
SUPPLIES
Drop cloth
Paint-stripping gel
Disposable paint brushes
Rubber gloves
Eye protection
Respirator mask
Nylon brush
Mineral spirits
- Pour a small amount of the stripper into a glass jar or metal can. Using a disposable paint brush, apply the chemical paint stripper to the metal, and let it set according to the instructions on your commercial stripper. As it sets, you should start to see the paint bubble up from the surface of the metal.
- Wearing protective gear, take a paint scraper, and chip off the bubbled paint from all the flat surfaces of the metal. For crevices and harder-to-reach areas, switch to a scrubbing pad or nylon brush (you can use the one from Step 2, but first give it a good wash and trim the bristles short!) and continue to chip away. Reapply stripper and scrape or brush away again as needed until the whole piece is paint-free.
- Next, dampen a rag with mineral spirits and wipe the surface down. This will remove any leftover flakes of lifted paint and the bulk of the remaining chemical residue.
- Thoroughly rinse off the metal with water to completely remove all traces of the stripper, then wipe it down using a fresh, dry rag.
Tips for Removing Paint From Metal

Removing paint from metal surfaces can sometimes be an easy project; in other instances, it can be time-consuming and difficult. Make sure to take time to adequately set up the project area and gather everything you need, including personal protective equipment, before starting. Here are some more tips:
- Set up the project in a well-ventilated area.
- Protect the area with a drop cloth to collect the paint chips and dust.
- Always wear a face mask and gloves when removing paint from metal.
- Use a plastic paint scraper on softer metal surfaces to prevent scratching.
- You may need to use a combination of methods to remove all paint from a metal surface.
- Always try the easiest method before moving on to power tools and chemical stripping.
Final Thoughts
Learning how to remove paint from metal surfaces will help save money and resources as you can refresh and reuse those household items. Depending on the size and shape of the metal object, one method may be better suited than another. Also, you may need to try a few methods before all of the paint is gone. If removing paint from a metal item is only the first step in a bigger upcycling project, you may want to learn more about the best paints for metal.
About the Author
Theresa Clement is a handy designer who has been improving homes for more than 20 years. A certified color expert, she is known for solving design dilemmas with paint, and has painted everything from metal and wood furniture to plastic hopper balls and gum balls to complete a look for a client. Starting with her work at architecture firms, she has authored DIY books; writes for Architect magazine, JLC magazine, and Remodeling magazine; and worked as a design producer on makeover shows. She now works with her carpenter husband on private homes and their home improvement brand, MyFixitUpLife.
FAQs
If you need to know how to remove paint from metal without scratching, consider the type of metal you’re working with. Softer metals, such as silver, gold, and tin, can be susceptible to scratching when using a metal paint scraper or other tools. It’s best to use a plastic paint scraper and the most gentlest methods while working with soft metals to avoid scratching. If there is an inconspicuous area on the metal surface, attempt to remove the paint from that area first.
If you are wondering how to remove spray paint from metal, it’s similar to removing bucket paint from metal. Spray-painted metal objects can be stripped of the paint finish with the methods described above.
How to remove rust from painted metal is a common question, since old metal paint is usually accompanied by rust. Rust can make the process a little more difficult and a lot more messy. The easiest way to remove rust is to use a drill with a wire wheel. Operate the drill on a low setting and make sure to wear eye protection as well as protection of your skin.
The post How to Remove Paint From Metal appeared first on Bob Vila.
]]>The post The Best Plug-In Air Fresheners appeared first on Bob Vila.
]]>Spray an air freshener and it may mitigate bad house smells momentarily. But, plug-in air fresheners combat unpleasant odors continuously, masking or even eliminating them completely. These products come in a number of different formats and typically work by heating oil or wax to aerosolize or vaporize fragrances. Although air purifiers sanitize the air by filtering out dust, mold spores, pet dander, and more.
While choosing the best plug-in air freshener might seem like a simple decision, there are a number of considerations to weigh. Our favorite was the plug-in air freshener from Febreze because of its simple design and effective refills. This guide explores important features and considerations and some of the top products on the market.
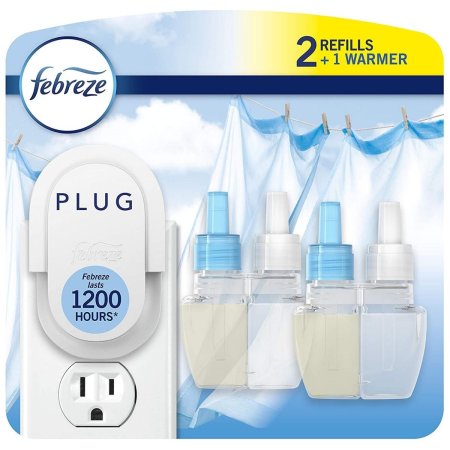
- BEST OVERALL: Febreze Odor-eliminating Plug Air Freshener
- BEST BANG FOR THE BUCK: Air Wick Plug in Scented Oil Starter Kit
- BEST ECO-FRIENDLY: Air Wick Botanica Plug in Scented Oil Starter Kit
- BEST DIFFUSER: Pure Daily Care Ultimate Aromatherapy Diffuser Set
- BEST AIR PURIFIER: LEVOIT Smart WiFi Air Purifier for Home
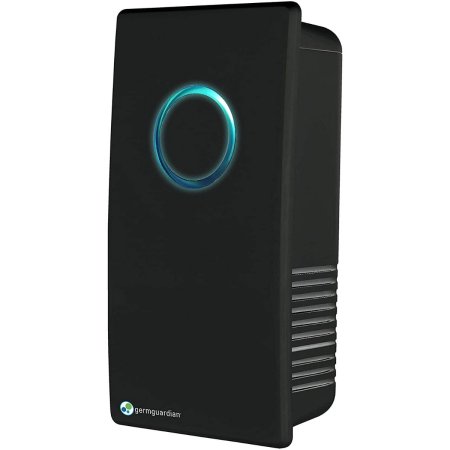
- BEST MINI AIR PURIFIER: Germ Guardian Pluggable Air Purifier & Sanitizer
- BEST FOR BATHROOM: Mindful Design Frosted Pagoda Wax Warmer Plug-In

Product Comparison
| Type | Scent(s) | Longevity | |
| Febreze Odor-eliminating Plug Air Freshener | Heated oil | Clean linen, lily, and pear | 50 days (per refill) |
| Air Wick Plug in Scented Oil Starter Kit | Heated oil | Lavender and chamomile | 60 days (per refill) |
| Air Wick Botanica Plug in Scented Oil Starter Kit | Heated oil | Caribbean sweetgrass and sandalwood, French lavender and honey, pineapple and Tunisian rosemary, and Himalayan magnolia and vanilla | 60 days (per refill) |
| Pure Daily Care Ultimate Aromatherapy Diffuser Set | Essential oil diffuser | Lavender, eucalyptus, tea tree, orange, peppermint, lemongrass, jasmine, nutmeg, clove, and spearmint | Unlimited |
| LEVOIT Smart WiFi Air Purifier for Home | Air purifier | N/A | Unlimited |
| Germ Guardian Pluggable Air Purifier & Sanitizer | Air purifier | N/A | 4,000 to 5,000 hours |
| Mindful Design Frosted Pagoda Wax Warmer Plug-In | Wax warmer | Universal | 4 to 8 hours |
Our Top Picks
The following recommendations take into account the abovementioned factors and features for choosing the best plug-in air freshener, in addition to overall quality and value. Check out these top options in a variety of categories for eliminating unpleasant odors and controlling the air quality in your home.
Best Overall
Febreze Odor-eliminating Plug Air Freshener
What We Like
- Refill cartridges
- Suitable for large and small spaces
- Compatible with horizontal and vertical outlets
- Compact and lightweight
What We Don’t Like
- Should not be used in enclosed areas with pets
- Cannot be used with extension cords
- Not compatible with wet or moist areas
This heated oil set from Febreze packs a serious punch—and some pleasant scents. It includes the plug-in warmer as well as one to two refill cartridges, each of which features two rotating, complementary scents that feature notes of lily and pear. Use the highest setting for large open spaces and the lowest setting for smaller rooms.
Each cartridge operates for 1,200 hours (approximately 50 days) at the lowest setting. The warmer is also compatible with all other versions of Febreze plug-in cartridges for more tropical, musky, or floral scents. The warmer is compatible with both horizontal and vertical outlets and can be placed upside down if necessary.
Product Specs
- Type: Heated oil
- Scent(s): Clean linen, lily, and pear
- Longevity: 50 days (per refill)
Get the Febreze plug-in air freshener at Target or Walmart.
Best Bang for the Buck
Air Wick Plug in Scented Oil Starter Kit

What We Like
- Extra refills
- 5 settings
- Lasts for 360 days total on the lowest setting
- Dye- and phthalate-free
- Recyclable and eco-friendly
What We Don’t Like
- Some users report issues with the scent quality
Air Wick’s scented oil starter kit features two warmers and six refills at a budget-friendly price. Control the amount of fragrance emitted by choosing from five settings for tackling cooking, musty, and pet odors. This kit provides a lavender aroma for 360 days on the lowest setting, with each cartridge lasting for approximately 60 days.
The oil is free of dyes and phthalates and contains natural fragrances, which include notes of lavender essence as well as chamomile and woods. The packing materials and glass cartridges are recyclable to make the product eco-friendly. The refills are also compatible with all other Air Wick plug-in air fresheners.
Product Specs
- Type: Heated oil
- Scent(s): Lavender and chamomile
- Longevity: 60 days (per refill)
Get the Air Wick Starter Kit at Amazon, The Home Depot, and Walmart.
Best Eco-Friendly
Air Wick Botanica Plug in Scented Oil Starter Kit

What We Like
- Free of propellants, dyes, and phthalates
- Cruelty-free
- Responsibly-sourced oil
- 100 percent recyclable packaging
What We Don’t Like
- Some users report poor scent quality
Air Wick’s Botanica line is tough on unpleasant smells and gentle on the planet. The oil contains responsibly sourced ingredients and no chemical propellants, dyes, or phthalates, and it was not tested on animals. The scent features Caribbean sweetgrass and sandalwood, and the sweetgrass essential oil is responsibly sourced from Haiti. It comes in a 100 percent recyclable box and is made in a zero-waste plant.
The kit includes two warmers and six refills, each of which provides up to 60 days of pleasant, warm aromas on the lowest setting. Air Wick also makes a number of other eco-friendly Botanica fragrances, including French Lavender and Honey, Pineapple and Tunisian Rosemary, and Himalayan Magnolia and Vanilla.
Product Specs
- Type: Heated oil
- Scent(s): Caribbean sweetgrass and sandalwood, French lavender and honey, pineapple and Tunisian rosemary, and Himalayan magnolia and vanilla
- Longevity: 60 days (per refill)
Get the Air Wick Scented Oil Starter Kit at Amazon.
Best Diffuser
Pure Daily Care Ultimate Aromatherapy Diffuser Set

What We Like
- Suitable for aromatherapy
- 10 essential oils with amber jars for sun protection
- BPA-free plastic construction
- 400-millimeter capacity
- 7 ambient light modes
What We Don’t Like
- No longevity between reloads listed
- Pricey compared to similar options
Pure Daily Care makes an excellent starter kit for those interested in aromatherapy. This diffuser comes with 10 therapeutic-grade essential oils, including lavender, eucalyptus, tea tree, orange, peppermint, lemongrass, jasmine, nutmeg, clove, and spearmint. Each is packaged in a 10-milliliter amber jar that protects the oil from sun degradation.
The diffuser itself is made from BPA-free plastic with a wood grain design and has a 400-milliliter capacity. It features seven ambient light modes with two light intensity settings as well as a timer and an auto-shutoff feature that detects low water levels.
Product Specs
- Type: Essential oil diffuser
- Scent(s): Lavender, eucalyptus, tea tree, orange, peppermint, lemongrass, jasmine, nutmeg, clove, and spearmint
- Longevity: Unlimited
Get the Pure Daily Care diffuser set at Amazon or Walmart.
Best Air Purifier
LEVOIT Smart WiFi Air Purifier for Home

What We Like
- Connects to Wi-Fi networks; controllable through smartphones and tablets
- Removes 99.97 percent of airborne contaminants
- 3-step filtration system
- Circulates air multiple times per hour
- Night mode
What We Don’t Like
- Pricey
- No air quality sensor built-in
LEVOIT smart air purifier connects to a Wi-Fi network, allowing users to control it remotely from a smartphone or a tablet. Eliminate 99.97 percent of airborne contaminants that are 0.3 microns in size, including dust, pollen, mold, and pet dander, using the ultrafine nylon prefilter, activated carbon filter, and HEPA filter. In a 183-square-foot room, this air purifier circulates air five times per hour and twice per hour in a 376-square-foot room.
For uninterrupted sleep, users can turn off all display lights while the purifier is operating. Sleep mode also operates quietly at just 24 decibels, while “high-speed” mode produces 45 decibels of sound, which is comparable to the sound of a fridge running.
Product Specs
- Type: Air purifier
- Scent(s): N/A
- Longevity: Unlimited
Get the LEVOIT Smart WiFi air purifier at Amazon or Target.
Best Mini Air Purifier
Germ Guardian Pluggable Air Purifier & Sanitizer
What We Like
- Compatible with standard wall outlets
- UV-C light technology; removes VOCs, germs, and viruses
- Compact, lightweight design
What We Don’t Like
- Not suitable for large spaces
- Replacement bulbs sold separately
Many plug-in air purifiers sit on a tabletop, but mini models rest directly on a wall outlet, taking up minimal space. Despite its compact size, this Germ Guardian product is powerful enough to sanitize the air in small spaces. Rather than filters, it uses UV-C light to remove airborne germs and viruses and reduce volatile organic compounds (VOCs). The light actually alters the genetic structure of particles like influenza, killing them before they are breathed in. Each bulb lasts for between 4,000 and 5,000 hours.
Product Specs
- Type: Air purifier
- Scent(s): N/A
- Longevity: 4,000 to 5,000 hours
Get the Germ Guardian mini air purifier at Amazon, The Home Depot, and Walmart.
Best for Bathroom
Mindful Design Frosted Pagoda Wax Warmer Plug-In

What We Like
- Removable dish
- Toggle switch turn-on
- Produces aroma and light
What We Don’t Like
- Wax not included
- Should be used with soy-based waxes for best results
To bring a spa-style vibe to any bathroom, consider this Mindful Design product. As a wax warmer, it provides the peaceful ambiance of a scented candle without the stress of an open flame. The pagoda-shaped warmer has a wood frame and glass siding, and it uses a glowing filament bulb to create a gentle golden glow for a relaxing atmosphere.
The outlet cord features a toggle switch so users can easily turn the warmer off when leaving the room. The bowl is removable for easy cleanup once the wax has cooled. The wax is not included; purchase soy-based wax for the best results.
Product Specs
- Type: Wax warmer
- Scent(s): Universal
- Longevity: 4 to 8 hours
Get the Mindful Design plug-in air freshener at Amazon.
How We Chose the Best Plug-In Air Fresheners
We researched the most sought-after plug-in air fresheners in their respective categories and discovered that the best options are determined by their type, size, fragrances offered, longevity, ease of setup and use, and other special features included by top brands.
To ensure our list included top picks that satisfied a range of preferences, we included heated oil models, essential oil diffusers, air purifiers, and wax melts that are compact enough to fit standard wall outlets as well as tabletops and vehicles. While many options come with various fragrances, some options remove unpleasant odors with air purification and elimination without the use of natural or artificial fragrances.
Though some options on our list provide unlimited usage, all of the other products listed above offer odor control for 4 hours to as long as 360 days at a time in small to large rooms. Each option is also easy to set up and use by simply plugging in or refilling a reservoir with water and compatible essential oils. Plus, these air fresheners are suitable for use in living room, kitchen, automotive, and bathroom spaces and their odors.
What to Consider When Choosing the Best Plug-in Air Freshener
A number of factors and product features may affect a plug-in air freshener’s scent, settings, aesthetic, convenience, and overall quality. Keep reading to learn important considerations when shopping for the best plug-in air freshener for unpleasant home smells.
Types of Plug-in Air Fresheners
There are four basic types of plug-in air fresheners for unpleasant odors: heated oils and sprays, wax warmers, essential oil diffusers, and air purifiers. Each provides varying benefits and offers differing levels of convenience, longevity, and additional features.
Heated Oil and Spray
These standard plug-in air fresheners are energy efficient, emitting a fairly strong fragrance while using a minimal amount of electricity. They feature cartridges filled with a wide variety of scented oils, which are then aerosolized and sprayed into the room. Most models are compatible with any refill cartridge from the same brand. Each cartridge lasts between 30 and 60 days, though longevity varies from brand to brand.
Some folks find the fragrance from this type of air freshener to be overpowering, but there are products that let you control the level of scent emitted, adjusting it to room size or user preference. Be mindful of standard plug-in air fresheners when it comes to children and pets, because heated oils and sprays are dangerous if ingested.
Wax Warmers
Wax warmers act as a safer alternative to burning candles, relying on either a light bulb or a warming plate as a heat source instead of an open flame. Bulbs for plug-in wax warmers range from 25 to 40 watts, and various models may emit soft, ambient light to mimic a candle. While some models may come with wax, it can also be purchased separately.
These products feature a heat-resistant bowl where users place wax melts or pucks that come in various natural and synthetic fragrances. The wax takes several hours to cool completely and should not be accessible to children or pets. Each wax melt lasts for up to 10 hours.
Essential Oil Diffusers
Essential oils are natural, plant-derived substances said to have a number of aromatherapeutic benefits. Essential oil diffusers heat essential oils to break them down and dispense the smaller particles into the air. Most models also use water to provide both a humidifying and air- freshening effect.
While the water reservoir must be refilled daily, only a few drops of essential oil are required. Some oil diffusers are sold with essential oils while others require that you purchase them separately. Essential oil diffusers should only be used for half an hour at a time because prolonged exposure to essential oils may have negative health effects.
Air Purifiers
Air purifiers actually eliminate unpleasant odors rather than simply covering them up. Not only that, but they also improve air quality by removing dust, pollen, mold, and pet dander. They are the ideal choice for reducing airborne contaminants that aggravate allergy symptoms and cause respiratory issues. They draw in odors and particles from the air, then use filters to purify the air before recirculating it into the room.
The highest-quality filters are known as HEPA (high-efficiency particulate air) filters. They have been certified to trap 99.97 percent of all particles that are 0.3 microns or larger in size. HEPA filters must be changed every 3 to 6 months.
When choosing an air purifier, consider the size of your space. Most manufacturers will stipulate the ideal room size for their product and provide an air change per hour (ACH) rate, which lets users know how many times per hour it will filter all of the air in the room.
Location
When choosing an air freshener, first consider where it will be placed. While a stronger fragrance may be a great choice for a large open space, it may be overpowering in a small bathroom. Also, consider any pets or young children in the household, and be sure to place the plug-in air freshener out of their reach.
Note that your vehicle may also benefit from a plug-in product. Some are designed to be plugged into a car’s 2-volt outlet, while others use a USB cable. They’re convenient for covering up the smell of fast food or stinky sports equipment. They typically power on when the engine is running to avoid wasting the car’s battery.
Scent
One of the primary considerations when choosing an air freshener is whether to go with a scented or unscented version. Standard air fresheners, as well as essential oil diffusers and wax warmers, feature a wide variety of fresh scents that can be swapped out seasonally or depending on your preference.
Decide whether natural aromas from essential oils or synthetic scents are the better choice for your household, keeping in mind that some artificial smells may act as irritants to allergy sufferers. Also remember that air purifiers eliminate odors without emitting any additional scent.
Settings
Each type of plug-in air freshener can feature a range of settings.
- Some standard air fresheners allow users to control the level of fragrance emitted based on how strong they want the smell to be. Others feature night-lights that are convenient for late-night bathroom trips.
- Essential oil diffusers may include timers, ambient light settings, and auto-shutoff features that detect low water levels.
- Air purifiers often feature different fan settings, timers, and filter change indicators. They may also include smart technology, allowing users to control them remotely via a smartphone or a tablet.
Aesthetic
When choosing an air freshener that will be placed in a visible location, the product’s appearance is a key consideration.
- Heated oil and spray air fresheners typically have a simple plastic design and display the color of the oil or liquid.
- Wax warmers vary widely in appearance, with options to suit a number of different decor styles. They may have either a natural, a contemporary, or a bohemian aesthetic.
- Essential oil diffusers come in a variety of shapes and sizes and feature casings made from plastic, wood, glass, and terra cotta.
- Air purifiers often feature streamlined modern designs that help them blend in with existing decor items.
Convenience
Some shoppers may prioritize convenience when choosing a plug-in air freshener. Air purifiers offer optimal convenience since their filters only need to be changed a few times per year. Essential oil diffusers, on the other hand, need their water reservoirs filled daily.
When shopping for a standard plug-in air freshener, look for a model that is compatible with both vertical and horizontal outlets that can be plugged in upside down if necessary.
FAQs
Here are answers to some of the most frequently asked questions about plug-in air fresheners for bad home smells.
Q: Do plug-in air fresheners use a lot of electricity?
Plug-in air fresheners are very energy efficient, using an average of 4 watts of power.
Q: Are plug-in air fresheners a fire hazard?
While some plug-in air fresheners have been blamed for causing fires, this is extremely rare. These incidents are typically caused by faulty wiring.
Q: What is the most effective air freshener?
Air purifiers are more powerful than traditional air fresheners because they actually filter and eliminate dust and mold particles to clean the air in your home. The LEVOIT Smart WiFi Air Purifier for Home is one of the best air purifier options available.
Q: What is the longest-lasting plug-in air freshener?
The Air Wick Plug in Scented Oil Starter Kit is one of the most long-lasting plug-in air fresheners on the market, with the included cartridges lasting for a total of 360 days.
Q: How often do plug-in air fresheners need to be replaced?
The cartridges on standard plug-in air fresheners typically need to be replaced every 30 to 60 days, depending on the brand.
The post The Best Plug-In Air Fresheners appeared first on Bob Vila.
]]>The post Homemade Ice Melt Recipes: 3 Solutions for When You’re Iced In appeared first on Bob Vila.
]]>A slippery coating of ice can bring your life to a grinding halt if you don’t have the means to get rid of it. While ice melt gets the job done, what if a surprise storm strikes after you’ve used up the last of your supply? Or maybe you’re trying to cut down on commercial ice melt out of concern for plants, pets, and the environment. In either scenario, DIY alternatives can help you clear ice off your car, sidewalks, driveway, and other surfaces. So, the next time you find yourself iced in, try one of these three homemade ice-melting solutions that use ingredients you probably have on hand.
1. For front steps, car windshields and doors, and other small areas, try rubbing alcohol.

Alcohol has a much lower freezing point than water. This homemade de-icer recipe harnesses its ice-melting potential: Combine 4 gallons of hot water, 16 ounces of rubbing alcohol, and 1 teaspoon of dish soap. (The dish soap reduces the surface tension of the water, helping the solution spread more evenly.) Pour the solution over icy areas, and then use a shovel to clear off loose ice and water.
For icy car doors or windshields, pour some of the cooled solution into a spray bottle and spritz the frozen areas. Keep a bottle of this solution in the car so you’re ready if the windshield gets frosted over when you’re far from home.
Pro Tip
No matter which homemade ice melt you choose, it’s a good idea to also lay down a substance that adds friction, at least to surfaces anybody might walk on. Sand, rock salt, and kitty litter all do the trick.
2. For walkways and driveways, try salt.
Rock salt, or sodium chloride, is the most common (and cheapest) ice melt around. It works by lowering the freezing point of water, eventually breaking down the ice. If you don’t have any rock salt handy for de-icing, table salt can do in a pinch. For best results, remove as much snow as possible from the surface before applying the salt. Because of its small granule size, table salt will start working faster than rock salt, but it won’t provide the same traction. As well, table salt tends to turn ice into tough-to-move slush, while rock salt is more likely to break it down into manageable chunks. For small areas, such as the front steps, try mixing warm water with table salt and applying this solution; this method also works for unsticking car tires. Though cheap and usually plentiful, salt has a few drawbacks: It is not effective at the low temperatures that some of the best commercial ice melts can handle. As well, it can harm plants, corrode metal and concrete, and impact fish and wildlife if it gets into waterways, so avoid regular use.
3. If you have nothing else available, try fertilizer.
Ammonium sulfate, a common ingredient in commercial fertilizers, works by lowering the temperature at which ice melts. While it doesn’t melt ice immediately, it speeds the process along. If you have no other potential ice melt around, check your leftover fertilizer to see if ammonium sulfate is listed as a component. To use, scatter it over the ice. Although fertilizer can help melt ice, it’s not recommended. Overuse can harm plants, fertilizer chemicals can damage concrete surfaces, and fertilizer runoff from melting ice is an environmental concern.
The post Homemade Ice Melt Recipes: 3 Solutions for When You’re Iced In appeared first on Bob Vila.
]]>The post The Best Double-Sided Tapes appeared first on Bob Vila.
]]>Move over, duct tape, there’s another tape that has nearly as many uses. Double-sided tape can be used to adhere any two surfaces a user wants to stick together tightly—without the need for glue or nails—in crafting, household, industrial, or manufacturing applications.
With so many products to choose from, it can be hard to select the best double-sided tape for a project. We’ve done the legwork with this comprehensive review, aiming to help shoppers make the right purchase. Our favorite is the Tough & Clear from Gorilla, offering a versatile and strong bond suitable both indoors and outdoors.
- BEST OVERALL: Gorilla Tough & Clear Double-Sided Mounting Tape
- BEST BANG FOR THE BUCK: Phinus Clear Waterproof Double-Sided Mounting Tape
- BEST HEAVY-DUTY: Hitlights Heavy-Duty Double-Sided Foam Mounting Tape
- BEST REMOVABLE: Scotch Removable Double-Sided Tape Dispensered Roll
- BEST FOR CARPET: XFasten Double-Sided Tape
- BEST FOR PAINTED WALLS: Scotch-Mount Indoor Double-Sided Mounting Tape
- BEST FOR CRAFTS: AJ Sign World 164-Foot Premium Double-Sided Adhesive

Product Comparison
| Length | Color | Features | |
| Gorilla Tough & Clear Double-Sided Mounting Tape | 60 or 150 inches long by 1 inch wide; 48 inches long by 2 inches wide | Clear | Weatherproof, 12- to 37.5-pound hold (depending on tape length) |
| Phinus Clear Waterproof Double-Sided Mounting Tape | 10 feet long by 0.75 inches wide | Clear | Nonresidue, weatherproof |
| Hitlights Heavy-Duty Double-Sided Foam Mounting Tape | 32 feet or 100 feet long by 0.39 inches wide | Black | Foam core |
| Scotch Removable Double-Sided Tape Dispensered Roll | Various, from 200 to 450 inches long | Clear | Removable, dispenser included |
| XFasten Double-Sided Tape | Various, from 15 to 30 yards long | White | UV-, heat-, and moisture-resistant |
| Scotch-Mount Indoor Double-Sided Mounting Tape | Various, from 55 to 350 inches long | White | Industrial-strength adhesive holds up to 15 pounds |
| AJ Sign World 164-Foot Premium Double-Sided Adhesive | 164 feet long by 0.5 or 1 inch wide | Clear | Ultrathin, tearable by hand |
Our Top Picks
Double-sided tape can work in a variety of scenarios if the right option is used. The ones listed here were selected for their quality and price to help shoppers find the best one for their projects.
Best Overall
Gorilla Tough & Clear Double-Sided Mounting Tape
What We Like
- Suitable for use both indoors and outdoors
- Easily bonds to a wide variety of materials
- Ideal for use on glass without creating tape marks
What We Don’t Like
- Removing the backing can be quite tricky
Products Specs
- Length: 60 or 150 inches long by 1 inch wide; 48 inches long by 2 inches wide
- Color: Clear
- Features: Weatherproof, 12- to 37.5-pound hold (depending on tape length)
Gorilla’s double-sided tape is great for projects where traditional fasteners won’t work. The tape works on a variety of surfaces, including stone, concrete, glass, metal, bricks, tile, plastic, and wood. However, because it’s a permanent tape and features a strong adhesive, it’s not recommended for delicate surfaces such as painted drywall.
This mounting tape holds 1 pound per 4 inches of tape. It’s good for both indoor and outdoor applications and it won’t yellow over time. The tape is moisture- and heat-resistant up to 194 degrees Fahrenheit.
Gorilla tape offers a wide range of mounting, repairing, and bonding applications. For those who need a permanent tape that mounts in an instant with a long-lasting, weatherproof bond, Gorilla’s product is a solid choice.
Get the Gorilla double-sided tape at Amazon or The Home Depot.
Best Bang for the Buck
Phinus Clear Waterproof Double-Sided Mounting Tape

What We Like
- Suitable for a variety of surfaces
- Waterproof, weatherproof, and multipurpose
- Nonresidue adhesive formula
What We Don’t Like
- Isn’t suitable for use on delicate surfaces
Products Specs
- Length: 10 feet long by 0.75 inches wide
- Color: Clear
- Features: Nonresidue, weatherproof
A budget-friendly option, this double-sided tape by Phinus works best on smooth surfaces, such as glass, metal, plastic, ceramic tile, and marble. Because it has a strong acrylic adhesive base, it’s not suitable for delicate surfaces such as wallpaper, painted surfaces, or broken walls.
The tape is flexible and leaves no residue when removed from proper surfaces. It has a cold/heat resistance of -4 to 160 degrees Fahrenheit and is resistant to moisture and solvents, making it useful outdoors as well as inside the home.
Get the Phinus double-sided tape at Amazon (2-pack).
Best Heavy Duty
HitLights Double Sided Tape
What We Like
- Provides flexibility on more difficult surfaces
- Ideal for installing LED strips on multiple surfaces
- Provides an excellent permanent bond
What We Don’t Like
- Tape is difficult to remove once applied
Products Specs
- Length: 32 feet or 100 feet long by 0.39 inches wide
- Color: Black
- Features: Foam core
This industrial-strength, high-bond acrylic foam tape is suitable for most applications, including outdoor use. It works on a variety of materials, including aluminum, steel, glass, and plastics.
HitLights is a heavy-duty double-sided tape that grabs a firm hold immediately. The bond created by this permanent tape actually strengthens over time, and the product truly shines in cases where waterproof adhesion is required.
Get the Hitlights double-sided tape at Amazon or Hitlights.
Best Removable
Scotch Removable Double-Sided Tape Dispensered Roll
What We Like
- Ideal for small projects like scrapbooking
- Tape comes in the included dispenser
- Gentle enough to not damage delicate surfaces
What We Don’t Like
- Removability sacrifices adhesive strength
Products Specs
- Length: Various, including 200 inches long by 0.75 inches wide, 250 inches long by 1 inch wide, 300 inches long by 3 inches wide, and 450 inches long by 1 inch wide
- Color: Clear
- Features: Removable, dispenser included
This removable tape features a unique adhesive that holds paper securely but is easy to reposition or remove if needed or desired. This ability makes Scotch’s tape a terrific option to use in small projects, such as photo albums and scrapbooks. (The tape is acid-free and archival, so it will not yellow or damage either photographs or papers.)
For light-duty mounting needs, this double-sided tape is a fine option, not least because it comes in an easy-to-use tape dispenser that allows the tape to glide off the roll smoothly.
Get the Scotch removable double-sided tape at Amazon, Target (3-pack), Staples, or Office Depot.
Best for Carpet
XFasten Double Sided Carpet Tape
What We Like
- Can easily stick to most surfaces
- Sticky enough to hold most rugs in place
- Resistance to heat, moisture, and UV light
What We Don’t Like
- Unless installed carefully, rugs may still curl up in the corners
Products Specs
- Length: Various, including 15 yards long by 3 inches wide, 20 yards long by 2 inches wide, 20 yards long by 4 inches wide, and 30 yards long by 2 inches wide
- Color: White
- Features: UV-, heat-, and moisture-resistant
XFasten’s durable carpet tape is a top solution for keeping area rugs and runners firmly in place. If the rug may need to be moved later, no worries—the tape can be removed easily by hand without leaving a sticky residue behind.
Surfaces must be dry and free of debris before application, but the tape is safe for use on hardwood, vinyl, and tile, as well as on carpeting of all types.
Get the XFasten double-sided tape at Amazon or XFasten.
Best for Painted Walls
Scotch-Mount Indoor Double-Sided Mounting Tape
What We Like
- Suitable for most common uses around the home
- Comfortably tackles most DIY projects
- Thick and pliable tape
What We Don’t Like
- Mounting heavier objects may start to fail over time
- Removing the tape may inadvertently peel some paint off the wall
Products Specs
- Length: Various, including 55 inches long by 1 inch wide, 125 inches long by 1 inch wide, and 350 inches long by 0.75 inches wide
- Color: White
- Features: Industrial-strength adhesive holds up to 15 pounds
Not all double-sided tapes like to adhere to painted surfaces, but Scotch’s foam mounting tape delivers a strong, permanent bond in 30 seconds flat and is able to hold 1 pound per 5.5 inches of tape up to a maximum of 15 pounds when using 80 inches of tape.
This product is ideal for mounting pictures and decorations, not least because it can be used on most types of walls, including ceramic tile and wood surfaces that are clean, dry, and smooth. However, this tape is not recommended for use on wallpaper or delicate surfaces. For the best results, apply when the temperature is between 50 and 100 degrees Fahrenheit.
Get the Scotch-Mount double-sided tape at Amazon (125 inches), Ace Hardware (350 inches), The Home Depot (55 inches), or Lowe’s (350 inches).
Best for Crafts
AJ Sign World 164-Foot Premium Double-Sided Adhesive
What We Like
- Relatively affordable price point
- Tape is very thin and easy to tear
- Backing is easy to remove
What We Don’t Like
- Adhesive is quite strong and doesn’t remove easily
Products Specs
- Length: 164 feet long by 0.5 or 1 inch wide
- Color: Clear
- Features: Ultrathin, tearable by hand
AJ Sign World’s acid-free tissue tape excels in all types of arts and crafts applications. It’s easy to tear by hand—no scissors required—and it’s transparent, which makes the tape more versatile. This 1-inch wide tape is only suited for use on smooth surfaces. Note also that this is a permanent tape. Once it’s on, it’s on for good.
Those who are looking for a thinner version of this AJ Sign World tape may want to consider the 0.5-inch-wide version.
Get the AJ Sign World double-sided tape at Amazon.
Jump to Our Top Picks
How We Chose the Best Double-Sided Tapes
To build our top picks list, we researched all the top double-sided tape brands available across several categories. Our recommendations cover a range of specific uses for the best double-sided tapes, each offering unique qualities to suit a household task or project.
Our top picks are available in a variety of colors and lengths. We made sure to include a varied selection of adhesive strengths, from options that can be easily removed and repositioned to others capable of holding up to 15 pounds of weight. Our list also includes a range of both thick and thin tapes, which are better suited to different tasks.
What to Look for When Choosing Double-Sided Tape
Double-sided tape is a versatile, economical alternative to glue. It has pressure-sensitive adhesive exposed on both sides of the tape which allows two items to be bonded together. The adhesive lies on top of a carrier material, which can range from film as thin as a fraction of a millimeter up to a thick foam several millimeters thick.
Unlike single-side tape, double-sided tape creates an invisible bond between two objects. Moreover, there’s little time required for the bond to form—simply peel and stick. The tape is often used to hang signs or temporary displays, attach foam to wall panels or flooring underlayment to floors, secure and hold carpets in place for major events or trade shows, and much more. The type of double-sided tape required depends on the application.
When shopping for double-sided tape, consider the tape type, adhesive level, thickness, width, application setting, and other factors. Below are some common characteristics to take into account when picking the right double-sided tape for a particular project.
Type
There are several types of double-sided tape with various carrier materials, each serving a specific purpose. Double-sided tape types fall into one of the below categories:
- Tissue tape is the most common type used for light bonding tasks. It’s mostly used for stationery, art, crafting projects, office, and general applications. Double-sided tissue tape is easy to tear, and is thin enough that it can adhere to irregular surfaces. It’s also inexpensive and a good alternative to glue.
- Acrylic tape is primarily used in industrial environments. It’s stronger than tissue tape and is weather-resistant, making it ideal for both indoor and outdoor use. Acrylic double-sided tape should only be used when permanent bonding is needed.
- Polyethylene tape, also known as foam double-sided tape, provides thick cushioning and insulation. Double-sided polyethylene tape is well-suited for uneven surfaces.
- Floor tape is used on floor surfaces, like carpet, to hold items like area rugs or runners in place. They have medium adhesion, which allows for removal without residue.
- Double-sided tape has either acrylic or rubber adhesives. Acrylic adhesives are stronger but more expensive and rubber adhesives are generally cheaper but less suited for long-term applications. Acrylic adhesive is also more heat- and light-resistant than rubber.
Thickness and Width
Double-sided tape has either thick or thin bonding systems. Tapes with thick bonding systems adhere well to unusual, non-uniform, or highly patterned and textured surfaces. This type of tape usually has a foam carrier layer. Thin bonding systems are significantly thinner. Sometimes the carrier layer is so thin that they are pretty much an adhesive on top of a silicone liner. These tapes are best suited for light adhesion applications.
Width varies quite a bit with double-sided tape. Rolls are available in widths less than 1/4-inch to several inches wide. Each type of tape will have several width options to suit specific projects.
Bonding Surfaces
The right double-sided tape for a project depends on the surface of the two objects that the user wants to stick together. Surface energy is the degree of attraction or repulsion force a material exerts on another material. Double-sided tape works best on surfaces with a high surface energy, like glass, glazed tile, and bare metals. The surface energy of plastic can vary quite a bit, but in general, it’s best to use a stronger tape. Then there’s silicone, which has such low surface energy that conventional adhesives won’t stick to it. Silicone needs a very tacky adhesive, or one specially formulated to adhere to it.
For flat and smooth surfaces like glass, aluminum, and PVC, thinner tape works well. For rougher surfaces like wood, cement, brick, and stucco, thicker tapes work best. Painted or coated surfaces need thicker, stronger tape as well.
Environment
The environment plays an important role in the adhesion of double-sided tape. Is the tape for indoor or outdoor use? Some tapes are not designed to hold up in outdoor environments.
For outdoor tapes, the weather impacts adhesion quality. The cooler the temperatures, the weaker the resulting bond will be. But high heat isn’t good for adhesion either—it can cause the adhesive to melt and loosen the bond.
Dust, grease, or moisture can also compromise the bond between two surfaces. Cleaning the surface with rubbing alcohol and making sure it’s completely dry before application will guarantee a stronger bond.
Object Weight
Double-sided tapes are rated by the maximum load they can hold. In general, thicker tapes hold more weight. Additionally, tapes with acrylic-based glue will hold more weight. However, the strength of the bond depends on the surface and weight of the object.
The load capacity is determined by the tape’s adhesive viscosity. Adhesive viscosity is similar to liquid viscosity— if it flows easily, it has low viscosity; if it does not, it has high viscosity. However, the viscosity rating for double-sided tape basically determines how well it binds to uneven surfaces. For rough surfaces, a viscous tape is preferable because it will spread into all the nooks and crannies of the uneven surface. Smooth surfaces do not need tape that is as viscous.
In some tapes, viscosity increases as the tape cures on the surface, strengthening the bond.
Pick a tape that best matches the surface energy of the items and consider the maximum load rate.
Longevity
Double-sided tape is either removable or permanent. The removable variety is meant for temporary use and is easily removed. Permanent tapes are used mostly in industrial manufacturing, but strong tapes are also available for home use. These tapes are typically used in lieu of glue or nails to permanently hold two objects together.
The longevity of the bond depends on how strong the adhesive is, as well as the environment. In climate-controlled environments, most double-sided tapes will hold a bond until the user removes it. In outdoor environments, the bond is subjected to heat, cold, and moisture, which will eventually cause the bond to deteriorate.
Removal
There may come a time when it’s necessary to remove double-sided tape. Thankfully, for most of them, a little heat will cause the adhesive to melt and break the bond. A blow dryer or a heat gun can be used to warm the surface and slightly melt the adhesive. Sometimes the tape will release from one side but hold fast to the other. In that case, it may be necessary to apply more heat to break the bond.
If heat does not remove the adhesive, try commercial residue cleaners. These products work by dissolving the sticky adhesive on the tape, making it easier to remove. Pour some of it on the tape and let it soak in for a few minutes, then scrape it off.
FAQs
Now that you have read through the characteristics of double-sided tape, you may still have a few questions. Read on to see some of the commonly asked questions about double-sided tape.
Q. How do you prepare a surface for tape application?
The surface must be free from dust, dirt, and oil, and be completely dry before application. Use rubbing alcohol to wash away any residue and dry with a tack cloth before applying the tape.
Q. What is the ideal temperature for applying double-sided tape?
The ideal temperature for both the surface and the tape is 65 degrees Fahrenheit, or 18 degrees Celsius.
Q. What is the strongest double-sided tape?
VHB tape, such as the Hitlights double-sided tape, is the strongest double-sided tape available for consumers.
Q. Can double-sided tape be removed?
Yes. Typically applying heat to the surface will cause the adhesive to melt and release the bond.
The post The Best Double-Sided Tapes appeared first on Bob Vila.
]]>The post 12 Smart Ways to Lock a Door Without a Lock appeared first on Bob Vila.
]]>Locks are the best method for securing a door. But if a lock fails, the door doesn’t have a lock, or you don’t trust the lock situation in an apartment or hotel, you can take steps to ensure that the door and the home are secured. Even if the exterior door has a lock, extra security can help fortify a sliding door to the yard, and locking your bedroom door can keep your college roommate from wandering in.
While the best fix is often to install, rekey, repair, or replace a lock, we also know of some clever DIY hacks for how to lock a door without a lock. The following are quick, temporary solutions that can help you get a good night’s sleep without worrying about your safety.
1. Use a Doorstop
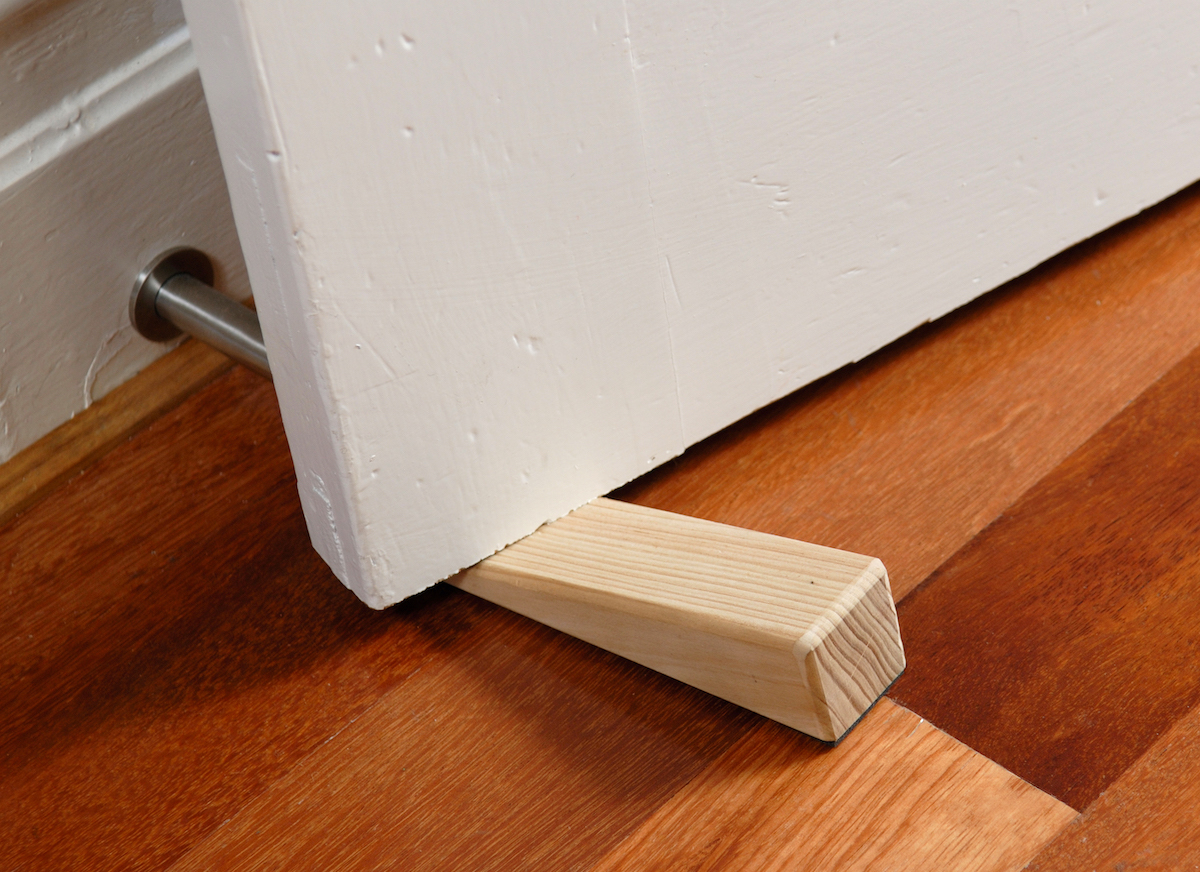
Doorstops are typically used to prevent doors from closing. But when you place a doorstop against an inward opening door, it physically prevents someone from opening it, even if they can turn the door knob. It’s a simple, effective method to help secure a home when the door lock or latch is broken. For extra security, look for a doorstop with an alarm such as a siren or barking dog sound. A nonslip bottom is essential to help resist pressure, especially for travel-size doorstops.
A doorstop will not work on outward-opening doors, however. And with enough force, an intruder could manage to bypass a doorstop. Consider securing an outward-opening door with an additional method on this list for increased security.
2. Make a Barricade Using the Back of a Chair

Installing a quality door lock is important, but if you need to barricade a door using items you have around the house, look no further than your dining room: Sturdy chairs can be a good choice for keeping a door closed because you can angle them so that the top of the chair wedges under the door handle while the chair’s feet stay firmly planted against the ground. This creates pressure between the door and the floor along the back and legs of the chair, preventing the door from opening.
The back of the chair also can block lever-style door handles from opening downward. If the door handle also can open the door with an upward turn, then this method isn’t as useful. In this case, tie a belt or rope to the lever handle from the chair as outlined next to prevent it from opening downward or upward.
3. Tie a Belt or Rope
Lever-style door handles tend to be easier to lock than door knobs because a belt or rope can help restrain the physical movement of the handle. Just attach one end of the belt or rope to the handle and the other to a fixed object. Consider using two tethers to completely prevent movement when the handle can open both upward and downward.
A belt or piece of rope also is a good option for securing an outward-opening door because the tether can be attached to a heavy indoor object like a refrigerator or couch. For French doors, wrap both handles with the tether, blocking them from opening.
4. Insert a Portable Door Lock
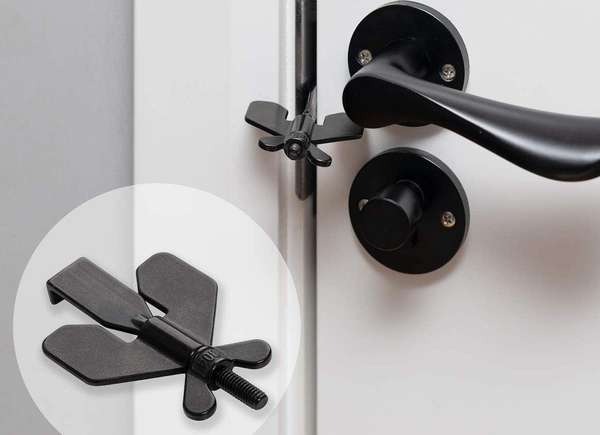
These helpful devices are great for renters and travelers who cannot install more permanent solutions. As the name suggests, an Addalock portable door lock is designed so you can use and remove it as necessary. Most consist of a metal piece, sometimes referred to as a claw, that fits over the bolt or latch on the existing door knob, and a lock that fits into the claw to prevent the door from opening. These locks are less effective on outward-opening doors.
5. Install a Security Bar
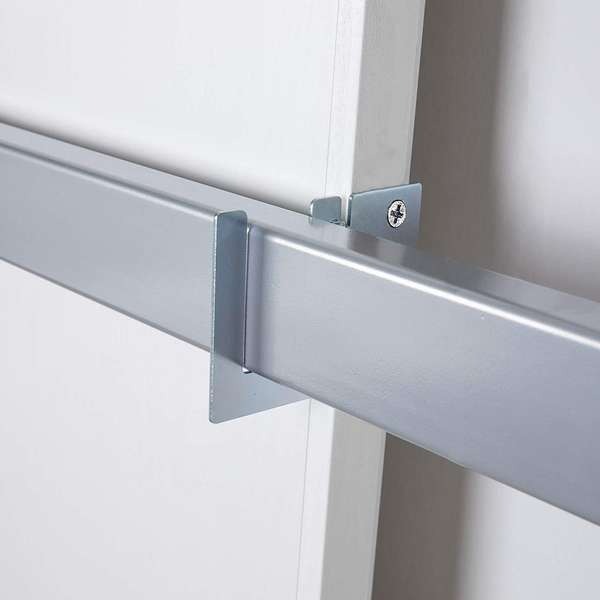
For better protection against significant force, like intruders attempting to kick a door in or break it down with their shoulder, security bars can help. Security bars or barricades consist of a pair of heavy-duty brackets that DIYers can fasten to the wall or door frame, depending on the product. A thick metal or wood bar then sits in the brackets, blocking the entire width of the door.
You can lift this security bar up and out of the brackets when you need to use the door, and can quickly place it back in the brackets afterward with very little effort. Security bars are not effective at securing outward-opening doors.
6. Stick a Fork in It

In a pinch, you can grab a simple fork to temporarily lock a door that opens inwardly. To secure the door, bend the tines of the fork so that the tips of the tines fit into the door latch and the rest of the fork can comfortably remain in the gap between the door and the door frame when the door is closed. Open the door and remove the fork, then break off the handle of the fork.
Place the head of the fork back into the door latch as before, making sure that the bent tines are securely hooked to the door latch, then close the door. With the door closed, slide the handle of the fork through the tines, creating a horizontal barrier that prevents the door from opening inward.
7. Prop Up a Door Jammer
A door jammer is a simple alternative to DIY solutions for locking a door without a lock, and an especially good solution for securing apartment doors. These tools typically consist of a height-adjustable security bar with a rounded end designed to fit snugly under a door knob or door handle. The other end has a padded foot that is made to sit flat on the floor and resist sliding, creating a system that puts pressure on the floor if someone attempts to open the door inwards. For recommendations on the solution for your situation, refer to our tested guide to the best door security bars.
8. Install a Floor Barricade
Floor barricades are made up of two pieces: a base and a brace that can fit into or be removed from the base. Install a floor barricade by inserting screws through the base and into the floor. Make sure when opening the door that it will clear the top of the base before installing, so you can use the door when the brace is removed. When you want to secure the door, just insert the brace and it will prevent the door from opening inward. Using a floor barricade is a good choice to help prevent a break-in for people who can install it in their homes, but it isn’t an option for renters and travelers.
9. Remove the Door Handle

While this isn’t the best option to keep the door secure, removing the door knob or handle entirely presents a challenge for anyone trying to gain access to the home (or an interior room). Without a handle, an intruder can’t open the door in the traditional sense, though anyone interested in using this method should keep in mind that with enough effort and one or more makeshift tools, a savvy person can turn the door mechanism even without a handle. It might be best to pair this option with another temporary door lock, such as a doorstop, or even a barricade.
10. Mount a Strike Plate Lock
A strike plate lock is a small device that a DIYer can mount to the door frame. It works similarly to a standard door chain except that the strike plate lock has a metal loop that slips over the door handle to prevent the door from opening. This method is more secure than relying on a set of screws on the back of a door to keep the door secured against break-ins. Also, users can install a strike plate lock using the existing strike plate screw holes to prevent further damage to the door frame. Or place it high and out of kids’ reach to secure a wandering toddler.
11. Install Security Film and a Glass-Break Sensor

Not all doors are made with solid wood or metal, so it’s important to consider how to prevent someone from simply shattering the glass to access the door knob or lock. One of the best ways to increase the security of your front door with an adjoining glass panel or a glass door is to apply a security film to the door. The film will reinforce the glass and hold the shards together if shattered.
However, with enough time and effort, a potential intruder might still be able to break through the film, so pair this setup with a glass-break sensor that will detect when the glass is broken and then sound an alarm. This sudden alarm paired with the unexpected protection of security film will typically dissuade would-be thieves and trespassers.
12. Block a Sliding Door with a Broom Handle or Bar
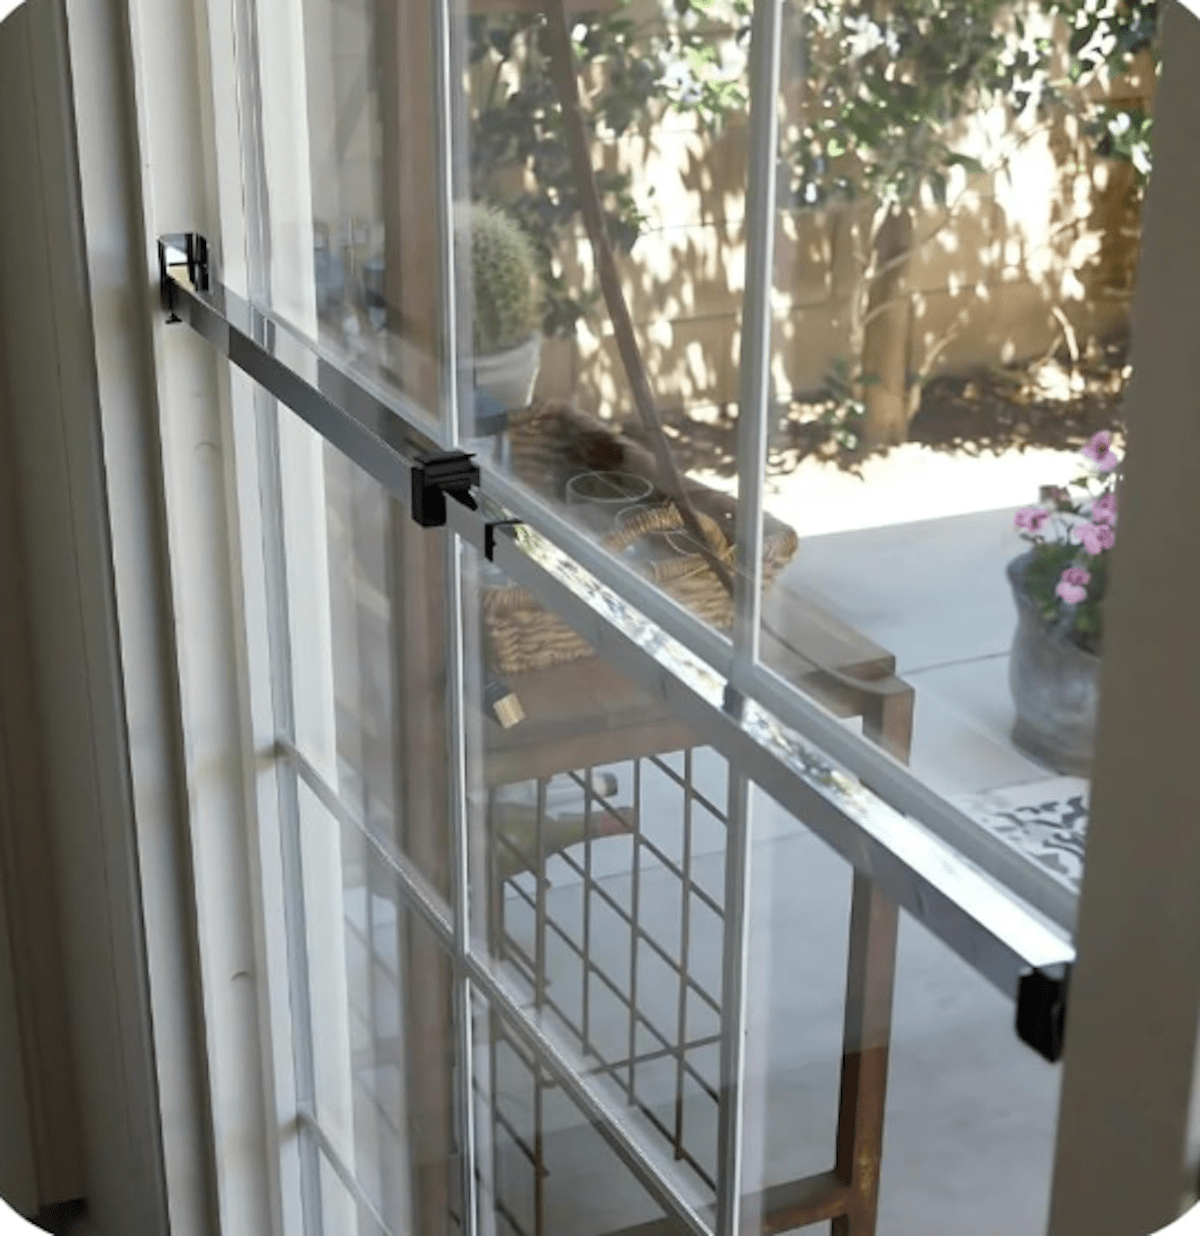
Sliding doors are often installed at the back or side of the home, where they open into the yard. Even if you use security film and a glass-break sensor, these measures are only effective if the door has a functional lock. If the lock on your sliding door is not working or might not be robust enough to stop determined assailants, then you should wedge a security bar into the door frame or track.
Alternatively, you can place a sturdy household object like a broom handle or a long wooden dowel to block the sliding door and prevent it from opening, thereby securing the back door even without a reliable lock.
The post 12 Smart Ways to Lock a Door Without a Lock appeared first on Bob Vila.
]]>The post How to Fix a Noisy Radiator appeared first on Bob Vila.
]]>There’s a simple reason why builders relied on steam radiators for decades and decades—they work! But every technology has drawbacks, and with steam radiators, homeowner complaints often center around noise. At times, with all that clanking and banging, you might wonder why the radiators didn’t come with earplugs. What causes that cacophony, and how can you usher in quiet? If you want to repair a radiator that’s making a lot of noise your home, here are a few things to know.
Why is the radiator making noise?
In a typical steam heat system, a single pipe extends from the boiler to the radiators. At the point where the pipe connects to a radiator, you’ll find an intake valve. This component performs two functions. First, it feeds steam into the radiator. Second, once the steam cools and condenses into water, the intake valve allows the liquid to drain out of the radiator and return to the boiler. At least, that’s how things are supposed to work. But water often gets trapped in the radiator, and when that happens, steam is blocked from entering. As the trapper water and blocked steam play a game of tug-of-war, they produce the delightful symphony that keeps you up at night. So aside from being an awful racket, a noisy radiator means that your system isn’t operating as well as it should.
What to Do About a Noisy Radiator
Tilt it toward the intake valve.
A properly functioning steam radiator does not sit perfectly level on the floor. Rather, it tilts slightly toward the intake valve. That positioning allows condensed water to flow out of the radiator, not by means of a pump, but through the force of gravity. Therefore, if your radiator starts getting noisy, the first thing to check is check whether the radiator remains tilted toward the valve. Use a level, and if you see that the radiator sits level or is tilting away from the valve, intervene. Try slipping a wooden shim or paint stirrer under the legs on the end opposite to the valve. A tilt of only five degrees or so should do the trick.
Tried-and-True Advice
“Growing up in freezing-cold Scotland, I often dealt with noisy radiators that would clank and bang at all hours. One simple trick I found helpful was using a long-handled screwdriver to gently tap the top of the radiator. This can help release trapped air inside, which is often the cause of the noise. Just be sure to tap lightly—too much force could cause damage. It’s a quick fix that worked for me, and might help reduce the noise in your own radiator.”
—Paul Rankin, Contributing Writer
Insulate the radiator pipe.
If you’ve checked the radiator and found that it’s tilting correctly, a different common problem may be at play. Often, steam condenses in the pipe before it even reaches your radiator. If that’s the case, the fix is to insulate the pipe, wherever possible, along its run up from the boiler. Pipe insulation couldn’t be much easier to work with, but the portions of the pipe most in need of insulation may be hidden behind a wall.
Clean or replace the steam vent.
Another possible cause of radiator noise: the steam vent. Try this: Close the intake valve so that no steam can enter the radiator. Next, remove the steam vent from the radiator, placing it in a bowl of vinegar. Let it sit overnight. Doing so may help dissolve any calcium deposits that have gradually accumulated over time. If that doesn’t work, purchase a new steam vent to see whether the replacement fares any better. Readily available at most home centers, a new vent only costs about ten bucks, so it’s worth a shot if all else fails.
Finally, a friendly reminder regarding the use of steam radiators in general: The intake valve should be either fully open or fully closed. Leaving the valve partially open can result in leaks and damage to floors.
The post How to Fix a Noisy Radiator appeared first on Bob Vila.
]]>The post The 7 Wood Chippers That Cut Best in Our Tests appeared first on Bob Vila.
]]>A wood chipper cuts twigs, limbs, branches, and other solid yard material into small pieces. These chips may provide mulch for a garden, kindling for a fire pit, or even the raw material for pressed wood to make furniture or complete other carpentry projects.
The best wood chipper for home usemust accommodate the twigs and branches you feed into it and suit your power requirements. While thebest electric wood chipperis quieter and runs on a home power supply, gas and power take-off (PTO) models are much more powerful, cutting through more material at a faster pace.
We interviewed a landscaping expert to get his insight on what specifically to look for. Then we shopped around to identify electric and gas-powered wood chippers that our readers could count on for their outdoor cleanup projects. Then we spent more than 8 hours assembling and testing the following picks in a huge brush pile in order to compare wood chippers.
Through this testing, we selected the Earthquake K33 Chipper Shredder as our best overall wood chipper for its ability to shred and chip branches of 3 inches in diameter, 301 cubic centimeter (cc) 4-cycle gas engine, low shredder hopper, and dock-and-lock bagging system.
Continue reading for insight on our shopping considerations and check out ourwood chipper reviews to see how each of these models performed in our tests—and why one of them may be the best wood chipper for your project.
- BEST OVERALL: Earthquake K33 Chipper Shredder
- BEST BANG FOR THE BUCK: Sun Joe CJ601E Electric Wood Chipper
- UPGRADE PICK: DK2 OPC503 3-Inch Disk Chipper Shredder
- BEST FOR COMPOSTING: Earthwise Electric 15-Amp Corded Chipper Shredder
- BEST WITH LEAF VACUUM: Troy-Bilt CSV060B Chipper Shredder Vacuum
- BEST HEAVY-DUTY: Champion Power Equipment 3-Inch Chipper Shredder
- ALSO CONSIDER: Predator 6.5 HP 212cc Chipper Shredder

Product Comparison
| Engine | Branch Capacity | Weight | |
| Earthquake K33 Chipper Shredder | 301cc gas engine | 3 inches | 140 pounds |
| Sun Joe CJ601E Electric Wood Chipper | 14 amp (A) corded electric | 1.5 inches | 25.4 pounds |
| DK2 OPC503 3-Inch Disk Chipper Shredder | 7 horsepower (hp) 208cc Kohler Command Pro gas engine | 3 inches | 187 pounds |
| Earthwise Electric 15-Amp Corded Chipper Shredder | 15A corded electric motor | 1.75 inches | 30 pounds |
| Troy-Bilt CSV060B Chipper Shredder Vacuum | 163cc gasoline engine | 1.5 inches | 125 pounds |
| Champion Power Equipment 3-Inch Chipper Shredder | 224cc Champion gasoline engine | 3 inches | 135.6 pounds |
| Predator 6.5 HP 212cc Chipper Shredder | 212cc gas engine | 3 inches | 120 pounds |
Our Top Picks
We tested some of the top-rated wood chippersin our test facility brush pile. Read on to learn how each of these machines performed in our tests and why we consider them to be among the best wood chippers for home use.
Best Overall
Earthquake K33 Chipper Shredder
What We Like
- Starts easily and handles tough material without stalling
- Chips branches up to 3 inches in diameter
- Easy loading of leaves and small debris
- Includes a dock-and-lock bagging system
- Large 11-inch airless wheels
What We Don’t Like
- Pricey compared to other options
- The included bottle of oil isn’t enough
Product Specs
- Engine: 301cc gas engine
- Branch capacity: 3 inches
- Weight: 140 pounds
The best all-around wood chipper we tested was durably built, easy to operate, and tackled the toughest branches without bogging down. It also featured a compact design that made it easy to transport and store. A 301cc gas engine and dual-knife chipper disc allow the Earthquake K33 chipper shredder to tackle branches up to 3 inches in diameter. Four hammer assemblies (two J-hammers and two tri-hammers) on the shredder make quick work of leaves, pine cones, smaller sticks, and other yard waste.
The big, powerful engine is the key to this chipper’s success. It started on the first pull and produced more than 13 foot-pounds of torque, while the other gas models in the test group averaged just over 11 foot-pounds. With that kind of power, the Earthquake K33 did an outstanding job chipping the thickest branches that bogged down or stalled out the other chippers.
When it came to shredding, we liked that the hopper opening was just 35 inches high, whereas some of the others were over 40 inches high. The lower height made it easier to load, especially when we were dumping large quantities of debris from a container. To offset the low height and still allow for leverage to make transport easy, the handlebar attaches at an angle so that it is higher than the rim of the hopper.
The debris bag worked great, too. Rather than relying on a drawstring as most models did, this one uses a locking bracket with its own handle. A support rod holds the bag open so that it fills all the way, with no need to reposition or shake down the material. When it’s full, the handle rotates off the mounting bracket for transport, and a heavy-duty zipper on the opposite end facilitates fast disposal.
We felt that the performance and build quality warranted the premium price for this wood chipper. Although it’s not the cheapest model available, the Earthquake K33 would make a smart pick for heavier use on larger properties.
Get the Earthquake wood chipper at Amazon, Lowe’s, or Mowers at Jacks.
Best Bang for the Buck
Sun Joe CJ601E Electric Wood Chipper
What We Like
- Shreds branches up to 1.5 inches thick
- Strong 14A electric motor
- Upright configuration saves space in storage
What We Don’t Like
- Not made for shredding leaves or soft, pliable stems
- Operates more slowly than other electric chippers
Product Specs
- Engine: 14 amp (A) corded electric
- Branch capacity: 1.5 inches
- Weight: 25.4 pounds
For those who want to save money when cleaning up a small yard, Sun Joe’s 14A electric wood chipper could be considered thebest budget wood chipperaround. This affordable small wood chipper uses an electric motor that runs at speeds up to 4,300 revolutions per minute (rpm). As a light-duty chipper, it won’t clear fallen trees or do heavy landscaping work, but it cuts sticks and limbs up to 1.5 inches thick and produces usable mulch for the garden or yard. When the job is done, its compact, upright design won’t take up a lot of room.
This electric chipper has the lowest average price of all the models we tested, making it a smart choice for budget shoppers with limited storage space. Setup and start-up took about 15 minutes, and all tools were included in the box. We also noticed right away that this chipper was even lighter than the other electric models, weighing in at just over 25 pounds. The stated reduction ratio is 16:1 (to reduce a volume equal to 16 bags of debris down to one).
After a half hour of grinding branches, we noted that this Sun Joe model operates somewhat slower than other electric chippers and produces larger particles. In 30 minutes of chipping a mix of green and woody branches, it produced approximately 15 gallons (three 5-gallon buckets full) of chips. The motor strained a few times but never jammed, so we didn’t get to try out the jam-clearing function in a real-world scenario. The compact, upright build; strong performance; and maintenance-free design make this an easy choice for everyday use.
Get the Sun Joe wood chipper at Amazon, Lowe’s, or The Home Depot.
Upgrade Pick
DK2 OPC503 3-Inch Disk Chipper Shredder
What We Like
- Professional-grade Kohler gasoline engine for durability
- Large hopper capacity and lower height for easier loading
- Air-filled off-road tires and removable ATV towing hitch
- Drop stand and locking wheels
What We Don’t Like
- Horizontal configuration takes up more storage space
- Top discharge configuration can become clogged with fine debris
Product Specs
- Engine: 7 horsepower (hp) 208cc Kohler Command Pro gas engine
- Branch capacity: 3 inches
- Weight: 187 pounds
The towable DK2 chipper shredder features a 7 hp 208cc Kohler Command Pro engine and dual high-strength steel-carbide cutting blades for reliable performance in tough conditions. Pneumatic off-road tires, a removable ATV towing hitch, and a drop stand make it easy to access worksites on difficult terrain. The wheels lock in place for added safety while chipping. An extra-large hopper and branch auto-feed chute placed at a comfortable height make it easier to load composting materials, yard waste, brush, and branches up to 3 inches in diameter.
After about a half hour of easy assembly, we fueled up the DK2 chipper shredder and moved it in place for testing. The large air-filled tires and hand-truck configuration made it the easiest gas-powered model to move manually; the added convenience of the removable tow bar was icing on the cake. Locking the wheels in place for operation required removal of the wheel pins from the end of the axle, sliding the wheels outward on the axle, and reinstalling the pins through the wheels and axle. In practice, this was only slightly awkward and less complicated than it may sound. The machine started on the first pull and ran smoothly throughout the test.
We operated the chipper for a half hour, feeding it a combination of green and dried hardwood branches, sunflower stalks, cornstalks, brush, and dried leaves. We really liked the wide mouth and comfortable height of the chute at just 36 inches high. It made it super easy to load leaves and other fine-textured materials. Even the largest, driest branches presented no problem. However, we did note that some of the fine material fed through the hopper accumulated at the base of the discharge chute. It did not clog the flow, but we recommend occasionally checking for excessive buildup during the course of a workday. Overall, this was the most pleasurable chipper shredder we tested. It was very easy to maneuver, powerful, and relatively quiet compared to competitors.
Get the DK2 wood chipper at Tractor Supply Co. or The Home Depot.
Best for Composting
Earthwise Electric 15-Amp Corded Chipper Shredder
What We Like
- Powerful exhaust-free operation
- Includes a 1.2-bushel collection bin
- Processes large branches
- Lightweight yet durable construction
What We Don’t Like
- Limited working range without extension cord
- Shallow plastic hopper is somewhat flimsy
Product Specs
- Engine: 15A corded electric motor
- Branch capacity: 1.75 inches
- Weight: 30 pounds
When processing organic waste for composting, a clean, quiet electric chipper makes sense. The Earthwise 15A electric chipper grinds sticks and branches up to 1.75 inches in diameter and other yard and garden waste into smaller, more uniform particles for fast, efficient composting. It requires no gas or oil and virtually no maintenance. The included 1.2-bushel plastic collection bin makes it easy to capture chips, and the slim design with rear wheels makes for easy transport.
The Earthwise electric chipper was the easiest to assemble of all the models we tested, taking only about 10 minutes. However, we didn’t love the lightweight plastic snap-in-place hopper since the tabs lined up with difficulty and the assembled hopper was too easy to knock off while working. On the other hand, we really liked the plastic collection bin that simply slides into place and backs out like a drawer.
Feeding a wide range of such materials as plant stalks and woody branches was a breeze, and the included tamper tool helped us safely feed smaller items. The motor operated quietly, unfazed by even the largest, driest woody material, and the finished chips were quite uniform in appearance. We filled the collection bin within the half-hour testing time frame. The strong electric motor, compact build, and generously sized collection bin make this an easy choice for composting enthusiasts.
Get the Earthwise wood chipper at Amazon, The Home Depot, or Walmart.
Best with Leaf Vacuum
Troy-Bilt CSV060B Chipper Shredder Vacuum
What We Like
- Excellent versatility; chips, vacuums, shreds, and bags
- Gas engine reduces user fatigue
- 24-inch vacuum width
- Onboard vacuum hose reaches into tight spots
- Accepts branches up to 1.5 inches in diameter
What We Don’t Like
- Requires more storage space than other chipper shredders
- Does not work well in natural areas or tall grass
Product Specs
- Engine: 163cc gasoline engine
- Branch capacity: 1.5 inches
- Weight: 125 pounds
Anyone looking to win “Tidiest Yard in the Neighborhood” will want to look into Troy-Bilt’s chipper-shredder-vacuum combo. With its 24-inch vacuum opening, leaf removal is as simple as walking across the lawn. Need to collect a few leaves blown beneath the shrubs or a pile near the front-door vortex? Just detach the 8-foot-long 7-inch-diameter vacuum hose and it will reach them. If a few sticks fell from the shade tree, simply insert them into the 1.5-inch chipper feed chute.
This machine operates somewhat like a push lawn mower. The deck height is adjustable for optimal leaf pickup. It rolls smoothly on 11-inch rear wheels and 8-inch front wheels. The cast-aluminum impeller is powered by an easy-starting California Air Resources Board (CARB)–compliant 163cc engine. It turns eight bags worth of yard waste into a single bag of chips and collects them in the onboard 2-bushel felt bagger.
This Troy-Bilt model arrived mostly assembled, with the exception of the handle, bagger, and hose. Installing those took about 15 minutes. Then we added oil and gas, adjusted the deck height, and started testing.
We found that the Troy-Bilt exhibited good suction, easily picking up dry or damp leaves, small pine cones, and twigs from the lawn, and the hose feature sucked up matted debris from beneath shrubs. The 1.5-inch chipper feature operated smoothly and efficiently for the most part. We tested it with both green wood and dried hardwood branches, though strongly curved and crooked branches did need to be broken into short pieces or tossed aside in a few cases.
The weight of the engine and deck countered the weight of the debris bagger quite well until the bag was mostly full. Emptying the bagger onto the ground was easy enough, but transferring the chips to a disposal bag was awkward. This machine could really help those who live where summer storms regularly leave debris in the yard or where autumn leaves fall over an extended period of time. It could also boost productivity during spring cleanup.
Get the Troy-Bilt wood chipper at The Home Depot, The BuildClub, or Troy-Bilt.
Best Heavy-Duty
Champion Power Equipment 3-Inch Chipper Shredder
What We Like
- Powerful 224cc engine and dual-blade chipper
- Extra-large shredder hopper handles debris up to 0.5 inches thick
- Branch feed chute accepts straight limbs up to 3 inches thick
- Hand-truck style makes it easy to maneuver over uneven terrain
What We Don’t Like
- Tall stance makes loading more difficult
- Handle built into the hopper rim with no padding or finger molding
Product Specs
- Engine: 224cc Champion gasoline engine
- Branch capacity: 3 inches
- Weight: 135.6 pounds
The ruggedly built Champion Power Equipment 3-inch portable chipper shredder proved to be the best heavy-duty wood chipper in our tests. A clean CARB-compliant 224cc Champion gas engine drives the chipper’s steel blades. This chipper grinds the equivalent of 20 bags of yard debris to fit into one bag. The large hopper is suitable for shredding fine debris like twigs, leaves, and other material smaller than 0.5 inches thick, while the branch feed chute accepts limbs up to 3 inches in diameter. The discharge chute features an adjustable angle top and comes with an easy-to-use 2-bushel drawstring collection bag for fast, easy cleanup.
As with the other models we tested, we set aside 30 minutes and a large pile of branches, brush, and leaves to test the Champion chipper shredder. After 45 minutes of easy assembly, we added gas and oil before going to work. The tall height of the hopper rim, which is where the transport handle is located, was a help and a hindrance. Because the wheels are on the same side of the machine as the handle, it easily maneuvers like a hand truck over all kinds of terrain, and the tall height provides welcome leverage. Later on, however, we realized that the 50-inch-tall hopper was less comfortable for loading debris compared to models with lower hoppers.
The engine started on the first pull of the recoil cord. We were impressed by the smooth operation and grinding power provided by the big gas engine. This was the largest gas engine in our test lineup. The automatic feed branch chute fed really fast, even with dry, large-diameter hardwood. The hopper, as noted earlier, was a bit too high for comfort but was wide enough to hold lots of material. The machine never clogged or showed signs of struggle with the workload. We also noted the machine’s small footprint, which makes it ideal for saving space in storage. This is a great choice for making fast work of occasional tough cleanup jobs.
Get the Champion Power Equipment wood chipper at The Home Depot.
Also Consider
Predator 6.5 HP 212cc Chipper Shredder
What We Like
- Affordable and effective for medium-duty cleanup
- Easy to load with leaves and small debris
- 2-bladed chipper flywheel makes quick work of larger branches
- Includes discharge collection bag
What We Don’t Like
- Less powerful engine
- Can get bogged down with tougher branches
Product Specs
- Engine: 212cc gas engine
- Branch capacity: 3 inches
- Weight: 120 pounds
No need to overspend on a seldom-used specialty tool. The Predator chipper shredder is value priced and delivers more chipping capability than electric models, along with the freedom of movement that only comes with gas-powered equipment. In terms of its overall build, it mimics our top pick but comes with a smaller 212cc engine and a drawstring debris bagger.
We assembled the Predator wood chipper in about 45 minutes, and other than having difficulty trying to read the tiny lettering used in the instructions, assembly went smoothly. This chipper does not come with engine oil, so be prepared with 2 quarts of 10W-30. Immediately after fueling up the first time, it started on the third pull, but going forward the engine started on either the first or second pull every time.
This chipper comes equipped with air-filled tires. For us, that was a good thing, as they rolled easily across all types of terrain, including wet ground. However, users will need to be cautious to prevent punctures. Another unique feature was the wheel brakes that could be locked for safety while chipping.
This chipper was a bit underpowered for branches thicker than about 2 inches. When we fed it larger material, the engine consistently bogged down, and in three cases stalled out. It was not a great performer compared to the other gas models we tested, but it was several hundred dollars cheaper on average. As a step up from electric chippers, the Predator wood chipper was a lot faster, more powerful, and generally more convenient for working anywhere on the property. Budget-conscious shoppers in need of a light- to medium-duty wood chipper will find good value here.
Get the Predator wood chipper at Harbor Freight.
Jump to Our Top Picks
How We Tested the Best Wood Chippers
Our testing observations and comparison started with unpacking and assembling the chippers. All of the electric wood chippers came together in about 15 minutes as they were all comparatively lightweight and compact. While basic, disposable tools were included in the packaging; however, using personally owned tools ought to make the job go faster and easier. All of the electric chippers require a heavy-duty 12-gauge extension cord to avoid tripping the circuit breaker during operation.
Assembling each of the gas-powered chippers took 45 minutes to 1 hour and required installation of the hopper, branch chute, safety guards, discharge chute, wheels, and standing brace. These machines all weigh more than 100 pounds, so it’s a good idea to have a helper. Again, the included tools will get the job done, but using ones from a personal tool kit makes the process more comfortable. The packages included engine oil and gasoline that must be added before operation.
After assembly, we transported each of the chippers across the lawn to the worksite. In so doing, we noted that the small plastic wheels on the electric chippers provided the most stability on solid, flat ground. The larger hard wheels on the gas machines worked fine on average lawns but caused some struggles on sloped, uneven surfaces. The towable DK2 chipper, which includes a handle for moving by hand, was the easiest to move on rough ground.
In general, chippers with wheels on the same side of the machine as the handle—what we called a “hand-truck” configuration—were easier to maneuver than those with wheels and handles on opposite sides of the machine, like a wheelbarrow. The wheelbarrow configuration requires the user to lift the handle and bear more of the machine’s weight versus the hand-truck configuration, which transfers more weight to the wheels.
Finally, we set up and operated each chipper for 30 minutes. During operational testing, we fed each model a combination of large and small branches, including green wood and dried wood, and dry leaves (when applicable) to observe the full range of functionality. In addition to the machine’s ability to chip, we observed chip consistency, working stability, operator comfort, and noise level from a purely subjective standpoint to help determine our preferences and recommendations.
We also spoke to Kaustubh Deo, president of Blooma Tree Experts, a tree care company based in Seattle, Washington, featuring International Society of Arboriculture (ISA)–certified arborists with over 17 years of experience. He says that once you’ve purchased a chipper, “Don’t forget to follow the maintenance instructions in the guides. Make sure you keep the chipper knives sharp and rotate them.” He also adds this expert tip: “Rental shops that rent out chippers should be able to sharpen chipper knives for you.”
What to Consider When Choosing a Wood Chipper
Before buyers choose a wood chipper for their yard cleanup needs, they’ll want to take a few minutes to educate themselves on the most important shopping considerations for these tools.
Types of Wood Chippers
Wood chippers fall into three main types based on their power source: electric, gas, and PTO.
Electric
Electric wood chippers often look a lot like golf bags. These compact machines run quieter than either gas or PTO chippers, but they often lack the power and capacity needed to deal with material larger than 2 inches in diameter.
For small branches and yard trimmings, an electric wood chipper does the trick. They’re reasonably priced, lightweight, and easy to use. Plug them into a standard outlet, and they’re good to go.
Gas
The most common residential models, gas wood chippers are larger, louder, and produce gasoline exhaust. Gas-powered wood chippers generally employ 4-cycle engines from 150cc to 250cc and produce 7 to 10 hp. To find the models with the lowest exhaust emissions, look for the CARB-compliant label. CARB adheres to the highest emission standards in the United States.
More powerful than electric options, gas chippers need not sit near an outlet and won’t tether the user to an extension cord. Situated in the middle of the price range for chippers, gas-powered options cost more than electric ones but are not quite as much as PTOs. Gas chippers can typically handle material of more than 3 inches in diameter.
PTO
PTO refers to the drive shaft on the wood chipper, through which it attaches to a splined output shaft on a tractor, mower, or truck. Through this connection, the PTO wood chipper draws energy from the engine of the vehicle. This method of energy supply makes PTO wood chippers more effective than their gas or electric counterparts. They can cut through more material at a faster rate.
The best PTO wood chippersmake an excellent choice for anyone who lives on a large plot of land. They cost more than either electric or gas chippers, and they require a compatible vehicle to work. These machines are much larger and less convenient for average home landscapes. Although professionals will want to findthe best commercial wood chipper, we did not test PTO-driven models.
Bag Capacity
Not all wood chippers use bags or bins to gather the chipper refuse. Those who are looking for one that comes with a bag or bin will want to consider the storage container’s capacity. Larger bags make a great choice if users plan to use the wood chipper for a big cleanup project.
Keep in mind that the larger the bin, the heavier and more cumbersome it will be to empty. If weight is a concern, a model with a smaller bag or bin will require more frequent but easier emptying—a smart choice to avoid the risk of injury that comes with lifting a heavy bag.
Cutting Blades
Wood chippers use one or both of two cutting-blade types to grind up yard waste: fixed blades, also called knives; or hinged blades, sometimes called hammers. The most commonly used material for both blade types is hardened chromium-alloy steel. Steel tends to bend rather than chip and may be resharpened numerous times before it needs to be replaced.
A wood chipper’s ability to cut through material fed into the machine is a key factor. Shoppers will want to think about how they’ll use their wood chipper. An electric wood chipper will be fine for small branches and clippings. These devices usually shred branches up to 2 inches in diameter across the widest point. Those dealing with larger material will want to consider a gas or PTO chipper, which may be able to shred materials up to 4 inches in diameter. Some commercial wood chipper models cut through branches up to 7 inches in diameter, though these cost significantly more than the average residential wood chipper.
Torque
A wood chipper uses a powerful motor to turn a series of cutting and grinding blades with enough force (torque) to cut through solid wood quickly. Torque describes the rotational force, typically measured in foot-pounds, that a motor imparts on an object. In wood chippers, torque forces the blades to cut through any appropriate material pushed into the hopper. Most residential wood chippers get a torque rating between 7 and 15 foot-pounds.
Shredding Chute
Many chippers include two different chutes for feeding material into the machine: a long, narrow branch chute for thick branches; and a wide shredding chute, also known as a hopper. Shaped like a broad funnel, the shredding chute compresses bundles of thin pliable twigs and branches so that they can contact the blades more efficiently. This separate chute shreds less rigid material, such as weeds, leaves, grass, and other soft plant waste, so it can come in handy for common yard work.
While a leaf shredder would tackle this job, a wood chipper with a built-in shredding chute gets the same results in a more cost-effective and space-saving way. However, a wood chipper/leaf shredder combo will cost more than a model without the shredder. But this combo may be considered the best residential wood chipper option.
Reduction Ratio
The reduction ratio of a wood chipper indicates how small the material will be after it has passed through the wood chipper. For example, if a wood chipper has a reduction ratio of 8:1, it will reduce the material down to an eighth of its original size. Another way to think of it is that it can reduce eight bags of yard waste to fit into one bag. The reduction ratio of most wood chippers typically ranges from 8:1 to 20:1.
Chippers need more power and energy to cut materials into smaller pieces. As the engine size increases, so does the price of the chipper. If users don’t need to cut material into tiny pieces, they can save money by choosing a chipper with a lower reduction ratio.
Weight and Mobility
Weight and mobility rank as key considerations in the purchase of a wood chipper, but many shoppers overlook these factors. Thebest small wood chipper for the extent of yard work is typically the ideal purchase. A wood chipper that’s too big or doesn’t have decent wheels can be very difficult to move around the yard, which reduces overall yard cleanup efficiency.
Look for wood chippers that come with sturdy stands and large wheels capable of moving over grass, paving stones, deck boards, sticks, and any other obstacles on the ground. Keep in mind that the heavier a wood chipper, the more difficult it will be to move across uneven ground or up steep inclines. For larger properties with fewer trees, a lightweight wood chipper may be ideal because users can move it around the yard quickly and effectively without significant fatigue.
How to Use a Wood Chipper Safely
There’s a reason wood chippers make frequent appearances in horror films. This incredibly dangerous yard tool should only be operated by an experienced user who is sure to take the following safety precautions:
- Read the manufacturer’s instructions thoroughly before using a wood chipper.
- Use hearing protection, eye protection, hand protection, and a hard hat.
- When users are feeding branches into the wood chipper, they shouldn’t force stubborn branches into the blades. Users will want to let the chipper pull branches in while they stand to the side to avoid flying debris.
- Keep hands and any other body part away from the wood chipper when it is connected to a power source. A simple accident could result in severe injury or death.
- Users will want to disconnect the power and the spark plug before performing maintenance to ensure that the wood chipper does not start up while they’re vulnerable to the blades.
The Advantages of Owning a Wood Chipper
Yard-waste disposal is the greatest benefit of owning a wood chipper. Bushes require regular trimming, trees may need pruning, and old trees shed dead branches frequently, which can create a substantial pile of wood and yard material to remove. A wood chipper makes it easy to use or dispose of that debris.
Wood chippers are also a useful tool to reduce the potentially harmful emissions produced by burning chemically treated wood. Instead of releasing these toxic fumes and unpleasant odors into the air, wood can be mulched and used to protect plants.
Besides mulch, users may also create pressed wood for carpentry projects or biofuel for certain cars or other machinery.
To recap, a wood chipper:
- Quickly process yard waste into small, easily managed chips;
- Provides an environmentally friendly means of disposing of yard waste; and
- Produces useful materials like mulch, pressed wood, and biofuel.
FAQs
Q. How big a wood chipper do I need?
Electric wood chippers are made for processing small and midsize twigs and branches. For this purpose, most users only require a wood chipper with a 1.5-inch cutting diameter. But if you have older trees on your property, or wish to grind up leaves and other finely textured material, you may want to have a larger gas-powered chipper. These models feature a hopper for processing fine materials and a larger branch chute to chip branches up to 3 inches in diameter.
Q. How do you use a wood chipper?
Choose a level location for the machine to sit. Once it is in position, set the parking brake on any equipment used to haul it and then adjust the chip deflector and chip chute to direct chips to your desired location.
Check the chipper for any debris before starting. If it is clear, start it up. If it isn’t, you’ll want to disconnect the spark plug and clean it out before turning it on. Never perform maintenance of any kind without disconnecting the power.
With the engine started, feed material into the wood chipper, blunt end first. The machine will begin chipping away, allowing you to back off and move to the side of the chipper so you don’t get hit by pieces that may shoot out. Once you have finished chipping, clean up the wood chips with a leaf blower or leaf vacuum and either dispose of them or put them to good use.
Q. How do you feed a wood chipper?
To feed material into the wood chipper, begin with the blunt end and carefully guide it into the chipper. You may also want to include a mixture of dry and green limbs so that the moisture from the green branches can help to cool and lubricate the wood chipper’s knives.
Q. How loud is a wood chipper?
A wood chipper’s noise output generally falls between 85 and 110 decibels, which is more than enough to warrant hearing protection.
Q. How much does a wood chipper cost?
Wood chippers range in price from about $150 to well over $2,000, depending on the type, size, torque, and overall power. Typically, residential wood chippers cost about $200 to $800, though heavy-duty models can greatly exceed this amount.
Q. Can wood chippers shred leaves?
Some wood chippers can also shred leaves, but if you don’t need to chip any wood, it may be better to invest in a dedicated leaf shredder instead. These tools tend to take up less space and they are more affordable.
Q. Is it better to chip wood when it is dry or wet?
Dry wood is harder and causes more wear and tear on the chipper’s blades, so it’s best to do wood chipping when the wood is cool and moist.
Q. What shouldn’t I put in a wood chipper?
Keep yourself safe and protect your equipment by only chipping branches within the size range your machine is built to process. Never place branches that may have nails or screws, lumber, excessively sappy wood, long vines, palm fronds, or other fibrous materials into the chipper.
Q. How do you clean a wood chipper?
Start any maintenance process by stopping the engine (ensuring all moving parts have stopped before proceeding) and disconnecting the spark plug wire or power cord to prevent accidental start-up.
To clean the wood chipper, begin by removing the flail screen and any larger debris. Clean the flail screen separately, and then clean the chute and around the muffler with water and a brush or dry cloth. Avoid using a high-pressure spray of water because it can contaminate the fuel system.
Meet the Tester
Mark Wolfe is a writer and product tester with a background in the nursery and landscaping industries. For more than 20 years he mowed, edged, planted, pruned, cultivated, irrigated, and renovated beautiful landscapes. Now he tests and writes reviews about the latest outdoor power equipment, hand tools, lawn care products, and other outdoor-living goods.
Additional research provided by Timothy Dale and Tom Scalisi.
The post The 7 Wood Chippers That Cut Best in Our Tests appeared first on Bob Vila.
]]>The post The Best Soils for Raised Beds in Your Garden appeared first on Bob Vila.
]]>For plants, soil provides another vital element. It doesn’t just deliver nutrients to hungry fruits, vegetables, and flowers; good garden bed soil increases the airflow around plant roots to avoid compaction and improve drainage as it retains moisture for basic hydration.
Gardening with raised beds provides more control over the soil. However, the best soil for raised beds depends on the plants you want to grow. Many soil types are suitable for a variety of uses, while others are more specific in their purpose. To bolster our own research, we interviewed Elizabeth Jones, the seed librarian at the Jefferson Public Library in Jefferson, Georgia, and owner of Excel at Gardening, who gave us her expert advice on soil.
Our favorite was FoxFarm’s Happy Frog potting soil for its organic mix of pH-balanced ingredients. Read on for more of the top soils for raised beds and some things to keep in mind as you shop.
- BEST OVERALL: FoxFarm Happy Frog Potting Soil
- RUNNER-UP: Sunday Natural Moisture Potting Soil Mix
- BEST BANG FOR THE BUCK: Mountain Valley Minute Soil Compressed Coco Coir
- BEST ORGANIC: Organic Plant Magic Compressed Potting Soil
- BEST TOPSOIL: Michigan Peat Garden Magic Top Soil
- BEST COMPOST: Charlie’s 10-Pound Compost
- BEST PEAT MOSS: Hoffman Canadian Sphagnum Peat Moss
- BEST VERMICULITE: Ferry Morse Professional Grade Vermiculite
- BEST FOR VEGETABLES: Coast of Maine Castine Organic Raised Bed Mix
- BEST FOR HERBS AND FLOWERS: Miracle-Gro Raised Bed Soil

Product Comparison
| Ingredients | Quantity | Organic? | |
| FoxFarm Happy Frog Potting Soil | Earthworm castings, bat guano, and aged forest products | 2 cubic feet |  |
| Sunday Natural Moisture Potting Soil Mix | Sphagnum peat moss, peat humus, coir, perlite, ground limestone | 20 quarts |  |
| Mountain Valley Minute Soil Compressed Coco Coir | Compressed coco coir | 15 gallons (from 1 block); other sizes available | |
| Organic Plant Magic Compressed Potting Soil | Coco coir, worm castings, and fertilizer | 12 cups (expands to 3 gallons) | |
| Michigan Peat Garden Magic Top Soil | Reed sedge peat and sand | 4.5 cubic feet | |
| Charlie’s 10-Pound Compost | Chicken manure, biochar, organic grasses and organic crop production residue | 0.4 cubic feet | |
| Hoffman Canadian Sphagnum Peat Moss | Peat moss | 10 quarts | |
| Ferry Morse Professional Grade Vermiculite | Vermiculite grades | 8 quarts | |
| Coast of Maine Castine Organic Raised Bed Mix | Fully cured compost, sphagnum peat moss, dehydrated poultry manure, lobster and crab shell meal, greensand, biochar, worm castings and mycorrhizae | 1 cubic foot | |
| Miracle-Gro Raised Bed Soil | Sphagnum peat moss, compost, worm castings, alfalfa and kelp meal | 1.5 cubic feet | |
Our Top Picks
Here are some of our top soil recommendations to help fill raised garden beds. There are specialized soils as well as general mixes to help plants thrive, including soils from brands long trusted in the gardening world. All you’ll need to do is slip on your gardening gloves, open up the bags, fill up your beds, refill your watering can, and get growing.
BEST OVERALL
FoxFarm Happy Frog Potting Soil

Product Specs
- Ingredients: Earthworm castings, bat guano, and aged forest products
- Quantity: 2 cubic feet
- Organic: Yes
What We Like
- Mycorrhizal fungi content promotes root development
- Excels at starting seeds
- Great for winter sowing
- pH-balanced product ideal for fruits, vegetables, and flowers
What We Don’t Like
- Comes at a premium price
The FoxFarm Happy Frog organic garden soil contains a mix of microbes with mycorrhizal fungi and sediment. The fungi content enhances the nutrient uptake of the root system by creating a symbiotic relationship with the root mass. Essentially, it expands the root’s reach, promoting their development.
That fungi content gets balanced with sediment that maintains the light texture and aeration needed to let plant roots expand as they consume nutrients. The mix contains a pH balance for optimal growth that’s supportive of fruit, vegetables, or flowers. Keep in mind that the soil has been inoculated with mycorrhizal fungi, so there is a possibility to see white growth in the mix, which is normal.
Get the FoxFarm soil for raised beds at Amazon, Target, or Walmart.
RUNNER-UP
Sunday Natural Moisture Potting Soil Mix

Product Specs
- Ingredients: Sphagnum peat moss, peat humus, coir, perlite, ground limestone
- Quantity: 20 quarts
- Organic: No
What We Like
- Ideal for repotting plants into containers and raised beds
- Also includes ground limestone for added nutrients
- Helps drain and aerate roots for better plant growth
What We Don’t Like
- Users will want to pair it with a fertilizer for best results
With ingredients like peat humus for nutrients, perlite for aeration, and peat moss for moisture retention, Sunday’s soil mix provides the right growing conditions for healthy plant growth and proper drainage. This is especially useful when used in a raised bed setting, where aeration and drainage are vital to plant success.
This 20-quart bag of soil is suitable for both indoor and outdoor use and is especially great for repotting plants and herbs in containers. A final special ingredient in this product is ground limestone, which adds essential calcium and magnesium nutrients to the soil for optimal plant growth. Sunday does note to consumers, however, that this is not a substitute for fertilizer.
Get the Sunday soil for raised beds at Sunday.
BEST BANG FOR THE BUCK
Mountain Valley Minute Soil Compressed Coco Coir
Product Specs
- Ingredients: Compressed coco coir
- Quantity: 15 gallons (from 1 block); other sizes available
- Organic: Yes
What We Like
- Compact, lightweight, and easy to store until needed
- Available in multiple sizes, either as large bricks or smaller pucks
- Suitable for a range of flowers, plants, and herbs
What We Don’t Like
- Coco coir is nutrient-poor, requiring supplements for better plant growth
- Retains moisture extremely well; not suitable for all plants
Mountain Valley Minute Soil compressed coco coir fiber grow medium squeezes the growing medium down to a compact brick full of goodness. Made of raw coconut coir, this fibrous block expands to a light texture designed to aerate and it retains moisture. At the same time, it provides a nutritious boost for topsoil.
Gardeners can rehydrate the entire block to create 15 gallons of growing medium or hydrate only the amount needed for a specific project. The compressed packaging stores easily and provides options for a wide range of gardening needs and uses. These compressed blocks come in several sizes to suit most gardener’s available storage space.
Get the Mountain Valley soil for raised beds at Amazon or True Leaf Market.
BEST ORGANIC
Organic Plant Magic Compressed Potting Soil
Product Specs
- Ingredients: Coco coir, worm castings, and fertilizer
- Quantity: 12 cups (expands to 3 gallons)
- Organic: Yes
What We Like
- Holds 50 percent more water than regular soil
- Can be used on existing soil as a nutrient boost
- Can be rehydrated as needed
What We Don’t Like
- Not available in multiple size options
Organic Plant Magic compressed organic potting soil for gardens and plants contains natural, organic fertilizer ingredients to feed and nourish plants. This compressed soil can be rehydrated and used as the nutrient layer or applied directly to existing soil without rehydrating. This dry, organic mix alone holds 50 percent more water than regular soil, which is one reason it works so well for raised beds.
The soil contains natural coconut coir, worm castings, mycorrhizae, helpful bacteria, amino acids, and humic acids. These ingredients work together for a slow release of nutrients so that plants don’t get overwhelmed. This package requires 12 cups of water to create 2 pounds of compressed soil. The mixture then expands to create 3 gallons of usable healthy soil.
Get the Organic Plant Magic soil for raised beds at Amazon or Organic Plant Magic.
BEST TOPSOIL
Michigan Peat Garden Magic Top Soil

Product Specs
- Ingredients: Reed sedge peat and sand
- Quantity: 4.5 cubic feet
- Organic: Yes
What We Like
- Works well with heavy clay soils to help loosen the mixture
- Helps increase water retention in lighter soils
- Can be used as a top dressing and to fill holes in lawns and gardens
What We Don’t Like
- Must be mixed with other soil
Topsoil fills a raised bed rather than nourishing the plants in it. The Michigan Peat Garden Magic top soil does that with a mix of reed sedge peat and sand. For gardeners who are using dirt from the natural landscape, this garden soil mix can loosen heavy clay soils and improve the water retention of light, airy soils.
Sometimes topsoils can arrive with twigs and debris that aren’t harmful but don’t help your garden. The Michigan Peat topsoil (usually) arrives without clumps or these surprise additions, sticking with pure ingredients. However, the topsoil is designed to be used as conditioner for heavy soil or mixed with other growing mediums, but not used on its own.
Get the Michigan Peat soil for raised beds at Amazon.
BEST COMPOST
Charlie’s 10-Pound Compost

Product Specs
- Ingredients: Chicken manure, biochar, organic grasses and organic crop production residue
- Quantity: 0.4 cubic feet
- Organic: Yes
What We Like
- Composted for 8 to 12 weeks
- Powerful formula, yet it’s still safe to use in direct contact with plants
- Affordable compared to other big name brands
What We Don’t Like
- Made to be used as an amendment/natural fertilizer only
Charlie’s Compost has natural ingredients composted and ready for plants to soak up nutrients. It contains a garden soil mix of chicken manure, cornstalks, forest products, hay, straw, clay, and microbe inoculants. Before being bagged, the ingredients are composted for 8 to 12 weeks, at which time they’re ready for application to the garden.
The blend is designed to be mixed with other soils or as an additive around plants. If used in direct contact with plants, be sure to use it sparingly: It’s powerful enough to burn delicate plants. There have also been (rare) instances of bags arriving with ingredients that aren’t completely broken down.
Get the Charlie’s Compost soil for raised beds at Amazon.
BEST PEAT MOSS
Hoffman Canadian Sphagnum Peat Moss
Product Specs
- Ingredients: Peat moss
- Quantity: 10 quarts
- Organic: Yes
What We Like
- Provides ample drainage and aeration
- Also adds great moisture retention
- Relatively affordable bag
What We Don’t Like
- Designed to be mixed with heavy soil
Hoffman Canadian sphagnum peat moss contains 99.8 percent natural ingredients, consisting almost entirely of natural peat. This mix helps break up compacted soils, aerate roots, and improve drainage. However, the peat also holds water for better moisture retention in a raised bed setting.
This bag provides a big bang for the buck. It’s meant to mix with other soils, so even in a large raised bed, it can go a long way. Keep in mind that heavily compacted soils will require more peat to loosen the soil than light, airy soils.
Get the Hoffman peat moss at Amazon.
BEST VERMICULITE
Ferry Morse Professional Grade Vermiculite

Product Specs
- Ingredients: Vermiculite grades
- Quantity: 8 quarts
- Organic: No
What We Like
- Can be added to other soils for a potent mix
- Suitable for seedlings and plants that prefer a high moisture content
- Can help promote aeration in more compacted soils
What We Don’t Like
- May provide too much moisture for some plants
- Not meant to be the primary growing medium
The professional-grade vermiculite by Ferry Morse contains a mix of vermiculite grades, fine to coarse, in one mix. However, it tends to contain more fine-grade particles, which makes a difference in the plants for which it works best—mostly plants that prefer a high moisture content. With the right soils, it can be used to improve aeration and keep plants well hydrated.
This vermiculite provides adequate moisture levels for seedlings, too. However, the fine grade doesn’t take much moisture to keep plants healthy. Gardeners need to know their plants and soil mixes well when using this vermiculite. In some cases, it can retain too much moisture for plants that are easily overwatered.
Get the Ferry Morse vermiculite at Amazon, Ace Hardware, or Ferry Morse.
BEST FOR VEGETABLES
Coast of Maine Castine Organic Raised Bed Mix

Product Specs
- Ingredients: Fully cured compost, sphagnum peat moss, dehydrated poultry manure, lobster and crab shell meal, greensand, biochar, worm castings and mycorrhizae
- Quantity: 1 cubic foot
- Organic: Yes
What We Like
- Specially designed for outdoor raised garden beds
- Balanced pH is safe to use for vegetables, fruits, plants, and flowers
- OMRI listed for guaranteed natural and organic materials
- Website has a handy calculator for how much users need for their space
What We Don’t Like
- Moisture retention and nutrients not suitable for indoor use or potted plants
Coast of Maine Organic & Natural Mix nourishes plants with natural ingredients designed for plants meant for human consumption. That doesn’t mean it can’t work well for flowers and inedibles, but when it comes to vegetables, organic ingredients ensure top nutrients. It’s OMRI listed, providing an extra layer of assurance that ingredients meet requirements to qualify as natural and organic.
This raised bed mix contains fully cured compost, dehydrated poultry manure, sphagnum peat moss, biochar, worm castings, lobster and crab shell meal, greensand, and mycorrhizae.
A wide and varied mix of ingredients balances pH and provides nutrients for an equally diverse range of plants. Keep in mind that this soil is designed specifically for outdoor raised beds. It’s not one to use with indoor potted plants because it won’t provide the right moisture retention or nutrients.
Get the Coast of Maine soil for raised beds at Amazon, The Home Depot, Target, or Coast of Maine.
BEST FOR HERBS AND FLOWERS
Miracle-Gro Raised Bed Soil
Product Specs
- Ingredients: Sphagnum peat moss, compost, worm castings, alfalfa and kelp meal
- Quantity: 1.5 cubic feet
- Organic: Yes
What We Like
- Premixed bag is specially formulated for raised bed gardens
- Mixture can help control weeds and pests
- Certified by the Organic Materials Review Institute
What We Don’t Like
- Does not control moisture as well as other options
The OMRI-certified Miracle-Gro raised bed soil mix provides organic matter needed for good drainage while growing flowers, herbs, vegetables, and fruits. The raised bed soil requires no mixing. Designed specifically for raised beds, this mixture helps keep pests and weeds under control.
The premixed blend comes in 1.5 cubic foot bags. It takes about three bags to fill a 2-foot by 2-foot bed that is 1 foot high.
Get the Miracle-Gro soil for raised beds at Ace Hardware, Lowe’s, or Tractor Supply Co.
Jump to Our Top Picks
How We Chose the Best Soil for Raised Beds
We researched the most sought-after soil for raised beds in their respective categories and discovered that the best options are determined by their ingredients, quantity, versatility, and other special features included by top brands.
While searching for the best garden bed soil, we reached out to Teri Valenzuela, the natural science manager at Sunday, a nationwide lawn and garden care company. Her advice? “Look for ingredients like fresh compost or peat humus for good nutrient levels, vermiculite or perlite for aeration, and peat moss or coconut coir for moisture retention. These ingredients provide the right growing conditions for healthy plant growth and proper drainage.”
She adds that shoppers will want to “avoid mixes with heavier in-ground garden soil mixes, bio-solids containing contaminants, and excessive wood products. They may hinder plant growth by impacting drainage and nutrient availability.”
With these expert tips in mind, we made sure to include a wide range of soil recipes on our list of recommendations that meet these standards, avoiding poorer quality mixes. As such, many of our chosen mixes are formulated to provide drainage and aeration and select options can be used for indoor and outdoor plants, vegetables, fruits, flowers, and herbs.
Whether you need 1 cubic foot or over 15 gallons of soil, the above list includes options that resist compacting, are pH-balanced, and can be used on existing soil with grown plants as well as seedlings. Many of our picks can be mixed with other soils to create a custom blend that works perfectly for your own plants.
What to Consider When Choosing Soil for Raised Beds
Growing flowers and food in a raised garden bed differs from growing them directly in the ground. Consider these key points before dumping dirt into your raised beds.
Raised Bed Height
Knowing the size of your raised bed garden will help you determine how much soil you will need to fill it. Thankfully, there are plenty of useful calculators that can help with this task, taking into account shape and dimensions. In general, the taller the raised bed, the more raised bed soil you’ll need.
Taller raised beds or tabletop designs can eliminate back strain and make gardening more comfortable. Alternatively, you can fill the bottom of a tall ground level bed with filler like dead leaves or cardboard to minimize the amount of raised bed soil mix you’ll need.
Plant Type and Root Depth
The plants grown in the garden will determine the best raised bed soil depth needed for optimum growth. Generally, a good rule of thumb is to build a raised bed that’s at least 6 inches deep. This depth allows for drainage and retains moisture at levels needed for many common crops. However, some plants have deeper roots than others. For example, if you plan to grow root vegetables like carrots, a depth of 12 inches is preferable.
Raised beds are great for any kind of plant but work particularly well for growing vegetables. Elevating the growing space keeps weeds at bay and the soil warm and prevents compaction. Gardeners also get to start with pristine, neutral-pH soil. However, if you’re using previously used soil, do a soil test to determine whether you need any amendments or fertilizer to renew the nutrients.
Soil Components
Many gardeners have tried-and-true soil mix recipes, but in general, it’s best to avoid settling for uber-cheap bags of raised bed soil. A good soil mix contains topsoil, a small amount of substrate, and a significant amount of compost, which contains nutrients that improve soil conditions.
The least expensive bags of soil are usually low quality and full of weed seed, debris, and other nasty contaminants. They’re also unlikely to contain many valuable nutrients.
Topsoil is basically filler soil needed for everything from raised bed gardening to indoor potted plants. It makes up the bulk of most raised bed soil mixes. It’s not very rich in nutrients but is a necessary component that contains organic matter.
The substrate makes up a small percentage of the raised bed soil mix but is extremely important. It helps control moisture content, which is key in a raised bed. Some of the substrates that might appear in soil mixes include peat moss, rock phosphate, vermiculite, perlite, and coco coir. Again, the type of plants you choose to grow will help determine the appropriate substrate to support them.
Be careful to avoid adding too much peat moss, which can increase the acidity of the soil and throw off the pH balance. Some gardeners prefer to fill raised garden beds with a topsoil-free mix, using equal parts compost, perlite, and coco coir. It makes for a fluffy, moisture-retaining growing medium.
Compost from multiple sources is best because it provides a wide variety of nutrients. It can even come from your own backyard pile that consists of leaves, grass clippings, and other yard waste.
In the world of soil, the term “organic” refers to organic materials such as compost and mulch. “Nonorganic” materials aren’t necessarily harmful. They’re just inert and include things like pebbles, rock phosphate, and perlite. Nonorganic soil that contains no organic matter lacks nutrients but is also free of contaminants. When the terms are used in this way, the term “nonorganic” doesn’t mean synthetic fillers or chemicals; it means that the substances are not nor have they ever been alive.
However, the term “organic” can also mean free of synthetic chemicals and pesticides. The USDA’s National Organic Program (NOP) covers farm practices, including soils and other substances applied to crops like organic fertilizer. In addition, the Organic Materials Review Institute (OMRI), a volunteer organization, lists products that organic farmers can use to produce food. Both the NOP or OMRI list possible soils, amendments, and fertilizers that can be used and still maintain an “organic” garden.
Topsoil
Topsoil isn’t the same as garden soil. As the name suggests, it’s the top layer of soil. This general-purpose soil is ideal for filling in garden beds or preparing a bare lawn for growth.
It’s not very nutrient-rich, but it contains important organic matter, so it’s not entirely useless. If you buy topsoil bags and plan to use them to fill your raised beds, pour the topsoil in first since this soil makes a great base layer and filler. Then cover the topsoil with a more nutrient-rich mix of compost, peat moss, and substrates that will nourish the plants.
Fertilizer
The best raised bed soils contain nutrients that fuel growth. Organic, natural fertilizers include various types of compost, sea kelp, and worm castings. These fertilizers enhance the quality and condition of the soil without you having to worry about contamination. The slow-release properties of organic fertilizers prevent potentially harmful buildup and ensure that your plants aren’t harmed by a flood of nutrients all at once.
According to Jones, “You want to check what type of fertilizer is in the soil and how long it takes for it to break down so you don’t overfertilize and burn your plants. You’ll also know how often you need to fertilize again. I prefer getting premixed soil to minimize how much work (physical labor) I’ll have to do. Hand mixing and moving dirt is hard work.”
It’s also important to note that some raised bed soil mixes may contain synthetic fertilizers. They provide a quick nutrient boost but don’t improve soil condition and texture like organic options. This is why it is best to choose or make a soil mix with organic nutrient sources.
FAQs
It depends entirely on the size and shape of the raised bed. If you know your garden bed’s dimensions, you can plug them into a soil calculator to find out how much you need.
If you’re buying potting soil in bags, it’s typically premixed, so there’s not much to do other than water it before planting. Topsoils that act as fillers require you to layer substrate and/or compost on top. Once you’ve done that, it’s all about water. Watering the soil prior to planting, using either a watering can or a garden hose, ensures your plants have enough moisture to start growing.
A topsoil product is a great filler, but it’s not designed to be the main nutritive soil in a raised bed. The plants need nutrients, and topsoil is not rich in organic matter like compost or potting soils.
Yes. In fact, the Square Foot Gardening Foundation recommends a compost-only option for gardeners on a budget or those who don’t have access to other mix-ins. However, while this can be cheaper (if you have access to free compost), the soil in a compost-only bed can become compacted.
Jones shares her insights on this topic: “Signs that you need more soil nutrients: The plants aren’t thriving as they did in years past. Could be stunted, low fruit/vegetable production, or generally unhealthy.”
She adds, “All beds are going to lose soil. It’s the nature of raised beds. I add more soil to mine a minimum of every 2 years, more if needed. I will side-dress with compost and manure every year. Plus, I add things like egg shells, coffee grounds, and wood ash.”
The post The Best Soils for Raised Beds in Your Garden appeared first on Bob Vila.
]]>The post Yes, You Need a Fertilizer Spreader (Not Your Hands) To Treat Your Lawn—These 9 Tested Best appeared first on Bob Vila.
]]>Whether seeding a new lawn, feeding an existing garden, or treating a yard for an insect infestation, a fertilizer spreader is an invaluable tool. These machines apply lawn care products quickly and evenly without requiring you to touch them, keeping you safe from contacting potentially dangerous chemicals and resulting in more consistent application with less product waste. In the winter, they can also be used to spread salt on icy walkways and paths. But knowing which spreader is right for your property and needs requires a little research, which is why we tested 13 popular models before selecting just nine to recommend.
Based on our tests and the professional opinions of two lawn care experts, we chose the Earthway 50-lb. Commercial Broadcast Spreader as our top pick. This three-point fertilizer spreader holds a substantial amount of product, delivers a consistent spread pattern, and is easy to maneuver—even when full. However, there’s also a lot to like about the rest of the models that passed our tests, so it’s worth reviewing all of the best fertilizer spreaders before choosing the one that’s right for you.
- BEST OVERALL: Earthway 50-lb. Commercial Broadcast Spreader
↓ Jump to Review - RUNNER-UP: Titan Attachments Professional Broadcast Spreader
↓ Jump to Review - BEST BANG FOR THE BUCK: Scotts Turf Builder EdgeGuard Mini Broadcast Spreader
↓ Jump to Review - UPGRADE PICK: Scotts Elite Spreader
↓ Jump to Review - BEST FOR LARGE YARDS: Agri-Fab 130-lb. Push Broadcast Spreader
↓ Jump to Review - BEST PULL-BEHIND: Agri-Fab 130-lb. Tow-Behind Broadcast Spreader
↓ Jump to Review - BEST DROP: Scotts Turf Builder Classic Drop Spreader
↓ Jump to Review - BEST MANUAL HANDHELD: Scotts Whirl Hand-Powered Spreader
↓ Jump to Review - BEST BATTERY HANDHELD: Ryobi 18V One+ 1-Gallon Power Spreader
↓ Jump to Review
Fertilizer Spreaders Comparison Chart
| Product Name | Type | Capacity | Flow Controller |
| Earthway 50-lb. Commercial Broadcast Spreader | Walk-behind, rotary | 50 pounds | Sliding lever |
| Titan Attachments Professional Broadcast Spreader | Walk-behind, rotary | 50 pounds | Sliding lever |
| Scotts Turf Builder EdgeGuard Mini Broadcast Spreader | Walk-behind, rotary | 25 pounds | Dial and spring lever |
| Scotts Elite Spreader | Walk-behind, rotary | 60 pounds | Dial and spring lever |
| Agri-Fab 130-lb. Push Broadcast Spreader | Walk-behind, rotary | 130 pounds | Sliding lever |
| Agri-Fab 130-lb. Tow-Behind Broadcast Spreader | Tow-behind, rotary | 130 pounds | Sliding lever |
| Scotts Turf Builder Classic Drop Spreader | Walk-behind, drop | 32 pounds | Dial and spring lever |
| Scotts Whirl Hand-Powered Spreader | Handheld, rotary | 2 pounds | Dial and spring trigger |
| Ryobi 18v One+ 1-Gallon Power Spreader | Handheld, rotary | 10 pounds | Dial and sliding lever |
Our Top Picks
Each of the following models earned a spot on our list based on their standout performance in our hands-on tests. Read on to learn more about their spreading capacity, holding capacity, precision, and method of operation.
Best Overall
Earthway 50-lb. Commercial Broadcast Spreader
What We Like
- Heavy-duty steel T-handle, epoxy-coated frame, and pneumatic stud tires
- Easy to operate and maneuver when full
- Instructions for assembly and use are simple to follow
What We Don’t Like
- Takes up a lot of storage space
- Doesn’t come with a rain cover
Specs
- Type: Walk-behind, rotary
- Capacity: 50 pounds
- Flow controller: Sliding lever
Our Ratings: Durability 5/5; Maneuverability 5/5; Ease of Assembly 5/5; Storage 3/5; Value 5/5
The Earthway walk-behind broadcast fertilizer spreader is a commercial-grade multiuse spreader sized for yards between 10,000 square feet and an acre. It features a heavy-duty poly hopper with a 50-pound capacity, and its frame has a 175-pound load-bearing limit for withstanding uneven terrain. The 13-inch-diameter stud tires are attached via rustproof rims, and the super-duty gearbox is durable enough to last for years.
While the assembly instructions for this pick were incredibly easy to follow, assembly and calibration still took a few hours. However, once we got started actually using this rugged yard fertilizer spreader, we found its two-position height adjustment handle and T-speed lever comfortable despite our different heights, and we liked how evenly the three-hole drop shut-off system delivered product across our lawn. Even when fully loaded, the air-filled pneumatic stud tires rolled effortlessly up and down slopes and over rough ground, cushioning bumps to maintain a highly consistent distribution pattern. In addition to being an excellent choice for year-round use as a lawn seed fertilizer spreader, this Earthway model would also work well with ice-melting products.
What our tester says: “Once we got to testing this spreader, we both remarked on how durable it felt and how comfortable and easy it was to operate. Since it is on the large side, it would be nice if it had a rain cover so we could store it outside, but that’s really the only thing about this pick that we don’t love.”—Mark Wolfe, Product Reviews tester and writer
Get the Earthway fertilizer spreader at Amazon, The Home Depot, Walmart, Northern Tool + Equipment, or Earthway.
Runner-up
Titan Attachments Professional Broadcast Spreader
What We Like
- Large hopper is ideal for big properties
- 3-position handle makes it easy to control flow
- Comes with a rain cover for outdoor storage
What We Don’t Like
- Instructions are a bit hard to follow
- Too large for most small- and medium-sized yards
Specs
- Type: Walk-behind, rotary
- Capacity: 50 pounds
- Flow controller: Sliding lever
Our Ratings: Durability 5/5; Maneuverability 5/5; Ease of Assembly 4/5; Storage 4/5; Value 4.5/5
Titan Attachments broadcast fertilizer and seed spreader is a versatile, high-capacity tool designed to evenly distribute herbicides, fertilizers, insecticides, grass seed, and even ice melt. With a 50-pound drum and three-position gearbox, it holds plenty of product and is easy to control for consistent application.
Built for year-round use, this spreader features a high-grade steel frame, heavy-duty plastic components, and pneumatic tires that make it possible to run on turf or sod without damaging the grass. Despite its sturdy construction, it only weighs 25 pounds, making it light enough to maneuver without much effort but heavy enough to tackle hilly, root-filled, and rugged terrain. It covers a wide path for efficient lawn fertilizer application and is probably best for open spaces that are 10,000 square feet or larger. Though it was relatively quick to assemble and calibrate at about an hour and 15 minutes, the instructions would be fairly hard to follow if you didn’t have much experience putting this type of tool together.
Get the Titan Attachments fertilizer spreader at Amazon, Walmart, or Titan Attachments.
Best Bang for the Buck
Scotts Turf Builder EdgeGuard Mini Broadcast Spreader
What We Like
- Comes precalibrated and fully assembled
- Folds down for storage
- EdgeGuard feature keeps fertilizer on lawns only
What We Don’t Like
- Hard to get the last bit of fertilizer out
- Can be difficult to maneuver on uneven ground
Specs
- Type: Walk-behind, rotary
- Capacity: 25 pounds
- Flow controller: Dial and spring lever
Our Ratings: Durability 3/5; Maneuverability 3/5; Ease of Assembly 5/5; Storage 5/5; Value 5/5
Scotts Turf Builder EdgeGuard mini broadcast spreader is small, lightweight, and easy to store, making it ideal for those with limited space. Though it can hold up to 5,000 square feet of lawn products for yards up to 10,000 square feet, its fold-down handle makes it easy to tuck out of the way when the work is complete. It also includes a control panel with precision rate settings for more accurate coverage and an EdgeGuard feature that blocks the right side to prevent fertilizer from spraying onto sidewalks or flower beds.
During testing, we appreciated that this little spreader didn’t need any assembly. Its hard plastic wheels came attached and the spreader itself was already calibrated. Still, the wheels are fairly skinny and hard, so they didn’t roll as smoothly across uneven ground as air-filled tires. Also, we noticed that the last bits of product always got stuck to the bottom of the spreader due to static buildup. For the price, though? It’s a great choice for homeowners with small- to mid-sized yards and limited storage space who still want easy operation and precision coverage.
Get the Scotts EdgeGuard fertilizer spreader at Amazon, Lowe’s, Tractor Supply Co., Ace Hardware, The Home Depot, Walmart, or Scotts.
Upgrade Pick
Scotts Elite Spreader
What We Like
- 2 rotors for consistent coverage
- Holds up to 60 pounds to treat over 20,000 square feet
- Arrives calibrated and mostly preassembled and folds for storage
What We Don’t Like
- Some fertilizer discharges toward the wheel during use
- Wheels aren’t great for rough ground
Specs
- Type: Walk-behind, rotary
- Capacity: 60 pounds
- Flow controller: Dial and spring lever
Our Ratings: Durability 4/5; Maneuverability 3/5; Ease of Assembly 4/5; Storage 4/5; Value 4/5
The Scotts Elite spreader is a high-capacity option designed to efficiently cover up to 20,000 square feet with 60 pounds of product. Its twin discharge design evenly lays down material in a 6-foot-wide path, meaning it spreads fertilizer twice as fast as more basic models.
Assembly of the Scotts Elite was quick and easy—all we had to do was snap on the wheels and unfold the handle. The soft plastic wheels rolled much more easily over varying terrain than the standard hard-plastic wheels on less expensive Scotts spreaders, but not as well as air-filled tires. We liked that the comfortable ergonomic handle has a smartphone holder so you can stay connected as you work. This is also a versatile spreader since it can accommodate large particles of corrosive rock salt in addition to standard-sized ice melt, making it a good all-around spreader for midsize suburban yards, especially in icy climates.
Get the Scotts Elite fertilizer spreader at Amazon, Lowe’s, Tractor Supply Co., Ace Hardware, The Home Depot, Walmart, Blain’s Farm & Fleet, or Scotts.
Best for Large Yards
Agri-Fab 130-lb. Push Broadcast Spreader
What We Like
- Holds 130 pounds, covering up to 25,000 square feet
- Large air-filled pneumatic tires
- Easy to smoothly control fertilizer flow
What We Don’t Like
- Gearbox feels a bit undersized for so much weight
- Coverage path also feels narrow for such a big machine
Specs
- Type: Walk-behind, rotary
- Capacity: 130 pounds
- Flow controller: Sliding lever
Our Ratings: Durability 4/5; Maneuverability 5/5; Ease of Assembly 2/5; Storage 2/5; Value 4/5
The Agri-Fab push broadcast spreader is big enough to apply conventional or organic lawn fertilizer to yards of up to 1 acre. With a 130-pound hopper, it holds nearly three times as much product as our top two picks. Depending on how you have it set, it can distribute a path width of 8 to 12 feet and cover up to 25,000 square feet with each load.
Despite its large capacity, this lightweight spreader weighs only 6.81 pounds, enabling excellent maneuverability even when full. Its steel rod flow-control arm makes it easy for users to open and close the rustproof poly-constructed hopper, and the heavy-duty 1-inch pneumatic tires offer a smooth ride even over roots and rocks or through dips in the yard.
Assembly of this spreader takes about an hour, plus you’ll need another 10 minutes or so to calibrate it. Although the coverage path is similar to 50-pounder spreaders, the massive hopper reduces time spent refilling, making it an efficient option for larger properties.
Get the Agri-Fab push fertilizer spreader at Amazon, Tractor Supply Co., Northern Tool + Equipment, or Target.
Best Pull-Behind
Agri-Fab 130-lb. Tow-Behind Broadcast Spreader
What We Like
- Low center of gravity increases stability
- Durable steel frame and 13-inch pneumatic tires
- Short trailer tongue makes it easy to maneuver
What We Don’t Like
- Control arm awkward to maneuver from mower seat
- Gearbox seems a bit undersized
Specs
- Type: Tow-behind, rotary
- Capacity: 130 pounds
- Flow controller: Sliding lever
Our Ratings: Durability 4/5; Maneuverability 4/5; Ease of Assembly 3/5; Storage 2/5; Value 4/5
The Agri-Fab pull-behind fertilizer spreader functions as a large motorized fertilizer spreader when attached to a lawn tractor, riding lawn mower, or other vehicle via its universal hitch. Designed for properties of 1 acre or more, it features a 130-pound heavy-duty plastic hopper and a steel direct flow control arm, which is accessible from the driver’s seat for quick and even application of seed and other lawn care materials.
When trying out this tow-behind model, we liked its squatty dimensions, short hitch length, and 13-inch pneumatic tires, which made it highly maneuverable, even around curves. The low height also allowed for easier loading and improved stability on hilly ground. However, we found the control lever, located on the trailer tongue, to be somewhat awkward to operate from the mower seat.
Get the Agri-Fab tow-behind fertilizer spreader at Amazon, Lowe’s, Tractor Supply Co., Ace Hardware, Walmart, Northern Tool + Equipment, Target, Blain’s Farm & Fleet.
Best Drop
Scotts Turf Builder Classic Drop Spreader
What We Like
- Built-in cable-driven gate control for accurate application
- Heavy-duty frame built for long-term use
- Works well along flower beds and gardens
What We Don’t Like
- Too small for large spaces
- Plastic wheels aren’t great for uneven ground
Specs
- Type: Walk-behind, drop
- Capacity: 32 pounds
- Flow controller: Dial and spring lever
Our Ratings: Durability 3/5; Maneuverability 3/5; Ease of Assembly 5/5; Storage 4/5; Value 5/5
The Scotts classic drop spreader is a reliable choice for small properties. Its heavy-duty plastic hopper holds 32 pounds of fertilizer for new grass or already established lawns, which is enough to cover up to 10,000 square feet. It features a 22-inch spread pattern for excellent coverage and accuracy, controllable by a cable-driven gate on the handle. Select from 23 spreader settings to customize the application rate and then squeeze the handle to open the hopper to let it flow.
We liked that this spreader came preassembled and calibrated. It also laid a highly consistent path of fertilizer, but we had to pay attention to prevent gaps in coverage. Like many other Scotts spreaders, this one features hard plastic wheels that sometimes struggle on uneven ground or imperfect grass. Its tubular frame seems strong and durable, but the other parts are mainly lightweight plastic. This would make a good fertilizer spreader for occasional use, especially if the property has numerous plant beds, sidewalks, tree rings, and other obstacles that users need to work around.
Get the Scotts Classic fertilizer spreader at Amazon or Ace Hardware.
Best Manual Handheld
Scotts Whirl Hand-Powered Spreader
What We Like
- Takes up almost no storage space
- Noncorrosive materials also compatible with garden fertilizers, weed killers, and ice melt
- No assembly required
What We Don’t Like
- Less accurate than walk-behind spreaders
- Flow can be inconsistent at times
Specs
- Type: Handheld, rotary
- Capacity: 2 pounds
- Flow controller: Dial and spring trigger
Our Ratings: Durability 4/5; Maneuverability 5/5; Ease of Assembly 5/5; Storage 5/5; Value 4/5
The Scotts Whirl fertilizer hand spreader is a convenient year-round tool for small yards. It measures just 8.5 inches high by 8.7 inches wide by 13.1 inches deep and weighs only about a pound, making it convenient to carry and store. Since it’s constructed from heavy-duty plastic, it’s safe to use with everything from spring and winter grass fertilizer to ice melt without worrying about corrosion, as you might with a spreader with metal components.
We liked this spreader because it takes up almost no storage space and is super easy to operate. All we had to do was fill the hopper, squeeze the trigger, and turn the handle. It has an adjustment dial to control the opening width, and the trigger opens the hopper gate to release the material as you turn the baseplate crank. There’s even a slide-out wrist support to help steady the hopper and reduce operator fatigue during use. This would be a good tool for seeding bare spots created by chinch bug damage, treating difficult-to-reach areas, or spreading ice-melt products.
Get the Scotts Whirl fertilizer spreader at Amazon, Lowe’s, Tractor Supply Co., Ace Hardware, The Home Depot, Walmart, or Target.
Best Battery Handheld
Ryobi 18V One+ 1-Gallon Power Spreader
What We Like
- No assembly required
- Great for small areas or more precise application
- Works with everything from organic fertilizer to ice melt
What We Don’t Like
- Battery sold separately
- No always-on setting
Specs
- Type: Handheld, rotary
- Capacity: 10 pounds
- Flow controller: Dial and sliding lever
Our Ratings: Durability 4/5; Maneuverability 5/5; Ease of Assembly 5/5; Storage 5/5; Value 4.25/5
The Ryobi 18V (volt) One+ 1-gallon power spreader is a cordless battery-powered tool that makes it easy to distribute fertilizer and seed as well as ice melt. Compatible with the brand’s One+ battery system and equipped with a 10-pound hopper, it’s great for quick and easy application in small- to medium-sized spaces. It features an adjustable flow rate that allows you to customize spread based on material and desired coverage and a lightweight design that’s easy to maneuver, especially compared to large, push-type spreaders.
Those looking to cover a large property will likely find their hand getting tired since there’s no always-on setting. Instead, users must hold the trigger down to propel product out, making it a better option for spot treatments or small spaces. However, if you already own compatible 18V Ryobi tools and prefer the precision of a hand spreader, it’s an excellent option.
What our tester says: “I like this little battery-powered hand spreader for spot-treating areas of my yard that seem to struggle, but I also used it this past winter to apply salt to my front porch and steps so delivery people didn’t slip. Since I already had other 18V Ryobi tools, this multi-function spreader made an especially nice addition to my lineup.”—Michelle Larson, Product Reviews tester and writer
Get the Ryobi fertilizer spreader (tool only) at The Home Depot.
Jump to Our Top Picks
How We Tested the Best Fertilizer Spreaders
| Testing Stats | |
| Products tested | 13 |
| Hours/weeks/time spent testing | 37 hours |
| Tests performed | 5 |
| Price range | $30 to $370 |
Testing fertilizer spreaders meant rating them based on ease of assembly and calibration; distribution width, accuracy, and consistency; ease of controlling the on-off function while in motion; maneuverability over varying terrain; and user comfort.
To arrive at these ratings, we assembled each model, loaded them with lawn fertilizer, and ran them across a tarp on level ground, measuring discharge width and consistency. During that process, we tested the on-off functionality while moving, which is important at start-up and when preparing for end turns. Finally, we pushed or pulled each spreader through a variable-terrain course, observing the way it rolled over bumps and dips and navigated corners.
| Product Name | Durability | Maneuverability | Ease of Assembly | Storage | Value |
| Earthway 50-lb. Commercial Broadcast Spreader | 5 | 5 | 5 | 3 | 5 |
| Titan Attachments Professional Broadcast Spreader | 5 | 5 | 4 | 4 | 4.5 |
| Scotts Turf Builder EdgeGuard Mini Broadcast Spreader | 3 | 3 | 5 | 5 | 5 |
| Scotts Elite Spreader | 4 | 3 | 4 | 4 | 4 |
| Agri-Fab 130-lb. Push Broadcast Spreader | 4 | 5 | 2 | 2 | 4 |
| Agri-Fab 130-lb. Tow-Behind Broadcast Spreader | 4 | 4 | 3 | 2 | 4 |
| Scotts Turf Builder Classic Drop Spreader | 3 | 3 | 5 | 4 | 5 |
| Scotts Whirl Hand-Powered Spreader | 4 | 5 | 5 | 5 | 4 |
| Ryobi 18v One+ 1-Gallon Power Spreader | 4 | 5 | 5 | 5 | 4.25 |
What to Consider When Choosing a Fertilizer Spreader
To help us determine which fertilizer spreader features matter most, we also spoke to Taylor Olberding, co-founder of nationwide lawn maintenance company Heroes Lawn Care, for his professional opinion. In addition to considering your property’s size and unique features, it’s also important to consider whether you’d rather push, pull, or carry the spreader and whether there are any extras that might make using it more comfortable. You’ll also want to pay attention to what it’s made from since some materials are more durable than others.
According to Olberding, users should “Ensure it has air-filled tires (not plastic tires), is made of stainless steel/noncorrosive material with a plastic hopper, and can be easily configured based on the fertilizer product.” He also adds, “Ensure you are able to adjust the openings for accurate application and have an edge guard to help prevent fertilizer from spreading onto nontarget areas.”
Types of Fertilizer Spreaders
Two basic types of spreaders exist for dry applications––rotary spreaders, also known as broadcast spreaders—and drop spreaders. There are also spreaders designed for liquid products, including homemade lawn fertilizer.
Rotary/Broadcast Spreaders
A rotary spreader uses a rotating base plate to disperse seeds or granules that pour slowly from a hopper. They are called broadcast spreaders because they throw the product several feet to the front and sides of the spreader path.
Rotary spreaders cover an area three times their width, or broader, on every pass. These are the fastest tools you can use to spread dry materials, but their spreading abilities are less accurate than those of drop spreaders. Rotary spreaders are available in several sizes, so you can buy one that works for a tiny garden, a large estate lawn, and anything in the middle.
Drop Spreaders
When precision is critical, choose a drop spreader. These devices drop a swath of product through a wide, narrow opening directly beneath the spreader. They provide calibrated coverage, but the precision boosts the chance that the user will miss or double-cover an area.
For users who have precise application needs, this tool is ideal. Users can easily control where a drop spreader distributes the product because it only drops between its wheels. The downside is that users will spend more time covering a lawn using a drop spreader than a rotary spreader.
Liquid/Spray Spreaders
The most efficient way to spread liquid fertilizer and other liquid lawn treatments is with a hose-end chemical spreader/sprayer. These devices automatically mix the correct proportion of concentrated chemicals with a flowing stream of water that travels through the spreader and out the nozzle.
Liquid spreaders are especially useful as secondary tools for emergency treatments and for applying product quickly, although they are less accurate than the other two types of spreaders. Remember, too, that liquid lawn chemicals deliver fast results, but most liquids dissipate more quickly than granules, so regular use is costly.
Method of Operation
The most popular spreaders are broadcast because they offer a balance between speed and precision. Manufacturers make these spreaders in a wide range of sizes, including everything from small, handheld models to extra-large spreaders that can be pulled behind vehicles.
Drop spreaders are the best choice when users must navigate obstacles and narrow spaces. They work exceptionally well on small to medium intensively landscaped yards.
Holding Capacity
It is important to know the spreader’s holding capacity because that will determine how often the spreader will have to be refilled based on the size of the area it needs to cover. Ideally, users will want to simply fill the spreader once and deposit the treatment over the entire area.
Holding capacity and lawn size go hand in hand. A handheld spreader is well suited for small lawns up to 1,500 square feet. For medium-sized lawns up to 5,000 square feet, a small walk-behind spreader suits the job. Large walk-behind spreaders work well for yards up to about 20,000 square feet. Go for a tow-behind spreader if the yard is larger than half an acre.
Spreading Capacity
Spreading capacity refers to the types of fertilizers or materials a spreader can handle. The best fertilizer spreaders can help with planting grass seeds and distributing pelletized chemicals, but far fewer can handle sand, powdered lime, and compost.
Precision
All lawn spreaders deliver better precision than spreading fertilizer by hand, making them useful tools since applying too much or too little product is one of the most common fertilizer mistakes people make. Still, some spreaders are more precise than their competitors, and spreaders that are more accurate tend to be slower. For example, drop spreaders are precise but slow, whereas broadcast spreaders are a bit less accurate but fast. Liquid spreaders are not exact, but they are quite quick.
Drop spreaders are the most precise because manufacturers calibrate them for a consistent flow rate to spread only a thin band directly beneath the hopper and between the wheels. You can calibrate a broadcast spreader to deliver a steady flow rate, but you must walk at a consistent pace for even coverage. Manufacturers calibrate liquid spreaders to mix the amount of concentrate per gallon of water accurately, but you are in control of the coverage.
The Advantages of Owning a Fertilizer Spreader
A fertilizer spreader simplifies lawn treatments because it allows users to quickly and evenly apply seed, fertilizer, and lawn pest control products. You will also save time and money using a spreader because it allows you to quickly and evenly apply lawn products.
- Spreaders apply lawn treatments far more evenly than hand spreading.
- Fertilizer spreaders significantly reduce the time and effort users expend to apply lawn treatments.
- The use of a fertilizer spreader for lawns minimizes the user’s exposure to chemicals.
FAQs
Even if you’ve already chosen the best fertilizer spreader for your yard, you may still have a few questions. The following answers to frequently asked questions should fill in any remaining gaps in your knowledge about operating and caring for these tools.
Refer to your spreader owner’s manual to find the correct setting for the product you will spread. The product label tells you how many pounds to apply per 1,000 square feet.
Load the hopper with enough product for the square footage of the area you will cover. Select the correct setting for the material you spread, squeeze the handle, and walk from one corner of the yard, continuing in straight parallel lines until the area is covered.
You can spread fertilizer by hand, though your results might not be as consistent as they are with a spreader. Don gloves and pour granular fertilizer into a plastic bucket. Start to walk at one corner of the yard and toss the fertilizer in a sweeping motion as you walk in straight lines. Try to keep a consistent pace to spread the product as evenly as possible.
For more even coverage, apply half the fertilizer while you walk in parallel lines in one direction, then apply the other half while you walk in a perpendicular set of parallel lines.
To clean a fertilizer spreader, empty the hopper and use compressed air or a rag to remove all granules and residue from the spreader’s parts. Thoroughly wash the spreader, paying close attention to crevices and moving parts where debris may be lodged. Allow the spreader to dry thoroughly and store it out of the elements once you’re done.
We checked in with Chris Ramos from Blain’s Farm & Fleet to see when he recommends customers fertilize their lawns, and he had this to say: “Fertilizing in fall proves best because root strengthening through winter leads to a healthier spring lawn. Applying fertilizer during spring can benefit grasses that need an early growth advantage, especially cool-season varieties.”
It’s always a good idea to read the label for post-application recommendations straight from the manufacturer. However, it’s generally best practice to water the area lightly to help the product get into the soil and avoid mowing for a few days to prevent the fertilizer from getting kicked up before it has a chance to work.
“To find the right setting, check the product label, which generally includes the settings for seeds and fertilizers. If you are still unsure, begin with a lower application rate and add more if necessary to prevent overapplication,” says Ramos.
Meet the Tester
Mark Wolfe is a product tester and writer with an extensive background in the nursery and landscaping industries. He kept his tool box well stocked in order to build or repair fences, walls, irrigation systems, and equipment on any given day. Now he tests and writes reviews about the latest hand tools, lawn care products, outdoor power equipment, and other outdoor-living goods.
The post Yes, You Need a Fertilizer Spreader (Not Your Hands) To Treat Your Lawn—These 9 Tested Best appeared first on Bob Vila.
]]>The post The Best Weed and Feed Products for Fewer Weeds and Greener Grass, Tested appeared first on Bob Vila.
]]>A drab, weedy lawn isn’t a lost cause with the help of modern weed and feed fertilizers. Designed to introduce essential nutrients to accelerate the grass’s growth, these products help lawns grow thick and healthy. At the same time, they put the hurt on weeds to choke out the plants you don’t want in favor of the lush carpet of greenery you do. After researching the top fertilizer mixes, we tested eight of the top weed and feeds on a lawn that needed some serious help. These weed and feed products were all tested for at least 4 weeks with varying results and levels of success.
After testing, we can say that our favorite is the GreenView Broadleaf Weed Control Plus Lawn Food. It’s highly concentrated, so it doesn’t take much product to make a big difference. We tested the products in a grid, and the square with this product outgrew (and out-greened) all the others.
The test lawn needed both nutrients and weed reduction, so it gave us the perfect canvas for testing. Keep reading to get a look at how the best weed and feed performed in real-world conditions and what kind of growth (and weed death) you can expect in your own yard.
- BEST OVERALL: GreenView Broadleaf Weed Control Plus Lawn Food
↓ Jump to Review - BEST BANG FOR THE BUCK: Scotts Turf Builder Weed and Feed
↓ Jump to Review - UPGRADE PICK: BioAdvanced 5-in-1 Weed & Feed
↓ Jump to Review - BEST NATURAL: Espoma Organic Weed Preventer
↓ Jump to Review - BEST COOL-SEASON: GreenView Fairway Formula Spring Weed and Feed
↓ Jump to Review - BEST WARM-SEASON: Scotts Turf Builder Southern Triple Action
↓ Jump to Review - BEST LIQUID: Scotts Liquid Turf Builder With Plus 2 Weed Control
↓ Jump to Review
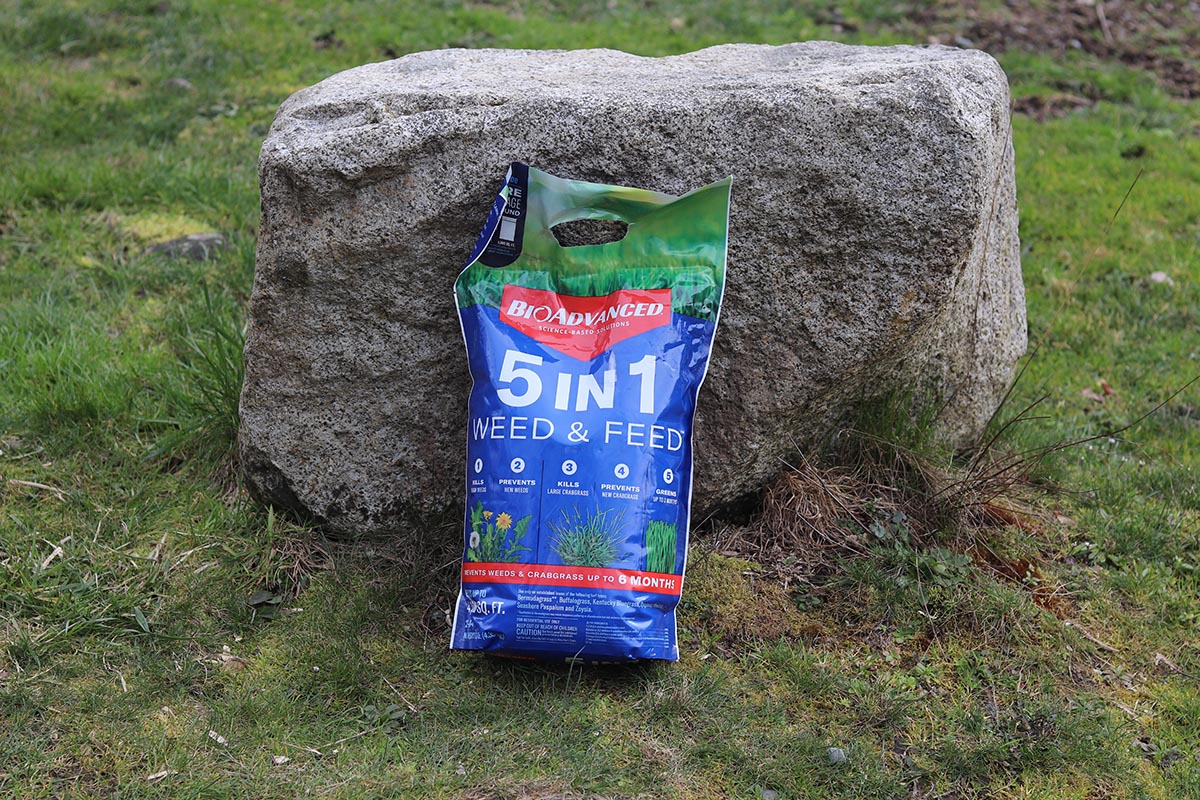
Before You Buy Weed and Feed
Maintaining a healthy lawn includes mowing, weeding, watering, and fertilizing. However, fertilizing isn’t always necessary. Overfertilizing a lawn will make the grass grow more vigorously, requiring more frequent mowing or leading to runoff, which ends up in the local watershed.
Excessive fertilizing can also result in lawn burn, which is when the nitrogen and salt levels in the soil are too high and cause yellow to brown strips or patches of dead grass. A lawn only needs fertilizing if the soil lacks the vital nutrients to help it grow. Home soil test kits can be used to check the soil composition and help you decide what type of fertilizer will best nourish your grass.

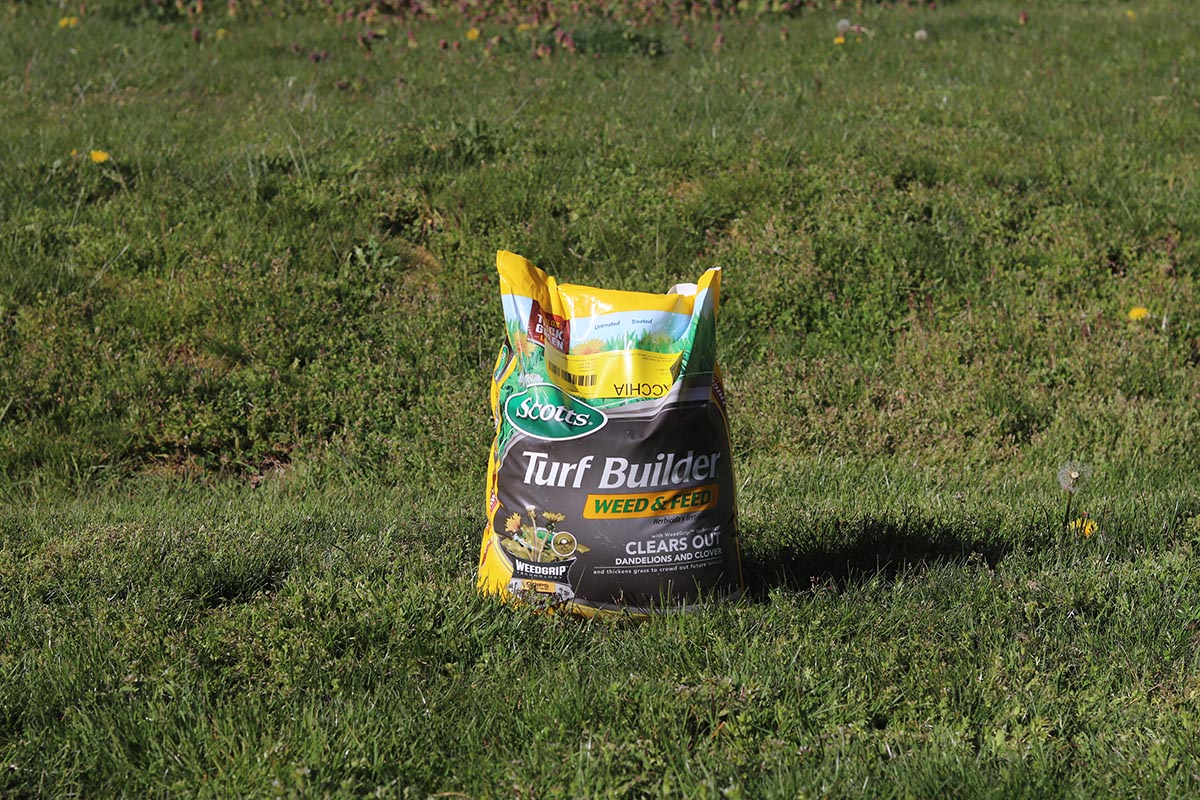

Product Comparison
| NPK Ratio | Application | Grass Type | |
| GreenView Broadleaf Weed Control Plus Lawn Food | 27-0-4 | Spring or early fall | Kentucky bluegrass, fine and tall fescues, perennial ryegrass, Bahia, St. Augustine, common Bermuda, hybrid Bermuda, zoysia, centipede, Colonial bent |
| Scotts Turf Builder Weed and Feed | 26-0-2 | Spring | Kentucky bluegrass, fescue, ryegrass, centipede, Bahia, Bermuda, zoysia |
| BioAdvanced 5-in-1 Weed & Feed | 22-0-4 | Spring, early summer, fall | Bermuda, fescue, buffalo grass, seashore paspalum, zoysia |
| Espoma Organic Weed Preventer | 9-0-0 | Spring | All grasses |
| GreenView Fairway Formula Spring Weed and Feed | 24-0-6 | Spring or fall | Kentucky bluegrass, Bermuda, buffalo grass, perennial ryegrass, fine and tall fescues, Bahia, centipede, zoysia, St. Augustine (except for Floratam) |
| Scotts Turf Builder Southern Triple Action | 29-0-10 | Active growth periods | St. Augustine, Floratam, zoysia, centipede, carpet grass |
| Scotts Liquid Turf Builder With Plus 2 Weed Control | 25-0-2 | Spring or fall | Bahia, Bermuda, centipede, zoysia, Kentucky bluegrass, fescue, ryegrass |
Our Top Picks
The following list includes the fertilizers that stood out during research and were then tested to narrow the field to some of the most effective weed and feeds on the market. This list includes both liquid and granular weed treatments.
Best Overall
GreenView Broadleaf Weed Control Plus Lawn Food

What We Like
- Doesn’t require a lot of product to make a difference
- Capable of killing over 250 weed varieties
- Slow-release nitrogen formula
- Made a noticeable difference in grass growth rate and health
What We Don’t Like
- Should not be used on Floratam St. Augustine, Dichondra, and carpet grass
- Contains 2,4-D
Our Ratings: Application 5/5; Feed Effectiveness 5/5; Weed Control 2.5/5; Value 5/5
Product Specs
- NPK ratio: 27-0-4
- Application: Spring or early fall
- Grass type: Kentucky bluegrass, fine and tall fescues, perennial ryegrass, Bahia, St. Augustine, common Bermuda, hybrid Bermuda, zoysia, centipede, Colonial bent
Taking care of a lawn and reducing common weeds is part of property ownership, and for those who want to spruce up lawn health quickly, this GreenView weed and feed mix can do it. This fertilizer and weed killer for lawns is made with a slow-release nitrogen formula that thickens grass, without excessive growth, targeting 250 weed varieties, including dandelions, clover, plantain, dollar weed, and ground ivy. It was the top performer in our testing, creating grass that outgrew the rest. It’s also a great spring or fall weed and feed.
The granules are effective for over 8 weeks and are safe to use on warm- and cool-season grass types, though there are a few varieties to avoid. Plus, the slow release nitrogen is safer to use when temperatures start to rise without burning the grass or causing other lawn injury.
The grass was noticeably taller and greener in the square with this GreenView mix. It’s also a highly concentrated fertilizer and weed preventer, so it doesn’t take a large amount to make a big difference in lawn health. While it didn’t kill existing weeds, fewer weeds grew in the area where this mix was applied. Our only issue with this product is that it contains 2,4-D (as did almost all of the other synthetic products in this test), which has the potential to affect human health and the environment. Make sure to read the application instructions to reduce the potential harmful effects.
Get the GreenView broadleaf weed and feed at Amazon, Lowe’s, Tractor Supply Co., The Home Depot, Walmart (39 pounds), or GreenView.
Best Bang for the Buck
Scotts Turf Builder Weed and Feed
What We Like
- Quick, tangible results for thickening grass and preventing weeds
- Highly concentrated and ample quantity
- Compatible with multiple grass varieties
What We Don’t Like
- Not suitable for warm-season grasses
- Contains 2,4-D
Our Ratings: Application 5/5; Feed Effectiveness 4.5/5; Weed Control 2.5/5; Value 4/5
Product Specs
- NPK ratio: 26-0-2
- Application: Spring
- Grass type: Kentucky bluegrass, fescue, ryegrass, centipede, Bahia, Bermuda, zoysia
Scotts is a well-known brand with an extensive range of lawn care products, including fertilizer and weed and grass killer. This product combines the strongest weed and feed for lawns available from Scotts. It’s supposed to kill common broadleaf weeds like dandelions and clover using WeedGrip technology while feeding the lawn for thicker grass. However, our testing revealed more feed than weed. Granted, the lawn we tested it on has a serious clover and dandelion problem. It’s possible the weed issues were too much even for this powerful weed killer. While we didn’t see a noticeable difference in weed health, they didn’t proliferate.
Scotts Turf Builder is one of the most popular and economical fertilizer and weed control combination products available. Although this weed and feed for Bermuda grass works on many common turf grasses, such as fescue, centipede, Kentucky bluegrass, ryegrass, Bahia, and zoysia, it’s not recommended for some warm-season grasses, such as St. Augustine, Dichondra, or carpet grass. As a synthetic product, it contains 2,4-D, which has the potential to damage human and environmental health.
Get the Scotts Turf Builder weed and feed at Amazon, Lowe’s, or The Home Depot.
Upgrade Pick
BioAdvanced 5-in-1 Weed & Feed
What We Like
- Works on over 200 weed and grassy-weed varieties
- Long-lasting formula feeds for up to 3 months
- Provides nutrients as well as heat and drought resistance
- Requires a minimal amount of mix to make a big difference in lawn health
What We Don’t Like
- Not suitable for new grass
- Contains 2,4-D
Our Ratings: Application 5/5; Feed Effectiveness 5/5; Weed Control 3.5/5; Value 5/5
Product Specs
- NPK ratio: 22-0-4
- Application: Spring, early summer, fall
- Grass type: Bermuda, fescue, buffalo grass, seashore paspalum, zoysia
Taking care of grass while keeping away common weeds and crabgrass can be exhausting and time-consuming. But the BioAdvanced 5-in-1 weed and feed long-lasting formula greens grass and boosts growth so much that users might need to add an extra cutting to their weekly routine. This potent mix can act as a grass killer for crabgrass as well as broadleaf weeds like clover, dandelion, chickweed, and 200 other weed and grassy-weed varieties. It also strengthens established grass by fortifying roots.
With a coverage area of over 4,000 square feet, this weed and feed mix resists the effects of heat and drought and is safe to use on cool-season grass types. It’s also a highly concentrated mix, requiring a minimal amount to be effective.
In testing, it made a big difference in grass growth rate and health, making the grass noticeably brighter and taller. However, it didn’t do much to choke out the clover and weeds, though it showed some ability to prevent new weeds from sprouting. It also contains 2,4-D, a chemical that can potentially harm the environment or people.
Get the BioAdvanced weed and feed at Lowe’s, Walmart, or BioAdvanced.
Best Natural
Espoma Organic Weed Preventer

What We Like
- Made from 100 percent corn gluten meal
- Can be used in any season and is compatible with all lawn types
- Can be used in flower beds or vegetable gardens
What We Don’t Like
- Only covers 1,250 square feet of lawn
- Doesn’t fertilize or control weeds as well as synthetic products
Our Ratings: Application 5/5; Feed Effectiveness 4/5; Weed Control 2.5/5; Value 3.5/5
Product Specs
- NPK ratio: 9-0-0
- Application: Spring
- Grass type: All grasses
Espoma’s Organic Weed Preventer is a natural solution to prevent lawn weeds without harming the environment. This product is made with 100 percent corn gluten meal, which is a byproduct of the corn-milling process that contains a high amount of nitrogen. When applied to your lawn, the nitrogen in the corn gluten meal provides a slow-release fertilizer to nourish the grass and make it more resistant to weeds. Additionally, the corn gluten meal acts as a natural pre-emergent herbicide that inhibits the growth of weed seeds by drying out their roots.
Unlike chemical-based weed preventers, Espoma’s Organic Weed Preventer is safe for pets, children, and the environment. It can safely be used on flower beds and in gardens. During testing, we found that much more of this mix is required to be as effective as synthetic fertilizers. The granules are also more noticeable on the lawn. However, we didn’t have to worry about children or pets walking on that lawn while the granules were still visible. We also appreciated that it can safely be used on flowers and vegetable gardens.
This fertilizer/weed preventer did improve grass color and growth, but it didn’t perform as well as synthetic products. Espoma can help prevent pre-emergent weeds, but not those already growing.
Get the Espoma weed and feed at Ace Hardware or Walmart.
Best Cool-Season
GreenView Fairway Formula Spring Weed and Feed
What We Like
- Kills over 200 varieties of weeds
- Slow-release formula fertilizes for up to 12 weeks
- 36-pound bag treats up to 10,000 square feet of lawn
- Made a noticeable difference in the health and growth rate
What We Don’t Like
- Contains 2,4-D
- Didn’t kill existing weeds
Our Ratings: Application 5/5; Feed Effectiveness 5/5; Weed Control 2.5/5; Value 4.5/5
Product Specs
- NPK ratio: 24-0-6
- Application: Spring or fall
- Grass type: Kentucky bluegrass, Bermuda, buffalo grass, perennial ryegrass, fine and tall fescues, Bahia, centipede, zoysia, St. Augustine (except for Floratam)
GreenView Fairway Formula fertilizes lawns, targets over 200 lawn weed species, and prevents crabgrass from growing. It contains both slow-release and quick-release nutrients that feed a lawn for up to 12 weeks at a time. We like that the slow release reduces the number of times the fertilizer would need to be applied in a year.
Due to the slow-releasing formula, GreenView Fairway Formula is best for use on established lawns with a healthy root system. Using it on new grass may result in burning and stunted growth. It can be used on warm- or cool-season grasses, but check the acceptable grass varieties as there are some exceptions.
This mix noticeably boosted grass health during testing, with the grass growing at a faster rate and being greener than non-treated grass. It comes in a large bag and doesn’t require a lot of granules to be effective, making it an economical option for large lawns. However, we didn’t notice any difference in weed health, either killing them or preventing more from growing.
Get the GreenView Fairway Formula weed and feed at Tractor Supply Co., Ace Hardware (18 pounds), The Home Depot, Walmart, or GreenView.
Best Warm-Season
Scotts Turf Builder Southern Triple Action
What We Like
- Helps lawns withstand heat and drought
- Large coverage area of up to 8,000 square feet
- High-nitrogen formula
What We Don’t Like
- Not safe for people and pets until fully watered in and dry
- Contains Atrazine
Product Specs
- NPK ratio: 29-0-10
- Application: Active growth periods
- Grass type: St. Augustine, Floratam, zoysia, centipede, carpet grass
We understand that warm-season grasses need a weed and feed that can withstand heat and drought conditions while building a thick green lawn. Scotts Turf Builder Southern Triple Action is a 3-in-1 weed and feed made for southern lawns. It’s safe for use on St. Augustine, zoysia, centipede, and carpet grasses, but it’s not recommended for use on Bermuda grass. This product also contains an insecticide that targets fire ants, mole crickets, sod webworms, fleas, armyworms, and more, and it keeps them away for up to 6 months.
Please note that this product wasn’t tested due to the geographic location of the tester.
Get the Scotts Turf Builder Southern weed and feed at Amazon, Tractor Supply Co., The Home Depot, or Walmart.
Best Liquid
Scotts Liquid Turf Builder With Plus 2 Weed Control
What We Like
- Suitable for fertilizing and weeding in any season on any grass type
- Easy to apply
- Affordable
- Noticeably killed weeds after a single application
What We Don’t Like
- Contains 2,4-D
Our Ratings: Application 4/5; Feed Effectiveness 3/5; Weed Control 2.5/5; Value 1.5/5
Product Specs
- NPK ratio: 25-0-2
- Application: Spring or fall
- Grass type: Bahia, Bermuda, centipede, zoysia, Kentucky bluegrass, fescue, ryegrass
Scotts Liquid Turf Builder weed spray lets users easily fertilize a lawn while killing dandelions and clover. One of this product’s best features is the ease of application. All that’s required is for the user to attach the applicator to a garden hose and apply this liquid weed and feed concentrate spray as needed. The process was easy during testing. The bottle has a clear strip so we could see how much we’d applied as we went along. That was helpful, as we applied it to a small area and didn’t want to use the entire bottle.
Scotts weed and feed helps control buckhorn, chickweed, clover, dandelion, ground ivy, henbit, knotweed, and more. Scotts Liquid Turf Builder weed and feed spray can be used with almost any grass type during any season. When used as directed, it won’t burn the lawn and only requires one or two treatments per year. However, for those who don’t notice a change in weeds after one application, it can be applied again within 3 to 4 weeks.
The brand says there should be a noticeable decline in weeds after a few days, but we didn’t notice weeds dying out until 3 weeks into testing. This was one of the few products that killed existing weeds. While it increased grass growth and deepened the green somewhat, it didn’t have the drastic health benefits for the grass as some of the other weed and feeds we tested.
Get the Scotts liquid weed and feed at Amazon, Lowe’s, Ace Hardware, or The Home Depot.
Or, DIY Your Own Weed and Feed
While there are many effective weed and feed products on the market, using commercial weed and feed can be expensive and harmful to the environment. A more natural solution is to make a DIY weed and feed using safe and effective ingredients.
Mix 1 pound of corn gluten meal, 1 cup of Epsom salt, and 1 cup of dried lawn clippings to make your own weed and feed. Corn gluten meal acts as a natural pre-emergent herbicide that prevents weed seeds from germinating, while Epsom salt provides magnesium and sulfur to nourish the grass. Dried lawn clippings act as a slow-release fertilizer that provides nutrients for healthy lawn growth. By using this natural DIY weed and feed, users can maintain a beautiful and healthy lawn without harming the environment.
Jump to Our Top Picks
How We Tested the Best Weed and Feed
| Testing Stats | |
| Products tested: | 7 |
| Hours spent testing: | 8 weeks |
| Tests performed: | 1 |
| Price range: | $20 to $70 |
We created a numbered grid using marking paint and stakes, and one weed and feed fertilizer was applied in each square. The exception was the liquid weed and feed, which required application in a larger area; it was applied to a 100-square-foot area next to the grid.
We calculated how much weed and feed to spread in each square based on the manufacturer’s instructions so that we didn’t over- or under-fertilize. The space was small enough that we spread the fertilizers by hand to prevent them from mixing. We then took pictures upon application and once a week for 4 weeks. Each weed and feed was scored according to a rubric based on how much product it required, how well it performed, and the ingredients. We also considered the eco-friendliness of each fertilizer, looking for nontoxic options and also pet-friendly weed and feed.
| Application | Feed Effectiveness | Weed Control | Value | |
| GreenView Broadleaf Weed Control Plus Lawn Food | 5 | 5 | 2.5 | 5 |
| Scotts Turf Builder Weed and Feed | 5 | 4.5 | 2.5 | 4 |
| BioAdvanced 5-in-1 Weed & Feed | 5 | 5 | 3.5 | 5 |
| Espoma Organic Weed Preventer | 5 | 4 | 2.5 | 3.5 |
| GreenView Fairway Formula Spring Weed and Feed | 5 | 5 | 2.5 | 4.5 |
| Scotts Liquid Turf Builder With Plus 2 Weed Control | 4 | 3 | 2.5 | 1.5 |
What to Consider When Choosing Weed and Feed
Not every weed and feed formula works on every type of grass or in every climate. You need to keep in mind the type of grass, the weed species you want to target, and fertilizer ingredients. Different weed and feeds are also designed for application during different seasons to provide nutrients the grass needs at specific stages of the growth cycle and to better target weeds when they’re at their most vulnerable.
Weed and Feed Type
Weed and feed can be divided into several types. The first is between natural and chemical weed and feeds. Natural weed and feeds may be organic (but not always) and often contain cornmeal as a natural weed preventative and grass fertilizer. These weed and feeds do not contain synthetic chemicals.
Chemical weed and feeds can be further divided into pre- and post-emergent weed and feeds. Pre-emergent weed and feeds contain chemicals that prevent weed seeds from germinating. They do not target already existing weeds. Post-emergent weed and feeds contain chemicals that target existing weeds while fertilizing grass. However, some products (like BioAdvanced 5-in-1 Weed & Feed, our upgrade pick), contain chemicals that affect both pre- and post-emergent weeds.
Grass Type
The best weed and feed product for a lawn depends on the grass type. Grass species have different nutrient requirements, so not all products are safe for every species of grass. Using the wrong weed and feed can stunt growth, burn, or further damage the grass. In general, grass species are divided into two categories: warm season and cool season. The seasons do not refer to the time of year but the climate and average soil temperature range.
- Warm-season turfgrasses grow best with average soil temperatures between 80 and 95 degrees Fahrenheit. Warm-season grasses thrive in the warmer climates of the southeastern and southwestern United States. They include Bahia, Bermuda, carpet grass, St. Augustine, and zoysia (Japanese lawn grass).
- Cool-season turfgrasses grow best with average soil temperatures between 60 and 75 degrees Fahrenheit. Cool-season grasses thrive in the cooler climates of the Midwest and northern regions of the United States. Some cool-season grasses are Kentucky bluegrass, perennial ryegrass, and tall and hard fescue.
Selecting a weed and feed that’s compatible with the grass species will provide far better results.
NPK Ratio
To grow a lush lawn, your soil needs to have essential nutrients. Fertilizers temporarily add nutrients to the soil. Fertilizers typically list their nutrient ratios as an NPK formula. This denotation represents the percentage of nitrogen (N), phosphorus (P), and potassium (K) in the product.
- Nitrogen (N) helps the grass grow properly and develop a green color.
- Phosphorus (P) helps develop strong root systems.
- Potassium (K) protects plants from disease, drought, and cold.
There are at least 11 states that ban phosphorus fertilizer use or sale. Luckily, many lawn weed and feed manufacturers have adapted to this and removed phosphorus from their products. Don’t worry—the weed and feed will still green and thicken the grass without the additional phosphorus.
Fertilizers can also contain secondary elements and micronutrients needed for healthy growth, such as sulfur, calcium, magnesium, boron, iron, molybdenum, zinc, copper, chloride, nickel, and manganese. To find out exactly what nutrients the lawn needs, conduct a soil test. Either purchase a test for home use or take a soil sample to the local cooperative extension testing office.
Natural vs. Synthetic
There are distinct differences between natural and synthetic weed and feeds.
Natural and organic weed and feed products contain plant-based or mineral ingredients that are safe for the environment and human health. They nourish the soil and plants to make them more resistant to weeds and prevent weed seed germination.
At this time, natural alternatives aren’t as effective as their synthetic counterparts. However, some users of natural weed and feeds report that they notice healthier grass and fewer weeds after using the products for several seasons. In short, it takes patience and consistency to see gradually improved lawn health. It also takes more of the product to fertilize, which increases the overall cost, but it’s often worthwhile for the long-term health of people and the environment.
On the other hand, chemical-based products contain synthetic herbicides that quickly kill weeds and improve grass health. However, they may contain ingredients that hurt beneficial plants, insects, and wildlife. Two of the most commonly used herbicides, 2,4-D and Atrazine, have been linked to numerous health and environmental problems. 2,4-D is a hormone-disrupting chemical that can potentially cause cancer, congenital disabilities, and developmental issues in children. Atrazine is a highly toxic herbicide that can contaminate drinking water, cause congenital disabilities, and harm wildlife.
Be careful when applying these products in areas with a shallow water table, as they have the potential to contaminate the water supply. Always follow the manufacturer’s instructions, and keep children and pets off the lawn until the product has dried or worked its way into the grass/soil.
Application
Weed and feed comes in two forms: liquid and granular. Liquid forms are simple to apply and kill weeds faster than the more economical, though slower-acting, granular forms. Weed killer spray or liquid weed and feed is designed for small yards. Granular weed and feed covers more area, often 5,000 square feet or more, and is often available in 18-pound bags and larger. Granular versions offer a better value, but users do need to water their lawns after application for the product to penetrate the grass.
FAQs
If you want a pet-safe weed and feed or are curious to know what type is best for killing stubborn weeds, read on for answers to these and other commonly asked questions.
Depending upon the brand, it may take from 5 days to up to 2 weeks to see the visible results of weed and feed. However, natural and organic products may take longer to produce visible results.
As with most gardening or fertilizing tasks, it is best to apply weed and feed in the spring. This is when weeds are actively beginning to grow, which allows the weed and feed to kill the weeds as seedlings. However, some brands do not recommend that the weed and feed become wet after application, so apply the weed and feed before rain—in some cases, at least 24 hours before any forecasts of rain.
Read the manufacturer’s instructions. Some weed and feed products should be applied a day or two after mowing, while others should not. The application time varies by product and sometimes by the season in which the product is used.
Weed and feed is a combination of fertilizer and various weed killers, so these products are not bad for your lawn.
If used properly, pet-friendly weed and feed and many standard weed and feeds are generally safe to use on lawns and spaces where dogs (and even children) are actively playing. However, always follow the package instructions because some herbicides can be moderately toxic to dogs.
Meet the Tester
Stacey L. Nash has written about home and garden products, home design and decor, and general indoor and outdoor home improvement for 5+ years. She’s passionate about research and hands-on testing to find the products that add true value to homeownership and daily life. She lives on 12 heavily wooded acres, where she and her family put home and outdoor products to the test while avoiding bears and cougars.
Additional research provided by Debbie Wolfe.
The post The Best Weed and Feed Products for Fewer Weeds and Greener Grass, Tested appeared first on Bob Vila.
]]>The post The Best Soil Test Kits, Tested appeared first on Bob Vila.
]]>Testing garden soil is the best way to determine what it needs—if anything—and how much. A variety of soil testing kits are available, but how reliable are they? Home gardeners rely on these kits when deciding whether to amend their soil, so to narrow down the best soil test kits, we tested for accuracy, dependability, and ease of use.
Soil testers range from simple pH strips to complex kits that pinpoint deficiencies. Serious gardeners will want to reach for comprehensive tests. As Jon Traunfeld, director of the Home & Garden Information Center at University of Maryland, explains, “We recommend that gardeners have their soil tested by accredited soil testing labs, public or private. A basic test that measures soil pH, important soil nutrients, and organic matter costs $20 to $25. The labs also provide recommendations for lime and fertilizer if needed.” These tests are available directly from labs or through your county extension office.
For the average home gardener though, it can be easier to buy a soil test kit online, so that’s what we tested. To ensure accuracy, we compared product results to test results acquired from the Kansas State University soil testing lab. Our favorite product ended up being the MySoil Test Kit—it was easy to use and the results were simple to interpret, and most importantly of all, they were accurate. Ahead, learn what to look for when shopping for a soil test kit, and find out why the following products are well suited for helping determine soil deficiencies.
- BEST OVERALL: MySoil Test Kit
↓ Jump to Review - RUNNER-UP: Soil Savvy Soil Test Kit
↓ Jump to Review - BEST BANG FOR THE BUCK: Atree 3-in-1 Soil pH Meter Tester Kits
↓ Jump to Review - BEST PH STRIPS: Garden Tutor Soil pH Test Strips Kit
↓ Jump to Review - BEST CHEMICAL TEST: Luster Leaf 1662 Soil Test Kit
↓ Jump to Review - BEST DIGITAL TEST: Luster Leaf 1605 Digital Soil Test Kit
↓ Jump to Review - BEST FOR CROPS: Whitetail Institute Laboratory Soil-Test Kit
↓ Jump to Review - BEST PRECISION PH: Bluelab Soil pH Pen
↓ Jump to Review

Product Comparison
| Type of Test | Tests For | Result Time | |
| MySoil Test Kit | Professional, mail-in | 13 nutrients plus pH level | Results by email within 6 to 8 days of mailing the sample |
| Soil Savvy Soil Test Kit | Professional, mail-in | 14 nutrients plus pH level | 11 days from when the sample was mailed |
| Atree 3-in-1 Soil pH Meter Tester Kits | Analog probe | Moisture, pH, light | Immediate for moisture and pH, 10 minutes for light |
| Garden Tutor Soil pH Test Strips Kit | Strips | pH levels | Within 20 seconds of testing |
| Luster Leaf 1662 Soil Test Kit | Chemical (at home) | pH, nitrogen, phosphorus, potassium | Varies by the test but all within a few minutes |
| Luster Leaf 1605 Digital Soil Test Kit | Chemical (digital results) | Nitrogen, phosphorus, potassium, and pH | Within a few seconds |
| Whitetail Institute Laboratory Soil-Test Kit | Professional, mail-in | Calcium, magnesium, phosphorus, potassium | Results available by email in one week |
| Bluelab Soil pH Pen | Digital probe | pH and temperature | Immediate |
Our Top Picks
The kits we tested had to be accurate and relatively simple to use to earn a spot on this lineup. Test kits and equipment vary by the type of test being performed, so some are better suited to home gardeners, while others appeal to commercial and agricultural growers. We tested a range of kits—some required mailing off a soil sample for professional analysis, some involved chemical testing at home, and others required nothing more than sticking a probe in the soil.
Best Overall
MySoil Test Kit
Our Ratings: Ease of Use 5/5; Accuracy 5/5; Value 5/5
Product Specs
- Type of test: Professional, mail-in
- Tests for: 13 nutrients plus pH level
- Result time: Results by email within 6 to 8 days of mailing the sample
What We Like
- Professional test for pH and a range of soil nutrients and minerals
- Process is clear and straightforward
- Results are detailed and easy to understand
What We Don’t Like
- No print option available on the website
For professional results, check out the MySoil test kit, which allows gardeners to gather soil samples and have them professionally tested. The MySoil kit offers an in-depth analysis, revealing the amounts of micronutrients, NPK, and macronutrients in the tested soil.
With the MySoil kit, we registered online and followed detailed instructions, gathering a large amount of soil from various areas of the property, mixing it together well, and filling the provided testing cup with the soil blend. Then we sent my soil sample to MySoil as well as an additional soil sample to Kansas State University’s agricultural department so we would have a quality comparison.
We received an email 6 days later with the results of the soil tests. We were impressed with the comprehensive results. The lab listed the levels of existing nutrients, including nitrogen, potassium, sulfur, calcium, iron, and more, and then compared our soil’s levels with optimal levels, which were also listed for each nutrient. We also received a bar chart that allowed us to visually compare the results, making them simple to understand.
Best of all, when the soil results from K-State came back, they were very close to the MySoil results, making us feel very comfortable with the quality of the MySoil lab results.
Get the MySoil soil test kit at Amazon or MySoil.
Runner-up
Soil Savvy Soil Test Kit

Our Ratings: Ease of Use 4/5; Accuracy 5/5; Value 5/5
Product Specs
- Type of test: Professional, mail-in
- Tests for: 14 nutrients plus pH level
- Result time: 11 days from when the sample was mailed
What We Like
- Soil-collection instructions are easy to follow
- Results provide detailed recommendations for both synthetic and organic amendments
- Tests for aluminum, which our top pick does not test for
What We Don’t Like
- Could provide a better explanation of the results
- It took the longest of all labs to get results
The Soil Savvy soil test kit offers professional soil analysis and custom fertilizer recommendations. It comes with a scoop, a collection cup containing liquid and a plastic ball, a prepaid postage envelope, and complete instructions for collecting and submitting a soil sample.
As with the other soil samples we sent in the mail for professional testing, used the same soil gathered from various spots and then blended well. We spooned the soil into the cup, sealed it, and then went online and registered the barcode that came with the kit.
The lab took a little longer than we’d anticipated to get back to us, but in 11 days, we got an email directing us to log on for my results. We were impressed by the accuracy of the test results—they were right in line with the K-State results, and we also received customized recommendations for amending my soil to make it healthier. The Soil Savvy recommendations were broken down by synthetic and organic fertilizers—telling me exactly how much of each to apply per 1,000 square feet to amend the soil.
Soil Savvy could have provided a better explanation of the results, however. We understand what nutrient ratios are, but a newbie gardener might benefit from further explanation of what the numbers mean. The lab tested for the 14 most common nutrients plus pH level.
Get the Soil Savvy soil test kit at Amazon or Soil Savvy.
Best Bang For The Buck
Atree 3-in-1 Soil pH Meter Tester Kits
Our Ratings: Ease of Use 5/5; Accuracy 5/5; Value 5/5
Product Specs
- Type of test: Analog probe
- Tests for: Moisture, pH, light
- Result time: Immediate for moisture and pH, 10 minutes for light
What We Like
- Very simple to use and provides immediate or near-immediate results
- Doesn’t need batteries
- Low-effort option
What We Don’t Like
- Only measures moisture, pH, and light
Not all gardeners need or want a nutritional analysis of their soil. Some just want to know the pH level or how much light a plant would receive in a specific location. The Atree soil pH meter provides those answers accurately and at an affordable price.
We tested the Atree meter by inserting it in various spots in our flower garden. Over the years, we’ve added amendments, such as sulfur, to specific areas where acid-loving plants are growing, and we were curious whether this simple tester would pick up on that. It did—the soil around our hydrangeas, which we’ve amended heavily, tested at 6 on the pH scale, while the soil around our daisies registered at 6.8. Both seemed accurate based on our historical knowledge of our soil and the amendments we’ve made.
We then tested both moisture and light levels in various garden spots, and the Atree again seemed accurate. While this tester didn’t determine things like specific nutrient levels, we found that it would be great for gardeners who are happy with the health of their soil but would like to know if the light is adequate or whether the soil is draining well. The Atree did a good job measuring both.
Get the Atree soil test kit at Amazon.
Best Ph Strips
Garden Tutor Soil pH Test Strips Kit
Our Ratings: Ease of Use 5/5; Accuracy 5/5; Value 4/5
Product Specs
- Type of test: Strips
- Tests for: pH levels
- Result time: Within 20 seconds of testing
What We Like
- Quick and accurate pH test results
- Simple to use and read
- Includes 100 test strips for lots of testing at an affordable cost
What We Don’t Like
- Poor packaging likely led to short shelf life
Garden Tutor’s test strips offer quick results in determining indoor or outdoor soil’s acid/alkaline content. The kit contains 100 test strips and also includes a 16-page handbook that lists optimal pH levels for growing various plants.
We found the Garden Tutor soil pH test strips to accurately determine the pH levels in various parts of our flower garden. The simplest of all the kits we tested required mixing soil from a specific garden area with water and then dipping it in a pH test strip. In a few seconds, sensitive tabs on the test strip turned color, and we visually matched them to the color-coded chart on the outside of the bottle to determine the amount of acid or alkalinity of the soil.
We tested the soil in an area we knew had a lower pH, as we’ve added pH-lowering amendments for years. The Garden Tutor test strips determined that level to be 6.1, which sounded close and aligned with other pH tests we performed. We then tested the soil in a spot we knew was more alkaline and got a higher pH reading.
One thing we wish the manufacturer would have included, however, was a moisture-absorbent pack with the strips. We used about 20 strips in our initial tests, and all were fine. Three weeks later, however, the pH pads had all turned brownish, which we suspected was due to moist air getting into the bottle.
Get the Garden Tutor soil test kit at Amazon or Garden Tutor.
Best Chemical Test
Luster Leaf 1662 Soil Test Kit
Our Ratings: Ease of Use 4/5; Accuracy 5/5; Value 4/5
Product Specs
- Type of test: Chemical (at home)
- Tests for: pH, nitrogen, phosphorus, potassium
- Result time: Varies by the test but all within a few minutes
What We Like
- Provided accurate results
- Looks intimidating but it’s relatively easy to use
- No need to send off a sample and wait days for results
- All the components fit into a small kit that’s easy to store
What We Don’t Like
- Did not have enough solution to complete 40 tests
In addition to determining soil’s pH level, the Luster Leaf soil test kit pinpoints the amount of the three most common soil macronutrients: nitrogen, phosphorus, and potassium. There’s no need for the user to send a sample to a laboratory with this chemical test.
When we first opened the Luster Leaf test kit case, we were surprised by the number of vials and bottles of solutions. It didn’t look very easy. After reading the instructions, we found it was actually pretty simple. Testing involved gathering soil, putting a tiny bit in a glass vial, adding a specific liquid and/or powder (depending on the test), and shaking the vial. We were then able to compare the color of the liquid in the vial to an included chart to get the results.
To determine the accuracy of the Luster Leaf tests, we compared the results we got from the mail-in soil tests. The NPK results were close to the lab results. For an at-home test, we were pretty impressed. (The pH, on the other hand, tested lower than the lab tests, but the soil where we took the sample for this test had been previously amended to lower pH.)
The downside? The manufacturer says the kit will perform 40 tests. We found that to be inaccurate. We followed the instructions carefully and had only enough solution to do about 15 tests.
Get the Luster Leaf 1662 soil test kit at Amazon.
Best Digital Test
Luster Leaf 1605 Digital Soil Test Kit
Our Ratings: Ease of Use 4/5; Accuracy 5/5; Value 4/5
Product Specs
- Type of test: Chemical (digital results)
- Tests for: Nitrogen, phosphorus, potassium, and pH
- Result time: Within a few seconds
What We Like
- Digital results are straightforward and very easy to interpret
- Testing just requires inserting the sample and pressing a test button
- Includes a booklet that has pH preferences for over 450 plants
What We Don’t Like
- Only 5 capsules per test for nitrogen, phosphorus, and potash
The second Luster Leaf kit in the lineup tests for nitrogen, phosphorus, and potassium, but it takes some of the complexity out of testing using color-coded capsules. It also takes the guesswork out of matching the results with its easy-to-read digital display. Everything is color-coded: N, P, and K correspond with purple, blue, and orange, respectively, while green is for pH.
We collected a soil sample, filled one of the four test tubes, and then added filtered water to the tube. We shook the soil and water solution, inserted a color-coded capsule in the vial, and shook again. Once the contents were well mixed, we inserted the vial into the hole at the top of the digital reader and pressed the button corresponding to the test.
This was the same test as the first Luster Leaf kit, but it was more user-friendly, and the color-coding made everything understandable. The digital reader gave me the results via a lit-up button. If the soil had too much of a nutrient, it registered as “surplus,” and lower amounts registered as “sufficient,” “adequate,” “deficient,” or “depleted.”
Unfortunately, the digital tester did not show how low or high a nutrient might have been, but we were able to look in the booklet and see optimal NPK levels for different plants, grasses, and flowers. The booklet also offered suggestions on how to amend the soil to raise or lower specific nutrient levels.
Get the Luster Leaf 1605 soil test kit at Amazon or Earth Easy.
Best For Crops
Whitetail Institute Laboratory Soil-Test Kit
Our Ratings: Ease of Use 5/5; Accuracy 5/5; Value 4/5
Product Specs
- Type of test: Professional, mail-in
- Tests for: Calcium, magnesium, phosphorus, potassium
- Result time: Results available by email in one week
What We Like
- Ideal for food plots
- Customizable—write down the intended crop for personalized results
- Detailed results arrive quickly and are tailored to the chosen crop
What We Don’t Like
- Less comprehensive than some other tests
Hobby farmers and crop growers can receive an expert soil analysis with the Whitetail Institute’s Laboratory soil test kit. Growers also receive a custom consultation and recommendations for improving their soil based on the type of crop that will be grown.
For testing, we once again used the same soil gathered from various spots, blended well, and sent the sample to Whitetail. Of the three mail-in soil kits we tested, Whitetail offered the highest level of customization. When we filled out the form, they asked what we planned to grow in the soil. We chose alfalfa and Whitetail sent specific instructions for amending the soil to make it suitable for growing alfalfa.
The nutrient test results were very close to those we obtained from the other labs and Kansas State University, but Whitetail only tested for four nutrients: phosphorus, potassium, calcium, and magnesium. We called the local extension agent and asked why. He said those are the most critical four nutrients for most agricultural crops.
We could access the test results in just one week, and a few days later, a paper copy arrived via snail mail. We found that the Whitetail test kit results would be a boon for farmers or hobby farmers who want to create optimal soil conditions for a specific crop.
Get the Whitetail Institute soil test kit at Amazon, Cabela’s, or Whitetail Institute.
Best Precision pH
Bluelab Soil pH Pen
Our Ratings: Ease of Use 3/5; Accuracy 5/5; Value 4/5
Product Specs
- Type of test: Digital probe
- Tests for: pH and temperature
- Result time: Immediate
What We Like
- Provides very precise pH testing, measuring to 0.1 degree
- Easy-to-see digital readout on a backlit LCD display
- Developed for commercial growing needs
What We Don’t Like
- Must be calibrated before use
For commercial-scale growers, hydroponic growers, or gardeners who want the ultimate in precision pH testing, consider the Bluelab pH pen that provides highly accurate acid/alkaline results. The pen comes with a backlit LCD display and requires a AAA battery for operation. It also features two-point calibration for ensuring accurate pH readings, but the calibration solution is not included.
We had to locate 7.0 and 4.01 pH solutions, and we were able to borrow some of both from the local high school chemistry class, but be aware that if you want to use this pen, you’ll need to buy some of your own.
After calibrating the Bluelab pen, which involves putting it first in one solution and then the other and pushing the calibration button each time, we were able to test the pH and the temperature of the soil of our potted plants. We were surprised at the accuracy of this pen tester as it measured pH to a tenth of a degree and clearly displayed the number on the LED screen. The pH was close to what we had gotten in other tests, but this seemed to be the most accurate of all the tests. The temperature reading was also handy, and it would be vital for hydroponic growers or commercial growers who needed to maintain a specific growing temperature.
Get the Bluelab soil test pen at Amazon or Bluelab.
Jump to Our Top Picks
How We Tested the Best Soil Test Kits
| Testing Stats | |
| Products tested | 9 |
| Time spent testing | 1 hour per kit |
| Tests performed | 9 |
| Price range | $10 to $200 |
Our goal in testing the soil test kits was to determine how accurate each was, how easy they were to use, and how beneficial the results would be for our readers. The types of soil tests varied widely—from professional tests that required sending a soil sample to a lab to simple pH meters that determined a soil’s acid or alkaline level via a probe. We extensively researched dozens of soil test kits and products before choosing which ones to test, and we intentionally chose different types of kits because growers have very different needs.
Misti Mathis, co-owner of Harvest Gold Organics, which sells plant care products out of McKinney, Texas, offers some advice on how shoppers can decide between kits: “Ultimately, the best choice depends on your specific needs and budget. While home test kits won’t be as precise as professional labs, they’re a good option for many gardeners.” She adds that “a professional lab test might be a better choice if you’re facing severe plant growth issues or have unique soil characteristics.”
To help determine the effectiveness of individual lab tests, we also sent a soil sample to the agricultural department at Kansas State University, where they do high-end soil and plant testing. The results from Kansas State were used as a starting point for comparing the other lab tests and the at-home chemical testing kits.
We awarded points for each kit or product, and at the end of testing, we added the points and used them to help determine the best uses and specific awards for each of the kits that earned a spot in this lineup.
What to Consider When Choosing a Soil Test Kit
Many gardeners and home landscapers buy fertilizer and soil amendment products that promise to produce robust plant growth, improve soil structure, or result in abundant blooms. Still, unless the products provide what the soil lacks, the results may not be what the gardener expected. In some cases—such as adding fertilizer to nutrient-dense soil—plants may even suffer from fertilizer burn. Soil testing takes the guesswork out of gardening and landscaping, and that’s why I tested the top soil test products on the market today.
Soil
Soil quality varies from location to location. The soil in some regions might be perfect for growing vegetables and flowers, while the soil someplace else must be heavily amended with organic matter to grow anything. The following four common types of soil have different properties:
- Silt: Fine and soft, silt grains are smaller than grains of sand. Silty soil is associated with prior flooding that washed topsoil downstream. Silty soils are suitable for growing most types of plants but will benefit from adding organic matter to help increase drainage. Depending on its nutrient content, silt may also require a fertilizer.
- Loamy: An optimal blend of silt, sand, clay, and organic matter, loamy soil is a gardener’s best friend. It drains well, yet resists compaction as it dries out. It’s suitable for growing fruits, vegetables, and most types of flowers and shrubs.
- Clay: While clay soil is full of nutrients, it’s composed of ultra-fine particles that stick together when wet and become rock-hard when dry. Plants don’t grow well in clay soil because their roots can’t push as easily through thick clay as they can with other soil types. Clay soil must be amended with organic matter, such as compost, to help aerate the soil and make it suitable for growing plants.
- Sandy: Better than clay because it offers spaces between the grains for roots to grow, but not as nutrient-dense as loam, sandy soil drains well. It is suitable for growing bulbs, such as tulips, and root crops, including potatoes and carrots. When preparing soil for the upcoming growing season, adding organic matter will help it retain moisture when growing other types of plants.
Test Types
Several soil-testing products are available to determine the amounts of various nutrients and macronutrients in the soil. Among the most comprehensive tests are those that involve taking soil samples and sending them to a lab for analysis. Still, at-home kits and instruments like these can be of help.
- Strips: A simple type of soil test, pH strips are coated bits of paper that determine the current acidity or alkalinity level of the soil. The gardener mixes soil with distilled water, using the recommended ratio on the package instructions. (Tap water can influence the pH readout.) After inserting the test strip in the solution, the resulting color of the strip lets the gardener know whether the soil in the garden is acidic or alkaline. A chart usually comes with pH test strips so users can compare the colors.
- Analog: These testers are commonly used to test soil for moisture content, pH levels, and some may even test the quantity of the light in specific locations. They feature aluminum probes to be inserted in the soil when taking readings. Some may use batteries, but many analog testers react to wetness in the ground and often don’t need batteries.
- Digital: Like analog soil testers, digital soil testers often come with probes to insert in the ground to determine moisture content and pH levels. They usually require batteries and may also be used in conjunction with chemical testing to help determine nutrient levels, such as the amount of nitrogen or potash in the soil.
- Chemical: At-home chemical soil tests require adding a drop or two of a specific chemical called a “reagent” to a soil sample. The reaction helps show the health of the soil. Chemical soil tests are suitable for testing one or more factors, including pH, and specific nutrients, such as nitrogen or calcium.
- Professional: The most reliable of all soil tests, professional tests require the gardener to collect a soil sample. The sample is mailed to a laboratory, where it’s analyzed for structure and a variety of nutrients. Then the lab sends the results and soil recommendations back to the gardener.
Testing
Testing kits and instruments commonly help pinpoint soil characteristics. Knowing the makeup of the soil helps you better maintain your garden. Keep in mind that various plants have specific nutrient requirements, so it’s essential to research the plant that will be grown before adding nutrients.
- Macronutrients: The three most common macronutrients needed for healthy plant growth are nitrogen (N), phosphorus (P), and potassium (K). Every bag of fertilizer will list an NPK number that identifies the amount of each of these three nutrients. The types of N, P, and K nutrients come in various forms, such as potassium carbonate for phosphorus, and urea or anhydrous ammonia for nitrogen. In general, all the NPK varieties perform similar functions. The key is knowing which specific nutrient that a plant needs and then using the soil test results to add a fertilizer formulation that helps balance nutrient levels.
- Micronutrients: Plants may require trace minerals as well as macronutrients, and a soil tester that pinpoints micronutrients, such as copper, iron, and manganese, tells the gardener if too much or not enough of these nutrients is in the soil.
- Acid or alkaline: The pH scale runs from 0 to 14, with 7 being neutral. Most garden plants prefer slightly acidic soil, between 6 and 7. However, some plants such as lilac and clematis prefer slightly alkaline soils, while azaleas prefer acidic (5.5) conditions.
- Temperature: Testing soil temperature is much like testing human temperature; the tester has a thermometer that indicates how warm or cool the soil is. This is helpful for commercial growers who want to start production as early in the spring as possible. It also can be helpful for hobby gardeners who want to make sure the soil is warm enough before they set out seedlings.
- Light: Because plants need various amounts of light, a light meter can help determine whether a location will be optimal for a specific plant variety. While plants have different light needs, all need some light for photosynthesis, which is how the plant synthesizes water and carbon dioxide into food. Most at-home light meters will display low, medium, and high lighting conditions. A gardener can use these readings to determine whether a plant is receiving enough light (or too much light) in a specific spot.
- Moisture: One of the most common soil tests is for moisture, and it’s used to determine whether the soil is draining well. Moisture meters usually have a gauge that allows the gardener to see if the soil, whether it’s in a garden bed or is a potting soil mix, is dry, moist, or wet.
Accuracy
Soil test kits vary in accuracy, with professional lab tests ranking as the most accurate. The quality and composition of the soil may also vary from one end of the garden to the other based on the amount of light that a specific spot gets, whether leaves fall and decompose in one spot, or what types of plants were grown there in the past. For example, plants in the legume family, such as soybeans or clover, can add nitrogen to the soil.
Choosing the most accurate test or tester can prove challenging, but look for features such as large, easy-to-read gauges on analog testers and probes that are solidly attached. Chemical kits should offer multiple testing processes for double-checking results, and pH test strips will be most accurate before their expiration date. No matter the individual test kit, gardeners can help avoid mistakes by performing multiple tests in different spots.
Speed of Results
The quickest results come from tests that determine pH and moisture. At-home test kits and instruments can determine these two factors in mere seconds. Testing for other nutrients may take longer, especially if the soil has to be combined with water and then allowed to settle before performing a chemical test.Light and moisture meters can often determine results in a few minutes. Retesting can be done as often as desired to get an idea of light quality during different times of the day and to see whether moisture evaporates more quickly from soil during higher outdoor temps.
The longest wait period comes when seeking professional laboratory results. The gardener must gather the soil samples, place them in a package, and mail the package to the laboratory. Depending on the speed of the lab, it may take a few days to test the sample and then a few extra days to get the results. Some labs can send results by email, which speeds up the process by a couple of days.
Ease of Use
Test kits that feature pH strips and meters with probes are simple to use and self-explanatory for the most part, but the best soil test kits come with directions on how to handle the strips and the probes, in addition to offering information for understanding the relevance of the test results. Chemical test kits can be more complex, but they come with instructions on gathering soil samples, mixing them, and choosing the chemicals to use when conducting specific nutrient tests. Chemical kits often come with charts that explain what the different results mean, such as various color changes that occur when testing for particular macronutrients and micronutrients.
FAQs
The best soil test kit can help a gardener figure out the most beneficial fertilizers or amendments to add to a garden. Below are answers to some common questions about soil testing kits.
If plants are thriving, there’s no need to test the soil. However, if plants seem to wilt, die, or just do poorly, testing the soil could help determine if the problem is due to a structure or nutrient deficiency in the soil.
Absolutely. Many DIY-type soil testers are available for testing everything from moisture and pH to the amount and type of nutrients in the soil. Some involve sending the soil sample to a professional lab—these can yield the most accurate results.
Digital soil testers are usually reasonably accurate. Gardeners can increase accuracy by performing multiple tests in different spots of the garden and comparing the results.
There are several soil testing methods. Soil test kits you can buy for at-home use feature pH strips, analog or digital meters, and chemical testing. They will include directions for the testing method. Professional testing is available by sending soil samples to a lab—you mail in a soil sample and they’ll provide results within a few days or weeks.
A pH test measures the acidity and alkalinity levels of the soil. The acidity of the soil can affect plant health, including how well it absorbs nutrients, so aiming for the ideal pH level for your plant types is one important step toward a flourishing garden.
Soil treatments are available that will either raise or lower the soil’s pH level, depending on what the gardener is growing. These are often called pH-UP and pH-DOWN products. You can also use amendments like garden lime and bone meal (which increase soil pH) and peat moss or sulfur (which lower soil pH) to naturally adjust pH levels in your garden.
Kits with pH strips may expire in a few months, especially if they’re not kept in an airtight container. Meters and monitors will not expire. However, if they’re battery operated, they will require new batteries when the old ones run down. Chemical kits are often good for 2 to 5 years.
Meet the Tester
Glenda Taylor is a product tester and writer specializing in the construction, remodeling, and real estate industries. She and her husband own a general contracting company, and Taylor is experienced in both residential and commercial building applications. She tests a wide range of power tools as well as other home improvement, household, and lawn-and-garden products.
The post The Best Soil Test Kits, Tested appeared first on Bob Vila.
]]>The post The Best Hose Nozzles for Leak-Free Gardening, Tested appeared first on Bob Vila.
]]>Using your thumb to direct the flow on an open-ended garden hose is hardly an effective way to water plants. A good hose nozzle provides superior control and helps prevent the wasteful overwatering that can harm plants. However, with so many options out there, it can be challenging to decide which hose nozzle to choose. We wanted to know whether today’s top-rated nozzles are all they’re cracked up to be, so we tried them out.
We attached the nozzles to garden hoses and cranked up the water pressure, noting how easily they connected, whether they dribbled (no one likes that!), and how well each of the spray functions performed. We watered grass, potted plants, and raised beds in our quest to determine which nozzles would earn a spot in this lineup of the best hose nozzles. After all that testing, we chose the Green Mount New Patent Garden Hose Nozzle as our top pick. It earned that spot as a result of its ergonomic design and the fact that it didn’t leak even a little.
Keep reading to learn some essential tips for choosing the best hose nozzle, and find out the best (and worst) aspects of each of the following products before selecting the right one for your yard and garden this year.
- BEST OVERALL: Green Mount New Patent Heavy-Duty Hose Nozzle
Jump to Review - RUNNER-UP: Twinkle Star Heavy-Duty Brass Adjustable Hose Nozzle
Jump to Review - BEST BANG FOR THE BUCK: Gilmour Pistol-Grip Adjustable Watering Nozzle
Jump to Review - BEST HEAVY-DUTY: Dramm Adjustable Hose Nozzle
Jump to Review - BEST WAND: The Relaxed Gardener Watering Wand
Jump to Review - BEST ERGONOMIC: Green Mount Ergonomic Handle Fireman’s Hose Nozzle
Jump to Review - BEST LIGHTWEIGHT: Gilmour Heavy Duty Thumb-Control Nozzle
Jump to Review - BEST MULTIPURPOSE: Esow Garden Hose Nozzle
Jump to Review - BEST FOR POTS: Dramm One-Touch Rain Wand
Jump to Review - BEST HEAVY USE: Fanhao Garden Hose Nozzle
Jump to Review
Product Comparison
| Type | Material | Spray Variations | |
| Green Mount New Patent Heavy-Duty Hose Nozzle | Pistol | High-density ABS plastic | Spray, mist, jet, shower, soaker, cone, and flat |
| Twinkle Star Heavy-Duty Brass Adjustable Hose Nozzle | Twist | Heavy-duty brass | Fluctuates between jet and cone |
| Gilmour Pistol-Grip Adjustable Watering Nozzle | Pistol | Zinc | Adjustable from narrow jet to wide cone with spray variations in between |
| Dramm Adjustable Hose Nozzle | Twist | Brass | Adjustable from mist to jet |
| The Relaxed Gardener Watering Wand | Watering wand | Steel and molded plastic | 8 |
| Green Mount Ergonomic Handle Fireman’s Hose Nozzle | Twist | Steel, rubber coating | Adjustable, ranging from jet to mist with various shower functions in between |
| Gilmour Heavy Duty Thumb-Control Nozzle | Pistol | Steel, rubber coating | 8 (mist, shower, rinse, soft wash, clean, sweep, jet, and bucket-filling) |
| Esow Garden Hose Nozzle | Pistol | Brushed steel and brass | Adjustable from jet to mist |
| Dramm One-Touch Rain Wand | Wand | Aluminum, rubber coating | Shower (not adjustable) |
| Fanhao Garden Hose Nozzle | Pistol | Brushed steel, brass, rubber coating | 7 (center, flat, jet, shower, mist, cone, and full) |
Our Top Picks
With so many hose nozzles on the market, selecting one can be tough. We put these nozzles through their paces, and we didn’t pull any punches so that our readers will have a good shot at getting a nozzle likely to perform well for years. All the nozzles that earned a spot in our lineup are GHT, so they’re all suitable for garden hoses in the U.S., and each one is a standout in its class.
Best Overall
Green Mount New Patent Heavy-Duty Hose Nozzle
Our Ratings: Comfort 5/5; Ease of Use 5/5; Effectiveness 5/5; Durability 4/5; Value 4.5/5
Product Specs
- Type: Pistol
- Material: High-density ABS plastic
- Spray variations: Spray, mist, jet, shower, soaker, cone, and flat
What We Like
- Nonslip ergonomic grip prevents strain on the users’ hands and arms
- Fireman-type water-adjustment handle for ease of use
- Durable construction prevents any leaks or drips
What We Don’t Like
- Handle is slightly stiff but may loosen up over time
DIY gardeners looking for a high-quality garden hose nozzle may want to check out Green Mount’s heavy-duty hose nozzle. We were certainly impressed. This hose nozzle features a large on-off handle with an ergonomic design that’s easy to grip and a pistol-grip-style handle for control. We were able to select from six spray options by twisting the selector ring, including jet, mist, soaker, and shower. We then adjusted the amount of water pressure by moving the handle forward or backward.
The Green Mount nozzle connected to the hose easily, and it didn’t leak anywhere—not where it attached to the hose and not at the nozzle openings, which was refreshing because we’ve used nozzles that dribbled so much, our sleeves would be soaked.
The construction of this Green Mount nozzle is mostly ABS plastic, making it impact-resistant and durable, but it also features a metal nozzle housing and hose fitting. It comes with a metal mesh screen that users can remove to clear clogged sediment from the nozzle. This garden hose nozzle is well suited for those with various watering needs. The spray options can provide a robust stream of water to clean off sidewalks, a gentle mist for delicate plants, such as orchids, and a soaker for quickly watering large potted plants or shrubs.
Get the Green Mount heavy-duty hose nozzle at Amazon or Walmart.
Runner-Up
Twinkle Star Heavy-Duty Brass Adjustable Hose Nozzle
Our Ratings: Comfort 3/5; Ease of Use 4/5; Effectiveness 4/5; Durability 5/5; Value 4/5
Product Specs
- Type: Twist
- Material: Heavy-duty brass
- Spray variations: Fluctuates between jet and cone
What We Like
- No-leak performance; heavy-duty construction lasts for a long time
- Easy to hold; long design is comfortable
- 4 adjustable spray pattern options integrated to suit any user’s preference
- Comes in a 2-pack
What We Don’t Like
- No padded grip; may not be ideal for some users
If we could only use two words to describe this pair of Twinkle Star twist nozzles, they’d be “rugged” and “dependable.” Some might call these old-fashioned nozzles, but there’s nothing stodgy about high performance.
Each nozzle features rubber O-rings, located in the fitting attachment and in the twisting part of the nozzle, for maximum protection against leaking. There are also four holes in the tip of the nozzle, allowing for twice the water flow of a typical brass nozzle. It was easy to connect the nozzles to the hose, and neither one leaked.
We twisted the nozzles to adjust the water flow to choose between a wide cone of spray, a powerful jet of water, and various shower-type pressures in between. There are no frills with these nozzles, just solid performance.
Get the Twinkle Star hose nozzles at Amazon.
Best Bang for the Buck
Gilmour Pistol-Grip Adjustable Watering Nozzle
Our Ratings: Comfort 2/5; Ease of Use 4/5; Effectiveness 4/5; Durability 5/5; Value 4.3/5
Product Specs
- Type: Pistol
- Material: Zinc
- Spray variations: Adjustable from narrow jet to wide cone with spray variations in between
What We Like
- Well made and functional; ergonomic design prevents fatigue during long periods of use
- Easy to adjust water pressure via the integrated trigger
- Front threads adapt to optional spray tips to suit users’ preferences
What We Don’t Like
- No padded or nonslip grip; may cause some strain to the hands if used frequently
A simple solution to watering control, the all-metal Gilmour pistol-grip nozzle is budget-friendly and durable. It has a small flow-control dial that helps users adjust the water force. Choose from full flow, cone spray, or a sharp stream that’s designed for cleaning tough messes. The Gilmour nozzle is made from zinc to resist rusting. This is another no-frills spray nozzle that offers good performance in a tried-and-true style.
Initially, when we connected the Gilmour nozzle, we had some leaking at the fitting, but upon inspection, we’d overlooked putting the black rubber washer inside the fitting. We added the washer and experienced no more leaks.
A threaded front makes it easier to attach cleaning tools, such as specially designed brushes (not included) for scouring patio furniture, bicycles, and other grimy gear. The trigger-style nozzle has a metal loop at the top of the trigger that locks it in place to make gripping more comfortable, but in truth this isn’t the most comfortable nozzle to use. It’s not padded and doesn’t have a nonslip grip. Yet we still believe this simple watering nozzle is a good product and an excellent price.
Get the Gilmour pistol-grip hose nozzle at Amazon or Little Hardware.
Best Heavy-Duty
Dramm Adjustable Hose Nozzle

Our Ratings: Comfort 2/5; Ease of Use 5/5; Effectiveness 5/5; Durability 5/5; Value 4.2/5
Product Specs
- Type: Twist
- Material: Brass
- Spray variations: Adjustable from mist to jet
What We Like
- High-quality design; long nozzle with twist adjustment allows for ample customization
- Powerful water-jet ability; perfect for washing as well as watering
- Sturdy brass design provides no leaks and is built to last
What We Don’t Like
- No padding or nonslip grip; may cause some fatigue over prolonged use
The second twist nozzle we tested—the Dramm adjustable hose nozzle—proved to be a modest but highly efficient watering tool. A twist of the barrel was all it took to regulate the spray pattern on this all-brass nozzle. When we ran full water pressure, the Dramm nozzle narrowed the stream of water to a high-pressure jet that quickly removed dried mud from a concrete patio.
When we twisted the nozzle in the other direction, it went from jet to mist and between the two extremes ran through a range of shower-like options.
The Dramm is made from solid brass, and it didn’t leak at the nozzle end or the hose end during testing. This hardworking nozzle is designed to last, and it can serve a range of watering needs with just a simple twist.
Get the Dramm adjustable hose nozzle at Amazon.
Best Wand
The Relaxed Gardener Watering Wand
Our Ratings: Comfort 5/5; Ease of Use 4/5; Effectiveness 5/5; Durability 4/5; Value 4.5/5
Product Specs
- Type: Watering wand
- Material: Steel and molded plastic
- Spray variations: 8 (one malfunctioned during testing due to perceived manufacturing error)
What We Like
- Extended reach for watering baskets and pots and cleaning
- Ergonomic nonslip grip is ideal for frequent or long-term use
- Comes with 8 easy-to-change spray patterns
- Thumb control for easy adjustments to the water pressure
What We Don’t Like
- Some users have reported that one of the spray patterns is prone to malfunction
Hose wands can be extremely helpful when watering hanging baskets and hard-to-reach plants. At 15 inches long, the Relaxed Gardener Watering Wand proved to be just the right length to access high baskets while still being easy to handle and store. It has a nonslip ergonomic grip, and we were able to adjust water pressure via the thumb lever.
We scrolled through eight different watering spray patterns by turning the ring at the end of the nozzle. The shower and soaker patterns are excellent on this watering wand, but the Center option dribbled and sprayed off to one side. We inspected the head, and it appeared that something hard was stuck in that specific spray opening—perhaps lodged during manufacturing. We decided that this must have been a fluke, not an inherent design flaw.
The watering wand attached easily to the hose and didn’t leak except for that “center” spray setting. The wand simplified watering high baskets and potted plants while offering a range of other spray patterns that would be suitable for newly seeded lawns, flower beds, and even vegetable gardens.
Get the Relaxed Gardener hose nozzle at Amazon.
Best Ergonomic
Green Mount Ergonomic Handle Fireman’s Hose Nozzle
Our Ratings: Comfort 5/5; Ease of Use 4.5/5; Effectiveness 4/5; Durability 4/5; Value 4/5
Product Specs
- Type: Twist
- Material: Steel, rubber coating
- Spray variations: Adjustable, ranging from jet to mist with various shower functions in between
What We Like
- High-quality construction should last a user a long time
- Large water pressure handle is suitable for multiple uses; perfect for watering, washing, and more
- Rubberized grip is comfortable to hold for long periods of time
What We Don’t Like
- Heavyweight compared to similar hose nozzles
This sprayer nozzle excels at controlling water on even high-pressure hoses, yet while it weighs in at just under 2 pounds—about twice as heavy as the typical sprayer—it’s definitely built for comfort. This Green Mount nozzle features a large fire-hose-style handle that’s easy to grab and move, even with gloved hands, and it also has a nonslip rubber grip.
Inside the attachment fitting, we found a screen designed to keep sand and dirt out of the sprayer. There’s a wide bell-shaped dial that we twisted one way and the other to change the spray pattern from a strong jet to a fine mist, with varying shower-type sprays in between.
This nozzle boasts solid metal construction, so it should last multiple seasons without wearing out, and we felt it was very well made—no cut corners here. The only downside might be for those who experience hand or arm fatigue since the Green Mount nozzle may feel a tad heavy after a while.
Get the Green Mount ergonomic hose nozzle at Amazon.
Best Lightweight
Gilmour Heavy-Duty Thumb-Control Nozzle

Our Ratings: Comfort 5/5; Ease of Use 4/5; Effectiveness 4/5; Durability 5/5; Value 4.2/5
Product Specs
- Type: Pistol
- Material: Steel, rubber coating
- Spray variations: 8 (mist, shower, rinse, soft wash, clean, sweep, jet, and bucket-filling)
What We Like
- Quality construction; ergonomic and durable design for long-term use
- Nonslip handle is comfortable to hold while in use
- Swivel attachment ring can accommodate most garden hoses easily; no twisting required
What We Don’t Like
- Separate steel ring on end of nozzle can be accidentally loosened
Anyone hunting for a lightweight garden hose nozzle may want to give this model from Gilmour a look. Weighing under 10 ounces, it’s one of the lightest pistol-type nozzles we tested. It features eight spray patterns, including mist, shower, rinse, soft wash, clean, sweep, jet, and a bucket-filling setting—all patterns worked well.
Our favorite feature of the Gilmour nozzle was the swivel attachment ring that allowed us to connect it to the garden hose without twisting either the hose or the nozzle. It was simple to spin the attachment ring and securely attach the nozzle.
The thumb-control lever is handy to operate using the same hand holding the sprayer, but this nozzle does have one thing against it: a separate steel ring that holds the spray pattern adjustment ring in place. Rather than a single adjustment ring, the end of the sprayer features an additional steel ring that we inadvertently kept loosening when we twisted the spray adjustment ring. Each time that happened, water would dribble out from under the ring. It held better after we tightened the steel ring using some force, but we feel it would have been designed better without the additional steel ring.
Get the Gilmour thumb-control hose nozzle at Amazon.
Best Multipurpose
Esow Garden Hose Nozzle
Our Ratings: Comfort 3/5; Ease of Use 4/5; Effectiveness 4/5; Durability 5/5; Value 4/5
Product Specs
- Type: Pistol
- Material: Brushed steel and brass
- Spray variations: Adjustable from jet to mist
What We Like
- High-quality materials; made with durable brushed steel and brass
- Loop integrated for the holding trigger; keeps the water running without having to grip the trigger
- Connects easily to standard garden hoses without leaking
What We Don’t Like
- Trigger may be on the short side for some users’ preferences
Right out of the package, the Esow hose nozzle displayed high-end workmanship. Its smooth steel exterior features a brushed finish for an ultrasmooth feel, and its solid brass nozzle tip turned smoothly. There was no mistaking the quality—it simply felt good to hold.
While it’s a basic hose nozzle in design, it features brass and zinc-alloy construction to resist corrosion and make it durable and impact resistant. Its pistol-grip and fine-tune nozzle adjustment make it well suited for multiple uses, from misting the flower bed to washing the car. The spraying patterns range from a jet stream for high pressure to a fan spray for covering a wide area.
It connected easily to our hose, and we didn’t detect any leaks. However, the downside to this nozzle is the length of the trigger. Maybe we just have big hands, but the trigger is barely over 2 inches long with room for only two fingers. If we didn’t use the loop to hold the trigger in the “on” position, our fingers got a little sore after about 10 minutes of constant watering. Other than that, however, this is a top-notch hose nozzle.
Get the Esow hose nozzle at Amazon.
Best for Pots
Dramm One-Touch Rain Wand
Our Ratings: Comfort 5/5; Ease of Use 4/5; Effectiveness 3/5; Durability 3/5; Value 3.5/5
Product Specs
- Type: Wand
- Material: Aluminum, rubber coating
- Spray variations: Shower (not adjustable)
What We Like
- Long 16-inch wand for ample maneuverability in hard-to-reach places
- Optimal for watering pots, washing the car, and/or cleaning the exterior of a home
- Nonslip grip can be held comfortably for long periods of time without fatigue
What We Don’t Like
- Only 1 spray pattern integrated; not as versatile as some other comparable options
The Dramm rain wand has only one spray pattern: a gentle shower that’s just the ticket for watering potted plants. Those who have tried watering potted flowers and shrubs will likely agree that most other spray patterns are either too robust, too wide, or otherwise not well suited to pot watering.
This product delivers a wonderful shower, and the pressure is controlled by a thumb lever at the top of an ergonomic, nonslip handle. The wand features a sloped head that let us reach overhead baskets without accidentally spraying on the other side.
Those in the market for an adjustable spray pattern nozzle may want to look at other options, but folks who have a lot of pots to water will likely be quite happy with this Dramm wand. It’s simple to use and the gentle rain-like, pot-pleasing spray pattern never changes.
Get the Dramm one-touch hose nozzle at Amazon.
Best Heavy Use
Fanhao Garden Hose Nozzle
Our Ratings: Comfort 2/5; Ease of Use 5/5; Effectiveness 5/5; Durability 5/5; Value 3.9/5
Product Specs
- Type: Pistol
- Material: Brushed steel, brass, rubber coating
- Spray variations: 7 (center, flat, jet, shower, mist, cone, and full)
What We Like
- Comes with 7 spray patterns; center, flat, jet, shower, mist, cone, and full
- Easy to connect to any standard garden hose without leaking
- All-steel body components are durable enough to withstand frequent or heavy-duty use
What We Don’t Like
- No rubberized grip; may be harsh on the hands after extended use
Those looking for a heavy-duty hose nozzle won’t be disappointed with this Fanhao model. This nozzle features all-steel body components for durability and a high-density molded-plastic spray adjustment ring covered with rubberized nonslip coating. The sprayer’s brushed-steel finish is soft to the touch, and the trigger, which is nice and long for secure gripping, can be held in place while watering via an attached steel loop at the bottom of the handle.
We liked the high-end construction of the Fanhao spray nozzle, although we would have appreciated a nonslip grip on the handle to match the one on the adjustment ring. When water from the spigot is bitterly cold, the chilly temp transfers through the steel handle of this sprayer, so a coated grip would have been nice. (Tip: Wear gardening gloves for a thermal-resistant barrier between the cold steel and hands).
The Fanhao spray nozzle features seven spray patterns; center, flat, jet, shower, mist, cone, and full. Each one was distinct and functioned well without drips. Water pressure can be controlled with the hand trigger. This sprayer is well-made and designed to stand up to heavy use. If you want a spray nozzle that’s likely to last, it’s hard to go wrong with this one.
Get the Fanhao hose nozzle at Amazon.
Jump To Our Top Picks
How We Tested the Best Hose Nozzles
| Testing Stats | |
| Products tested | 10 |
| Time spent testing | 5 hours |
| Tests performed | 5 |
| Price range | $5 to $30 |
Hose nozzles are simple watering tools, but one that dribbles, leaks, or doesn’t spray as it should can be frustrating and take the fun out of gardening. Our goal in testing the top hose nozzle available today was to determine which performed best and which were well suited for various watering tasks.
We examined each hose nozzle before use and read any accompanying information to make sure we fully understood its purpose and capabilities. To ensure they were working as intended, we checked all the moving parts—handles, spray selection rings, dials, and valves. We inspected the quality of the materials to help estimate potential durability.
We attached each nozzle to the end of a standard garden hose and turned the water pressure up all the way (approximately 55 pounds per square inch, or PSI). We checked for leaks at the connection point as well as from the tip of the nozzle when using each of the available spray functions.
We scored each nozzle using a rubric—awarding points between 0 and 4, depending on how well it performed. At the end of the testing, we added up the points and used them to categorize each nozzle for its best use.
| Comfort | Ease of Use | Effectiveness | Durability | Value | |
| Green Mount New Patent Heavy-Duty Hose Nozzle | 5 | 5 | 5 | 4 | 4.5 |
| Twinkle Star Heavy-Duty Brass Adjustable Hose Nozzle | 3 | 4 | 4 | 5 | 4 |
| Gilmour Pistol-Grip Adjustable Watering Nozzle | 2 | 4 | 4 | 5 | 4.3 |
| Dramm Adjustable Hose Nozzle | 2 | 5 | 5 | 5 | 4.2 |
| The Relaxed Gardener Watering Wand | 5 | 4 | 5 | 4 | 4.5 |
| Green Mount Ergonomic Handle Fireman’s Hose Nozzle | 5 | 4.5 | 4 | 4 | 4 |
| Gilmour Heavy Duty Thumb-Control Nozzle | 5 | 4 | 4 | 5 | 4.2 |
| Esow Garden Hose Nozzle | 3 | 4 | 4 | 5 | 4 |
| Dramm One-Touch Rain Wand | 5 | 4 | 3 | 3 | 3.5 |
| Fanhao Garden Hose Nozzle | 2 | 5 | 5 | 5 | 3.9 |
What to Consider When Choosing a Hose Nozzle

There are several things to keep in mind when it comes to selecting the best garden hose nozzles, but perhaps the single most important criteria is how you plan to use it. For example, a high-pressure nozzle that’s great for washing siding won’t deliver water optimally in the garden. We considered each of the following factors—and tested them when possible—to give our readers up-to-date information about each nozzle on our list.
Plastic vs. Metal
Anything stored outside must endure a lot of wear and tear. However, hoses and their nozzles must withstand more than natural weathering; nozzles in particular may get dropped on hard surfaces or stepped on accidentally.
Plastic can crack when dropped and break down after prolonged sun exposure, while metal better stands up to impacts and the elements. Brass is a preferred material for metal hose nozzles due to its ability to resist corrosion. Some metal nozzles are dipped in a rubberlike coating, and others have a baked-on enamel finish; both methods add durability, protection, and longevity.
For dependability and durability, avoid nozzles made entirely of plastic and consider metal or a plastic-and-metal hybrid. With inner components made of metal and exteriors constructed of molded plastic, hybrids are often lighter than their all-metal counterparts.
Spray Pattern
In addition to water pressure adjustments, most hose nozzles come with adjustable spray patterns that allow users to change the amount and direction of the spray to match the specific watering situation. Need to water a pot? Just switch to the “shower” or “rain” option on the nozzle. Want to wash muddy paw prints from the patio? Switch to the nozzle’s jet function and spray the mess away.
If you’re looking for a versatile hose nozzle, one with a dial for switching between different spray patterns may be a good option. A dial generally provides a range of patterns, from a gentle mist perfect for moistening seeds to a high-pressure jet stream that blasts caked mud off the sidewalk. In addition to mist and jet, these nozzles often have several other patterns, including:
- Shower is ideal for watering the garden and container plantings.
- Flat is designed for fragile plants and young seedlings.
- Cone offers the excellent coverage needed when watering the lawn before a fertilizer application, for instance.
- Soak is designed for watering large trees and shrubs.
While these nozzles offer ample flexibility, if the large range of options is more than you need, a fitting alternative may be a basic metal nozzle that adjusts the spray from a fine mist to a powerful stream with a simple twist.
Pistol vs. Dial
The pistol grip is the most common type of hose nozzle; it has a squeeze trigger that activates water flow. When the trigger is released, the water flow stops. The amount of pressure applied to the trigger adjusts the water flow. Rotating a tiny flow adjuster above the trigger changes the spray from a mist to a jet stream.
A dial nozzle suits those who want more options. The dial usually includes six or more spray patterns, which are adjustable with the turn of the dial on the front of the nozzle. This nozzle type might have a pistol grip or a simple molded handle with a button or a slider to adjust water flow. Both types allow the user to direct the water where needed rather than using a sprinkler that tends to oversoak one area while neglecting another.
The Wand Alternative
Nozzles suit many gardeners for a host of outdoor tasks. But for watering hanging baskets and plants in hard-to-reach places, or for those with physical limitations that make bending difficult, a watering wand might be an excellent solution. Like nozzles, wands come in numerous models, but their length sets them apart. Wands may be anywhere from 10 inches to 25 inches long, and some come with a hooked sprayer head to direct water downward into the pot when watering overhead.
Available in fixed length or telescoping, watering wands can have a single pattern spray head or a dial adjuster at the end. Some have a pistol grip to squeeze with one hand, and others use a button or slider to adjust the water flow.
Another helpful feature included with some wands is a stop-valve trigger near the grip that lets the user control water flow from the watering wand, saving the walk to the faucet to turn it on and off.
Ergonomics
Ergonomic hand tools are designed to help users work pain-free. Comfort is an asset for anyone doing yard work and especially those with arthritis or strength issues in their hands and wrists. For example, maintaining constant pressure on a pistol or a trigger grip can take a toll on the hands, so many of the best garden hose nozzles are designed to stave off hand and wrist fatigue.
No-press grips allow changing water flow with a simple button or a slider that can be manipulated with a thumb. Trigger nozzles often include a metal loop at the top of the trigger that can lock the handle in the spray position and take the pressure off a hand.
Weight is another important consideration. All-metal construction nozzles, while very durable, are heavier than a hybrid made of metal and plastic.
Hose Compatibility
There are more types of hoses than the one that hooks to a lawn and garden hose. Gardeners in the U.S. use a completely different hose thread system than everywhere else in the world, so compatibility with the hose on a hose reel is key.
Nozzles sold to U.S. customers feature the standard garden hose thread (GHT) of ¾ inch. This means that the end of the hose has 11½ threads per inch and features a 1/16-inch thread pitch, which is the angle of the threads.
For basic hose nozzles sold outside of the United States, the common thread in these countries is based on British Standard Pipe (BSP). These fittings are ¾ inch in diameter, and they feature 14 threads per inch.
There also are quick-connect fittings that allow the user to snap a nozzle on and off a hose without unscrewing it. These nozzles will only work with quick-connect fittings on a hose, and they may not be necessary for the average gardener.
FAQs
After learning about the different features of hose nozzles, some new questions might spring up. After all, there are a lot of choices on the market, and you still might not be sure which garden hose nozzle is ideal for you. This section aims to offer that info, as it answers some of the most frequently asked questions about the best hose nozzles.
Finding the best garden hose spray nozzle depends on several factors, and it’s usually on a case-by-case basis. For watering pots, we appreciated the gentle rain-like spray of the Dramm one-touch hose nozzle, and those who might want the comfort of a lighter weight hose nozzle will want to consider the Gilmour thumb-control hose nozzle. While using a hose nozzle takes more hands-on watering time—as opposed to setting a sprinkler and then using a hose timer to turn the water on and off, nozzle is more versatile in its application because it can be used for a range of watering and washing chores.
Watering wands can be tricky, as they’re often too long and cumbersome to be truly useful. The Relaxed Gardener hose nozzle/watering wand is one of the best watering wands, as it lets you reach hanging baskets, but it’s not so long that it’s difficult to handle.
Often, fire-hose-style nozzles offer the most concentrated pressure. They can restrict the opening while still allowing a jet stream of water to flow through for maximum pressure.
There are several reasons a hose nozzle might leak:
If it’s leaking at the hose connection, it’s likely that the rubber ring inside the nozzle is either in poor condition or missing.
If it’s leaking at the tip, the O-rings inside the nozzle might be broken, deteriorated, or missing. Most nozzles aren’t serviceable, so they’ll likely need to be replaced.
The other leading cause for a leak is a crack or corrosion within the nozzle. If corrosion removes metal or creates an uneven seal inside the nozzle, it will leak. Also, if the nozzle was dropped, there could be a crack inside, causing the leak.
The first thing to try to repair a leak is to replace the rubber washer inside the hose connection. Very often, these rubber rings wear down or fall out, causing the handle to leak any time the hose is changed. You also can try wrapping the hose thread with a few passes of pipe tape.
One thing to avoid is overtightening the nozzle, as the leak will probably worsen, and you could ruin the threads on the hose and the nozzle.
Meet the Tester
Glenda Taylor is a product tester and writer specializing in the construction, remodeling, and real estate industries. She and her husband own a general contracting company, and Taylor is experienced in both residential and commercial building applications. She tests a wide range of power tools as well as other home improvement, household, and lawn-and-garden products.
The post The Best Hose Nozzles for Leak-Free Gardening, Tested appeared first on Bob Vila.
]]>A burst pipe or clogged toilet can be a real headache. We depend on the plumbing in our home to function seamlessly so we have clean water to use; cold and hot water running throughout the house in each shower, tub, faucet, and water-using appliance; and the ability to remove wastewater.
But when plumbing isn’t working, the problem needs fixing right away. Many homeowners try to address plumbing issues on their own, but that isn’t always a good idea. “While it’s great that homeowners are interested in tackling some plumbing tasks themselves, it’s important to know where to draw the line,” warns Al Fagundes, founder and CEO of A. Fagundes Plumbing and Heating Inc., with locations in Massachusetts and New Hampshire. “I’ve seen my share of DIY mishaps over the years, and some can be costly,” he says.
We spoke with Fagundes and other professional plumbers to ask what they think are the three biggest DIY plumbing mistakes they’ve seen and been asked to fix. They also offered tips to help homeowners determine which plumbing repairs are typically suitable for DIYers and which are best left to the pros.
1. Over-Tightening Connections
A common mistake that DIYers make is tightening pipe fittings, supply lines, faucet connections, and toilet bolts too much, which can result in cracking pipes or destroying washers. “Many DIYers think that if a little tightening is good, then more is better, but this is often not the case,” says Fagundes. “Over-tightening pipe fittings, especially plastic ones, can actually damage them, leading to cracks and leaks. It can also strip threads on metal fittings, making them unusable.” This can ultimately cause leaks that could have easily been avoided.
The goal should be to create a seal, not to crush the pipes. Fagundes offers a good rule of thumb: tighten fittings until they’re snug and then give them just a little bit more—usually no more than a quarter turn. Use Teflon tape or pipe dope on threaded connections to help create a seal and prevent seizing.

2. Incorrect Use of Sealants and Tape
Another issue occurs when DIYers use duct tape or epoxy fillers incorrectly. Danny Pen, a plumbing and HVAC contractor at New Era Plumbing & HVAC in Dracut, Massachusetts, often sees inexperienced homeowners wrapping Teflon tape backward or using too much of it. “In both of these cases, it causes leaks instead of preventing them,” he says. Pen suggests wrapping the tape clockwise two to three times so it tightens with the fitting.
Understanding which sealant to use for which application is also critical. Teflon tape is great for threaded connections, but it’s not appropriate for all plumbing situations, says Fagundes. “For example, it shouldn’t be used on compression fittings,” he explains. “Pipe dope (pipe joint compound) is another sealant that’s used on threaded connections, often in conjunction with Teflon tape.” Also, using too much sealant can be just as bad as using too little. Excess sealant can squeeze out and create obstructions in the pipes.
Finally, Alex Atkinson, plumber and HVAC technician with Super Brothers in San Jose and Sacramento, California, has walked into homes where residents have attempted to repair a burst or leaking pipe with temporary solutions like duct tape or DIY epoxy fixes. “While these might hold for a short time, they’re not permanent solutions and can lead to costly water damage if they fail,” he says. The temporary patches can easily give out, requiring you to replace entire sections of drywall or flooring due to water damage.

3. Forgetting to Turn Off the Water Supply and Drain Pipes
Another big error is when homeowners forget to turn off the water supply and then drain pipes before they attempt to fix a plumbing issue. “It’s amazing how often DIYers forget (or don’t know how) to turn off the water supply before starting a plumbing repair,” says Fagundes. “This can lead to a real mess—water spraying everywhere, potential water damage to walls and floors, and even the risk of electrical shock if water comes into contact with electrical wiring.”
How can you avoid a disaster? Before tackling any plumbing project, be sure to always locate the main water shutoff valve for your home and turn it off. For smaller repairs, like replacing a faucet, you might be able to use the shut-off valves under the sink or toilet.
It’s also critical to drain the pipes before starting any work on them, says Pen. “This means when they start unscrewing a connection, water still under pressure sprays everywhere, leading to soaked drywall, flooded cabinets, and a mess they didn’t see coming.” Always open a faucet downstream to relieve pressure before doing anything with your plumbing.
Plumbing Repairs Most Suitable for DIYers
When it comes to determining which plumbing repairs are DIY-friendly and which require a professional, consider complexity, risk, and tools, says Atkinson. Make sure you have the proper plumbing tools, including a toilet plunger, plumber’s tape, mini sink and drain plunger, and drain-cleaning auger. You’ll also want to find the proper instructions for each type of repair that you can follow easily.
Here are some straightforward, quick plumbing repairs that can typically be handled as DIY projects:
- Replacing a faucet washer
- Unclogging minor blockage in a drain with a drain snake or a plunger
- Swapping out existing fixtures like faucets and showerheads
- Fixing a running toilet by replacing the flapper
- Tightening a minor leak under a sink (if it’s just a loose connection)
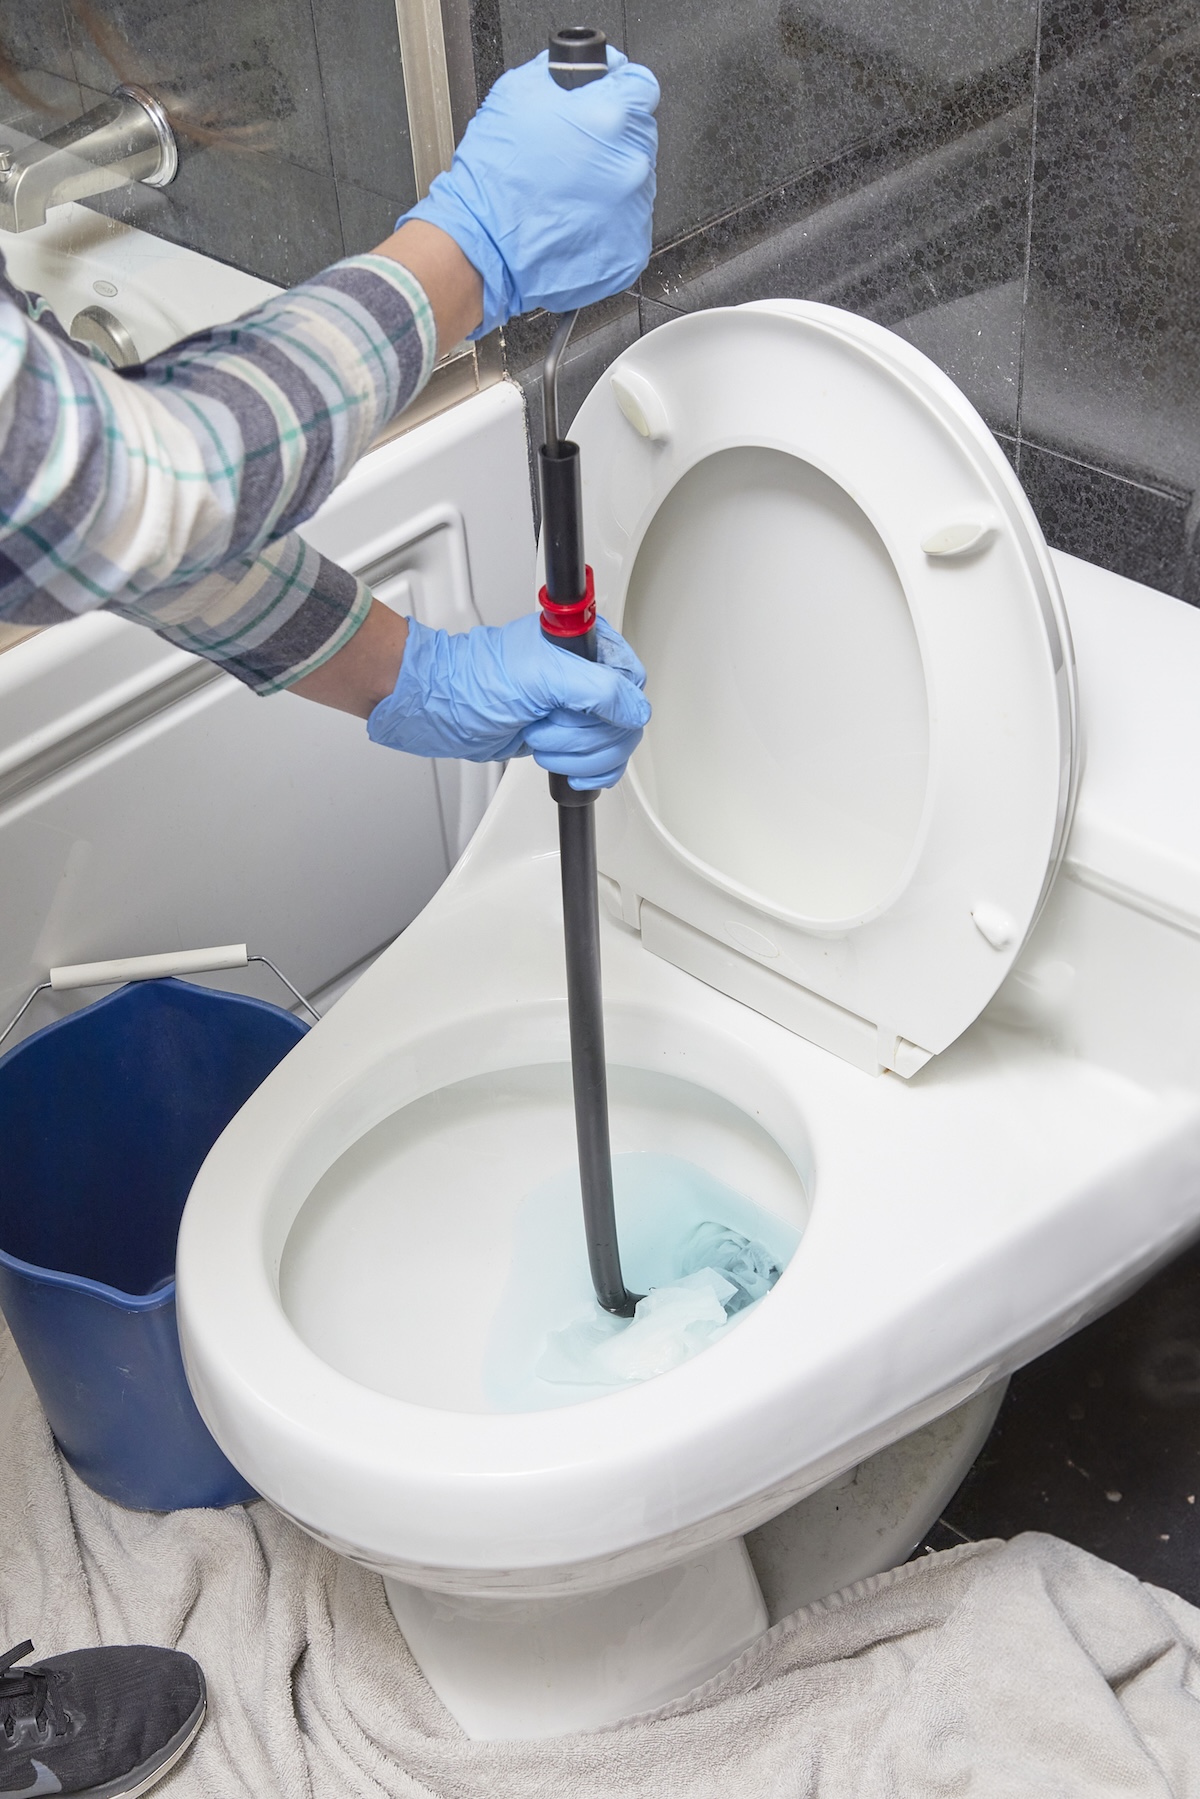
When It’s Time to Call a Pro
On the other hand, sometimes it’s best to hire a professional plumber to avoid DIY plumbing mistakes and ensure the job is done well. The typical cost range to hire a plumber is between $180 and $489, with a national average cost of $331. Costs will vary depending on the plumber’s expertise level, type of service, job complexity, supplies, labor, and geographic location.
Anything that includes cutting into pipes, working with pressurized water lines, or taking care of sewage should be left to a licensed plumber, says Atkinson. “If a mistake has the potential to cause significant water damage, mold growth, or safety hazards, it’s best to bring in an expert who has the training and equipment to handle the job properly,” he says.
A good rule to follow, according to Fagundes, is: “if it’s wet, call a pro.” If the problem involves a significant amount of water or if you’re dealing with drain lines or sewer lines, it’s generally best to call a professional plumber. “Water damage can be very expensive to repair, so it’s not worth the risk,” he says.
If you’re not sure if a plumbing repair is something you can handle yourself, it’s always best to err on the side of caution and call a licensed plumber. Here are some of the more complex plumbing tasks that often require a pro:
- Repairing burst or leaking pipes
- Relocating pipes
- Repairing or replacing water heaters
- Working on any plumbing behind a wall, under the foundation, or involving gas or sewer lines
- Addressing persistently low water pressure
- Figuring out the cause of mysterious leaks
- Addressing major drain clogs
- Installing smart toilets and luxury faucets and fixtures
- Performing any work requiring permits or adherence to local codes
The post We Asked Plumbers the 3 Biggest DIY Repair Mistakes to Avoid appeared first on Bob Vila.
]]>Even the greenest of thumbs can struggle with common lawn issues like patches, snow mold, and pests. As an antidote to wandering a store searching for the right products and hoping that you chose correctly, lawn care subscriptions offer everything for proper yard maintenance — delivered right to your door.
Now, that convenient service, more synonymous with large chains, is available through a local hardware store. Known for providing personalized advice on home and lawn maintenance to its in-store customers, the venerable lawn and garden retailer Ace Hardware is now debuting a lawn care subscription called Ace YardRx—a natural next step on the journey to help even more homeowners work on their landscape.“We’re excited to launch Ace YardRx, a new subscription service that delivers yard care directly to our neighbors’ homes,” said Kim Lefko, Chief Marketing Officer at Ace Hardware.
How Does Ace YardRx Work?
Similar to other lawn care subscription services, the customized lawn care plan is location-based and delivered to customers throughout the growing season—spring, summer, and fall. Each box includes seasonal treatments for lawn growth and nourishment, weed prevention, and pest problems, as well as recommended application dates. Prices are given upfront along with estimated delivery dates for each box. Customers can also pick up subscription boxes in store or curbside.
To get a customized lawn care plan, customers simply create an account and enter their home address. Ace YardRx will use data such as climate, property size, and seasonal growth habits to develop a lawn care plan. Customers can further identify specific issues including insects, diseases, and fungi and filter by product preferences such as brand names, natural ingredients, or concentrates.

Curated Solutions From Local Experts
Local Ace “YardRx-perts” identify the right products for specific regions and issues based on the data you submit. All products ship from local Ace Hardware stores, making pricing competitive and shipping free. Plus in-store experts are available to help troubleshoot or further tailor the products to specific growing zones.
Ace YardRx Takes the Guesswork Out of Lawn Care
Available nationwide, Ace YardRx offers homeowners a lawn care prescription to treat any lawn care problems and get a fast track to a healthy, lush lawn. Simply follow each product’s recommendations for proper application. This program handles everything besides applying the products—or mowing the lawn. For that, a robot mower may be in order.
The post Ace Is the Place—For a New Lawn Care Subscription Service appeared first on Bob Vila.
]]>I’ve never been able to carry a full sheet of drywall alone—until now. Even with a helper, it was always awkward. And plate glass? Let’s just say my wallet took a hit after a costly mishap.
Rating: 4.5/5
DeWalt Grabo Lifter
The first time I saw a DeWalt Grabo, I was intrigued—but skeptical. I’d used glass suction cups before, and they only worked on perfectly smooth, impermeable surfaces.There was no way the Grabo could grip drywall or plywood, or so I thought. I was wrong.
After loading a DeWalt PowerStack battery into the Grabo, I set it on my kitchen counter and pressed the suction button. Instantly, the rubber seal compressed, gripping the countertop like a vise. Within seconds, it was locked tight—and no matter how hard I yanked, it wouldn’t budge. That was impressive, but how would it fare on other flat surfaces? I headed outside to test.
Over the next few weeks, I used the Grabo on virtually every hard flat surface I could find, including drywall panels, plywood, steel plates, and more. I discovered that the Grabo worked even on slightly porous surfaces like concrete pavers. It dawned on me that I’d been lifting things the hard way for years.
That’s when I decided I needed another one—for large, two-person tasks, like carrying heavy marble or travertine slabs. I bought a second DeWalt Grabo Suction Lifter.
So, how does it work? Pressing the suction button activates an internal vacuum that removes the air between the tool and the surface. A dense foam ring around the base compresses, forming a rock-solid seal. I could actually see the Grabo sink down as the suction kicked in. When the (negative) pressure between the tool and the surface reached about -12.1 PSI, the vacuum shut off, but the suction remained.
On semi-porous materials, such as concrete pavers, the suction began to drop slowly after the vacuum shut off, but I could still lift and carry the items. When the suction dropped to around -8.4 PSI, the vacuum automatically kicked back on to increase the suction again. The time it takes for the suction to drop depends on the material being carried. When I tested the Grabo on a clean mirror, the suction barely dropped at all—not enough for the tool to kick back on.


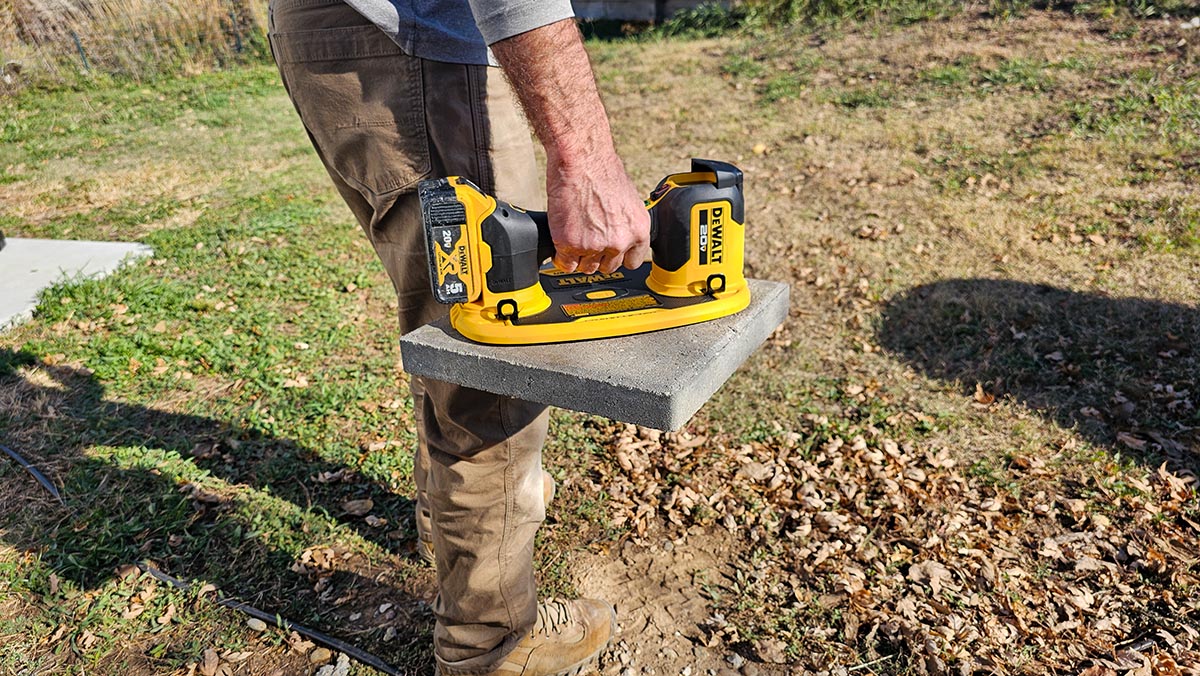


One of my favorite features on the Grabo is its safety button, which prevents accidental activation. DeWalt added a tiny release lever next to the suction start button, which I had to push before I could fully press the start button to activate suction. It only took a few tries before I could do it by feel, but that extra step adds a simple and critical layer of safety.
Like any power tool, the Grabo Suction Lifter may need occasional maintenance. It comes with extra vacuum filters for the small intake holes on the base, and the dense foam seal is also replaceable. Most retailers sell this as a “tool only,” which means you’ll need to buy a separate battery if you don’t have other DeWalt 20V tools. But at $249.00, it’s well worth it for anyone who regularly lifts and hauls panels, glass, or other unwieldy items with smooth surfaces.
Now, I can’t imagine lifting without it.
Where to Buy the Dewalt Grabo:
Meet the Tester
Glenda Taylor is a contractor, product tester, and writer focusing primarily on construction, DIY tools, and home appliances.
The post I Never Thought I Needed a Suction Lifter—But Once I Tried It—I Had to Have Another One appeared first on Bob Vila.
]]>One of the most common ways to update the interior of a home is with fresh painted walls and trim. While it can be easier to paint baseboards when the flooring is a hard surface like tile or wood, avoiding painting baseboards with carpet can cause worn trim to stick out and detract from your makeover efforts.
Some may say that the most surefire method for painting baseboards in a carpeted room is to remove the baseboards entirely, paint them in a separate space, then reinstall the baseboards once the paint has dried. However, if you aren’t careful, you can damage the baseboards during removal or reinstallation, making this a risky and time-consuming endeavor.
Instead, many DIYers touch up baseboard trim and paint the baseboards in place, with great attention and care required to avoid getting paint on the carpet. If you are repainting baseboards in a carpeted room and don’t want to remove the baseboards, follow the steps in this guide to learn how to paint baseboards with carpet.
Tools & Materials
Bobvila.com may earn a commission from purchases made through these links.
Before You Begin
There are a few necessary steps you need to take before painting floor molding—baseboards and shoe molding—in order to prepare the area and make sure that you have everything you need on hand to get the ideal baseboard paint finish. First, you will need to head to a local home improvement store to purchase paint and baseboard painting tools, including a paint brush, putty knife, sandpaper, and painter’s tape. It’s also a good idea to find heat-resistant paint for baseboard heaters if the home has these heating appliances.
Next, it’s important to vacuum the floor before painting baseboards with carpet to get rid of any hair, fluff, or other debris that could mess up the paint job. You will also want to open the windows and doors, as well as setting up a fan to help ventilate the space, especially if you are using paint that is high in volatile organic chemicals (VOCs).
While you can paint baseboards without removing the carpet, you can also try to peel back the carpet and roll it up and out of the way while you work. Since carpet is secured next to the wall with a tack strip, you may be able to lift the carpet off the tack strip to peel it back. However, carpet is often attached to the tack strips under the baseboards, which can make this process difficult. It’s even more difficult to reinstall the carpet when you are done, so this may not be a feasible option for many DIYers based on skill level.
Step 1: Sand and make any necessary repairs to the baseboards.
Some baseboard painting hacks may skip the sanding and repair process. If the baseboards are in poor condition, touch up any minor damages and sand down any old or peeling paint to prepare the baseboards for a new coat. Otherwise, the finished product will just look like you tried to cover up past mistakes.
Use 100- to 180-grit sandpaper to sand down the surface of the baseboards using even pressure and back-and-forth strokes. Apply caulk to any small holes or cracks in the baseboards to make simple repairs and then run a fresh bead of caulk along the edge of the baseboard where it meets the wall to fill in any gaps. Just keep in mind that if there is any severe damage, it’s best to replace the damaged baseboard entirely.
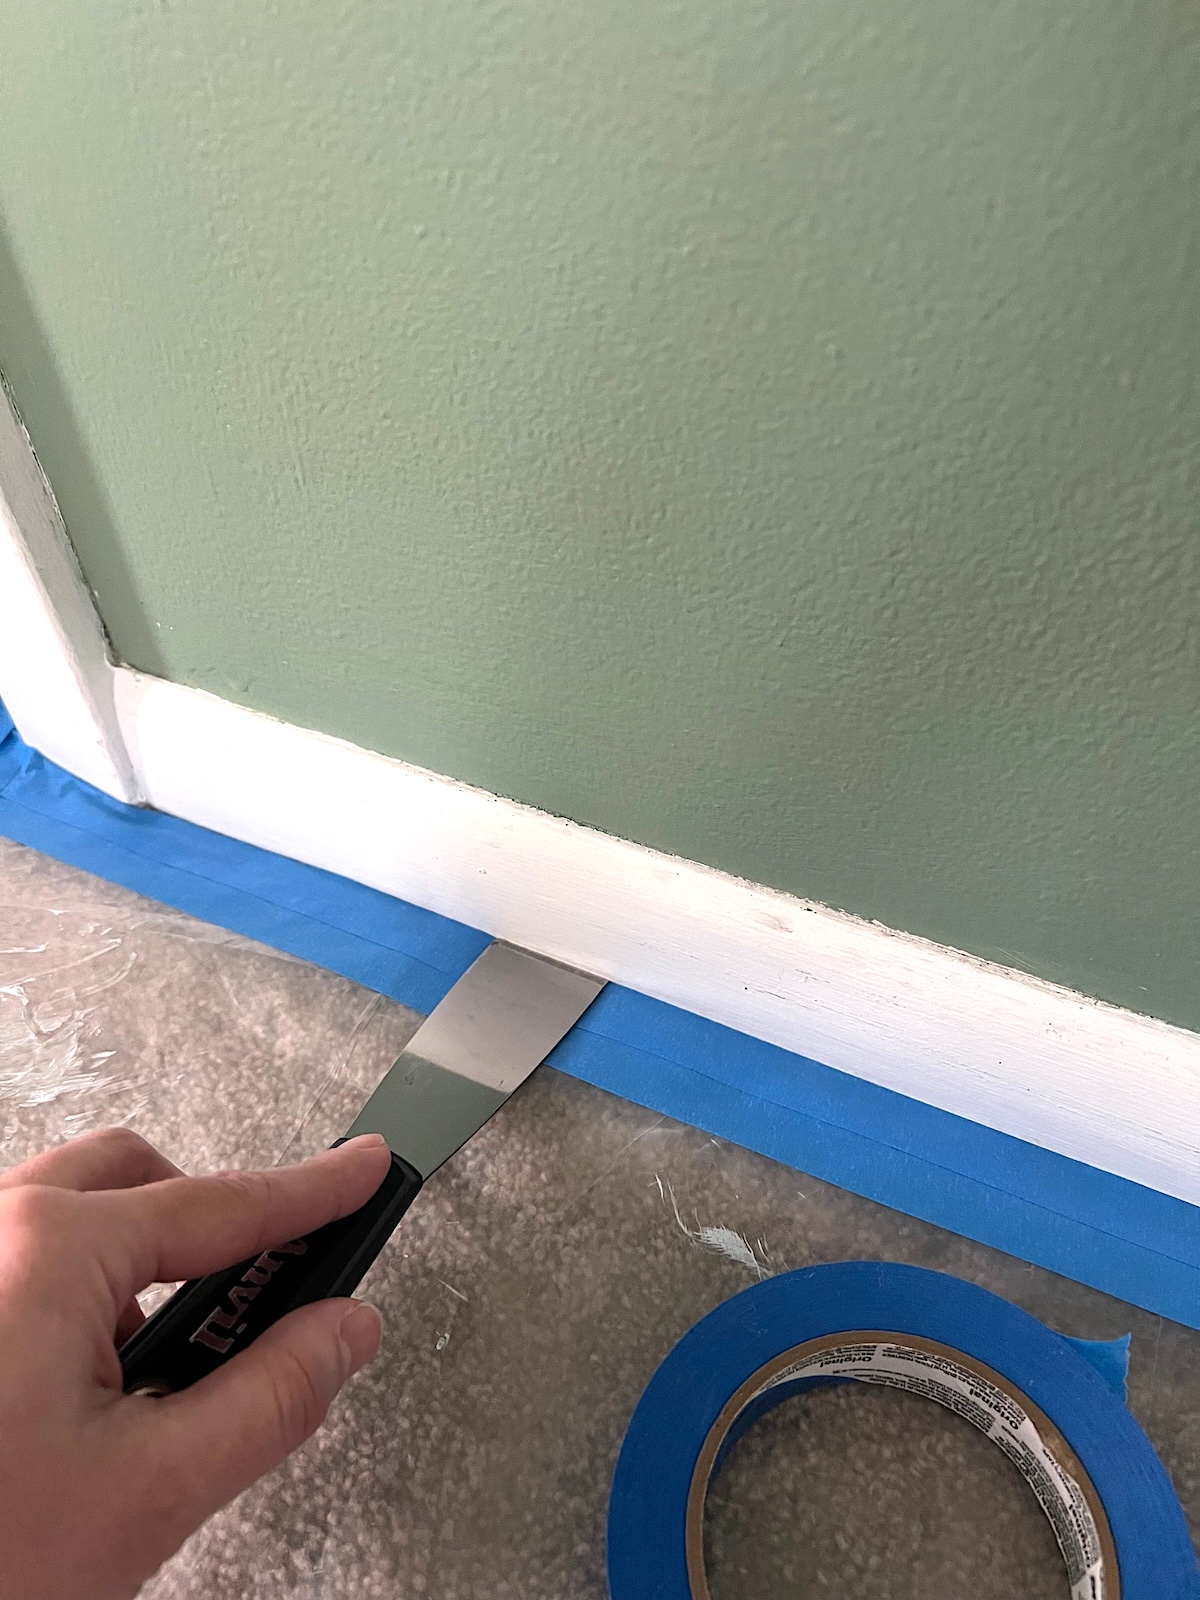
Step 2: Apply painter’s tape and lay down a drop cloth.
The easiest way to paint baseboards in a carpeted room without accidentally painting the carpet is to use painter’s tape to create a protective coating over the carpet nearest the walls. You should also lay down a plastic drop cloth over the rest of the room to avoid dripping paint on exposed carpeting.
It also helps to use a putty knife to press the tape down and under the baseboards for full protection. Since there is usually a decently sized gap between the carpet and baseboard, this process should be relatively easy. If you aren’t confident in just one layer of painter’s tape, apply a second layer to ensure the paint doesn’t seep through.
Step 3: Prep the paint brush.
Once the room is ready to go, you can load up the paint brush with paint. It’s recommended to invest in a paint edger brush for superior control while painting. Cover about half of the bristles when dipping the brush into the paint, then use the sides of the paint can or paint tray to wipe off any dripping paint from your brush. Follow this process each time you dip the brush into the paint to reduce the risk of dripping paint on the floor or walls.

Step 4: Paint the baseboards.
Ultimately, it’s up to you whether to paint the walls or trim first, but once you have started on the baseboards it’s recommended to continue until you are done. Use the loaded-up paint brush to paint along the length of the baseboard either from left to right or from right to left, depending on your personal preference. Just make sure to stick to painting in one direction after you make your choice to achieve the best results.
Apply one coat, then wait for it to dry before applying another coat, if necessary. Usually two coats of paint is more than enough for the baseboards, so after the paint has dried, you can remove the tape and the drop cloth to complete the project.
Final Thoughts
Whether you are painting the entire room, updating the baseboards and trim, or just touching up areas around the room, it’s important to protect the floor. While you may be able to wipe up a few drips of paint from hardwood, spilling paint onto carpet creates a significant problem that is difficult to undo without professional cleaning or replacing the carpet entirely.
With this in mind, when you are painting baseboards in a carpeted room, make sure to take the time to lay down protection and apply painter’s tape under the baseboards to create a secure barrier. Not only will this keep the carpet in good condition, it will also help speed up the painting process, since you can work faster when you don’t have to worry about accidentally painting the carpet.
The post This Is the Easiest Way to Paint Baseboards With Carpet appeared first on Bob Vila.
]]>There are a wide range of sanders and each is designed for specific uses, such as a detail sander for fine furniture or a benchtop drum sander for sanding large pieces of wood or metal. Belt sanders are another great addition to a lineup of sanding tools, as they offer a variety of uses that make them essential for a woodworker’s or metalworker’s tool kit.
Belt sanders are typically handheld power tools that can be either corded or battery-powered. These sanders are highly versatile, though they are commonly equipped with coarse-grit sanding belts that can remove substantial amounts of material in a hurry. Use this guide to learn about a range of belt sander uses and projects these tools can handle around the home.
Our Recommendation: Makita 9903 3″ x 21″ Belt Sander at The Home Depot for $339
This Makita belt sander features auto-tracking belt alignment to help keep the abrasive belt centered on the track even after several sanding passes, and a built-in dust collection bag that reduces the amount of airborne dust by about 65 percent.
Smooth wooden playground equipment.
Wooden swings, sandboxes, and see-saws can develop rough surfaces that make the playground equipment hazardous for your kids. Without proper maintenance, one wrong move could result in cuts, scrapes, or splinters, which is why it’s a good idea to use a belt sander for smoothing and sanding wood surfaces in order to improve the look and safety of the equipment.
While you are working, if there are any uneven areas on the wooden playground equipment, you can take the opportunity to use the belt sander for leveling out these spots to reduce the areas where water may otherwise pool. After sanding smooth, seal the wood to prevent weathering.

Prepare a hardwood floor for refinishing.
Refinishing a hardwood floor can reinvigorate the appearance and texture of the floor, giving the room an aesthetic upgrade without the expense of new flooring. Belt sanders are one of the best sanders for hardwood floors because they can be used to quickly and efficiently remove old floor finishes.
After removing the old finish on the hardwood floor, you can also use a belt sander to prepare the exposed wood for a new finish. Just make sure to work slowly and carefully to avoid removing too much material from the existing hardwood.
Restore a wood gate, fence, or deck.
When you are still learning how to use a belt sander, it’s a good idea to take on a project where there is room for mistakes, like restoring an old deck. Since decking tends to be made of thick pieces of wood, there’s wiggle room if you oversand a bit. You can usually go back and even out the surface with little issue.
Deck boards become rough and cracked over time due to exposure to rain, UV radiation, snow, and ice. By using a belt sander to remove old paint or stain, sand away the top layer of material, and level out any uneven spots, you can expose the smooth layers of the wood below. Similarly, a belt sander can be used for the same purpose on a wooden gate or fence boards. Just be sure to sink all of the fasteners below the wood decking before beginning.
Strip old paint, stain, or varnish.
Many types of sanders can be used to strip old paint, stain, or varnish from a wooden or metal surface, but belt sanders are a top choice due to their ability to quickly and efficiently remove thick layers of material with little effort. However, when you are using a belt sander to strip paint, stain, or varnish, you need to be careful to avoid removing too much material.
Additionally, if you apply too much pressure to the sander, there is a risk of damaging wood, metal, or even plastic materials, making the job significantly more difficult, so make sure to work slowly and diligently if you plan to tackle this type of project.
Pro tip: Always practice on a scrap surface in order to develop a level of comfort with a sander.

Sharpen knives and chisels.
A surprising use for belt sanders is sharpening knives, chisels, and other metal tools. However, it’s important to mention that this process takes some time and effort to learn properly, so you should practice with an old knife or chisel the first couple of times in case you make a mistake.
You can switch between different grit belts to grind, sharpen, hone, and polish the tools to get the ideal result. If you feel it’s too difficult to start with a belt sander, you can also tackle this project with a fixed-base bench sander, allowing you to focus on the tools as you work.
Shape metal contours.
Using a belt sander on metal may seem counterintuitive at first glance, but the power behind these essential tools allows metalworkers to smooth and shape complex contours into softer metals. You can get the desired shape for the metal by using the continuous movement of the sanding belt to follow the curve of the metal surfaces, while applying light pressure to shape the intended contours.
However, if you want to create tight curves or cylindrical shapes, you would be better off using a specialized tube belt sander, which is typically designed to wrap the sanding belt around the contours of the metal.

Level uneven wood, metal, or plastic.
One of the most well-known uses for a belt sander is to level an uneven surface. These tools can be used on wood, metal, or even plastic to quickly and efficiently grind away material, allowing you to smooth and level surfaces.
The best belt sanders can quickly switch out sanding belts so you can choose the correct grit depending on the amount of material that needs to be removed and the target material you are working with. Carefully move the belt sander across the material to gradually level uneven areas and achieve a flat, even plane.
The post This Is Why You Need a Belt Sander in Your Home Workshop appeared first on Bob Vila.
]]>The post How to Sharpen Hedge Trimmers appeared first on Bob Vila.
]]>If they’re properly sharpened, power hedge trimmers are a great time saver over manual trimmers for maintaining neat hedges and other landscaping. If your power trimmers are continually getting jammed and are chewing instead of slicing through branches, however, it’s probably time to sharpen the blades.
As is the case with lawn mower blades, knives, and other sharp implements, you can bring trimmers in for professional sharpening, but you can save money by handling this job yourself. Follow the simple steps below on how to sharpen hedge trimmers.
Why It’s Important to Sharpen Hedge Trimmers
Sharpening your hedge trimmers allows you to make quick work of that pruning job, plus it contributes to the health of your plants. “Letting your trimmers go dull is like trying to cut steak with a butter knife,” says Bryan Clayton, a longtime landscaper and CEO of GreenPal, a company that matches homeowners with landscaping services. He says with dull blades, “You’ll end up tearing your hedges rather than cutting them cleanly, which can lead to unhealthy plants prone to disease.”
RELATED: AUDIO: Bob Vila Explains How to Sharpen Hedge Trimmers
Best Power Hedge Trimmer
Black+Decker 20V Max Cordless Hedge Trimmer, $64.98 at Lowe’s. This Black+Decker tool can cut through branches 3/4 inch in diameter. It has a padded front handle and enough battery power to trim up to 3,000 square feet.
To discover other top-performing tools in this category, read our tested guide to the best hedge trimmers,
How often should you sharpen your hedge trimmers?
While you don’t need to sharpen your hedge trimmers often, you’ll need to give them a little TLC every now and then. “A good rule of thumb is to sharpen them at the start of the season, then check them every 50 hours of use,” Clayton says. It’s worth the time, he says, since “dull blades make your job harder.”
There are telltale signs that your hedge trimmer has dull blades:
- Frequent jams: If branches and foliage are getting jammed in between the hedge trimmer’s teeth, it’s likely because the blades aren’t sharp enough to cut through the material.
- Ragged cuts: Your hedge trimmer should cut cleanly through twigs and branches. If they’re chewing through them and leaving ragged cuts, then the blades are dull
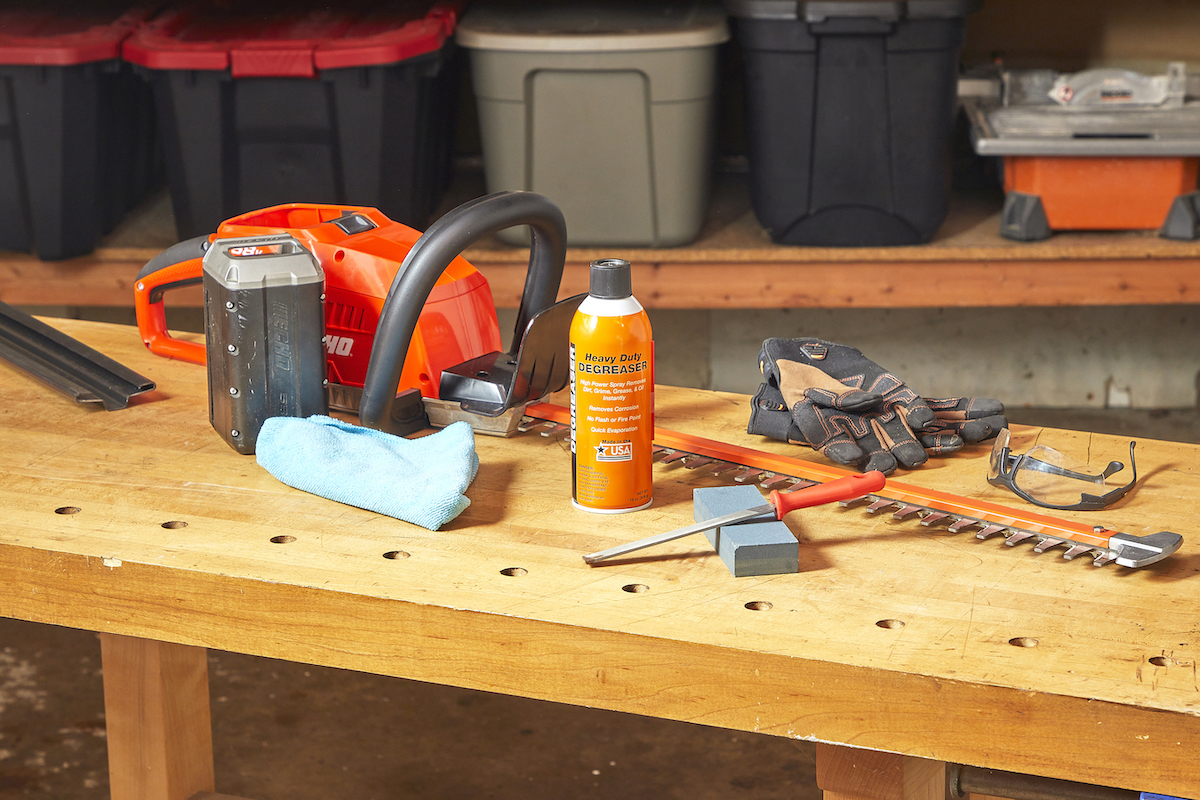
Types of Hedge Trimmers
Power hedge trimmers come in several types, including gas, corded, and cordless electric models. Whether you own gas hedge trimmers, electric hedge trimmers, or battery-operated hedge trimmers, you’ll use the same process to sharpen the blades.
Tools & Materials
Bobvila.com may earn a commission from purchases made through these links.
Project Overview
Working Time: 1 hour
Total Time: 1 hour
Skill Level: Intermediate
Estimated Cost: $10 to $15
Before You Begin
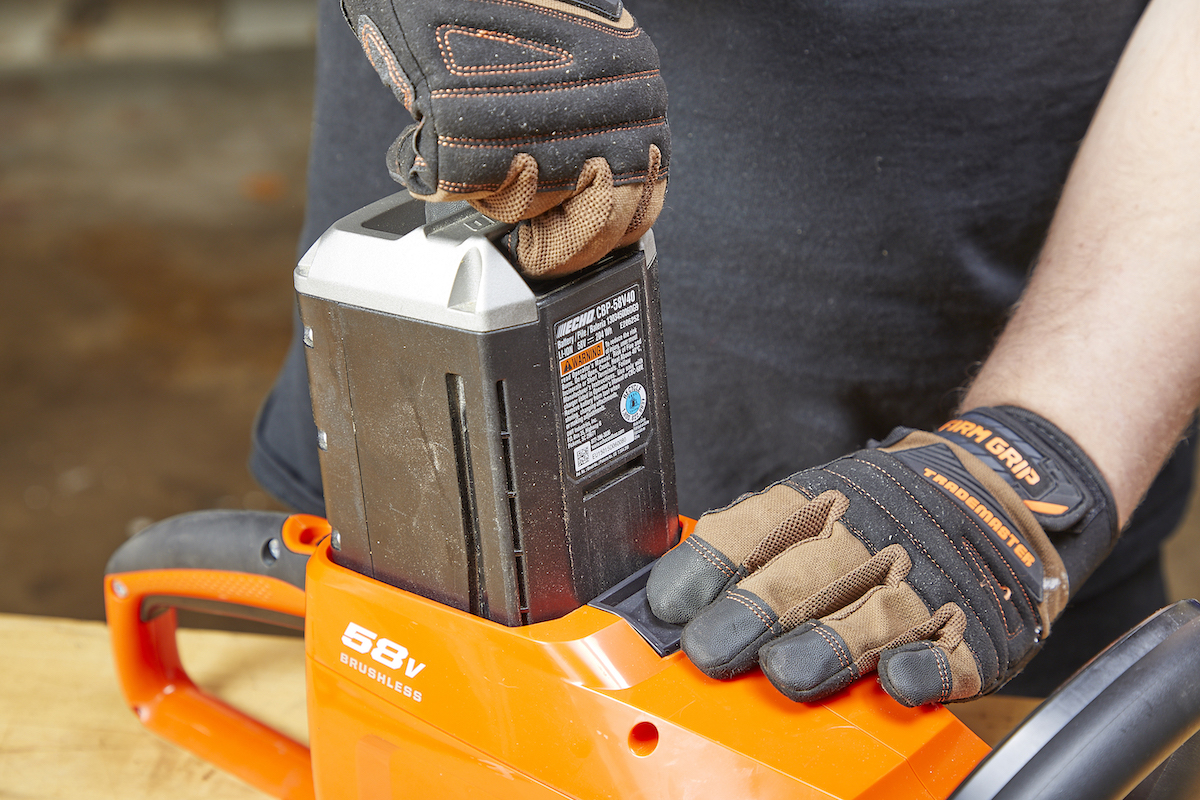
Sharpening a hedge trimmer involves working around blades and filing, which can send metal shavings airborne. Take the required safety precautions before getting started. “Wear gloves and eye protection,” says Clayton. “Always unplug electric trimmers before you start, and for both types, make sure the trimmer is securely clamped down or held in a vise.” If you are maintaining battery-powered hedge trimmers, remove the battery.
How to Sharpen Hedge Trimmers the Right Way
Step 1: Clean the trimmer blades.

Hedge trimmer blades often end up clogged with sap and pieces of branches and leaves. Start by removing any debris that’s caught in the trimmer’s teeth. Spray the blade with a little WD-40 to break down any sap that’s stuck to the blade. Give it a few minutes for the solvent to work its magic, then use a cloth to wipe the blades clean.
Step 2: Misalign the trimmer blades.
If the blades are aligned over top of each other, you’ll need to misalign them to expose all the edges so you can access each one with the file. Use a flathead screwdriver to reposition the blades so that each one is accessible.
Step 3: Sharpen with a flat file.
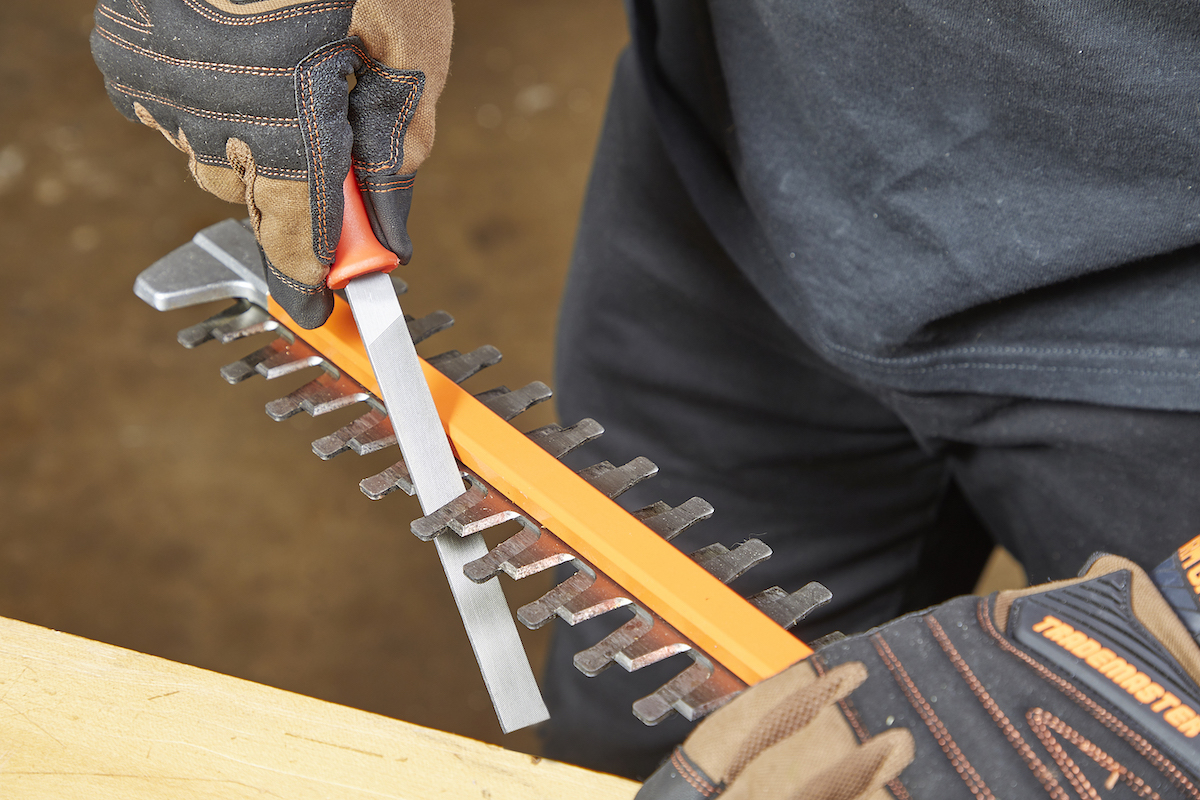
Using your flat file, sharpen each blade individually.
- File in the direction of the cutting edge only. Don’t use a back-and-forth sawing motion, since a flat file is designed to remove material in one direction only.
- Filing using the correct angle is crucial to getting a sharp edge. Check your trimmer’s manual for the proper angle for the specific hedge trimmer.
- File with care. Removing too much metal from the blades can weaken them, making the trimmer unusable.
- Be consistent with the number of strokes you make on each blade to ensure they’re a consistent length when done. “Just focus on sharpening the top edge of each blade, maintaining the original angle, and whatever you do, don’t touch the flat bottom side,” Clayton says. “That’s your guide for keeping the cut accurate.” After sharpening one tooth, move onto the next until you’ve sharpened each one.
Step 4: Use a whetstone to remove burrs.
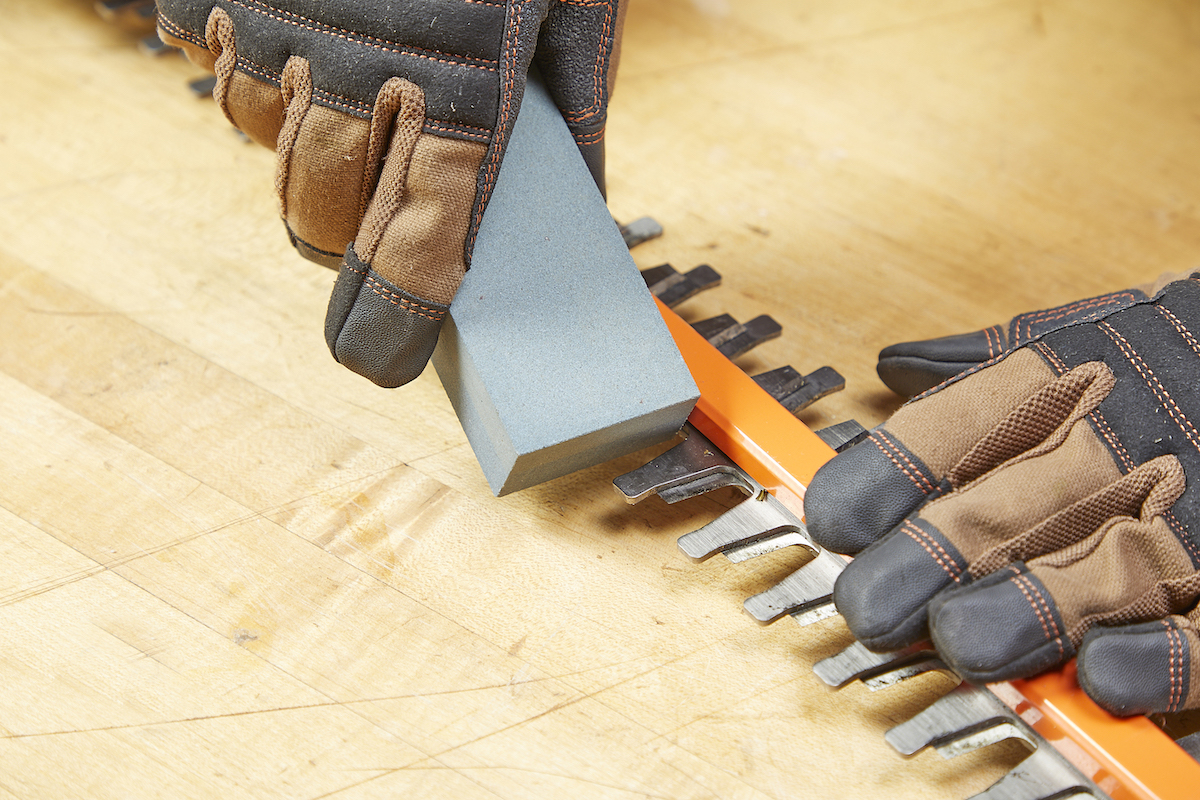
Run a whetstone over the sharpened blades to remove any burrs that formed during sharpening. Remember, the blades cut by sliding against each other like a pair of scissors, so removing burrs that can interfere with this action is crucial.
Step 5: Spray with resin solvent.
Sharpening your hedge trimmers also removes any corrosion protection that was on the blades. Before you put the hedge trimmers back into service, you’ll need to restore that protection by applying a resin solvent to the blades. Spray the solvent onto the blades and wipe off any excess resin.
Final Thoughts
While learning how to sharpen hedge trimmer blades isn’t difficult, there is some risk to doing it yourself. Over-sharpening the blades can weaken them, making your hedge trimmer unusable. “Sharpening hedge trimmers isn’t rocket science, but it does require a steady hand and a bit of know-how,” Clayton says. “If in doubt, taking them to a professional isn’t just playing it safe; it’s ensuring your tools last longer and perform better.”
The post How to Sharpen Hedge Trimmers appeared first on Bob Vila.
]]>The post Cleaning and Preventing Black Mold in the Bathroom appeared first on Bob Vila.
]]>People spend about 90 percent of their time indoors, so keeping indoor air healthy is a must.
Mold is a fungus that’s plentiful in the natural environment and, when conditions are right, indoors as well. The bathroom is damp, and often warm, so it can be a favorite spot for black mold to grow.
According to Donald Weekes, a certified industrial hygienist in Ontario, Canada, and a member of the American Industrial Hygiene Association (AIHA) Indoor Environmental Quality Committee, “there is something in the neighborhood of 200,000 different types of mold.” Since it’s natural, alive, and goes airborne, mold can happen just about anywhere, Weekes says. Read ahead to learn what conditions support mold growth in your home, how black mold can make you sick, and what to do about black mold in a bathroom.
What is black mold?
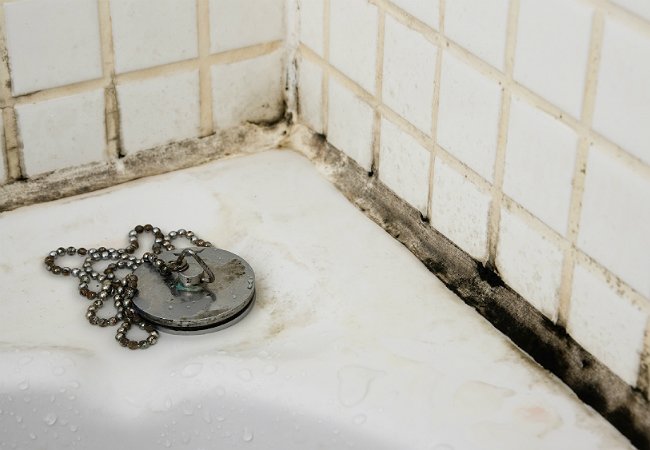
The black mold species Stachybotrys chartarum is an aggressive and highly toxic mold variety that might be best removed by a professional. It’s among the world’s 10 most hazardous fungi. “Black mold, in particular, produces mycotoxins,” says Kenny Key, CEO and founder of Lead and Mold Detectives in New York. Those can lead to health problems, especially in the respiratory system.
It can be difficult to tell whether a fungus in your bathroom is black mold vs. mildew or another mold variety. But even as you consider the health effects and identification markers of black mold below, note that the experts we consulted agree that you should address any signs of mold, regardless of type. ”If you spot any mold in your bathroom—whether black or not—it’s important to take action immediately,” says Laura Linn Knight, author of The Toxic Mold Solution: A Comprehensive Guide to Healing Your Home and Body from Mold. Leaving any mold in place too long, especially without addressing moisture, can increase the chance the problem will progress to black mold.
Black Mold’s Impact on Health
Exposure to any mold over time can lead to health effects. The type and range depend on “the type of mold, the level of exposure, and the individual’s sensitivity,” says Knight. Potential health effects of mold exposure and black mold symptoms include:
- Respiratory issues—black mold exposure can cause or worsen asthma. Other signs are wheezing, coughing, sneezing, shortness of breath, and sinus infections.
- Allergic reactions, such as skin rashes, watery eyes, and even swollen eyes.
- Headaches, such as migraines
- Fatigue, dizziness, or vertigo
- Brain fog and difficulty concentrating
- Abdominal pain, nausea, bloating
- Mental health effects such as anxiety or depression.
The mycotoxins in black mold “can cause chronic fatigue, nausea, vomiting, and neurological symptoms like dizziness, confusion, and sometimes memory loss,” says Key. Knight says that mycotoxins can interfere with brain function, “contributing to mood swings, memory problems, and increased stress levels.” If you don’t address mold exposure like black mold in the shower, you can have “chronic, long-term health issues, including chronic respiratory problems and neurological effects,” says Knight.
How to Identify Black Mold in the Bathroom

Before knowing how to get rid of black mold in the bathroom, learn what conditions support mold growth. First, Weekes says to look for the three things mold needs to thrive: mold spores, a porous surface they can latch onto, and high humidity/moisture. Drifting through the air, mold spores eventually land on a moist surface amenable to mold, like cellulose, and “they’ll most likely land on that surface and grow,” says Weekes.
To tell the appearance of black mold from other molds, look for a dark patch that forms in a circular pattern. “Black mold typically is darker in color, a black or greenish-black, and usually looks wet,” says Key. “Black mold also has a very distinct musty smell that can help in identification,” he says.
Still, black mold could lurk under bathroom floors or inside walls. The only sure way to identify black mold is to take a sample and test it—either by asking professionals to come in or by using a black mold test kit. Once you confirm the bathroom mold type and extent of the problem, you can learn how to remove black mold safely or seek professional help.
Before You Begin
Cleaning mold requires that you be near the spores. If you attempt to remove black mold, “you need to wear protective gear,” says Key. This includes gloves, goggles, an N95 respirator mask, and long sleeves. “Make sure you have proper ventilation in the area in which you’re working,” Key advises. Further, use similar caution when turning to various cleaning products; follow all instructions on the container and never mix chemicals, especially ammonia and bleach.
Follow these protective measures to minimize exposure. If you notice any health effects from being near the black mold, it’s best to stop working and have a professional take over. Likewise, if you are uncertain about the type of mold or extent of the problem, notice significant water damage, or see that black mold covers more than 10 square feet of surface area, turn to a professional remediator instead.
How to Clean Black Mold From Bathroom Surfaces
SUPPLIES
N95 respirator mask
Rubber gloves or chemical-resistant gloves
Eye goggles
Distilled white vinegar
Detergent or antifungal cleaner
Hydrogen peroxide
Rags, sponges, or a scrub brush
BleachAmmonia
Without testing the mold, it can be difficult to know in advance what works best to kill black mold or another type. If uncertain and facing a small amount of stain, start with milder household products and move on to harsher ammonia if necessary. “Generally speaking, it’s the simplest product that works best,” says Weekes. When deciding how to eliminate mold in bathroom fixtures or walls, always consider the surface type, partly to avoid abrasive tools that might scratch the surface. In addition, porous surfaces can absorb all liquids, as well as the mold spores you can see.
How to clean hard surfaces, like ceramic tiles and bathroom countertops
Follow these directions for nonporous surfaces and fixtures include toilets, porcelain sinks, some shower or floor tiles, mirrors, and vinyl shower curtains. Unless they are sealed well, grouts and many types of caulk are porous.
- Spray the area with your preferred safe cleaner, such as distilled white vinegar or a mixture of vinegar and household detergent. You could also use undiluted 3% hydrogen peroxide or a commercial antifungal cleaner (follow manufacturer’s directions.)
- Let the cleaner sit for several minutes, then spray again just before wiping.
- After wiping the cleaner on the surface, check your results.
- If mold remains, spray again and scrub with a brush or abrasive scrubber. Dry the area thoroughly and assess whether the cleanup was effective.
- If mold remains after cleaning, clean the area again with ammonia and water (10 percent ammonia to 90 percent water).
- If the problem persist, you may need to call in the experts.
The easiest way to clean a vinyl shower curtain is to remove it and soak it in a large tub or container filled with water and about a cup of white vinegar (or bleach if the curtain is colorfast) for about an hour.
Only turn to bleach if necessary when cleaning black mold in bathrooms. Biocides like chlorine bleach kill living organisms such as mold, but the EPA does not recommend them for routine mold cleanup, even on nonporous surfaces. Weekes says the suggestion for years has been to use “water and about a 10 percent solution of ammonia.” You also can opt for a commercial product designed to kill mold, but check it carefully for safety precautions for surfaces and ventilation.
How to clean porous surfaces such as grout, ceiling tiles, and walls
Porous materials allow moisture—and mold—to penetrate their surfaces. In a bathroom, this might include wood, walls, wallpaper, carpet, unsealed grouts, caulk, and ceiling tiles. According to Weekes, mold will latch onto surfaces “made up of cellulose, like paper and wallboard.” He says the porous materials are “soft and chewy, which is why most problems are in walls and ceilings.” Even moisture-resistant wall materials like greenboard can take in mold if a shower surround or wall was not designed or installed properly or if excess moisture and mold have been allowed to sit on the walls.
Again, although you might see advice about using bleach to kill mold, apply that only to nonporous surfaces. “You don’t want to use bleach on a porous surface,” says Key. It could make the problem worse, since water in the bleach will penetrate the porous surface and add to moisture. Plus, Key says “black mold has a protective outer layer that bleach doesn’t penetrate effectively.”
- Select your treatment option. As with hard surfaces, start with the simplest or mildest option. White vinegar can help kill mold since it penetrates porous surfaces, and its acid could help rid crevices of mold.You also can use a commercial mold cleaner designed for multiple surfaces—follow package directions. If you have a small patch of black mold, skip right to the 10 percent ammonia and water solution.
- Spray the product on the affected area and let it sit for a few minutes.
- To avoid soaking the porous surface, wipe the area with a cloth or sponge, since a brush could harm porous surfaces.
- To avoid soaking the porous surface, Wring out the cloth or sponge if you dip it in a solution or as it becomes damp from wiping.
- Gently wipe the wall again with a wrung-out sponge or cloth dipped in clean water.
- To clean grout, dip a toothbrush in the cleaning solution and scrub the grout lightly before wiping with a cloth or sponge dipped in clean water and wrung out.
- Help the porous surface dry quickly by opening windows or directing fans toward the cleaned area.
- Let the wall dry for 24 hours if possible before checking results.
- If mold persists, repeat steps above or call in a pro.
According to the EPA, mold in ceilings and carpet can be difficult to impossible to remove since it fills the empty spaces and crevices of the porous materials. It is generally better to replace moldy ceiling tiles, carpet, or any large section of wall affected by mold.
When to Hire a Professional for Bathroom Mold Remediation
Tackling small spots of mold and mildew are easy DIY tasks and important bathroom maintenance to prevent black mold. But it’s important to know when you should call in a mold remediation professional instead. Professionals have the equipment and expertise to return your home to a safe state. They also can make recommendations on how to prevent mold from coming back in the future.
“Times to call in a pro are when it’s more than 10 square feet of mold, or if there is structural damage like mold growing on the walls, ceilings, or floors,” says Key. If mold is hidden behind walls, under carpet, or in your HVAC system, he explains, you need a professional remediation.
“Call in a pro…when it’s more than 10 square feet of mold, or if there is structural damage like mold growing on the walls, ceilings, or floors.”
— Kenny Key, CEO and founder of Lead and Mold Detectives
Your health and sensitivity also are factors, say Key and Knight. For example, those with asthma or allergies shouldn’t tackle black mold removal. “If you are sensitive to mold, I suggest hiring a professional to remove even a small amount of mold,” says Knight. Key adds: “If there is extensive water damage from flooding or minor damage in the bathroom from a leak,” you need a pro to treat that as well.
Key says to look for a licensed company in your state. All states have some type of certification for professional mold remediators. The AIHA maintains a list of industrial hygiene and environmental health and safety consultants. Mold inspection costs typically average around $656, but some companies will waive this fee if the customer hires them for remediation services.
Black mold removal costs start at about $1,223 and average about $2,300. Homeowners insurance may cover mold remediation, depending on the circumstances.
How to Prevent Mold in Your Bathroom

The best way to address black mold in your bathroom is to prevent mold from growing and to address any mold or signs of moisture damage immediately. “Prevention is a matter of maintenance more than anything else,” says Weekes. This includes making sure your home is sealed from outside moisture, that you’re not seeing condensation on windows, mold on windowsills, or water activity on surfaces, and that your home has adequate ventilation.
Clean your bathroom regularly.
Thoroughly clean the bathroom weekly; this consistent regimen should keep mold spores from taking hold and running amok. If you see signs of bathtub mold or other mold or mildew, rotate an antifungal cleaner into the routine at least once a month. Store a spray bottle of vinegar in the bathroom, then apply it and let it air-dry after every shower or bath. And don’t simply paint over mold on walls; take steps to clean the spores first.
Keep bathroom surfaces dry between uses.
To prevent black mold in the shower, use a squeegee to remove water droplets from the shower walls, then towel down glass doors and tile to remove the remaining moisture from those surfaces. It’s even helpful to dry the floor, dry off shampoo bottles, and hang damp towels elsewhere. Prevent black mold in a bathroom sink by wiping the basin out after each use. If you see signs of black mold in a bathtub or around it, be sure to drain it completely, wipe down wet edges if necessary, and check for signs of cracks in or black mold in bathroom caulk around the tub, shower, windows, or sink.
Take steps to eliminate moisture from leaks or a poorly sealed home.
“One of the main contributors to mold growth is excess moisture,” says Knight. “Fix any leaks in your bathroom plumbing or shower as soon as possible to prevent water from pooling or seeping into the walls,” she says. When the weather allows, open your bathroom window after a shower. Add moisture-loving plants like orchids or peace lilies to soak up some of the moisture and green up the space.
Running an exhaust fan for at least 30 minutes after fogging up the bathroom with showers or laundry if located there can help, but if you already have mold spores, use caution. “Most bathroom vents go directly up into the attic,” says Weekes. The attic probably has plenty of porous and cellulose surfaces for those spores to grow. If your exhaust fan vents to the outside, it can help. However, Weekes says, the best ventilation comes from your air conditioning system.
Use mold- or moisture-resistant construction.
“When renovating or maintaining your bathroom, consider using mold-resistant products,” says Knight, who says that new products like mold-resistant paperless drywall, vapor barriers or retarders, are always coming on the market. Opt for nonporous surfaces when possible, and ensure that all caulks, grouts, and joints are properly sealed to prevent water from seeping through cracks.
Final Thoughts
According to Weekes, cleaners and other efforts help control mold, but you can’t be completely free of this living organism. “Mold has survived for hundreds of thousands of years. Anything that you can throw at it will not be completely effective,” he says. Still, managing moisture, regularly cleaning spores from surfaces, and getting rid of any black mold with these steps or through professional remediation can help. If black mold returns or spreads after you try to kill it, turn to a licensed mold removal company to help eliminate existing mold damage and correct issues like moisture or poorly constructed shower walls that support its growth.
The post Cleaning and Preventing Black Mold in the Bathroom appeared first on Bob Vila.
]]>A couple of months ago I got the Dewalt 735 Planer to help expedite board prep for woodworking projects. I wanted the flexibility to use wood from a variety of sources, but flattening boards and matching thicknesses has never been my favorite part of a project. Sanded “project” lumber is prohibitively expensive and limited in scope. Hand planing is slow, and router planing requires a clunky jig. After years of workarounds, I finally splurged on the right tool for the job.
As a brand, DeWalt enjoys broad-based customer satisfaction across its array of power tool offerings, and I’ve had positive experiences with the DeWalt jobsite table saw and router I’ve been using the past few years. After initially testing it in combination with a Rikon 8-inch jointer, I’ve been using the 13-inch planer to clean up edge-glued panels, and for dimensioning a couple of log-to-lumber milling projects in my workshop. In this DeWalt planer review, I’ll share my observations after two months using the DeWalt DW735, including the pros and cons that I’ve experienced, and why I’m confident that I made the right choice.
Rating: 4.7/5

DeWalt Planer DW735
| DeWalt Planer DW735 Specs | |
| Motor | 15-amp |
| Cutterhead | Three-knife, 10,000 RPM |
| Maximum width | 13 inches |
| Maximum thickness | 6 inches |
| Feed rate | Two-speed 196 CPI or 79 CPI |
Testing the DeWalt Planer DW735
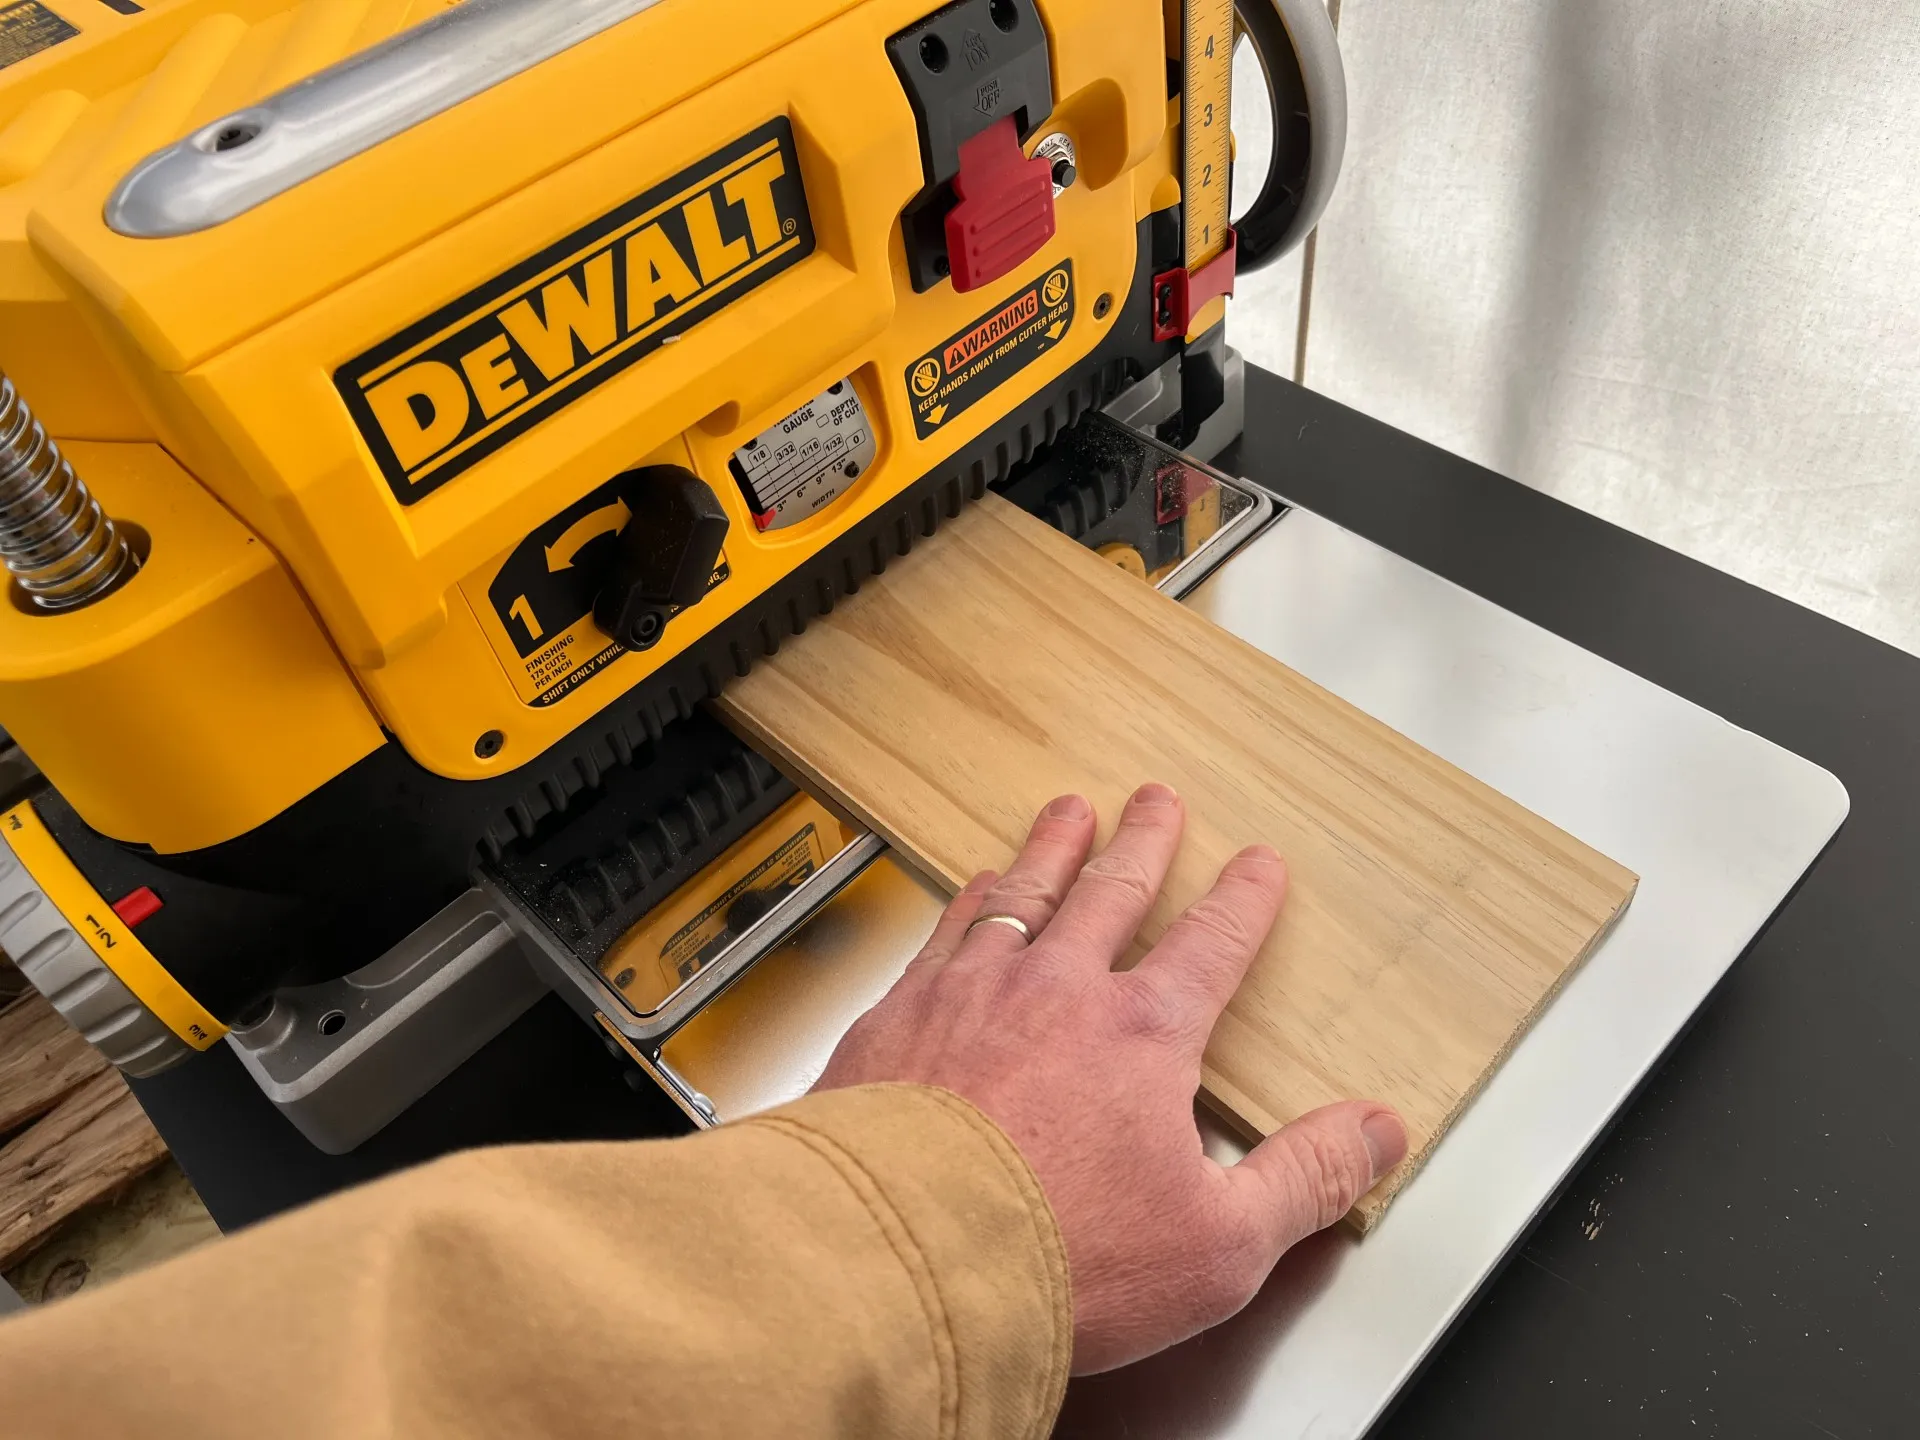
Store-bought lumber is milled within a fairly wide error-tolerance range that can leave woodworking projects looking rough unless you take the time to match the pieces. The usual way to match boards is by using a jointer to remove cupping and warping, which creates one flat face, then planing the other face down to a set thickness. Alternatively, both of these functions can be completed using only a planer with the help of a shop-built planing sled—an effective option for boards that are too wide for the jointer. The planer smooths the surface, but more importantly, it evens out the board thickness while also making it possible to match thicknesses from one board to the next. I’ve tested this planer both ways.
Over the past couple of months I’ve used the DeWalt 735 Planer with and without the jointer as project circumstances have dictated. I used it while preparing boards for glue-ups, and for final surfacing after gluing. When I wanted to make lumber from an oak log, I used a sled with the planer to flatten the surfaces, then matched thicknesses of the rough-cut boards. I’ve logged about 12 hours on the planer so far, which has been enough time to know that this is exactly the tool I was looking for and that I’m glad I fought the urge to buy a cheaper model. The heavy build and powerful motor give it ample stability and steady cutting power. The thickness selector makes it easy to avoid over-planing while precisely matching boards, and the finished pieces come out with very little snipe or chip-out.
| What We Like | What We Don’t Like |
| Automatic carriage lock | Larger than other bench planers, very heavy |
| Fan-assisted dust port with impeller | Requires dust collection add-ons |
| Material removal gauge for quick set up | |
| Heavy-duty height adjustment system |
Helpful Features Boost Productivity and Minimize Mistakes

This model has been around long enough to become “exhibit A” when woodworkers need a point of reference with regard to thickness planers. It accepts workpieces up to 13 inches wide and 6 inches thick, and is capable of removing up to ⅛ inch layers per pass. Powered by a 15 amp motor, the cutter rotates at 10,000 revolutions per minute (RPM), while the two-speed rollers feed at either 14 or 26 feet per minute. The three-knife cutterhead extends production time between blade replacements up to 30 percent compared to 2-knife models. The two-speed gearbox allows the operator to choose either faster planing at 79 cuts per inch (CPI) or a smoother finish at 196 CPI.
A few key features set DW735 apart from other planers on the market. First off, it weighs a hefty 92 pounds, which is up to 40 pounds heavier than other popular models. The extra weight hints at better-than-average durability, and more importantly the weight boosts working stability. Another unique feature that I haven’t seen anywhere else is the fan-assisted dust port. Unlike other planers that require an external dust collection vacuum to pull the chips away, this machine is equipped with an impeller and fan that grinds up the shavings and blows them out—all the way across the shop, if not attached to a collection bag.
One of the handiest features is the material removal gauge. It helps when setting up the first pass on a face-jointed rough board. I can place the board beneath the spring-loaded gauge and crank the carriage down until the gauge needle indicates the amount of material I want to remove, then turn on the motor and plane as normal. The planer also has several automatic thickness settings that, when selected, will prevent accidentally making the board too thin.
Hard to Lift, Easy to Operate
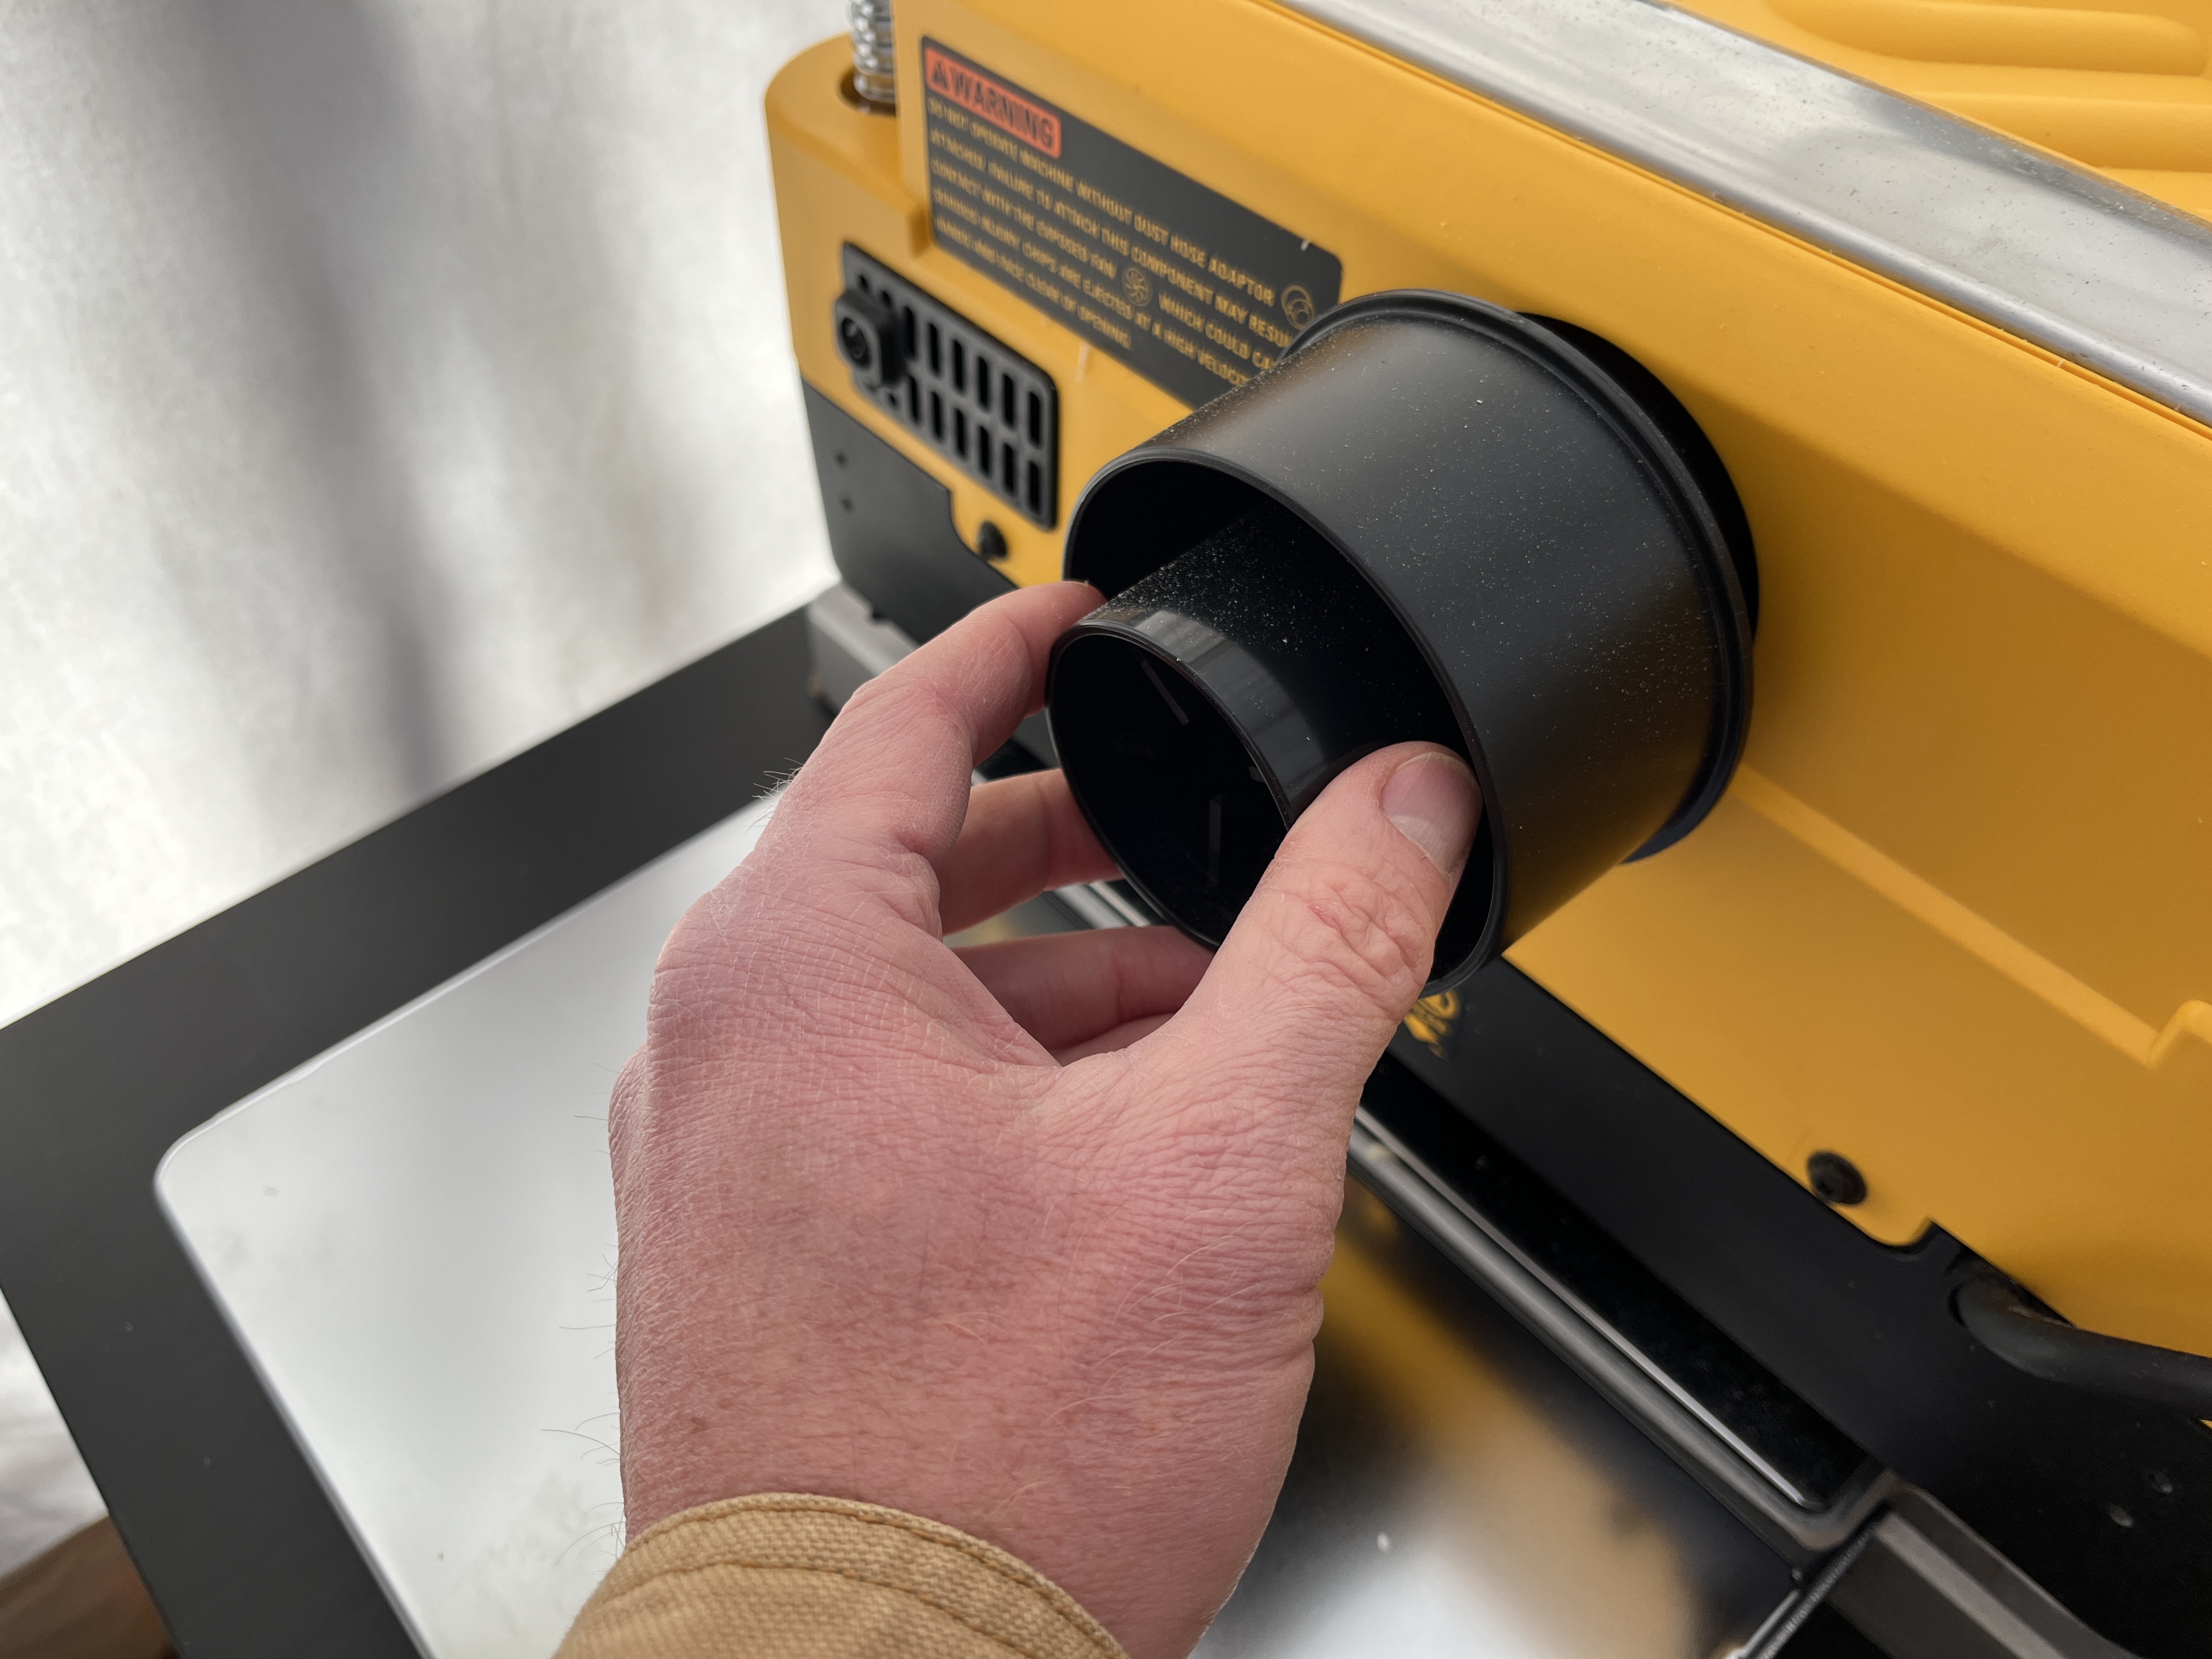
I had minimal experience with thickness planers before I got the DeWalt DW735. I had borrowed one a couple of times, but was not proficient. I spent the evening after it arrived setting it up and reading the owner’s manual to make sure I wouldn’t break anything or get injured. Turns out, the biggest risk was that I might throw my back out trying to move it. I recommend getting a helper any time you need to pick this machine up. For shop use, a dedicated planer stand would be a smart addition.
It only took about 15 minutes to set up the planer and assemble the infeed and outfeed tables. I actually purchased the DW735X kit, which is the same machine as the DW735 but includes the infeed/outfeed tables, dust port adapter, and an extra set of knives. The unit is pretty much plug-and-play, but opting for the tool-only unit will require just a bit more setup.
After adjusting the carriage height for my plank, I flipped the switch and sent the piece through. I decided to test the planer outdoors since I don’t have a dust collection system, and I’m glad I did. When I ran the first test piece through I was amazed to see the wood shavings blown up to 20 feet away. The noise level was much louder than I anticipated, so I put on a set of over-ear hearing protectors and kept working. I experimented with different removal thicknesses, tried out the material removal gauge, the thickness selector, and the different feed speeds on a pile of pine and hardwood scrap. Everything worked as expected and there was basically zero learning curve.
Plenty of Cutting Power, Silky Smooth Finish, Consistently Accurate

So far I have used the DeWalt Planer DW735 on store-bought poplar and yellow pine lumber, blanks split from an oak log, and various cutoffs and reclaimed boards. I mostly work with pieces that are less than 4 feet long. It has delivered excellent results on everything I have fed it. Neither the feed rate nor the cutting speed seems to be affected by the hardness of the wood. Hardwood, softwood, fresh and sappy or old and dried boards, the finished faces always come out clean and smooth. Thickness accuracy has been pretty much perfect too, although it does produce a bit of snipe.
Snipe is a ubiquitous issue with benchtop planers. The snipe section averages about 15 thousandths of an inch, measured with a digital caliper, and runs about 3 inches back from the board end. Raising the infeed-outfeed tables a bit has helped, but the best solution I found was to either run longer boards and cut off the snipe, or send a sacrificial board through just ahead of the good board.
The DW735 has a maximum planing depth of ⅛ inch. I usually plane no more than 1/16 inch at a time, often as little as 1/32 inch. The owner’s manual cautions against planing the maximum depth on 13-inch wide boards due to the strain it would place on the motor. In order to provide a full review, I did test the maximum depth on 8-inch-wide lumber. On the nearly flat surface, the full-depth cut seemed (audibly) to strain the motor some, but it did not affect the feed rate or the appearance of the finished surface.
Why I Think the DeWalt DW735 Planer Is Worth Every Penny

I am a firm believer in “buy it once, use it forever,” and the DeWalt DW735 feels like that kind of tool. Based on 2 months of fairly intensive hobby-level use, it has done everything I’ve needed exceedingly well. The blades have remained sharp, the cutter and carriage structure is perfectly sturdy and still exactly square with the feed table. The adjustment mechanisms are dead-on reliable. Just as importantly, it comes from a highly-regarded, time-tested brand that also has an excellent track record for product support. When I eventually need replacement blades, I don’t have to worry whether or not I’ll be able to get them. I think that the price is fair for that level of performance and peace of mind.
Buy the DeWalt 735 Planer on:
- Amazon for $599.00
- Lowe’s for $599.00
- The Home Depot for $599.00
- Rockler for $599.00 (with extra knives and infeed/outfeed table)
- Byrd Tool for $1,695 (with Shelix helical 40-insert cutterhead upgrade)
Product Comparisons
| DeWalt Planer DW735 | Grizzly Planer G0940 | Hercules Portable Planer | Craftsman Benchtop Planer | Oliver Machinery 10045 Planer | |
| Motor | 15-amp | 15-amp | 15-amp | 15-amp | 15-amp |
| Cutterhead | Three-knife, 10,000 RPM | 30-insert helical, 8,500 RPM | Three-knife, 9,700 RPM | Two-knife, 8,000 RPM | 36-insert helical, 10,000 RPM |
| Maximum width | 13 inches | 13 inches | 12.5 inches | 12.25 inches | 13 inches |
| Maximum thickness | 6 inches | 6 inches | 6 inches | 6 inches | 6 inches |
| Feed rate | Two-speed 14 FPM or 26 FPM | 25 FPM | 25.3 FPM | 26.2 FPM | Two-speed 17 FPM or 26 FPM |
| Price | $599.00 | $870.00 | $399.99 | $349.00 | $999.99 |
So, is the DeWalt Planer DW735 right for you?
A power planer can be a big help in the wood shop. Flattening and choosing custom-thickness for rough-cut boards is far less expensive than buying sanded-four-sides (S4S) project lumber at a retail store. Your shop-planed boards will be more consistent than those at the store, and it gives the option to use wood from other sources, like local sawmills or your own logs. A planer also allows for flattening multiple-board panels after gluing them together.
Not every workshop needs a thickness planer. Other workarounds can suffice until buying one is necessary or fits into the budget. If it’s time to buy a benchtop planer, the DeWalt 735 is one of the best options available. The DW735 is not the cheapest or most expensive option, but it offers outstanding performance for the price, and is backed by a support network that offers replacement knives and other parts and accessories to keep it in top condition. You’ll get the best value from the DW735X kit, which includes the infeed/outfeed tables, or for the smoothest possible finish and extra-long cutter life, it is available with the Byrd Tools Shelix upgrade cutterhead pre-installed.
Meet the Tester
Mark Wolfe is a writer, product tester and serial DIYer who lives in an older home. When he isn’t writing, he spends his time upgrading, repairing, and replacing anything and everything in his home, yard, and garden. He tests and writes reviews about hand and power tools, lawn care and home repair products, and outdoor living goods.
The post In Just 2 Months, This Tool Has Transformed My Workshop appeared first on Bob Vila.
]]>The post What Are the Tiny Black Bugs in My House Near the Window? appeared first on Bob Vila.
]]>Finding tiny black bugs in the house, especially near windows, can be an unsettling experience. These pests may be harmless nuisances like ants or carpet beetles, or they could signal a larger pest infestation that requires immediate attention.
Understanding what type of bugs have invaded your home, what attracts them, and how they’re getting inside is key to removing them quickly and preventing future problems. This guide covers common household bugs, effective removal methods, and prevention strategies to keep your home pest-free. If the infestation persists, a professional pest control service may be the best solution to eliminate the issue for good.
Identifying Tiny Black Bugs
For those who aren’t entomologists, distinguishing small black bugs in the house can be tricky. Many species look alike, but these key features help with identification:
- Size: Tiny black bugs that look like specks of dirt look much different from bugs over a millimeter long.
- Color: Some insects that seem black from a distance actually appear dark red, brown, or gray up close.
- Patterns & texture: Unique markings or body textures can set certain bugs apart.
- Body structure: Ants have three body segments, while ticks only have two.
- Legs: Insects have six legs, while arachnids (like spiders and ticks) have eight.
- Wings: Whether or not the bugs have wings can help narrow down the type.
By noting these characteristics, you can more easily determine which tiny pest has invaded your home.
Types of Small Black Bugs
1. Ants

Ants are one of the most common household pests, often entering homes through tiny cracks in search of food and water. Different types of ants may be found near windows:
- Carpenter ants: These large black ants tunnel through wood, potentially causing structural damage.
- Little black ants: These tiny ants form large colonies and often invade kitchens and bathrooms.
- Fire ants: Recognizable by their reddish color, fire ants are aggressive and can sting, causing painful welts.
To manage an infestation, it’s important to seal entry points, clean surfaces to remove scent trails, and use bait traps to eliminate colonies.
2. Flies

Flies are common pests found near windows, often attracted to food, moisture, or organic matter. The most common types include:
- Houseflies: These dark gray flies are about ¼ inch long and hover near garbage, dirty dishes, or decaying food.
- Phorid flies: Smaller than houseflies, phorid flies have a distinct humped back and prefer damp environments like leaky windows or drains.
- Drain flies: Also known as moth flies, these fuzzy-winged insects breed in slow or clogged drains and are common in bathrooms and kitchens.
Preventing fly infestations involves maintaining cleanliness, sealing food properly, and repairing any moisture issues around windows.
3. Mites

Mites are tiny, often microscopic pests that thrive in household environments. Two common types include:
- Clover mites: Often mistaken for black specks, reddish clover mites leave a red stain when crushed. They are attracted to moisture and can invade homes in large numbers.
- Carpet mites (dust mites): Too small to see with the naked eye, these mites live in textiles and feed on dust and skin cells. Their presence is often linked to allergies and respiratory issues.
Reducing mite populations involves regular vacuuming, controlling humidity, and replacing air filters.
4. Gnats

Gnats are small, winged insects that thrive in warm, humid environments. They can become a nuisance, especially when they swarm in large numbers. Some common types include:
- Fungus gnats: Attracted to damp soil, fungus gnats infest potted plants and overwatered areas.
- Fruit flies: These tiny flying insects are drawn to overripe fruit and sugary spills.
- Biting midges (no-see-ums): Unlike other gnats, these tiny insects bite and feed on blood, leaving itchy welts.
To control gnats, keep the home dry, avoid overwatering plants, and use traps like vinegar or sticky tape.
5. Carpet Beetles

Carpet beetles are small, oval-shaped insects that can damage household fabrics. They lay eggs on materials like wool, silk, leather, and pet hair. While adult beetles feed on pollen, their larvae consume natural fibers, leading to holes in clothing and upholstery. Signs of an infestation include shed skins, fecal pellets, and damage to textiles.
Using diatomaceous earth, essential oils, or professional pest control can help eliminate carpet beetles.
6. Booklice

Booklice are tiny, brownish insects that thrive in warm, damp areas. Despite their name, they are not related to lice but instead feed on mold, decaying paper, and organic matter. They are commonly found on window sills, bookshelves, and near indoor plants.
To eliminate booklice, reduce indoor humidity, improve ventilation, and clean affected surfaces with bleach.
How to Prevent Tiny Black Bugs From Coming into Your Home
Preventing tiny black bugs starts with keeping windows clean and sealing potential entry points. Regular maintenance makes it easier to spot gaps or cracks that insects use to get inside. Here are key steps to keep pests away:
- Seal gaps and cracks: Use caulk to fill holes around windows and repair any tears in window screens.
- Apply perimeter treatments: Spray insect repellent around the foundation, doors, baseboards, and any cracks where bugs might enter.
- Store food properly: Keep pantry items in airtight containers to eliminate food sources for pests.
- Reduce moisture: Fix leaks, use dehumidifiers, and ensure proper ventilation to discourage bugs that thrive in humid environments.
- Upgrade insulation: Install or replace weatherstripping around windows and doors to block entry points.
If tiny black bugs keep appearing despite these precautions, replacing old windows with better-insulated ones may help prevent infestations in the long run.
When to Call a Professional
If tiny black bugs continue to be a problem despite preventive measures, a pest control professional can provide a more effective solution. They can identify the source of the infestation, locate entry points, and seal problem areas to prevent future issues. Professionals can also inspect for more serious pests, such as termites, that may have gone unnoticed.
Pest control experts have specialized equipment and treatments designed to handle large-scale infestations. While DIY methods may seem cost-effective, repeated failed attempts can add up, often making professional services the more affordable option in the long run.
The post What Are the Tiny Black Bugs in My House Near the Window? appeared first on Bob Vila.
]]>Next to the lawn mower, a weed eater is perhaps the most essential tool for managing a lawn, allowing you to trim grass that’s up against your house, along fencing, and in other places the blade of your lawn mower can’t reach. A handy tool, but its trimmer line doesn’t last forever. You’ll need to replace the trimmer line from time to time to keep your weed eater doing its job.
While threading a weed eater with fresh line doesn’t take long, it can be an exercise in frustration if you’ve never done it before. Ahead, we take you step by step through the process of changing out the trimmer line while sharing a few tricks of the trade from a few lawn care pros to help make learning how to restring a weed eater easier.
Safety Precautions
String trimmer line replacement is a job you should only do with the string trimmer completely powered down. That means cutting off the engine if it’s a gas string trimmer, removing the battery if it’s a cordless electric string trimmer, or pulling the plug if it’s a corded string trimmer.
Tools & Materials
Bobvila.com may earn a commission from purchases made through these links.
How to Restring a String Trimmer
Changing weed eater string requires very few tools and doesn’t take long if you follow the steps below.
Step 1: Purchase the right line.
Make sure you’re using trimmer line that’s the same thickness as the line you’re replacing or a line thickness that’s compatible with your string trimmer. String trimmer line comes in different thicknesses ranging from light-duty 0.065 inch line up to heavy-duty 0.11 inch line. If you’re not sure what sizes are compatible with your weed eater, check the tool’s manual.
Pro Tip: Michael Clarke, founder of home and garden site Yardwork, advises selecting a line gauge that suits the job. “For thicker weeds, consider using a heavier gauge line or a twisted line, which are more durable and can handle tougher conditions without wearing out as quickly,” he says.
Step 2: Remove the cap.

Position the string trimmer on the ground upside down so that the trimmer head is facing upwards, giving you access to the cutting head. Remove the cap that covers the cutting head by pinching the cap on its two tabs or by unscrewing it. Just under the cap you’ll find a spool that holds the trimmer line. Remove the spool and discard any leftover line.
Pro Tip: Jeremy Yamaguchi, owner of Lawn Love, suggests using the old line as a guide. “A mistake a lot of people make is taking out the spool and then taking out the last bit of string without looking at it, and then when they go to attach the new string, they realize they aren’t exactly sure where things go,” Yamaguchi says. “If you just take a few moments to assess how/where the old string is attached—or better yet, take a picture on your phone—that will make installing the new string way easier.”
Step 3: Measure the line.
The best way to measure the amount of fresh line you need for your string trimmer is to use your arm span, says Mark Clement, home and garden tool reviewer and licensed contractor with MyFixitUpLife. Clement suggests making three pulls of string, extending your arm to its full length with each pull. While the amount you pull will vary depending on your arm length, this method should give you about what you need to fill the spool.
Step 4. Replace the line.

Locate the small hole that’s on the spool and insert the trim line into the hole. If your string trimmer has two cutting lines, there will be two channels on the spool (one for each line) and two holes, one for each line.
Look for an arrow that indicates the direction you should wrap the line and begin wrapping the line around the spool. Be mindful when wrapping the line, Clarke says. “When winding the trimmer line in the spool, keep it tight but not too tight, since a loose line can cause it to get caught or stuck when in use and a tight line can force the line to stick together,” he says. Clarke also warns against overfilling the line, which can cause it to jam.
After wrapping the line, you’ll need to hold it in place while you reload the spool. “Without letting the sprung line spring out of the channel it’s in, feed each one through the corresponding eyelet of the spool housing, then push the spool back into the housing and twist/lock it into place,” Clement says.
Note: If you find the process of re-wrapping trimmer line to be more of a hassle than you’re willing to deal with, you can skip the wrapping process by buying replacement spools of trimmer line. These spools are already wrapped with a trimmer line. Rather than re-wrapping the line you simply replace the entire spool. You’ll spend a little more for this convenience, but these pre-loaded spools make the process quicker. If you go this route, be sure to purchase replacement string heads that are compatible with the make and model of your string trimmer.
Step 5: Install the spool.
The next step is installing the spool, and the method depends on the type of trimmer you own.
Standard String Trimmer
Place the spool back into the string trimmer, making sure to thread the line into the hole or holes in the spindle as you do. Some string trimmers have grooves that you can drop the line into as you’re installing it. Once the spindle is in place and the lines are extending through the holes, pop the spindle cap back into place.
Speed Feed String Trimmer
If you have a weed eater with a speed feed head, you don’t need to remove the cutting head. Align the hashmarks on the head, then thread the line into one of the eyelets on the head and push it through and out the other eyelet.
Pro Tip: Given that line comes wrapped in a coil and you need to push it through a straight channel, threading it through both eyelets can be a challenge. To make the process easier, Clement suggests straightening some of the line first. “Flex the curve out of the first foot of line by straightening it,” he says.
Clement adds that the hashmark guides typically wear away after a few months of use. If that’s the case with your speed feed trimmers, you’ll need to rotate the spindle by pressing down on the head repeatedly until you can look through one eyelet and see out the eyelet on the other side.
Once the line is through, make sure there is an even amount of line on each side of the head, then turn the base of the head to wind the string into the trimmer.
Step 6: Set the line length.
Set the line length by pressing the head of the string trimmer, then use your fingers to pull out the line. You should be able to pull out a few inches of line with each press. If the line doesn’t come out, then you’ve made a mistake loading it, and you’ll need to start over. Repeat the process until the line is to the desired length. Don’t pull the line out far enough that it can come into contact with the shield that is around the head.
Final Thoughts
Having to pause to replace string trimmer line in your weed eater should only cause a minor delay in your summertime yard work ritual. But if you don’t know how to install trimmer line, what could be a quick and easy job can quickly spiral into a time-wasting struggle. By following the above instructions and tips, you can make quick work of this job and get back to beautifying your lawn.
FAQ About Stringing a Weed Eater
If you have lingering concerns about how to string a weed eater, here are some helpful answers to popular questions.
A. While it isn’t an absolute necessity, it’s not a bad idea to soak your trimmer line in water for about a day before loading into your trimmer. Trimmer line is made from nylon, which absorbs moisture. Soaking weed eater string in water makes it more malleable and less likely to break, so it will last longer.
A. First, make sure you choose a weed eater string that is compatible with your string trimmer. Check the manual if you’re not sure. If you’re trimming grass and light weeds, a thinner string will give you a precise, clean cut. If you’re taking down thicker vegetation, choose a thicker string line that’s compatible with your trimmer.
A. Extend the line between 4 and 6 inches from the cutting head. This allows for enough length to cut weeds and grass without being so long that the line comes into contact with the shield.
A. There are several signs that it’s time to change the string line in your weed eater. The most obvious is your weed eater is no longer trimming vegetation because there is no string extending from the head. It may also be time to change the string if the line repeatedly becomes tangled in weeds or grass or if it breaks easily, indicating it has become dry and brittle.
The post How to String a Weed Eater the Right Way appeared first on Bob Vila.
]]>The post How to Remove Paint From Brick appeared first on Bob Vila.
]]>If you’ve ever tried to remove paint from brick, you know that it can be a painstaking process. Depending on the scope of the job, it might take you several hours or several days to complete the work. Because of the time and effort involved, many homeowners are unable or unwilling to commit their schedules to the project and choose instead to hire professionals, or not to undertake the project at all.
If you’re dealing with only a modest expanse of brick, or if you relish a challenge, there’s good news: Paint-stripping products have improved over the years, making the work friendlier to your health and to the brick itself. These new, safer formulations are the way to go. Many pros and DIYers recommend Citri-Strip. SmartStrip has its devotees, too. None are cheap, but all are comparably effective.
You may be tempted to try a short cut, possibly sandblasting or powerwashing the paint. This may do more harm than good, and leave the building material in a vulnerable condition. Many caustic, chemical-based paint-removal solutions compromise brick in a similar way. If you remove paint from brick using any of these potentially damaging methods, you may end up with a problem that’s much more serious than paint.
Tried-and-True Advice
“Before you start, I’d give serious thought to answering, ‘Just because I can do this project, should I do this project?’ The likelihood you can get all the paint off is near zero. The approaches to stripping paint from brick, heat or chemicals, re-liquefy the paint, turning it into a sloppy slurry that is hard to manage.
First, you could try a heat gun brick-by-brick. Start on low and heat up the paint. It’ll bubble on the surface of the brick like cheese melting, and that’s your signal to scrape the paint from the brick. I’d use a 1-inch Hyde putty knife for this. As you go, adjust the heat gun to match your site conditions. For example, there may be multiple coats of paint that require more heat. That said, if there is lead paint, heat is a no-go because re-liquefying that paint can cause noxious fumes. Also, brick can fracture if it gets too hot.
Second, you can try chemicals. The chemicals also heat up the paint and render it a slop. Plus there is the additional gel of the actual chemical to deal with. It’s literally a hot mess.”
—Mark Clement, Contributing Writer
If you’re dealing with old brick, it’s critical to not to clean the brick in a way that does lasting harm. Today, the best solutions are gel or paste compounds, followed by fabric-based peeling strips. The paint stripper triggers a chemical reaction that causes the paint to soften and adhere to the fabric. In the final step, the fabric strips are peeled away, taking the paint with them in the process and exposing the natural brick. Know what you’re getting into, though. The right paint stripper can do much of the work for you, but most situations call for a great deal of further scrubbing and/or scraping by hand.
Tools & Materials
Bobvila.com may earn a commission from purchases made through these links.
How to Remove Paint From Brick
Step 1: Test the paint stripper.
Before applying a stripping agent to painted brick, test the stripper on an inconspicuous part of the installation. You may find that the stripper you’ve chosen does not work as well as expected, or you may discover the brick was painted to conceal its poor condition. Another good reason to start with a test: Doing so gives you a sense of how much effort the job is going to take. You may still opt to hire a pro, or you may decide you can put up with the paint.
Step 2: Protect yourself and your work area.
Stripping paint from brick is a messy job. Minimize cleanup by setting up your work area in a thoughtful way. First, lay down a series of drop cloths or some thick plastic sheeting to catch the peeling and flaking paint that will fall away from the brick. Don’t forget to tape the drop cloth or plastic to the bottom edge of the brick. If you don’t want to disturb the finish of nearby painted areas—the adjacent wood trim, perhaps—take the time to cover it up completely with painter’s tape.
Don the protective gear recommended by the manufacturer of the paint stripper you’ve chosen.
Step 3: Apply the paint stripper.
Before applying the gel or paste, start out by scraping away any paint that’s already loose. Next, using a trowel or a specialized tool provided by the paint stripper manufacturer, apply the compound to the brick. Be thorough, making sure to push the gel or paste into all the little crevices in the brick and mortar. Layer by layer, build the stripper up to the thickness recommended by the manufacturer.
Step 4: Position the peeling strips.
With the compound in place, start positioning the peeling strips. Typically made of fabric, these strips should be pressed and held against the stripper until firmly attached. Overlap the strips so that no brick remains visible. Once the strips have been applied, let them set for the period of time stipulated by the manufacturer. In many cases, particularly when multiple paint layers are involved, it takes a full 24 hours for the compound to cure and really work its magic.
Step 5: Remove the strips.
Once sufficient time has passed, return to the work area and begin lifting off the strips. If necessary, use the trowel to gain purchase behind any sluggish strips. Peel the strips in a slow and deliberate fashion; don’t rip them. As you peel, the paint beneath should come off too. Wherever the strips leave behind either compound or paint, use the trowel to flake off as much residue as possible. If the trowel doesn’t cut it, scrub with a stiff-bristled brush and rinse with water. If it wasn’t already clear, now it is: Removing paint from brick is a labor-intensive, if not grueling, project.
Dispose of the used strips according to the manufacturer’s instructions. For some products, the chemical reaction stops on its own, while for others it stops only after the addition of a neutralizing chemical. Also important: Do not attempt to remove paint from brick if, within a month or so, there’s any chance that the temperature is going to fall below freezing. If the brick doesn’t dry completely before the frost, it will be especially likely to succumb to damage.
The post How to Remove Paint From Brick appeared first on Bob Vila.
]]>Although best known for its DIYer-friendly electric power tools, Ryobi actually makes a pretty diverse portfolio of products. Over the years, the brand ventured into the world of vacuums with its cordless stick, handheld, and wet/dry vac (which we tested and consider one of the better compact wet/dry vacs). Now, this March 2025, Ryobi will expand its cleaning line even more to include its new and improved handheld pool vacuum.
Powered by the brand’s flagship 18V One+ battery system, the handheld pool vacuum boasts a hose-free design, which means no more fighting with bulky and tangled hoses. The vacuum, instead, suctions everything into the removable debris tank. If you’re like me and have experienced frustration over tangled hoses while cleaning a pool, that’s quite a helpful upgrade! For greater reach, the handheld vacuum can also be used with a standard pool pole. The vacuum has an IPX8 rating and is submersible up to 13 feet. With a suction power of 13 gallons per minute and a wide inlet, this powerful handheld vacuum will make quick work of dirt and debris, including leaves. The large 1.7-liter tank will also allow pool owners to clean more before having to empty the tank.


The Ryobi 18V One+ pool vacuum will be available for $149 (tool only) or $179 (as a kit with 18V lithium battery) exclusively at The Home Depot.
Ryobi wading into the waters of pool and hot tub cleaning is a pleasant surprise. Although, honestly, I’m not too shocked by the launch after having seen Ryobi launch everything from power scrubbers to coolers in recent years. It’s clear that Ryobi is on a mission to make its impressive rechargeable batteries even more versatile and useful for the average homeowner by adding these outdoor, cleaning, and even recreational gadgets to the collection. The flagship One+ line includes more than 300 handy products that can run on 18V One+ batteries! So if you don’t already have a collection, maybe this is your sign to start one.
The post This Major Power Tool Brand Wants to Help You Clean Your Pool appeared first on Bob Vila.
]]>The post How to Use Painter’s Tape the Right Way appeared first on Bob Vila.
]]>Painter’s tape is used to create crisp lines, protect ceilings and trim, and make a painting job look like it was done by a professional. Using painter’s tape, however, can be trickier than it looks.
While experienced painters sometimes cut in without tape, beginners usually use painter’s tape to mask off areas that they don’t want to paint and then peel the paint off to reveal perfectly painted lines.
This guide will teach you about the different types of painter’s tape, and how to use this kind of tape around doors, windows, and other areas you want to protect from paint spatter.
5 Types of Painter’s Tape DIYers Should Know
These are the most common types of painter’s tape you’re likely to see at your local home improvement store. The best painter’s tape for you depends on the task at hand.
1. Multipurpose Painter’s Tape
Multipurpose painter’s tape is suitable for most common household projects. It has a medium level of adhesion and sticks to most painted walls without causing any damage. It can also be used on floors, trim, baseboards, tile, and glass. Some tape brands use colors to differentiate their painter’s tape varieties, and most blue tape is considered multipurpose tape.
Our Recommendation: ScotchBlue Original Multi-Surface Painter’s Tape at Amazon (0.7 inches / 60 yards) for $6.05
ScotchBlue’s Original Multi-Surface Painter’s Tape is an excellent all-around pick with medium adhesion that works well for a wide variety of surface types.
2. Textured Surface Painter’s Tape

When masking textured surfaces for paint, it’s important to use a style of tape with a higher level of adhesion that’s ideal for rougher materials like brick, concrete, and wood. Many brands make their high-adhesion tape green.
Our Recommendation: Scotch Rough Surface Extra Strength Painter’s Tape at Amazon (0.94 inches / 60 yards) for $5.99
This tape from Scotch adheres well to rough and textured surfaces and resists UV rays.
3. Delicate Surface Painter’s Tape

One of the risks of using painter’s tape is potentially damaging the surface. With delicate surface painter’s tape, however, that’s not a concern. Some brands use the color purple to designate their delicate surface painter’s tape.
Our Recommendation: FROGTAPE Delicate Surface Painter’s Tape (24mm x 55m) at Acme Tools for $7.49
This low-adhesion tape is easy to tear and gives you very sharp paint lines while protecting the delicate surface underneath.
4. Exterior Painter’s Tape
When working outdoors, the highest level of adhesion is necessary—especially if your project takes a few days. Exterior painter’s tape is designed to withstand the elements and won’t peel off if it rains.
Our Recommendation: Scotch Exterior Surface Painter’s Tape (1.88 in. / 45 yards) at Amazon for $19.99
This tape adheres well to common outdoor surfaces like metal, vinyl, painted wood, and glass, and it’s ideal for when you need a high-adhesion option.
5. Decorative Shape Tape

Those attempting crafty DIY projects may appreciate thinner rolls of painter’s tape, which allow them to create thin lines for a design. Some decorative tapes come in unique patterns like chevrons, which can be used to create a graphic effect on walls and other surfaces.
Our Recommendation: Chinco Painter’s Automotive Masking Tape (6 rolls) at Amazon for $12.99
This set of six tape rolls comes in a variety of widths so that users can use them for myriad artistic painting projects.
How to Protect Trim and Ceilings Using Painter’s Tape
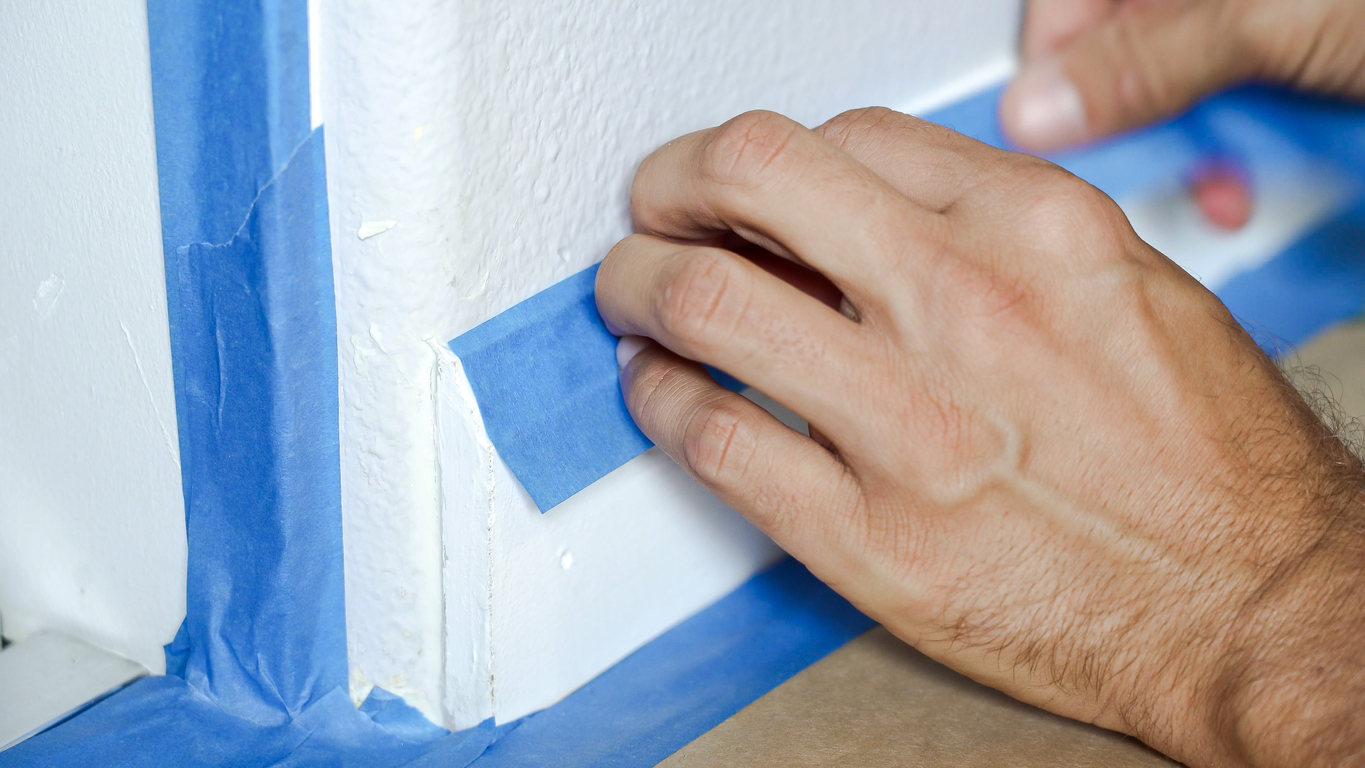
When painting walls, painter’s tape can be used to protect ceilings, baseboards, and trim. The following steps will help ensure that your paint lines are crisp and that no paint splatters onto unwanted surfaces.
Step 1: Prep and clean walls, ceiling, and trim.
Before starting any painting project, it’s important to ensure that all of the surfaces are clean and free of dust. This is especially important when using painter’s tape since it won’t adhere properly to dirty surfaces.
After cleaning, make sure everything has dried completely before moving on to the next step.
Step 2: Apply the tape to the trim and ceiling.
The next step is identifying the areas you need to protect. In most rooms, this means the ceiling, the trim around windows and doors, and baseboards.
Rip off 1-foot-long pieces of tape, which are easier to handle. Apply them to the intended area in a straight line. Start in the middle of each piece, smoothing it down with a finger or putty knife as you go. If any pieces bubble or lay unevenly, it’s best to pull them up and try again.
Step 3: Remove the tape as soon as you’re done painting.
While painter’s tape can usually remain in place for hours—or even days—without causing any damage to the surface underneath, it’s best to remove it as soon as possible to ensure the best results.
Slowly peel the tape off the trim at a 45-degree angle. If any sections don’t come off easily, a putty knife usually helps.
How to Use Painter’s Tape When Painting Trim

When it’s time to paint your trim, you’ll need to protect your walls, floors, and ceiling from becoming covered in paint.
Step 1: Apply tape to the floor, whether it’s carpeting or a hard surface.
When painting trim, painter’s tape can be used to protect hard flooring like wood and tile as well as carpeting. It’s especially important to protect wall-to-wall carpeting from paint because it’s really hard to get paint out of carpet.
Ensure that the floor is clean, and then apply a wide piece of painter’s tape along the edge where the baseboards meet the ground, working one foot at a time. For carpets, use a putty knife to tack the tape down so that no carpeting is exposed to paint while you work.
Step 2: Use tape to protect your walls from paint.
The next step is applying painter’s tape to the walls where they meet the trim. Ensure that walls are clean and free of dust before applying the tape along all of the trim.
If you painted your walls first, it’s important to wait 24 hours—or until the paint has dried completely—before using painter’s tape to ensure the paint doesn’t peel off when it’s removed.
Tried-and-True Advice
“Choosing the correct painters tape for the surface makes a big difference for me. It ensures the tape adheres and functions as it should. I find it easier to tape long surfaces with a partner. Together, we pull out the correct length of tape and line it up before setting over the surface. While not mandatory, it does make for even lines with less fuss.
At the end of the day, taping is tedious and takes time to get everything perfect. Don’t rush and pay attention to the details. It will make for a cleaner and better looking paint job when everything is finished.”
—Zach Lazzari, Contributing Writer
Step 3: Apply painter’s tape to the ceiling.
If your trim includes crown molding or any other style of molding that abuts the ceiling, the ceiling will need to be protected. It would be easy to assume that white trim paint won’t be noticeable on a ceiling, but trims are typically painted with semi-gloss paint, whereas it’s generally recommended that ceilings are painted with flat paint.
Apply paint along the upper edge of the trim, smoothing it down as you work.
How to Use Painter’s Tape When Painting a Ceiling

When painting a ceiling, protect your walls—especially if they’re freshly painted. Similarly, if the space has crown molding, tape can be used to maintain its crisp, white color.
Step 1: Apply tape along the edges of the ceiling.
If the room in question doesn’t have an upper molding, apply painter’s tape directly onto the walls where they meet the ceiling. If the walls have recently been painted, make sure they have dried completely.
Ensure the tape lies perfectly flush with the edge of the ceiling and doesn’t have any bubbles or ripples. Take your time—it’s important to ensure the tape is straight.
Step 2: Apply painter’s tape to the crown molding.
If the room has a molding that meets the ceiling, use the same technique detailed above, applying the tape to the molding instead.
Press down the edges of the tape using your fingers or a putty knife, ensuring it adheres to the molding. When working with a particularly detailed molding, this may require a bit more time.
Step 3: Remove the tape as soon as you’re done painting.
Once you’ve finished painting the ceiling, remove the tape from the walls or moldings as soon as possible. If the paint has already dried, you may need to use the straight edge of a putty knife to score the tape in order to cleanly peel it away without causing the ceiling paint to chip.
The prices listed here are accurate as of February 11, 2025.
The post How to Use Painter’s Tape the Right Way appeared first on Bob Vila.
]]>The post How to Remove Linoleum Flooring appeared first on Bob Vila.
]]>Linoleum is a classic and resilient material, often found in high-traffic spaces like kitchens, bathrooms, and hallways. Because the bond between linoleum and its adhesive actually strengthens over time, you’ll need a few special tricks up your sleeve—and a good measure of patience—when you’re ready to rip out outdated linoleum flooring. If you’re thinking about updating your space and wondering how to remove linoleum flooring, follow these steps.
Before You Begin
While the terms are often used interchangeably (even by flooring salespeople), linoleum and vinyl flooring are not the same thing, and they do not behave the same way during removal. Before removing any flooring, your first step is to confirm that your flooring is, indeed, linoleum. Removing vinyl flooring is a different process altogether.
Though linoleum is made of natural materials, if your linoleum flooring was installed before 1980, there’s a good chance that it contains asbestos in its backing paper. When asbestos is disturbed, it can release carcinogenic fibers into the air.
Before pulling up linoleum flooring, use a home kit or hire a pro to test it for asbestos, and hire a qualified contractor to remove it if you find any. Among other requirements, removing asbestos requires wearing safety gear and disposal into approved disposal bags. We advise that asbestos removal be done only by professionals; some municipalities even prohibit homeowners from removing the material themselves.
Tools & Materials
Bobvila.com may earn a commission from purchases made through these links.
After confirming the linoleum does not contain asbestos, follow these steps to learn how to remove old linoleum flooring.
How to Pull Up Linoleum Flooring

Step 1: Score the flooring into 6- to 12-inch strips.
Working in small sections with a utility knife, score the flooring into strips about 6 to 12 inches wide. If your linoleum features a tile pattern, you can use the outlines of the tiles as general guides to show where to score. Proceed carefully and don’t cut all the way through the material to avoid damage to the floor underneath, particularly if it’s hardwood that will become the new finished floor.
Tried-and-True Advice
“I find that a hair dryer or heat gun really helps to soften glue while releasing the linoleum from the floor. It helps to have an extra person [to pull up flooring], but you can complete the job solo while scoring the flooring to remove in small sections.
Take your time and use a scraper to remove glue while it’s soft. The glue is often more difficult [to remove] than the flooring itself, and it will require some cleaning time even after the flooring is cleared.”
—Zach Lazzari, Contributing Writer
Step 2: Remove the top layer of flooring material.
To fully remove linoleum, you’ll need to tackle both of its layers: The top is a layer of flooring material that should come off fairly easily, and the bottom is a paper backing with adhesive. Removing the latter can be a challenge.
Remove the entire top layer of linoleum first before going back later to pull up any remaining paper backing or adhesive. Start by working your scraper or the edge of your oscillating multi-tool underneath one of your score marks. Then, push forward to bring up the top of the linoleum. Keep working in small sections until you have removed the entire first layer.
Step 3: Remove the underlying paper backing and/or adhesive.
To remove any remaining backing, apply heat to the floor in small sections using a wallpaper steamer (a heat gun or even a hair dryer set on high can also work in a pinch). Soften a small section with your chosen heat source, and scrape up the adhesive, working at a 45-degree angle and being careful not to gouge the subfloor as you work. Move section by section until all the backing and adhesive has been removed.
If you come across particularly stubborn spots, apply some isopropyl alcohol or paint thinner to the area and allow the solvent to sit according to the manufacturer’s instructions. Proceed to scrape away the remainder of the adhesive, again working at a 45-degree angle.
Step 4: Dispose of the old linoleum properly.
Linoleum is made of natural materials. Unless the vintage linoleum flooring contains asbestos, there is no need to take special steps to dispose of it. While it can be bagged and picked up by the regular trash pickup, there are more sustainable alternatives.
Many areas have local recycling centers that will take linoleum. There also are some composting centers around the country that accept linoleum—or you can add asbestos-free linoleum to your backyard composting bin.
Final Thoughts
Updating old flooring like linoleum can have a huge impact on the home’s style. While removing linoleum flooring is a DIY project, it’s best handled by a professional if it contains asbestos. If the floor is asbestos-free, remember that the removal process is a marathon, not a sprint. With patience and the right tools, you can rid your rooms of linoleum and lay the groundwork for a new floor, and a whole new look.
FAQs
An easy way to tell if a floor is vinyl or linoleum is to look at the surface and thickness. Vinyl flooring is rarely more than ⅛-inch thick and the pattern is stamped on the top. It’s usually linoleum if the pattern is seen through the thickness of the material.
Isopropyl alcohol or paint thinner can help remove adhesive. However, one of the best adhesive removers on the market is Goo Gone.
You can, in some instances, lay a new material directly on top of your current linoleum. But be aware that this shortcut will raise the floor by at least ⅛ inch, so the transitions into adjoining rooms may need to be adjusted.
The post How to Remove Linoleum Flooring appeared first on Bob Vila.
]]>The post Use Your Lawn Mower Year-Round With This Handy Attachment appeared first on Bob Vila.
]]>Best Overall

Husqvarna E-Lift 50" 2-Stage Snow Thrower Attachment
Best Bang for the Buck

Husqvarna Manual 42" 2-Stage Snow Thrower Attachment
Best for Large Driveways
NorTrac 3-Pt. 72-76" Snow Blower Attachment
Lawn mower snow blower combos offer a practical way for homeowners to get more out of their equipment, allowing them to cut grass in warmer months and add an attachment to blow snow in the winter season. But since this type of driveway- and lawn-maintenance equipment isn’t exactly cheap, it’s smart to spend time researching their key features to ensure you buy the right one for your needs.
To simplify this process, we reviewed five excellent models and consulted a snow-removal expert for additional insights. Based on our efforts, we selected the Husqvarna E-Lift 50″ 2-Stage Snow Thrower Attachment as our top pick for its electric lift, toolless hookup and removal, and easily adjustable deflector and chute. Keep reading to compare our picks for the best lawn mower snow blower combos and learn which features matter most when choosing between them.
- BEST OVERALL: Husqvarna E-Lift 50″ 2-Stage Snow Thrower Attachment
↓Jump to Review - BEST BANG FOR THE BUCK: Husqvarna Manual 42″ 2-Stage Snow Thrower Attachment
↓Jump to Review - BEST FOR LARGE DRIVEWAYS: NorTrac 3-Pt. 72-76″ Snow Blower Attachment
↓Jump to Review - BEST ELECTRIC LIFT: Husqvarna E-Lift 42″ Snow Blower Attachment
↓Jump to Review - ALSO CONSIDER: NorTrac 3-Pt. 50-54″ Snow Blower Attachment
↓Jump to Review
Before You Buy a Lawn Mower Snow Blower Combo
Lawn mower snow blower combos are essentially large snow plow blades that turn a riding mower into a snow plow. Folks in warmer climates and areas that only get a small amount of snow can likely skip them in favor of a simple shovel or cordless snow blower. On the other hand, those who have large properties and see significant snowfall each year (and already own a garden tractor) may find that these attachments make their lives much easier.
Still, since these units are typically several feet wide, weigh hundreds of pounds, and cost over $2,000, users will want to carefully consider compatibility, ease of attachment and removal, and storage space as part of the purchasing process. Also, if you don’t already own a riding mower, this will increase the cost, though you may be able to get a good deal on a used riding mower. Still, be careful the attachment you choose will work with your mower, as small lawn tractors may not have enough oomph to support them or may lose traction if the machine is too front-heavy. Also, some lawn mower snow blower combos are only compatible with mowers of the same brand.
When it comes time to add the attachment to your mower, you will need to be knowledgeable and strong enough to remove the mower’s deck assembly and replace it with a pulley system that operates the snow blower. To make the installation and removal process easier, you may want to look for a model that runs off of your tractor’s power take-off (PTO) system.
| Product Name | Stage | Clearing Capacity | Compatibility |
| Husqvarna E-Lift 50″ 2-Stage Snow Thrower Attachment | 2-stage | 50 inches | Fits all Husqvarna lawn tractors |
| Husqvarna Manual 42″ 2-Stage Snow Thrower Attachment | 2-stage | 42 inches | Fits all Husqvarna lawn tractors |
| NorTrac 3-Pt. 72-76″ Snow Blower Attachment | 2-stage | 72 to 76 inches | 35- to 50-hp lawn tractors, category 1 hitch |
| Husqvarna E-Lift 42″ Snow Blower Attachment | 2-stage | 42 inches | Fits all 2006 and newer Husqvarna tractors |
| NorTrac 3-Pt. 50-54″ Snow Blower Attachment | 2-stage | 50 to 54 inches | 16- to 35-hp lawn tractors, category 1 hitch |

Our Top Picks
Each riding mower snow thrower attachment that made our list is one of the best options available to turn your lawn tractor into a snow plow.
Best Overall
Husqvarna E-Lift 50" 2-Stage Snow Thrower Attachment
What We Like
- Replaceable wear plate and skid shoes
- Toolless hookup and removal (after initial installation)
- Deflector and chute angle adjust from the seat
What We Don’t Like
- Wheel weights and chains recommended
Specs
- Stage 2-stage
- Clearing capacity: 50 inches
- Compatibility Fits all Husqvarna lawn tractors
Folks looking for a lawn mower snow blower combo with all the features should check out Husqvarna’s E-Lift Snow Thrower Attachment. This snow blower has a 50-inch clearing capacity, which is enough for the typical Folks looking for a lawn mower snow blower combo with all the features should check out Husqvarna’s E-Lift 2-stage snow thrower attachment. This riding snow thrower has a 50-inch clearing capacity that’s more than enough for the typical driveway as well as a two-stage setup that allows it to handle heavy, deep snow.
This lawn tractor with snow blower attachment got the award for best overall since it has a few extra features that make it especially desirable. Once initially installed, it can be hooked up or removed without tools. Users can raise and lower the snow blower and adjust the chute angle and deflector right from the seat. It’s also compatible with most Husqvarna models, though the manufacturer recommends adding wheel weights and chains to maintain traction.
Get the Husqvarna 50″ lawn mower snow blower combo at Lowe’s or Husqvarna.
Best Bang for the Buck
Husqvarna Manual 42" 2-Stage Snow Thrower Attachment
What We Like
- Works as a snow blower for gravel driveways
- 180-degree adjustable chute
- Toolless attachment and removal after initial installation
What We Don’t Like
- Manual lift
- Initial installation is easier with at least 2 people
Specs
- Stage 2-stage
- Clearing capacity 42 inches
- Compatibility Fits all Husqvarna lawn tractors
The Husqvarna 42-inch manual lift snow thrower attachment is a two-stage option with a universal-fit design that works with all of the brand’s lawn tractors. It features a manual lift system, two 12-inch diameter serrated input augers that efficiently pull in snow, and a high-speed impeller that launches precipitation through the poly chute.
Like our top pick, this model offers toolless attachment and removal after the initial installation of mounting brackets and pulley frame brackets. You can adjust the 180-degree chute and control the deflector from the seat, and the machine also features replaceable wear plates and skid shoes for long-lasting use. For best results, Husqvarna recommends adding wheel weights and chains.
Get the Husqvarna manual lawn mower snow blower combo at Amazon, Lowe’s, Walmart, or Husqvarna.
Best for Large Driveways
NorTrac 3-Pt. 72-76" Snow Blower Attachment
What We Like
- Attaches to a 3-point hitch system on larger tractors
- Uses power take-off system instead of a pulley
- Massive clearing capacity up to 76 inches
What We Don’t Like
- Attaches to back of tractor
- Manual chute adjustment
Specs
- Stage 2-stage
- Clearing capacity 72 to 76 inches
- Compatibility 35- to 50-hp lawn tractors, category 1 hitch
Those looking to clear long or wide driveways with as few passes as possible might consider NorTrac’s 3-Point Snow Blower. This model attaches to heavy-duty tractors with a three-point hitch system, getting Those looking to clear long or wide driveways with as few passes as possible will want to consider this 3-point snow blower from NorTrac. Its 72-inch blower and bolt-on 4-inch wing kit can clear a path up to 76 inches wide and throw it 40 feet. It’s designed to fit lawn tractors with 35-to 50-horsepower (hp) engines and category 1 hitches and uses the tractor’s power take-off system to make installation and removal quick and easy. The two-stage system also features a chute that rotates up to 340 degrees, though you must adjust it manually unless you buy and install the optional hydraulic kit.
One of the best things about this model is its versatility, as it will work with a range of tractor sizes. It also has adjustable skid shoes for precise height control and heavy-duty steel construction that stands up to harsh winter conditions. We also really like that it’s powered by the tractor’s PTO rather than a pulley system. If there’s a downside, it’s that it attaches to reach hitch, which could make use uncomfortable during extended jobs.
Get the NorTrac 72-76″ lawn mower snow blower combo at Northern Tool + Equipment.
Best Electric Lift
Husqvarna E-Lift 42" Snow Blower Attachment
What We Like
- Electric lift system, chute, and angle adjustments
- 42-inch clearing capacity
- Toolless hookup and removal
What We Don’t Like
- Requires wheel weights and chain
- Only compatible with Husqvarna lawn tractors
Specs
- Stage 2-stage
- Clearing capacity 42 inches
- Compatibility Fits all 2006 and newer Husqvarna tractors
This 42-inch lawn mower with snow blower combo features an innovative electric lift mechanism that allows you to lift and lower the snow blower with just a push of a button directly from your seat. Not only that, its 12-inch dual serrated augers and 180-degree rotating chute also use electric adjustment, adding to user convenience and efficiency.
Beyond its electric lift, this tractor with snow blower also features a two-stage design with high-speed impeller to pull snow in and propel it quickly through the durable poly chute. It fits all Husqvarna lawn tractors made in 2006 or later, and after its initial installation, you can attach and remove it without needing tools. Like the other models we recommend from this brand, the manufacturer recommends you add wheel weights and chains for optimal performance.
Get the Husqvarna electric lift lawn mower snow blower combo at Lowe’s or Husqvarna.
Also Consider
NorTrac 3-Pt. 50-54" Snow Blower Attachment

What We Like
- Versatile compact tractor snow blower
- Clears snow up to 20 inches deep
- Scraping edge is replaceable
What We Don’t Like
- Only throws snow about 20 feet
- Automatic chute adjustment requires additional purchase
Specs
- Stage 2-stage
- Clearing capacity 50 to 54 inches
- Compatibility 16- to 35-hp lawn tractors, category 1 hitch
If you liked the features offered by our pick for large driveways but need a more compact package, this model is worth considering. With a clearing width of up to 54 inches (including the bolt-on 4-inch wing kit), this model still moves plenty of snow with each pass. Similar to the other NorTrac model we love, it is compatible with a wide range of lawn tractors with category 1 three-point hitches and 16- to 35-horsepower engines.
While we wish the 340-degree adjustable chute wasn’t manual-only without an additional purchase, we like that the attachment is powered by the tractor’s PTO rather than a pulley. Also, it only throws snow about 20 feet, but that’s likely sufficient for residential and light commercial use. Its body, auger, and discharge chute are made of steel for durability, and it has heavy-duty adjustable rear skid shoes and a replaceable scraping edge.
Get the NorTrac 50-54″ lawn mower snow blower combo at Amazon or Northern Tool + Equipment.
Jump to Our Top Picks
How We Chose the Best Lawn Mower Snow Blower Combos
To choose the best lawn mower snow blower combos, we began by drawing on our expertise regarding lawn mowers and snow blowers. We identified which features are absolutely essential for using a tractor with a snow blower and conducted thorough product research to find models that fit those criteria. With a pool of eligible models to choose from, we compared features, performance, price, and overall value, eliminating options that didn’t stack up. In the end, the only models we picked are the ones we’d actually buy for ourselves.
You may have noticed that no all-in-one versions of a riding lawn mower with snow blower made our list. The current options on the market are either incredibly expensive or don’t offer enough power to be worth their price. For now, we think most DIYers will be better off choosing one of the best lawn tractors first and adding a compatible snow blower attachment second rather than ending up disappointed with an all-in-one machine.
What to Consider When Choosing a Lawn Mower Snow Blower Combo
Because they are undoubtedly one of the best tools for conquering snow and ice, lawn mower snow blowers come at a premium price. Purchasing one is a big decision that requires careful thought and research. However, when it comes to making quick and easy work of year-round maintenance tasks like lawn mowing and snow removal, they are nearly impossible to beat. To help you make a smart selection, we’ve outlined the features that matter most below.
Number of Stages
Like traditional snow blowers, lawn tractor with snow blower combos come in a few different types, also known as stages. The stages refer to how the machine scoops and discharges the snow.
Single-stage snow blowers, or snow throwers, have an auger that grabs snow and pushes it out of the chute. They’re the most limited in the distance they can throw and the height of the snow they can handle.
Two-stage snow blowers have both an auger as well as an additional impeller. As the auger collects the snow and funnels it toward the chute, the impeller forces it out. These snow blowers can throw snow up to 50 feet or farther, especially when users lubricate the chute using a nonstick snow blower spray.
Three-stage snow blowers have an auger, an impeller, and an additional grinder that shreds chunks of ice. They can throw snow extremely far but are often limited to commercial use since they’re so expensive.
Compatibility and Horsepower
When choosing a riding lawn mower snow blower combo, compatibility with your lawn mower is essential. Smaller mowers may lack the power and traction necessary to maximize efficacy, and not all brands of attachments are compatible with all brands of mowers.
To ensure compatibility, you may want to start by looking for a lawn mower snow blower combo that’s made specifically for the lawn mower’s model number. You can generally find this information on the manufacturer’s website, or you can call or email them for help. You’ll also want to make sure your garden tractor has sufficient horsepower (generally 16 hp or more) and may want either four-wheel drive or a set of tire chains.
Clearing Capacity
Lawn mower snow blower combo attachments come in various clearing capacities, which are the widths of the snow they can remove with each pass. Choosing the right size depends on the area that needs to be cleared and the power of the tractor.
For standard driveway snow removals, a 40- to 50-inch riding lawn mower with a snow blower should do the trick. This size snow blower doesn’t require a large, heavy-duty machine and can clear most driveways in three or four passes.
For larger driveways and parking areas, a 50- to 60-inch lawn mower snow blower attachment will usually fit the bill. These require a bigger tractor but fewer passes to clear wider areas.
For very long driveways or large parking lots, a 60-inch or larger lawn mower snow blower combination will be ideal. Rather than needing you to make four passes to clear a given area, a snow blower with a wider clearing capacity may do it in two—half the amount of time. However, these machines require large tractors with 25 to 50 hp.
Ease of Use
Certain additional features may make some lawn mower snow blower combos easier to use than others. While these features are more about convenience than performance, finishing a big job quicker and with a bit more comfort can be a big deal on a cold day.
- Electric lift systems: these allow you to raise and lower the snow blower from the seat rather than forcing you to get off the machine and find the right height manually
- Adjustable chutes and deflectors: these allow you to change the angle of the discharge chute as you work, helping you blow snow in the direction you intend
- Adjustable skid shoes and replaceable wear plates: these allow the snow blower to move along the ground without damaging the blade
When we asked Francisco Fuenmayor, insured handyman and snow-removal expert at LocalProBook, which of these features he thinks makes the biggest difference during big jobs, he said, “An electric lift system is a game-changer, especially if you have back issues or are frequently adjusting the height of the snow blower. It saves a ton of effort compared to manually lifting and lowering the attachment.”
The Advantages of Owning a Lawn Mower Snow Blower Combo
Even with a traditional snow blower, removing snow from a long driveway can be exhausting. A lawn mower snow blower attachment makes the job easier by allowing you to sit down and steer instead of pushing a heavy machine. Combo units also have more power than standard snow blowers, enabling them to remove more snow without bogging down. Some models can handle more than 20 inches at a time.
In addition to power, lawn mower snow blower combos offer greater versatility. Unlike snow plows, they can navigate walkways and sidewalks, making them ideal for snow removal across an entire property.
Lawn mower snow blowers are:
- Easier to use than traditional snow blowers
- Better for removing larger amounts of snow
- More versatile than plows or snow blowers alone
FAQs
The following section aims to answer any questions you may still have, covering topics like how deep snow combination machines can handle and whether lawn mowers and snow blowers use the same type of gas.
Most riding snow blowers for residential use are just large snow blower attachments installed on compact garden tractors. While there are a few actual riding snow blowers available, we didn’t include any on our list as they are incredibly expensive and yet offer enough power to make them worth their price.
Yes, lawn mower snow blowers work. Unlike electric snow blowers, which use batteries or outlet power, or traditional snow blowers with gas engines, lawn mower snow blowers run off the tractor’s engine. They essentially turn lawn tractors into sit-down snow blowers, making these tools useful year-round.
Yes, you can turn your existing lawn mower into a snow blower if your mower has enough power and you can find a compatible snow blower. See the Compatibility and Horsepower section above for additional information.
Some zero-turn mowers have snow blower attachments, but it’s important to check that they’re compatible before purchasing one.
Two-stage snow blowers have an auger that scoops now and an impeller that throws it. Single-stage snow blowers, on the other hand, scoop and throw snow using power from their augers alone. Since two-stage machines can throw snow and ice further than single-stage models, they generally come at a higher price.
You can maintain a lawn mower snow blower combo by following the same general steps found in our guide on how to maintain a snow blower. It’s also a good idea to refer to the owner’s manuals for both parts of your unit for additional recommendations.
Yes, most gas snow blowers and lawn mowers will work with unleaded gas that has an octane rating of 87 or higher or an ethanol-gas blend with less than 10 percent ethanol (E10). Still, you should always check your owner’s manual to see if your equipment has specific fuel requirements.
The depth of snow a snow blower can handle will vary based on which type of snow blower it is as well as its size. The clearing depth offered by your machine could be anywhere from 5 or 6 inches for a single-stage machine all the way up to 20 inches or more for a lawn mower snow blower.
The post Use Your Lawn Mower Year-Round With This Handy Attachment appeared first on Bob Vila.
]]>The post How to Get Rid of Caterpillars appeared first on Bob Vila.
]]>While backyard gardens attract some “pests” that are actually beneficial to the ecosystem, they also appeal to a number of insects that are detrimental to plants. While there are caterpillars, which are the larvae of moths and butterflies in the order Lepidoptera, that gardeners welcome to their properties—planting extra pots of dill for swallowtail caterpillars, and making sure there’s milkweed for monarchs—there are others that are unwelcome whenever they turn up: Tomato hornworms, tent caterpillars, and cabbage loopers, for example, have big appetites and can decimate gardens, and even trees, rapidly.
Getting rid of caterpillars in your garden is doable, but you have to act quickly and be diligent. These all-natural methods can help you regain control of your landscape.
1. Hand-Pick Them

SUPPLIES
5-gallon bucket
Dish soap
Gardening gloves
When it comes to caterpillar removal, the fastest way to address the problem is to pick them off by hand.
Fill a bucket about halfway with hot water and a couple of tablespoons of mild dish soap, pull on a pair of rubber or canvas gardening gloves, and head out to your garden to do a different kind of picking.
This time, you’ll want to lift caterpillars from the leaves—checking all of the undersides, where caterpillars are known to hide—and drop them one by one into the bucket to drown. The protective hand gear will ensure that you aren’t stung by the spines on some varieties of caterpillar as you handle them, like the saddleback.
While this method is the most proactive, it also may require repeating to remove the entire population.
Pro tip: Removing tomato hornworms is easiest to do at night. Bring a black-light flashlight with you because hornworms glow in the dark.
Tried-and-True Advice
“Most caterpillars don’t do much damage to garden plants, so I leave them alone. However, I do take action against cabbage loopers, which love munching on my brassicas!
I find the best way to control cabbage loopers and other pest caterpillars is with physical barriers. By keeping vulnerable crops protected with row covers from the very beginning of the season, moths can’t lay their eggs on my plants and I have minimal caterpillar issues. Sometimes I also plant additional dill, parsley, and mustard plants on the side of my garden to act as sacrificial trap crops to entice caterpillars away from my more valuable produce.”
—Lauren Landers, Contributing Writer
2. Empty the Nest
SUPPLIES
A more aggressive way to attack the problem is to destroy the caterpillars’ nest.
You’ll often find these silk-spun homes hanging from tree limbs. Simply punch your implement of choice (either a long sharpened stick or broom handle work well) into the nest itself, then spin and scrape along its interior to remove all of its inhabitants. Afterward, dispose of the nest and its contents in a bucket of warm, soapy water to drown remaining caterpillars.
For the best chance of success, attack the camp early in the morning or late at night to guarantee that the majority of the caterpillars will be in the nest. While immediately effective, this method may also require repeating should any remaining caterpillars rebuild their home.
3. Spray Bt

SUPPLIES
Bacillus thuringiensis
Gardening gloves
Homeowners who aren’t interested in hunting and handling these pests can opt to administer the hands-off—and hand-down most effective—extermination solution, Bacillus thuringiensis (Bt).
This naturally occurring soil bacteria kills caterpillars in a matter of days by destroying the lining of their stomachs. Simply dust its powder or mist its liquid form directly onto your garden plants and wait for the caterpillars to get hungry.
Apply without worry about negative side effects: Bt is completely safe for the plants, their pollinators, pets, and humans. The bacteria is only toxic to caterpillars, as well as some moths and worms who’d like to munch on your greens.
Reapply after a week or two if your infestation still exists, as your first application would have broken down in direct sunlight and rainfall.
4. Make Homemade Caterpillar Deterrent
SUPPLIES
Spray bottle
Molasses
Dish soap
Garlic
Vegetable oil
If you’re not ready to shell out for caterpillar control, you can mix up a home remedy to get the job done. For plants, a regular spray of a molasses solution (1 tablespoon molasses, 1 teaspoon dish soap, and a liter of warm water) or a garlic solution (three crushed cloves of garlic, 1 tablespoon vegetable oil, 1 teaspoon dish soap, and a liter of water) will deter insects from munching.
The post How to Get Rid of Caterpillars appeared first on Bob Vila.
]]>The post The Best Backpack Sprayers for Easier Yard Work appeared first on Bob Vila.
]]>Built for comfort and ease of use, the backpack sprayer is becoming a go-to tool for gardeners, landscapers, and pest-control professionals—as well as home dwellers who simply want to enjoy a weed- and insect-free outdoor space. A backpack sprayer’s ergonomic design features adjustable shoulder straps and a spray wand, allowing you to carry fertilizer, herbicide, pesticide, or other liquids on your back rather than hauling around a heavy metal cart or handheld manual sprayer.
We tested and reviewed a variety of outstanding backpack sprayers. We also spoke to Tim Sherrer, owner of Expest Exterminating based in Snellville, Georgia, who shared his pest control expertise. Preview our top picks below, and then keep reading to learn how these tools work, features to consider, and how to pick the best model for your space and style. Later on, check out our reviews of the best backpack sprayers for lawn and garden maintenance.
- BEST OVERALL MANUAL: Field King Max 190348 Backpack Sprayer
↓ Jump to Review - BEST OVERALL MOTORIZED: Field King 190515 Battery-Powered Backpack Sprayer
↓ Jump to Review - BEST BANG FOR THE BUCK: Chapin 61800 4-Gallon Manual Backpack Sprayer
↓ Jump to Review - UPGRADE PICK: My4Sons M4 4-Gallon Battery-Powered Backpack Sprayer
↓ Jump to Review - BEST PROFESSIONAL: PetraTools HD5000 Battery-Powered Backpack Sprayer
↓ Jump to Review - BEST HOBBYIST: Chapin 61900 4-Gallon Manual Backpack Sprayer
↓ Jump to Review - ALSO CONSIDER MANUAL: Solo 425 4-Gallon Backpack Sprayer
↓ Jump to Review - ALSO CONSIDER MOTORIZED: PetraTools HD4000 4-Gallon Backpack Sprayer
↓ Jump to Review
How We Tested the Best Backpack Sprayers
We considered these backpack sprayers from a home-dweller’s perspective. Although several of our picks offer truly professional-level performance and durability, our testing criteria centered on basic functionality, ease of use, operator comfort, and overall value.
To gauge mobility and operational comfort, we filled each sprayer to capacity with plain water and walked a spray route: putting on and taking off the backpack, walking between house and foundation plants, opening and closing a gate, uphill and downhill, and over small obstacles. Scoring favored sprayers that stayed most secure with less “slosh” and that generally felt most comfortable.
We then pressurized each sprayer, either by switching it on or by manually pumping and tried each nozzle. We noted ease and comfort of operation, speed of attaining initial pressure, motor noise, and drips from spray tips after releasing the spray trigger. The best backpack sprayers were easy to operate, versatile, fast, quiet, and drip-free.
| Testing Stats | |
| Products tested | 8 |
| Hours spent testing | 4 to 6 hours |
| Tests performed | 6 |
| Price range | $150 to $200 |
Our Top Picks
We tried each of the following sprayers in our backyard testing program. Read on to learn their individual features and benefits, how each one performed, and why we included them in this lineup of the best backpack sprayers.
Best Overall Manual
Field King Max 190348 Backpack Sprayer
What We Like
- Very comfortable harness system can be worn for long periods of time
- 4 interchangeable nozzles included with purchase to satisfy multiple users’ preferences
- High maximum psi of 150; suitable for small- to large-scale spreading
What We Don’t Like
- Manual operation increases user fatigue over extended periods of use
Specs
- Pressure: 150 pounds per square inch (psi)
- Tank capacity: 4 gallons
- Type: Manual
Our Ratings: Ease of Use 4/5; Comfort 5/5; Functionality 4/5; Durability 5/5; Value 4.7/5
If you’re looking for excellent performance with long-lasting comfort, the manual Field King Max 190348 is bound to deliver on both fronts. It features a 150 max psi— adequate power for most applications—and an internal pump design to contain leaks within the tank.
There are four nozzles: one for stream-to-cone spray patterns, one for a wide flat fan spray pattern, one for a narrow flat fan spray pattern, and one for a foaming spray. While a bit of muscle is required for operation, we found the Field King Max to be the best manual backpack sprayer we tested, largely due to its harness system. It isn’t especially well padded, but it includes a hip belt, sternum strap, and wide shoulder straps that did not dig into the shoulders during testing. It also had the least amount of drip after releasing the spray trigger, when compared with the other manual sprayers.
Get the Field King 190348 backpack sprayer at Amazon, Northern Tool + Equipment, or Gemplers.
Best Overall Motorized
Field King 190515 Battery-Powered Backpack Sprayer
What We Like
- Powered by rechargeable 20V lithium-ion battery for long usage times
- Padded shoulder straps and hip belt keep the unit in place comfortably; most comfortable battery-powered sprayer tested
- No drips when the spray trigger is released; no wasted product
What We Don’t Like
- Low psi limits this option’s uses; may not be ideal for some tasks
- Battery must be removed for charging
Specs
- Pressure: 40 psi
- Tank capacity: 4 gallons
- Type: Battery-powered
Our Ratings: Ease of Use 4.3/5; Comfort 5/5; Functionality 5/5; Durability 4/5; Value 4.7/5
With a 4-gallon tank and a 4-hour battery charge, the Field King 190515 backpack sprayer is ideal for an enthusiastic amateur landscaper. It features a fully padded harness to cushion your shoulders against muscle strain, a preset rating of 40 psi that users can increase if necessary, and a lockable shutoff on the wand to help reduce hand fatigue. A built-in carry handle and wand storage make transportation simple.
In our tests, the Field King 190515 was the most comfortable to carry battery-powered backpack sprayer, thanks to a generous amount of padding in the shoulder straps and hip belt. At 40 psi, it offered the lowest pressure rating, but that was still plenty of pressure to apply a variety of spray patterns, from a fine mist to a coarse shower of heavier droplets. The lithium-ion battery saves significant weight compared to the lead acid batteries in other sprayers, and the price is comparatively affordable. Good performance and excellent value.
Get the Field King 190515 backpack sprayer at Amazon or Forestry Suppliers.
Best Bang for the Buck
Chapin 61800 4-Gallon Manual Backpack Sprayer
What We Like
- Adjustable brass spray nozzle accommodates users during multiple tasks
- Great price for this sprayer’s quality; can last for years of use
- Clean, efficient operation for weeds, fertilizer, and pest control
What We Don’t Like
- Minimal harness support and padding; may dig into the user if worn for extended periods
- Manual operation can increase user fatigue; may not be ideal for some users
Specs
- Pressure: 60 psi
- Tank capacity: 4 gallons
- Type: Manual
Our Ratings: Ease of Use 4/5; Comfort 3/5; Functionality 4/5; Durability 3/5; Value 4/5
Users are unlikely to make a mess when filling the tank of this affordable backpack sprayer, thanks to a large 5-inch-diameter opening that helps prevent spills. It weighs about 9 pounds when the tank is empty and comes with adjustable padded shoulder straps to help support the tank when it’s full. The adjustable brass spray nozzle allows users to change the spray pattern from a fine mist to a coarse stream. This backpack sprayer from Chapin has a maximum psi of 60, and it requires manual pumping to keep the sprayer pressurized while in use.
When we tested this sprayer, it became apparent that Chapin saved costs on the harness system to preserve tank and pump quality at a bargain price. The manual pump and tank system proved easy to use and was efficiently designed. The spray tip dripped only slightly after the trigger was released. The bare-bones harness system, which consisted of thinly padded shoulder straps and a minimal lumbar pad at the base of the tank, was fine for limited work with a partially filled tank but was not comfortable for extended use.
Get the Chapin 61800 backpack sprayer at Amazon or Gemplers.
Upgrade Pick
My4Sons M4 4-Gallon Battery-Powered Backpack Sprayer
What We Like
- Accessible variable pressure switch can adjust the pressure of the product
- Automatically maintains psi between 40 and 60 for pest control, fertilizers, and weeds
- Excellent shoulder-strap padding supports the users’ back and hips while in use
- Sprays up to 30 feet; suitable for large-scale product applications
What We Don’t Like
- Heavier than the other battery-powered sprayers; may wear on some users
- Cannot be used if the battery isn’t charged
Specs
- Pressure: 60 psi
- Tank capacity: 4 gallons
- Type: Battery-powered
Our Ratings: Ease of Use 4.3/5; Comfort 5/5; Functionality 5/5; Durability 5/5; Value 4.3/5
This backpack sprayer from My4Sons is a premium product that comes at a premium price. It includes such impressive features as a variable pressure switch that allows the user to adjust the output pressure to the optimal level. It also boasts a variety of nozzles so users can switch between them, depending on the job and personal preference.
The battery-powered backpack sprayer has a motorized pump that works continuously to keep the pressure inside the sprayer between 40 and 60 psi. When used with the right nozzle and held at the right angle, this pressure allows the unit to spray up to 30 feet in a horizontal direction. Just keep in mind that even if the 4-gallon tank is filled and ready to go, the sprayer will not run unless the battery is charged.
In testing, we really liked the build of this My4Sons sprayer. The combination of a low-profile tank and thick padded shoulder straps provides excellent comfort, balance, and maneuverability. The powerful pump brought the tank up to pressure in a matter of seconds and ran quieter than other motorized sprayers tested. Pressure was excellent and no drips, and we felt it was definitely worth the added cost for those who use a sprayer frequently.
Get the My4Sons backpack sprayer at Amazon.
Best Professional
PetraTools HD5000 Battery-Powered Backpack Sprayer
What We Like
- High-volume tank is suitable for large-scale product applications; perfect for weeding, fertilizing, and pest control
- Converts from backpack to cart for increased portability and mobility
- Variable pressure switch can adjust the output level of the product for added versatility
- Includes 4-foot and 100-foot spray hoses depending upon the application area
What We Don’t Like
- Oversize tank can be cumbersome in backpack mode
- Cannot be used if the battery isn’t charged
Specs
- Pressure: 80 psi
- Tank capacity: 6.5 gallons
- Type: Battery-powered
Our Ratings: Ease of Use 5/5; Comfort 4/5; Functionality 4/5; Durability 5/5; Value 4/5
Professionals in the market for a new backpack sprayer may appreciate the PetraTools backpack sprayer’s 6.5-gallon tank and its rugged steel cart for hauling the unit from the vehicle to the work site. It features a 100-foot hose for treating large areas without moving the sprayer from the cart.
This battery-powered sprayer provides a base setting of 70 psi that can be increased to suit user needs—a great versatility factor when working on a variety of yards over the course of a long day.
This convertible backpack/cart sprayer offers excellent versatility for intensive spraying in a compact area or dispersed use over a larger area. In testing we found that the 6.5-gallon spray tank is too heavy to completely fill for backpack mode but a good size for the cart. The conversion from backpack to cart mode was quick and uncomplicated. The pump offers ample pressure to apply common lawn and garden chemicals, and the wand operated drip-free.
Get the PetraTools backpack sprayer at Amazon.
Best Hobbyist
Chapin 61900 4-Gallon Manual Backpack Sprayer

What We Like
- Wand-mounted pressure gauge monitors spray pressure
- Multiple spray tips included for various spray patterns
- 3-stage filtration system resists clogging
What We Don’t Like
- Steel spray wand may not be appropriate for use with some chemicals
- Manual operation can increase user fatigue
Specs
- Pressure: 60 psi
- Tank capacity: 4 gallons
- Type: Manual
Our Ratings: Ease of Use 4/5; Comfort 4/5; Functionality 4/5; Durability 4/5; Value 4.3/5
For versatility and safety, the Chapin 61900 sprayer can handle some of the most volatile fertilizers, weed killers, and pest control treatments in use today. It features Viton seals, which are specially manufactured to be chemically resistant, and a three-stage filtration system to prevent clogging.
A wand-mounted pressure gauge and a control flow valve both assure the user that the spray and pressure levels are consistent, while three different nozzles are included for direct stream, fan spray, and foaming applications. Great for home use or for industry professionals who need a single sprayer suited for multiple applications.
In our tests, the Chapin 61900 proved comfortable and capable as well as affordable. The wide shoulder straps and hip belt provided good comfort and excellent stability. The built-in pressure gauge gave a sure indication of adequate operating pressure, which the other manual sprayers tested did not offer. For just a few dollars more than our budget pick, the price appears to be a bargain for this upgraded sprayer.
Get the Chapin 61900 backpack sprayer at Amazon.
Also Consider Manual
Solo 425 4-Gallon Backpack Sprayer

What We Like
- Comfortable padded straps can support the back and hips of the user
- Collapsible carry handle provides added versatility and maneuverability
- 5 spray tips included with purchase depending on the application type
- Four pressure settings integrated; suitable for small- to large-scale applications
What We Don’t Like
- No padding in the lumbar area or on the hip belt; may not be ideal for some users
Specs
- Pressure: 60 psi
- Tank capacity: 4 gallons
- Type: Manual
Our Ratings: Ease of Use 4/5; Comfort 3/5; Functionality 4/5; Durability 4/5; Value 4/5
Gardeners looking for a durable sprayer for regular or intermittent use should consider the Solo backpack sprayer. It offers reliable operation and quality components, like a manual diaphragm pump that produces up to 60 psi, a full array of five spray nozzles for customized applications, an unbreakable wand, and padded shoulder straps. This sprayer is suitable for use with liquid concentrates, wettable powders, and bleach solutions that could damage other sprayers.
In our tests, this Solo sprayer came up to full pressure quickly and produced an excellent spray pattern with no drips. It was comfortable and easy to carry when half full, but at capacity, the shoulder straps dug in a bit too much for comfort. The plastic spray wand provided some flexibility and, as required equipment for use with bleach solutions and certain other chemicals, makes a good all-purpose applicator.
Get the Solo backpack sprayer at Ace Hardware, The Home Depot, Northern Tool + Equipment, or Gemplers.
Also Consider Motorized
PetraTools HD4000 4-Gallon Backpack Sprayer
What We Like
- Adjustable pressure output depending upon the application type and size
- Automatic pump to maintain 70 psi while spraying
- Low-profile tank is easier to carry that some comparable options
- Well-padded shoulder straps are comfortable for the user
What We Don’t Like
- Thin nylon waist belt does not relieve shoulder pressure
- No padding in the lumbar area; may not be ideal for those with back problems
Specs
- Pressure: 70 psi
- Tank capacity: 4 gallons
- Type: Battery-powered
Our Ratings: Ease of Use 4.7/5; Comfort 4/5; Functionality 4/5; Durability 5/5; Value 4.3/5
Capable of operating for up to 8 hours on a single battery charge while maintaining a constant pressure of 70 psi, this PetraTools backpack sprayer is an excellent choice for anyone with a lot of ground to cover.
The 4-gallon tank can handle large yards without frequent refills, and it’s translucent, so users can see how much liquid is left at any time. With padded straps for added comfort and a wide-mouth tank lid to offset spills, this motorized backpack sprayer will keep the operator working comfortably all day long.
We really liked this PetraTools sprayer’s low-profile tank and padded shoulder straps. It felt comfortable and well balanced for limited use. Unfortunately, the thin nylon waist belt only provides lateral stabilization without relieving weight from the shoulders, which makes it less than ideal for extended use. The pump worked quickly and was fairly quiet—nearly on the level of our upgrade pick and for about $80 less.
Get the PetraTools backpack sprayer at Amazon.
Jump to Our Top Picks
What to Consider When Choosing a Backpack Sprayer
Before opting for the first hobbyist or professional backpack sprayer you see, take some time to familiarize yourself with the various product factors likely to lead you to the right decision. Consider the pressure (psi), tank capacity, the type of liquid delivery system, and the type of pump that pressurizes the backpack sprayer.
Pressure
Pounds per square inch (psi) is the unit of measure identifying the amount of pressure a backpack herbicide sprayer can propel through its nozzle. The average for a backpack sprayer is around 70 psi, but smaller models can use as little as 40 psi, and a commercial backpack sprayer may use as much as 150 psi.
Pressure is important to ensure that a backpack sprayer operates effectively. Too little pressure will produce an uneven spray that reduces the effectiveness of its contents, while too much will prove excessive for a smaller yard.
If you have a large yard with many hard-to-reach spots, or you are a professional who works in many different-size spaces, a sprayer with a psi rating of 70 or above is your best bet. For those with average-size or smaller yards, a moderate rating between 40 and 70 psi is more than enough to spray your space.
Piston vs. Diaphragm
Backpack sprayers generally come in one of two types of liquid delivery systems: piston pump and diaphragm pump.
- A piston pump works by drawing liquid from the tank into an enclosed chamber on the upstroke and pushing the liquid out through the outlet valve or nozzle on the downstroke. Piston pump sprayers are more popular with the average home dweller because of their simple design, easy accessibility for repairs, and beneficial psi ratings.
- A diaphragm pump is designed for the safety of professionals who use potent pest control and weed killer chemicals. It is a sealed system that works by moving liquid from one side of a chamber to the other with a diaphragm so that one side is always full and one side is always empty. The diaphragm pump cannot produce the same pressure as the piston pump but is better suited to pros because it’s made of more chemically resistant materials.
Manual vs. Motorized
Backpack sprayers use an internal pump to draw liquid out of the chamber, through a hose, and out through a wand and nozzle. This pump can be operated manually, or an electric backpack sprayer will often use a motorized system—the pricier option.
Manual backpack sprayers operate via a hand pump attached to the backpack chamber. Pumping manually for an extended period can cause muscle fatigue and pain, so while this style of sprayer is fine for smaller yards, once-per-season jobs, and the average home dweller, it’s less suited to professionals who have to spray for hours at a time. Manual backpack sprayers cost as little as $40 to as much as $150, on average.
Motorized backpack sprayers are powered either by battery or gas, with a battery backpack sprayer offering more versatility and a simpler setup. A motorized sprayer automatically pumps the liquid from the backpack chamber to the wand, requiring no physical work by the user. Intended for large projects and long workdays, a motorized sprayer (which can run between about $100 and $500) is a better choice for the busy professional who’ll rely on it daily.
That said, Sherrer explains, “Most homeowners can use a backpack sprayer with a hand pump for effective results.” A motorized option may only be worth the jump in price for those looking for a more heavy-duty option to use more often.
Tank Capacity
Sprayers are available in a tank capacity range between 2 and 7 gallons. Carry smaller-capacity sprayers with a handle, and tote the largest tanks with a wheeled cart. A 4-gallon backpack sprayer is considered to be about average in size.
Sprayers that fall between these two size extremes are true backpack sprayers—light enough to carry on your back but too heavy to lug around by hand. For typical jobs, such as fertilizing a lawn or spraying an insect infestation, a 4-gallon tank can do the trick for a yard between 5,000 and 10,000 square feet.
Additional Features
Backpack sprayers may include a variety of features, such as a built-in gauge to monitor the pressure of the unit while in use, extra padding in the shoulder straps for added comfort, a foaming nozzle, and a foldaway pump handle that won’t get in the way while spraying. Larger models may offer an extended hose and wheeled cart that can be used for more complex yards and heavier tanks.
“Some backpack sprayers are designed with detachable and changeable nozzles,” Sherrer says. “Some nozzles produce a pin stream, which is useful when spraying in cracks and crevices or when a precise application is needed. Fan spray nozzles are useful when applied over a larger area.” He also adds that “the ability to adjust the application flow will make any sprayer more versatile and effective.”
Tips for Using a Backpack Sprayer
Backpack sprayers are helpful tools for quickly and efficiently treating the yard and garden with liquid fertilizers, herbicides, and insecticides. But to ensure against over- or under-spraying an area, it’s important to keep the same walking speed and distance from the target during use.
Additionally, users should ensure that the backpack sprayer is properly pressurized at all times so that it’s easier to maintain an even spraying pressure. By taking the time to balance the pressure, the same amount of solution will be applied to each area of the yard and garden.
Before starting to use a backpack sprayer, adjust the shoulder straps so that the unit fits properly. You don’t want to have to deal with a shifting tank of fertilizer, water, or pesticide while working because it will take extra effort to control the moving weight, increasing fatigue.
In general, remember to:
- Maintain a uniform walking speed.
- Balance the spraying pressure.
- Adjust the straps before use for a secure fit.
FAQs
Buying and using a backpack sprayer brings up several questions. We’ve answered some of the common questions below.
You can fill a backpack sprayer with almost any liquid solution that has a similar consistency to water. This includes insecticide, herbicide, and liquid fertilizers. Just make sure the solution isn’t too corrosive or volatile, as these dangerous substances might eat through the walls of the sprayer.
Backpack sprayers are safe to use as long as they are filled with suitable solutions and proper precautions are taken to protect the eyes, skin, and respiratory system during use. The reason for the added personal protection is that when the liquid sprays from the backpack, some might get caught in the wind and blow back toward the user. While this wouldn’t matter much with water, it could be hazardous when the sprayer is filled with pesticide or herbicide.
The maximum distance that a sprayer can spray a liquid solution is determined by the maximum psi of the unit, the type of nozzle, the wind direction, the force of the wind, and the angle of the spray wand. On average, a backpack sprayer can spray up to about 10 to 20 feet, though there are models that can reach over 30 feet.
To clean a backpack sprayer after using it to apply a volatile chemical like herbicide or pesticide, follow these simple steps:
Responsibly empty any excess solution from the sprayer tank and add about half a tank of water.
Flush the sprayer system by using the sprayer until the tank is empty again.
Fill the tank half full with water again, this time adding any cleaning agents or neutralizing solutions that can help to remove remnants of the herbicide or pesticide solution.
Open all recirculation lines and any other hoses on the backpack sprayer.
Shake or agitate the unit to ensure the cleaning solution reaches every inch of the backpack sprayer.
Fill the tank to the top with water, and agitate again before emptying the sprayer.
Refill the sprayer with water to rinse out any remaining cleaning solution.
The post The Best Backpack Sprayers for Easier Yard Work appeared first on Bob Vila.
]]>The post Homemade Weed Killers and Preventative Treatments That Really Work appeared first on Bob Vila.
]]>Share
We may earn revenue from the products available on this page and participate in affiliate programs. Learn More ›
Although not all of these methods will work all of the time, weed management should always begin with the most eco-friendly choices. Anything we can do to prevent the use of harmful herbicides is a good thing. Overusing herbicides can contaminate groundwater and harm beneficial plants and soil. Studies have shown that many of these chemicals remain in the soil and harm insects and microbes that are essential to soil health.
Although today’s herbicides are more selective than in the past, they can still pose health dangers to people, animals, desired plants, and soil. Instead, keep weeds away with these more natural approaches.
How to Kill Weeds Naturally
Getting rid of weeds is a two-step process: Kill them and prevent them. We’ll start with some ways to kill the weeds that are plaguing your lawn and gardens.
Spray weeds with vinegar.

Apply undiluted household vinegar to the leaves of weeds with a spray bottle, pump sprayer, or brush, as long as you can direct it only to the plants you wish to get rid of, because vinegar cannot differentiate between weeds and other plants, and will kill whatever it comes in contact with. To avoid contaminating nearby plants, apply vinegar early in the morning when there’s little wind. Also, choose a cloudless day, which ensures that rain won’t wash it off before it works its magic.
Household vinegar is usually effective but if it fails to work in your yard, consider using a commercial preparation that contains a higher concentration of vinegar. Your local extension office can offer advice about what works well in your area and how to use it safely.
Sprinkle table salt at the base of the weed.

Regular old table salt is very effective at killing weeds. Put just a pinch of this natural weed killer down at the base of each unwanted plant. Be sure to use table salt (sodium chloride), not Epsom salt (magnesium sulfate), as the latter is not an effective weed killer. Salt is useful around the house in many ways and in the garden will render soil inhospitable for several months, so make sure you apply just a small amount and only where needed. Avoid getting it on your grass or other plants.
Spray DIY herbicidal soap.

If you’re not having luck with just vinegar or just salt, add dish soap to the party and make your own homemade weed killer using this natural weed killer recipe. Mix up 1 gallon of regular household vinegar, 2 cups of table salt, and ¼ cup of Dawn dish soap. Put the mixture in a sprayer and apply it to the offending weeds, but be judicious. This concoction might kill any plants it touches, so be careful not to get it on your prized perennials.
Pour boiling water on the unwanted plant.

If you’ve researched how to kill weeds naturally, you’ve probably read about using boiling water, because it works. Just grab your kettle or pot of boiling water off the stove, take it to the garden, and pour a stream of water carefully over each unwanted plant. Tough perennial weeds with long tap roots may take two or three applications but will eventually stop coming back. Use pot holders, of course, and dress for the task by wearing long pants and closed-toe shoes.
Smother them with recycled cardboard.

To prepare a garden bed for planting, smother weeds and help prevent new ones from growing by covering the soil with old cardboard boxes or even newspapers. A thick layer will keep sunlight from reaching weed seeds so they can’t sprout. First, remove visible weeds and wet the soil, and then lay the recycled paper product down, wetting it thoroughly again before covering it with mulch.
Placing the opaque layer on for 4 to 5 weeks at a time keeps sunlight from reaching weed seeds so they do not germinate. Leave the bed open for 1 or 2 weeks and repeat this DIY weed killer cycle a couple times to increase success. This smothering method also works with plastic tarps, which you can reuse. However, remaining cardboard and newspaper eventually break down into the soil, improving chances of earthworms and healthy soil activity.
Use a weed torch.

A weed torch works by heating the water inside the cells of plants. When the water turns to steam, the cells explode and the plant dies. You don’t need to char the weeds, just wilt them. This takes some practice, but it is very effective.
Use caution with this method, of course, especially on windy days or in drought-prone areas. Don’t ever use it on poison ivy or other poisonous plants because it can release their oils into the air and ultimately into your eyes or lungs. Finally, be careful where you use the weed torch. The heat will melt plastic borders and landscape fabrics.
Apply an Organic Commercial Solution
Online or at a garden center, you should be able to find commercial preparations that use natural ingredients to kill weeds. Some, like this product from Natural Armor, contain “industrial strength” vinegar. Others contain iron, which kills weeds by overfeeding them, and some contain citric acid or citric oil, the acidity of which will get rid of unwanted plants. Cornmint oil, derived from the Mentha arvensis (wild mint) plant, is another ingredient found in natural weed-killing products.
How to Prevent Weeds Naturally
Optimally, of course, you’d prevent weeds from growing in the first place, so you don’t have to mess with killing them. But odds are, you’ve had to do some weed cleanup. Now, on your quest for weed-free gardening, endeavor to prevent new ones from growing.
Promptly pull them by hand.

Before a colony of weeds can take root in your garden beds or lawn, be vigilant about hand-pulling individual weeds as they emerge. Wear a dedicated pair of gardening gloves for the task to avoid inadvertently transferring weed seeds where you don’t want them. Weed-removal tools such as claws or sharp trowels can help you loosen the weed roots from the soil. Pulling a weed completely out by the root is the only way to ensure it will not return.
Spread corn gluten meal in the garden.

Corn gluten meal is like birth control for seeds: Sprinkle it on exposed areas of your garden to prevent weed seeds from germinating and growing into plants. Of course, corn gluten meal might keep other seeds from germinating too, so don’t try this method in your vegetable garden until your plants are established and you’ve finished planting seeds.
Layer on some mulch.
Cover your planting areas with a few inches of mulch and you’ll prevent weed seeds from coming into contact with the soil in the first place. Because mulch will also keep sunlight from reaching seeds that are already underground, they won’t get a chance to sprout. Organic mulches offer the added benefits of retaining moisture and breaking down to enrich the soil below. Bonus: A fresh layer of mulch amps up your curb appeal, too.
RELATED: Buyer’s Guide: The Best Organic Weed Killers
Plant ground cover.

Weeds mostly attack bare, open soil. Protect these weed-prone sites with ground cover, or low-growing plants that spread across and close to the soil and make it more difficult for weed seeds to get through. Plus, if these seeds do try to take root, they receive little to no light. As a bonus, you get to buy and enjoy some new plants that add evergreen or flowering color.
The best ground cover for your garden depends on your growing zone and where you need the greenery. Some good candidates include creeping thyme (Thymus serpyllum), especially between walkway stones; bugleweed (Ajuga), which thrives in shade; and ice plant (Delosperma), a sun- and heat-loving succulent.
Lay down landscape fabric.

Much derided in some circles, landscape fabric has its place in gardens when used correctly. Today’s fabrics are not like the old nonpermeable landscape plastic, which basically depletes the soil beneath it. A good landscape fabric lets air and water through while preventing weed seeds from rooting. Use the fabric prudently, such as along walkways (covered with mulch, gravel, or crusher fines), to cut down on weeds in those spots where you aren’t growing plants. The fabric works best at weed suppression if it is laid from border to border, with as few cuts or openings as possible.
Plant cover crops.

Also known as “green manure,” cover crops are plants that are typically sown in fall and grow in winter. They’re similar to ground covers in their ability to cut down on weed growth, but they also help improve the health of the soil. Come spring, they’re plowed or tilled under, and the plants and their nutrients are incorporated into the soil. Although cover crops are largely a farming practice, they can work for home gardeners as well, especially in vegetable gardens during the off-season.
Check with local nurseries, landscapers, or extension offices for the best cover crop for your area. Choose a native or local favorite for the greatest success and the least amount of watering and care. Most cover crops are from the legume, grass, and grain families. Some popular examples are winter wheat, certain clovers, and cereal rye.
Solarize garden beds.

Similar to smothering, solarization kills existing weeds, but is a little more effective at preventing most annual weeds from emerging. This method uses clear plastic to let in sunlight First remove debris and live weeds, then till or turn the soil (to bring weed seeds closer to the surface). Next, wet the loosened ground and cover it with thin clear plastic and secure it by layering loose dirt on all its edges.
Temperatures under the plastic of at least 99 degrees Fahrenheit for 2 to 4 weeks are optimal to stop weeds, so it is most effective in summer to prepare future beds. In cooler climates, leave the plastic on for up to 6 weeks if desired. This method also can improve soil health. Painter’s plastic drop cloths are readily available from home improvement retailers. One downside to these cloths is that the thin plastic can rip, so double the plastic over if you can.
Change your mowing routine.

Another natural weed killer for lawn weeds involves has to do with your lawn maintenance schedule. Consider mowing more frequently, but to a taller height than perhaps you’re accustomed to. Changing your mowing height to 3 or 4 inches enables your lawn to grow more densely, which can crowd out weeds. Additionally, frequent mowing offers more opportunities to lop off developing weed seed heads before they can do their damage.
Add organic matter to your soil.

Some weeds actually prefer compacted, nutrient-deficient soil. If you keep your soil healthy, you might discourage weedy plants from settling in. Add organic matter to your soil and mix it in well, breaking up the soil to keep it loose and welcoming to desirable plants.
Adjust your watering schedule.

Watering deeply but less frequently allows turfgrass lawns to produce deep roots and grow stronger overall. A healthy lawn is better able to squeeze out weeds, whereas a weak lawn is susceptible to takeover by unwanted invaders. Take this into consideration when determining your irrigation schedule.
The post Homemade Weed Killers and Preventative Treatments That Really Work appeared first on Bob Vila.
]]>The post We Tested 2025’s Best Single-Stage Snow Blowers and Found 9 Top Models You Can Rely On appeared first on Bob Vila.
]]>Single-stage snow blowers are compact and lightweight, offering an affordable and highly maneuverable alternative to full-size machines while still eliminating the back-breaking work of shoveling. But when gas, cordless, and corded options can cost between $100 and $1000, it’s hard to know how much you need to spend to get a model you can rely on. That’s why we researched dozens of popular options before testing nine you can trust to clear your driveways and walkways.
After using these tools in a variety of snowy conditions and reaching out to an expert for their opinions, we selected the Snow Joe 24V-X2-SB18 48V Ionmax Snow Blower as our best overall electric model and the Troy-Bilt Squall 208E 21″ Snow Blower as the top gas option. Both machines offer consistent performance and impressive clearing abilities. By reading through the pros and cons of the snow blowers on our list and familiarizing yourself with the features of these machines that matter most, you will be well positioned to choose one of the best single-stage snow blowers for your property.
- BEST OVERALL ELECTRIC: Snow Joe 24V-X2-SB18 48V Ionmax Snow Blower
↓ Jump to Review - BEST OVERALL GAS: Troy-Bilt Squall 208E 21″ Snow Blower
↓ Jump to Review - BEST BANG FOR THE BUCK: Greenworks 13-Amp 20″ Corded Snow Thrower
↓ Jump to Review - UPGRADE PICK: Ego Power+ Peak Power 21″ Snow Blower
↓ Jump to Review - BEST LIGHT-DUTY: Wen 5664 Snow Blaster 18″ Electric Snow Thrower
↓ Jump to Review - BEST MEDIUM-DUTY: DeWalt 21″ 60V MAX Single-Stage Snow Blower Kit
↓ Jump to Review - BEST HEAVY-DUTY: Ryobi 40V HP Brushless 21″ Whisper Snow Blower
↓ Jump to Review - BEST SELF-PROPELLED: Toro Power Clear 721 E 21″ Gas Snow Blower
↓ Jump to Review - BEST BATTERY LIFE: Greenworks 60V 22″ Single-Stage Snow Blower
↓ Jump to Review
Before You Buy a Single-Stage Snow Blower
Compared to traditional two-stage machines, single-stage snow blowers are lighter, more mobile, and better suited to light- to moderate-duty jobs. For folks who regularly get severe storms with several feet of heavy snow at a time, these machines might be underpowered.
However, if you’re looking for a good snow blower that can clear smaller amounts of snow on average-size driveways and walkways, a single-stage model will be a relatively cheap snow blower that still offers plenty of convenience power.
Single-Stage Snow Blowers Comparison Chart
| Product Name | Type | Weight | Clearing Width |
| Snow Joe 24V-X2-SB18 48V Ionmax Snow Blower | Cordless electric | 37.5 pounds | 18 inches |
| Troy-Bilt Squall 208E 21″ Snow Blower | Gas | 100 pounds | 21 inches |
| Greenworks 13-Amp 20″ Corded Snow Thrower | Cordless electric | 50.6 pounds | 21 inches |
| Ego Power+ Peak Power 21″ Snow Blower | Corded electric | 32 pounds | 18 inches |
| Wen 5664 Snow Blaster 18″ Electric Snow Thrower | Cordless electric | 59 pounds | 21 inches |
| DeWalt 21″ 60V MAX Single-Stage Snow Blower Kit | Cordless electric | 52 pounds | 21 inches |
| Ryobi 40V HP Brushless 21″ Whisper Snow Blower | Gas | 84 pounds | 21 inches |
| Toro Power Clear 721 E 21″ Gas Snow Blower | Cordless electric | 65.5 pounds | 22 inches |
| Greenworks 60V 22″ Single-Stage Snow Blower | Corded electric | 32 pounds | 20 inches |
Our Top Picks
Just ahead are some of the best single-stage snow blowers in a variety of categories, all tested in tough conditions. Each of these snow blowers are capable of clearing driveways and sidewalks after moderate snow events.
Best Overall Electric
Snow Joe 24V-X2-SB18 48V Ionmax Snow Blower
What We Like
- Two 24-volt batteries; 40 minutes of runtime each
- Quadruple-bladed steel auger cuts 10 inches deep
- Moves up to 10 tons of snow per charge
- 180-degree adjustable snow chute
What We Don’t Like
- Plastic blade can chip on hard gravel or debris
Specs
- Type Cordless electric
- Weight 37.5 pounds
- Clearing width 18 inches
This Bob Vila Approved product carries our brand’s highest level of recommendation.
Bob Vila Approved recognizes the household and DIY products that impressed us most in our real-world testing and that exemplify core values of the Bob Vila brand, including craftsmanship, innovation, and value for the dollar. Winners of this designation come recommended by our professional review team and are personally approved by Bob Vila.
This battery-powered snow blower from Snow Joe is made to rival the power of a standard two-stage snow blower. Equipped with two rechargeable 24-volt (V) batteries, it offers up to 80 minutes of runtime and can throw up to 10 tons of snow per charge. Its 18-inch auger is rubber tipped, can cut a 10-inch-deep path, and works noticeably faster than other models. In some instances, it also threw snow farther than the 20-foot mark claimed by the manufacturer.
We chose this Snow Joe cordless snow blower as the best electric snow blower because it’s very functional, moderately priced, and a solid, consistent performer in a variety of conditions. At a relatively light weight of 37.5 pounds, it’s plenty easy to push around and manage. It also has a nice set of LED headlights to increase visibility in dark conditions.
Shoppers seeking an economical single-stage snow blower with plenty of power, simple operational features, and great performance won’t be disappointed.
What our tester says: “We were so impressed by how quickly the batteries on this Snow Joe charged. But they also lasted long enough for us to make it through full snow-clearing sessions during testing, which is a big part of why this model was a clear favorite.”—Zach Lazzari, Product Reviews tester and writer
Read our full review: Snow Joe 24V-X2-SB18 48V Ionmax Snow Blower
Get the Snow Joe single-stage snow blower at Amazon (with cover and scraper), Walmart, Best Buy, or Blain’s Farm & Fleet.
Best Overall Gas
Troy-Bilt Squall 208E 21" Snow Blower
What We Like
- Easy to start, runs efficiently, and is impressively quiet
- Auger throws snow with remarkable force
- Fairly affordable for a high-quality gas-powered snow blower
What We Don’t Like
- Wheels may be too small for deep snow
Specs
- Type Gas
- Weight 100 pounds
- Clearing width 21 inches
The Squall is a smooth-running unit with an efficient 208 cubic centimeter (cc) 4-stroke engine, meaning it doesn’t require users to mix oil and gas as with a 2-stroke machine. Its user-friendly design features an easily accessible gas-fill neck and an oil fill that doesn’t require any manipulation of the machine or leveling. The unit’s electric start performed flawlessly, repeatedly firing up on the first push.
During testing, we really appreciated how quiet the engine ran and how easy it was to push this snow blower around, especially considering how loud and heavy gas models can be. We were impressed with the auger’s ability to virtually vacuum up snow before projecting it through the chute at high speeds. While its standard-size half-gallon fuel tank may seem small, the machine’s efficiency allowed us to clear multiple properties without needing to refill. The 100-pound machine pushed along easily, even though its wheels are smaller than is ideal for deep snow. Overall, however, this gas snow blower is perfect for moderate storms and snow loads under 12 inches.
What our tester says: “We tested several gas models that performed exceptionally well, so assigning this award wasn’t easy. Ultimately, the Troy-Bilt Squall took the top prize, but we think shoppers will also want to take a hard look at the Toro self-propelled model. Both snow blower brands excel in the gas snow blower design with reliable engines and smooth functionality.”—Zach Lazzari, Product Reviews tester and writer
Get the Troy-Bilt single-stage snow blower at The Home Depot, Walmart, or Northern Tool + Equipment.
Best Bang For The Buck
Greenworks 13-Amp 20" Corded Snow Thrower

What We Like
- Clears a 20-inch swath of snow with each pass
- Discharge chute throws snow up to 20 feet
- Rubber auger blades don’t damage pavement
- Attractive and affordable price point
What We Don’t Like
- Corded operation can be inconvenient
- Requires an extension cord, which is not included
Specs
- Type Corded electric
- Weight 32 pounds
- Clearing width 20 inches
At just 32 pounds, this corded electric Greenworks 20-inch snow thrower is almost a mini snow blower, yet our tests proved it’s powerful enough for clearing snow up to 12 inches deep on small driveways, walkways, and decks. Though the manufacturer doesn’t advise operating it in heavy snow, we did try to tackle some deeper snow and found the ramping-up technique quite effective. The unit put out consistent power without requiring us to stop and recharge a battery. Of course, that meant we always had to be within access to an outlet, which generally involved using an outdoor-rated extension cord we had on hand.
While this model does have a clip that helps secure its cord to prevent it from accidentally unplugging, it was sometimes still challenging to wrangle the long cord in areas with multiple obstacles. Still, there’s a lot to like about using this unit to remove snow: its push-button start is convenient, and controlling the chute is simple via a lever located just below the handle. Although our model did not include LED lights, Greenworks makes a version with the option, which would make nighttime snow removal much easier.
Get the Greenworks 20-inch single-stage snow blower at Walmart.
Upgrade Pick
Ego Power+ Peak Power 21" Snow Blower
What We Don’t Like
- Large wheels make it easy to push
- Throws snow up to 40 feet for clearing large driveways
- Handles can fold for easy storage
- Extended battery life provides plenty of working time
What We Like
- Can be challenging to push up hills
Specs
- Type Cordless electric
- Weight 50.6 pounds
- Clearing width 21 inches
For those looking to invest in a machine with some unique features, the Ego Power+ cordless snow blower could be just the ticket. This model can throw snow up to 40 feet, far exceeding many single-stage units. That impressive distance, along with the adjustable discharge chute and steel auger, makes plowing large snow piles easy—even in icy conditions.
This Ego snow blower features a 21-inch capacity, which is a bit larger than most comparable models. It comes with two 56-volt 5.0 amp hour (Ah) batteries that can power the brushless motor long enough to clear snow off a 12-car driveway. The adjustable throttle also allows the user to regulate the power and battery as needed. This unit even has a folding handle with quick-release levers that make it easy to store. The only downside to this Ego is that it is on the heavier side, but the extended battery life is definitely a plus that cannot be ignored.
What our tester says: “During testing, this model performed exceedingly well. It was easy to operate and push, even over less-than-smooth terrain. We also enjoyed the folding handle with quick-release levers, as it made storing this model a breeze.”—Zach Lazzari, Product Reviews tester and writer
Read our full review: Ego Power+ Peak Power 21″ Snow Blower
Get the Ego Power+ single-stage snow blower at Amazon, Lowe’s, Ace Hardware, or Walmart.
Best Light-Duty
Wen 5664 Snow Blaster 18" Electric Snow Thrower
What We Like
- Lightweight, portable snow blower
- 13.5-amp motor clears snow up to 7.8 inches deep
- Can move up to 490 pounds of snow per minute
What We Don’t Like
- Requires some assembly and an extension cord
- Not designed for deep snow removal
Specs
- Type Corded electric
- Weight 32 pounds
- Clearing width 18 inches
This 13.5-amp electric blower by Wen is a lightweight, 32-pound machine designed for use in small areas. It can clear an 18-inch swath of light to medium snow accumulation up to 7.8 inches deep and features a 180-degree rotating chute that’s easy to adjust with minimal effort. Despite its compact and simple design, we found it to be a powerful and effective tool for removing light snowfall as well as wet snow (if we gave it a little extra push).
This Wen requires a cord to function, so it’s best in areas with convenient access to electricity—we found it most useful on our front steps and deck. The plastic auger worked surprisingly fast, and the throwing distance was more than ample for those spaces. We also liked that this unit has a folding handle that makes it easy to transport and store.
Get the Wen single-stage snow blower at Amazon or Wen.
Best Medium-Duty
DeWalt 21" 60V MAX Single-Stage Snow Blower Kit
What We Like
- Impressive 21-inch clearing path
- Steel auger is tough enough for hard, icy snow
- Electric controls enable quick throwing-direction changes
What We Don’t Like
- Auger angle control requires manual adjustment
Specs
- Type Cordless electric
- Weight 59 pounds
- Clearing width 21 inches
With this medium-duty model, DeWalt introduces some great features into the electric snow blower market. It’s one of the few single-stage options available that has a steel auger, making it great for chopping through ice and wet snow. It also offers an impressive 21-inch width so users can process more snow in less time, and its batteries provide about 40 minutes of continuous runtime.
During testing, the DeWalt worked through light snow with no resistance, and once conditions iced up, it continued to do really well. We had to use a bit more effort as the snow got heavier, but the auger was more than capable and still threw snow reasonably far. We were also impressed by how easy it was to change throwing directions via this machine’s electric tab-style buttons. If you need a snow blower that’s a bit more powerful than a light-duty model but not as heavy-duty as a two-stage machine, the DeWalt is a great choice.
Get the DeWalt single-stage snow blower at Tractor Supply Co., Ace Hardware or The Home Depot.
Best Heavy-Duty
Ryobi 40V HP Brushless 21" Whisper Snow Blower
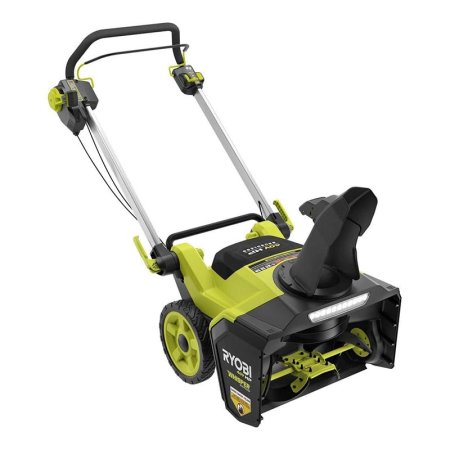
What We Like
- 21-inch clearing width and 13-inch clearing depth
- Variable-speed auger throws snow more than 35 feet
- Whisper-quiet operation and LED light bar
- Handle-mount controls are comfortable and easy to use
What We Don’t Like
- Not a self-propelled option
- Plastic tires aren’t as durable as rubber ones
Specs
- Type Cordless electric
- Weight 52 pounds
- Clearing width 21 inches
With its multiple batteries and 40 minutes of runtime, this Ryobi snow blower boasts plenty of long-lasting power and excellent snow-blowing capabilities. The 40V brushless single-stage unit comes with a push-button start, a variable-speed rubber-metal auger (the center shaft of the auger is metal while the blades are rubber), and handle-mount control for an overall ergonomic design.
This Ryobi has a 21-inch clearing width, a 13-inch clearing depth, and a 1.4-watt LED light bar. It comes with dual 7.5Ah batteries as well as a charger. Want more? It also has whisper-quiet operation (purportedly 84 percent quieter than other snow blowers) and launches snow over 35 feet.
During testing in a huge storm event in the Sierra Nevada mountains, this model really stood out. The batteries charged quickly, and it was capable of churning through heavy snow with minimal force. The charging port does only accept one battery at a time, but for most users, this is still a high-performance machine that will get the job done.
Get the Ryobi single-stage snow blower at The Home Depot.
Best Self-Propelled
Toro Power Clear 721 E 21" Gas Snow Blower

What We Like
- Self-propelled 212cc 4-cycle overhead valve engine
- Throws snow up to 35 feet
- 210-degree chute features a locking deflector
- Folds for compact storage
What We Don’t Like
- For use on paved surfaces only
- Heavy compared to similar models
Specs
- Type Gas
- Weight 84 pounds
- Clearing width 21 inches
Those wanting to quickly remove snow without having to push a heavy snow-removal tool can rely on the Toro Power Clear 721 E. This self-propelled snow blower has an electric start and comes with Curve Technology that easily shreds through snow. Its auger is durable and strong, making this unit a candidate for pushing the limits of single-stage capabilities. The locking deflector on the 210-degree chute allows users to direct where the snow goes after it has been picked up.
This Toro nearly snagged the best overall gas model, and it’s certainly one of the best and most powerful single-stage snow blowers we tested. The gas motor is powerful, efficient, and even relatively quiet. Though it’s not on par with electric models for reduced noise, the trade-off is that users won’t even need to wait for this machine to recharge. The fact that the Toro is self-propelled is a major bonus, as this will save users the effort of pushing through difficult snow. The only downside is that changing chute angles and throwing directions is done manually. It’s a quick process, but there are no controls within reach of the handle area.
Get the Toro 721 E single-stage snow blower at Lowe’s, Tractor Supply Co., Ace Hardware, or The Home Depot.
Best Battery Life
Greenworks 60V 22" Single-Stage Snow Blower
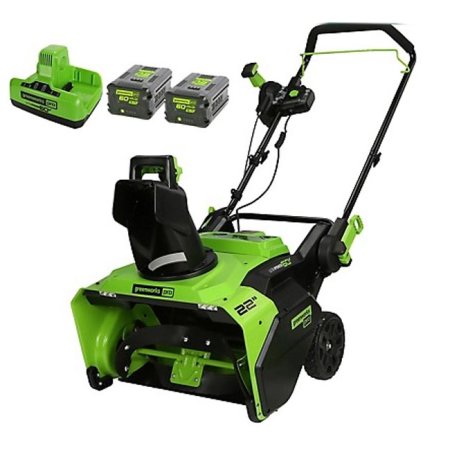
What We Like
- 2 powerful 5.0Ah batteries and a dual port charger
- Runs for up to 60 minutes; recharges in about 45
- Folding handle enables easy transport and storage
- LED headlights enhance visibility during heavy storms
What We Don’t Like
- Not self-propelled
Specs
- Type Cordless electric
- Weight 65.5 pounds
- Clearing width 22 inches
While battery-powered tools offer the convenience of cordless operation and minimal maintenance requirements, the compromise in power and runtime can make them impractical. Not so with this snow blower from Greenworks. The 60-volt, 22-inch model doesn’t look especially beefy, but its two 5.0Ah batteries really pack a punch. They deliver exceptional power and longer runtimes so users can work up to an hour to get big jobs done.
It’s hard to overstate the benefits of more battery power. We found the battery life to be a huge bonus during bigger storms and when the neighbors needed a hand with snow removal. The dual charging port also offers simultaneous or alternate charging for near-continuous use.
Outside of the batteries, this unit also performed as well as any of those tested. It has great auger speed and throwing distance as it zipped right along, clearing a wide 22-inch path. It’s not self-propelled, but otherwise, we had zero complaints about the quality of this machine.
Get the Greenworks 22-inch single-stage snow blower at Tractor Supply Co. or Walmart.
Jump to Our Top Picks
How We Tested the Best Single-Stage Snow Blowers
We tested a range of electric and gas single-stage snow blowers in a series of Montana and Sierra Nevada storms. We evaluated each unit’s ease of assembly and functionality on concrete as well as light gravel, if applicable. We looked at overall performance, auger quality and speed, snow-throwing distance, battery life, and build quality.
Since the storms during our tests delivered everything from a few inches of powder to a foot of heavy snow alongside temperatures as low as -10 degrees Fahrenheit, we got a great idea of how well these machines’ batteries and gas motors could hold up in difficult conditions. After rating each unit based on the above factors, we assigned awards to worthy models.
What to Consider When Choosing a Single-Stage Snow Blower
According to Wes Bollingmo, Channel & Product Support Manager at Toro, one of the most important things to consider when choosing a snow blower is its type, and that doesn’t mean gas or electric. Wes says, “While fuel types do matter in the buying process, it’s much more important to ensure you have the proper type of snow blower: single-stage, in-line two-stage, or two-stage.” After that, you can look into things like power source, clearing width and depth, ease of use, and additional features.
Type/Power Source
The best snow blowers come in corded electric, battery-powered, and gas-powered varieties.
- Electric snow blowers are typically designed to clear light snow up to about 8 inches deep. They must be plugged into an outlet with an extension cord, limiting their performance slightly and making them best for minimal snowfall levels and relatively short sidewalks and driveways. Since they’re lightweight enough to lift and move, they’re also handy for clearing snow from decks and steps.
- Cordless snow blowers are convenient battery-powered machines ideal for light to medium snowfall and spaces that can be cleared in 30 to 40 minutes. To extend this runtime, some models come with a spare battery that users can swap in if needed. Generally speaking, single-stage cordless models are lighter and more compact than gas units.
- Gas-powered snow blowers boast more power than electric and battery blowers and don’t restrict their operators to the length of an extension cord. They can clear away deep and heavy snow all along the driveway and then continue down the sidewalk and clear the neighbor’s drive as well. They’re generally more expensive and louder tools and also require more snow blower maintenance to stay operational across seasons.
Toro’s Wes Bollingmo does point out, however, that the power difference between gas and electric machines is becoming less substantial over time. “Thanks to recent technological advances, today’s battery-powered snow blowers offer performance comparable to gas models, making fuel type less of a deciding factor than in years past,” he says. Still, since power source can impact ease of use, it remains a relevant consideration.
Weight
Weight plays a significant role in how easy it is to push or turn a snow blower. Though a large snow blower can clear a driveway in fewer passes than a small snow blower, bigger machines are harder to maneuver.
Most single-stage gas snow blowers weigh at least 80 to 100 pounds, while corded and cordless blowers weigh closer to 30 to 60 pounds. Those needing something lighter may want to consider a handheld snow blower, snow thrower, or electric shovel snow blower.
Clearing Width and Depth
Before choosing the best single-stage snow blower, it’s important to consider the width and depth of snow the machine can clear with each pass. Most single-stage machines can clear paths between 15 and 22 inches wide—and the wider the path, the faster you’re finished.
Intake height determines the depth of snow each tool can remove with each pass, and most single-stage snow blowers have an intake depth between 7 and 12 inches. A good rule of thumb is to choose a snow blower with an intake depth 2 inches higher than your area’s average snowfall.
Wheels, Tracks, and Terrain Type
Wheeled snow blowers feature two large rear wheels that drive the machine forward, while tracked models have tracks similar to those found on a military tank.
- Tracked snow blowers provide significantly better traction in the snow, making them better able to climb steep slopes without slipping backward. Most tracked models are two- or three-stage snow blowers, as single-stage models typically don’t produce enough power to drive the tracks. They also operate more closely to the surface, leaving a thinner layer of snow and ice on a driveway or sidewalk than wheeled models.
- Wheeled snow blowers are easier to turn since tracked models don’t pivot. Wheel sizes for single-stage snow blowers range from 6 to 8 inches. Larger wheels perform better in deeper snow, while smaller wheels are easier to maneuver. While wheeled blowers are generally faster than tracked models, some higher-end tracked blowers offer faster speed and turn-on-a-dime technology that makes them comparable in speed and maneuverability.
Terrain type will influence which of these design options is best for a specific user. Paved surfaces, such as driveways and sidewalks, are best suited for wheeled snow blowers. Tracked snow blowers are better suited for unpaved surfaces. Grade also has a significant impact; steep driveways require a snow blower with good traction and enough power to pull it up a snow-covered slope.
Speed Control
Speed control in a snow blower can refer to both the speed at which you can move the machine as well as the speed of the auger. Gas snow blowers can be quite heavy, so many shoppers prefer self-propelled models to make pushing them faster and easier. Battery-powered blowers are generally lighter and feature digital drive systems that help optimize output without unnecessary effort.
Blowers with variable-speed augers can be useful for adapting to different types of snow. If the snowfall is nice and light, increasing the speed at which the snow is scooped and thrown through the chute will make it easier to move the machine. For heavy, packed snow, you will need to slow the blower to give the machine time to discharge it without clogging.
Chute Control
The chute, a curved, hollow tube that extends from the back of the intake on a snow blower, provides a route for the snow to be thrown from the machine. On most blowers, a manual crank or lever lets users change the angle and direction of the snow being displaced.
Premium snow blowers, however, have auto-rotating chutes that users turn by pushing a button near the handle, which doesn’t require the machine to be stopped. The angle on some chutes also can be changed to allow the snow blower to throw snow even further.
Additional Features
Single-stage snow blowers often boast some extra features to improve ease of use.
- Electric start is a useful feature for gas snow blowers. This typically involves a push-button ignition that replaces the standard pull start and choke.
- Heated handles may seem luxurious, but personal safety is an important part of working outdoors in freezing temperatures. The heat generated by the handles helps keep the user’s fingers warm in the cold air and makes it easier to hold and control the snow blower.
- Drift cutters help clear deep drifts of snow. The cutter’s metal housing collects and pushes snow down into the auger for removal.
- Headlights make it easier and safer to clear snow at night or in dim lighting.
- Automatic safety shutoffs turn off the snow blower when the user releases the handle.
We asked Corey Welch, founder and CEO of Mow & Snow, an on-demand snow removal and lawn care company in Canada, which of these features he appreciates most on a snow blower. He said, “Headlights are a game-changer for early mornings or late evenings, and heated handles are a luxury that keeps your hands from freezing during long jobs.” Anyone looking to increase comfort and ease of use will want to look for a model with these features.
FAQs
If you still have questions about single-stage snow blowers, we suggest you refer to the answers to common FAQs below before putting on your work boots and heading outside.
The biggest difference between a single-stage vs. a two-stage snow blower is power. Most single-stage snow blowers can handle a maximum of 7 to 12 inches of snow, whereas two-stage snow blowers can tackle up to 2 feet. The “stage” term refers to how each blower removes snow.
A single-stage snow blower has an auger that both gathers and blows away the snow. A two-stage snow blower, in comparison, has an auger that sucks up the snow and an impeller that launches it into the air. In addition to being able to remove deeper snow, two-stage snow blowers also have larger intakes that range in width from 20 to 36 inches.
The length of the extension cord depends on the gauge of the power cable. A 12-gauge cord will work up to 100 feet, while a slimmer 14-gauge cord only extends about 50 feet.
Getting a snow blower started depends on its power source. Keep these tips in mind for electric and gas-powered machines:
– Corded electric: Plug the unit into an outlet and press the start button. These models take their power from an AC power source, so there are no issues with low-temperature start-ups.
– Cordless electric: Some electric snow blowers will not start if the battery is too cold. It’s a good idea to store lithium-ion batteries at room temperature to prevent this issue.
– Gas-powered: Gas snow blowers with a pull-start motor may be challenging to start in low temperatures. Make sure to use lightweight motor oil, such as 5W-30, which is designed to operate at low temperatures.
Periodically changing the fuel filter ensures contaminants won’t find their way inside the engine and negatively impact performance. The fuel filter is usually located between the fuel pump and fuel tank.
Change the filter by removing the two hoses that connect to it, making sure to keep the hoses pointing upward to prevent fuel from leaking out of the tank. Install the new filter by attaching the hoses to the line leading from the fuel tank and the line leading to the engine.
A single-stage snow blower might use gas, corded electricity, or a battery as its fuel.
Yes, single-stage snow blowers are good, though they aren’t right for everyone. If you live in an area with light to medium amounts of snowfall and don’t have an especially large property, a single-stage snow blower can provide effective performance and affordability.
The augers on single-stage snow blowers are designed to clear snow down to the ground, so using them on grass is not recommended. They may damage your lawn or even pick up debris that can damage your machine.
Meet the Testers
Zach Lazzari is a freelance writer splitting time between the great outdoors, travel, and DIY projects ranging from camper builds to home renovations and maintenance. His home base in Montana is the perfect testing grounds for winter products and snow equipment. With over a decade of professional writing experience, he also covers a variety of other projects and maintenance topics for Bobvila.com.
Tom Scalisi is a full-time DIY and construction writer for many of the largest websites in the industry, including BobVila.com, This Old House, Family Handyman, and Forbes. He also owns and operates a pest control blog called RiddaBugs.com.
Additional research provided by Tony Carrick.
The post We Tested 2025’s Best Single-Stage Snow Blowers and Found 9 Top Models You Can Rely On appeared first on Bob Vila.
]]>The post 2025’s Best Metal-Cutting Saws Can Slice Through Brass, Aluminum, Copper, and More appeared first on Bob Vila.
]]>It’s an understatement to say that sawing through metal by hand is hard work, but there’s no need to break a sweat when today’s powered metal-cutting saws make quick work of the task. Sure, a hacksaw can tackle occasional small jobs, but for larger pieces, or if you cut metal on a regular basis, a power tool is a more sensible solution.
However, the wide variety of metal-cutting chop saws, band saws, and circular saws on the market makes it challenging to find the right tool. We evaluated some of the top options and rounded up those that we feel stand out from the rest of the bunch, such as our favorite: DeWalt’s DW872, a versatile workhorse that’s priced fairly and built to last. It also has the best 14-inch carbide metal-cutting blade for general-purpose use we found. But we also liked other metal-cutting saws for other reasons, such as the Wen 94396, which we’ve tested first-hand in the past. In this guide, we’ll help clarify the options available, discuss the key technical features of each type, and offer our suggestions for the best metal-cutting saws on the market.
- BEST OVERALL: DeWalt DW872 14″ Multi-Cutter Saw
↓ Jump to Review - RUNNER-UP: Makita LC1230 12″ Metal Cutting Saw
↓ Jump to Review - BEST BANG FOR THE BUCK: Porter-Cable PCE700 14″ Chop Saw
↓ Jump to Review - BEST DIY: Evolution RAGE4 Multi-Material Cutting Chop Saw
↓ Jump to Review - BEST PORTABLE: Wen 94396 5” Handheld Portable Band Saw for Metal
↓ Jump to Review - BEST CIRCULAR: Milwaukee M18 Fuel Metal Cutting Circular Saw
↓ Jump to Review - BEST HEAVY-DUTY: Shop Fox W1715 ¾ HP Metal Cutting Bandsaw
↓ Jump to Review

Metal Cutting Saw Comparison Chart
| Product Name | Power | Speed | Weight |
| DeWalt DW872 | 15 amps (corded) | 1,300 RPM | 50.7 pounds |
| Makita LC1230 | 15 amps (corded) | 1,700 RPM | 42.5 pounds |
| Porter-Cable PCE7014″ | 15 amps (corded) | 3,800 RPM | 32 pounds |
| Evolution RAGE4 | 10 amps (corded) | 4,200 RPM | 20.1 pounds |
| Wen 94396 | 10 amps (corded); 20-volt cordless also available | Variable: 60 to 420 FPM | 14.5 pounds |
| Milwaukee M18 | 18-volt cordless | 3,900 RPM | 5.9 pounds |
| Shop Fox W1715 | ¾ horsepower, single phase (uses standard 110-volt outlet) | 78, 108, or 180 FPM | 139 pounds |
Our Top Picks
Now that you’ve learned about the differences in the types of metal-cutting tools and their features, it’s time to check out some of the best models on the market.
Best Overall
DeWalt DW872 14" Multi-Cutter Saw
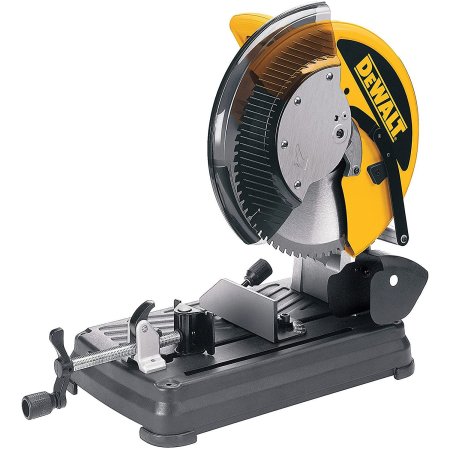
What We Like
- Renowned DeWalt quality
- 70-tooth carbide-tipped blade
- Minimal heat buildup
What We Don’t Like
- Premium price
- No chip collection
Specs
- Power: 15 amps (corded)
- Speed: 1,300 RPM
- Weight: 50.7 pounds
The DeWalt DW872 is a frequent favorite in independent reviews of the best chop saw for metal. The powerful 15A (amp) motor combines with a 70-tooth carbide-tipped blade to provide fast, clean cutting of steel, aluminum, copper, and other metals, as well as plastics, composites, and wood.
The DW872 has a class-leading cutting capacity of up to 5-3/16-inch diameter in solid bar or 6½ inches by 4½ inches in rectangular stock. Users can create bevels of up to 45 degrees using the adjustable fence, and the clamp has a quick-release lever.
At just over 50 pounds, the chop saw is fairly portable while also being sturdy, though the pressed-steel base isn’t quite as rigid as some cast versions. The blade guard is plastic. There is neither a chip tray nor a spark deflector, but since the DeWalt produces very few sparks, this isn’t really an issue.
Get the DeWalt metal-cutting saw at Amazon, The Home Depot, or Acme Tools.
Runner-up
Makita LC1230 12" Metal Cutting Saw
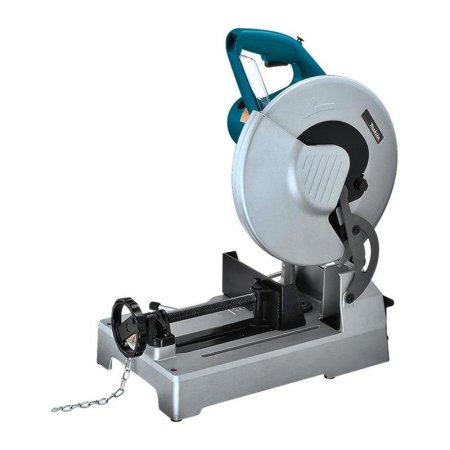
What We Like
- Rigid, durable build
- 60-tooth carbide-tipped blade
- Safety goggles included
What We Don’t Like
- Ineffective chip tray
- Expensive for DIY users
Specs
- Power: 15 amps (corded)
- Speed: 1,300 RPM
- Weight: 50.7 pounds
Another popular, high-performance choice, this Makita model offers proven durability, competitive performance, and rapid adjustment. It has a blade slightly smaller than the DeWalt, with a maximum cut of 4½ inches. However, the 60 carbide-tipped teeth provide fast cutting and a smooth finish through a wide variety of metals. The base is a solid aluminum casting, and the blade guard is steel, although it produces very few sparks.
While several chop saws have a quick-release clamp for fast, repetitive cutting, the Makita also boasts a quick-release fence for rapid setting of different angles. Quick-and-easy blade changing requires a socket wrench, but it’s included. A pair of safety goggles also comes with the saw. Although a chip tray is provided, it catches very little. The Makita chop saw makes a useful light- to medium-duty tool, but for DIY users, it’s a significant investment.
Get the Makita metal-cutting saw at Amazon, The Home Depot, or Acme Tools.
Best Bang for the Buck
Porter-Cable PCE700 14" Chop Saw
What We Like
- Sturdy, reliable build
- Comparatively lightweight
- Great cost value
What We Don’t Like
- Abrasive wheel could be better
- Lacks precision
Specs
- Power: 15 amps (corded)
- Speed: 3,800 RPM
- Weight: 32 pounds
At first glance, it was difficult for us to understand why the Porter-Cable chop saw is so affordable. Its overall construction is sturdy, and it has a powerful 15A motor. It features an adjustable fence for cutting angles at up to 45 degrees and a quick-release clamp. The spark deflector protects the user and provides a clear view of the cut line.
The big difference in this chop saw is its abrasive wheel. While it runs at 3,800 RPM (revolutions per minute), the actual cutting speed is considerably slower than with a toothed blade. Additionally, while replacement wheels are a fraction of the cost of a tungsten carbide blade, they wear out much more quickly. So while the maximum cut is stated at 5 inches, it quickly reduces with regular use. Abrasive wheels also produce a lot of sparks. Still, we think this chop saw’s humble price makes it a worthy option for home welders and engineers who don’t need high precision.
Get the Porter-Cable metal-cutting saw at Amazon, The Home Depot, or Acme Tools.
Best DIY
Evolution RAGE4 Multi-Material Cutting Chop Saw
What We Like
- Very versatile blade
- Light and portable
- Relatively inexpensive considering its quality
What We Don’t Like
- Light-duty only
- Modest capacity
Specs
- Power: 10 amps (corded)
- Speed: 4,200 RPM
- Weight: 20.1 pounds
DIYers in the market for a multipurpose saw may wish to check out the Evolution RAGE4. Lightweight and affordable, it’s a well-made, sturdy tool with an adjustable fence and quick-release clamp. The 10A motor isn’t as powerful as some, but it’s a good match for the 7¼-inch tungsten-tipped blade.
Thanks to its remarkable versatility, the blade is the star here. It can make accurate cuts in ferrous and nonferrous metals, plastic, PVC, composites, and wood. The maximum thickness in steel plate is only ¼ inch, but it can saw through a box section up to 5 inches across.
The saw generates very little heat and few sparks. Weighing just 20.1 pounds, it’s highly portable and easy to store, making it a good choice for a small workshop with limited space.
Get the Evolution RAGE4 metal-cutting saw at Amazon, The Home Depot, or Tractor Supply Co.
Best Portable
Wen 94396 5” Handheld Portable Band Saw for Metal
What We Like
- Variable speed function
- Very maneuverable
- Useful stand included
What We Don’t Like
- A lot of plastic
- May suffer occasional breakdowns
Specs
- Power: 10 amps (corded); 20-volt cordless also available
- Speed: 60 to 420 feet per minute (FPM)
- Weight: 14.5 pounds
Wen has a reputation for producing durable tools at competitive prices, and we think this handheld portable band saw is a good example. It boasts a reliable 10A motor that drives a 10/14-TPI variable pitch blade suitable for a variety of materials. Users can adjust the speed, so the feed rate can be optimized for metals ranging from aluminum to cast iron. It can complete a maximum cut of 5 inches.
The ball-bearing guides help ensure smooth cutting, and an external lever simplifies blade tensioning. A rubberized grip offers room for a gloved hand, and an auxiliary handle at the front provides a sure hold.
At under 15 pounds, it’s light, but that’s because it contains quite a lot of plastic. Although the saw isn’t fragile, it might suffer damage in tough jobsite environments. Reports also exist of occasional breakdowns, though these seem to be isolated incidents rather than a common problem.
What our tester says: Glenda Taylor, a Bob Vila staff writer and product tester, notes in the Best Portable Band Saws that she “tested the Wen by cutting angle iron, steel, PVC, and conduit. It sliced through all of them like butter. With a cutting capacity of 5 inches by 5 inches, this is a deep-throat band saw that will cut through sizable items, and because it’s corded, it won’t lose power as long as an outlet is nearby.”
Get the Wen metal-cutting saw at Amazon, The Home Depot, or Walmart.
Best Circular
Milwaukee M18 Fuel Metal Cutting Circular Saw
What We Like
- Efficient brushless motor
- Very light and compact
- Good battery life
What We Don’t Like
- Battery and charger are extra
- Pricier than most
Specs
- Power: 18-volt cordless
- Speed: 3,900 RPM
- Weight: 5.9 pounds
Milwaukee makes the cut with its M18 Fuel circular saw, a versatile tool popular with jobsite welders, installation contractors, and sheet-metal workers. It uses a powerful brushless motor that features RedLink Plus electronics to maximize battery life. Unlike brushed motors, brushless versions are maintenance-free.
The Milwaukee M18 has the best metal-cutting circular saw blade we’ve seen, with 30 carbide-tipped teeth ideal for tackling angle iron, rebar, sheet steel, and EMT (electrical conduit), among other metals. A wide stainless steel shoe (base plate) provides stability when sawing, and a clear guard offers good cut-line visibility. Its 5.9-pound weight makes it very manageable.
We found it difficult to find fault with the Milwaukee M18 Fuel metal-cutting circular saw for the most part, but it is expensive, and a battery and charger are not included.
Get the Milwaukee metal-cutting saw at Amazon, The Home Depot, or Acme Tools.
Best Heavy-Duty
Shop Fox W1715 ¾ HP Metal Cutting Bandsaw
What We Like
- Horizontal and vertical cutting ability
- Competitively priced considering all it offers
- Wheels and handle for mobility
What We Don’t Like
- 2-person assembly recommended
- Significant investment
Specs
- Power: ¾ horsepower, single phase (uses standard 110-volt outlet)
- Speed: 78, 108, or 180 FPM
- Weight: 139 pounds
Shop Fox produces affordable heavy-duty machinery aimed at home and small workshop users. The Shop Fox W1715 metal-cutting band saw has a powerful ¾-horsepower motor with three speed ranges, yet it plugs into a standard 110-volt outlet.
Thanks to the included vertical sawing attachment, the band saw can be used either horizontally or upright. Its maximum cut is a 4½-inch diameter in round stock or 6 inches by 4½ inches in rectangular. Adjustable clamps allow sawing at any angle. The saw shuts off automatically as soon as the cut is finished.
Some assembly is required, and since it weighs 122 pounds, I don’t suggest trying this alone—it’s a job for two people. Once assembly is complete, the wheels on the stand make it relatively easy to move around. Although the Shop Fox W1715 is a significant investment, it’s a good value when compared with similar rivals.
Get the Shop Fox metal-cutting saw at Amazon, The Home Depot, or Acme Tools.
How We Chose the Best Metal-Cutting Saws
As an engineer, I have extensive experience with metal-cutting saws and metal-cutting saw blades. The Bob Vila team also researched leading brands and the latest products to make sure we were aware of recent developments. While the technical aspects discussed here are clearly important, several other key factors impacted our choices.
- Type: Although lots of different types of metal-cutting saws are available and chop saws are popular among metal workers and welders, they aren’t the best metal-cutting saws to trim rebar set in concrete or saw through metal piping installed in a building. Our goal was to choose models that provide solutions for a variety of different users.
- Value: We tried to find metal-cutting saws for every budget, but we never base our choices on price alone. Each of these saws comes from a brand with an established reputation for reliability and durability to ensure long-term value.
What to Consider When Choosing the Best Metal-Cutting Saw
Finding the best saw for cutting metal isn’t as straightforward as it might seem. Different sizes, power options, and cutting capacities are available. Also, it’s important to consider how it will be used: Will the tool be stationary in a workshop, or do you need a portable saw? To get the right combination of both performance and value, take the following considerations into account.
Blade Type and Size
The two main types of tools for cutting metal are chop saws and band saws, and they have different types and sizes of blades.
- Chop saws, with a rise-and-fall action similar to a woodworking miter saw, have either a toothed blade or an abrasive wheel (often called a cut-off wheel). Most toothed blades have carbide-tipped teeth, which stay sharp longer. They outlast abrasive cut-off wheels, though the latter are considerably cheaper. The diameter of the blade or cut-off wheel can range from 7¼ inches to 16 inches. This size has a big impact on the maximum cutting thickness, though individual machine specifications should always be checked.
- Band saws, which range from handheld portable models to heavy-duty workshop tools, have a continuous steel ribbon with teeth along one edge. While the length of a band saw blade is fixed, both width and teeth per inch (TPI) can vary. Wider blades are stiffer and used for straight cutting, whereas thinner, more flexible blades can cut curves. A blade with fewer teeth cuts more quickly, while blades with more teeth can create a smoother finish.
Angled Cuts and Fence Adjustment
Chop saws get their name from the rise and fall of the blade. Unlike a woodworking miter saw, the blade cannot be rotated or tilted. Instead, a rotating fence is fitted, and the workpiece is clamped against it at the required angle.
Handheld metal-cutting band saws are typically used for making pipework or cutting rebar. In theory, they can cut at any angle, but their freehand nature can make it difficult to maintain accuracy. Workshop versions of this saw can offer great versatility, either with a rise-and-fall action similar to a chop saw or by using a flat table to support the workpiece, which is then fed into the blade.
Motor Power and Source
Since it’s the maximum available from a standard electrical outlet, corded motors are often restricted to 15A (amps) of power, so workshop models often have a motor of this size. More portable saws are usually pushed by 10A motors, which are, strictly speaking, less powerful but still able to deliver a good performance. Heavy-duty models are frequently assigned a horsepower rating rather than amps, and a dedicated circuit is sometimes required to run them.
The power for cordless metal-cutting saws is rated in volts (V) instead of amps, which describes the battery capacity. Light-duty 12V models are the smallest, 18V or 20V models are the most common, and powerful 36V tools are now available.
Vise Adjustment and Blade Change
Chop saws and workshop band saws feature a vise for securely clamping the work during cutting. Unlike a standard vise that has two jaws, most have a single jaw that closes against the fence. The distance the jaw can open defines the maximum size of workpiece that it can accommodate. Quick-release mechanisms are a convenient addition on many of these saws.
Changing blades is straightforward on chop saws, which usually have a way to prevent rotation while the main nut is loosened and a new blade is fitted. Band saws are a bit more involved because blade tension and tracking must be set, but it’s not a difficult task.
Safety
Chop saws invariably have blade guards that expose the minimum amount of blade necessary to cut metal while offering maximum protection for the operator. Spark deflectors are also common, but while they do a good job of suppressing most of the material thrown off, users should still wear safety goggles or glasses.
The design of a band saw makes it impractical to have a full blade guard, so a length of blade remains exposed at all times. Extra care must be taken when using these tools.
Trigger locks, another important safety feature, help prevent accidental operation. Some handheld metal-cutting saws have a soft start, which reduces the initial torque when the trigger is pulled, thus making them easier to control.
Portability
The ease of transporting a tool that cuts metal depends largely on the type of saw. Handheld band saws and metal-cutting circular saws, which are similar to their woodworking counterparts, are usually light and very portable.
Chop saws vary in weight, so we considered models that weigh from about 20 pounds to more than 50 pounds. That’s still fairly movable, but weight might be a factor if the tool must be taken to and from a jobsite every day.
Heavy-duty workshop band saws can weigh 100 pounds or more, so they aren’t typically considered portable. Some, however, have wheels to move them around if necessary.
Additional Features
Metal-cutting tools may have few design specs and extra features to make them easier and more convenient to use.
- The best metal chop saws have big handles that allow easy access for a gloved hand and are comfortable to use for long periods.
- A shaft lock allows blade changing with a single wrench.
- Some chop saws have chip trays to collect waste and make cleanup easier.
- Variable speed on band saws allows the user to match the cutting rate to the type of material for more efficient sawing.
- On cordless tools, a brushless motor offers greater battery efficiency than brushed motors.
- With a circular saw, it can be difficult to see where the blade is actually cutting, so some models have laser guides that project forward. More basic models simply contain a guide arrow on the bottom plate.
Safety Tips for Using Metal-Cutting Saws
Any saw that can cut metal has the potential to be dangerous, but taking a few simple precautions will help prevent accidents.
- Read the manufacturer’s instructions carefully. Electric saws for metal cutting can be quite dangerous, so make sure you understand how the machine works and how to turn it off quickly.
- Always wear protective goggles or safety glasses. Cutting metal with a saw is usually quite noisy, so wearing ear protection is also a good idea.
- Metal can sometimes get hot when being sawed, and cut edges can be sharp. Experts recommend that you wear strong, heat-resistant gloves.
- Make sure any guards are in place correctly. Although you may be tempted to remove them for a better view, don’t.
- Sparks are often generated when cutting metal. Make sure flammable liquids are well away from the work area.
- Securely clamp the item you plan to cut, and never lift a workpiece into a rotating saw blade. If the metal catches or is thrown out, it can cause serious injury. Band saws with vertical tables are an exception, as the workpiece cannot be pulled into the blade.
FAQs
The information in this guide provides a comprehensive explanation of the key features of the best metal-cutting saws. However, during our research, we came across some general questions, which we’ve presented alongside their answers below.
A hand saw for cutting metal is called a hacksaw. Powered saws are often called chop saws or cut-off saws, but metal-cutting band saws and metal-cutting circular saws also are available.
Because some saws are better at particular tasks than others, no single answer exists as to which saw is the best. This article considers the various features and offers a variety of solutions.
A cut-off saw usually has an abrasive disk rather than a toothed blade. It works similarly to an angle grinder, but it’s mounted on a sturdy base, which helps provide stability and improve both control and accuracy.
Each of the listed metal-cutting saws could be described as a cold-cut saw, because unlike metal-cutting lathes and mills, they don’t use lubricants. However, the term typically refers to chop saws, and the DeWalt and Makita are our favorites.
No. Saws designed for cutting wood might be able to cut soft metals like aluminum or brass, but cutting metal with a hand saw is no walk in the park. And if you expect your hand saw to double as a steel-cutting saw, forget about it. There are metal-cutting saws that are capable of doing it, but even then, manufacturers don’t recommend it because swarf (metal scraps) can damage the motor or other moving parts. It’s wise to follow manufacturers’ recommendations as to the capabilities of their machines.
It’s possible, but it depends on the type of saw and the blade fitted. Sawdust tends to clog metal-cutting band saw blades because they have lots of small teeth. Using a saw like the Evolution RAGE4 is a multipurpose solution. However, if you cut wood on a regular basis, a dedicated saw is usually a worthwhile investment.
The post 2025’s Best Metal-Cutting Saws Can Slice Through Brass, Aluminum, Copper, and More appeared first on Bob Vila.
]]>If you are moving to a cold state for work, family, or a craving for crisp and cool air or nearby skiing, it’s important to note the weather-related adjustments you might face in your new home. Indeed, relocating to a cold state is a big shift, and there’s a lot to think about beyond buying a new winter coat, since you can expect your home to endure snowstorms, freezing rain, ice storms, and sleet during wintertime. “The moment you decide to move to a colder state, you are in for a completely new set of issues, but if you prepare well enough you will be quite comfortable,” says Charlie Hughes, CEO of ContractorNerd.
Here are seven tasks involved in managing a home in a colder region; be aware of these before you pack your bags and head North or up to the mountains to experience your first intense winter.
1. Winterize your home.
The first step to take when you arrive at your new home is to winterize it so you’re prepared for the cold months. Compared to maintaining homes in warm or temperate climates, “winter home maintenance demands different skills and routines,” says Erik Wright, owner and CEO of Buy My Home Nashville in Franklin, Tennessee. “My clients often express surprise at needing to winterize outdoor spigots, clean gutters before the first freeze, and check their heating systems monthly.”
Other recommended winterization tasks your new home might need include sealing around windows and doors with weatherstripping; checking for cracks and reapplying caulk to any you find; removing hoses from their connections outside; and insulating the attic, walls, and basement.

2. Prevent plumbing problems.
Frozen or burst pipes are another potential problem that can cause stress and strain your bank account. “Frozen pipes are a nightmare,” says Judi Kutner, licensed realtor and a senior contributor at Virtual Staging in Seattle, Washington. “Insulate any exposed pipes, especially in unheated areas like garages or crawl spaces. If you’re buying a home, ask about freeze-proof faucets—they’re worth it. I had a client last year who didn’t think about this, and they ended up with a burst pipe in the middle of January. Not fun.” Heat tape or foam pipe insulation are good solutions to help prevent pipes from freezing and bursting.
3. Identify roof and gutter issues.
Many people who have never experienced living with snow and ice don’t realize how it can damage their home’s roof and gutters. As ice and snow build up during freezing temperatures, the frozen layer can create ice dams that lead to gutter damage and roof leaks that require expensive repairs. Clear your gutters of debris before cold weather arrives and keep them clear. You’ll also want to remove icicles, apply a deicer, or install heated gutter cable to prevent icicles from forming in the first place, since they can damage the roof with all their weight.

4. Protect trees and prevent damage.
Trees can also get damaged in cold environments. The weight of ice and snow on tree limbs and branches can cause them to snap off, damaging the tree and possibly nearby cars or structures. The branches can hit siding on your home, power lines, and the roof when they fall. To prevent this from happening, prune trees during the fall, remove cracked limbs in the spring. You also can have branches loosely cabled and braced before winter arrives.
Clear branches of snow buildup in the winter if possible. But use caution; avoid shaking snow-covered or icy branches. Instead, gently remove snow by pushing the branch up slightly with an extension pole, and watch out for falling snow and smaller branches. If branches are covered in ice, leave them alone and let the ice melt naturally.
5. Prepare for higher heating bills.
It’s probably no surprise that your winter energy bills will be higher to keep your home at a comfortable temperature when relocating to a cold zone. Depending on where you live, you might need to turn on the heat for up to half of the year. “In winter months, heating costs in cold states may be three times those of warmer regions,” says Wright. “I always tell my clients to budget more money for utility bills and consider adding energy-efficient windows and additional insulation, all of which usually pay for themselves in a few seasons.”

6. Stock up on snow and ice removal equipment.
The biggest nuisance might be having to invest in several tools to deal with the snow and ice that accompany colder weather in many regions. This is especially important if your home faces North, which means your driveway and entry can stay icy for some time. “Snow removal becomes almost a part of your daily routine, and this is where a good quality snow shovel, ice melt, and a sturdy snowblower come in handy,” says Hughes. “We have to clear our walkways and salt our driveways.”
Other must-have tools include a roof rake for snow removal and ice scrapers. You might even need to budget for professional plowing, sanding, and snow removal services, says Andie Fusco, a realtor with Four Seasons Sotheby’s International Realty in Stratton, Vermont. “Prices vary depending on the length of your driveway, whether it’s shared, and the amount and type of snowfall—wet, heavy snow takes more effort and money to clear than light, fluffy powder.”
7. Assemble an emergency kit.
Given the potential for winter storms, it’s good to always be prepared. After moving to a cold state, create an emergency kit in case you get stuck at home during a blizzard and/or lose your power. It’s critical to have enough equipment and supplies to shelter in place for up to a few days in the dead of winter. Items for the emergency kit include: a flashlight, batteries, first aid supplies, a battery-powered or hand-crank portable radio, blankets, sleeping bags, warm clothing, non-perishable food items, bottled water, medications, a fire extinguisher, and basic tools like a wrench and pliers.
You’ll also want to have an alternative heat source or a backup generator. Invest in a space heater or wood stove and make sure your wood pile is stocked in case you need to use your fireplace to stay warm.
The post 7 Things You Should Know How to Do When Moving to a Cold State appeared first on Bob Vila.
]]>Looking out into your picturesque backyard is something to be grateful for, but dirty and smudged windows can taint your view. For decades, people cleaned their windows with newspaper and vinegar since it was an easy and inexpensive option that didn’t leave behind residue or streaks and helped reuse old papers.
However, newspaper for windows is a cleaning hack that does not work anymore for several reasons. Fortunately, there are much better methods to clean windows, mirrors, and other glass surfaces. Here are the reasons why newspapers are no longer a good choice and some better tools for cleaning windows.
Newspaper isn’t as strong as it used to be.
In the past, newspapers were made with much thicker paper. The cheaper paper today doesn’t hold up as well as it used to, making the material less suitable for cleaning glass. “Today’s newspapers are thinner and less absorbent, meaning they can fall apart easily, leaving behind fibers and a mess,” says Leon Hansraj, CEO and founder of Gridlock Services, a commercial cleaning company based in Orlando, Florida.
Muffetta Krueger, cleaning expert and founder of Muffetta’s Housekeeping in Westchester County, New York, agrees. “Today’s newspapers are much thinner and more fragile, making them prone to tearing and leaving behind lint and residue.”
The ink used today makes it more difficult to clean glass.
The ink used to print newspaper content is also different from past ink types, and ink smudging is now a problem. “Unlike older newspapers with oil-based ink, modern newspapers use soy-based ink, which can smudge and leave streaks on glass,” says Krueger. Another issue is ink transfer. “The ink can transfer onto your hands and window frames, creating extra mess rather than a spotless finish,” she adds.

Most households don’t receive printed newspapers anymore.
The days of paperboys and papergirls are long gone. It’s now rare for households to get print newspapers delivered. In fact, it’s hard to find a printed newspaper even in supermarkets anymore. Instead, people receive their news online. Therefore, this material is no longer on hand to use for tasks like cleaning windows and mirrors. “With fewer people receiving physical newspapers, it’s a less practical choice,” says Hansraj.
Windows can get scratched.
As both the materials involved in producing newspapers and glass have changed over the years, the potential for scratching has increased. “Windows manufactured in the last approximately 7 years have a protective coating and/or tints that can be damaged by the abrasive texture of newspaper, essentially rubbing off the layer of coating,” says Aaron Reed, butler and estate manager at The Butler’s Choice in Portland, Oregon. “There’s also a risk of micro-scratches since some newspapers contain synthetic materials,” adds Hansraj.
Try these better window-cleaning alternatives instead:
Forget the newspaper hack. There are more effective ways to achieve a streak-free shine on windows, mirrors, and other glass surfaces.
Microfiber Cloths
Experts agree that soft microfiber cloths are an excellent option for removing dust and debris from glass surfaces. “They are highly effective at trapping dust and moisture, leaving glass spotless without streaks or lint. Plus, they’re reusable and eco-friendly” says Krueger. Look for well-made microfiber cloths that are tightly woven together. If you hold one up to the light and see no light poking through, then you know you have a high-quality product.

Squeegees
Another favorite tool, according to experts, is a squeegee, which has a thin piece of rubber, like a blade, on the end that is perfect for washing windows. It is abrasive enough to loosen dirt but will not damage the glass. With squeegees, you also can cover a larger area than with a balled-up newspaper or cloth, so you save some time. The handle on most squeegees helps you more easily clean hard-to-reach windows without standing on a ladder. Finally, squeegees are reusable, so you won’t need a new one every time you want to clean a glass surface in your home.
“We use professional-grade squeegees with gentle but effective cleaning solutions to remove grime without damaging the glass,” says Hansraj. They are effective because they ensure that you remove all the soap and water from the window, producing a streak-free shine. Krueger adds: “A high-quality squeegee with a bit of dish soap in warm water ensures a professional-grade clean without leaving streaks.”
Other Types of Cleaning Cloths
Krueger also recommends some other types of cleaning cloths. Look for glass-specific cleaning cloths that are specially designed to be lint-free, she says. “Also, reusable cleaning pads are another great eco-friendly choice, offering excellent cleaning power without waste,” says Krueger.
Coffee Filters
Another interesting option is to try wiping with a coffee filter. This inexpensive household staple is lint-free and won’t leave behind any residue. Just spray some cleaner and wipe with a coffee filter. Depending on how absorbent the filters are, you may need to use more than one at a time.

DIY Cleaners
You can make your own homemade glass cleaner to apply with one of these newspaper alternatives. Experts agree that the most effective and natural cleaning solution for your home is a mixture of water and vinegar. “For eco-conscious cleaning, a simple vinegar and water solution works wonders, breaking down dirt and leaving windows sparkling,” says Hansraj. Just mix equal parts white vinegar and water, spray it on the glass, and wipe with a microfiber cloth, says Krueger. Just keep in mind that a DIY cleaner is great for indoor windows, but might not be as effective on outdoor windows, which could require a professional strength cleaner to tackle the dirt, debris, and pollen that builds up outdoors from weather, air pollution, and other factors.
The post This Old School Cleaning Hack Simply Doesn’t Work Anymore appeared first on Bob Vila.
]]>The post The Best Garden Fertilizers, Vetted appeared first on Bob Vila.
]]>Garden plants need nutrients to grow and remain healthy. Adequate soil fertility is as important to plants as a healthy diet is to animals and people. Experienced gardeners know the necessity of understanding soil nutrients so they can use them at the optimal time and in the right proportion with the best fertilizer to supplement the soil.
Choosing a fertilizer can be downright overwhelming because there are so many types and options available. Our favorite is Jobe’s All-Purpose Granular Fertilizer, because of its fast-acting, balanced, multipurpose formula that works for many different types of plants. Read on for tips and suggestions to help when shopping, and don’t miss our roundup of all our favorite picks among the best garden fertilizers available.
- BEST OVERALL: Jobe’s Organics All Purpose Granular Fertilizer
- BEST BANG FOR THE BUCK: Burpee Natural Organic All-Purpose Plant Food
- BEST ORGANIC: Sunday All-Purpose Plant Food Mix
- BEST LIQUID: GS Plant Foods Organic Fish and Kelp Blend
- BEST FOR VEGETABLES: Dr. Earth Organic and Natural Home Grown Fertilizer
- BEST FOR FLOWERS: Jobe’s Organics Annuals and Perennials Plant Food
- BEST PLANT STARTER: Espoma Organic Bio-Tone Starter Plus Fertilizer
- BEST ACIDIC: Dr. Earth Organic and Natural Acid-Lovers Fertilizer

Before You Buy Garden Fertilizer
Choosing the right garden fertilizer is highly dependent on the types of plants being fed. Before buying garden fertilizer, take stock of the plants in the garden and research their individual nutritional needs. Flowers have different nutritional needs than vegetables, and seedlings have different nutritional needs than mature plants.
Before buying and applying a garden fertilizer, consider performing a soil test to determine the soil’s pH level and nutrient content. Use these test results to determine which type of fertilizer is the best fit.
Product Comparison
| Type | NPK Ratio | Quantity | |
| Jobe’s Organics All Purpose Granular Fertilizer | Granular | 4-4-4 | 16 pounds |
| Burpee Natural Organic All-Purpose Plant Food | Granular | 4-4-4 | 4 pounds |
| Sunday All-Purpose Plant Food Mix | Granular | 6-3-7 | 4 pounds |
| GS Plant Foods Organic Fish and Kelp Blend | Liquid | 2-3-1 | 32 fluid ounces |
| Dr. Earth Organic and Natural Home Grown Fertilizer | Granular | 4-6-3 | 4 pounds |
| Jobe’s Organics Annuals and Perennials Plant Food | Granular | 3-5-4 | 4 pounds |
| Espoma Organic Bio-Tone Starter Plus Fertilizer | Granular | 4-3-3 | 4 pounds |
| Dr. Earth Organic and Natural Acid-Lovers Fertilizer | Granular | 3-4-3 | 4 pounds |
Our Top Picks
Organic fertilizers are the safest and most versatile for most landscapes and home gardens. They are unlikely to harm plants from accidental overapplications, are generally people- and pet-safe, and pose a lower risk for water pollution when used according to directions. That said, be sure to feed plants consistently for the best results.
Best Overall
Jobe’s Organics All Purpose Granular Fertilizer

What We Like
- Contains bacteria and fungi for soil health
- Increases root mass and promotes healthy plant growth
- Fast-acting, balanced, multipurpose formula
What We Don’t Like
- Needs to be applied every 4 to 8 weeks
- Can have a strong smell, attracting dogs
Product Specs
- Type: Granular
- NPK ratio: 4-4-4
- Quantity: 16 pounds
This all-purpose fertilizer includes a combination of healthy bacteria, mycorrhizal fungi (fungi that form a symbiotic association with plants), and archaea (a microorganism that aggressively breaks down material). It checks the boxes for most basic plant needs, plus it is Organic Materials Review Institute (OMRI) listed for organic gardening by the USDA, which means it’s 100 percent organic and made with all-natural ingredients.
The blend of beneficial microorganisms in the fertilizer helps to improve soil quality, increases root mass, and promotes plant growth. The nitrogen-phosphorus-potassium (NPK) ratio is 4-4-4, which makes it a suitable fertilizer for flowers, a vegetable garden, shrubs, trees, and houseplants.
Get the Jobe’s Organics all-purpose garden fertilizer at Amazon or The Home Depot.
Best Bang For The Buck
Burpee Natural Organic All-Purpose Plant Food

What We Like
- Also contains micronutrients and beneficial microbes
- Has received an OMRI label for organic use
- Fine granular texture, making it easy to spread
What We Don’t Like
- Isn’t as readily available from major retailers
Product Specs
- Type: Granular
- NPK ratio: 4-4-4
- Quantity: 4 pounds
Burpee natural organic all-purpose plant food offers great value for a product that is effective and only contains organic ingredients. This fertilizer contains a balanced 4-4-4 formula of macronutrients as well as calcium, minor nutrients, and beneficial microbes. While some nutrients are released immediately, this is a slow-release product that feeds plants for up to 3 months. This versatile formula is suitable for seed starting, bedding plants, vegetable gardens, trees, shrubs, and container gardening, according to the manufacturer.
It comes in a 4-pound resealable bag that’s easy to store between feeding sessions. The product has been certified organic and given an OMRI label for organic gardening.
Get the Burpee garden fertilizer at Amazon or Burpee.
Best Organic
Sunday All-Purpose Plant Food Mix

What We Like
- Suitable for both outdoor and indoor plants
- Offers higher nutrient levels than many competing products
- Turkey litter and feather meal improve soil health slowly over time
What We Don’t Like
- Should be applied every 4 to 6 weeks, which is more often than other options
Product Specs
- Type: Granular
- NPK ratio: 6-3-7
- Quantity: 4 pounds
Sunday is known for its all-natural plant care products, and the all-purpose plant food mix is a star performer. According to the manufacturer, it’s a good choice for new or established flowers, vegetable gardens, trees, and shrubs.
Organic fertilizers typically have lower nutrient levels than inorganic formulas, but this product has an NPK ratio of 6-3-7, providing higher levels of nitrogen and potassium than many other organic fertilizers on the market. The fertilizer contains ingredients like turkey litter and feather meal to improve soil health.
While it needs to be applied every 4 to 6 weeks, the amount of fertilizer needed during each application is much less than for other products on this list. It’s also suitable for both indoor and outdoor plants, making it a versatile pick for those with a variety of plants to feed.
Get the Sunday garden fertilizer at Sunday.
Best Liquid
GS Plant Foods Organic Fish and Kelp Blend

What We Like
- Liquid formulas provide immediate absorption
- Suitable for most plant types, and can be used on both plants and flowers
- Made from a renewable raw material
What We Don’t Like
- The smaller container comes at a high price per ounce
Product Specs
- Type: Liquid
- NPK ratio: 2-3-1
- Quantity: 32 fluid ounces
Water-soluble fertilizers penetrate the soil, and foliage absorbs them immediately, giving the plants fast access to nutrients. Fish emulsion and kelp are excellent natural sources of nitrogen, phosphorus, and potassium—the three nutrients that help plants thrive. GS Plant Foods’ organic liquid fish and kelp blend delivers these nutrients in a 2-3-1 NPK ratio, so it is safe for any type of plant and serves as a compost enhancer.
Although liquid fertilizers do not tend to last as long as granular fertilizers, they typically come in concentrated forms that need to be diluted before applying. Organic liquid fish and kelp blend comes in a 1-quart, 1-gallon, 5-gallon, or 55-gallon container. It’s compliant for use in organic gardening and OMRI listed for organic use.
Get the GS Plant Foods garden fertilizer at Amazon.
Best For Vegetables
Dr. Earth Organic and Natural Home Grown Fertilizer

What We Like
- Contains organic and feed-grade ingredients
- The formula includes both essential nutrients and trace elements
- Designed to be used as a starter, a top dressing, or a compost tea
What We Don’t Like
- Primarily used for vegetable growth; not suitable for all plant types
- The powder form must be worked into soil
- Dogs may be attracted to the food-grade ingredients
Product Specs
- Type: Granular
- NPK ratio: 4-6-3
- Quantity: 4 pounds
Made from human- and feed-grade ingredients, Dr. Earth fertilizer is enriched with multiminerals, proteins, carbohydrates, humic acids, and trace elements that promote the healthiest soils. It’s versatile, too. Use Dr. Earth as a starter fertilizer during initial planting and transplanting and regularly as a top dressing or in compost tea.
Dr. Earth fertilizer contains no synthetic chemicals, chicken manure, or toxic ingredients, so it’s safe for pets and people. This fertilizer is sustainably made in the United States and carries the OMRI seal.
Get the Dr. Earth Home Grown garden fertilizer at Amazon or Target.
Best For Flowers
Jobe’s Organics Annuals and Perennials Plant Food

What We Like
- Improves soil condition over time
- Pet- and people-friendly
- Balanced formula for flowering plants
What We Don’t Like
- Strong smell of manure
Product Specs
- Type: Granular
- NPK ratio: 3-5-4
- Quantity: 4 pounds
Featuring Biozome with archaea (Jobe’s proprietary microbe package), this fertilizer rapidly breaks down nutrients in the soil for faster results and improves soil condition over time by increasing microorganism activity for a healthier, living soil. Made from all-natural materials and certified for organic use, this fertilizer is pet- and people-friendly, will not cause fertilizer burn, and is safe for the environment.
The fertilizer analysis for this Jobe’s product is 3-5-4, which makes it a good source of nutrients for most annual and perennial plants. Use the granular formula on flowering plants such as impatiens, begonias, marigolds, zinnias, blue minks, lilies, daylilies, peonies, ferns, and more.
Get the Jobe’s Organics annuals and perennials garden fertilizer at Amazon or Ace Hardware.
Best Plant Starter
Espoma Organic Bio-tone Starter Plus Fertilizer
What We Like
- Designed to promote root growth
- Contains beneficial fungi along with key macronutrients
- Ideal for starting a wide variety of plants
What We Don’t Like
- Works best when placed in the hole at planting
Product Specs
- Type: Granular
- NPK ratio: 4-3-3
- Quantity: 4 pounds
Specially enhanced with beneficial bacteria and starter cultures of seven different beneficial mycorrhizal fungi, Espoma Organic Bio-tone Starter Plus fertilizer promotes maximum root development directly after transplanting. Mycorrhizal fungi work symbiotically with the root system of the plants to greatly increase the amount of water and nutrients a plant can use.
Use of Bio-tone Starter Plus during planting will help seedlings develop a healthy colony of mycorrhizal fungi so the plants will settle into their new homes more quickly and thrive in the long run. With an NPK ratio of 4-3-3, Bio-tone Starter Plus is a good all-purpose starter fertilizer that gardeners can use in garden beds for all types of plants.
Get the Espoma fertilizer at Amazon or Ace Hardware.
Best Acidic
Dr. Earth Organic and Natural Acid Lovers Fertilizer

What We Like
- Helps lower soil pH
- Assists plants with absorbing nutrients efficiently
- Designed for fast release
What We Don’t Like
- Strong smell
- Isn’t suitable for products requiring alkaline soil
- Has a Proposition 65 warning
Product Specs
- Type: Granular
- NPK ratio: 3-4-3
- Quantity: 4 pounds
Some plants need a little acidity to look their best. Acid fertilizers lower soil pH to free up and help plants access nutrients rendered unavailable in high-pH soils. Dr. Earth Organic and Natural Acid Lovers fertilizer is ideal for hollies, gardenias, hydrangeas, blueberries, evergreens, ferns, shade plants, azaleas, camellias, rhododendrons, and maples. It temporarily lowers pH values in the soil, allowing the plants to absorb the nutrients they need to promote healthier foliage and bigger blooms.
This fertilizer is specially designed to release a portion of nutrients quickly and provide continuous feeding for several months of long-lasting results. It’s also safe for people and pets when used as directed.
Get the Dr. Earth Natural Acid Lovers garden fertilizer at Amazon or The Home Depot.
Or, DIY Your Own Garden Fertilizer
Compost can provide beneficial microbes and nutrients for plants. It can be made easily at home with vegetable scraps and yard clippings. Ingredients like coffee grounds, banana peels, and other kitchen scraps all make excellent natural fertilizers. Compost should make up about half of the total volume of the fertilizer blend.
Bone meal provides phosphorus, which encourages root growth, flower production, and better fruit yields. This organic material also helps plants resist disease and increases the number of beneficial microorganisms in the soil. Bone meal should make up one quarter of the total volume of the fertilizer blend.
Kelp meal is full of trace minerals like calcium, iron, zinc, magnesium, and boron that help keep plants healthy. Kelp meal can help promote microbial activity in the soil as well as improve its structure. This organic material should make up one eighth of the total volume of the fertilizer blend, too.
Fish emulsion is a great source of nitrogen, which helps plants produce the protein needed for photosynthesis, flowering, and fruiting. Fish emulsion also contains other essential minerals like potassium, calcium, and magnesium that allow plants to thrive even when conditions are unfavorable. This organic material should also make up one eighth of the total volume of the fertilizer blend.
Jump to Our Top Picks
How We Chose the Best Garden Fertilizers
Garden fertilizers can give new plants a boost and feed plants throughout their growing season. We looked at fertilizer types and common plant needs to come up with this carefully curated list of some of the best garden fertilizers.
We considered more than 20 garden fertilizer options, and we weighed a number of practical considerations. We analyzed the nutrient ratios, the purpose of various products, and the quantity of fertilizer in packages before making our recommendations.
The list includes multipurpose formulas and a few designed for specific garden uses.
- Organic vs. inorganic: We only considered organic fertilizers for this guide since they are capable of top-notch performance without causing any negative environmental impact.
- Type: We considered both liquid and granular formulas for our recommendations since both fertilizer types offer unique benefits.
- Value: Since fertilizers vary in type and quantity, it can be hard to determine a product’s value. We ensured that each recommended product offered excellent value, regardless of the format.
Our Verdict
We recommend Jobe’s Organics all-purpose garden fertilizer as our top pick for its organic formulation, fast-acting results, and ready availability. There are other common garden fertilizer options, including Miracle-Gro Shake ‘N Feed All Purpose Plant Food and JR Peters All Purpose Fertilizer. However, they do not meet our sustainability guidelines and are not recommended in our top picks due to their potentially harmful ingredients and negative impact on the environment.
Types of Garden Fertilizers
Fertilizer comes in three basic forms: granules, liquid, and stakes. Each type of fertilizer can be classified as either organic or inorganic.
Granule Fertilizers
Gardeners apply fertilizer granules by either mixing them into the soil at planting time or by “top dressing.” Top dressing simply means sprinkling the granules on the soil surface over the plant’s root zone. Granular fertilizers are available in either slow-release or quick-release formulas.
- Slow-release fertilizers provide a steady flow of nutrients for an extended time, up to a full growing season. These fertilizers comprise organic or inorganic ingredients. Soil microbes break down organic slow-release fertilizer and make it available for plants to use. Manufacturers coat inorganic slow-release fertilizer pellets to slowly dissolve as water moves through the soil.
- Quick-release fertilizer is inorganic. It should dissolve fully into the soil within just a few weeks, giving plants a quick burst of nutrients.
Liquid Fertilizers
Liquid fertilizers include ready-to-mix dry granules and liquid concentrates. They can consist of either organic or inorganic ingredients. Water-soluble fertilizers can soak the roots, or in some instances, spray right onto plant foliage. These formulas are available to the plant immediately.
Fertilizer Spikes
Fertilizer spikes also come in either organic or inorganic formulas. They act similarly to slow-release fertilizers. Calculate the number of spikes needed for a plant based on plant size and manufacturer directions. Space the spikes evenly around the edge of the plant’s root zone and push them into the soil.
Organic vs. Inorganic Fertilizers
There are two major differences between organic and inorganic fertilizers: ingredients and the way nutrients become available to the plant.
- Organic fertilizers add vital organic matter to the soil and work with the living microorganisms in the soil to feed plants. These fertilizers come from plant and animal sources: composted chicken manure, bone meal, blood meal, alfalfa meal, cottonseed meal, and kelp meal.
- Inorganic fertilizers are highly concentrated and feed plants directly. Manufacturers make inorganic, or synthetic, fertilizers from the synthesized chemicals of nitrogen, phosphorus, and potassium, sometimes as byproducts of other industrial processes.
What to Consider When Choosing Garden Fertilizer
NPK Ratios
It is usually best to begin with a soil test to determine the natural fertility of a garden soil before applying fertilizer. Contact the local Cooperative Extension Service to submit a soil sample for testing. The results will show which nutrients the soil might lack, so those nutrients can be provided in the form of fertilizer.
The major nutrients in fertilizer are nitrogen, phosphorus, and potassium. Fertilizer products list these elements on the bag as a ratio such as 10-10-10 or 4-3-4. The package listing always appears in the order NPK.
Determining the right ratio for a garden depends on what the specific plants need.
- Nitrogen supports foliage plants’ growth. High-nitrogen fertilizer is useful to help grass start growing in spring or to help leafy greens produce a heavy yield.
- Phosphorus helps plants establish roots, produce flowers, and develop fruit. High-phosphorus fertilizer is useful as a starter fertilizer or to spruce up annual flower beds.
- Potassium is an important element for rigid stems and overall plant health. Potassium helps plants get through drought and other growing stresses.
Plant Needs
Different kinds of plants, and plants at various stages of life, have different nutrient requirements. Flowering and fruiting plants need plant food with higher phosphorus content, while plants grown for foliage need more nitrogen.
Planting a new flower, vegetable, or herb bed? Use a starter fertilizer to help the young plants become established in their new home.
Do the azaleas, camellias, gardenias, or blueberries look weak and puny? Perk them up with a fertilizer specifically formulated for acid-loving plants.
Quantity
Regular fertilizer applications keep plants vigorous and productive. How often fertilizer should be applied depends on the soil type and whether the plants are in raised beds or containers. Most plants growing in porous, well-drained soil or in containers need more frequent feeding, about every 3 to 4 weeks throughout the growing season. Plants growing in clay soils typically require less fertilizer. One application every 4 to 6 weeks after planting is usually enough.
Typically, granular fertilizer will go further than a liquid fertilizer. To determine how much fertilizer is needed, look at how much area one bag or bottle covers and divide that by the square footage of the garden beds. The result will indicate how much fertilizer will get the plants through the growing season.
FAQs
Q. When should I fertilize my garden?
The best time to fertilize outdoor plants is when they are placed in the ground, beginning with added compost or a starter fertilizer. After that, plants need nutrients during their peak growing season, typically spring through summer. When choosing a long-acting or continuous feeder, you can apply it less often.
Q. What is the best fertilizer for vegetables?
Vegetables need a good start since they typically have a short, one-time growing season. Start them out with a boost of nutrients and good soil, and then apply a balanced fertilizer for vegetables and herbs like Dr. Earth Home Grown garden fertilizer for tomato, vegetable, and herb gardens.
Q. What is the best fertilizer for garden plants?
The best fertilizer depends on the plants. Lawn fertilizers, for example, differ from vegetable fertilizers. Many native plants need little to no fertilizer, assuming they are growing in decent soils. But flowering plants often need a boost so the plant can stay healthy plus send extra energy into producing lots of large, colorful flowers. Try Jobe’s Organics all-purpose garden fertilizer for beautiful blooms.
Q. When should I apply 10-10-10 fertilizer to my vegetable garden?
Apply most balanced (10-10-10) fertilizers monthly during the growing season to boost the health of perennial plants. But be sure to check the package directions, since some fertilizers have slow-release formulas that last longer.
Q. How do you naturally fertilize soil?
Nutrient-rich soil is the best type for gardens, and keeping soil balanced and with plenty of humus is preferred by many gardeners over adding fertilizer regularly. Get healthy soil with annual additions of organic compost such as manure, homemade compost from kitchen scraps, and even leaves or grass clippings. Mix up the ingredients for the best effect, and use organic fertilizer as needed.
Q. Are eggshells good for fertilizer?
Ground-up eggshells can add some calcium and other nutrients. They won’t necessarily provide all nutrients that all plants need, and they break down slowly, so effects are not immediate. Still, adding them can be part of any effort to maintain soil health; they do not contain enough of any ingredient to harm plants.
The post The Best Garden Fertilizers, Vetted appeared first on Bob Vila.
]]>The post How Starting Seeds Indoors This Year Will Help You Grow a Better Garden Than Ever appeared first on Bob Vila.
]]>If you’re itching to get your garden going, there’s no need to wait until the weather outside is agreeable (and really, your garden will thank you for your impatience). By growing plants from seeds that you start indoors, you’ll save money and have access to a wider variety of vegetables, fruits, and flowers than you can buy at garden centers as seedlings.
Starting seeds indoors also helps extend the growing season for vegetables like peppers and tomatoes, since hardened-off seedlings will be weeks ahead of seeds sown directly in the ground. Although some plants, like carrots and beets, fare best when sowed directly in the ground, many others transplant well. What are you waiting for? Learn more about starting seeds indoors and avoiding potential missteps in the process.

Tools & Materials
Bobvila.com may earn a commission from purchases made through these links.
What to Know Before You Sow
Some seeds require stratification.
Many seeds can be sown as is, but some have additional requirements. If you’re sowing only vegetable seeds and annual flowers, you can likely skip this step. Some plants, however, require stratifying, or chilling, to mimic the overwintering cycle a fallen seed would undergo in nature. Among those that need stratification are black-eyed Susan and some types of milkweed.
If your seed packet calls for stratifying, place the seeds on a dampened paper towel and fold the paper gently before slipping it into a zip-top plastic bag and placing it in your fridge. Depending on the seeds, they may need to remain in the fridge for 1 to 3 months; the suggested chilling time should appear on the seed packet.
Scarify your seeds, if called for on the packet.

Scarifying is the process of nicking the outer shell of a seed to encourage it to germinate. Some seed shells (like those for nasturtiums and sweet peas) are so hard that the rate of germination is low unless they get a little help breaking out of their shells. A simple way to do this at home is to chip the edge of the seed with sharp fingernail clippers—only enough to perforate the hard shell casing and no more.
Start seeds at the right time.

A plant’s seed packet lists the best time to start the seeds. Many vegetable seeds should be started 4 to 6 weeks before the last expected frost date in your area. Other seeds, including many perennial flowers, should start earlier, as much as 8 to 10 weeks or 10 to 12 weeks before the last frost date. If you’re starting perennials, make sure the mature plants will survive in your growing zone through winter.
Sow and Grow
Prep your mix for planting.
Pour sterile seed-starting medium in a clean bowl and add just enough warm water to dampen it. Use of a sterile mix, not garden soil, is important to avoid spreading diseases to the young seedlings. Seed-starting mix is designed to be lighter and airer so that seeds and young roots can break through the soil.
Fill up your tray.
Purchase a plastic grow flat or tray designed for seed starting. A long, shallow container is designed specifically to accommodate a growing plant and its roots. Seed-starting kits might come with an insertable tray consisting of multiple cells with drainage holes and a bottom tray to catch and hold water. Having a tray with individual sections makes it easier to keep the roots of the seedlings separate after they start to grow, and the cells are tiny enough to hold one seedling each.
Moisten the seed mix well, so that it feels like a wrung-out sponge. Distribute the moistened mix between the individual cells in the tray and fill each one almost to the top. Another option is to set tiny peat pots in a large bottom tray or use peat starter pods.
Plot out the plants.
Make an indentation in the top of the planting mix in each cell, or make shallow rows if you’re using a flat without individual cells. The packet will tell you how deeply the seeds should be planted, but the general rule is to plant a seed four times as deep as its width. Large seeds, like cantaloupe and sunflower, need to be planted deeper than small, fine seeds.
Drop in seeds.

Allot one seed per cell or distribute them evenly in the shallow rows. Plant each at the depth listed on the seed packet. If the packet says they require light to germinate, then don’t cover them; these seeds may be sprinkled on top of the seed-starting mix. If there aren’t instructions regarding light for the seeds, cover them with the moistened medium to match the recommended depth, patting the soil very lightly on top. Then, cover the seed tray with a fitted plastic top or with plastic wrap to keep the medium from drying out.
Find an indoor spot with optimal temperatures.

Find a room-temperature or warmer spot for the seed tray, based on recommended temperature per the seed label. Both the ambient air temperature and soil temperature can affect seed germination. Adding gentle bottom heat for the soil often raises the temperature 10 to 20 degrees. Use a heated growing pad or place the tray on top of a refrigerator where it’s slightly warm.
For seeds that require cooler temperatures to germinate (like carrots, cabbage, or Swiss chard), find a cool part of the house away from heat sources until they sprout (or start the seeds outdoors in spring as directed by the seed label).
Wait Until Sprouts Start
Check seeds daily.
Germination times vary by seed type, so check seeds daily for moisture and for the chance to see a new sprout. Some seeds (such as lettuce and kale) can germinate within a couple of days, while others (including perennial flowers) can take two or more weeks.
Give sprouts the light they need.

Once the seeds sprout, remove the plastic cover and move the seedlings near a sunny window or place them under grow lights to encourage healthy growth. Don’t place them in direct sunlight, where they can become too warm—a table near a sunny window is sufficient. When using a grow light, place it directly overhead if possible and keep the bulbs about 2 to 6 inches above the surface of the sprouts’ leaves.
Water carefully and consistently.

Water plants as needed to keep the starting mix damp, but not soggy. If the seed-starting mix is moist and the tray is covered, you might not have to add any more water to get the seeds to sprout; if you do, a gentle mist is the best option. Once seedlings emerge, a few clues can help you know when to water: the tray feels lighter than normal, or the soil changes color or pulls away from the side of the tray.
Water sprouts carefully, either from above with a gentle mist or flow, or by pouring water into the tray beneath the pots so they can wick moisture up. Just be sure not to leave standing water in the tray for long; drain excess water after the soil feels damp.
Provide air circulation.

When setting a seed tray on top of the fridge or in a closet out of the way, recognize that the soil might not get enough air circulation. Lack of moving air combined with wet soil causes fungi to thrive. Damping off is a soil-borne fungal disease that often affects new seedlings, and can lead to demise of the plants. One way to provide airflow is to place a small fan near the seed-growing area; don’t point the fan directly at tender seedlings.
Thin out seedlings.
If you’ve hedged your bets at seed-sowing time by placing two or more seeds in some or all cells, you will have to sacrifice a few starts. The small cells in most seed-starting trays are designed to hold a single plant. Even if you sow in rows (indoors or out), thinning starts keeps the young plants from competing for resources and root space. As tough as it is to dispose of a successful sprout, it will pay off. Instead of pulling out the weaker of the starts, use a tiny pair of manicure scissors to snip it off at soil level; this avoids disturbing the other start.
Know when to pot up seed starts.
When the seedlings develop their first true leaves, transplant them into individual peat pots. This ensures they have room to grow as they prepare for transplanting outdoors. The first leaves that emerge are called cotyledons, or “seed leaves”—the plant’s true leaves will develop next. As one or more sets of true leaves develop (typically about 4 to 5 weeks after sowing), the seedling likely is strong enough to be transplanted into a peat pot where it can remain until it’s time to plant it in the garden. Any good potting soil will do for filling the peat pots.
Get Ready to Garden
Prepare the garden for transplants.
Till and prepare your garden soil in preparation for the new plants. Break up large clods and remove twigs and rocks. Most vegetables thrive in well-draining soil and full sunlight, but other plants have different light requirements, so choose a spot that’s suitable for your specific plants.
Harden off plants to make the switch to outdoors.
After sprouts have recovered from being potted up, and hopefully a week or so before time to plant outdoors, place young potted-up plants outdoors in a protected area. This means out of the direct sun and wind at first. Gradually introduce them to outdoor conditions by starting with only an hour or two of exposure the first trip outdoors and more time and sunlight each subsequent day as they gain strength.
Called “hardening,” this gives the tender plants a chance to adapt to the outdoor environment before you move them to their final growing spot. After hardening, transplant the young plants into the garden, leaving the peat pots in place if you like—they should biodegrade in the soil (or remove and compost them). Just be sure to tear off the top half-inch of each pot so it won’t wick moisture from the transplant, and the bottom of the pot to ensure delicate roots can go through. After planting, water the new transplants well to give them a good start in the garden.
Final Thoughts
The advice above can help new gardeners’ chances of success by ensuring seeds and young seedlings get the right water, light, soil, airflow, and space to grow. All you have to do is combine these tips with the wealth of information on each plant’s seed packet, so be sure to read those labels.
The other insurance for success is experience, even a failure or two. Make notes on what does and doesn’t so you can adjust for the next round of indoor seed starting.
The post How Starting Seeds Indoors This Year Will Help You Grow a Better Garden Than Ever appeared first on Bob Vila.
]]>Remember sunken living rooms, wood paneling, and brass bathroom fixtures? Home design trends come and go like the fashion runway, and can taint your view of a property when you are in the market for a new home.
“I’ve been in real estate long enough to see home trends rise and fall,” says Eric Bramlett, realtor and owner of Bramlett Real Estate in Austin, Texas. “What was once the must-have feature can quickly become the thing buyers want to rip out first. The good news is that a lot of outdated design choices are easy to fix and shouldn’t stop you from buying a house.”
However, some old features that go beyond aesthetics can be both expensive and dangerous to remedy, says Bramlett. “Structural problems, outdated electrical, and hazardous materials are a different story. When you’re buying a house, focus on what actually matters long-term. If it’s something you can change with a little time and money, don’t let it scare you away, but if it’s a major safety or structural issue, that’s when you need to think twice,” he advises.
We spoke with homebuyers and real estate professionals to determine which outdated home features top their list. Here are four outdated home trends once in vogue that have fallen out of favor, but are fairly easy to change or update, along with one trend that is a total deal-breaker.
Intercoms: Easy Fix
Back in the day, before every family member had a cell phone and smart home systems were invented, bulky plastic intercoms were used to communicate with family members throughout the home. When touring a possible new home, these antiquated devices that were popular in the 1980s might catch your eye and make you wonder if you can live with them. The good news is that they are easy to remove or cover up with a bookshelf, piece of artwork, or hutch.
Wallpaper, Stencils, and Bold Paint Colors: Easy Fix

Many of the people we spoke with mentioned outdated, unattractive walls, such as bold paint colors, loud wallpaper, decorative wallpaper borders, and stenciling on the walls.
Writer Gary Wollenhaupt recently moved to Colorado Springs, Colorado, and dealt with old-fashioned walls. “We were able to overlook accent walls and stencils because we’ve repainted many times,” he says. “Apparently, the previous owners went to Paris on vacation and there are several Paris-themed stencils in the house, like one for a historic perfume shop in the primary bedroom and one for a patisserie on the kitchen pantry door.”
Although Wollenhaupt has yet to address the Paris theme in his new home, he knows that these are easy fixes. They’re the type of outdated home feature that shouldn’t turn you away if you otherwise love the house. “Some people see a house stuck in the 1990s and assume it’s a bigger issue than it is, but a weekend project with a paint roller changes everything,” says Bramlett.
Popcorn Ceilings: Easy Fix

Sheldon Sutherland, retail expert and owner of Epoxy Werx in Surprise, Arizona, recently purchased his first home and looked up to see unappealing popcorn ceilings. “I came across a beautiful house from the 1990s, which had popcorn ceilings,” he says. “Initially, this out-of-trend characteristic turned me off, but then I realized this cosmetic problem could be solved with a little effort and money,” he says. Dealing with the ceilings helped Sutherland understand home features in the market that are mostly cosmetic and easy to fix vs. structural changes “that can completely ruin the deal.”
Note: If popcorn ceilings were installed in 1980 or before, the texture may contain asbestos that requires professional removal for safety.
Dated Light Fixtures: Easy Fix

While outdated lights are an eyesore, they are relatively easy and inexpensive to replace and shouldn’t deter someone from buying a property. Content marketing and brand specialist Jasmine Charbonier recently bought a home in Tampa, Florida. She was turned off by its awful Hollywood-style vanity lights, shiny brass bathroom fixtures, and fluorescent box lighting. However, she said they are all easy to swap out as a quick DIY project.
Bramlett agrees: “They might look bad, but replacing light fixtures is quick and cheap. These kinds of updates don’t cost much and shouldn’t be a dealbreaker if the bones of the house are good,” he says.
Knob-and-Tube Electrical Wiring: Red Flag

While some outdated home trends are easy to address, there are others that raise a red flag since they could end up being a major expense to update or fix due to heavy construction or health and safety issues. Sutherland faced the shock of discovering old wiring that was a big turnoff. “A seemingly perfect house revealed its true colors when the inspector uncovered extensive knob-and-tube wiring hidden behind freshly painted walls, a potentially hazardous and budget-busting issue that immediately crossed it off my list,” he says.
This experience taught him to look beyond surface-level eyesores, like the examples mentioned above, and focus on critical systems like electrical, plumbing, and foundation integrity. It’s critical to hire a professional to do a thorough home inspection. “In today’s competitive market, where move-in ready homes command premium prices, savvy buyers can find value in properties with outdated aesthetics but solid bones, allowing for personalization without breaking the bank on essential repairs,” says Sutherland.
The post 4 Outdated Home Features That Are Easy to Fix—and 1 That’s a Major Red Flag appeared first on Bob Vila.
]]>The post 8 Paint Primers That Provide a Blank Slate For Painting appeared first on Bob Vila.
]]>Whether you’re painting the living room or a patio table, applying a prep coat of primer to the surface can improve adherence, prevent peeling, and reduce the number of coats needed to finish the job. While all primers contain more resins and less pigment than paint, formulas vary from product to product. We tested some of the most popular options to find out which primer works best for different situations. Our number one pick is Rust-Oleum’s Zinsser Bulls Eye with its low odor and ability to work on multiple surfaces.
The right primer for your project depends on the environment you’ll be working in, the surface you’ll be painting, and your preferences for the time frame of the job and its final look. Read on to find out what makes a quality paint primer and why the below options rank as our top favorites among the best paint primers we tested.
- BEST OVERALL: Rust-Oleum Zinsser Bulls Eye 1-2-3 Water-Base Primer
- BEST BANG FOR THE BUCK: Kilz Original Interior Primer
- BEST ALL-PURPOSE: Kilz 2 All-Purpose Interior/Exterior Primer
- BEST FOR METAL: Rust-Oleum Clean Metal Primer
- BEST FOR GLOSSY SURFACES: Kilz Adhesion Interior/Exterior Primer
- BEST FOR ODOR BLOCKING: Kilz Restoration Interior Primer
- BEST FOR EXTERIOR: Kilz 3 Premium Interior/Exterior Primer
- BEST FOR INTERIOR WALLS: Sherwin-Williams SuperPaint Interior Acrylic Latex
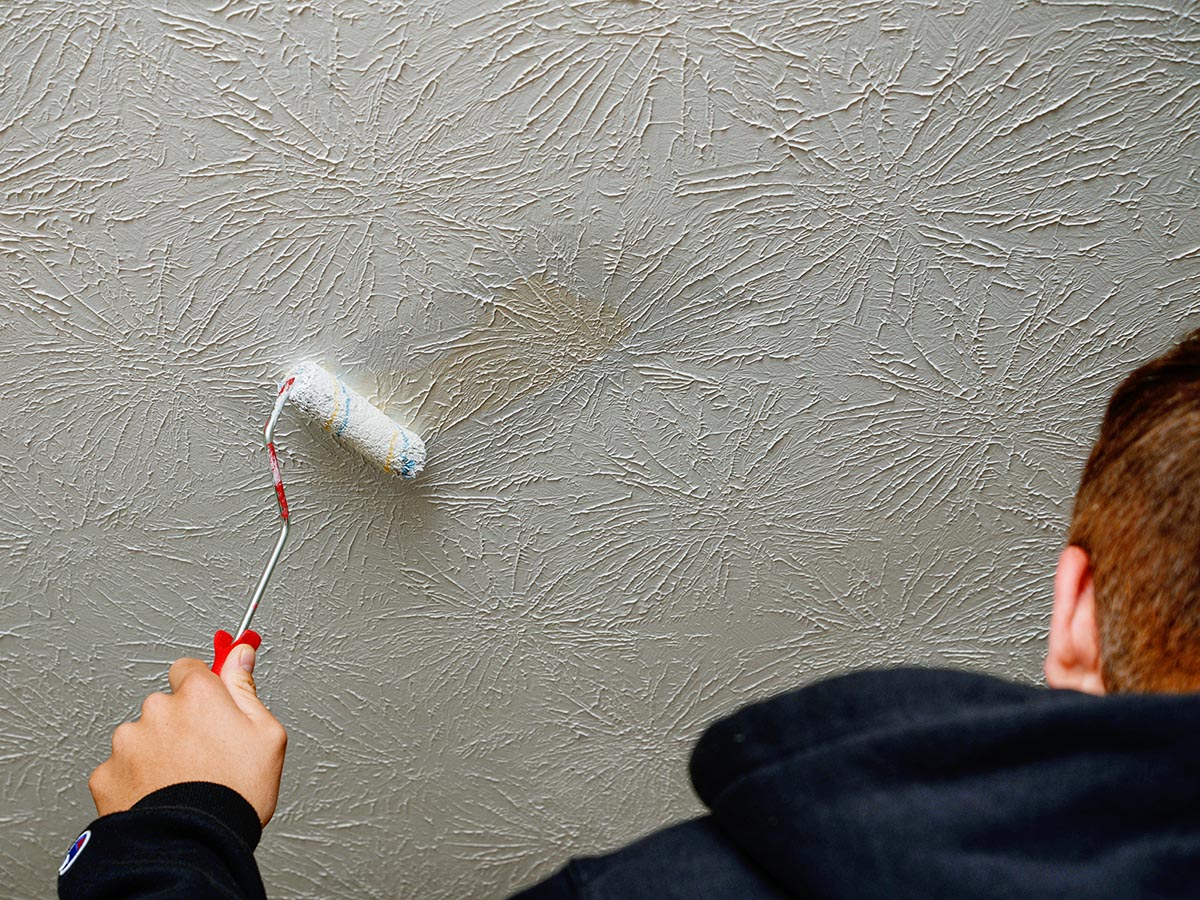
Product Comparison
| Interior/Exterior | Recoat Time | Base Material | |
| Rust-Oleum Zinsser Bulls Eye 1-2-3 Water-Base Primer | Both | 1 hour | Water-based acrylic |
| Kilz Original Interior Primer | Interior | 2 hours or less | Oil |
| Kilz 2 All-Purpose Interior/Exterior Primer | Both | 1 hour | Water |
| Rust-Oleum Clean Metal Primer | Both | 24 hours | Oil |
| Kilz Adhesion Interior/Exterior Primer | Both | 1 hour | Water |
| Kilz Restoration Interior Primer | Interior | 1 hour | Water |
| Kilz 3 Premium Interior/Exterior Primer | Both | 1 hour | Latex |
| Sherwin-Williams SuperPaint Interior Acrylic Latex | Interior | 1 hour | Latex |
Our Top Picks
We spent hours narrowing the paint primer market and testing the top-rated products. One or more of these recommendations for the best paint primer may suit your specific needs.
Best Overall
Rust-Oleum Zinsser Bulls Eye 1-2-3 Water-Base Primer

What We Like
- Low-VOC and low-odor formula
- Mold- and mildew-resistant
- Works on multiple surface types
What We Don’t Like
- Thin viscosity; second coat may be required for proper coverage
Product Specs
- Interior/exterior: Both
- Recoat time: 1 hour
- Base material: Water-based acrylic
Rust-Oleum is well known for its protective paints and coatings. Its Zinsser Bulls Eye 1-2-3 water-base primer is an all-purpose primer-sealer that sticks to various surfaces without sanding and works with any top coat. The brand is regarded as one of the top producers of rust-preventive paints.
The primer is low odor, low in volatile organic compounds (VOCs), and provides excellent coverage on interior and exterior surfaces. It’s made from water-based acrylic and is designed to resist blistering, peeling, and mold and mildew growth. The primer is tintable and available in white or gray. It’s also available in spray-paint form.
We tested this primer on multiple surfaces, including drywall, wood, metal, and plastic. It readily stuck to all of those surfaces and provided a textured finished surface that easily held onto a top coat of paint. The primer did not completely block the water stain on drywall, but we expected that—most white primers do not. We thought the paint was thin and needed two coats on all surfaces to ensure an even, smooth top coat. Overall, we liked this primer’s versatility of use on multiple surfaces, making it our top choice.
Get the Rust-Oleum Zinsser paint primer at Amazon or Ace Hardware.
Best Bang for the Buck
Kilz Original Interior Primer

What We Like
- Effectively blocks stains and odors
- Applies smoothly and evenly
- Lower-VOC formula
What We Don’t Like
- Strong odor
Product Specs
- Interior/exterior: Interior
- Recoat time: 2 hours or less
- Base material: Oil
Kilz is a trusted paint brand, especially for primers. Kilz Original interior primer is the company’s flagship primer designed to block most heavy interior stains on wood, drywall, plaster, paneling, wallpaper, masonry, brick, and painted metal. It also works on properly prepared glossy surfaces.
The primer is oil-based but can be used as a base coat for latex and oil paints. Kilz is our go-to primer for tough stains in our household. Previously, we had only used the spray-can version but found that the can version works just as well. We tested the primer on water stains on our drywall and as a base coat on various materials, including wood, brick, and metal. The primer adhered well to porous surfaces, but we did need to sand the metal before priming.
The white primer paint did a decent job blocking light-colored stains. However, in our experience with trying to hide stubborn stains on drywall, the primer works best at hiding stains when tinted gray.
Although it is available in a lower-VOC formula, it is not low VOC and the odor was strong. We recommend using a respirator or working in a well-ventilated area when using this primer. Overall, Kilz Original is a solid performer, and we highly recommend it for any ventilated interior primer application.
Get the Kilz Original paint primer at Ace Hardware.
Best All-Purpose
Kilz 2 All-Purpose Interior/Exterior Primer
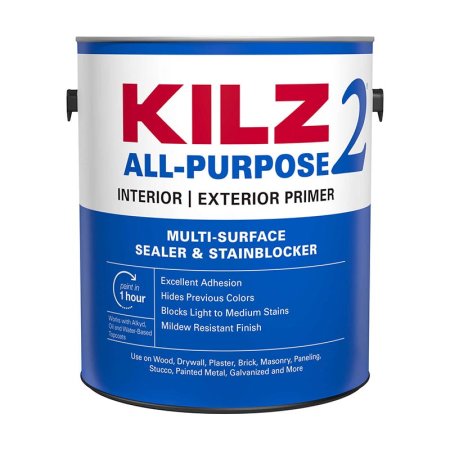
What We Like
- Minimal odor
- Mildew-resistant finish
- Easy soap-and-water cleanup
- Low-VOC formula
What We Don’t Like
- Only blocks light to medium stains
Product Specs
- Interior/exterior: Both
- Recoat time: 1 hour
- Base material: Water
Kilz 2 all-purpose interior/exterior primer is a general-purpose primer well suited for use on various DIY projects. This water-based primer has a drastically lower VOC content than the Original Kilz Primer, and it works under or over water-based or oil-based paints. It blocks light to medium stains and mild odors, and it leaves a mildew-resistant finish.
Kilz 2 all-purpose primer works well for general-purpose priming and sealing needs. In testing, it left a smooth base coat on drywall and bare wood. It did a moderate job blocking dark stains on walls, but it effectively blocked lighter stains like pencil marks, minor scuffs, and markers. We recommend using Kilz 2 for priming old walls before repainting or for any exterior surface as a base coat for exterior paint. It’s also handy to use a primer for craft painting projects.
Get the Kilz 2 paint primer at Lowe’s, Ace Hardware, or The Home Depot.
Best for Metal
Rust-Oleum Clean Metal Primer
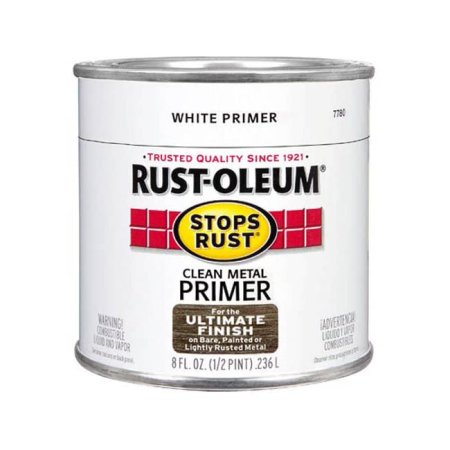
What We Like
- Prevents rust from growing in some areas
- Suitable for both indoor and outdoor use
- Weather- and corrosion-resistant
What We Don’t Like
- Metal surfaces should be sanded beforehand
Product Specs
- Interior/exterior: Both
- Recoat time: 24 hours
- Base material: Oil
Rust-Oleum Clean Metal primer is formulated to cover lightly rusted metals as well as bare and previously painted metals. It’s weather- and corrosion-resistant and bonds tightly to exterior/interior surfaces like wood, metal, concrete, and masonry.
This primer is designed primarily for use on metal, but it works well on other surfaces. It did a good job blocking rust stains on a metal bench we refinished, and it provided a smooth surface for a top coat. The only real drawback of this primer was that the smooth surfaces required prep work before use—smooth, hard, or glossy finishes need sanding for the primer to adhere. However, after applying onto sanded metal, it did form a durable finish, and the top coat went on beautifully.
Get the Rust-Oleum metal paint primer at Amazon, Ace Hardware, or The Home Depot.
Best for Glossy Surfaces
Kilz Adhesion Interior/Exterior Primer
What We Like
- Bonds to glossy surfaces without sanding
- Can be used on products containing xylene or other solvents
- Easy soap-and-water cleanup after use
What We Don’t Like
- Not for wet floors or horizontal surfaces
Product Specs
- Interior/exterior: Both
- Recoat time: 1 hour
- Base material: Water
Kilz Adhesion interior/exterior primer is formulated to bond to various tough-to-paint surfaces such as PVC, vinyl, glass, tile, and glazed brick. The water-based primer offers the same stain- and odor-blocking properties as the other Kilz primers. Unlike the other primers in the Kilz line, Adhesion does not require sanding a glossy surface before primer application.
Since this primer is virtually identical in its stain and odor properties to the others in the Kilz lines, we primarily tested its ability to stick to slick surfaces. We applied the primer to plastic, metals, and glazed ceramic. We did not sand the surface before application. It did adhere to the surfaces pretty well, but we did find that applying the primer in thin, multiple layers produced better results. Although it took at least two coats, we prefer to paint two coats rather than sanding the entire surface first.
Get the Kilz Adhesion paint primer at Amazon.
Best for Odor Blocking
Kilz Restoration Interior Primer

What We Like
- Minimal odor and low-VOC formula
- Easy soap-and-water cleanup
- Provides a smooth finish
What We Don’t Like
- Does not block or cover heavy or prominent stains
Product Specs
- Interior/exterior: Interior
- Recoat time: 1 hour
- Base material: Water
Water, mold, and rust stains are tough to cover, but odors are even harder to conceal. Smoke, pet urine, and food odors often require using an oil-based or shellac-based primer to seal them into the surface before painting. However, Kilz Restoration interior primer offers the same performance as oil-based primers but with the easy cleanup convenience of water-based paint.
Like the other primers offered by Kilz, this primer did an adequate job of covering most light to medium stains. However, Kilz Restoration shines as an odor blocker. We tested this primer drywall in a room where smokers previously resided. The primer went on smoothly and sealed in the odor. Once the top coat was applied, there was no hint of the smell. It did a moderate job concealing old water stains, but we expected that.
Since this primer is mainly formulated for odor blocking, we suggest only using this primer for that purpose. Kilz Original primer is a better stain blocker.
Get the Kilz Restoration paint primer at Amazon, Ace Hardware, or The Home Depot.
Best for Exterior
Kilz 3 Premium Interior/Exterior Primer
What We Like
- Blocks most medium to heavy stains
- No-VOC formula
- Great in moisture-prone areas
What We Don’t Like
- Not meant for applying to glossy surfaces
Product Specs
- Interior/exterior: Both
- Recoat time: 1 hour
- Base material: Latex
Kilz 3 Premium interior/exterior primer is formulated to minimize problems caused by color changes, minor stains, surface textures, and porosity differences. This primer offers excellent adhesion, a mildew-resistant coating, and seals interior and exterior surfaces for a uniform finish.
In testing, we found that this primer did an excellent job sealing new wood framing on our covered deck. It left an ultrasmooth finish, and the top coat went on smoothly. The primed and painted wood has been through a few rainstorms and high humidity conditions for a few weeks, and the surface still looks amazing.
As a stain blocker, it did a decent job covering up an older painted surface with minor mold and dirt discoloration. The only con we found with this primer was that it’s not made to adhere to glossy surfaces without preparation. However, it’s an excellent primer for exterior use because it sticks readily to plaster, paneling, masonry, brick, and painted metal without issue.
Get the Kilz 3 Premium paint primer at Lowe’s, Ace Hardware, or The Home Depot.
Best for Interior Walls
Sherwin-Williams SuperPaint Interior Acrylic Latex
What We Like
- Thick paint goes on smoothly
- Can also be used on ceilings
- Tintable in Sherwin-Williams’ full color options
- Low-VOC formula
What We Don’t Like
- Expensive compared to similar options
Product Specs
- Interior/exterior: Interior
- Recoat time: 1 hour
- Base material: Latex
Sherwin-Williams SuperPaint is the brand’s paint-and-primer combo available in interior and exterior formulations. The interior version is designed for one coat coverage on drywall, trim, and ceilings. SuperPaint creates a lasting finish and a surface that holds up to scrubbing.
We have used SuperPaint as our primary wall paint for years. It’s thicker than most interior paints, which allows it to cover in fewer coats than cheaper paints. The flat finish is perfect for ceilings, too. We could achieve solid coverage on walls in two coats, even over darker paint. Although we were able to cover a similar color wall in one coat in the past, we think it looks better with two coats of paint. The only con we have with this paint is that it’s expensive. However, Sherwin-Williams often offers promos that can help offset the cost.
Get the Sherwin-Williams paint primer at Sherwin-Williams.
Jump to Our Top Picks
How We Tested the Best Paint Primers
We tested each paint primer according to established rubrics, including how easy it was to apply, how well it adhered to various surfaces, and its stain- and odor-blocking abilities. We rated each primer based on these rubrics on a scale between 0 and 4 to determine a score. Lastly, we tested the primer’s durability and how attractive the final finish appeared on each surface.
We applied each primer to metal, masonry, drywall, and wood surfaces. The drywall surfaces included water stains, mildew, and lingering smoke odors. We applied two coats of primer to each surface and allowed it to dry for an hour, and then followed up with a flat white top coat to determine if there was any bleedthrough of stains and to judge the smoothness of the top coat.
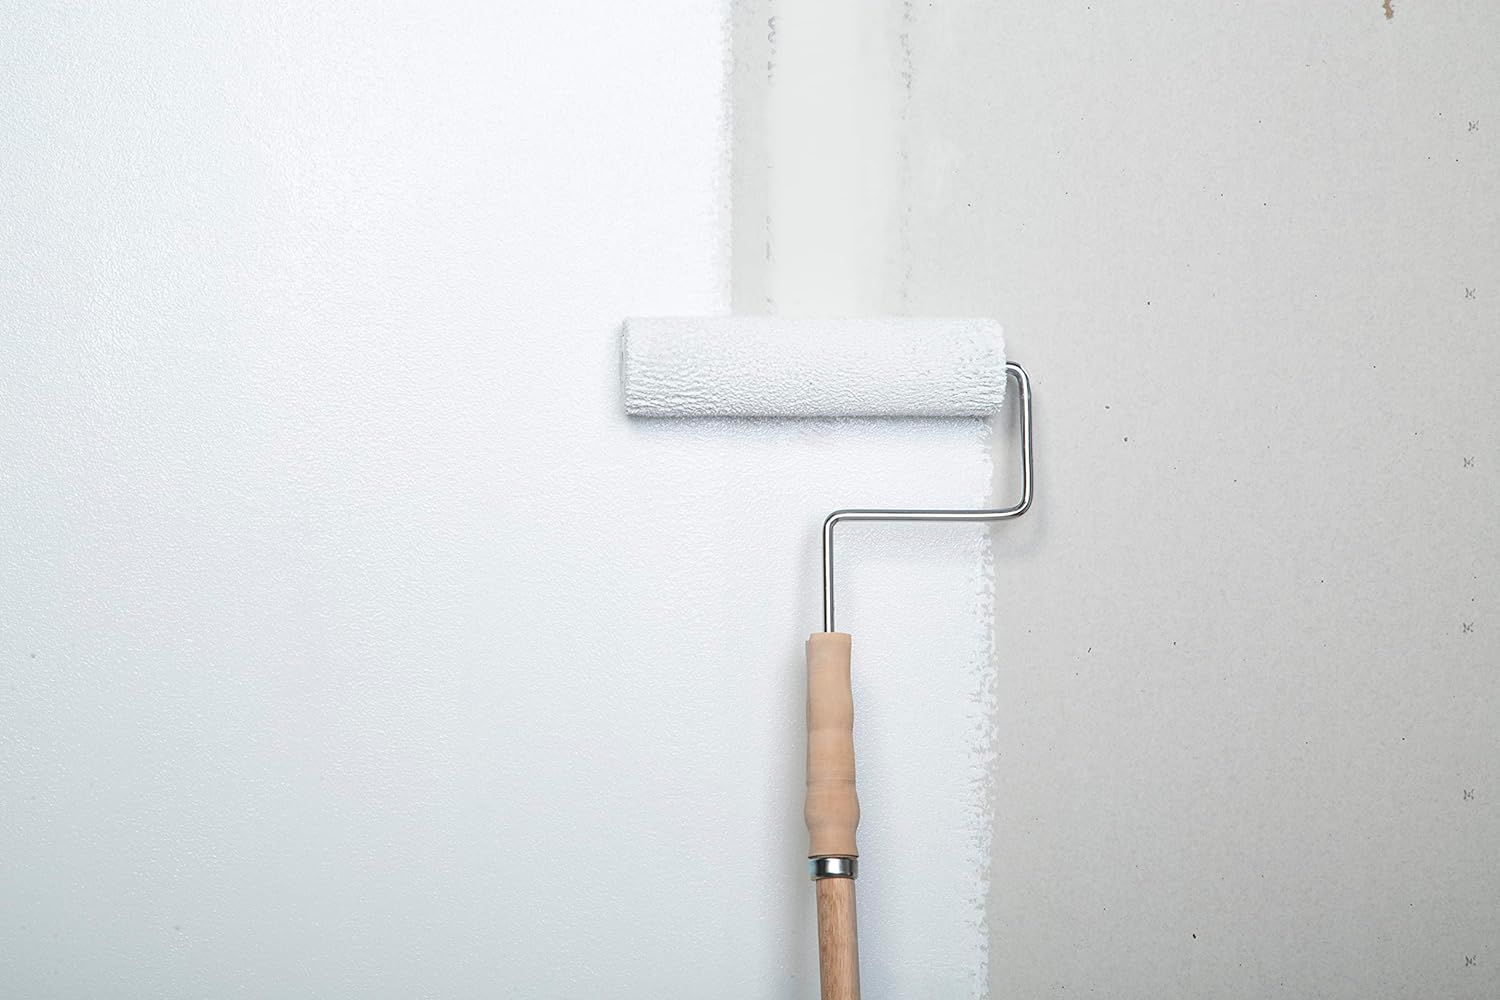
What to Consider When Choosing a Paint Primer
When choosing a primer for your project, there are several features to consider. The best paint primer options efficiently cover multiple surfaces, block stains, and ensure an even, smooth top coat. Here are more details about important features to consider when choosing a paint primer.
Project Environment
Paint primers come in three formulas: interior/exterior, exterior, and interior.
Interior/exterior primers are suited for indoor and outdoor use, while exterior primers are designed for outdoor use only. Both contain additives that stave off UV-related fading and moisture-related mold issues; they also add flexibility to withstand frequent outdoor temperature changes, preventing the paint from peeling or cracking.
Interior primers, formulated without exterior additives, are only suitable for indoor use. Interior/exterior primer is the best bet for doing a range of painting jobs, indoors and out. Plus, choosing a primer that works inside and outside saves on the costs of buying separate interior and exterior products.
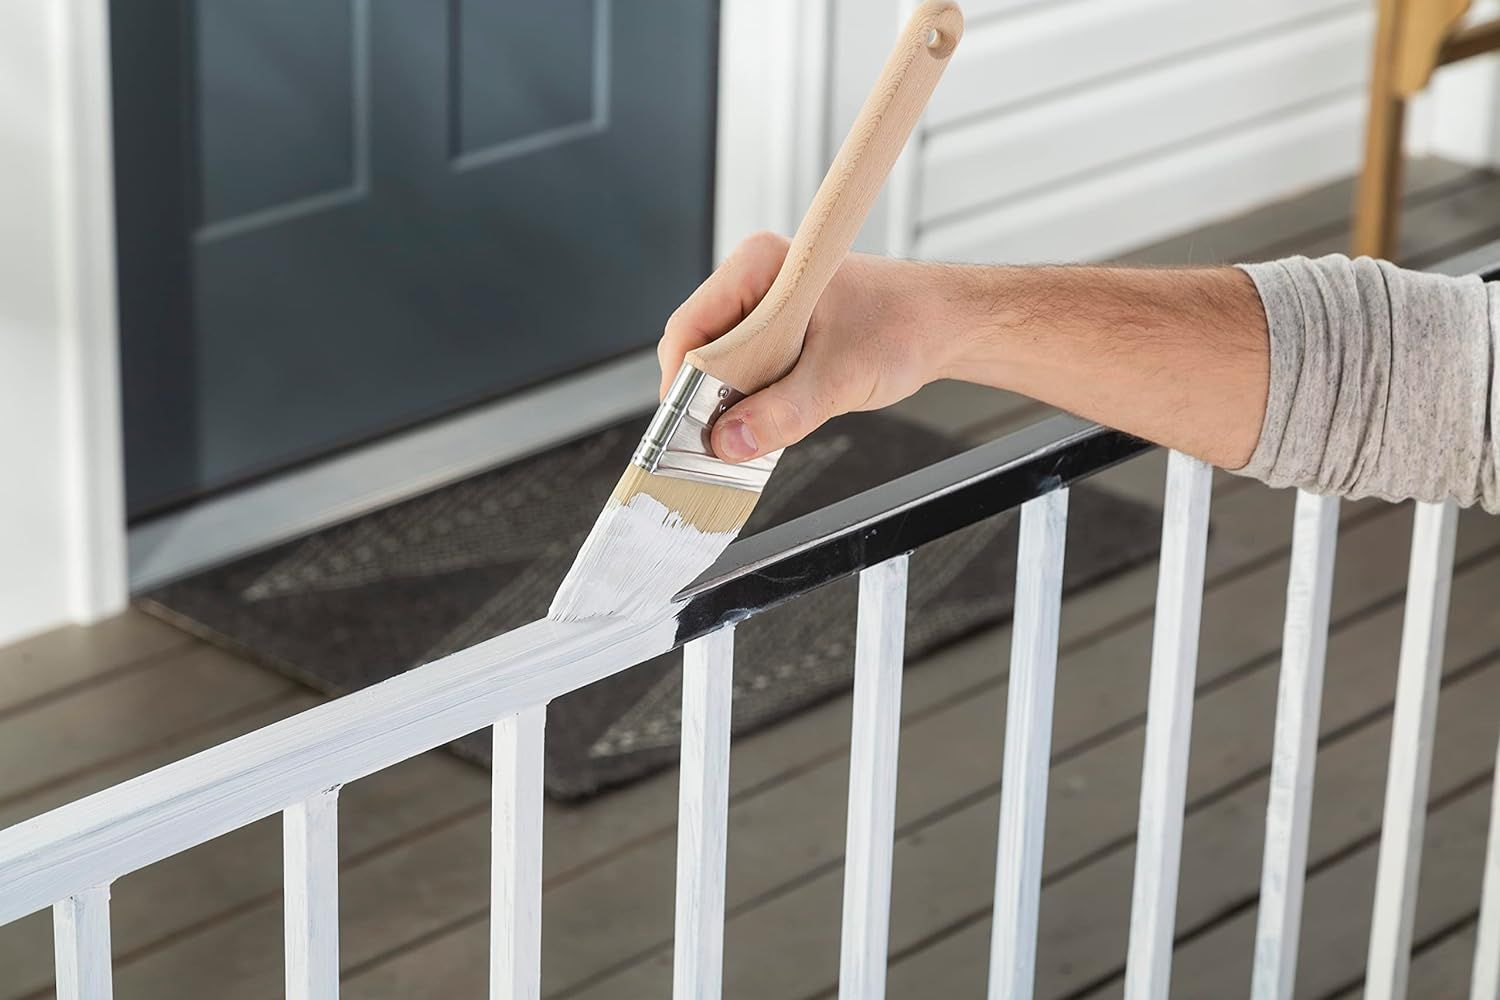
Surface
Each type of primer may adhere better to different surfaces. The following details the best primer type for common household surfaces:
- Bare wood: Apply an oil-based or latex primer to wood that has never been stained or painted to help seal the porous surface. Keep in mind that oil-based primers tend to emit more VOCs (smelly pollutants) than do latex primers.
- Drywall: Apply a latex primer to drywall, as an oil-based primer can raise the grain and make the surface look uneven.
- Stain-prone surfaces: Use a stain-blocking primer on stained wood, bare wood with high tannin content that can bleed out (e.g., cedar or redwood), interior walls with water or smoke stains, or cabinets/trim with grease stains. It will cover stains and keep them from bleeding into and discoloring top coats.
- Choose latex stain-blocking primer if the stains are solvent-based (e.g., crayons or grease).
- Choose an oil-based stain-blocking primer if the stain is water-based (e.g., water-based wood stain, smoke, or tannin).
- Painted wood: An oil-based primer is usually best for painted wood that shows chalking (a chalky powder on the surface as the paint binder degrades) or chipping; it will dry into a denser, smoother foundation to minimize these imperfections.
- Metal: Choose a rust-resistant oil-based primer on metals such as aluminum to avoid the formation of rust, which the water in latex primer can promote.
- Glossy surfaces: Bonding primer, formulated to stick to glossy surfaces, is a must for the slick likes of glass, plastic, or glazed tile.
Dedicated Primer vs. Paint-and-Primer in One
Self-priming paints—also known as paint-and-primer combo products—let users prime and paint a surface in a single step. But these two-in-one products are only recommended if all of the following are true:
- You’re not painting bare or stained wood.
- Your painting surface has no stains or signs of peeling.
- You’re repainting a previously painted surface in the same color or going from a lighter to a darker paint color.
Choose separate paint and primer to improve paint adhesion in the following situations:
- You’re painting bare or stained wood.
- You’re painting over a surface that has stains or is peeling.
- You’re switching from a darker to a lighter paint color.
- You want to use a paint with a different base than that of the primer. For example, use an oil-based primer with a latex paint to take advantage of the rot resistance of the oil primer and the lower VOCs and faster drying of the latex paint.
- You want to cover an old oil-based paint coat with a latex paint coat. An intervening layer of a dedicated primer is needed for optimal adhesion of the latex paint.
Tintability
Primer usually comes in white or gray. Use either color as is without tinting it or have the primer tinted to a hue that’s slightly lighter than the top coat. Tinting primer, which requires buying a primer labeled “tintable,” generally achieves a deeper, richer, and more uniform final color but is particularly recommended in the following situations:
- You’re changing the color from darker to lighter. The tinted primer reduces the number of paint coats needed to hide the darker base coat.
- For stubborn stains, like water or mildew, a tinted primer is necessary to block the stain effectively from bleeding through, especially when there is a light-color top coat.
- You’re changing from a lighter to a dramatically darker color, e.g., light blue to black. The tinted primer ensures that even if the top coat is uneven, no patches of white or gray primer will show through it.
Dry Time
Pay attention to the “dry-to-recoat” time specified on the primer packaging—an indication of when the primer is dry enough to be recoated either with another coat of primer or with paint. In general, latex primers have a shorter dry-to-recoat time of no more than 1 hour, whereas oil-based primers need 1 to 3 hours before they can be recoated.
FAQs
Water-based primer is best for walls and ceilings. Oil-based primer is primarily used for doors, windows, metal, woodwork, or over tough stains in well-ventilated areas.
Paint with primer is best for previously painted walls. Primers are recommended for use on any surface that has not been previously painted.
No, but using a paint primer does reduce the amount of top coat paint needed, and it protects and seals the surface.
Meet the Tester
Debbie Wolfe is a photographer, author, and freelance writer in various niches. She has contributed hundreds of home, garden, and crafting articles and DIY tutorials for leading media outlets and retailers, including HGTV, Real Simple, Forbes Advisor, The Spruce, The Home Depot, Walmart, and Mother Earth News. She is the author of two DIY books: Do-It-Yourself Garden Projects and Crafts and Crafting with Herbs from Skyhorse Publishing. Her testing approach is straightforward and budget-minded.
Additional research provided by Manasa Reddigari.
The post 8 Paint Primers That Provide a Blank Slate For Painting appeared first on Bob Vila.
]]>The post Keep Your Snow Blower Running Efficiently With These High-Quality Oil Options appeared first on Bob Vila.
]]>High-quality oil for snow blowers helps keep your gas snow blower in peak condition, making starting and running it easier and smoother so you can clear wet winter weather quickly. However, knowing which oil type is best for your machine can be a challenge, so we researched dozens of popular snow blower lubricant options and reached out to an expert for their insights on choosing the right one.
Based on our efforts, we learned that the best-performing oil should flow easily through a snow blower engine, even in the coldest temperatures, without leaving deposits and grime. That’s why we chose the Pennzoil Platinum Full Synthetic 5W-30 Motor Oil as our top pick: This synthetic engine oil offers excellent performance in extreme cold and washes away dirt as it flows through, helping extend the life of snow-blowing tools season after season.
Read on to learn more about the features that make a motor or car oil appropriate for a snow blower, and see the rest of the best oils for snow blowers on the market today.
- BEST OVERALL: Pennzoil Platinum Full Synthetic 5W-30 Motor Oil
↓ Jump to Review - RUNNER-UP: Briggs & Stratton 5W-30 Synthetic Engine Oil
↓ Jump to Review - BEST BANG FOR THE BUCK: Valvoline Advanced Full Synthetic SAE 5W-30 Motor Oil
↓ Jump to Review - BEST FOR SMALL ENGINES: Briggs & Stratton 5W-30 Low-Temp Small Engine Oil
↓ Jump to Review - BEST FOR 2-CYCLE ENGINES: Klotz TechniPlate 2-Stroke Snowmobile Oil
↓ Jump to Review - MOST VERSATILE: Castrol GTX High-Mileage 5W-30 Motor Oil
↓ Jump to Review

Best Oils for Snow Blowers Comparison Chart
| Product Name | Volume | Configuration | Type |
| Pennzoil Platinum Full Synthetic 5W-30 Motor Oil | 1 quart | 5W-30 | Synthetic |
| Briggs & Stratton 5W-30 Synthetic Engine Oil | 1 quart | 5W-30 | Synthetic |
| Valvoline Advanced Full Synthetic SAE 5W-30 Motor Oil | 1 quart | 5W-30 | Synthetic |
| Briggs & Stratton 5W-30 Low-Temp Small Engine Oil | 1 quart | 5W-30 | Synthetic |
| Klotz TechniPlate 2-Stroke Snowmobile Oil | 4 quarts | TC-W3 | Synthetic |
| Castrol GTX High-Mileage 5W-30 Motor Oil | 5 quarts | 5W-30 | Synthetic |
Our Top Picks
Our top picks feature oils specially formulated for cold weather, and many also have additives that help keep snow blower engines free of harmful dirt and deposits. Any of the following recommended products will help keep your snow blower running smoothly.
Best Overall
Pennzoil Platinum Full Synthetic 5W-30 Motor Oil
What We Like
- Suitable for snow blowers and car engines
- 5-quart size has 2 handles for controlled pouring
- Protects for long periods of time
What We Don’t Like
- Oil losses can occur with intense friction
Specs
- Volume: 1 quart (other sizes available)
- Configuration: 5W-30
- Type: Synthetic
Seasonal machines, such as snow blowers, often sit idle for months before they are needed, which allows time for impurities and gunk to build up. However, Pennzoil’s Platinum motor oil washes dirt and deposits out of the engine as it passes through, helping to extend the life of the machine while ensuring it starts when the next snowfall arrives. As a fully synthetic clear 5W-30 oil made from natural gas, this pick can keep your snow blower engine up to 45 percent cleaner than standard oils.
Pennzoil Platinum comes in 1-quart, 5-quart, and 55-gallon bottles, and buying a larger volume might be smart since it also works in car engines. Another thing we really like about this product is the 5-quart bottle has handles on both the top and the side, making it much easier to pour without making a mess.
Get the Pennzoil oil for snow blowers at Lowe’s, Ace Hardware, The Home Depot, Walmart, or Blain’s Farm & Fleet.
Runner-up
Briggs & Stratton Synthetic Small Engine Motor Oil
What We Like
- Helps maintain a clean engine
- Suitable for use in other garden equipment
- Enables a smoother snow blower start
What We Don’t Like
- More expensive than similar options
Specs
- Volume: 1 quart
- Configuration: 5W-30
- Type: Synthetic
This Briggs & Stratton 5W-30 small engine oil is well suited to snow blowers—its use makes starting engines in cold temperatures easier while also minimizing oil consumption. As a synthetic oil, it lasts longer (up to 5,000 hours in a snow blower) and stays thinner at lower temperatures than conventional oils.
With a high-temperature viscosity rating of 30, this oil is also a good option for other 4-cycle small engines that operate in hot temperatures, including lawn mowers. The 1-quart bottle has convenient measurements on the side that allow the user to see exactly how much snow blower oil is left.
Get the Briggs & Stratton synthetic oil for snow blowers at Amazon (2-pack), Walmart, or Briggs & Stratton.
Best Bang for the Buck
Valvoline Advanced Full Synthetic SAE 5W-30 Motor Oil
What We Like
- Provides excellent wear protection
- Slightly more budget-friendly than competitors
- Configured specifically for cold conditions
What We Don’t Like
- Bottle may leak if stored incorrectly
Specs
- Volume: 1 quart
- Configuration: 5W-30
- Type: Synthetic
Valvoline 5W-30 weight motor oil is a synthetic formula with additives that provide 50 percent more wear protection than standard motor oils. The included detergents flush sludge and harmful deposits from the engine, which is significant for small 4-cycle engines that are used only when it snows.
This snow blower oil’s low cold operating viscosity is ideal for winter-use tools, while its 30-weight high-temperature viscosity rating also makes it suitable for warm-weather machines like lawn mowers. This Valvoline product comes in a 1-quart bottle, but a 5-quart bottle with a pour spout is also available.
Get the Valvoline oil for snow blowers at Amazon (6-pack), Lowe’s, Walmart, or Tractor Supply Co.
Best for Small Engines
Briggs & Stratton 5W-30 Low-Temp Small Engine Oil
What We Like
- Ideal for use in cold temperatures
- From a brand known for high-quality products
- Specially suited for small engines
What We Don’t Like
- Quite pricey compared to similar products
Specs
- Volume: 1 quart
- Configuration: 5W-30
- Type: Synthetic
Made by one of the best-known names in small engines, this Briggs & Stratton 4-cycle oil is specially formulated for use in small engines. The synthetic formula comes in a 1-quart container with a handy gauge on the side that allows users to see how much oil is left in the bottle.
With its 5W rating, this snow blower engine oil works well in machines operating at temperatures below 50 degrees Fahrenheit. It also has a high-temperature viscosity of 30, making it suitable for use in warmer-weather motors like power washers or lawn mowers.
Get the Briggs & Stratton 4-cycle oil for snow blowers at Amazon or Briggs & Stratton.
Best for 2-Cycle Engines
Klotz TechniPlate 2-Stroke Snowmobile Oil
What We Like
- Made for temperatures as low as -48 degrees Fahrenheit
- ISO-EGD compliant for engine protection
- Formula helps extend engine life
What We Don’t Like
- Reports of leaky packaging
Specs
- Volume: 4 quarts
- Configuration: TC-W3
- Type: Synthetic
Made for cold temperatures as low as -48 degrees Fahrenheit, the Klotz TechniPlate Snowmobile oil is designed for with 2-cycle engines like those in ATVs, motorcycles, race cars, and, of course, snow blowers. It works with stock engines or modified ones made by all leading manufacturers, including Ski-Doo, Arctic Cat, Polaris, and Yamaha as well as C-TEC and E-TEC engines.
This clean-burning synthetic formula is TC-W3 certified and ISO-EGD compliant for reliability and efficiency. It’s made to improve throttle response and prevent plug fouling and can be used as an injection oil by pouring it directly into the tank or as a pre-mix product by blending it with gasoline.
Get the Klotz oil for snow blowers at Amazon or Klotz.
Most Versatile
Castrol GTX High Mileage 5W-30 Motor Oil

What We Like
- Provides immediate engine protection on startup
- Lasts for extended periods and still look clean
- Suitable for both cold and hot weather
What We Don’t Like
- Bottle shape is awkward for filling a snow blower
Specs
- Volume: 5 quarts
- Configuration: 5W-30
- Type: Synthetic
With technology designed to protect engines and improve performance, this 5W-30 Castrol GTX motor oil features Castrol’s sludge and wear protection additive. It prevents buildup, extending the life of engines both large and small.
Castrol GTX also makes it easier to get a pull-start engine running, and once you start your snow blower’s engine, the oil quickly coats it to provide immediate protection. Additionally, this option features the optimal 5W oil rating for winter use and a 30 high-temperature viscosity rating for hot weather.
Get the Castrol oil for snow blowers at Amazon, Lowe’s, Tractor Supply Co. (1 quart), The Home Depot (1 quart), or Walmart (1 quart).
Jump to Our Top Picks
How We Chose the Best Oils for Snow Blowers
To provide shoppers with a list of top picks for snow thrower and snow blower oils, we primarily considered oil type and viscosity.
Oil type: Synthetic oil is the best choice for snow blower motors because it can handle lower temperatures and resist breakdown better than conventional oil.
Viscosity: Our recommendations are all variations of 5W-30, which is the ideal oil viscosity for snow blowers. The products we selected include budget-friendly versions for occasional use and heavier-duty options that come at a slightly higher price point. Most of the picks on our list are also versatile enough for other home and garden equipment and suitable for both cold and hot weather conditions.
What to Consider When Choosing Oil for a Snow Blower
The right oil can make the difference between a snow blower not starting because it has a gummed-up engine and one that kicks on without issue. Ahead, learn how viscosity, snow blower oil type, and other factors affect engine performance in a snow blower.
Type
Gas-powered snow blowers use 4-cycle engine oil, a type of oil for snow blower engines that uses separate tanks for gas and oil, much like car engines. The gas fuels the engine, while the oil lubricates it.
Smaller engines, such as those on chainsaws, have 2-cycle engines. This type of small engine uses an oil and gas mixture that goes into one tank. Don’t use 2-cycle engine oil in a snow blower, as it will not properly lubricate the engine and will damage it. The motors on electric snow blowers don’t require engine oil.
Identifying the right type of engine oil is easy. The oil container has “4-cycle” or “2-cycle” clearly printed on the label. Although some 4-cycle engine oils are labeled for “small engines,” they are actually the same oil commonly used in cars and trucks.
Viscosity
Viscosity refers to the thickness of the oil. Higher viscosity oil is better at protecting and lubricating engines at high temperatures and peak load (high RPMs). Oil with a low viscosity remains thinner at lower temperatures, promoting better flow through the engine, making it easier to start and more efficient to run.
Viscosity is based on a scale created by SAE International, formerly known as the Society of Automotive Engineers (SAE). Motor oil has two viscosity ratings:
- The first rating—the “W” (for “winter”) after the number—represents the cold temperature viscosity. For example, an oil rated 5W flows better at lower temperatures than a 10W oil.
- The second number indicates the high-temperature viscosity. For example, an oil with a high-temperature viscosity of 30 stays thicker at higher temperatures.
Since snow blowers operate exclusively in cold weather, they typically use SAE 5W-30 weight oil, which ensures the engine will start at low temperatures. Make sure to check the maintenance section of your operating manual for the proper snow blower oil weight for your machine.
Synthetic vs. Standard
Not all 5W-30 engine oils are the same. Some engine oils are synthetic, which means they use higher-quality base oils than conventional oils. Synthetic lubricants can generally withstand higher temperatures and resist breakdown better. This means synthetic oil in a snow blower will last at least 50 percent longer than conventional oil, so you’ll probably need to perform less frequent snow blower maintenance.
Many synthetic oils also contain additives to help improve engine performance and extend engine life. Additives include detergents that flush grime and buildup and chemicals that coat engine parts to enhance lubrication.
For these reasons, synthetic oils are generally more expensive, often costing several times more than conventional oils. Still, proper maintenance of a quality snow blower will likely run you less than the cost of snow removal if you live in an area with relatively frequent snowfalls.
Versatility
The 4-cycle engine oil that snow blowers use is the same oil used in any 4-cycle engine, which means it’s also an appropriate oil for lawn mowers, power washers, and even cars and trucks. 5W-30 oil provides adequate protection during both cold and warm weather.
Engine oil generally comes in 1-quart bottles, which is ideal for snow blowers since they hold about that much. It also comes in 5-quart containers and large, multi-gallon drums, but since its shelf life is generally around 5 years, it’s important not to buy more than you need. To store 5W-30 oil, keep it tightly sealed in a cool, dry environment.
FAQs
Even though you now know a fair bit about oil for snow blowers, you may still have additional questions. For details on deciding which type of oil in a snow blower is best to use and how often to replace it, read answers to some frequently asked questions below.
Yes, synthetic options are likely the best oils for snow blowers. Synthetic oils are refined to run cleaner, leaving fewer deposits in the engine. Many also include additives that clean grime and sludge from the engine to improve performance.
Yes. Snow blowers, like cars, are 4-cycle engines, so they use the same type of motor oil. Use a motor oil weight with a low-temperature viscosity rating, such as 5W-30, since snow blowers must run during cold weather.
Snow blowers operate in frigid temperatures, so the most important factor to consider is viscosity. Use motor oil with a low-temperature viscosity rating, such as 5W-30, to ensure the snow blower starts easily and runs smoothly.
Adding too much oil to a snow blower, or any 4-cycle engine, will cause the oil to rise and come in contact with other moving parts around the engine, aerating the oil and creating a huge mess.
According to Christ Urato, owner-operator of Urato Landscaping, LLC, you should perform a snow blower oil change “after the first 5 hours of use for new snow blowers, then every 20 to 50 hours of operation or once per season, depending on usage.”
A well-maintained snow blower should last around 10 to 15 years, but actual lifespan will depend on build quality and frequency of use. Performing regular maintenance tasks and avoiding common snow blower mistakes will help your machine last as long as possible.
“Yes, running it dry prevents stale fuel from gumming up the carburetor and causing maintenance issues,” says Chris Urato, a landscaper and snow-removal provider from Goshen, New York.
If you have a gas snow blower, you can give it 2 to 5 minutes before use so oil has time to run through the engine and lubricate it. If you have a battery-powered blower, there’s no need to let it warm up.
The post Keep Your Snow Blower Running Efficiently With These High-Quality Oil Options appeared first on Bob Vila.
]]>The post How to Finish Concrete appeared first on Bob Vila.
]]>When you need to repair a sidewalk, create a space to store a trash can, or build a small storage shed, a few basic concrete skills come in handy. A small concrete slab doesn’t cost much to DIY, and the process is straightforward.
However, grading the soil, assembling concrete forms, and mixing and pouring concrete require a bit of planning. It is also no small amount of physical work. Properly finishing the concrete will ensure that the new slab looks great, resists cracking, and remains functional for many years to come.
After the concrete has been poured into the forms, it’s time to start finishing. The concrete finishing process transitions the freshly poured concrete into a strong, smooth surface before it fully sets. Doing it well calls for close attention to the condition of the wet concrete, and properly timing each step.
Read on to learn about the necessary tools, techniques, and timing for a strong, durable, and attractive finish on concrete. After reading this article, you will better know how to finish concrete.
Tools & Materials
Bobvila.com may earn a commission from purchases made through these links.
Project Overview
Working Time: 30 minutes
Total Time: 2 hours
Skill Level: Beginner
Estimated Cost: $15 or more, depending on tools that need to be purchased
Before You Begin
Wet concrete is highly alkaline, so the first order of business is to protect yourself from the risk of chemical burns. Whether you are mixing, pouring, or finishing concrete, be sure to wear rubber gloves to keep your hands safe, and safety glasses to protect your eyes.
Also wear long pants, a long sleeve shirt, and if you’ll be standing in the wet concrete, rubber boots. If your bare skin comes into contact with wet concrete, rinse it off with plain water right away.
Before beginning the essential job of finishing, bear in mind these helpful tips:
- Concrete projects are weather-sensitive. Hot (above 80 degrees) or cold (below 50 degrees) weather complicates the finishing process. For beginners, a cloudy day with moderate temperatures and no rain in the forecast is best for pouring and finishing concrete.
- Timing is critical. Each of the steps ahead is tied to the condition of the concrete. Steps 1 through 3 are done immediately after the pour, before water rises to the surface. Wait for “bleed water” to appear and evaporate before resuming steps 4 through 6. Step 7 is to be done after the concrete has completely cured.
- Avoid over-handling wet concrete. Doing so can cause the different sizes of aggregate within the concrete to separate, weakening the final slab.
- Use a flat shovel or trowel, if needed, to move and spread the concrete. Round point shovels do not spread concrete evenly.
Step-by-Step Guide to Finishing Concrete
Step 1: Spread the wet concrete evenly to completely fill the forms.

Immediately after pouring the concrete, make sure that the concrete form is completely and evenly filled. It may be necessary to move some of the wet mix from high spots, using a trowel or flat shovel, to fill voids.
If the form appears to be full and the surface is even, use a hammer to gently tap the form on all sides. This vibrates the wet concrete and helps it settle in place, preventing air pockets from forming in the face of the concrete.
Step 2: Screed the wet concrete level at the top of the form.
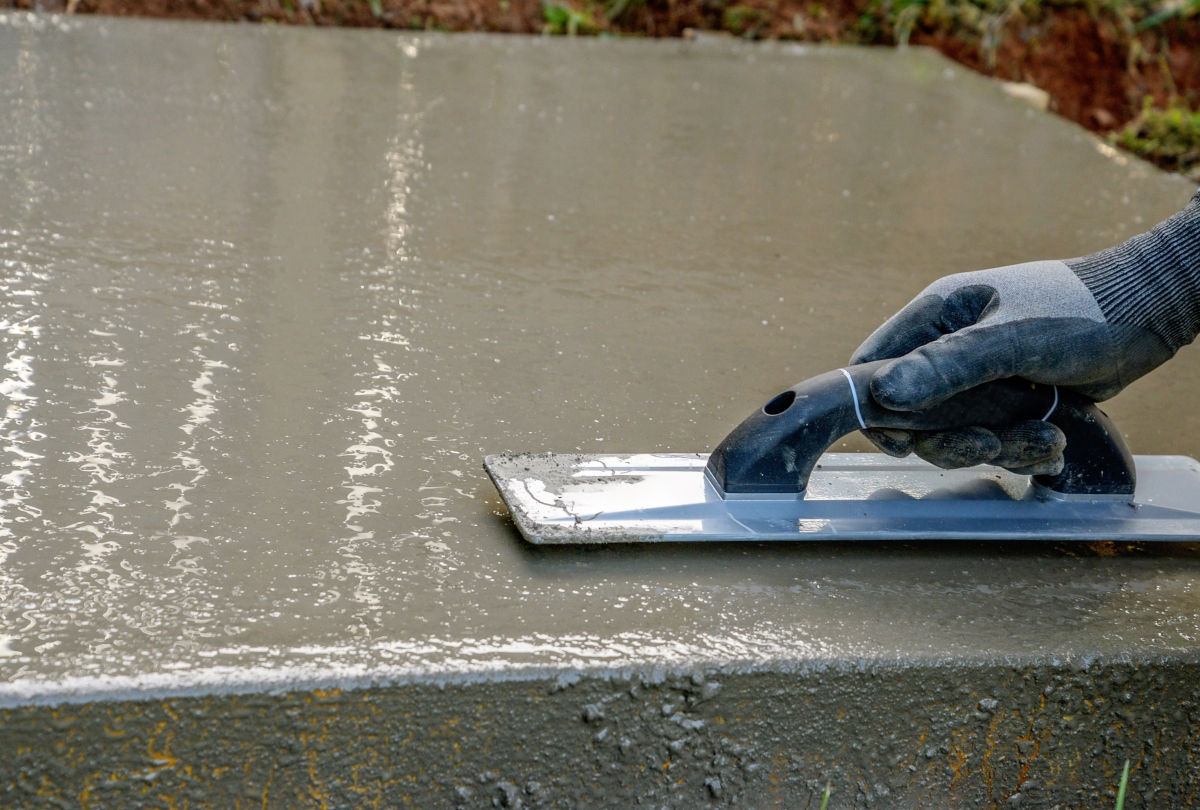
The purpose of screeding is to make the concrete surface perfectly flat and level with the top of the form. For all but the smallest projects, it helps to work with a partner on this step.
- Lay the narrow edge of a long, straight 2×4 board across one end of the form.
- Use a quick sawing motion to slide the screed board across the surface of the concrete from one end of the form to the other.
- Use a trowel to pick up excess concrete from high spots and fill in low spots.
- Screed 3 or four times, or more, until the whole surface is flat. Smoothing concrete at this point is not necessary.
Step 3: Float the surface of the concrete before bleed water appears.
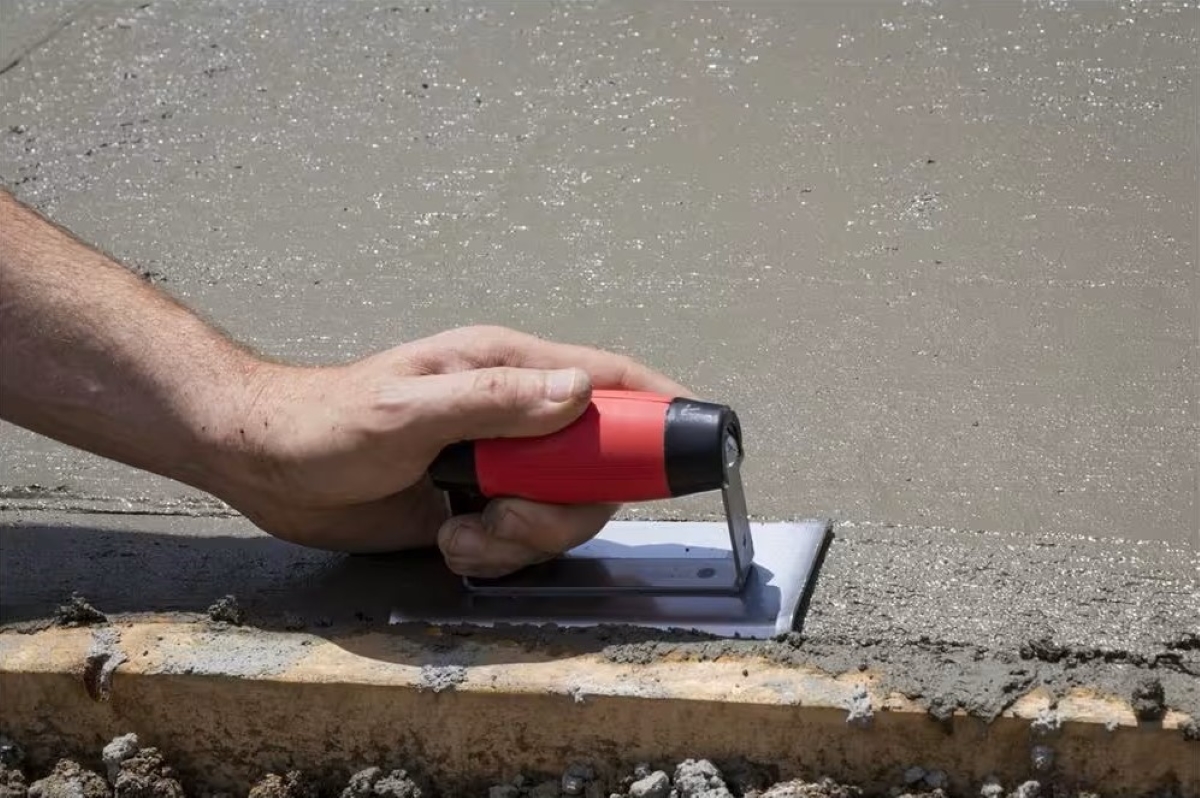
Floating concrete embeds the aggregate and begins to pull excess water to the top of the concrete. A handheld float or darby will suffice for smaller projects, but a bull float is a better option for large slabs. For best results, raise the leading edge of the tool slightly as you move it across the surface.
Use long sweeping strokes to smooth the entire surface of the concrete. Don’t worry about creating a perfect texture at this point. We will cover how to smooth concrete in step 6. After floating, allow the concrete to rest for at least 15 minutes before moving to the next step.
Step 4: Edge the concrete after the water evaporates from the surface.
You may only need to wait 15 minutes after floating the concrete, or it could take several hours. When the surface water disappears, it’s time to begin the finishing touches, starting with the edge. A rounded edge helps prevent breakage and chipping at the edges.
Use a handheld edging tool to shape the rounded edge all the way around the perimeter of the slab. As you move the edger along the form, keep the leading edge slightly raised and apply gentle downward pressure on the following edge.
Step 5: Add contraction joints at the proper depth and spacing.
A flat concrete surface is subject to cracking that diminishes both the appearance and durability of the slab. Adding grooves, or joints, minimizes uncontrolled cracking by providing space for expansion.
With a clean 2×4 board as a guide, use a handheld groover to score expansion joints from edge to edge into the surface of the concrete. These joints should penetrate ¼ the depth of the concrete, or 1-inch deep for a slab that’s 4 inches thick. Space them between 2 and 3 feet apart for each inch of thickness, so every 8 to 12 feet for a 4-inch-thick slab.
Step 6: Broom the surface or refine it with a trowel.

The earlier stages of finishing concrete leave the surface flat and uniform but with an inconsistent texture. The final tooling depends on your project preferences. Brooming establishes an even textured surface, while troweling concrete at this stage makes the surface of the concrete smoother.
If you prefer smooth concrete you can trowel finish concrete immediately after adding the expansion joints. Begin at a distant edge and work backwards to avoid marring the finished work. Move the trowel across the surface in broad sweeping motions with moderate downward pressure, always with the leading edge slightly raised.
For all-weather functionality, a broom finish looks good, remains durable for years, and offers good walking or driving traction. Wait until the concrete has dried to the point that it no longer exhibits a wet sheen. Then, with a stiff bristle broom, applying just enough pressure to raise the texture of the concrete, brush across the surface in long straight lines.
Tried-and-True Advice
“The slab is something you will look at regularly so take the time to tamp out air, trowel everything evenly and edge for a perfect form. I love a smooth trowel finish for smaller slabs, but brooming is far more efficient while working larger surfaces. Spend as much time as needed to get the final surface evenly finished, and your project will look fantastic.”
—Zach Lazzari, Contributing Writer
Step 7: Protect the slab until it hardens, then seal it after curing.
After all that hard work, protect the still-pliable concrete surface from foot traffic, falling debris, and rainfall for at least 24 hours or until the concrete is dry. Use scrap lumber laid across the forms to support a covering of tarps or plastic sheeting. This covering will also prevent the slab from drying too quickly which could cause cracking under certain conditions. Do not allow foot traffic for 3 to 4 days, and no automobiles for a week.
It takes about 4 weeks for a new slab to fully cure. After 28 days, it’s time to apply a protective concrete sealer. Concrete sealer prevents surface damage, corrosion, and staining, extending the life of the slab.
Final Thoughts
Some jobs call for the services of a professional contractor, but pouring and finishing a small concrete project does not have to be one of them. The timing of each step is critical and you’ll need to pay close attention to the moisture level of the concrete. With a good plan and the right tools, finishing concrete isn’t difficult. Following the steps outlined above, many DIYers can apply a durable and attractive finish on a freshly poured slab.
The post How to Finish Concrete appeared first on Bob Vila.
]]>The post How to Overseed a Lawn appeared first on Bob Vila.
]]>A full, green lawn creates curb appeal and makes you feel like sipping an iced tea on the back patio. But if bare spots peek through and weeds overpower the grass, the lawn might be more of an eyesore than a point of pride. Overseeding chokes weeds and fills out the grass until it’s thick and lush. If you’re not sure how to overseed a lawn, all it takes is the right tools, smart timing, and a little knowledge about your local climate.

What is “overseeding,” exactly? Why is this lawn task not just called “seeding”? “Overseeding” is the term for adding more grass seed to a lawn without turning the topsoil. For many homeowners, overseeding is central to general lawn maintenance. Some lawns might need it once a year if drought or disease threaten the grass, and other lawns might need it every few years only to brighten the grass and keep it full.
A few basic tools—like a lawn mower, seed and fertilizer spreader, and rake—are all that you need to achieve a less patchy, more verdant yard. With the right grass seed and timing, overseeding will restore the lawn and give it a lush, uniform appearance.
Tools & Materials
Bobvila.com may earn a commission from purchases made through these links.
Project Overview
Working time: 3 hours or more, depending on the size of the lawn
Total time: 3 hours or more, depending on the size of the lawn
Skill level: Beginner
Estimated cost: $100 to $200, depending on size of lawn and products used
Before You Begin
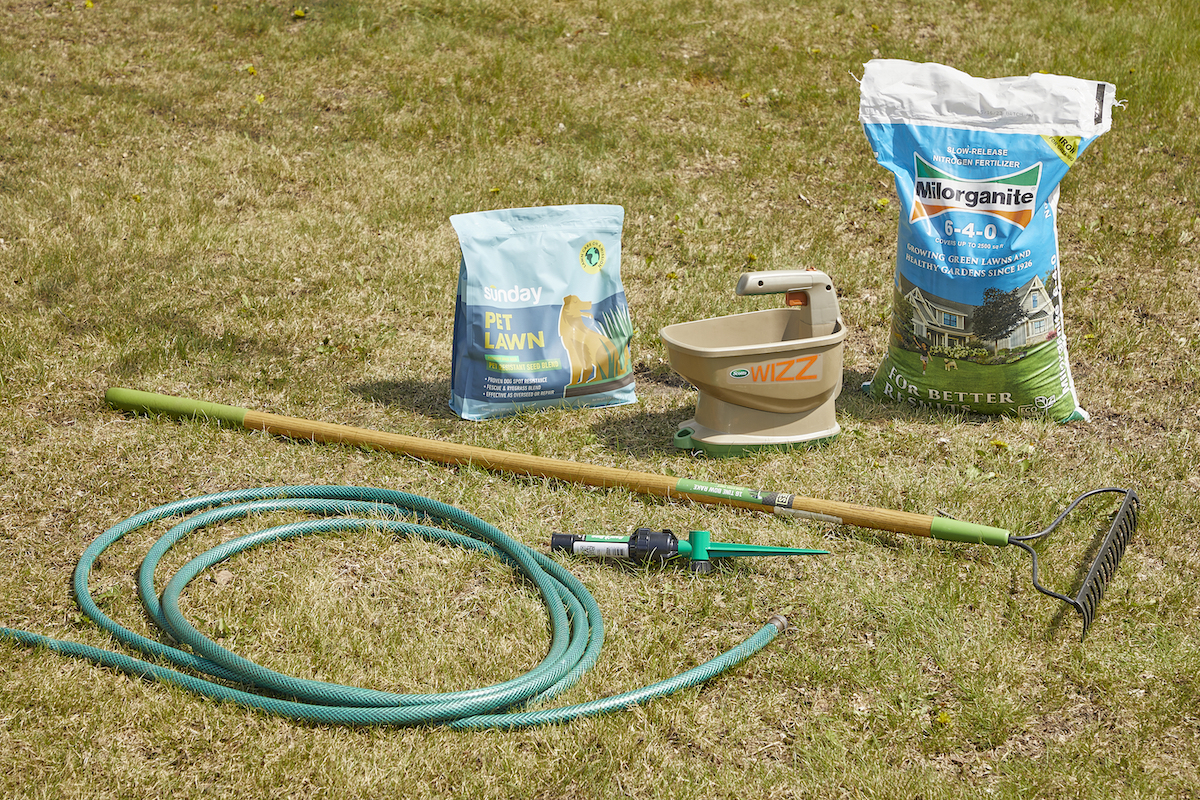
If your lawn has thatch (a compact layer of grass and soil), it might need dethatching or aerating before you spread seed. Otherwise, the grass seed used in overseeding won’t reach the soil to germinate and take root. Aerating creates holes in the grass and soil through which water, oxygen, and vital nutrients can reach the new grass seed and the roots of the existing grass.
Overseeding a Lawn in 5 Simple Steps
Step 1: Mow and rake the lawn.

The goal of overseeding a lawn is to get the grass seed in contact with the soil. To do that, the first step is to mow the lawn. Mow it shorter than usual so the grass seed will have a better chance of reaching the soil. Make sure to bag the clippings so they don’t come between the seeds and soil.
After mowing, rake the entire lawn to remove dead grass, rocks, sticks, and any other debris. This process removes any final barriers between the grass seed and soil, and loosens the soil in preparation for seeding and germination.
Step 2: Amend the soil, if necessary.
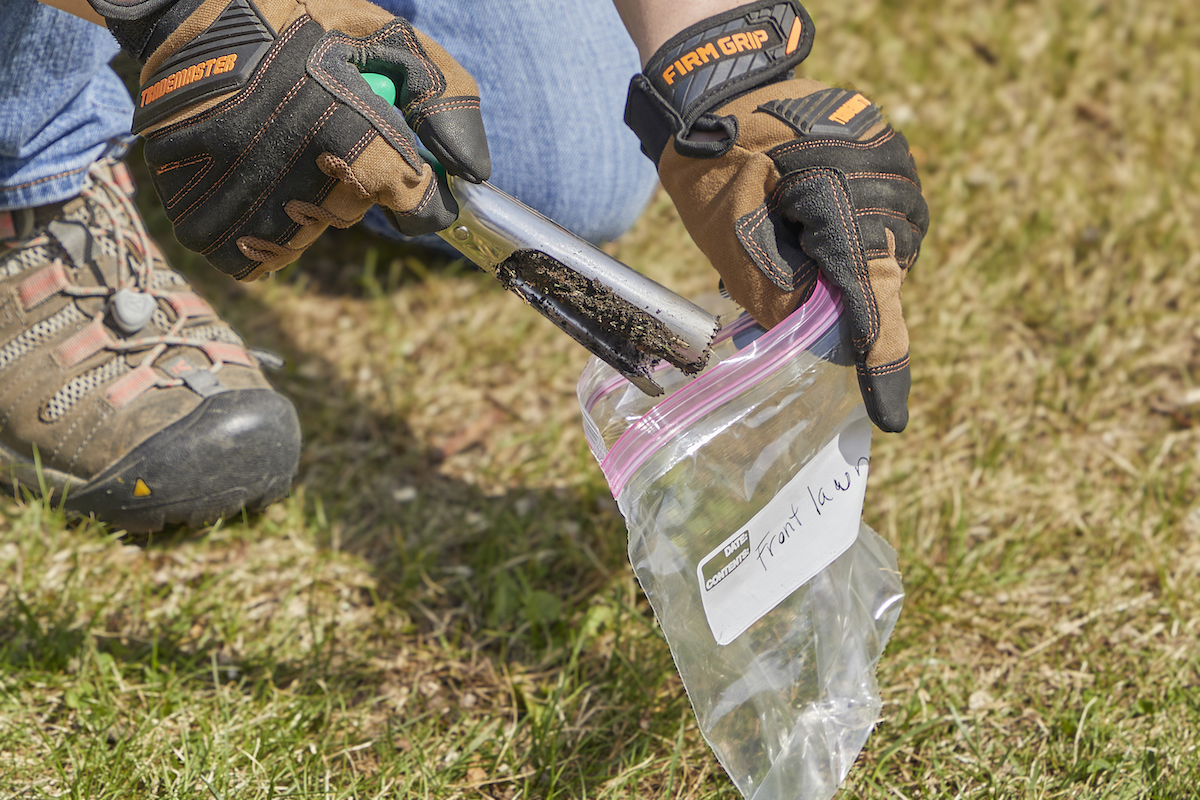
Soil amendments are different from fertilizers. Amendments have specific nutrients and chemical compositions for specific soil types. For example, lime, wood ash, and poultry manure raise the pH level of acidic soil to make it more suitable for certain plants and grasses. Sulfur amendments, on the other hand, add acidity to alkaline soil. Additions of peat moss for clay soil and compost for sandy soil also can improve the nutrients in the lawn and its condition.
If a lawn has not been growing and greening as it should, doing a soil test can determine the soil type and pH. The test results will identify what, if any, types of amendments the soil needs for grass to develop. Keep in mind that if the soil has a neutral pH and is fertile, it likely needs no amendments.
RELATED: Top-Dressing a Lawn: Why It’s Important and How to Do It
Step 3: Spread the grass seed.
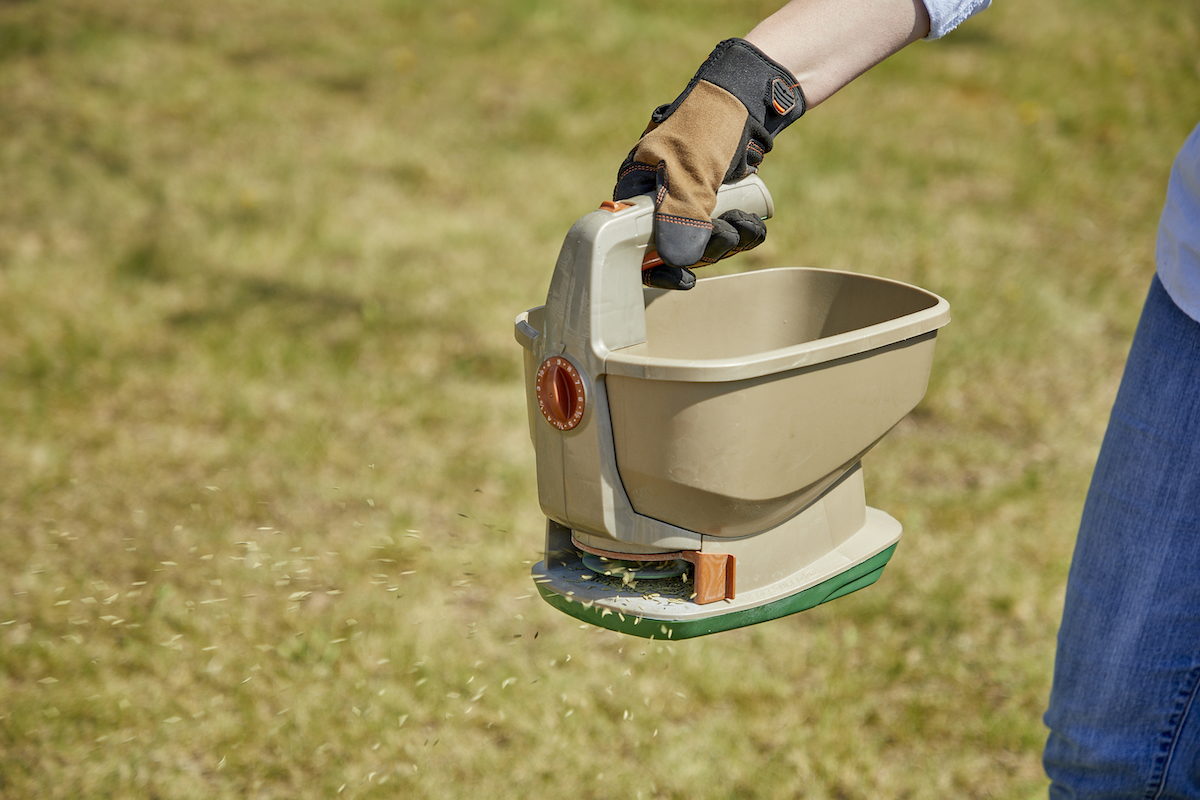
After determining the right time of year time to overseed (knowing when to reseed a lawn is based on your climate and grass type), load the grass seed into a seed spreader and set it to distribute about 16 seeds per square inch of soil. The right seed density will depend on the thickness of the existing lawn, so some lawns might need less. You can spread grass seed by hand if you don’t have a spreader.
Choose a grass seed designed for your climate or region that complements the existing grass. Cool-season grasses thrive in variable temperatures, like those found in the Northeast and Pacific Northwest. Warm-season grasses grow best in a climate like that of the southern United States. (For recommendations on quality seeds, see our researched guide to the best grass seed for overseeding.)
Consulting the USDA Plant Hardiness Zone Map can help determine the average local climate to best choose the appropriate grass type. Look for grass seed that’s rated by the National Turfgrass Evaluation Program because these varieties have been tested and found resistant to disease, drought, and common pests.
Step 4: Add grass seed fertilizer.
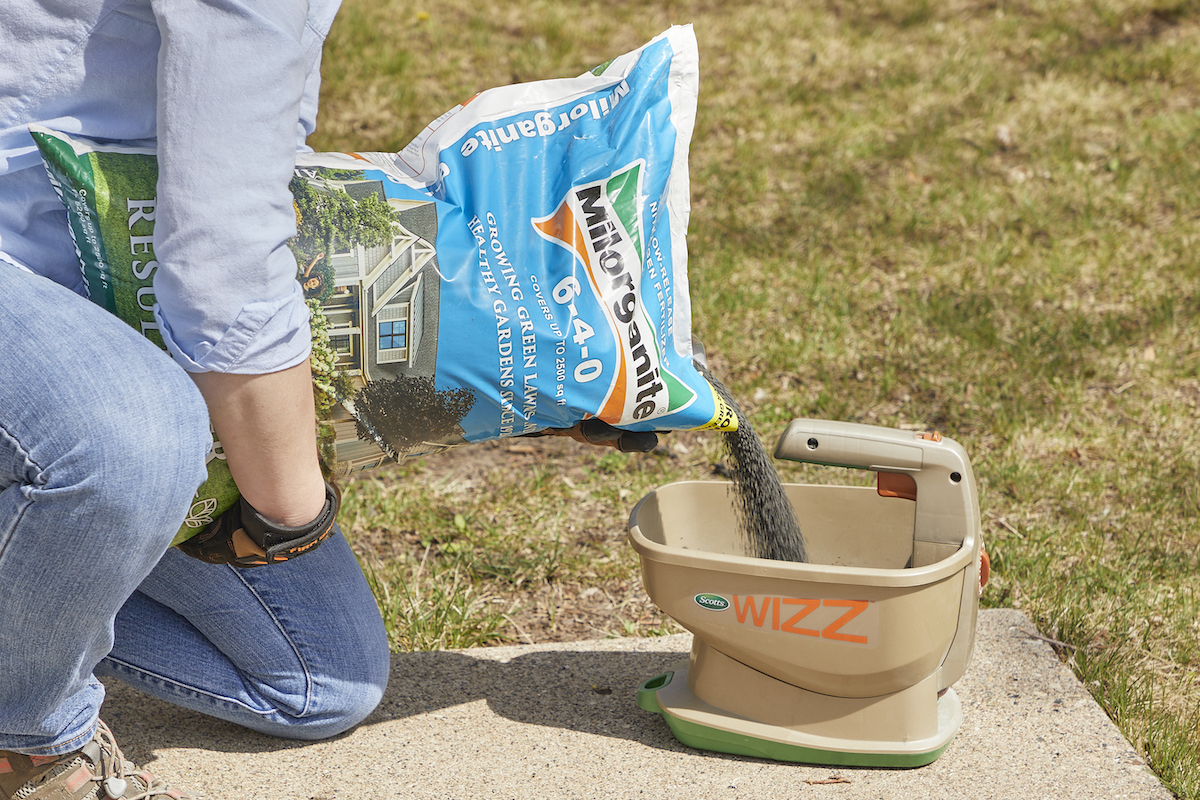
Select the best fertilizer for your region and property, and load it into a fertilizer spreader. Start by scattering around the perimeter of the lawn to make sure fertilizer reaches the edges of your property. Next, follow a pattern similar to a mowing pattern by moving in straight rows until the entire lawn is fertilized.
There are different types of fertilizer spreaders, including a broadcast spreader, handheld spreader, snap spreader, drop spreader, and liquid sprayer. Fertilizing small yards often requires just a small handheld spreader. Those with larger yards will save a lot of time and effort by using a broadcast spreader.
Both yard size and fertilizer type will determine which type of spreader is best for your property. For example, liquid fertilizer is applied via sprayer, like a quality backpack sprayer, and midsize yards are more easily fertilized with a snap or drop spreader. Keep in mind that some spreaders can handle both grass seed and fertilizer broadcasting, so depending on the fertilizer type and spreader, you might only need one tool for both steps.
Step 5: Water the seeded lawn.
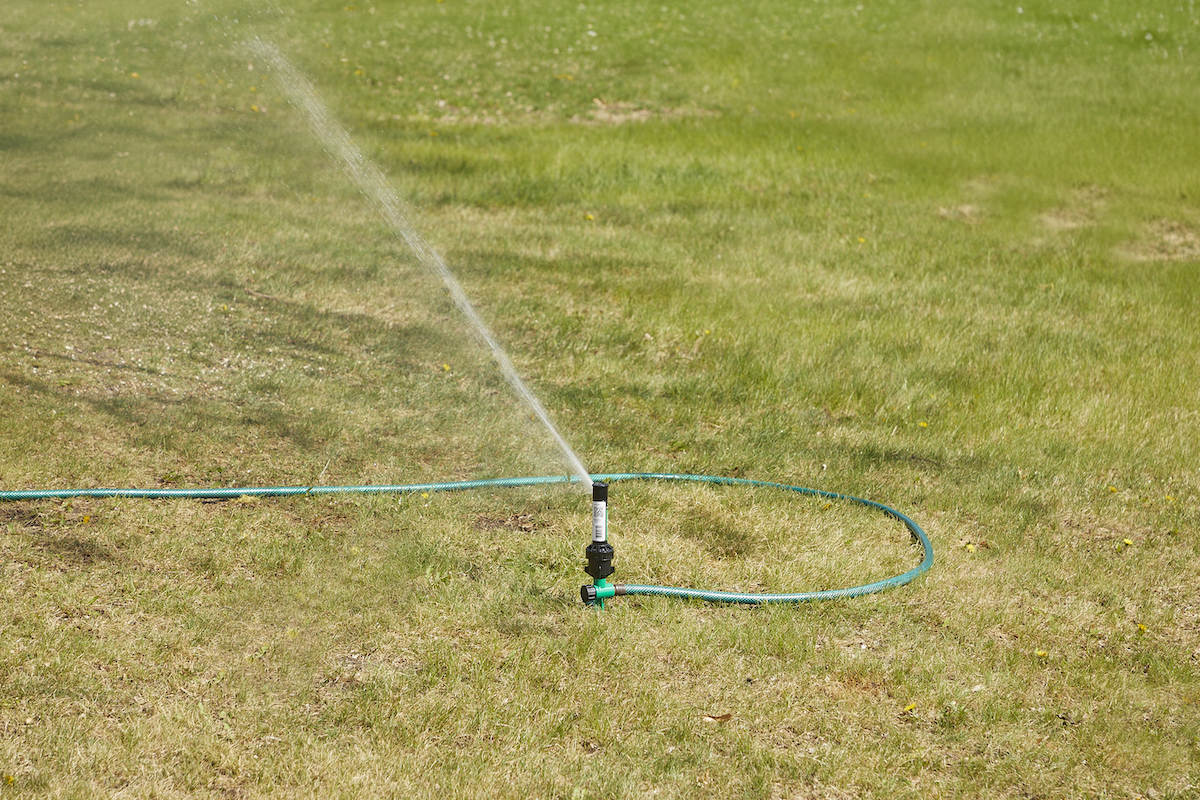
After fertilizing, water the lawn for a short time each day. It’s best to water in the morning to maximize the water intake. More evaporation occurs during the afternoon and evening, which means it will take more water to get the same benefits. You don’t want to overwater the lawn because doing so can wash away the seed, prevent germination, or encourage thatch development and the growth of fungus and weeds. If there are puddles or the ground feels spongy, cut back on the watering time.
RELATED: Solved! How Long Does It Take Grass to Grow?
Final Thoughts
Part of learning how to overseed a lawn requires knowing when to do it, and this has everything to do with climate and grass type. Cool-season grasses seed best in the late summer and early fall. The cooler temperatures slow the growth of the existing grass but give the seeds time to germinate and grow before the grass goes dormant. Warm-season grass does best when seeded between early spring and early summer. In this case, the seed has time to germinate and grow before the warmest summer temperatures hit. Keep the new seed well watered to give it a good start on growth.
Once your lawn grass is shipshape, consider browsing low-maintenance plants for your landscape.
FAQs
You will have very little success overseeding a lawn if you just head out and sprinkle grass seed and then cross your fingers. For grass seed to take, the soil must be ready and free of barriers like grass clippings. If the lawn has lots of weeds that compete with grass, for example, sprinkling seed is a waste of time.
Knowing when to overseed a lawn depends largely on grass type. Sow cool-season grass seed in late summer and early fall, giving the seedlings a little time to develop before winter. Overseed a warm-season lawn in spring for best success. Also, try not to overseed on especially windy days or after a heavy rain.
First, spread your seed on prepared soil, then add grass seed fertilizer. Since you typically are overseeding in fall or late summer for cool-season grasses, and in spring for warm-season ones, you might as well apply your fertilizer to the entire lawn anyway, not just the overseeded portions. It’s typical to seed and fertilize a lawn at the beginning of the turf’s growing season.
Mowing after overseeding a lawn requires a little patience. You might be itching to make your lusher lawn a nice, even carpet of turf now that it has filled in. But you should wait until the new grass blades are about 2 inches tall. Since you mowed as part of preparing the soil for lawn seeding, the established grass shouldn’t be wildly overgrown.
The post How to Overseed a Lawn appeared first on Bob Vila.
]]>The post What to Do About a Leaking Garbage Disposal appeared first on Bob Vila.
]]>Q: The cabinet under my kitchen sink has been soggy lately. Could this be a sign of a leaking garbage disposal? If so, how can I repair it myself?
A: A leaking garbage disposal often goes unnoticed until you confront a sopping cabinet, a foul-smelling puddle, or an audible drip-drip-drip from the unit. The fix can be frustrating, too, because the leak can stem from a number of components in the system. Fortunately, with a little sleuthing, you can zero in on the leak and, depending on the exact location, stop the icky oozing and repair the component that caused it. Following this process will help you isolate and fix the link.
Prepare to find the leak.

Before testing the garbage disposal for leaks, unplug it at the wall outlet, and turn off the power at the breaker box to prevent electrical shock. Then insert a watertight sink stopper into your sink drain and wipe the unit dry with a clean cloth. In any handy container, mix a few drops of food coloring into a few cups of water, and pour the dyed water onto the sink stopper to help you locate the leak.
Investigate the source.

Using a flashlight, examine the unit for escaping colored water, which is likely to come from one of three places:
- the top, where the disposal meets the sink drain
- the side, where the dishwasher hose or main drain pipe connects to the disposal
- or the bottom of the unit
Inspect each of these locations while gliding a light-colored rag over the unit; the dyed water will readily show on the rag and reveal the location of the leak. If a leak isn’t immediately apparent, remove the sink stopper and pour a few more cups of dyed water down the sink drain, then check for leaks again. Leaks near the top of the unit are more likely to show themselves while the sink is plugged, while side and bottom leaks are more noticeable while the sink is unplugged.
If the top of the garbage disposal is leaking, re-seal and tighten the sink flange.

The metal sink flange that sits directly inside the sink drain is typically sealed around the top with plumber’s putty (a clay-like sealant) and then secured from under the sink with bolts. If the plumber’s putty deteriorates, or the bolts loosen, the flange can no longer form a watertight seal between the sink drain and the disposal, which could cause a leak at the top of the unit.
To reseal the leaky flange, you must first detach the garbage disposal:
- Start by loosening the screws securing the main drain pipe to the disposal, then loosen the screws in the metal clamp securing the dishwasher hose to the disposal and detach the drain pipe and dishwasher hose from the disposal.
- Loosen the screws in the mounting ring that connects the disposal to the metal mounting assembly beneath the sink, then pull down the disposal and carefully set it on a clean, dry surface.
- Loosen the bolts in the mounting assembly with a wrench, then pull down the mounting assembly and set it near the disposal.

Lift the sink flange from the top of the sink. Use a plastic putty knife to scrape off the old plumber’s putty around the top of the flange, then wipe off any putty residue with a damp rag. Scoop a palmful of plumber’s putty (available at hardware stores, home centers, and online) and roll it into an 1/8-inch to 1/4-inch-wide “rope” with a length roughly equal to the circumference of the flange. Wrap the rope of putty around the top of the flange like a collar, then insert the flange into the sink drain opening until snug. Re-install the mounting assembly and mounting ring (taking care to securely tighten the mounting bolts on the mounting assembly), then reattach the garbage disposal, drain pipe, and dishwasher hose in the reverse order you detached them.
If the side of the garbage disposal is leaking, tighten drain line connections and replace worn gaskets.

Two drain lines extend from the sides of a garbage disposal: a narrower dishwasher hose that connects the dishwasher drain pipe to your disposal’s dishwasher inlet, and the main drain pipe that connects your disposal to the sewer through an outlet in the wall.
If you spy a leak on the side of the disposal where the dishwasher hose meets the disposal’s dishwasher inlet, the problem could be that the metal clamp connecting them is loose. In that case, tighten the screws in the metal clamp with a screwdriver.

If the leak is on the side where the disposal meets the waste drain pipe, loosen the screws that secure the drain pipe to the disposal and inspect the rubber gasket inside the pipe—it may well be worn out. Replace the gasket and re-tighten the drain pipe screws.
If the bottom of the unit is leaking, replace the disposal.

Leaks from the bottom of the garbage disposal (often from the reset button) commonly indicate that at least one seal on the interior shell of the unit that protects the motor has deteriorated, or that the shell itself has cracked. These vulnerabilities can cause water from the sink to seep into the shell of the disposal and leak out of the base of the unit. In an old garbage disposal, one compromised internal seal is often accompanied by others, so your best bet is to install a new one.
Hiring a pro to replace the unit will run you $400 on average, including labor and parts, or you can install a garbage disposal yourself and save anywhere from $90 to $200 in labor costs. You should be able to get eight to 15 years of use out of a new garbage disposal. (Our researched guide to the best garbage disposals can help you research quality options.)
https://secure.money.com/embeds/embedder.js?v=1
Test the repair or replacement by running water through the drain.

Whether you repaired or replaced the leaking garbage disposal, you will want to test your work to make sure the unit is shipshape. Wipe the unit dry with a clean cloth, then unplug the sink drain (if plugged) and pour a few cups of dyed water into the drain once more. Use a flashlight to inspect the entire unit. If you don’t see a leak, turn on the power to the disposal from your breaker box and plug in the disposal at the wall outlet.
How to Prevent a Garbage Disposal From Leaking
Proper use of a garbage disposal can stave off future leaks:
- Remember to grind only soft foods; hard items such as bones, apple cores, or raw potatoes can dislodge or damage the internal seals.
- Run hot water through the sink drain before and after food disposal to keep solid fats from congealing (which can deteriorate the sink flange and cause leaks).
- Inspect your disposal for leaks at least twice a year using the dyed-water test. It’s important to catch and repair minor leaks before they lead to water-damaged sink cabinets or kitchen floors.
The post What to Do About a Leaking Garbage Disposal appeared first on Bob Vila.
]]>Drywall is light, affordable, and relatively easy to cut, hang, and repair when you have the necessary tools and supplies, such as drywall tape, drywall screws, and drywall saws. A handheld drywall saw or jab saw has a long, narrow blade with large teeth and a sharp tip specifically designed for cutting into drywall. These tools are affordable and easy to use, making them a great option for any DIYer’s tool box.
Trying to take on a drywall installation or repair project completely unprepared can lead to a difficult, time-consuming mess. Like all tools, you will want to find a drywall saw that is durable, accurate, and effective so that you can accomplish any drywall cutting tasks with relative ease. Take a look at this list of the best drywall saws to find a product that is suitable for your next home renovation or drywall repair project.
Best Overall
DeWalt DWHT20540 Jab Saw
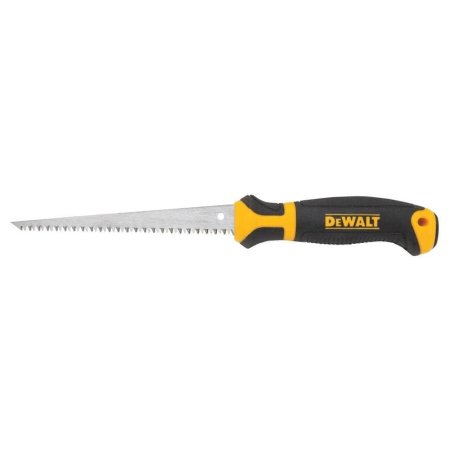
Pros
- Comfortable contoured handle improves ease of use
- Aggressive tooth pattern increases cutting efficiency
- Useful for cutting drywall, plastic, and other soft building materials
- Durable, induction-hardened teeth stay sharp for longer
Cons
- Not suited for large, clean cuts
- Teeth may tear soft-sided tool bags
Specs
- Blade material Carbon steel
- Number of teeth 8 TPI
- Blade length 6 inches
One of the top considerations for every DIYer selecting a quality drywall saw is the design of the handle. This DeWalt drywall saw features a comfortable, padded grip with a contoured handle that minimizes hand fatigue so you can work for longer periods without worrying about your hand cramping up. Additionally, the aggressive tooth pattern makes it easier for the blade to slice through the drywall, reducing the amount of power it takes to control the tool.
At 6 inches in length, the blade of this DeWalt drywall saw is long enough to pierce through several sheets of drywall and make accurate cutouts for ceiling lights, electrical outlets, pipes, cables, or any other objects that might protrude. It can also be used for cutting plastic and other soft building materials thanks to the highly durable, induction-hardened teeth. Just make sure to store the drywall saw in a solid plastic or metal toolbox that can withstand wear and tear from the sharp teeth.
What our tester says: “The tip of the saw penetrates drywall easily, and the long triple-ground saw teeth cut into drywall cleanly without tearing the paper at the edges of the cut. I also found the cushioned handle comfortable, which made it easy for me to control the blade for straight or curved cutting.” -Mark Wolfe, Product Reviews tester and writer
Get the DeWalt Drywall Saw at Amazon, Home Depot, or Ace Hardware.
More Drywall Saws Worth Your Money

Whether for making cutouts in the ceiling for new lights or cutting out damaged patches of drywall for minor repairs, these quality drywall saws come highly recommended. Choose the tooth pattern and blade design that suits your next project, or opt for one of the folding drywall saws to make tool storage easier.
- Goldblatt Folding Jab Saw, available at Amazon, Floor & Decor, or Walmart.
- Irwin Tools ProTouch Jab Saw, available at Amazon, Lowes, or Walmart.
- Klein Tools Folding Jab Saw, available at Amazon, Lowes, or Acme Tools.
- Shark RockEater Drywall Saw, available at Amazon, Sharp Corp., or Hardware World.
- Great Neck Double Edged Drywall Saw, available at Amazon, AutoZone, or Hardware World.
How We Chose the Best Drywall Saws
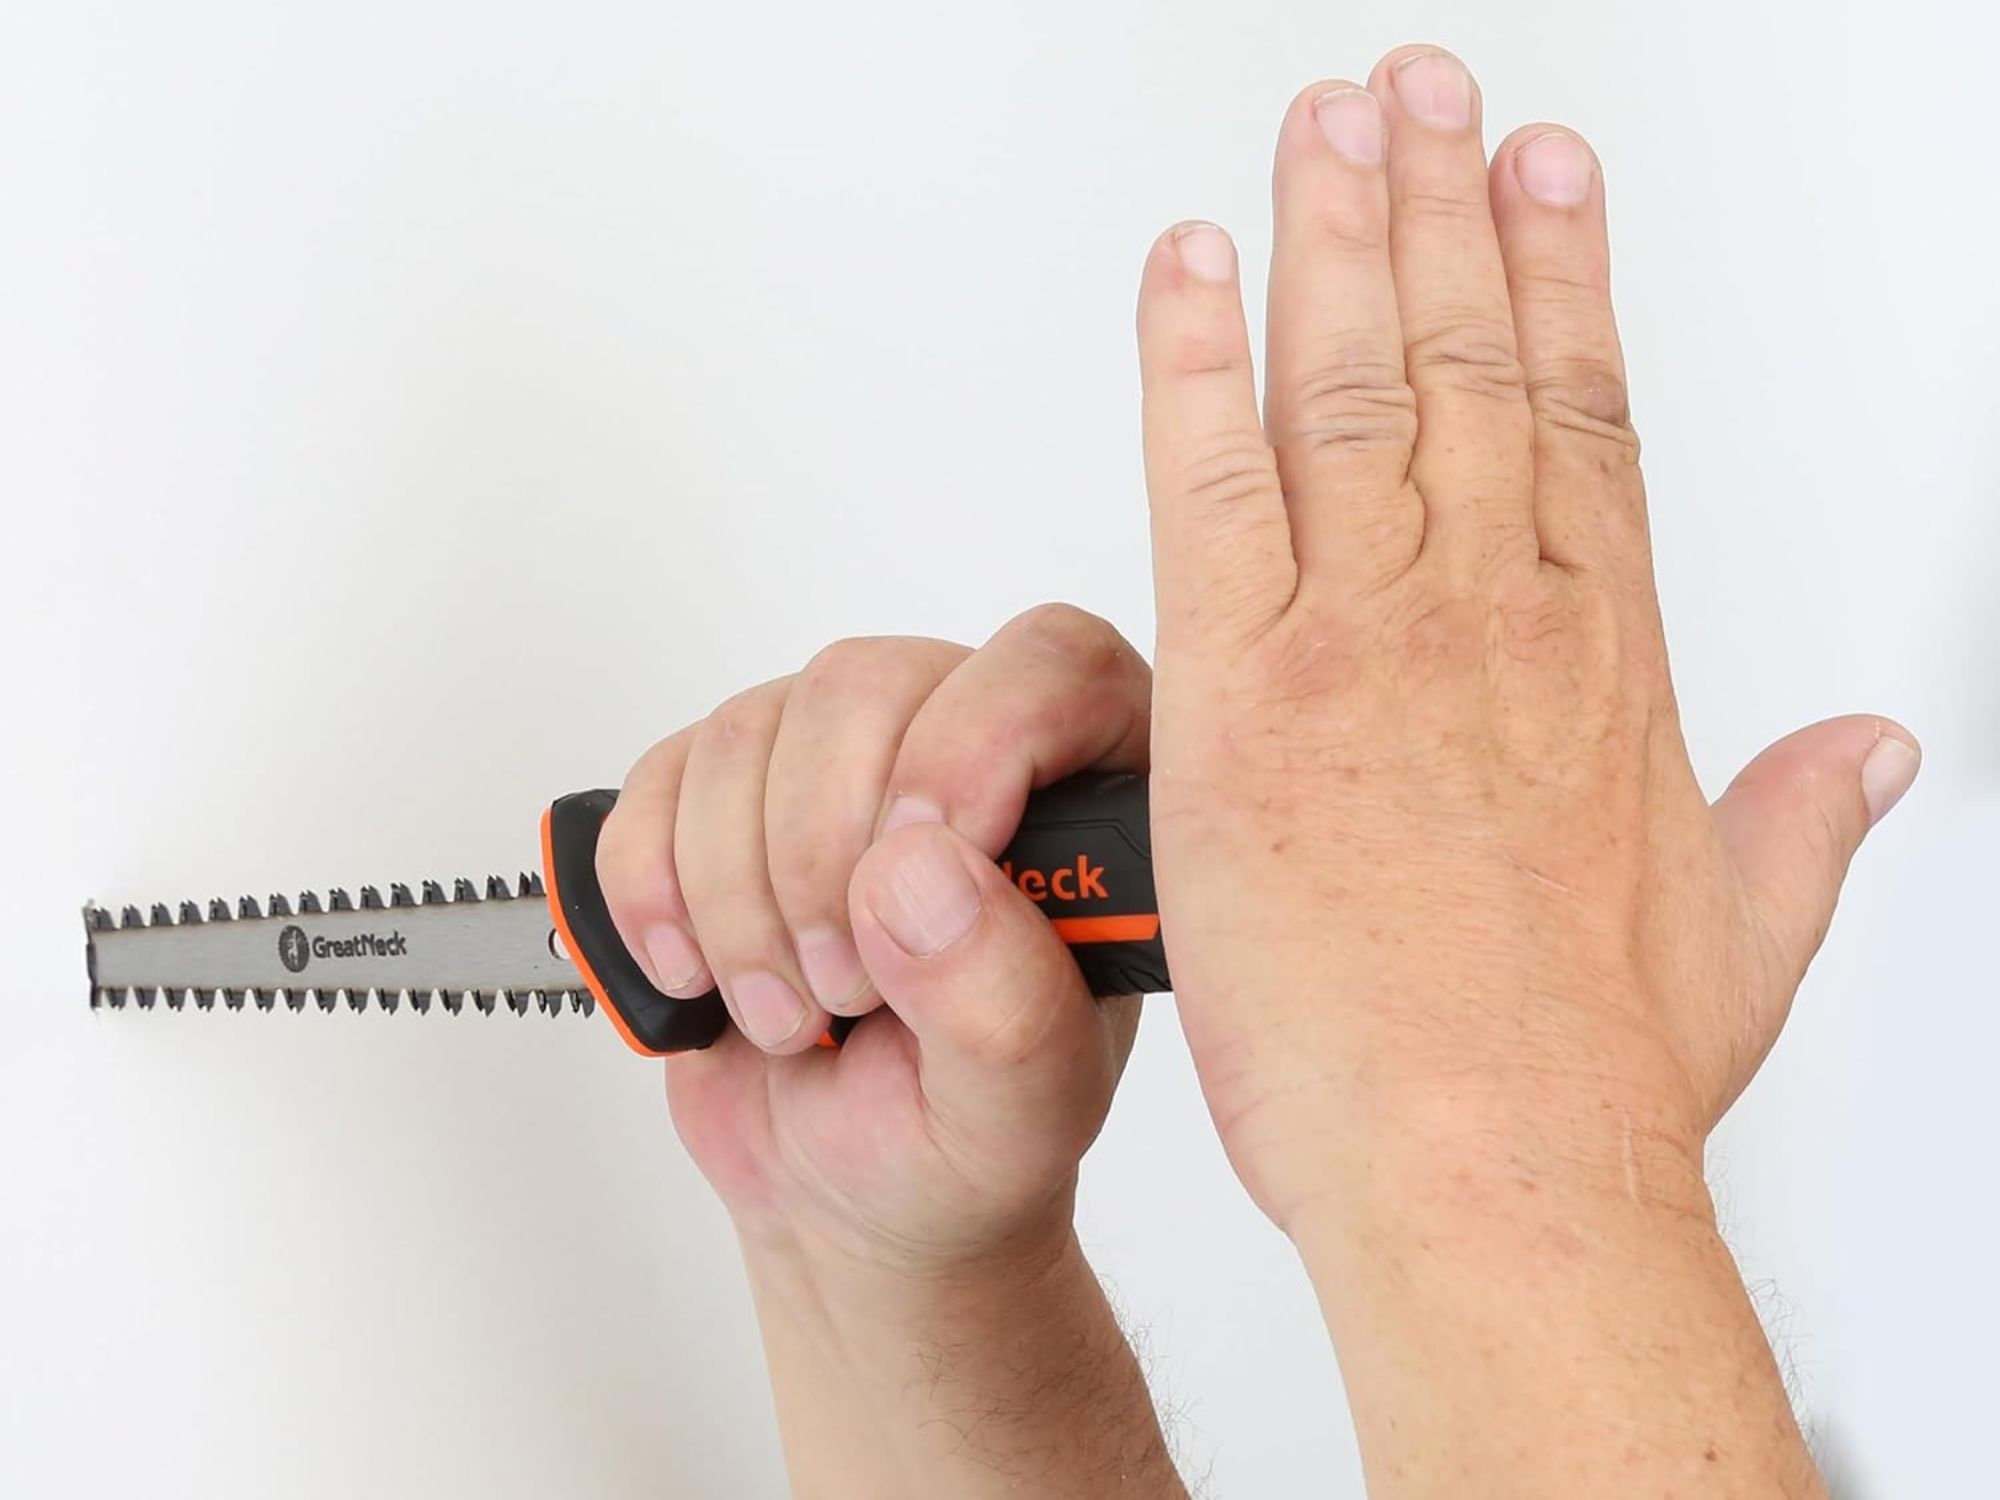
In order to select the best drywall saws for this list, we researched and reviewed a wide range of products from the top tool manufacturing brands. From a pool of over 30 potential options we narrowed our choices based on durability, blade design, blade material, size, weight, and any additional features, such as a folding blade that would make it easier to store the drywall saw.
We aimed to choose a variety of blade styles and drywall saw designs to provide a diverse selection of top tools for this list. The price of each saw also influenced our assessment, though the most important factor we considered was the overall quality of each drywall saw. With this in mind, we eliminated products with weak blades, uncomfortable handles, and low durability until only the best drywall saws remained.
FAQs
Before starting the search for the best hand saw to cut drywall, it’s worth finding out as much as possible about drywall saws and the right methods for cutting drywall. Otherwise, you may invest in a drywall or wallboard cutting tool that isn’t suitable for the project or that can only be used for certain aspects of the job, like an adjustable drywall hole saw. Check out this list of frequently asked questions about drywall and drywall saws to round out your understanding.
Whether you need a special blade or not depends on the type of saw. When selecting a tool for cutting drywall it’s important to make sure the drywall cutting tool is equipped with a drywall blade for the best results. A utility knife is a common tool to cut drywall that can be used with the standard blade to make long, straight cuts. Similarly, drywall saws already have a specially designed blade for small, accurate cuts, though when paired with a drywall cutting blade, some of the best oscillating tools can also be used to make clean square cuts for those who prefer an electric drywall saw.
Rotary tools equipped with drywall cutting bits can be some of the best tools to cut drywall. Jesse Andrews, owner of New England Home Pros, says “an electric rotary tool like the Dremel, paired with a drywall bit, offers superior speed and control for large-scale projects or intricate patterns.” You can also choose between a jigsaw vs reciprocating saw if you are looking for an alternative power drywall cutter.
Jesse Andrews, owner of New England Home Pros, explains that “drywall and Sheetrock are terms often used interchangeably, though Sheetrock is a brand.” This means that while all Sheetrock is drywall, only some drywall should be considered Sheetrock. Other drywall products may be made using a different chemical composition and can range from low to high quality, but when you are cutting Sheetrock you know that this material is made with a specific formula and is widely considered to be a high-quality product.
Part of learning how to cut drywall is understanding which side of the material to cut. Typically, drywall will have a light finished side and a dark paper side. Jesse Andrews, owner of New England Home Pros, says “when cutting, start on the finished side for cleaner, more professional-looking results.”
The post This Tool is a Must-Have for DIY Renovation Projects appeared first on Bob Vila.
]]>The post How to Find a Roof Leak appeared first on Bob Vila.
]]>The hardest part of fixing a roof leak? Locating the leak. Sure, it’s easy enough to spot water stains on the ceiling or mold on the walls, which are sure signs of a leak. But once water has penetrated the roof, it’s easily diverted by such things as insulation. Even though you may notice the evidence of a leak in the corner bedroom, the vulnerable point in your roof may be quite far removed from that part of your house.
For this reason, roof repair jobs typically begin with a certain amount of detective work. These tips for finding a roof leak will help you solve the mystery quickly and repair the leak before the damage to your roof, and your home’s interior, gets any worse.

Step 1: From inside the attic, inspect the underside of the roof.
Arm yourself with a flashlight and head up to the attic. Be careful up there: If there’s no proper flooring, step carefully from joist to joist. (If you step between the joists, you might put a foot through the ceiling of the room below.)
Once you’ve got your bearings, use the flashlight to examine the underside of the roof. Look for any areas that are darker than the surrounding roof sheathing. If it hasn’t rained recently, moist spots may be too difficult to discern. Mold, on the other hand, has a tendency to linger. If you encounter a patch of mold, which thrives on moisture, chances are you’ve found the vulnerable point in your roof.
Step 2: Follow damaged insulation back to the source of the roof leak.
The underside of your roof may be obscured by attic insulation, and that’s actually helpful for finding the roof leak. Insulation deteriorates more noticeably and more quickly than wood does. If you see damage on one section of the insulation, however, you must remember that the leak itself may be several feet to either side because it diverted rainwater from the source of the leak.
It’s best to carefully remove all insulation adjacent to part of the roof where you notice signs of a leak. That way, you can follow the path of the water from the damaged area all the way to the water’s entry point in the roof. (If you’re going to handle or work around insulation, it’s important to wear appropriate protective gear such as gloves, safety glasses, and a respirator mask.)
Step 3: Inspect the underside of the roof for perforations and vents.
Most noticeable to the eye are leaks caused by an object (for example, an errant nail) that has managed to pierce the roof. Failing any such obvious signs, inspect the roof vents next. These vents are typically near ridges or gable ends, or both. Over time, the seals around vents can gradually weaken and allow rainwater to seep in.
Tried-and-True Advice
“I’ve had to deal with a number of leaky roofs, and have found that most form not where there is a continuous flow of shingles, but where some utility or feature penetrates the roof: Plumbing vents, HVAC system vents, skylights, and chimneys are the most common. Chances are, a failing vent pipe boot or leaking chimney flashing is allowing water to enter and flow down the interior of the roof to the spot where it’s coming through the ceiling. If there’s roof penetration above the location of the leak on the ceiling, it’s likely the culprit.”
—Tony Carrick, Contributing Writer
Step 4: If the weather is dry, use a hose to simulate a downpour.

What happens if you’re desperate to find a roof leak, but dry weather has made your search more challenging? You can simulate a storm. This method requires two people: One person on the roof with a garden hose, and another person in the attic with a flashlight. Working in small sections, the person on the roof sprays the roof with water while the one in the attic carefully examines the underside of the roof for leakage.
By simulating a downpour, you can see firsthand how your roof withstands—or fails to withstand, as the case may be—conditions similar to those of a natural storm.
Step 5: Begin your roof repair.
Leaks only get worse. Act quickly once you’ve pinpointed the location of yours. Fortunately, in many instances it takes only a modest roof repair, like replacing a shingle, to fix the leak. If you don’t feel comfortable on the roof or if the leak seems extensive, hire a roof repair professional to do the work.
The post How to Find a Roof Leak appeared first on Bob Vila.
]]>The post How to Remove Stain From Wood appeared first on Bob Vila.
]]>Are you updating interior wood surfaces or refinishing a piece of furniture? You’ll first want to strip any stain from the wood. Removing dried wood stain and any protective varnish above it the initial step toward refinishing a prized piece of furniture or beautiful hardwood floors.
Eliminating old wood stain can be a little trickier than paint removal, since the wood grain absorbs stain. Still, removing wood stain is a home improvement project that first-time DIYers can tackle in an afternoon. This guide will help you get the job done right.
Project Overview
Working time: About 2 hours, plus drying time
Total time: 24 hours
Skill level: Beginner/Intermediate
Estimated cost: $45 to $100
Before You Begin
Before starting to remove wood stain, assess and prepare your work area for safety. This DIY task often requires the use of chemical strippers, so include protective equipment as part of your preparation. Many types of chemical strippers emit strong fumes and have high amounts of volatile organic compounds (VOCs). Put on a long-sleeve shirt, long pants, and closed-toe shoes. Before you open the stripper, don chemical-resistant gloves and safety glasses to keep the stripper from coming into contact with your skin or eyes. Finally, put on a respirator mask.
Plan to do your work with wood stain remover in a well-ventilated area—or outdoors, if possible. Clear the area of dust before starting, then lay down a drop cloth to protect the floors.
Tools & Materials
Bobvila.com may earn a commission from purchases made through these links.
Guide to Removing Wood Stain
Step 1: Gather your materials and prep the work area.
Before you get started, note that most wood strippers (and even paint strippers designed to handle varnish) contain harsh chemicals that are dangerous to breathe in and should not touch your skin. If possible, work outdoors. If your wood piece is too large to move or you are stripping hardwood floors, make sure windows are open and the room is well ventilated. If you are stripping stain from a piece of furniture, lay down a drop cloth to protect the work area. Have the paint brush, stripper, and paint scraper, and other tools within reaching distance.
Step 2: Choose your paint stripper.
Although sanding alone can remove some wood stains, in most situations, you will need a chemical paint stripper. Although these products are harsh and even toxic, they could do less damage to a prized antique or vintage piece than the roughness of sandpaper when sanding off stain from wood. The types of paint strippers include:
- Solvents, which are stronger and needed to work through varnish or thick layers or to remove oil-based stains. They can damage delicate wood, so be sure to follow directions carefully for use and safety precautions; these chemical strippers have a high VOC content and come with more health hazards than others.
- Caustic strippers, chemical strippers that are not as strong, and can remove latex- or water-based wood stains but not polyurethane varnish. They probably will take longer to work than solvents will.
- Biochemical paint strippers, which are safer than caustic or solvent types because they contain plant-based and organic compounds. They emit lower VOCs, but can still irritate skin and the respiratory system; these strippers are only effective on water-based stains.
- Zero-VOC strippers might be the best option for DIYers who are concerned about VOCs and the use of common stripper chemicals like methylene chloride. These are less effective on wood than on metal or masonry, especially when it comes to removing polyurethane layers.
Step 2: Prepare wood for stripping.

Before applying your paint stripper, be sure to prep the piece of furniture by removing any hardware, such as doorknobs, handles, or drawer pulls. Wood strippers or finishers can damage the color of metal hardware on furniture and wood cabinets. Reaching all the stain on a piece might involve taking furniture legs off or otherwise disassembling the item. Set the hardware aside or in a ziplock bag for reassembly later. Wipe down all of the wood surfaces with a microfiber cloth right before applying stripper.
Step 3: Apply paint stripper.
After donning protective gear, pour some stripper into a container. Only use a container that is designed to hold corrosive solvents, such as a disposable aluminum pan or a metal bowl. Pour the stripper into the container carefully so you don’t get any on your clothes or the floor.
Dip the paintbrush into the container of stain stripper and apply a thick layer of the stripper to the wood. Carefully brush it across the surface of the wood until the entire surface is covered. Be sure to keep the layer of stripper even and thick. Gently push the stripper into nooks and crannies to be sure they are covered.
Step 4: Let the stripper soak in.
Generally, the stripper needs to soak in for about 20 minutes, but you’ll want to read the label on the stain stripper you’re using for the product’s recommended timing instructions. Check on it every few minutes for signs of bubbling, which indicates that the stripper is working. If you notice any dry patches on the wood, apply more stripper. Cover the wood with plastic wrap if you need to to keep the stripper from drying out too quickly.
Step 5: Scrape the stain stripper off the wood.
Use a plastic scraper to scrape the varnish and stain from the wood. (To prevent nicks or damage to the wood, don’t use a metal scraper.) Exert gentle but consistent pressure, since the stripper softens the wood’s surface. Start at one edge of the workpiece and gently push the scraper across the surface of the wood in a straight line to match the wood grain. Scrape off the debris (into a bucket or trash can, if you can), and repeat the process in a different area. Continue until all the stain stripper has been scraped away.
If the wood piece has a thick layer of varnish, this first pass with the stripper might remove only that protective coat, but little to no wood stain. Reapply a coat of stripper where needed, and follow the steps above for removing the wood stain.
Step 6: Scrub the surface of the wood.
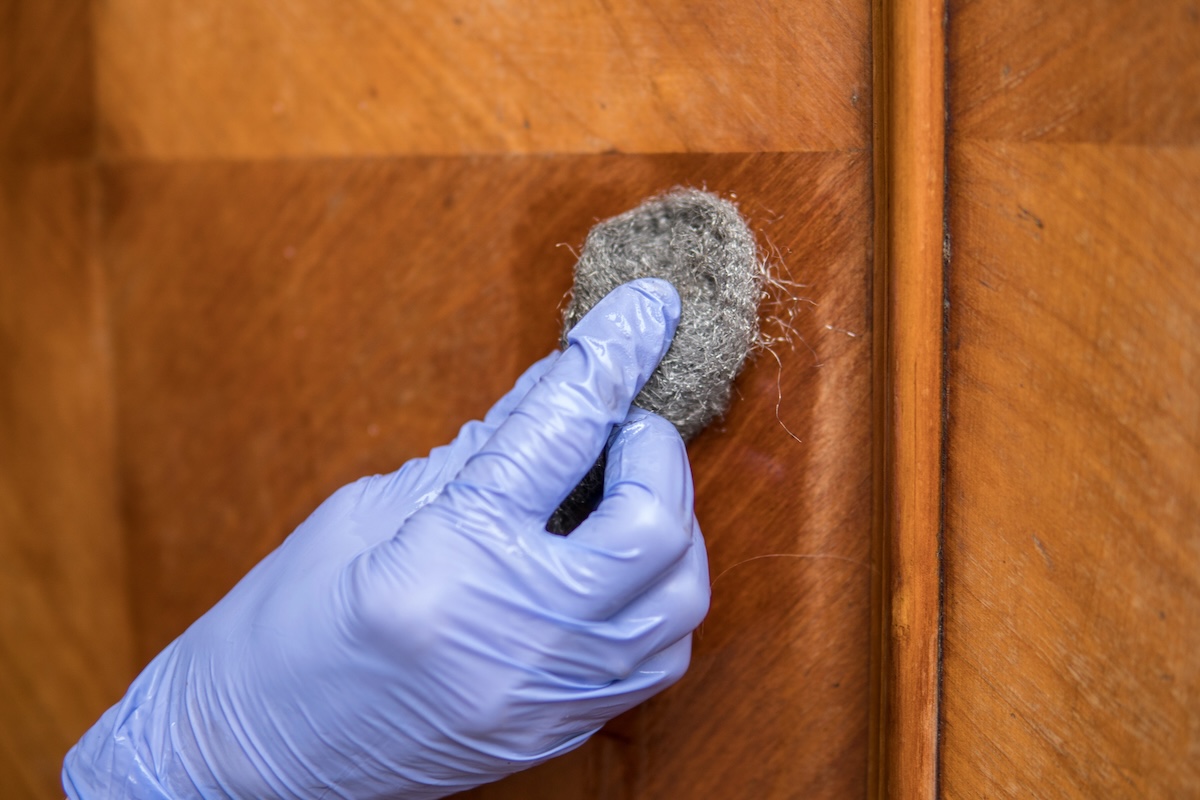
If only small amounts of stain remain, they might come off with final sanding. You can try scrubbing them off with a steel wool pad, wiping in the direction of the wood grain. If necessary, dip the steel wool pad in the stripper before wiping down the surface. Follow the direction of the grain and be sure to get into every nook and cranny.
Once you are satisfied that all the varnish and stain have been removed, wipe down the surface of the wood with a wet rag. (Another option is to dampen a cloth with mineral spirits to remove residue from stain and the stripper.) Allow the piece of wood to dry for 24 hours.
Step 7: Sand the wood surface.
Once the wood is dry, sand it with medium-grit sandpaper. If you’re working on a large area, use an electric hand sander. When sanding wood, always apply steady pressure and sand in the direction of the wood grain. Continue sanding until you remove all traces of the varnish and stain. As you continue to sand, the existing stain will fade away, exposing the raw wood beneath.
Follow up with fine-grit sandpaper to smooth out any scratches made by the coarser sandpaper.
Step 8: Wipe the dust with a damp rag.
Once you are satisfied with the color of the wood, clean the sanding dust from the surface. You can vacuum it off or wipe it well with a dry rag. Wipe again with a damp rag to remove all of the wood dust, using a dab of mineral spirits if desired. Once dry from the damp wipe, the piece of wood is ready for a new stain and protective finish.
FAQs
With most stains and varnish layers, a chemical stripper is the quickest route, saving on labor. However, it also introduces chemicals and fumes into the work area, so it requires the purchase and use of protective equipment like chemical-resistant gloves and even respirator masks. If you must work in an area without ventilation, do not turn to chemical solvents for wood stain removal.
If you are wondering what is the easiest way to remove wood stain, that depends partially on the size and scope of the item and project, and whether it is more important to avoid chemicals or to save time and scraping or scrubbing, in which case you might opt for a more eco-friendly approach.
Some wood stains, such as water-based ones, will come off without using harsh chemical strippers. In those cases, sanding will likely work best. Mineral spirits might remove residual stain or small amounts, but will not be effective on thicker and varnished stains. Any stain that includes polyurethane, lacquer, or oil-based varnish finishes will likely require use of a paint- or wood stain-stripping product.
In some cases, you can skip worrying about how to remove stain from the wood to update a piece; restain dried wood stain surfaces with a gel-based wood stain instead. This type of stain can even sit well over a polyurethane varnish. The new stain must be darker, however. It is a good idea to test a hidden area of wood surface first to be sure you can achieve the look you want without removing the original layer of wood stain.
In general, chemical paint and wood stain strippers with solvents contain harsh and highly odorous chemicals. The worst offender, methylene chloride, is flammable and can cause severe carbon monoxide intoxication and even death if used in an area without ventilation.
The good news is that the Environmental Protection Agency (EPA) banned the toxic solvent as of April 2024. It still could be present in strippers made before that date, so it is essential to read labels and follow all safety precautions listed for any paint stripper, including working outdoors or in a well-ventilated area and use of a respirator mask.
To cut fumes and use of more toxic ingredients, opt for a product with low VOCs, like CitriStrip or BlueBear 605Pro, or a biochemical stripper like SmartStrip. Just beware that these products will likely require more time and labor (including potentially more coats) than a chemical solvent.
You can opt to try a small container of these strippers first, even on a hidden patch of the wood, to see how they work before buying a solvent with a more toxic chemical formula. This could add to the total cost and time of the project, however, if you have to turn to chemical solvents in the end. You also need to carefully read and follow all usage and safety instructions on these products’ labels.
The number of coats and scrapings required to take stain off wood depends heavily on the type (and thickness or layers) of wood stain product and varnish above it, as well as other factors like the stripper formula. It is not uncommon for a DIYer to have to make a second pass of stripper over some areas of wood that resist the first coat of stripper.
Be sure to follow the manufacturer’s instructions for how thick a coat to apply, how long to let the stripper sit on the wood surface before scraping it off, and the recommended number of coats. Usually, using a thick layer works best.
It is possible to remove wood stain without sanding, assuming the chemical stripper and a scraper can remove all of the stain and any finishing layer above it. It might be possible to remove stain with only a carbide scraper (or in combination with a stripper). The tool has a hard and durable carbide blade. But it is best if you have some experience using the scraper to prevent damage to the wood, especially if it is a soft wood. If opting for no sanding, wipe the entire surface down with mineral spirits on a rag to remove any remaining bits of stain or stripper residue before refinishing the wood.
The post How to Remove Stain From Wood appeared first on Bob Vila.
]]>When it’s a challenge to capture a suspicious home issue with a conventional camera that relies on visible light, consider reaching for a thermal camera that can create an image using infrared radiation. These cameras work by detecting heat that’s emitted by objects and organisms. The heat reading is then converted into an electronic signal so it can create a thermal image that is displayed on a video monitor.
Thermal cameras can be used to identify differences in temperature across the detection field, which is one of the main reasons why thermal cameras are commonly used by home inspectors to help find hidden issues within the structure of a building. Find out more about thermal camera uses both around the home and in the garden with this informative guide.
Our Recommendation: TopDon TC005 Thermal Camera at Amazon for $469.99
The TopDon thermal camera has the ability to detect a wide temperature range—from -4 to 1,022 degrees Fahrenheit—with an accuracy of +/- 2 percent, making it possible to identify exactly where heat loss is occurring and where excess heat may be building up, allowing homeowners to pinpoint hidden problems within a home.
Locate leaks.
Leaking pipes and plumbing fixtures can cause a serious amount of damage to a home if they are left for an extended period of time, but in many cases, leaks can go unnoticed when they occur behind walls. They can even be difficult to spot with a borescope. However, if you use a thermal camera, you should be able to find the location of water leaks by detecting a difference in temperature around the pipes. This method can also be used to monitor the drying progress of an area where water damage or leakage has occurred. It’s essential for the health of a home’s structure to make sure building materials can fully dry.

Detect heat loss.
One of the top uses for a thermal camera around the home is to detect areas where a home may be leaking heat, which leads to inefficient heating/cooling and increased energy bills. Home inspectors commonly use thermal cameras for home energy audits. They scan walls, floors, ceilings, windows, and doors to locate where the home may be losing heat, so that you can improve the energy efficiency of a home by patching holes and cracks, adding insulation, and sealing small gaps.
Identify plant stress.
The top thermal cameras can be put to use both inside the home and out in the yard to help determine the health of the plants in your garden. Thermal cameras can be used to detect plant stress or disease, making it easier to identify potential problems before they can spread to the rest of the garden. Having this information helps gardeners determine the cause of the issue and take the necessary steps to correct the problem, leading to improved plant growth and better yields.
Find unwanted pests.
Another use for thermal cameras at home that often gets overlooked is helping track down pests both inside and outside the home. Using a thermal camera, you can detect areas of termite and ant activity, locate exactly where possums, rats, mice, and other animals may be in the roof, walls, or ceilings of the home, as well as find hidden burrows or nests in the yard. By locating these pests, you can then take action to remove any invaders before they can cause further damage to the property.
Pinpoint electrical faults.
When there are electrical faults in the home electrical system, it can lead to fires and other potentially hazardous situations. By using a thermal camera, you can detect hotspots in the electrical system. These hotspots are typically due to overloaded circuits, faulty wiring, or other issues with the electrical components, so it’s important to take action as soon as possible to repair these problems to help reduce the risk of fires. Even if homeowners are unsure about the reading from the thermal camera, but suspect there is a problem, it’s a good idea to have a professional electrician inspect and repair the area.

Inspect building structures and HVAC systems.
Homeowners and building inspectors can use a thermal camera when they are trying to determine why the electric bill is so high. The readings can identify any hidden issues within the home, like pinpointing where insulation may be inadequate or missing entirely. The thermal camera can also be used on the HVAC system and ducts to detect clogged filters, duct leaks, or components that are malfunctioning, making it easier for homeowners to take prompt action and prevent costly repairs. Additionally, thermal cameras can detect gas leaks that are otherwise invisible to the naked eye.
Assess outdoor heating and irrigation.
Outdoor heating systems, like patio heaters, can be great for enjoying the outdoors late into the evening and during the colder months of the year. With a thermal camera, you can analyze the heat distribution to ensure your outdoor heating sources are evenly placed. Additionally, thermal cameras can be put to use on the lawn and garden to track where water tends to flow, allowing you to optimize your yard and garden irrigation for the best growth potential.
The post 7 Brilliant Uses for a Thermal Camera Around the Home and Garden appeared first on Bob Vila.
]]>The post 2025’s Best Locking Mailboxes for Keeping Mail Dry and Safe, Tested appeared first on Bob Vila.
]]>Installing a locking mailbox can be a useful home security upgrade, protecting against package thieves and identity theft. But are all lockable mailboxes created equal? We recently put a number of them to the test, leaving them out in inclement weather and even taking weaponry to them to determine how well they’d stand up to determined thieves. The results? We found the Mail Boss 7536 Mail Manager to be the best overall, due in part to its nearly indestructible nature. But in order to cover a variety of locking mailboxes, we tested different styles, such as wall-mount mailboxes, and included recommendations based on our test results as well as customer reviews and reviews.
To learn what to look for while evaluating locking mailboxes, we first consulted with security specialist Jeff Ketelaars, co-founder of Security Guards Only, an online community for security professionals. He provided his expert insight on how to properly deter package pirates and what to look for in a locking mailbox, and this info helped set our research into motion. Whether you’re looking to ward off would-be package thieves or protect your mail from the elements, have a look through this roundup of the best locking mailboxes to find the right pick for you.
- BEST OVERALL: Mail Boss 7536 Mail Manager Locking Mailbox
↓ Jump to Review - RUNNER-UP: Mail Boss 7506 Mail Manager Locking Mailbox
↓ Jump to Review - BEST BANG FOR THE BUCK: Dalmbox Locking Mailbox
↓ Jump to Review - BEST WALL-MOUNTED: Architectural Mailboxes Designer Locking Mailbox
↓ Jump to Review - BEST VINTAGE: Polar Aurora Cast Aluminum Post-Mounted Mailbox
↓ Jump to Review - BEST MODERN: Mail Boss 7412 Locking Security Drop Box
↓ Jump to Review - BEST FOR PACKAGES: Architectural Mailboxes Oasis Classic Locking Mailbox
↓ Jump to Review - BEST CURBSIDE: Mail Boss 7207 Package Master Locking Mail
↓ Jump to Review - ALSO CONSIDER: Architectural Mailboxes Oasis 360 Locking Mailbox
↓ Jump to Review
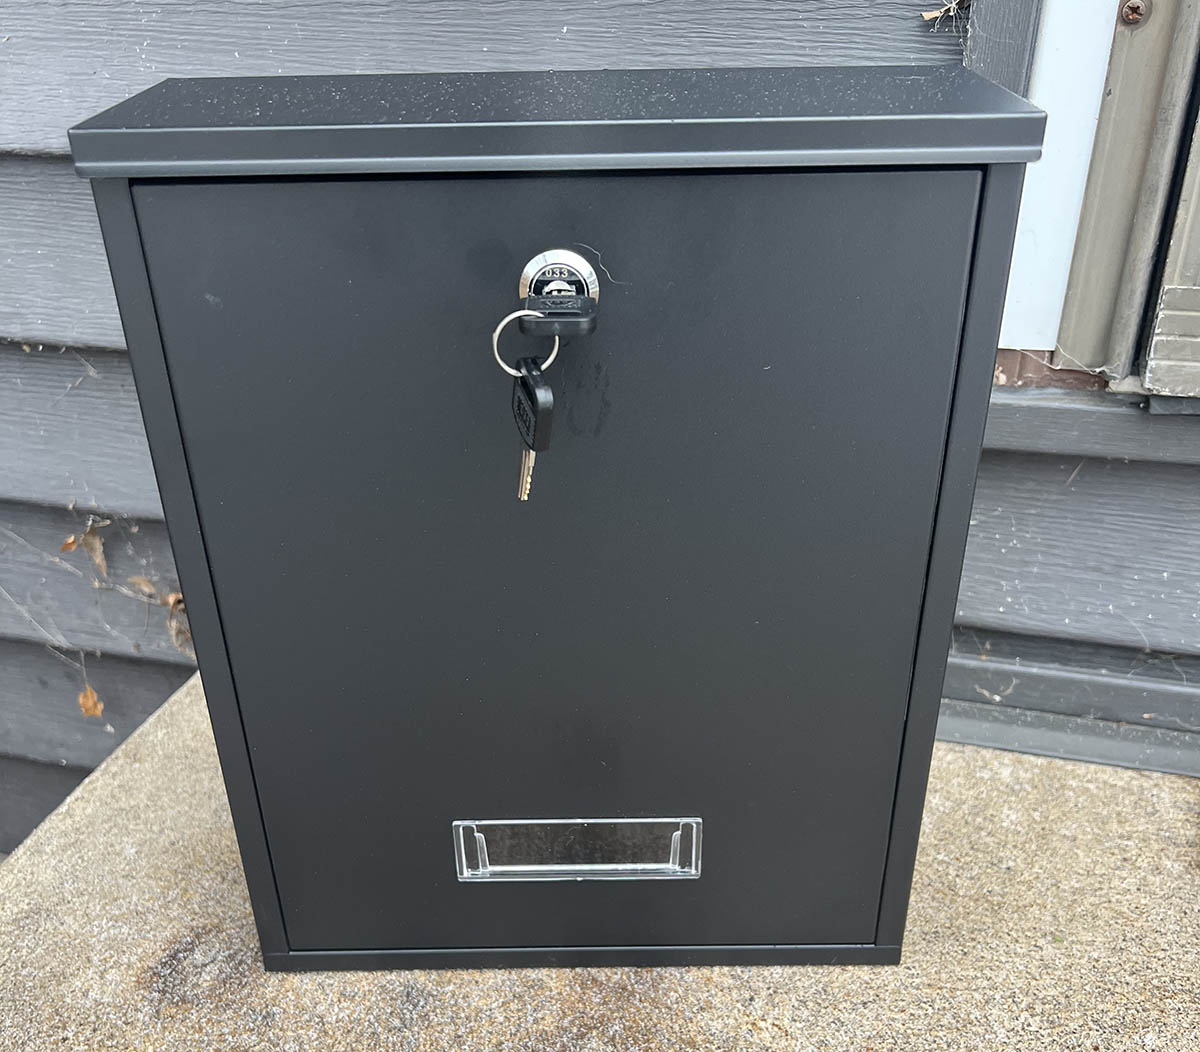
| Material | Dimensions | Security Features | |
| Mail Boss 7536 Mail Manager Locking Mailbox | Galvanized steel | 11.1 inches high by 10.8 inches wide by 21.5 inches deep | Anti-pry latch, baffle door, two 12-disc locks with anti-drill and anti-pick design, front and rear keyed access |
| Mail Boss 7506 Mail Manager Locking Mailbox | Galvanized steel | 11.3 inches high by 10.8 inches wide by 21 inches deep | Anti-pry latch, baffle door, two 12-disc locks with anti-drill and anti-pick design, front and rear keyed access |
| Dalmbox Locking Mailbox | Galvanized steel | 12.6 inches high by 10.2 inches wide by 3.7 inches deep | Locking |
| Architectural Mailboxes Designer Locking Mailbox | Galvanized steel | 12.6 inches high by 10.2 inches wide by 3.7 inches deep | Locking |
| Polar Aurora Cast Aluminum Post-Mounted Mailbox | Cast aluminum and steel | 46 inches high (including pedestal) by 14 inches wide by 9.8 inches deep | Locking |
| Mail Boss 7412 Locking Security Drop Box | Galvanized steel | 16.2 inches high by 11.2 inches wide by 4.7 inches deep | Anti-pry latch, baffle door, two 12-disc lock with anti-drill and anti-pick design |
| Architectural Mailboxes Oasis Classic Locking Mailbox | Galvanized steel | 15.2 inches high by 11.5 inches wide by 18.1 inches deep | Locking, front and rear keyed access |
| Mail Boss 7207 Package Master Locking Mail | Galvanized steel | 16.5 inches high by 12 inches wide by 21.5 inches deep | Anti-pry latch, baffle door, two 12-disc locks with anti-drill and anti-pick design |
| Architectural Mailboxes Oasis 360 Locking Mailbox | Galvanized steel | 11.5 inches high by 11.4 inches wide by 20 inches deep | Locking. front and rear keyed acc |
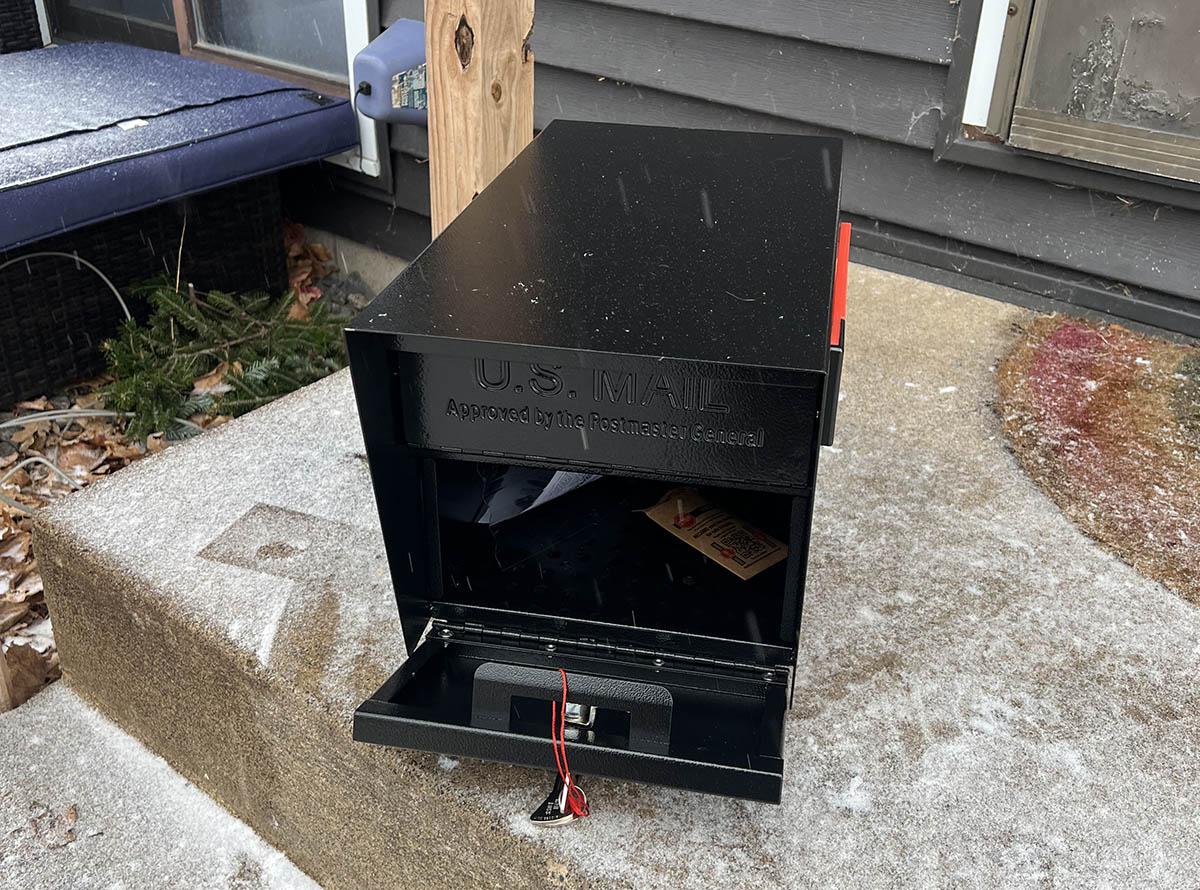
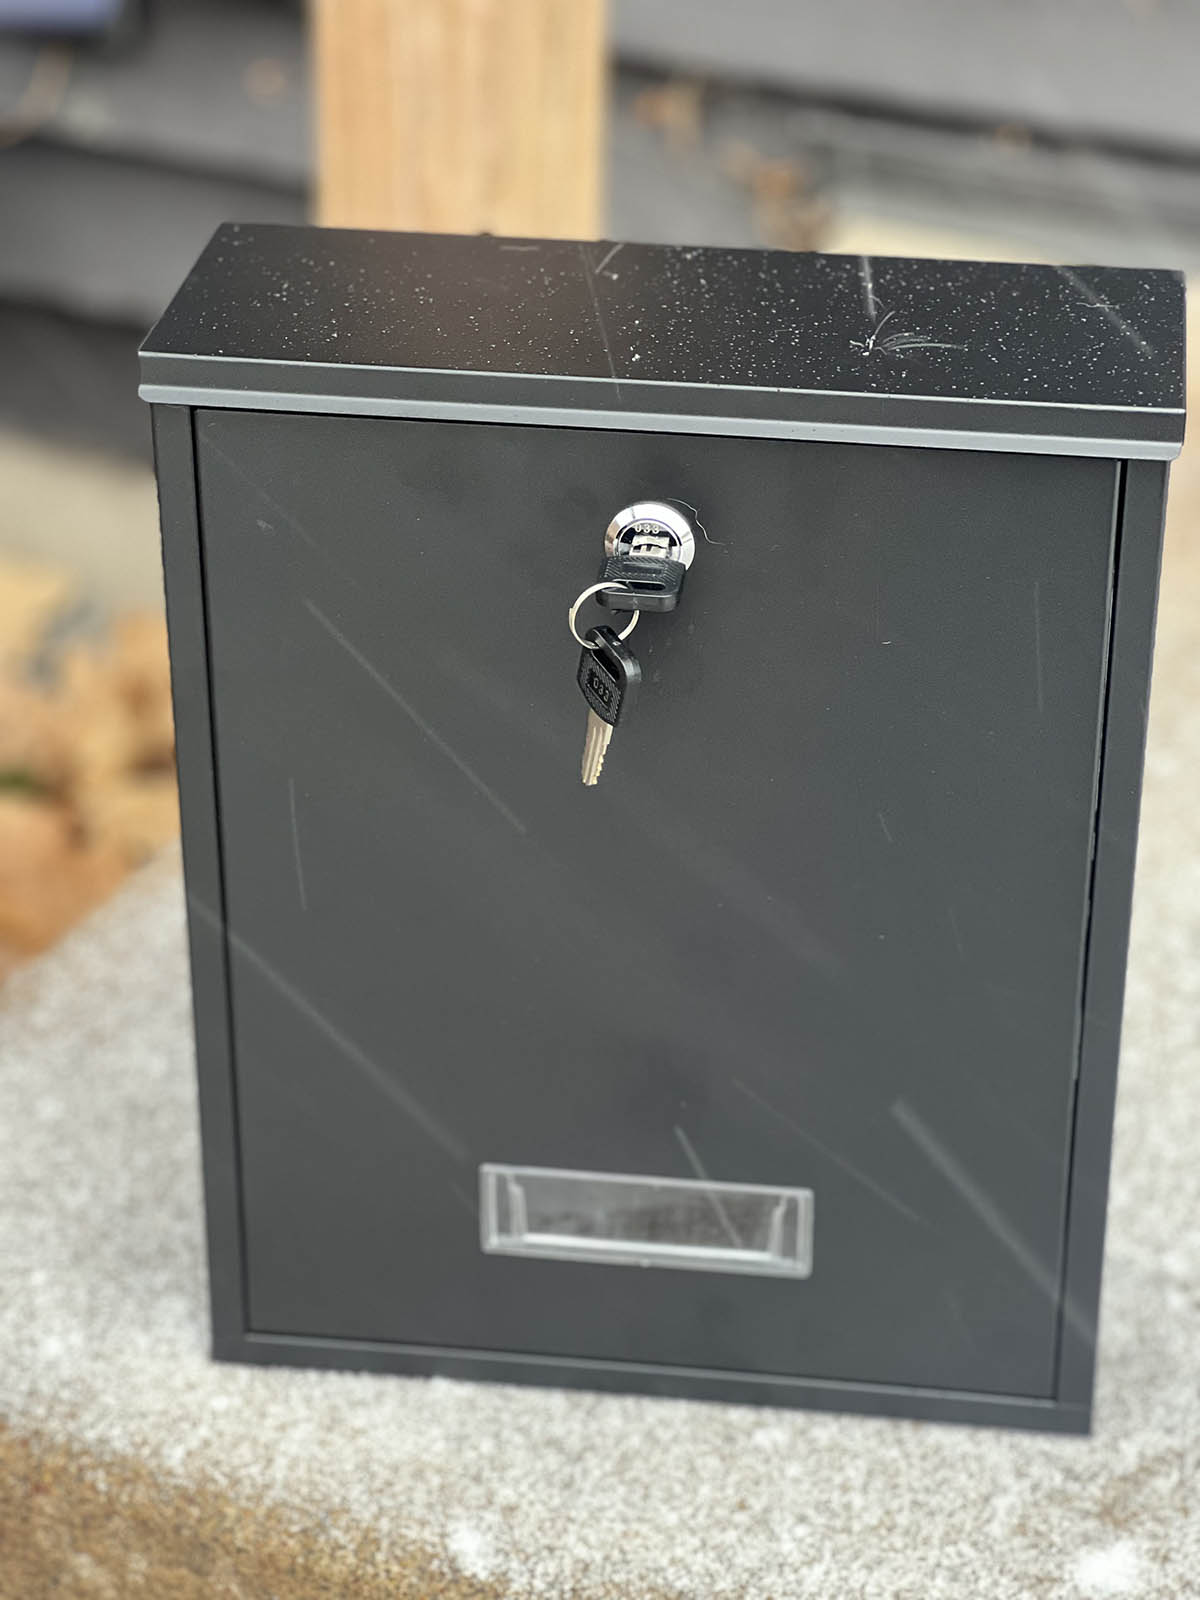
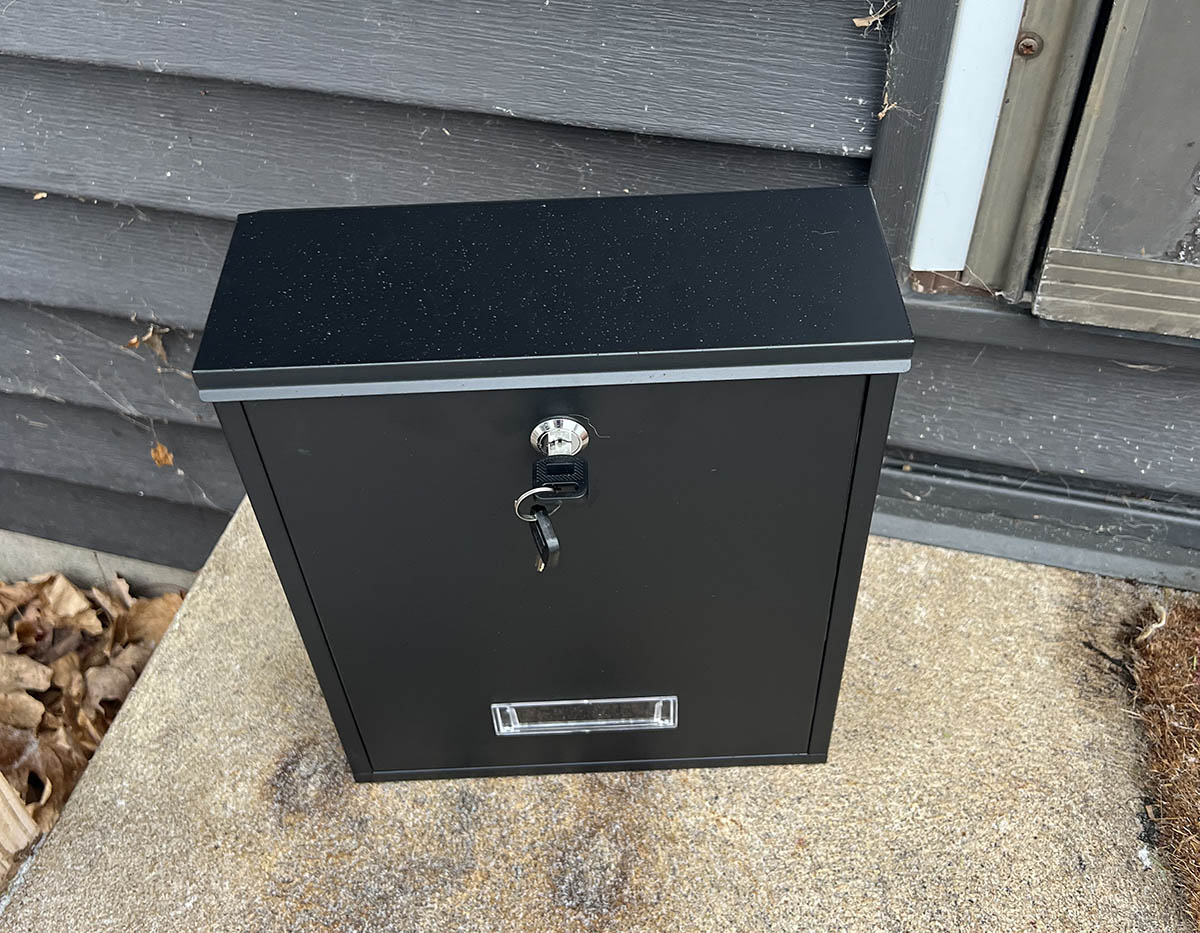
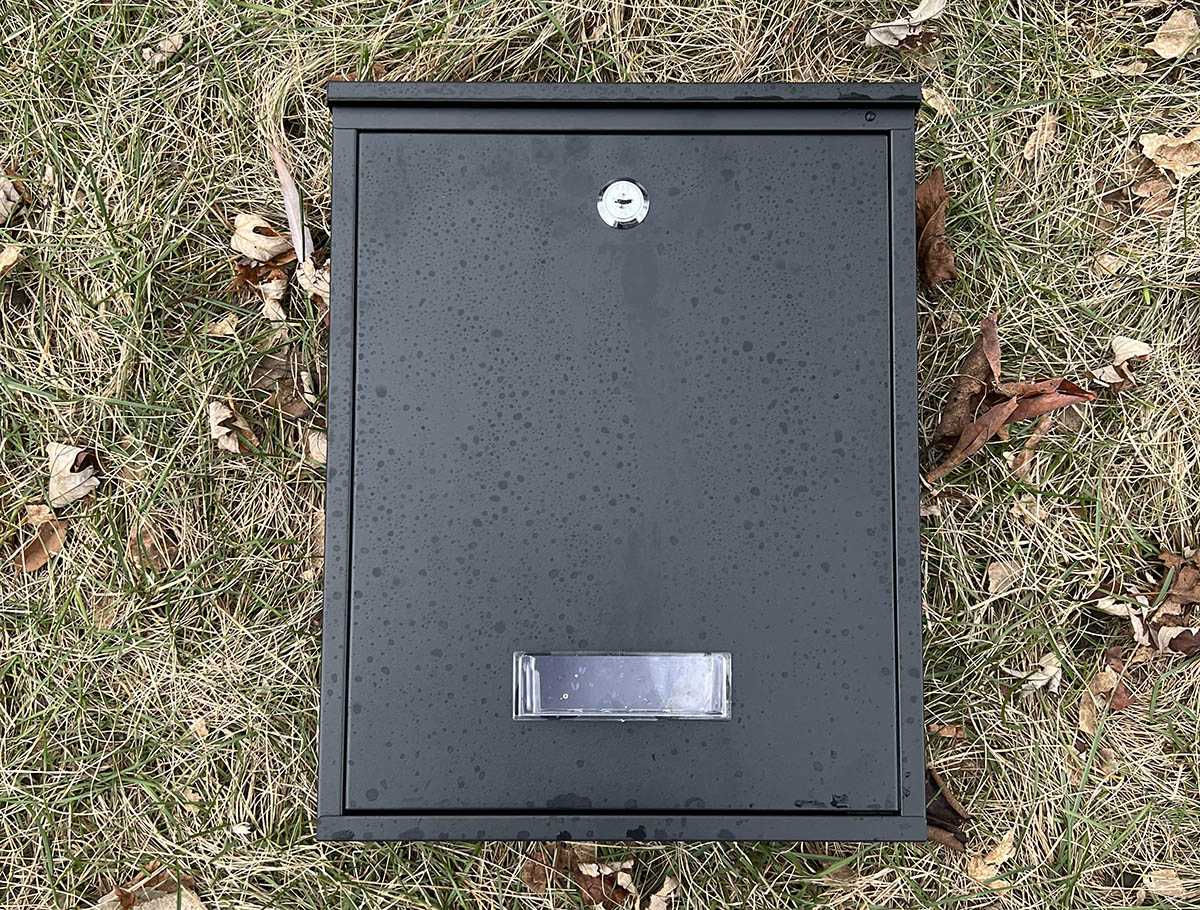
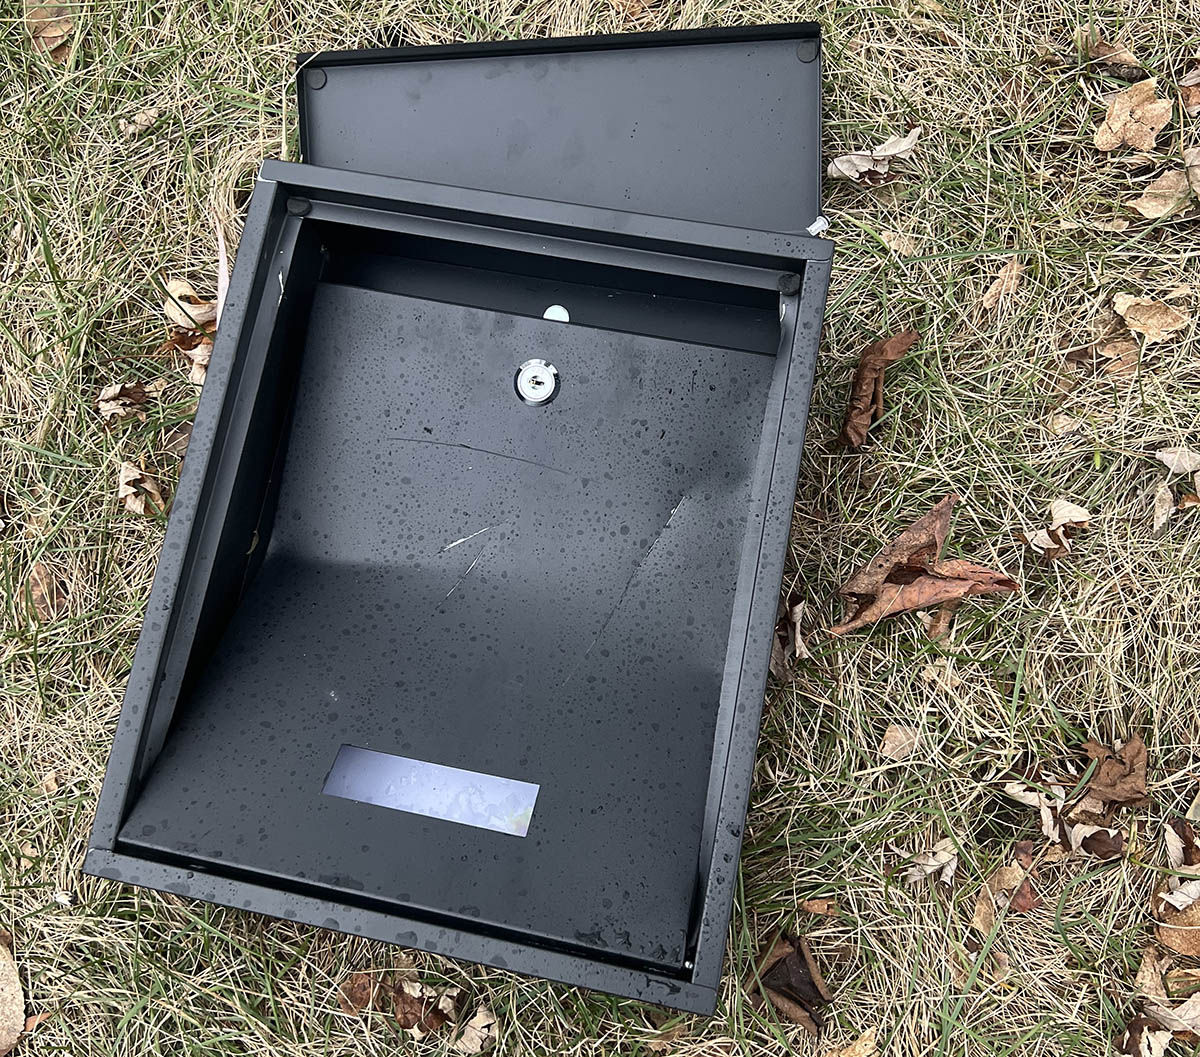
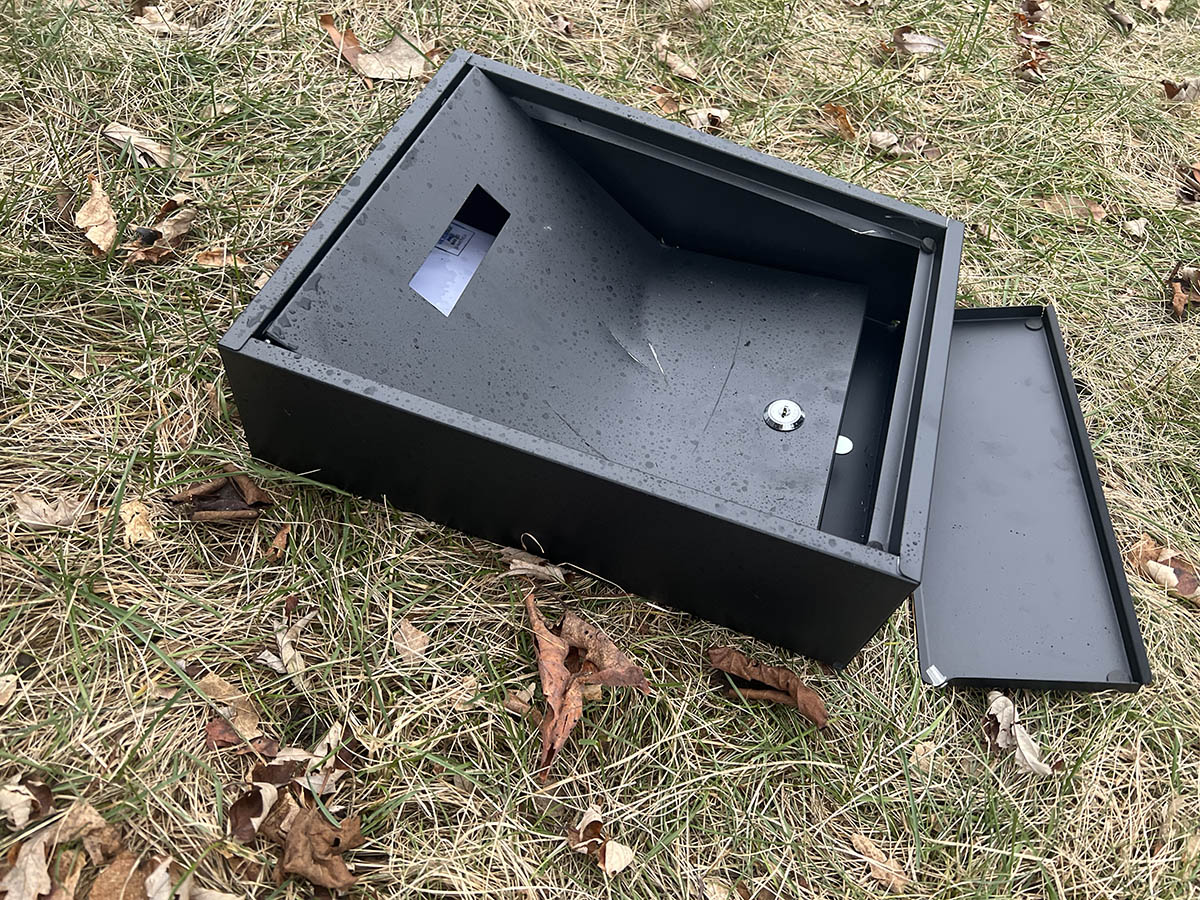
Our Top Picks
The quest for the right locking mailbox for a home can take some time, especially since there are many good options on the market. To help narrow the field of potential picks, this guide showcases some of the best lockable mailbox options in a variety of sizes, shapes, and mounting styles. One of the following may be what you need for your home.
Best Overall
Mail Boss 7536 Mail Manager Locking Mailbox

What We Like
- Nearly indestructible design
- United States Postal Service (USPS)-approved
- Includes 3 keys and installation hardware
- Holds small parcels
- Baffle door helps prevent theft
- Designed for post mounting
What We Don’t Like
- Heavy: may take two people to mount
- Style can feel too industrial for some
- On the expensive side for mailboxes
Specs
- Material: Galvanized steel
- Dimensions: 11.1 inches high by 10.8 inches wide by 21.5 inches deep
- Security features: Anti-pry latch, baffle door, two 12-disc locks with anti-drill and anti-pick design, front and rear keyed access
Our Ratings: Security 5/5; Build Quality 5/5; Value 5/5
This USPS-approved large lockable mailbox is designed to keep mail and small packages safe while users are away, and it comes with all hardware to install on a post upon arrival. In our rounds of testing, the galvanized steel Mail Boss 7536 was nearly indestructible. After aggressive tampering, we were unable to cause damage beyond a few dents on the top. We spent some time hitting the lock and attempting to pick it, all to no avail. And during a storm, the Mail Boss 7536 kept mail inside the box bone dry.
The interior is roomy enough to hold small packages. The baffle door on the inside helps to prevent fishing from the mail slot, and the anti-pry lock withstood our attempts with a screwdriver, crowbar, and even an axe. Overall, this was the strongest mailbox we tested, though the Mail Boss 7506, also on this list, is nearly identical. The 7536 model is slightly larger, which gives it the edge.
What our tester says: “I was amazed at how well this mailbox stood up to my tests, including chopping at it with an axe, trying to pry the locks with a screwdriver and crowbar, and hitting it with a sledge hammer. It remained nearly flawless, and the locks held tight.” —Amber Guetebier, Product Reviews tester and writer
Get the Mail Boss 7536 locking mailbox at Amazon or The Home Depot.
Runner-up
Mail Boss 7506 Mail Manager Locking Mailbox
What We Like
- Incredibly durable material
- Keeps mail dry
- Accepts mail and small parcels
- Includes three keys and installation hardware
- USPS-approved
- Post mounted
What We Don’t Like
- Heavy: may require more than one to mount
- Utilitarian style may not appeal to some
Specs
- Material: Galvanized steel
- Dimensions: 11.3 inches high by 10.8 inches wide by 21 inches deep
- Security features: Anti-pry latch, baffle door, two 12-disc wafer locks, anti-drill locks, anti-pick mechanism, front and rear keyed access
Our Ratings: Security 5/5; Build Quality 5/5; Value 5/5
The heavy-duty, post-mounted Mail Boss 7506 is a worthy option for anyone hoping to keep packages and mail secure. Like the Mail Boss 7536, which took best overall, this locking mailbox is made of extremely heavy-duty galvanized steel that endured rigorous testing. Additionally, the locks were difficult to pick or smash open—and oh, how we tried. In many ways, it is identical to the 7536 model, but is slightly smaller. It also features those 12-disc wafer locks with anti-pick and anti-drill ratings.
This model provides extra protection for mail with the inclusion of an interior baffle door. This helps prevent fishing and helps keep the mail nice and dry, which it did beautifully during testing. There is also an anti-pry latch so the mailbox cannot be forced open with a prying tool, like a screwdriver or the crow bar we used in testing.
Get the Mail Boss 7506 locking mailbox at Amazon or The Home Depot.
Best Bang for the Buck
Dalmbox Locking Mailbox
What We Like
- Easy to install with included hardware
- Attractive: fits a variety of home designs
- Mounts to wall near door
- Kept mail dry in inclement weather during testing
- Good cost value
What We Don’t Like
- Small: can’t hold packages
- Dented easily during testing
- Requires wall mounting
Specs
- Material: Galvanized steel
- Dimensions: 12.6 inches high by 10.2 inches wide by 3.7 inches deep
- Security features: Locking
Our Ratings: Security 4/5; Build Quality 3/5; Value 5/5
For a basic wall-mounted mailbox that won’t cost a fortune, we recommend Dalmbox’s locking mailbox, which held up well to testing. This small locking mailbox kept the mail inside dry during a storm and includes installation hardware to make installation easy.
The material is a coated galvanized steel, but it’s relatively thin compared to other locking mailboxes. We found it caved instantly under the axe and did not stand up well to the hammer. Heavy hitting did cause the lid to pop open and off, despite the fact that it was locked.
Before testing the mailbox with blunt force, we spent time trying to pick and pry the lock open and were unsuccessful. Because of this, the mailbox does the job it is set out to do: it keeps mail dry and prevents easy theft, so we feel it does add a measure of security. It has a simple, attractive design that goes with any style of home and will provide more peace of mind than a non-lockable mailbox.
What our tester said: “Although this wasn’t as sturdy as the post-mounted mailboxes I tested during heavy hitting, I liked how dry it kept the mail and felt that overall it would stand up to would-be thieves, as long as they aren’t on your porch wielding an axe or a sledgehammer. If they are, you might have bigger problems.”—Amber Guetebier, Product Reviews tester and writer
Get the Dalmbox locking mailbox at Amazon.
Best Wall-Mounted
Architectural Mailboxes Designer Locking Mailbox

What We Like
- Mounts to wall near front door
- Simple installation with hardware included
- Includes two keys
- Good budget-tier option
What We Don’t Like
- Won’t hold larger packages
- Material caved during (excessive) testing
Specs
- Material: Galvanized steel
- Dimensions: 12.6 inches high by 9.7 inches wide by 4.4 inches deep
- Security features: Locking
Our Ratings: 4/5; Build Quality 3.5/5; Value 5/5
If you’re in the market for a wall-mounted locking mailbox, the Architectural Mailboxes Designer model is an excellent choice. It includes all the necessary mounting hardware to install it on your porch under the watchful eye of a security camera or near your front door. The mailbox itself is made of a strong galvanized steel that held up relatively well during tests, though it did not endure as well as some of the more heavy-duty, post-mounted models on this list. The material did cave under the heave of an axe. The lock was fairly difficult to pick, though we did manage to get it open by hitting it with a hammer repeatedly.
The mailbox itself kept the mail inside dry despite a major storm. The mailbox includes an optional vintage-style plaque that reads “mail,” which can be placed anywhere on the front of the mailbox or left off for a more modern, streamlined look. The mailbox also comes in several colorways including black with brushed black, black with bronze or silver, as well as white and silver.
Get the Architectural Mailboxes Designer locking mailbox at Amazon, The Home Depot, or Wayfair.
More Great Options
With so many options for locking mailboxes, we weren’t able to test as many as we would’ve liked. We hope to test the following models someday, but their excellent reviews and ratings convinced us they’re worthy picks for folks looking for other styles and types of locking mailboxes.
Best Vintage
Polar Aurora Cast Aluminum Post-Mounted Mailbox
What We Like
- Water-resistant aluminum holds up to the elements
- Vintage style looks good with older homes
- Variety of colors available
- Suitable for large envelopes, magazines, and small packages
What We Don’t Like
- Fairly expensive, though high-quality
- Heavy: may require help to mount
- Style is not for everyone
- No red flag for outgoing mail
Specs
- Material: Cast aluminum and steel
- Dimensions: 46 inches high (including pedestal) by 14 inches wide by 9.8 inches deep
- Security features: Locking mail compartment
Those who are interested in a statement piece that also functions as a locking mailbox may want to consider this sophisticated option from Polar Aurora. This aesthetically pleasing curbside mailbox is made of water-resistant cast aluminum and steel with a powder-coated finish to withstand the elements long term. Its mail compartment is suitable for small to large envelopes, magazines, and small packages.
Approved by the United States Postal Service, this pedestal model is 46 inches high, comes with a locking access door and two keys, and is offered in three color options to match a home’s current exterior fixtures. Plus, all the necessary installation hardware is included with the purchase. Though this model comes with many fine attributes, it does not come with a red flag for outgoing mail.
Get the Polar Aurora locking mailbox at Amazon or Wayfair.
Best Modern
Mail Boss 7412 Locking Security Drop Box

What We Like
- Powder-coated finish designed to endure the elements
- Includes 3 laser-cut keys for multiple users
- Available in a variety of colorways
What We Don’t Like
- Cannot hold larger packages and parcels
- Vulnerable to picking, drilling, and prying
Specs
- Material: Galvanized steel
- Dimensions: 16.2 inches high by 11.2 inches wide by 4.7 inches deep
- Security features: 12-disc wafer lock and anti-pry latch
If your goal is to replace an old wall-mount mailbox with a new locking mailbox, but a bland, forgettable design isn’t appealing, take a look at the various color and style options offered with the Mail Boss 7412. Each model has a different powder-coated finish that users can match with the outside of their home and their personal tastes. Plus, the mailbox comes with steel hinges for ease of use and durability.
The locking mailbox measures 16.2 inches high by 11.2 inches wide by 4.7 inches deep, and it comes with three laser-cut keys for the household. The sturdy 16-gauge galvanized steel body, patented anti-pry latch, and chrome alloy-tempered steel hook cam are all great vandalism deterrents. The mailbox comes with mounting screws and drill bits, so users have everything necessary to install it as soon as it arrives.
Get the Mail Boss 7412 locking mailbox at Amazon or Lowe’s.
Best for Packages
Architectural Mailboxes Oasis Classic Locking Mailbox
What We Like
- Powder-coated finish resists exposure
- Multiple security features to keep mail safe
- Hopper drawer to allow for larger packages
What We Don’t Like
- High-volume mailboxes can be more appealing to thieves
Specs
- Material: Galvanized steel
- Dimensions: 15.2 inches high by 11.5 inches wide by 18.1 inches deep
- Security features: Anti-pry latch, baffle door, stainless steel tamper-proof lock, anti-pick mechanism
For those who frequently order items online and worry about parcel safety when they aren’t at home, the extra-large capacity and specialized features of this parcel mailbox can help.
The locking mailbox can accept small to medium parcels up to 9.75 inches long by 6.5 inches wide by 2 inches high. The entire box measures 15.2 inches high by 11.5 inches wide by 18.1 inches deep, giving users more than enough space for multiple package deliveries and an average volume of mail.
Once delivered, the packages are protected by the heavy-duty 16- and 18-gauge galvanized steel mailbox, an anti-pry latch, an anti-fishing hopper door, and a pick-resistant stainless steel lock that can only be opened using one of the two included keys.
The doors of the locking mailbox have weather-resistant rubber seals to keep the mail dry and stainless steel hardware that is naturally rust-resistant, so users don’t have to worry about the mailbox becoming stuck in the open or closed position.
Get the Architectural Mailboxes Oasis Classic locking mailbox at Amazon or The Home Depot.
Upgrade Pick
Mail Boss 7207 Package Master Locking Mailbox

What We Like
- Durable construction withstands exposure to the elements
- High-security mailbox comes with multiple safety features
- Accommodates small packages and high volume of mail
What We Don’t Like
- Expensive compared with other similar options
- Outgoing mail may be more attractive to thieves
Specs
- Material: Galvanized steel
- Dimensions: 16.5 inches high by 12 inches wide by 21.5 inches deep
- Security features: Anti-pry latch, baffle door, 12-disc wafer lock, anti-drill lock, anti-pick mechanism
This Mail Boss unit is a pricey addition to a home, but it has a strong, durable design that justifies the cost. The stainless steel hinges resist the elements well, and the 12- and 14-gauge electro-galvanized welded steel body prevents forced break-ins.
The anti-pry latch keeps out thieves who may try to pry the mailbox open, while the 12-disc wafer lock is rated for anti-pick and anti-drill security, and it’s made with flame-hardened steel. The mailbox has a large package slot that accepts items up to 10.5 inches long by 4.5 inches high by 4.5 inches wide.
A larger slot size can encourage fishing because the opening appears wider and easier to access, but the mail shield mechanism within this mailbox prevents this type of theft. Setting up the mailbox is easy, too, thanks to Mail Boss’s patented Fast-Track mounting plate for quick installation.
Get the Mail Boss 7207 locking mailbox at Amazon.
Also Consider
Architectural Mailboxes Oasis 360 Locking Mailbox
What We Like
- Includes four keys
- Has predrilled 4-inch by 10-inch holes for mounting
- Built-in mail clip to keep outgoing mail
- Durable, heavy-gauge galvanized construction
What We Don’t Like
- Mounting hardware and post are not included
Specs
- Material: Galvanized steel
- Dimensions: 11.5 inches high by 11.4 inches wide by 20 inches deep
- Security features: Locking, front and rear keyed access
Those who want a simple and safe mailbox will want to take a look at the Architectural Mailboxes Oasis 360 locking mailbox. This model provides both front and rear access for receiving mail, is made with powder-coated galvanized steel inside and out, has a red flag, and has predrilled 4-inch by 10-inch mounting holes for its post-mount installation. The box itself measures 11.5 inches high by 11.4 inches wide by 20 inches deep, and the magnetic door accepts parcels of up to 9.5 inches wide by 3.5 inches long by 2.5 inches high.
This versatile mailbox is capable of holding small to large envelopes, magazines, and small parcels, and it comes with four keys for multiple users to access their mail. Plus, it has a mail clip that keeps outgoing envelopes in plain sight. The only downside to this option is that it does not come with the mounting bracket or hardware for installation.
Get the Architectural Mailboxes Oasis 360 locking mailbox at Amazon, Lowe’s, The Home Depot, or Wayfair.
Jump to Our Top Picks
How We Chose and Tested the Best Locking Mailboxes
We curated this selection of the best locking mailboxes through extensive testing, research, and a focus on several top factors that impact the security, quality, and functionality of the locking mailbox. We interviewed security specialist Jeff Ketelaars, co-founder of Security Guards Only, an online community for security professionals, who provided his expert insight on how to properly deter package pirates. He suggested that “choosing the right locking mailbox for your needs will be effective at preventing mail theft as [it] mainly acts as a deterrent to potential thieves.” He went on to say that “Although the design may not be 100 percent effective in preventing hacking, someone looking to steal mail will usually skip the locked boxes and try for an easier grab elsewhere.”
The top consideration when selecting these products was the security of the mailbox, including the style of lock, the construction material, and any security features like baffle doors and anti-pry latches. We spent hours testing each mailbox for durability. We attempted to break into, smash, and pry open each mailbox, using heavy tools such as an axe, sledge hammer, standard hammer, and screwdriver. For added tenacity, we asked two teenage boys to have a go at each mailbox, and each attempted to pick the locks.
We also put mail in each box and left them out in a rain storm as well as during a heavy snowfall to determine how waterproof the boxes were.
The list of top picks includes several locking mailboxes with varying types, sizes, and shapes to provide a range of choices to suit a variety of users. However, some attention was also given to products that stood out with unique aesthetic features, proving that products can look great without sacrificing functionality.
| Testing Stats | |
|---|---|
| Products tested | 4 |
| Time spent testing | 3 weeks |
| Tests performed | 5 |
| Price range | $25 to $135 |
| Security | Build Quality | Value | |
| Mail Boss 7536 Mail Manager Locking Mailbox | 5/5 | 5/5 | 5/5 |
| Mail Boss 7506 Mail Manager Locking Mailbox | 5/5 | 5/5 | 5/5 |
| Dalmbox Locking Mailbox | 4/5 | 3/5 | 5/5 |
| Architectural Mailboxes Designer Locking Mailbox | 4/5 | 3.5/5 | 5/5 |
What to Consider When Choosing a Locking Mailbox
Before choosing the first locking mailbox that seems appealing, it’s worth considering various features and product factors. Factors that can impact the design type, durability, and overall security of household mailboxes include the material, security features, weather resistance, installation procedures, and aesthetics.
Taking some time to think about the type, size, and quantity of mail that you typically receive also can help narrow the options, making it easier to find the perfect locking mailbox for your home.
Type
Locking mailboxes are typically one of three different types: wall-mounted mailboxes, curbside locking mailboxes, and tower-style drop boxes.
- Wall-mounted mailboxes are secured to a boundary wall or to a house. This type will generally come with mounting brackets that can fasten to brick in order to securely attach the mailbox to the gate, garage, or house.
- Curbside locking mailboxes are typically installed on wooden or metal posts, though some service curbside locking mailbox models are installed on top of a concrete pillar. These curbside mailboxes are located near the curb, making them convenient for the mail carrier and the user. Due to the location, it reduces the likelihood and need for mail carriers to walk up to the front door.
- Tower-style drop boxes are freestanding mailboxes that are made up of a tall, tower-style drop box that sits on a broad, heavy base. For enhanced security and to prevent the entire mailbox from being picked up and loaded into a passing vehicle, it’s advised to use a mounting plate and heavy-duty bolts to attach the mailbox base to the ground.
Security
The main point of having a locking mailbox is to keep mail and packages secure after they have been delivered by the mail carrier, so it makes sense to look for an anti-theft mailbox that has high-quality security features to deter would-be thieves.
Consider the size of the mail slot opening, whether a key lock suits your needs better than a combination lock, and if premium security features—such as anti-pry latches, baffle doors, anti-drill locks, and anti-pick locks—are necessary for the neighborhood.
- Mail slots may provide an opening for a hand or a tool to reach into the mailbox and steal the mail, so it’s recommended to look for a product with a small opening or a baffle door, which prevents thieves from reaching into the storage compartment.
- Anti-pry latches will also stop thieves from using screwdrivers and pry bars to wrench open the compartment.
- A mailbox with lock and key can be equipped with anti-drill and anti-pick mechanisms that help to prevent would-be thieves from breaking into the mailbox. However, if the key is lost and it falls into the wrong hands, then the mailbox may be vulnerable.
- Combination locks can only be opened with the correct combination, so there’s no need to worry about keeping track of a key, but a determined thief could sit outside a home while everyone inside is asleep and test every combination until they find the correct code. Both key and combination systems have their benefits and drawbacks, but a key lock tends to be more secure.
Type and Quantity of Mail
Given that the purpose of a locking mailbox is to keep the mail secure, it’s necessary to consider the type of mail you typically receive and the quantity of mail that may be delivered before the mailbox is emptied. Otherwise, the mail carrier may be forced to leave mail and packages outside the mailbox where they are vulnerable to porch pirates and other mail thieves.
Look for a locking mailbox with a substantial storage compartment to accommodate the usual volume of mail, and consider whether a mailbox that is equipped with an oversize mail slot is needed in order to securely receive small packages.
Weather Resistance
Most locking residential mailboxes are installed outdoors so that the mail carrier has access in order to deliver mail and other packages. However, this also means that the mailbox is exposed to wind, rain, snow, and sleet, so it’s necessary to look for a unit with substantial weather resistance to survive for more than a few years outside a home.
Plastic and aluminum locking mailboxes have the highest level of weather resistance. Though there’s no need to worry about rusting and corrosion, these materials are relatively fragile, so a determined thief could break them apart to access the mail.
Stainless steel and galvanized steel are much more difficult to break into, but they are more vulnerable to rusting and corrosion.
It’s best to look for a high-quality stainless steel or a galvanized steel locking mailbox for the best protection against thieves and weather conditions. A metal post is also a better option than a wooden post when it comes to longevity and security, though these posts are more pricey. In addition, it’s important for homeowners to consider if a mailbox is fire-resistant. Unlike fireproof safes, for example, most mailboxes are not designed to be fireproof, although heavy-duty galvanized steel can provide some fire resistance.
Aesthetic
Choosing a locking mailbox with a charming aesthetic appearance that doesn’t detract from the exterior design can enhance the appearance of a home. The mailbox aesthetic can range from a design that is intended to mimic official government mailboxes to more modern locking mailboxes with creative designs that look more like lawn ornaments than mailboxes.
Mailboxes don’t need to be flashy or official to have curb appeal. There are also classic aesthetic styles that have vintage Victorian, postmodern, or contemporary looks.
While aesthetics aren’t usually the most important factor in choosing a locking mailbox, it’s important to be happy with how a new mailbox looks. Take some time to figure out what style is the most appealing based on your personal preferences and your home’s exterior design.
Installation
The type of mailbox typically dictates the difficulty of the installation, though there is some variety between curbside locking mailboxes depending on whether they’re configured for wooden posts, metal posts, or brick pillars.
- Wall-mounted locking mailboxes typically have one or two mounting brackets, masonry wall plugs, and bolts or screws in order to fasten the mailbox to the wall. Installing this type of mailbox will usually require a drill, screwdriver, and hammer.
- Curbside locking mailboxes can be difficult to install because they must be fastened to a mounting plate, then attached to a post or pillar to secure the mailbox and prevent theft. Wooden and metal posts should be installed in the ground with concrete, similar to the installation method used for a fence post. A brick pillar needs to be sturdy enough for at least four mounting screws to be driven through the top. Use masonry plugs and mounting screws/bolts to secure the mailbox to the pillar.
- Tower-style drop boxes are the least difficult to install. It’s advised to secure the mailbox to the ground with a mounting plate in order to be sure that the mailbox cannot be picked up and carried away or loaded into a nearby vehicle.
A locking mailbox usually comes with the necessary mounting brackets, screws, and bolts. Always check the included installation instructions before proceeding.
Ketelaars shared an expert tip with us to keep in mind during installation: “Placing the mailbox within sightlines from the front of your house or in line with a security camera can also help you better monitor activity.”
FAQs
Just because you own a locking mailbox doesn’t necessarily mean that you understand exactly how it works. Even after reading this guide, you may still have questions about how to access the mailbox and what differentiates a locking mailbox from a standard mailbox. Keep reading for the answers to these questions and additional commonly asked questions about locking mailboxes.
A locking mailbox is a type of mailbox that is equipped with a lock in order to prevent mail theft. They come in several different styles, so the door to unlock the mailbox may be in the front, side, or back of the mailbox. Choose a style that suits your preferences.
Locking mailboxes are made for the purpose of keeping your mail secure by using a locking mechanism that must be opened with a key or combination in order to access the mail. Just as you may want door or window alarms, a locking mailbox helps deter theft. While they can still be broken into with the proper tools and enough effort, locking mailboxes are significantly more secure than a standard mailbox.
The mail carrier doesn’t need access to an individual locking mailbox in order to deliver the mail. They can drop the mail through a mail slot and the mail will sit in the locked compartment, out of reach of the mail carrier.
Unfortunately, this means that any outgoing mail is vulnerable to theft while it is waiting to be picked up by the mail carrier. This can be avoided by simply dropping outgoing mail in a nearby postal box instead of leaving it in your personal mailbox for collection.
For locked community mailboxes, the mail carrier has what is known as an arrow key, which opens the entire bank of mailboxes in order to make deliveries.
In most cases, a locksmith should be hired to properly change the lock on a curbside, freestanding, or wall-mounted locking mailbox in order to ensure that the mailbox is secure. However, if you have some experience with changing locks, you can do it yourself.
Drill through the locking mechanism, taking care not to damage the housing. This will allow you to open the lock without a key in order to gain access to the back of the lock.
Remove the clip that is holding the lock in place and take out the interior components of the lock.
Replace the old lock by sliding the new lock through the lock housing and securing the locking clip to prevent the lock from moving or shifting.
Close the mailbox and test the lock with the new key.
A metal mailbox, especially one made of heavy gauge galvanized steel, will not only stand up to weather, but can be harder to break into than plastic.
Most aluminum mailboxes are coated with rust-resistant paint and will last for years without rusting.
The size of your mailbox will depend largely on how many packages or larger parcels you get on a regular basis. The more you receive, the larger mailbox you will need. In addition, if you travel frequently, you may want a mailbox that can accommodate several days’ worth of mail.
Locking mailboxes offer a variety of ways to retrieve your mail. Most of them feature a door in the front of the mailbox that allows the user to access the mail inside. Some have an additional rear-locking door.
Meet the Tester
Amber Guetebier is a writer and plant nerd who also happens to be the mother to a hockey-playing teenager. When tasked with testing locking mailboxes, she enlisted said teenager and a couple of teammates, armed them with hammers, screwdrivers, and axes, and they all went to town on the mailboxes. Despite looks from the neighbors during the axe-wielding phase of testing, overall, the tests proved just what a mailbox can endure. When not destroying large metal objects for Bob Vila, she is a product tester and garden writer.
The post 2025’s Best Locking Mailboxes for Keeping Mail Dry and Safe, Tested appeared first on Bob Vila.
]]>Renovating a home—whether you’re DIYing, hiring contractors, or a combination of both—can be a long, stressful process with many bumps in the road. To ensure it goes as smoothly as possible, you’ll want to capture the details by taking renovation photos.
If you haven’t guessed by now, the one tool every homeowner needs during a home renovation project is a reliable camera. In this digital age, with so many camera options available (including on your phone), images speak volumes. Taking photos captures memories as you transform your home, plus those photos can be an indispensable resource for the entire renovation process from start to finish.
This article explains several reasons why it’s important to take a lot of photos before, during, and after a home renovation, especially the projects you’re DIYing.

Keep track of progress throughout the renovation project.
Probably the most obvious reason to bring out a camera during a renovation is to capture each step along the way. Progress pictures can help demonstrate what is happening and how quickly it is getting done. Seeing such accomplishments can help assure you that the project is moving along as planned or whether you need to step in and find out why the contractor’s progress is slow.
“I always tell people to snap pictures every single time they visit the job site—yes, even when the lighting is terrible,” says Alice T. Chan, an interior renovation and design specialist, professional home stager, and home-selling strategist with the Southeast home renovation company Freemodel, who was also the co-host and designer for HGTV’s reality real estate show, Power Broker. “It feels like nothing is happening, or it doesn’t seem worth it. Trust me, those photos can save you so much stress (and money) down the road,” she says.
Progress pictures can also help track who is completing which parts of the project, especially when the work involves multiple contractors. They can help you tell whether the plumber, electrician, general contractor, or a subcontractor worked on a specific part of your house so you’ll know who is responsible for any mistakes.
Finally, collecting photos can help you more effectively communicate with everyone involved in the project. You can provide clear feedback and avoid misunderstandings by sharing images with contractors.
Have a record of what lies beneath the surface.
Renovation photos also can help you record what’s in places you typically can’t see, such as wires and plumbing behind walls and flooring hidden under carpet. “Taking photos will help you keep track of where the nuts and bolts of the home lie as you peel away each layer,” says Natalie Warady, who styles, stages, designs, and renovates homes in Colorado.
“At each step of the process, you might need to reroute wiring or you might discover some hidden but important length of plumbing,” says Warady. When she found out that the only access to her bath plumbing was directly behind the kitchen cabinets, she had to reconfigure the kitchen design to accommodate access, and it helped to have pictures. “By keeping the images, you can track where you’ve been and also flag previously concealed areas that are important to know going forward in the process and if you need to gain access.”

Recall product details.
A very practical reason to take photos is to have a record of basic information like brand names, model numbers, and paint colors that you choose throughout the renovation. You might think it’s easy to remember, but if you take a slow approach to renovating, lots can happen in that time. Having pictures of what products look like and their item or model numbers might save you time and hassle down the road if you need to replace or repaint anything, especially if disaster strikes. It is helpful to date each picture and include notes such as in which room the item is, as well as when and where you purchased it.
Have visuals to show a contractor you may hire in the future.
Having photos of your home throughout one renovation can help if you ever decide to hire another contractor in the future. The photos create a visual record of the “before” and “after” that can help the next contractor fully understand what’s involved in the work they need to do. When you take pictures of pipes behind a wall, for example, this can inform a contractor whether work involves getting behind that wall. Not only will these images help the contractor better plan their work, but it can prevent an expensive mistake from occurring.
Help celebrate your home’s transformation.
Completing a renovation is extremely satisfying, and documenting the entire process can make it all the more meaningful. “Taking a variety of photos throughout each stage of a renovation gives you something tangible to look back on and remember just how much your home has grown and changed with you,” says Amber Brandt, an interior decorator at The Coziness Consultant. Friends and family may also appreciate reviewing the photos as they admire your newly refurbished home or if you have a renovation reveal open house.

Use the images if you decide to sell your home.
If you decide to put your house on the market, you’ll be grateful you have “before” and “after” photos to include in the listing. Showcasing the improvements you invested in might impress potential buyers and help you sell your home for a higher price and recoup a large percentage of the money you spent during the renovation. It also helps present the potential of the space in case the new owners want to make additional changes once they buy the house. Finally, the pictures can prove that you already addressed problems in the house, making it much easier for the buyers once they move in.
Share photos with permitting agencies and insurance companies.
In the event of damage or accidents during the renovation, it’s crucial to have pictures to send to the insurance company. Photos are also beneficial if you need to prove that you have taken steps to remedy a structural or building code issue that might affect permits or property insurance. Finally, images are also useful to submit along with a home warranty.
The post The One Tool Every Homeowner Needs During a Big Reno appeared first on Bob Vila.
]]>Most of us associate all-purpose putty, sometimes referred to by the popular brand name Bondo, with auto body repairs. But this two-part compound that consists of a resin and a hardener isn’t just for cars. You can use it for a broad range of quick repairs on masonry, drywall, wood, and fiberglass. It’s a great alternative to wood filler for making furniture repairs, fixing chipped trim, or even patching damaged hardwood floors. You can also use it for less common applications, such as replicating broken-off furniture trim or patching a dented front door. Ahead are nine common and uncommon uses for all-purpose putty.
1. Scratched Furniture

Wood filler is what most people reach for when it comes to repairing chips and scratches on furniture. But all-purpose putty has several advantages over wood filler. It offers more structural stability, so you can use it for large gouges and deep scratches. Since it’s stronger than wood filler, it better endures daily wear and tear. And unlike wood filler, all-purpose putties like Bondo don’t have sawdust mixed in, so it’s easier to get a smooth finish.
2. Small Automotive Dents

Probably the most common application for all-purpose putty is using it to repair small dents in your vehicle. It adheres well to metal (but not paint, so you’ll need to sand away the paint before applying it; then paint over it after). This repair involves filling the dent with putty, allowing it to dry, then sanding it smooth, so it’s even with the surrounding metal. Given that repairing even minor dents can cost hundreds of dollars, all-purpose putty offers an affordable option for repairing your car.
3. Damaged Trim

The corner pieces of trim and baseboards can take a beating from furniture and feet. They also often pull apart as the house settles and wood trim expands and contracts. Often these gaps are too large or deep to repair effectively with wood filler. Plus, wood filler can also take a full day to dry. All-purpose putty is a better option. After mixing it with the hardener, apply it to chipped corners, dents, and any other damage. Give it about 15 minutes to dry, sand it so it’s uniform with the surrounding trim, then paint it to blend in.
4. Chipped Hardwood Floors

All-purpose putty is also a quick and effective way to fill cracks and chips in a hardwood floor. Simply tape around the damage with a painter’s tape. Fill the gap using a putty knife, then remove the painters tape. Give the putty about 15 minutes to dry, then carefully scrape away any excess using a razor blade. Follow up with a wood floor repair marker kit to blend in the color of the putty with the surrounding wood.
5. Cracked Concrete

While you’ll want to stick with concrete repair products for fixing large cracks and damage to concrete, all-purpose putty is a quick and easy way to repair hairline cracks that aren’t structural. The repair is simple. Use a putty knife to fill the crack, and then give it about 15 or 20 minutes to dry. Once dry, use an angle grinder to smooth the repair out so it’s even with the surrounding concrete.
6. Dented Front Door

Metal front doors aren’t cheap, costing around $300 for a basic model and far more for elaborate front doors with glass panes, so repairing a dent in one with an all-purpose putty is a much better option than replacing it. “It has a pretty firm hold and works surprisingly well for patching or repairing any dents or cracks in metal surfaces,” says Carr Lanphier, CEO of improovy, a Chicago-based house painting company. The process is very similar to repairing a dent in a car. Rough up the area around the dent with sandpaper to give the putty something to stick to. Fill the dent with all-purpose putty, then smooth it out with a putty knife so it’s level with the rest of the door. Allow it to dry for about 20 minutes, then sand it until it’s flush with the door.
7. Drywall Damage
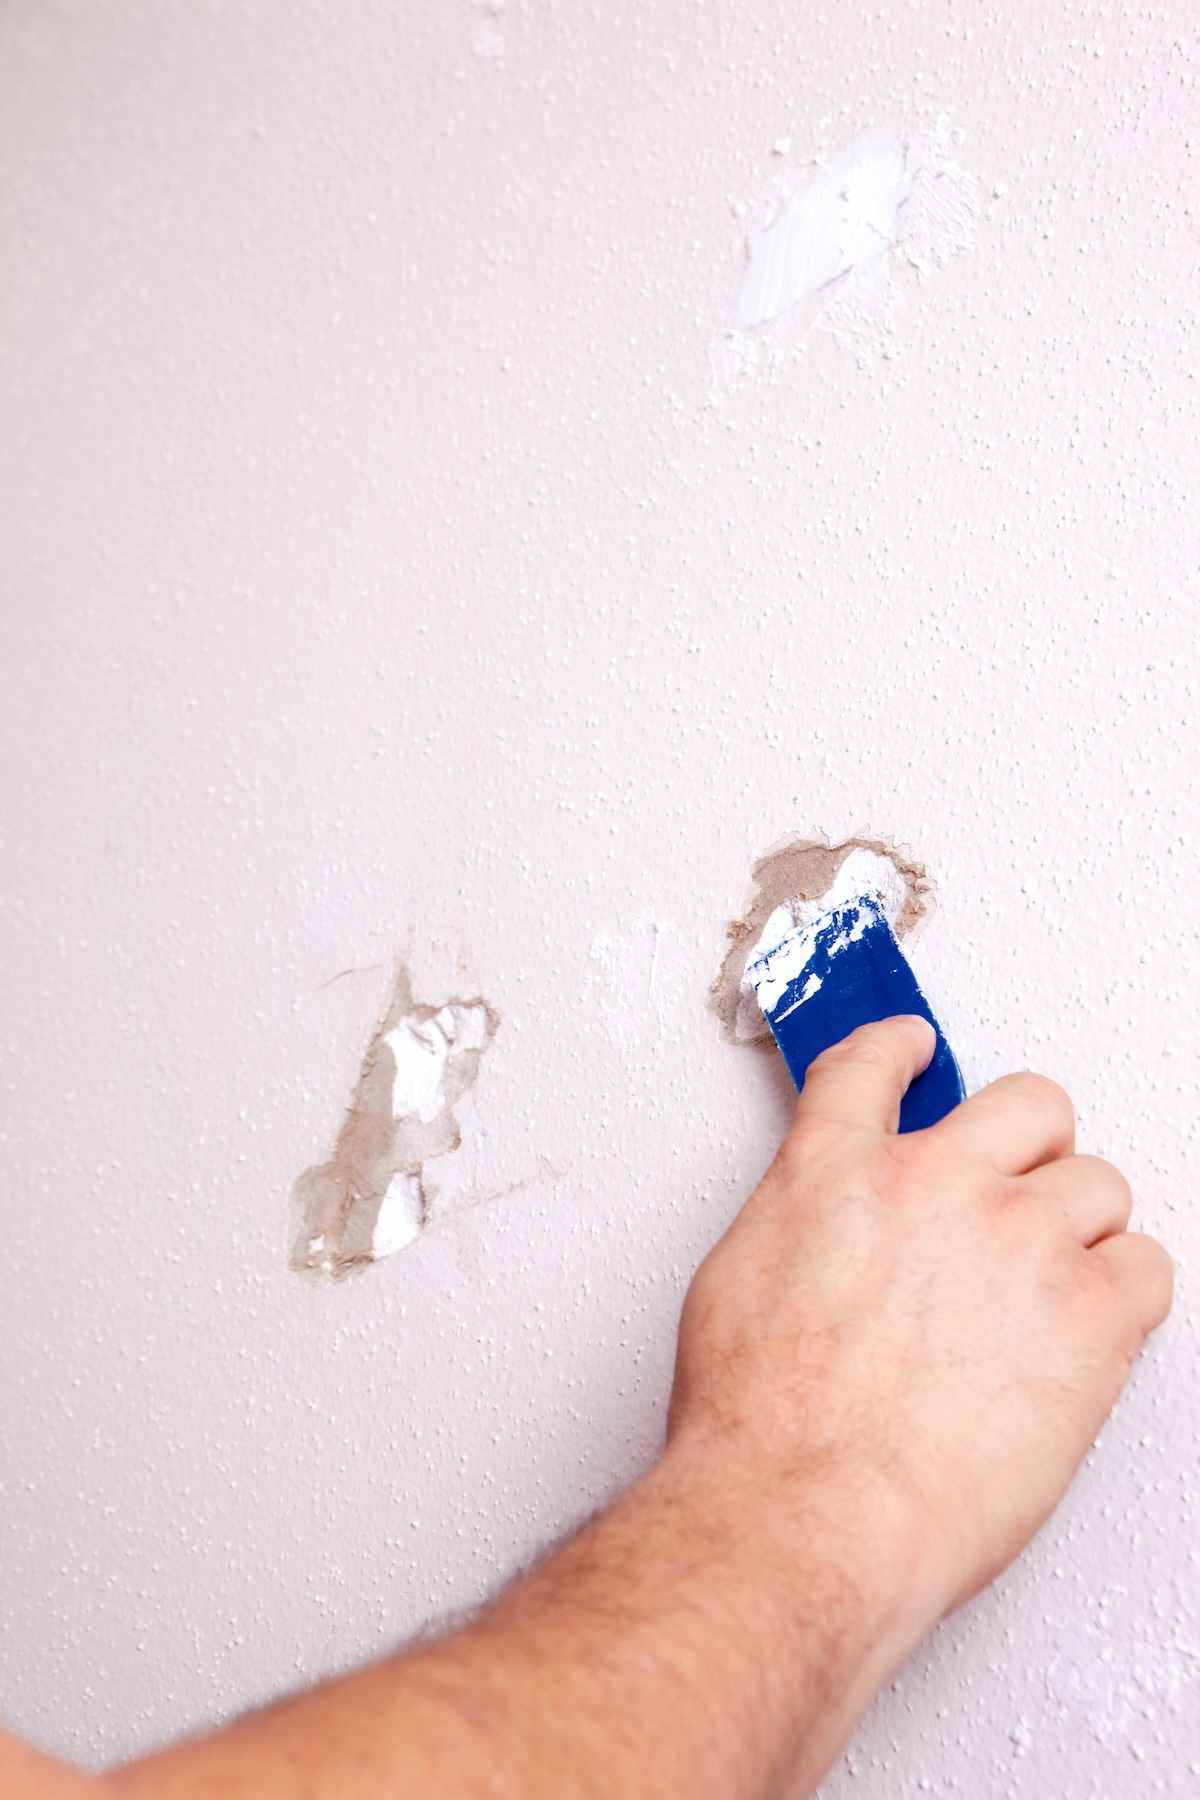
Lanphier says he often uses all-purpose putty to repair drywall. It dries much more quickly than spackle, and you don’t need to prime it before painting it. “It works great, especially on painted surfaces like drywall just because you can paint over it and can even sand it down to get a more exact patch and flat surface for painting,” he says.
8. Broken Furniture

You can make more advanced furniture repairs by using all-purpose putty to recreate trim and corners that have broken off. Press a piece of modeling clay or silicone caulk over a matching corner or trim piece that you want to reproduce. Allow the clay or caulk to harden, then fill with all-purpose putty. Once the putty has hardened, glue the piece onto the damaged area. Allow the glue to dry, then sand and paint for a seamless repair.
9. Stripped-Out Screw Holes
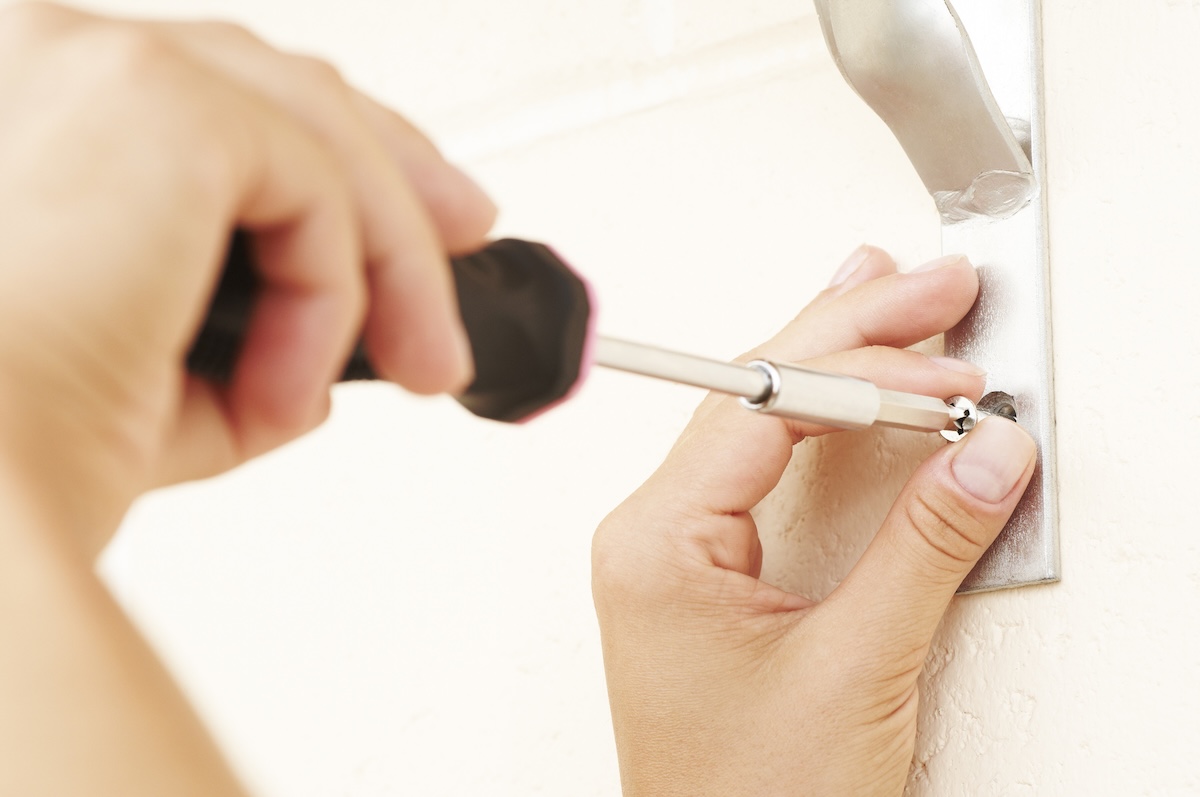
Stripped screw holes can cause a real problem, especially on a door strike plate or hinges, or in other places where moving the hole isn’t an option. An easy fix is to fill that stripped-out screw hole with all-purpose putty, which dries hard enough to hold screws in non-structural applications. After applying, allow the putty to dry fully, then drill a small pilot hole into it to reestablish that stripped out screw hole.
The post 9 Household Repairs You Can Make With All-Purpose Putty appeared first on Bob Vila.
]]>The post How to Fell a Tree appeared first on Bob Vila.
]]>Trees can provide shade, privacy, and add a unique aesthetic to the home, but if a tree is diseased, damaged, showing signs of falling, or simply blocking a great view, DIYers can remove the issue by felling a tree. Though, it’s important to mention that in some areas, the homeowner will need to get a permit before cutting trees, even in their own yard.
For those with the right tools, skills, and enough relevant DIY experience, learning how to cut down a tree can help manage their property and eliminate potential risks before they can become a true hazard to structures or people. However, due to the sheer size and bulk of most trees, this job can be highly dangerous. Use this guide to learn how to fell a tree safely.
Tools & Materials
Bobvila.com may earn a commission from purchases made through these links.
Project Overview
Working Time: 2 hours
Total Time: 4 hours
Skill Level: Intermediate
Estimated Cost: $220 to $360
Before You Begin
Protective equipment is necessary for a wide range of home DIY projects, and an important consideration when planning how to fell a tree. While it’s essential to avoid the falling trunk of the tree, falling branches also can pose a significant risk, so it’s recommended to have a quality chainsaw, wear a full chainsaw helmet, with a built-in face shield and hearing protection.
In addition, DIYers should wear some of the best work gloves to safeguard their hands while they fell a tree. It may be a good idea to invest in kevlar chaps, as well as a pair of durable work boots to protect their legs and feet from chainsaw grazes.
How to Cut Down a Tree
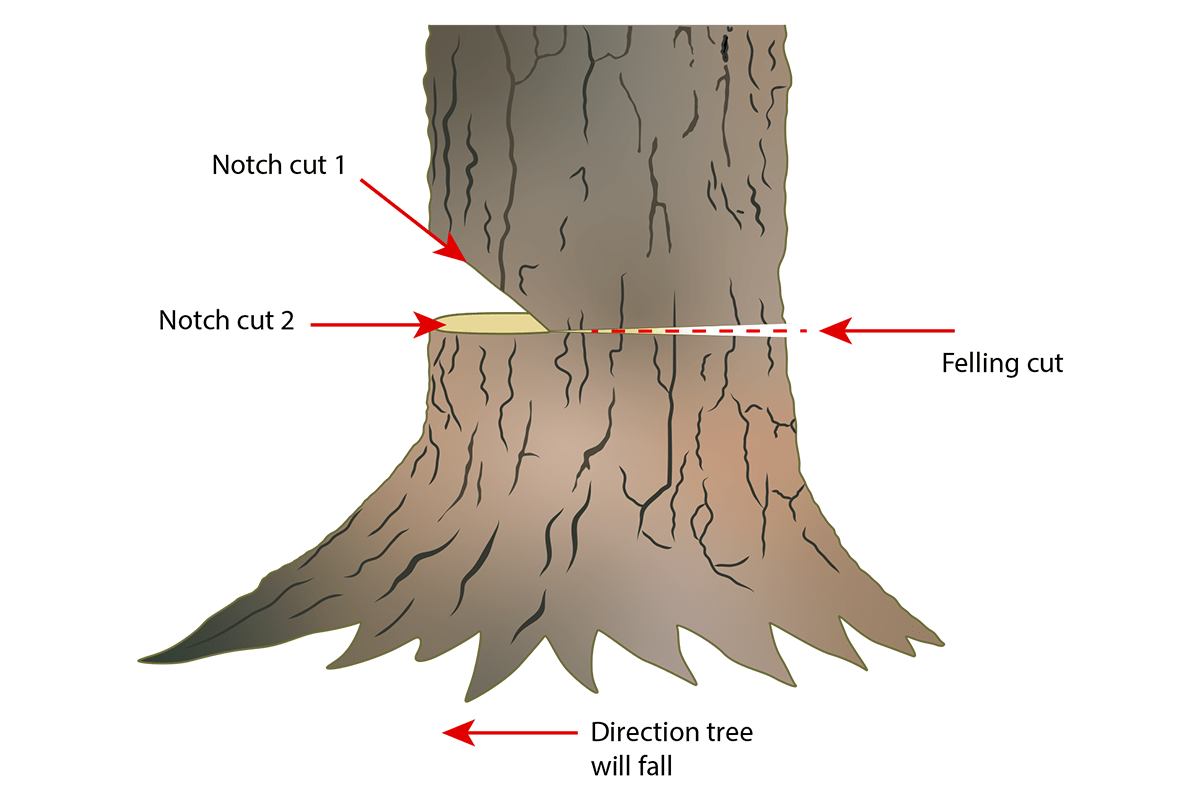
Learning how to fell a tree can help maintain the yard, but is also a useful skill for cutting down your own Christmas tree or splitting wood for the fireplace. Follow the steps provided below to find out how to inspect the condition of the tree, plan the felling zone, and safely fell a tree with wedges.
Step 1: Check whether it’s safe to cut down the tree.
Before cutting down a tree, it’s necessary to learn how to identify a dangerous tree to avoid injury to yourself, bystanders, and your surroundings. Start by examining the angle of the tree. If it is leaning significantly in one direction, it will be difficult to control the fall, so it’s best to call in the pros, who can manage the tree using specialized equipment.
Similarly, if the tree has dead branches still attached or that are being supported by other branches, they may fall on you while you are cutting the tree, another DIY safety consideration. Also, if the tree is located in a small backyard with nearby obstacles, like buildings, fences, or even power lines, this job should be handled by a crew of professionals. Otherwise, the tree may destroy the fence, get tangled in the power lines, or even fall on the house.
Step 2: Determine the felling zone.
After verifying whether it’s safe to cut down a tree, the next step is to determine the felling zone. The felling zone refers to the path where the tree will fall, and it needs to be free of structures, roads, and other trees to avoid causing any unnecessary damage or creating a domino-like effect in the area.
Estimate the height of the tree, then mark out a corresponding felling zone using a tape measure. The area from the base of the tree to where the top of the tree will land is the felling zone, though experts often recommend at least doubling the estimated height. You should also take this time to determine two escape routes on the opposite side of the felling direction that will allow you to safely retreat when the tree falls (at 45-degree angles from the trunk). Keep in mind that falling objects are one of the top reasons DIYers visit the E.R., so it’s necessary to take proper precautions before you begin.
Step 3: Clear the surrounding area.
Even if you are only cutting down a small tree, it’s important to clear the area as much as possible, including the felling zone and two escape routes. Cut away the brush from around the trunk of the tree, clear any shrubs, clear away items like outdoor furniture, and ensure that there aren’t any buildings or other structures that could be damaged while felling the tree. Additionally, it’s a good idea to pick up any sticks or stones that could become a tripping hazard while you are retreating from the falling tree.
Step 4: Plan the notch.
A directional notch forms a weak point in the bottom of the trunk that determines which way the tree will fall when the felling cut is made. When done correctly, the tree will fall in line with the notch. Without a directional notch to direct which way the tree will fall, you will be left guessing where it will land.
For inexperienced DIYers, it can help to wrap a chalk line horizontally around the lower part of the tree where you plan to cut the notch in order to keep the cuts on track. Determine the best direction for the tree to fall and make a mark on the trunk facing that direction.
Step 5: Cut the notch.

Before cutting into the tree, make sure you sharpen the chainsaw and inspect the tool for any problems. When you are satisfied that the chainsaw is in good working condition, make the first notch cut starting a foot or so above the chalk line and cut downward at a 70-degree angle until reaching the chalk line. Aim for the first cut to end up about one-third of the way into the trunk.
Make the second cut of the notch along the horizontal chalk line until it meets the bottom edge of the first cut. Use a hammer, maul, or mallet to knock the cut piece of wood out of the tree trunk. If you are having difficulty, use the chainsaw to widen the horizontal cut until the chunk of wood falls out on its own.
Step 6: Add wedges, if necessary.
Wedges can be used to help prevent the chainsaw from getting pinched while you cut. They aren’t necessary for smaller trees, with less weight and girth, but if the diameter of the tree is more than 18 inches, it’s a good idea to use wedges.
If you are felling a tree that is greater than 18 inches in diameter, start by making the notch cut, then begin the felling cut, but stop cutting as soon as the blade is far enough into the tree to insert the wedges. Lock the chain brake and leave the chainsaw bar in the cut with the saw running while you use a hammer or maul to tap in the wedges.
Step 7: Make the felling cut.
Felling a large tree is a task too big for a single person. The best way to ensure a safe fall is to have a reliable assistant known as a lookout. The lookout should stand a few feet behind the person who’s felling the tree and communicate emergencies using a pre-planned series of taps rather than verbal cues (which cannot be heard). If a problem occurs, the lookout should tap on the DIYer’s shoulders with a stick or broom handle to warn them.
When you are ready, get in position to cut the tree from the side opposite of where the direction notch is located. Begin cutting along the horizontal line indicated by the chalk marking. As the chainsaw blade gets closer to the notch, the tree will become unstable and may rock or lean slightly. This is normal.
Keep the chainsaw blade horizontal and continue cutting. When the tree begins to fall, stop cutting, lock the chain brake, and back up in the direction of the previously determined escape route. Make sure to keep your eyes on the tree until it lands to avoid any unfortunate surprises.
Step 8: Remove branches and saw the trunk Into firewood.
After felling the tree, you will need to cut it into pieces for proper storage, use, or disposal. Start by cutting the branches off the lower end of the trunk and work your way to the top. When possible, it’s recommended to stand on the uphill side of the tree to reduce the risk of it rolling on top of you.
Once the tree branches have been removed, you can begin cutting the trunk (and removed branches) into short pieces for use as firewood. Saw about three-fourths of the way through the log before rotating it to complete the cut.
FAQs
In some cases, landowners are allowed to cut down trees—in others; a professional tree-cutting service must perform the work. Similarly, in some states a permit is required before you can cut down a tree, while others do not have this regulation. Contact the local permit office or building authority to find out the rules in your area, and thoroughly assess the tree, felling area, and your skills and tools before proceeding.
The landowner of the property where the tree sits is responsible for any damage caused by the tree to the neighboring property. However, if the tree branches extend over a neighbor’s property, the neighbor can often legally cut off those branches.
It’s typically easiest to fell the tree in the direction of the lean, unless it’s leaning toward a home or other structure. In that case, the tree should be felled in the direction opposite of the lean. That may require the use of a crane, and it involves making cuts and inserting wedges to reverse the lean, and that’s best left to the pros.
Having a tree professionally cut down ranges from about $200 to $2,000, with $750 being the average. The final cost depends on the size of the tree and whether anything is in the way of the fall, such as a roof or power lines.
The post How to Fell a Tree appeared first on Bob Vila.
]]>The post How to Paint Wood Wall Paneling appeared first on Bob Vila.
]]>If you’re thinking about updating a room with wood-paneled walls, your instinct might be to start fresh, either by tearing out the paneling or by concealing it behind drywall. Both of these options involve expenses that may be difficult to justify if you are on a budget. As long as your paneling is in decent condition, the least expensive way forward is to leave the paneling in place and paint it.
Regardless of whether your wood paneling is solid or veneer, it’s pretty easy to paint. If you’ve ever painted a piece of wood furniture, you’re probably already familiar with the basic steps, though in this case you’ll also need to think about protecting adjacent walls and trim, and accounting for the grooves in the paneling. Follow the steps in this guide to painting wood paneling, and you should get professional-level results.
Tools & Materials
Bobvila.com may earn a commission from purchases made through these links.
Step 1: Clean the paneling with diluted TSP.
Dust, dirt, and oily fingerprints can prevent paint from adhering to wood paneling, so your first task is to thoroughly wash the wood-paneled walls with a solution of trisodium phosphate (TSP) and water. Before you use this toxic cleaner, put on full protective gear: full-sleeve clothing, rubber gloves, safety glasses, and a respiratory mask. Open windows in the room to adequately ventilate it. Then, dilute TSP per the instructions on the package in a bucket of water and wipe down the wood paneling with a sponge dampened in the solution.
Tried-and-True Advice
“I’ve painted wood paneling without thoroughly cleaning and priming, and it didn’t turn out perfect. The prep work is important. Clean the paneling with a wet rag to remove all dust and grime. A layer of primer will really help the paint and the overall end finish. A roller does most of the work, but a detail or sponge brush is really helpful for the gaps and textured elements on some panels.”
—Zach Lazzari, Contributing Writer
Step 2: Lightly sand the wood paneling.
Next, proceed to lightly sand the walls using a technique aptly known as “scuffing”; the goal here is to create a good mechanical bond between the paneled wall and the initial coat of primer that you will soon be applying. You’ll use a 220-grit sandpaper in even circular motions to do so.
Today’s primers are so good that you can probably skip the sanding, but I think it’s worth doing. Even though it takes only 20 or 30 minutes, scuffing gives you long-lasting insurance against chipping paint. Just be sure to wear a dust mask and, for health reasons as well as cleanliness, wipe away dust with a tack cloth or damp rag as you go. (Now may also be the time to vacuum the floor so that you don’t track dust room to room.)
Step 3: Protect the floor from paint splatter using drop cloths and painter’s tape.
Save yourself from having to scrub errant paint drips and splatter off the floor after the paint job is complete by laying down a bunch of old newspaper or a drop cloth. If there is molding or ceiling that you do not want the paint to inadvertently color.
Step 4: Apply two thin coats of stain-blocking primer.
Having finished scuffing the full width and height of the wood paneling to be painted, give the surface its initial coat of primer to prevent any of the wood grain, imperfections, and the like from showing through the final coat of paint.
Choosing the right primer is key. For solid wood, use a water-based product; for veneer, use a shellac-based one. While it’s not strictly necessary to do so, you can have the primer tinted to match the shade you eventually plan to paint the wood paneling. One detail you absolutely should look out for? The words “stain-blocking” on the label. This trait helps hide any knots that appear throughout the wood paneling, or else you may see them bleed through your weekend paint job sometime in the future.
Start in with a 2-inch high-quality angle sash brush to cut in at corners, then keep it handy to dab away drips as you work.
Since you’ll be covering such a large surface, switch to a roller for the rest of the paint job—you’ll still be able to coat the grooves of paneled walls just fine. In order to avoid ending up with the orange peel–like texture that roller-applied paints sometimes produce, opt to use a foam sponge roller cover (it’s inexpensive and easily purchased at your local paint supply store or home improvement center).
Two thin primer coats are normally sufficient. Check your can of primer for instructions on exactly how long to wait between coats.
Step 5: Apply at least two thin coats of paint.
Top with your chosen paint applied in the same manner as described in Step 4. While you’re rolling on the paint in thin layers, pay close attention to how much collects in the panel grooves and wipe out any excess that might be too thick and become tacky once dry.
Lightly sand the surface between coats, and expect to do two or three in total (leaving adequate dry time between each). It’ll be a weekend project for sure, but, when you finish, you’ll certainly admire the difference painted wood paneling can make in a room! Whether you’ve chosen to paint wood paneling a lighter color to for a very airy farmhouse vibe or a matte black for something cozier and more dramatic, like a library, the fresh color will definitely deliver results.
The post How to Paint Wood Wall Paneling appeared first on Bob Vila.
]]>The post How to Kill Tree Roots Naturally appeared first on Bob Vila.
]]>Trees add great beauty to your landscape and their shade can help keep cooling costs low. But when a tree outgrows its location or is seriously damaged in a storm, it becomes a hazard that should be removed, and chopping it down is only half the battle.
A tree’s underground root system can extend up to 20 feet deep in ideal soil conditions, and spread over an even greater area. The roots can continue to grow even after the trunk is gone; if they’re too close to your sewer line or foundation, they can cause serious damage. Killing the roots can avoid potential problems down the road.
One common way to kill tree roots is one that the BobVila.com staff does not support: using the chemical herbicide glyphosate, the active ingredient in RoundUp, on the roots and tree stump. We never recommend the use of this herbicide. Instead, we urge readers to seek out more environmentally solutions to lawn and garden problems.
How to Kill Tree Roots Using Rock Salt
Although it takes long time to work, rock salt can effectively kill tree roots by robbing them of water.
TOOLS AND MATERIALS
Rock salt
Water
Drill with a 1-inch or larger drill bit
Step 1: Drill holes into the tree’s trunk and roots.
Bore several holes 3 to 4 inches deep into the cut surface of the tree trunk. Make several additional holes into any larger roots that are exposed near the ground.
Tried-and-True Advice
“When we bought our house the front yard had one beautiful tree and one stump. After removing the stump there were still quite a few roots, so we took an unconventional approach: We built up a fire pit [over the roots], and for two years we had bonfires there. After two years, between the fire and the natural decomposition process, it was easy to just lift out the remaining dead roots and repair the lawn. I live in Minnesota where bonfires are permitted on the front lawn so it wasn’t an issue.”
—Amber Guetebier, Contributing Writer
Step 2: Fill the holes with rock salt and water.
Sprinkle rock salt into the holes you’ve bored, and then pour water into the holes. The rock salt solution is harmful to surrounding vegetation and toxic to pets, so take care to avoid overfilling the holes. Repeat this process several times over the course of a few months, and eventually the rock salt will kill the tree roots. (You’ll know the roots are dead when there is no longer any regrowth from the trunk.)
If you are worried that the roots have invaded a sewer line or your foundation, you can also try digging the larger tree roots out of the ground. It’s an arduous process, but once you remove them you can reclaim your lawn.
The post How to Kill Tree Roots Naturally appeared first on Bob Vila.
]]>The post How to Paint a Radiator appeared first on Bob Vila.
]]>Radiators have been keeping homes warm for about 150 years. While the units in your home probably aren’t that old, they may well bear signs of age: rust, chips, or a color that doesn’t suit your décor.
A fresh coat of paint can turn back the clock on a hot-water or steam cast-iron radiator, whether or not the unit is still operational. paint even dress up a unit made of mild steel, which is steel with a small amount of carbon. (Naturally rust- and fade-resistant stainless steel or aluminum radiators, on the other hand, aren’t usually painted. Those metals are less likely to need restoration in the first place, and these radiators have a more rigid, less pliant surface that isn’t particularly receptive to sanding and painting.) As with any paint project, painting a radiator is all about proper preparation, quality materials, and good technique.
Will you paint an old iron radiator white so it matches your baseboard trim, or select a bright hue that makes the heater a focal point rather than an eyesore? Once you settle on a suitable color and follow this guide for how to paint a radiator, the unit will have a new hue in the space of a weekend.
Note: The radiator will need to be turned off for the duration of this project, so midwinter is probably not the best time to undertake the project.
Tools & Materials
Bobvila.com may earn a commission from purchases made through these links.
Step 1: Select primer and paint.
Though you can certainly go the can-and-paintbrush route, we find that spray paint and primer will reach the curves, nooks, and crannies of this fixture best. Use an oil-based primer and either an oil- or water-based spray paint for metal that is labeled for interior use. Depending on your radiator, look for the following attributes:
- If you are painting a radiator that is non-operational, both the primer and paint that you use should be rust resistant.
- If you are painting a radiator that still works and is used to heat the home, the primer and paint should be rust resistant and able to withstand the high temperatures that radiators generate. Rust-Oleum High Heat Spray Paint is a good option.
If you want your radiator to blend in with its surroundings, go for a shade that closely matches the color of the wall behind it or the trim beneath it; to make the radiator pop, choose a hue that contrasts with the wall.
Step 2: Turn off the radiator, and cover vents and valves.
If your radiator is non-operational, skip this step and move on to Step 3.
For an operational radiator, turn the control valve located near the base of the unit clockwise until it reaches the “off,” or fully closed position, and let the unit cool completely.
Use painter’s tape to cover the valves and vents on your unit:
- On hot-water radiators, tape off the control valve and the air bleeder valve (located near the top of the unit)
- On two-pipe steam radiators, cover the steam vent valve near the top of the unit
- On on-pipe steam radiators, cover the air vent on the side of the unit.
Paint can block vents and make valves difficult to turn, which is why you want to avoid painting them.
Step 3: Prep the work area.
Apply masking tape to the wall around the perimeter of the radiator and lay drop cloths on the floor below the unit—you’ll want to do so thoroughly to protect the surrounding areas from overspray. Open a window in the room to improve ventilation while painting, and wear gloves and a respirator.
Step 4: Sand the metal radiator.

Scrape a small, inconspicuous area on the radiator surface with a screwdriver blade and look for flaking to confirm whether or not it had been previously painted or varnished. If there’s no flaking, go over any pitting from heavy rust with coarse-grit sandpaper, such as 40- to 60-grit. Then sand all surfaces with fine-grit sandpaper (e.g., 80- to 120-grit) to remove light rust accumulations and achieve a smooth, paintable surface.
If you’re covering a radiator that was previously painted, first test the paint for lead with a lead paint test kit (available at home centers for $7 to $15). Paint on radiators in homes built pre-1978 are the most likely to contain lead. Caution: Never scrape, sand, or otherwise disturb the surface of a radiator coated in lead paint, as you risk releasing lead particles, which can adversely affect the central nervous and endocrine systems if inhaled or swallowed and can even be fatal with high levels of exposure. Wait for the results, then sand and/or strip away any cracking paint using one of these methods:
- If the test is negative, use a putty knife to scrape away cracked/chipping paint from any of the radiator surfaces. Then, sand the surface using the sanding technique recommended above.
- If the test is positive, have a professional refinisher remove the paint, or use an environmentally friendly paint stripper such as Citristrip to remove it. These products trap the lead in gel to keep lead particles from going airborne.
Step 5: Wipe away the dust.
Glide a tack cloth over the radiator surface to remove sanding dust. Then, wipe down the surface with a water-dampened cloth to remove remaining dirt and debris. Let the radiator air dry fully.
Tried-and-True Advice
“It’s amazing how a fresh coat of paint can improve the aesthetics of any old radiator. I find it’s best to use compressed air to remove dust after sanding. You can wipe it down but air really helps to prep the surface for paint. A shop vacuum will also assist in full removal of dust particles if needed.”
—Zach Lazzari, Contributing Writer
Step 6: Spray a coat of primer.
Holding the can of primer upright and at a distance of 10 to 16 inches from the radiator, spray an even coat over all visible surfaces using a back-and-forth motion. Let the primer coat dry completely per the product instructions before you move on to paint.
Step 7: Paint the radiator.
Employing the same technique used for the primer, spray an even coat of the high-temperature metal spray paint over all visible surfaces of the radiator using a back-and-forth motion.
Let the first coat dry for 5 to 7 minutes (or according to the product instructions). Apply one or more coats to achieve the desired depth of color, allowing each coat to dry for 5 to 7 minutes before applying the next. Spraying the coats in relatively quick succession minimizes paint run-off of the previous coat. Let the final coat dry completely.
Step 8: Clean up the workspace.
Remove the painter’s tape from the wall and radiator valves, and discard the drop cloths. If the radiator is operational, turn the radiator control valve counterclockwise to the “on” or fully open position.
The post How to Paint a Radiator appeared first on Bob Vila.
]]>Imagine if you were given the chance for a $100 home update. What would you spend that money on? At first, this might seem overwhelming, but also an exciting opportunity that you wouldn’t want to pass up. We asked five serial renovators what they would grab at Home Depot with that $100. Here are their answers, which will hopefully inspire you the next time you are roaming the aisles at a home improvement store looking for the best items to enhance your home without breaking the bank.

New Light Fixture
Amber Brandt is an interior decorator at The Coziness Consultant. She believes that you can have both fashion and function in one home upgrade. That’s why she would spend the gift card on a new overhead light fixture or a pair of wall sconces. “Lighting sets the proper tone for tasks and ambiance, and naturally serves as a design feature or focal point for your room,” says Brandt. “Plus, a lighting upgrade is a simple and cost-effective way to transform a dated space into one that reads more modern and aesthetic.”
You can find her on Instagram @thecozinessconsultant.
Paint and Painting Tools
It’s no surprise that a painter would choose to spend a Home Depot gift card on paint supplies. Bart Caldwell of Caldwell Painting in Cordova, Tennessee, thinks the best way to transform your entire home is a fresh coat of paint. “I would start with the Wooster 3-pack of brushes, which will be perfect for your trim painting,“ he says. “Next, I would invest in a good roller, roller cover, and rolling pole. You will also want to grab yourself a roller tray and a pack of liners. The last thing you need is a drop cloth.” Now you are all set to paint your house once you pick your favorite paint colors.
You can find him on Instagram at @caldwell.painting and YouTube @caldwellpainting.

Knobs and Pulls
Lisa Mabey is a designer and founder of Lisee Ree Designs in Salt Lake City, Utah. Her years of design expertise have been honed and guided through both formal education and hands-on experience. After moving 10 times in a single decade, Mabey became adept at quickly and efficiently creating the feeling of home regardless of the dwelling’s condition or the length of time she lived there. She and her husband have completely renovated multiple homes to maximize the potential of each house to fit their family’s style and needs, and have overseen the design of multiple partial remodels.
When given a gift card, she would focus on the kitchen and bathrooms. “I’d update the knobs and pulls in a bathroom or kitchen,” she says. “Even if you don’t have a large budget, updating the hardware in your existing spaces can give you a huge visual return for very little effort no matter how old the cabinetry is. It’s a simple way to make your space shine.”
You can find her on Instagram at @liseereedesigns.
Decorative Address Numbers and Front Door Paint
Natalie Warady styles, stages, designs, and renovates homes in Colorado. She is in the process of renovating her 1974 mid-century modern home, which has needed everything updated. She would like to use the gift card to help feel more satisfied with how the exterior of the home looks.
“I think two purchases would help the exterior look less chaotic and more elevated,” she says. “First off, the address numbers on the home look like they were purchased at a craft store and hand-painted. I’d replace these with Everbuilt Modern Matte finish address numbers.” With the remainder, she would buy paint to freshen up the front door. “It is currently an odd shade of plum burgundy that doesn’t speak to the angular entry lines of the home.”
You can find her on Instagram @natalie_warady.

Power Washer and Front Door Paint
Alice T. Chan is a renovation specialist with the home renovation company Freemodel. She has spent nearly two decades working with real estate and homeowner clients as an interior renovation and design specialist, professional home stager, and home selling strategist throughout the San Francisco Bay Area. She was also the co-host and designer for HGTV’s reality real estate show, Power Broker.
“If you’re ready to kick off your home renovation and build some momentum, start with your home’s exterior,” she advises. “A quick refresh outside will inspire you to continue the transformation inside.”
Her Home Depot gift card wish includes a power washer and paint for the front door. “First, rent a power washer. A 4-hour rental costs $55. Use it to blast away dirt and grime from your house, porch, walkways, driveway, and other hardscapes. Trust me, this is one of the most satisfying home maintenance projects you’ll ever do.” Mind the clock, though, because your $100 home update budget covers only a 4-hour rental. “With $45 left in your budget, grab a gallon of semi-gloss black paint and give your front door a fresh look. It’s a minor update that instantly boosts curb appeal.”
Bonus tip: If you can borrow a power washer from a friend, then Chan recommends using that $55 to upgrade your porch light fixture. “A modern fixture can transform your entryway,” she says.
You can find her on Instagram @alicetchan/.
The post We Asked 5 Renovation Addicts How They Would Spend a $100 Home Depot Gift Card and This Is What They Said appeared first on Bob Vila.
]]>The post How to Remove Scratches From Stainless Steel appeared first on Bob Vila.
]]>From sinks and appliances to counters and cabinet hardware, stainless steel remains popular in home kitchens, favored for its sleek look and durability. Sturdy though it may be, stainless steel appliances can unfortunately acquire unsightly scratches from everyday household use. Armed with the knowledge of how to remove scratches from stainless steel, however, it’s totally possible to minimize and even successfully remove these scratches altogether.
Follow the two sets of steps below on how to remove fine or deep scratches in stainless steel to improve the appearance of your kitchen, and refer to some helpful scratch prevention tips to keep your stainless steel clean and in peak condition for years to come.
How to Remove Fine Scratches From Stainless Steel

Look closely and you’ll see that stainless steel has brush marks on its surface. This is called the grain, a result of the stainless steel manufacturing process. Whichever scratch removal method or product you use, it’s essential to rub only in the direction of this grain. A common stainless steel maintenance mistake is going against the grain, which may create new scratches and potentially worsen existing ones.
Note: Do not use this scratch removal method on stainless steel that has a protective clear coat or synthetic surface applied, or else you may do more damage than you fix.
SUPPLIES
Stainless steel buffing compound
Microfiber cloths
Step 1: Prepare the stainless steel buffing compound.
Start with a liquid or powdered non-abrasive buffing compound you would normally use to clean stainless steel, like Bar Keeper’s Friend (in a pinch, you can even use whitening toothpaste). If your stainless steel cleaner of choice is cream-based, proceed to the next step. If you’re using a powdered stainless steel scratch remover, follow the label instructions for mixing until you have a paste roughly the consistency of toothpaste. When mixing in water, it helps to add it a few drops at a time in order to achieve the right thickness.
Step 2: Identify and buff out the fine scratch.
If possible, start by finding a smaller scratch in an inconspicuous spot on the clean and dry stainless steel surface. Apply a small amount of the cream or paste to a microfiber cloth and very gently rub it back and forth over the scratch, working in the direction of the metal’s grain. Continue until the scratch buffs out or diminishes in appearance.
Tried-and-True Advice
“When buffing out scratches, be sure to move in the direction of the stainless steel grain and don’t rub your buffing cloth in circles. I’ve used baking soda mixed with water to work out scratches, but it’s important to test whatever buffing agent you decide to use in an inconspicuous spot before buffing to ensure you don’t make scratches worse.
After buffing out scratches, I like to spray the stainless steel surface with distilled white vinegar and then wipe it with a clean cloth. I finish up by polishing the stainless steel with oil. I’ve used olive oil in the past, but you can also use stainless steel polish. To avoid scratches altogether, make a habit of gently cleaning your stainless steel to keep grime from building up and eliminate the need for heavy-duty cleaning.”
—Lauren Landers, Contributing Writer
Step 3: Wipe the metal surface clean.
Dampen a fresh microfiber cloth and use it to remove any remaining metal scratch remover residue in the spot where the scratch was, wiping in the direction of the grain. Fully dry the area with a clean, dry microfiber cloth.
Step 4: Repeat with all visible fine scratches on the surface.
If the above process for how to get scratches out of stainless steel produces satisfactory results, repeat Steps 2 and 3 on any other visible scratches in the metal. Continue to go with the stainless steel grain while buffing, and be sure to swap in new microfiber cloths as needed to avoid leaving excess buffing compound residue on the surface.
How to Remove Deep Scratches From Stainless Steel
For larger or deeper scratches on stainless steel that aren’t obviously affected by the above method, there’s still hope for a scratch-free surface. Stainless steel scratch removal kits are made for this exact type of job, generally containing a set of abrasive pads, a buffing compound, and blending agent. Unlike the process for removing fine scratches, scratch removal kits fix stainless steel scratches by working up from a coarser grit to a finer one to remove imperfections and restore the surface. Carefully follow the manufacturer’s directions included in your kit.
Note: Unless otherwise specified on the product label or appliance user manual, do not use any scratch removal kit on stainless steel with a fingerprint-resistant clear coat or other synthetic surface. Using the included abrasive pads directly on anything but stainless steel can cause further damage.
SUPPLIES
Microfiber cloths
Stainless steel scratch removal kit
Barry’s Ultra Shine
Step 1: Identify the deep scratch and make a first pass.
Open the stainless steel scratch remover kit and read the full instructions on how to buff out scratches, including any preparation steps and safety warnings. Find the coarsest abrasive pad in the kit and apply the included buffing compound as directed to clean, dry stainless steel. Using the prescribed number of strokes, rub the compound into the scratch along the grain.
Step 2: Wipe the work surface clean.
Rubbing in the direction of the grain, use a microfiber cloth to wipe off the compound as directed and take a better look at the scratch. If the scratch is no longer visible, skip to Step 4. If the scratch is still visible, proceed to Step 3.
Step 3: Continue to buff the scratch with increasingly fine pads (optional).
Switch to the next finest abrasive pad as indicated by the kit instructions, and apply more buffing compound if directed. Repeat the process of scrubbing, wiping, and evaluating the scratch, switching to finer pads as necessary and going with the grain throughout. Even if the scratch remains after using all of the kit’s included abrasive pads, don’t worry: The final touchup pass might still produce a noticeable improvement.

Step 4: Blend the scratch into the surrounding area.
Depending on your chosen scratch removal kit, it may include an extra chemical and soft pad in addition to the buffing compound and abrasive pads. If your kit doesn’t include this, however, you can purchase Barry’s Ultra Shine or a similar product separately and apply it with a clean, dry microfiber cloth.
Apply the finishing agent to the provided pad or cloth and rub it onto and around the scratch as directed, polishing with the grain of the metal. Stop and check the progress of the blending frequently. Decrease the amount of applied pressure gradually you go until the work area is sufficiently blended with the rest of the stainless steel surface.

How to Prevent Scratches in Stainless Steel
With that scratch on your stainless steel fridge or other kitchen surface removed, now is a good time to brush up on how to keep your metal surfaces looking pristine. Follow these tips to prevent scratches on your stainless steel from accumulating in the first place:
- Do not use abrasive cleaners, steel wool, or other rough materials when cleaning and polishing stainless steel. (For cleaners we recommend, read about our tests of the best stainless steel cleaners, or make your own homemade stainless steel cleaner.)
- Avoid stainless steel sink scratches by laying down a rubber dish mat at the bottom of the basin when washing metal pots and pans, especially ones made of cast iron.
- Cut meat, fruit, and vegetables on a cutting board to avoid stainless steel countertop scratches.
The post How to Remove Scratches From Stainless Steel appeared first on Bob Vila.
]]>