The post How to Fix a Noisy Radiator appeared first on Bob Vila.
]]>Why is the radiator making noise?
In a typical steam heat system, a single pipe extends from the boiler to the radiators. At the point where the pipe connects to a radiator, you’ll find an intake valve. This component performs two functions. First, it feeds steam into the radiator. Second, once the steam cools and condenses into water, the intake valve allows the liquid to drain out of the radiator and return to the boiler. At least, that’s how things are supposed to work. But water often gets trapped in the radiator, and when that happens, steam is blocked from entering. As the trapper water and blocked steam play a game of tug-of-war, they produce the delightful symphony that keeps you up at night. So aside from being an awful racket, a noisy radiator means that your system isn’t operating as well as it should.
What to Do About a Noisy Radiator
Tilt it toward the intake valve.
A properly functioning steam radiator does not sit perfectly level on the floor. Rather, it tilts slightly toward the intake valve. That positioning allows condensed water to flow out of the radiator, not by means of a pump, but through the force of gravity. Therefore, if your radiator starts getting noisy, the first thing to check is check whether the radiator remains tilted toward the valve. Use a level, and if you see that the radiator sits level or is tilting away from the valve, intervene. Try slipping a wooden shim or paint stirrer under the legs on the end opposite to the valve. A tilt of only five degrees or so should do the trick.

Tried-and-True Advice
“Growing up in freezing-cold Scotland, I often dealt with noisy radiators that would clank and bang at all hours. One simple trick I found helpful was using a long-handled screwdriver to gently tap the top of the radiator. This can help release trapped air inside, which is often the cause of the noise. Just be sure to tap lightly—too much force could cause damage. It’s a quick fix that worked for me, and might help reduce the noise in your own radiator.”
—Paul Rankin, Contributing Writer
Insulate the radiator pipe.
If you’ve checked the radiator and found that it’s tilting correctly, a different common problem may be at play. Often, steam condenses in the pipe before it even reaches your radiator. If that’s the case, the fix is to insulate the pipe, wherever possible, along its run up from the boiler. Pipe insulation couldn’t be much easier to work with, but the portions of the pipe most in need of insulation may be hidden behind a wall.
Clean or replace the steam vent.
Another possible cause of radiator noise: the steam vent. Try this: Close the intake valve so that no steam can enter the radiator. Next, remove the steam vent from the radiator, placing it in a bowl of vinegar. Let it sit overnight. Doing so may help dissolve any calcium deposits that have gradually accumulated over time. If that doesn’t work, purchase a new steam vent to see whether the replacement fares any better. Readily available at most home centers, a new vent only costs about ten bucks, so it’s worth a shot if all else fails.
Finally, a friendly reminder regarding the use of steam radiators in general: The intake valve should be either fully open or fully closed. Leaving the valve partially open can result in leaks and damage to floors.
The post How to Fix a Noisy Radiator appeared first on Bob Vila.
]]>The post So, You Want to… Install a Laundry Chute appeared first on Bob Vila.
]]>Build or Buy?
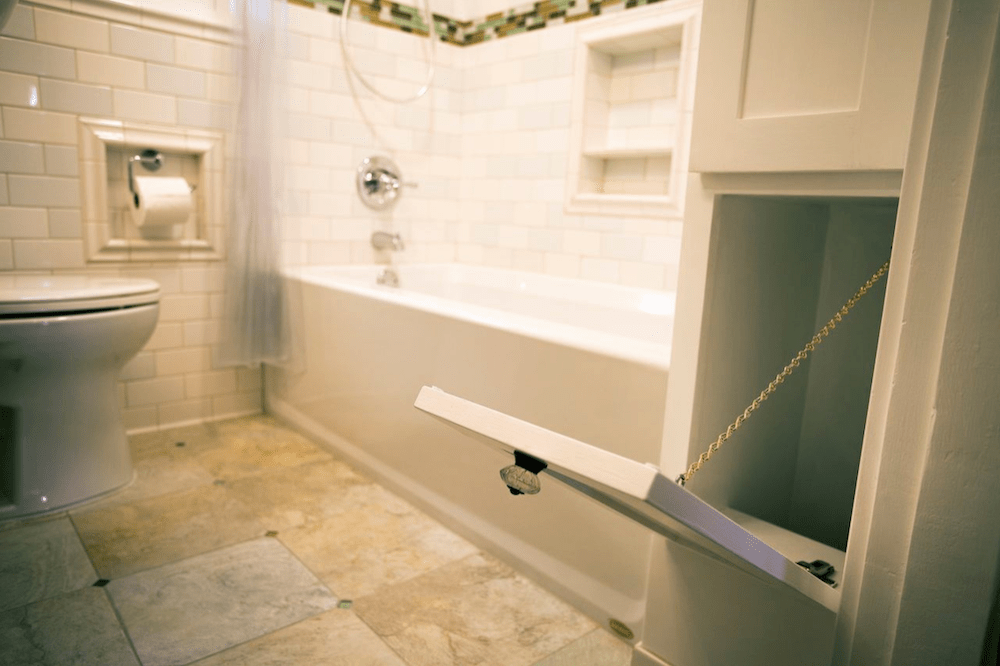
Sometimes it really does seem as though home centers stock literally everything. Believe it or not, you can even buy a laundry chute kit at your local box store. That convenience comes at a cost, though; it’s somewhat cheaper (but less quick and easy) to buy all the supplies separately.
What sort of materials are we talking about? For one thing, there’s the chase—that is, the passage through which dropped clothing travels to the basement (or wherever your laundry area happens to be).
- Usually, contractors and DIY-inclined homeowners build the chase from the galvanized ductwork typically used in home heating and cooling systems.
- Though costlier, large-diameter PVC pipe also works well.
- Wood, drywall, and melamine are additional options, but these latter materials require joints, and with joints you run the risk of snags (the enemy of a successful laundry chute).
Generally speaking, a wider chute is preferable to a narrow one. Shoot for a one-by-two-foot conduit. Fitting a chase of those dimensions entirely behind the plane of your existing walls probably isn’t in the cards. Instead, expect for the chase to punch at least a few inches into the rooms through which it’s going to run. Yes, you’re right—doing that is definitely going to complicate the job!
Location, Location, Location
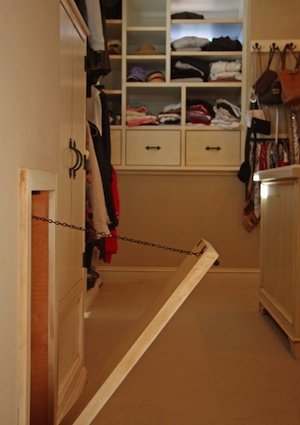
Real estate and laundry chutes have at least one thing in common: For both, location is of key importance. Certainly, you want to find a place for the chute that’s going to be convenient in your day-to-day life, but the greater challenge is going to be finding a spot where the chase can fit into the framework of your house.
While it’s easy enough to build a laundry chute into a new home or addition, integrating one into an existing house takes some doing. What you need to find is a stud bay that drops to the basement, with neither wiring nor plumbing in the way.
Prepare to cut a few small exploratory holes if you never knew or have forgotten what lies behind this or that wall.
Hallways are often a good bet, especially if their walls run parallel to underlying floor joists. Note that it’s possible for a laundry chute to bend slightly in its run so as to avoid an obstruction, but that bend must be gradual and of course is going to complicate matters.
The Big Drop
The idea of a laundry chute appeals most to those who live in a multistory home. Bear in mind, however, that the risk of a snag increases in direct proportion with the length of the chase. There are worse things in the world than having a sock snag in your laundry chute, but the impetus for building a chute is to minimize hassle, and clearing a snag is nothing if not annoying.
Most homeowners keep a pole or stiff wire on hand to deal with such a problem, but if you’re using a contractor, he or she may be able to design the chase in such a way that it allows for user-friendly maintenance over time.
Kid Stuff
Are there small children in the house? If so, position any upstairs entry doors to the chute high up on the wall, beyond the reach of kids who don’t know better than to send themselves (or the cat) on a ride to the basement. Alternatively or in addition, downsize the door so that no small bodies can fit through. Yet another child-safety option would be to put a lock on the door to the chute.
Fire Safety
Properly designed, a laundry chute provides unobstructed passage between floors. Many people believe that this chimney-like construction has the potential to turn a small fire into a really big and utterly devastating one. On the other hand, many builders and architects point out that stairways carry the same potential risk. And whereas stairways are typically open, laundry chutes are most often closed shut behind doors that can slow a fire’s spread.
Regardless, in some municipalities, there are strict fire codes prohibiting or restricting the construction of laundry chute. Before going ahead with plans, be sure to check with your local building authority.
The post So, You Want to… Install a Laundry Chute appeared first on Bob Vila.
]]>The post So, You Want to… Heat Your House With a Wood Stove appeared first on Bob Vila.
]]>But is it really such a good idea? As with so many other things relating to the home, it depends. Before you go shopping for a new heating apparatus, learn whether wood stove heat will suit your home and family.
How does a wood stove work?
Wood stoves made of metal have been around for more than 400 years, and while they’ve become ever more efficient, the way they work hasn’t changed much: The homeowner places logs into the firebox—the fireproof central “belly” of the stove. Once ignited, the logs burn in this closed, controlled environment, with air from vents feeding the flames. The stove radiates its heat into the room, while smoke and other waste products vent through a pipe to the outdoors.
To do its job, a wood stove needs to get hot, typically between 500 and 800 degrees Fahrenheit. It’s important to maintain this middle ground. When temperatures are too low, the stove doesn’t generate enough heat, and the pipe doesn’t get hot enough to burn off creosote. If this byproduct of combustion is allowed to build up, it can lead to fires. At the other extreme, stove temperatures that are consistently too high can cause components to warp or crack.
The Pros and Cons of a Wood-Burning Stove
There are good reasons that we moved beyond wood heat long ago. For those of us who enjoy our modern comforts, heating the house with a wood stove would be a monumental inconvenience. For others, however, a wood stove offers the chance to heat the home in a way that emphasizes self-reliance and independence. Which camp do you fall in? Weigh the pros and cons before you commit to warming your home with wood stove heat.
Pros
- In areas where wood is dependably available at low cost, heating your home with a wood stove can save money over a gas or oil system, particularly if you’re able to harvest your own firewood.
- Unlike fossil fuels, wood is a renewable resource. For some, that’s reason enough to think seriously about making the switch from a traditional oil- or gas-fueled system.
- Particularly if you’re using a wood stove as the sole source of home heating, wood heat provides a way to decrease your reliance on the grid.
- Wood heat is deeply satisfying on a primal level. It offers a connection to the land—and to human history—that simply cannot be matched by a system that’s controlled by a thermostat on the wall.
Cons
- It’s a lot of work to fell trees, saw them into logs, and split those logs into stove-length pieces. There are techniques and best practices here that might take the neophyte several seasons to master. Be realistic about your abilities and tolerance for heavy work.
- Heating the home with a wood stove takes real commitment. For instance, if you’re not willing to bank the stove at night (in essence keeping the fire going), you need to start a new fire every morning.
- In the absence of a backup heating system, there must always be someone at home to tend the fire so the plumbing pipes don’t freeze.
RELATED: 9 Reasons to Bring Back the Wood Stove
Wood Stove Installation: Cost and Other Considerations

A wood stove can be a beautiful way to both amp up your home’s ambience and lower your heating costs. In fact, according to Rich Steiner of The Fireplace Factory on Long Island in New York, homeowners who install a wood-burning stove can save between 400 and 1,000 gallons of heating oil per year. Consumers will find a range of models to choose from, including small-, medium-, and large-duty stoves. “There are even units certified for mobile homes,” Steiner says. But before you rush out to buy, here are a few additional considerations worth noting:
- Permits: You will need to obtain a permit from your local building office.
- Stove cost: Prices vary widely, from about $400 at the extremely low end to $4,000 at the high end, depending on size, materials, style, quality, and special features.
- Installation cost: Buying the stove is just the beginning. You also need to factor in the cost of a wood stove pipe to carry smoke up through the interior of the space as well as a chimney pipe for venting through the wall or, ideally, the roof to the outside. “Piping and labor can end up being more than the price of the stove itself,” Steiner cautions.
- Clearances: Because wood stoves are extremely heavy and get very hot, placement and installation can be complicated. The stove should sit close to the center of the space to be heated and away from exterior walls. You’ll also need a heat shield—metal, brick, stone, tile, or some other noncombustible surface—behind the stove. Stove and pipes must be situated at least 3 feet away from combustible items like furnishings, curtains, and firewood, and at a safe remove from unprotected walls. There are also minimum ceiling heights; check the manual for specific measurements.
- Hearth: The floor below the stove must be covered with noncombustible material, such as brick, ceramic tile, concrete, or stone, and the floor itself may need to be reinforced to handle the weight of the stove and the platform or hearth below it.
- Homeowners insurance: Talk with your insurance company before you move forward with wood stove installation. Insurers may require professional installation or inspection, and homes that use wood stoves as the sole heating source may be ineligible for coverage.
- Bedrooms: Check local building codes before putting a wood-burning stove in a bedroom. As well, installation instructions from many manufacturers specifically state that their wood-burning stoves should not be installed in sleeping quarters.
- Federal tax credit: If you opt for a high-efficiency stove, you may qualify for a federal tax credit. As Steiner notes, “A lot of today’s stoves achieve 75 percent efficiency or better.”
- Pro or DIY installation? Given the requirements and variables, wood stove installation costs vary widely, from about $325 to more than $4,000. While a competent and experienced DIYer may be able to take on the job, wood stove installation is best left to professionals.
RELATED: 10 Home Heating Mistakes That Spike Your Bills
How to Use a Wood Stove
The first step in figuring out how to use a wood-burning stove should always be to consult the manual for the stove you own. However, here is some general advice to introduce you to the basics of wood stove ownership.
How to Select Wood
When you’re using a wood stove, it’s crucial to burn only seasoned wood—in other words, wood that has been aged and dried. (If you’re not sure about the wood, use a moisture meter.) Hardwoods like oak, ash, and maple are best. Properly seasoned softwoods may also be an option, although they burn fast and might be best suited as kindling. If you own a multifuel stove, you can burn various mineral fuels like anthracite coal in addition to wood.
RELATED: Buyer’s Guide: The Best Moisture Meters We Tested This Year
How to Start a Fire
To get a fire going in a wood stove, open up the damper, put crumpled newspaper at the bottom of the stove, add kindling, and place logs on top. Light the paper and give the kindling a chance to catch. Keep the door open, watching carefully for wayward sparks, until the logs are burning brightly. Once you have a good fire going, close the door and keep it closed unless you’re adding logs to the fire. Many stove owners, especially those with newer models, recommend building the fire in reverse, starting with logs and then placing kindling and newspaper above. Whichever process you use, never overload the firebox; to maintain a hot fire, air needs to be able to circulate.
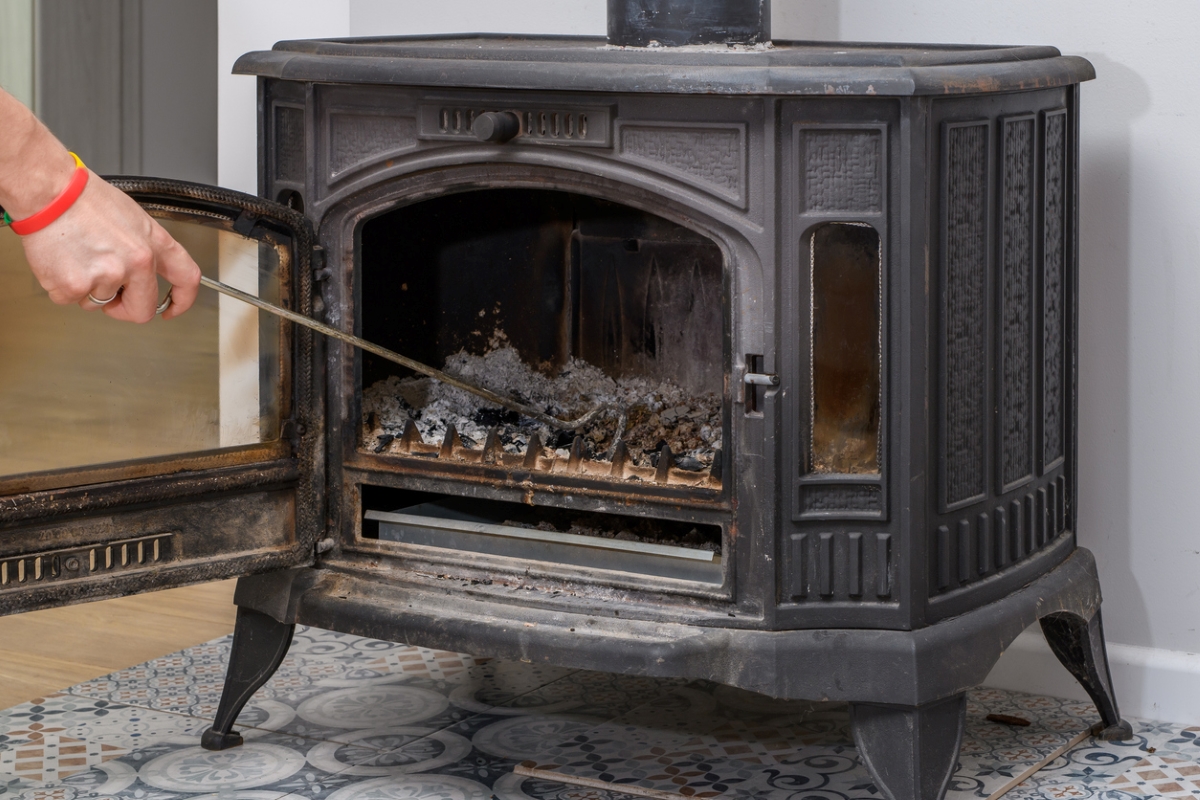
How to Handle Ashes
You should maintain a bed of ashes at the base of the firebox, typically around ¾ of an inch (check the manufacturer’s instructions). Periodically shovel out excess ash, leaving the larger bits of unburnt wood. (Of course, put this task off until the ashes have cooled down.) If your wood stove is equipped with an ash pan, you just need to push the ash through the grate into the pan below. Always dispose of ashes in a metal container with a tightly fitting lid, and take it outside the house, safely away from any combustible material. After ashes have cooled for several days, they can be added to the trash or saved to use around the house.
RELATED: 20 Surprising Ways You Can Use Ashes from Your Fire Pit or Fireplace
3 Ways to Circulate Heat From a Wood Stove
A wood stove-based heating system presents many challenges. One that continually frustrates even veteran wood-stove custodians is the art and science of dispersing the heat that the stove produces. Try one of these strategies for helping the heat from your stove reach the far corners of your space.
1. Use a wood stove fan.
A wood stove fan sits on top of the stove and kicks into action when the stove reaches a minimum temperature. The heat of the stove drives a motor that causes the fan blades to turn, pushing that warmth outward into the room.
2. Try a plug-in blower.
A plug-in blower is an electric-powered fan that installs on the wood stove (different models fit different stoves) and pushes heat away from it.
3. Set up a few fans.
To get the warm air really flowing, many wood stove owners position stand-alone fans strategically throughout the house. Fans that are mounted high, such as ceiling fans and small doorway fans, can be effective at pushing heated air to cooler areas farther from the wood stove, while a box fan placed on the floor in a colder area can push cool air toward the stove.
Wood Stove vs. Fireplace: Which is right for you?

When most of us hear the word “fireplace,” we picture an open hearth in the living room or a stone chimney billowing smoke into the evening. We cherish the charming vision of cozying up to a blazing fire, yet the aesthetic value of a fireplace vastly outweighs its heat production. In fact, fireplaces are notoriously inefficient. Just like an open window, the typical fireplace rapidly leaks heated air (air you’ve paid to heat) out of the house.
If you’re considering the relative merits of a wood stove vs. a fireplace, note that a wood stove has some distinct advantages. Like a romantic hearth, a wood stove offers something beautiful to gaze at, but unlike the typical fireplace, it’s a source of heat that doesn’t seriously compromise your home’s energy efficiency. If you’ve always wished that your home had a fireplace, or if you’re looking for an improvement over your existing fireplace, it might be time to look into the beauty and functionality of a wood stove. To get you started on the search, consider an EPA-certified wood stove from Ashley Hearth. The brand was among our top picks in our researched guide to the best wood stoves.
Keep in mind that while a wood stove can be a viable sole heating solution for homes in some parts of the country, it more commonly serves as a companion to an existing gas- or oil-fueled system. What you ultimately decide depends largely on what you want to get out of the wood stove, and what you’re willing to put into it.
The post So, You Want to… Heat Your House With a Wood Stove appeared first on Bob Vila.
]]>The post How to Clean a Chimney appeared first on Bob Vila.
]]>A clean flue is critical for avoiding a catastrophic chimney fire. While the task might seem intimidating—what if you mess up somehow?—cleaning a chimney is surprisingly easy. Ahead, learn how to clean a chimney, including a list of tools you need to get the job done.
Why is it important to clean your chimney?
Cleaning a chimney is incredibly important, because a chimney’s function is to allow dangerous chemicals and gasses to escape from the home. During the combustion process, a fireplace or wood stove produces smoke. The smoke is full of gasses and a chemical compound called creosote. Creosote is a sticky, tar-like substance, and it likes to grab onto every surface it can as it travels up the chimney.
Some creosote buildup is normal on wood stove doors and even the sides of the chimney, and can be removed with a creosote cleaner. Routine cleaning will help minimize the danger creosote poses in the chimney, though. Considerable creosote buildup in a chimney is almost like rocket fuel, waiting for ignition. Creosote is incredibly flammable and will burn at temperatures in excess of 2,000 degrees Fahrenheit. Those temperatures can crack chimney flues and cause the fire to spread to the rest of the home.
In fact, some estimates hold that dangerous accumulations of creosote contribute to about 25 percent of all house fires. Folks who have experienced chimney fires often describe the noise coming from the chimney as sounding like a freight train going by. It’s terrifying stuff.
Cleaning your chimney also gives you an opportunity to ensure there are no other obstructions. Birds, bees, squirrels, branches, and leaves can all clog a chimney and prevent the necessary updraft to remove the smoke and chemicals caused in the combustion process. (Unless you have the appetite for smoked squirrel, it’s best to chase them from the chimney before the first fire of the season, anyway.)
Finally, a clean chimney is an efficient chimney. With the proper amount of airflow coursing through the fireplace or wood stove, the wood can burn hotter (albeit faster), and produce more thermal energy. If a chimney is choked by obstructions, it won’t pull enough fresh air into the firebox, preventing optimal combustion.
How often should you clean your chimney?
Chimney cleaning should be part of your regular house maintenance program. The best rule of thumb? Clean it right before the heating season starts, so once a year. This ensures that there are no obstructions in the chimney flue when the burning season starts, and the chances of wildlife setting up shop for the rest of the season are pretty minimal.
It’s also a good idea to inspect a chimney once during the burning season, if conditions allow. This is particularly important if the wood you’re burning isn’t particularly well-seasoned (as is often the case with late-season wood deliveries). Just be sure to give the chimney plenty of time to cool down (at least a day) before inspecting, and ensure that there aren’t any embers in the wood stove that can reignite with the introduction of oxygen.
If you’re not confident with the condition of your chimney during the season, it may be best to hire a chimney specialist to perform an inspection.
How to Reduce Creosote Buildup
You can reduce the amount of creosote that builds up in your chimney by just changing a few of your wood-burning habits.
- Use dry, well-seasoned hardwood. Moisture in wood prevents efficient combustion and produces steam, which means lower combustion temperatures. This will prevent creosote particles from escaping out of the chimney, leading them to collect on the sides of the flue instead.
- Understand that burning wood slowly by choking the airflow into the wood stove or wood burning insert can lead to creosote buildup. Again, colder combustion temperatures produce slower-moving smoke, which can lead to creosote buildup.
Here’s a tip for folks who like to set their wood stoves up to burn all night: When you wake up, burn a hot fire right away. This is a trick that old-school wood burners used to prevent creosote buildup from the night before. Feed the stove and allow plenty of airflow (500 to 600 degrees Fahrenheit measured by a flue pipe thermometer) for 20 to 30 minutes, and then maintain a flue temperature of around 300 to 400 degrees for the rest of the day.
Tools & Materials
Bobvila.com may earn a commission from purchases made through these links.
Project Overview
Working Time: 2 hours
Total Time: 3 hours
Skill Level: Beginner
Estimated Cost: $50 to $100
Before You Begin

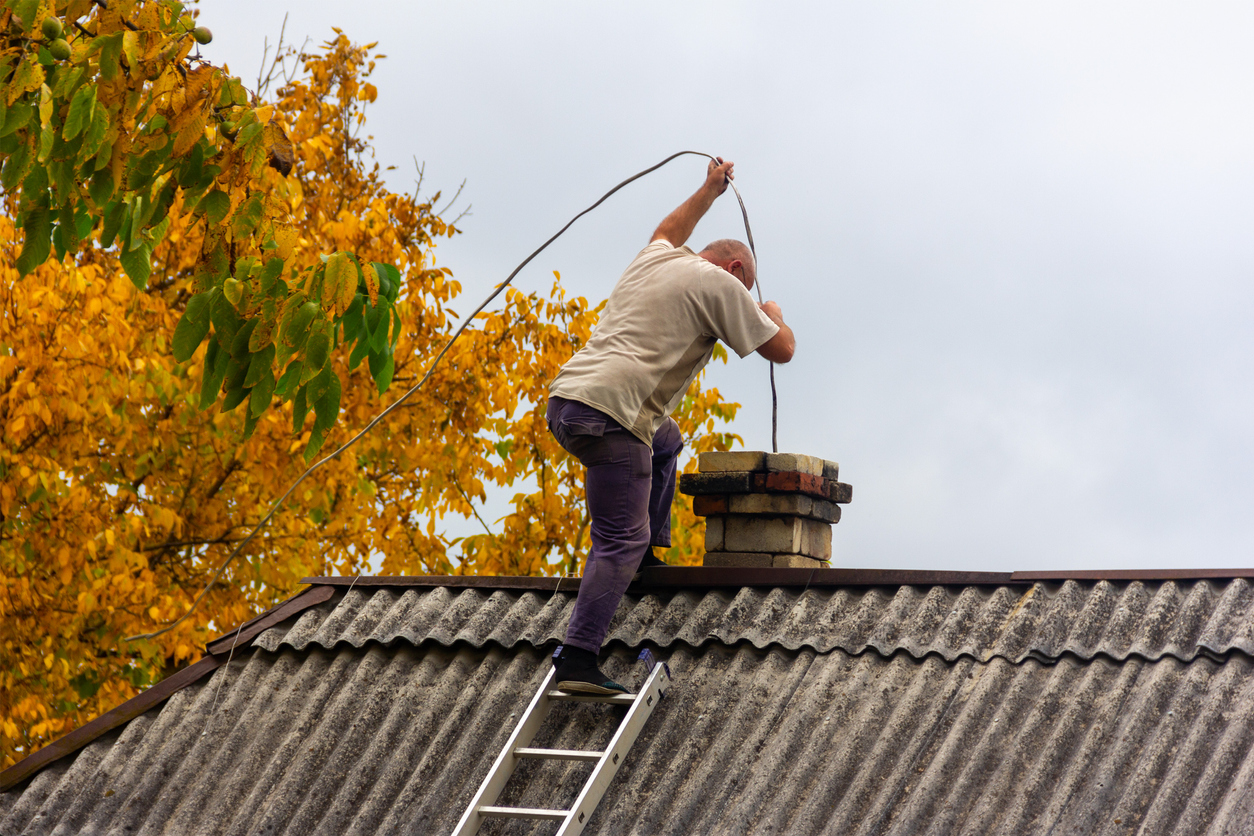
The best way to clean a chimney is to approach it from the roof, but climbing onto a roof poses its own challenges. Make sure that the ladder is secure and that you have good footing before stepping onto the roof. Once on the roof, beware the shingles can be slippery when wet, or when they’re starting to delaminate. Always take extreme care when scaling ladders and roofs, and have a spotter on the ground ready to help you should you need it.
How to Clean a Chimney
While creosote might be scary, the process of learning how to clean your chimney isn’t all that hard. Just follow these steps to ensure your chimney is clean and burning efficiently this year.
Step 1: Clean and seal your fireplace or wood stove.
Cleaning a chimney is much easier when starting with a clean wood stove or fireplace. Remove any ash and coals (make sure there are no live coals before removing!), as well as any log stands or other hardware that might be in the way. Brush debris out of the corners and use the shop vac to remove any stray dust.
Also, there’s no way to avoid dust when cleaning a chimney, but you can contain it. Use thick plastic sheeting and seal the fireplace. Tape it to the brick or fireplace surround to ensure that it’s fairly airtight, and that floating ash won’t be able to escape into the home. Throw drop cloths down on the mantle as well.
To help minimize the mess even further, cut a small hole in the plastic, insert the nozzle of the shop vac, and tape the nozzle to the plastic to seal the hole. This is an excellent opportunity to use a remote-controlled shop vac like this model from DeWalt (you can thank us later).
For wood stoves, simply keep the door shut for the first part of this process.
RELATED: How to Clean a Fireplace
Step 2: Climb onto the roof.
Once the fireplace is sealed from the rest of the house, grab a multi-screwdriver, a pair of pliers, and a flashlight and place them in your pocket or tool belt. If you have a remote control for the shop vac, place it on your wrist and ensure it works. Don your work gloves, safety glasses, and dust mask, as well. It’s time to climb the roof, and you’ll need these tools once you get up there.
Set up the ladder so that there are at least three rungs above the edge of the roof. These rungs provide a handhold as well as some counterweight above the roof to keep the ladder in place. Have a helper hand you the chimney brushes and rods.
As always, be careful when getting on and off the roof and ladder. If you’re not comfortable with ladders, roofs, or heights in general, it’s best to call a professional. Many of the most dangerous DIY projects are so dangerous because of heights, and it’s best not to take the risk.
Pro tip: For steep roofs, work on the peak side of the chimney. This will give you something to steady yourself and prevent falling.
Step 3: Remove the chimney cap.
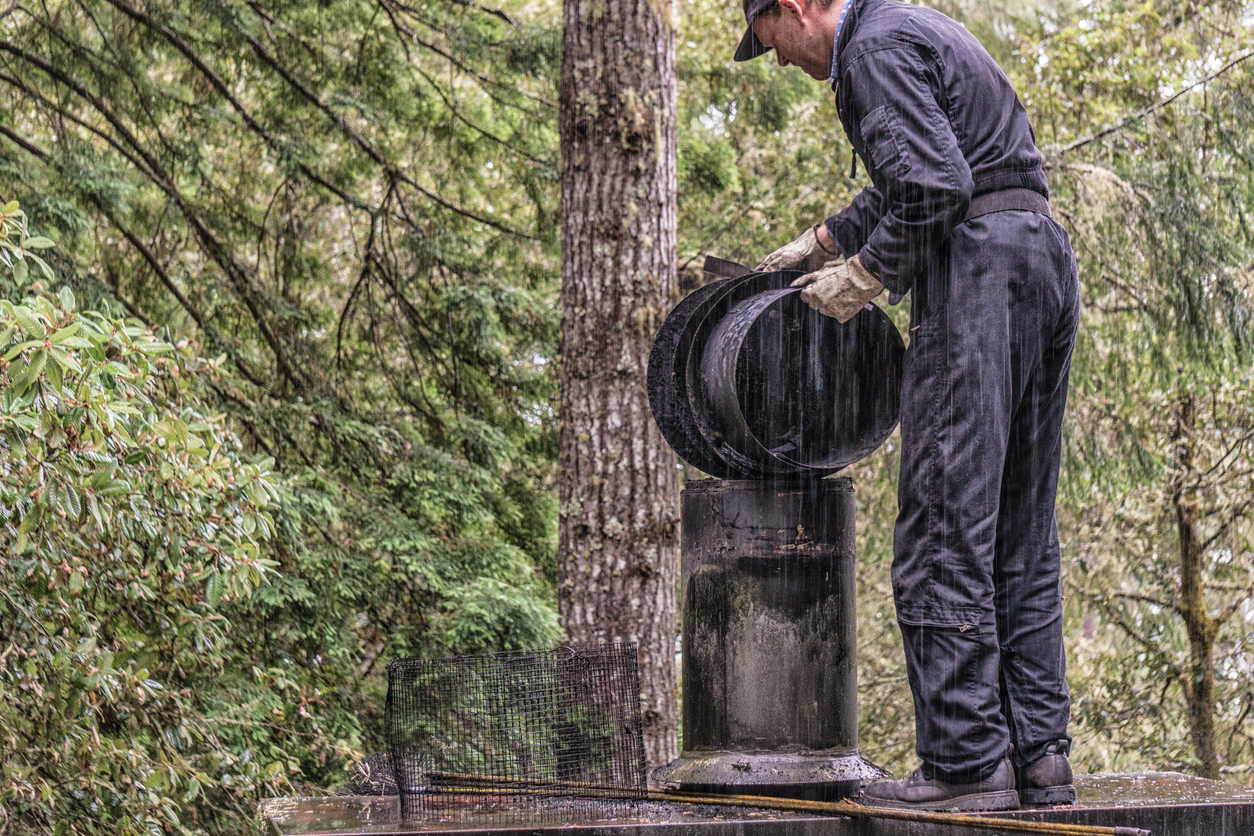
Most chimneys have a cap on top that attaches to the flue. They’re held one with screws or bolts, and they’re relatively easy to remove. A word of caution, however: Be sure to peek into the chimney cap first to ensure there aren’t any surprises inside (namely, bees or wasps).
Once removed, place the chimney cap safely aside to prevent stepping on it and slipping.
Step 4: Inspect the chimney.
Grab your flashlight and take a look down the chimney flue. If it’s a little dusty, turn on the remote-controlled shop vac to pull the dust downward and away from your face.
While looking down the chimney, look for signs of creosote buildup. Small bumps and deposits are totally normal (they may even be shiny), but any running creosote that looks like a liquid is a bad sign, and you may need to call a professional for chimney cleaning if this DIY cleaning doesn’t work.
Now is also the time to look for any obstructions or damage that might exist. If you see visible cracking in the flue, wildlife nests or carcasses, or large items in the chimney, you’ll probably need a professional to repair or remove these items and check the flue for safety.
RELATED: How Much Does a Chimney Inspection Cost?
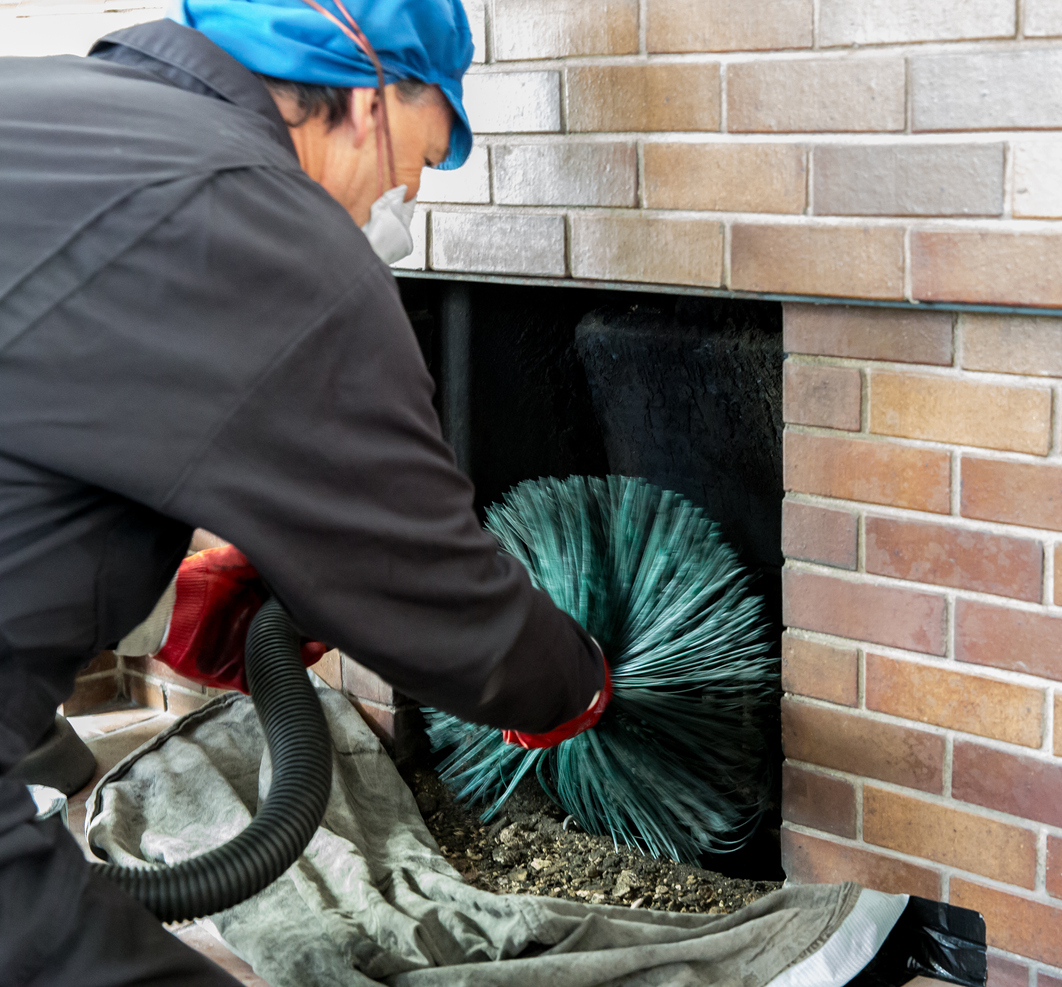
STEP 5: Brush the chimney.
Once you’re confident this is still a DIY job, it’s time to start brushing. Start by fitting the largest chimney brush that will fit down the flue on the end of a chimney brush rod (they usually screw on, but there are other types as well). Carefully push the chimney brush into the flue and brush up and down several times. Make sure the shop vac is running as this will create a lot of dust.
Once you’ve brushed back and forth, add another rod to the end of the rod attached to the brush and continue brushing lower. The rod will likely flex more, and the friction will make the motion difficult, but continue until you’ve brushed up and down multiple times.
Continue adding rods until you’ve reached the damper. If you’ve reached a smaller section of stovepipe, remove the brush, fit it with a smaller chimney brush, and continue the process until the smaller pipe is clean.
Note: At first, each pass will be difficult because the creosote is preventing easy passage. However, after the flue is clean, it will be much easier to push the brush through, at which point it may be time to add another rod.
Step 6: Inspect your work.
Once you’ve brushed all of the chimney flue that you can reach, slowly remove the brush from the chimney (slow speed prevents the bristles from flicking debris at you while removing it). Allow the dust to settle for a few minutes while the shop vac is still running.
Once you’re able to see into the flue, inspect it with the flashlight to ensure that all of the build-up has been removed and that the chimney flue is clean. Once clean, carefully remove the rods and brush and hand them down to your helper.
RELATED: Solved! Why Your Fireplace Might Be Smoking Up The House
Step 7: Replace the chimney cap and carefully climb down.
Inspect the chimney cap to ensure that it’s in good shape and that you didn’t damage it during the cleaning process. Place it back on top of the chimney and secure it in place with the screwdriver or pliers and the original hardware. Lift up to ensure that it’s secure.
Once you’re satisfied that the cap is secure, carefully walk down the roof toward the ladder and climb down.
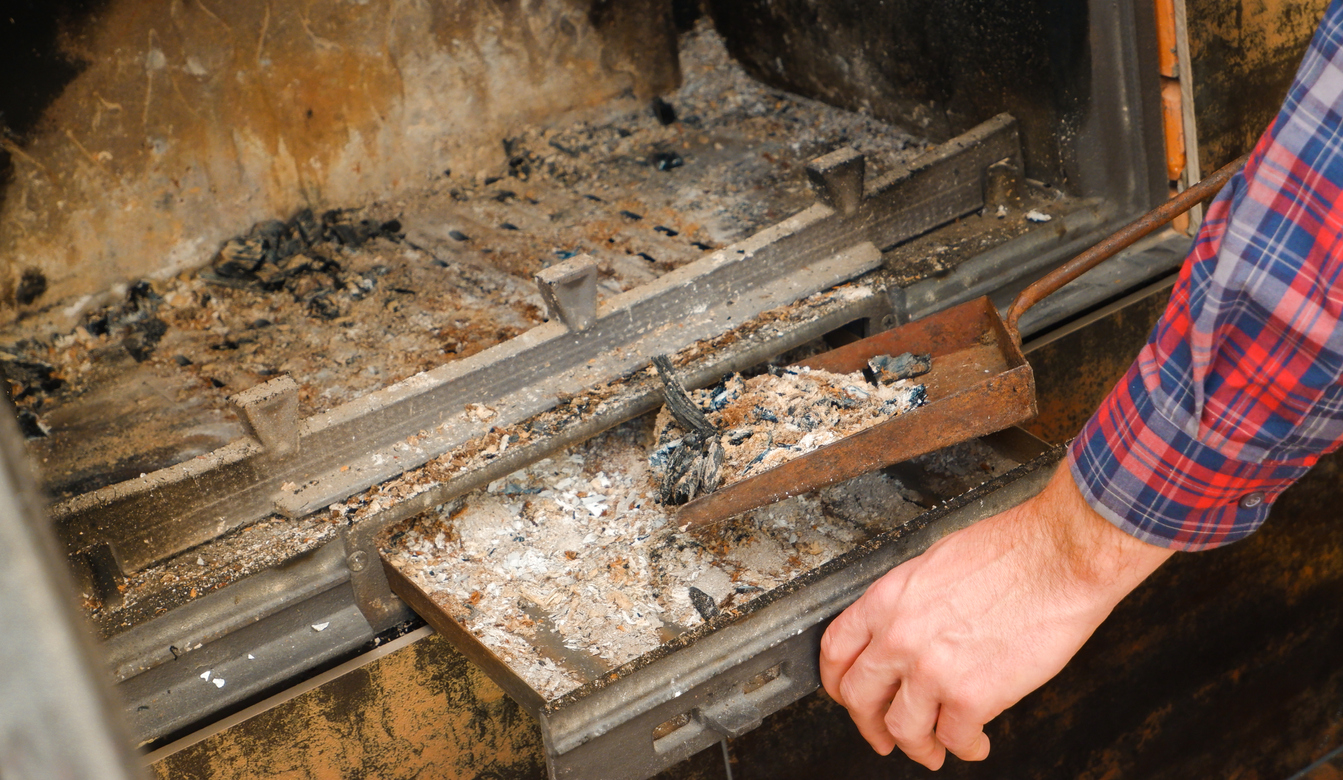
Step 8: Clean the damper and firebox.
The process of cleaning the flue will drop piles of flaky, chunky creosote and other particles onto the damper and into the firebox. Ensure that the dust has settled by giving the fireplace or wood stove 30 to 60 minutes to settle. After that point, remove the shop vac’s hose from the plastic and carefully remove the plastic from around the firebox.
Use the flashlight to peer inside the chimney and locate the piles of creosote. Use the shop vac to suck up any loose piles. Use a handled brush to reach up around the damper and knock down any debris. If the damper is dirty, use a wire brush to clean it (you don’t need to remove it).
The process is different for wood stoves. Disconnect the wood stove from the chimney by removing the sections of black stove pipe (you may need to slide the wood stove slightly to do this, so enlist your helper again). With the pipe removed, you should be able to see into the top of the wood stove and locate the piles of creosote. Vacuum these out and replace the stove and stove pipe.
Step 9: Clean up and dispose of the creosote.
Carefully clean up the plastic, drop cloths, and other items. Avoid shaking them if possible, as they’re covered in ash and creosote and will kick up a bit of dust. Vacuum up any dust films and then carefully empty the shop vac into a trash bag.
There are quite a few laws that determine how to dispose of creosote. Generally speaking, the creosote from a fireplace chimney can be bagged and thrown in normal trash, but it’s important to check with the local town hall or waste facility to ensure that this is okay.
When should you call a chimney sweeping professional?
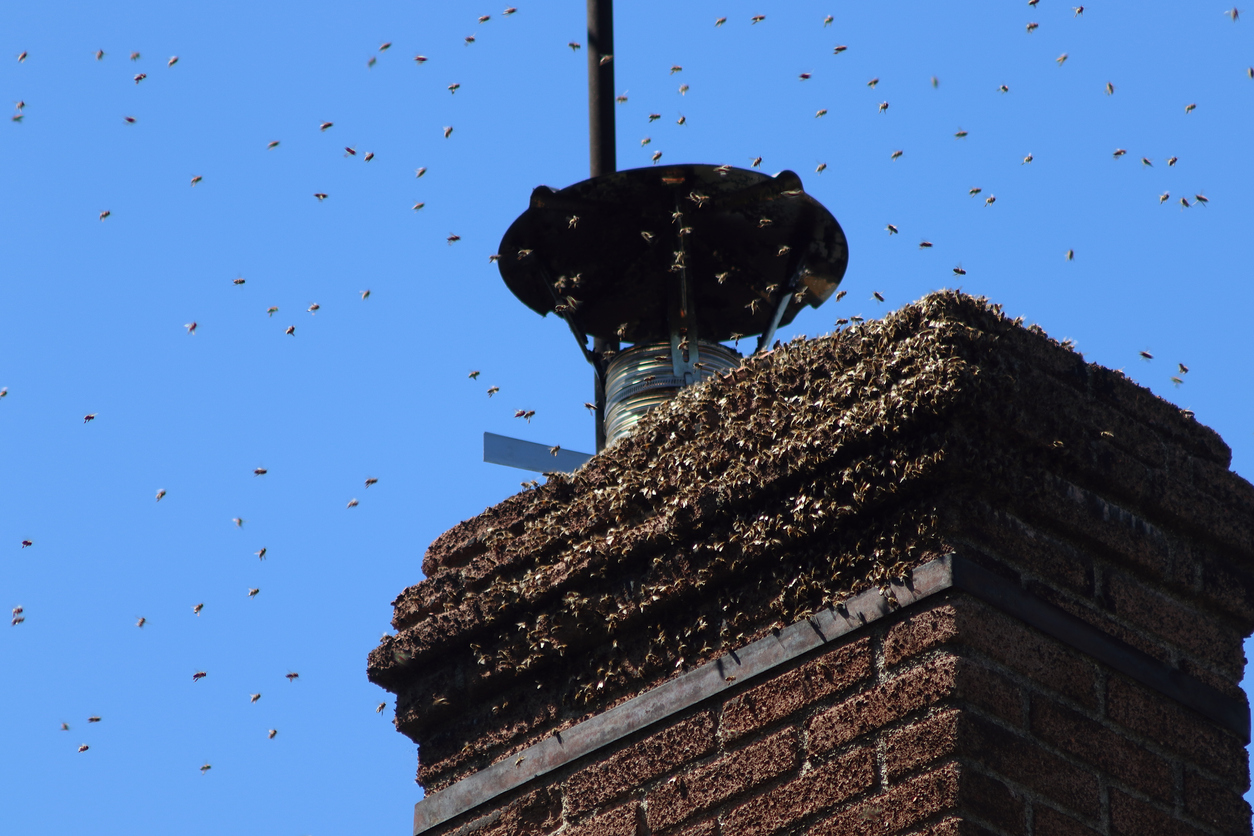
The act of chimney cleaning isn’t hard, but there are some instances when it’s better to call a chimney sweeping professional. For example, if there is a blockage in the chimney caused by wildlife or bees and wasps, calling a local pro makes more sense than getting bitten or stung.
Also, if you’re not comfortable on a ladder, you might consider letting someone else clean your chimney. While you can do it from inside the home, it’s much messier, so call a professional.
Finally, if your chimney is older, hasn’t been used in a few years, or is showing signs of visible wear, do not clean and use your chimney—the risk is not worth the cost of hiring a professional. Call a professional who can come in and verify that your chimney is safe. If not, they may suggest installing a new liner to protect the home from fires. That’s not something the average DIYer can confidently handle.
The post How to Clean a Chimney appeared first on Bob Vila.
]]>The post Too Hot Upstairs, Too Cold Downstairs? Here’s What to Do appeared first on Bob Vila.
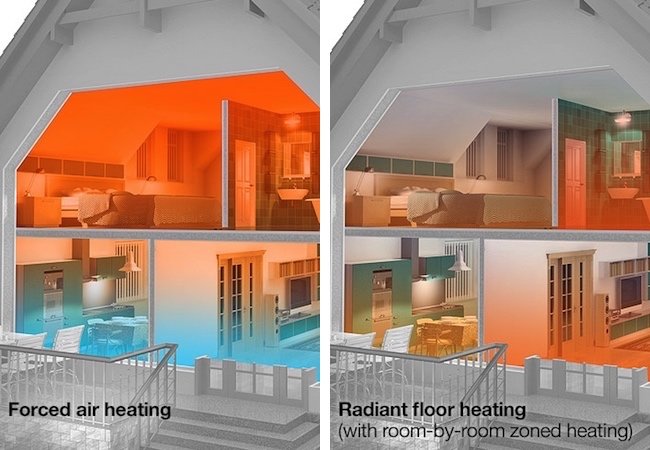
]]>Sometimes it’s an issue of insulation. Other times the blame goes to improper window installation. But in the case of many multi-story homes, winter discomfort often stems directly from the hit-or-miss operation of an increasingly outmoded HVAC technology. Forced air—the dominant heating technology since the postwar period—certainly comes with some redeeming qualities. But in single-zone applications, its normal operation inevitably leads to an unwanted result.
During system operation, while the ground floor of the home remains stubbornly chilly, the upper-level rooms become unpleasantly warm. Additionally, for homes with vaulted ceilings, much of that heat is wasted. Making matters worse, in the course of its ultimately futile attempt to normalize temperatures, forced air devours energy and drives up the utility bill. The good news? Thanks to staggering advances in technology, forced air isn’t the only option anymore.
Forced-Air HVAC
To understand why forced air often fails to create uniform conditions, you first need to know how the system works. It all starts with the thermostat. As soon as the thermostat registers that the temperature has fallen below a certain threshold point, the system kicks on, blowing furnace-heated air through supply ducts and into the living spaces. Once the target temperature has been reached, the heat turns off.
FORCED-AIR PERFORMANCE
Here’s the trouble: Not only does comfort depend largely on proximity to the nearest air vent, but there’s also the pesky fact that heated air rises—at least until it hits a barrier, such as attic insulation. As the heat heads upward, temperatures in the home stratify. Soon, the thermostat senses a lower temperature downstairs, which triggers the forced-air system to snap back on. In this way, the cycle repeats over and over, never resolving the fundamental problem of uneven heating.
Plus, further exacerbating homeowner discomfort, the forced-air system’s constant on-off cycling leads to dramatic temperature swings. Taken together, the shortcomings of the technology ensure that when there is comfort, it comes only to certain areas and only temporarily.
FORCED-AIR ENERGY COSTS
You’d think that climate control so frustratingly inconsistent would at least be economical. But perhaps no other HVAC system has done more to reinforce the perception that heating the home and saving energy dollars are mutually exclusive propositions. Why does it cost a small fortune to run a forced-air system from one winter month to the next? To a large extent, forced-air heating tends to consume more energy than strictly necessary because heat loss undermines its efficiency.
Of course, heat loss isn’t uncommon. In fact, it’s present in all homes, no matter their heating setup. The distinction is that in homes with forced air, heat loss occurs within the HVAC system itself—in the ductwork, most of all. Though vital to the operation of any conventional forced-air system, ducts have earned a reputation for being leaky. Even if the air leakage occurs only at the joints where two sections of ducting connect, it can be enough to compromise overall efficiency by 25 percent or more. To make up for the heat loss, the furnace must work harder and consume more energy. Essentially, homeowners must pay extra to correct a fundamental flaw of the system.
The Radiant Heating Alternative
Like so many other technologies, HVAC has improved by leaps and bounds in recent years. Today, homeowners enjoy an array of options designed to deliver where conventional forced air falls short. At the top of the “most intriguing” list? Radiant heating. There’s a popular misconception that “heated floors” are nothing more than a frivolous luxury for high-end bathrooms. But while it’s true that some radiant heating products are designed to be merely supplemental, others offer a viable means of heating the whole house.
RADIANT HEATING PERFORMANCE
With its unconventional, innovative approach, radiant technology actually manages to solve the uneven-heating issue that has frustrated homeowners for decades. How exactly? Because radiant-heat panels are installed beneath the floor, they deliver warmth silently and evenly across virtually every square inch of space, ensuring encompassing, “everywhere” comfort, no matter where you travel in your home. There are no uncomfortable temperature swings, and the in-floor technology concentrates heat not in the air above you—not near the ceiling or in the upstairs rooms—but at the level where you need it the most and can most readily feel it.
RADIANT HEATING ENERGY COSTS
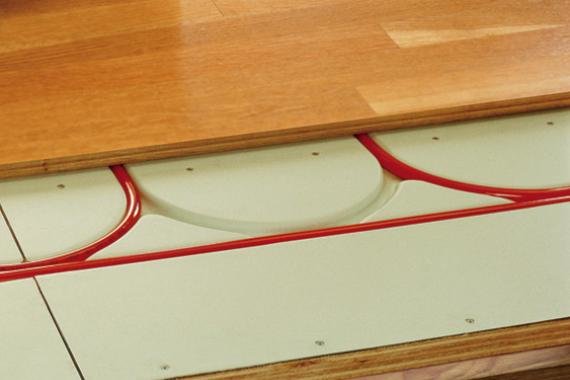
Whereas circulating air delivers the heat in a forced-air system, it’s water that does the job in a hydronic radiant setup. From the boiler, the water gets pumped through a network of tubes set into special panels under the floor. The water transfers heat to the panels, which then radiate heat to the floor and on to the people and furniture in the space.
Along the way, in contrast to forced air, a radiant system undergoes minimal heat loss. For that reason, even as it creates much more comfortable conditions, radiant heat consumes much less energy. In fact, it’s at least 25 percent more efficient! That said, materials matter when it comes to the efficiency of a given radiant system. Take the Warmboard system, for instance. Its panels are made not with the more standard gypsum concrete, but with aluminum—a material that conducts heat 232 times better. That enables the Warmboard system to operate using substantially less energy than others. So, while you can save with any radiant-heating system, certain systems can save you even more, thanks to their ingenious design.
Although it’s already widespread in Europe and Asia, radiant heating hasn’t yet taken off in the United States. But that’s been changing, as homeowners learn about the technology’s many advantages. In addition to sidestepping the all-too-common issue of stratification—too little heat downstairs, too much upstairs—radiant heating also offers a range of other performance benefits. For example, while traditional heating systems very often make a racket, radiant heating runs all but silently. In addition, radiant heat helps maintain healthy indoor air quality, because the technology operates without dust- and germ-spreading ductwork. Of course, installing or upgrading an HVAC system usually entails a number of important considerations, many quite sophisticated and complex. But in the end, the appeal of radiant heating couldn’t be simpler. The technology delivers a qualitatively different climate-control experience—even, all-encompassing, “everywhere” warmth—while consuming less energy and eating up fewer energy dollars.
This article has been brought to you by Warmboard. Its facts and opinions are those of BobVila.com.
The post Too Hot Upstairs, Too Cold Downstairs? Here’s What to Do appeared first on Bob Vila.
]]>The post So, You Want to… Insulate the Attic appeared first on Bob Vila.
]]>Types of Insulation
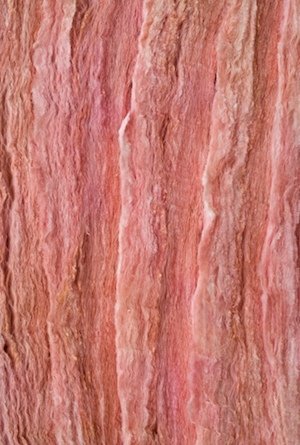
There are many different types of insulation, all of which are readily available at your local home center. For the tightest nooks and crannies of the attic, many people choose loose-fill insulation. Most common, though, is blanket-style insulation, made of either fiberglass or rock wool. The material comes in rolls or square batts, and for the convenience of contractors and do-it-yourselfers alike, it’s presized to fit between most studs, rafters, and joists. To seal up air leaks around chimneys, plumbing stacks, or any similar components that penetrate the building envelope, hire a pro to apply closed- or open-cell spray foam insulation.
R-Values
How much is enough insulation? In part, that depends on what type of insulation you’ve chosen to install. Each type rates differently on the R-value scale—a measure of how well a product blocks the passage of heat and cold. Most current building codes call for R-50 insulation in the attics of new homes, while specifying R-38 for insulation retrofit into existing dwellings. But the age of the home isn’t the only variable; one must also consider its geographical location. Energy Star provides an easy-to-read chart that specifies the recommended R-values for different parts of the country.
Ventilation
It may seem counterintuitive, but while attic insulation is critical, ventilation of the attic is equally important. Without ventilation, moisture can accumulate and condense, eventually rotting the insulation and compromising structural integrity. As well, ventilation goes a long way toward neutralizing the seasonal threat posed by ice dams, which are capable of causing extensive, expensive damage.
Some experts discount the value of attic vents, particularly in warmer climates. Most, however, agree that vents in the attic not only keep the house more comfortable, but also prevent potential problems. The typical attic includes ventilation in three locations: on gable ends, along the roof ridge, and in soffits. If you’re planning to install attic insulation, it only makes sense to think about ventilation too.
Before You Start
Before you begin the installation process, no matter what type of insulation you’ve chosen, take the time to do some prep work. In attics without lighting, prep includes plugging in a temporary clip-on work lamp; a flashlight won’t cut it here. Once you can see what you’re doing, look around for discoloration or any other evidence of a roof leak. Make all necessary repairs before continuing. Where there’s no flooring, lay down 3/4-inch plywood panels, so you have a safe, comfortable platform to work from. Finally, remember that most insulation products release hazardous particles. If you choose to insulate the attic yourself, it’s imperative that you wear full protective gear and a dust respirator.
Notes on Installation
Insulation expands once unpackaged, so leave it wrapped until you are ready to use it. Also, bear in mind that if you compress insulation in order to make it fit, the product loses much of its R-value. A better strategy is to measure the span into which you’re placing the insulation, before cutting the product to size. To cut blanket-style insulation, place the product over a piece of plywood, with its paper (or foil) side down. Lay a two-by-four on top, temporarily compressing the insulation to a manageable thickness. Finally, run a standard utility knife along the edge of the lumber, through the insulation, and down to the plywood.
Insulating the attic is a surefire way to warm your home this winter. But other home maintenance tasks can also defend your house (and all of its inhabitants) from chilly weather and blustering winds. Learn more by watching this video:
The post So, You Want to… Insulate the Attic appeared first on Bob Vila.
]]>The post The Little-Known Benefits of Pipe Insulation appeared first on Bob Vila.
]]>Minimizing Heat Gain and Loss
Among the unsung benefits of pipe insulation, its ability to minimize heat gain and loss may be the most important. As water travels along the plumbing lines in a home without pipe insulation, hot water tends to lose heat and cold water tends to gain heat. Introduce pipe insulation, and you greatly diminish these otherwise inevitable inefficiencies. So in the case of a hot-water pipe, it may not sound like a big deal for the plumbing run not to lose heat, but the benefits are very real: You get lower monthly energy bills, and you don’t need to wait as long for the hot water to reach the fixtures in your kitchen or bathrooms.
Controlling Condensation
When the surfaces of plumbing pipes are cooler than the surrounding air, insulation helps control the condensation that, if left unchecked, would slowly corrode the pipes and their fittings, eventually leading to a massive failure. Though condensation may seem like a remote concern, it’s not at all uncommon, particularly when cold-water lines come into contact with warm, humid air. Special vapor barrier-wrapped pipe insulation prevents warm air from reaching the pipes.
One other fringe benefit of pipe insulation: It not only protects pipes, it protects people too—from injuries that can be caused by contact with very hot or very cold piping.
Selecting Your Insulation
There are several types of pipe insulation, each made of a different material and capable of insulating to a different degree. Some are more suitable for hot-water applications, while others incorporate the vapor barrier necessary for controlling condensation along a cold-water line. The main options include:
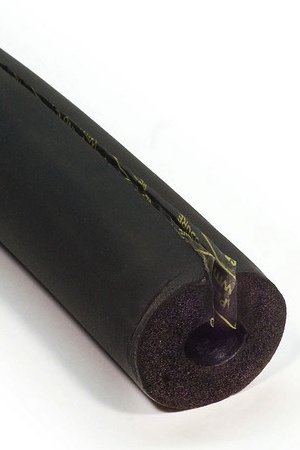
- Conventional foam insulation: This features a slit on its side that makes it easy to fit over existing pipes. Once it’s in place, it’s a good idea to tape the slits shut so as to enhance the product’s insulating capability.
- Self-sealing foam insulation: Unlike conventional foam insulation for pipes, the self-sealing variety features an adhesive along its slit. Remove the tape, press the adhesive strips together, and you’re done.
- Spray foam insulation: Typically installed by professionals equipped with pressurized containers, spray foam pipe insulation excels where there’s little space between the water pipes and exterior walls.
- Fiberglass pipe covers: This type of hinged, paper-coated rigid fiberglass insulation is most often used where pipe temperatures are unusually high, because fiberglass tends to resist heat quite well.
Dealing with Asbestos
Even today, some older homes still have pipe insulation that contains asbestos. Particularly if it’s disturbed and its fine fibers become airborne, asbestos-laden pipe insulation can present a serious health hazard. Asbestos insulation is not always easy to identify, says Dan O’Brian, a technical specialist with SupplyHouse.com, an online retailer of plumbing, heating, and HVAC products. “Asbestos pipe insulation has a distinct corrugated look,” he says. “And if you are suspicious you might have asbestos in your pipes or anywhere else in your home, make sure you consult a professional for removal.”
Cost vs. Benefit
Is pipe insulation ever a bad idea? “The only case I can think of where pipe insulation would be a bad idea,” O’Brian says, “would be on radiant heating or cooling loops, where insulation would actively work against the design of the system.” So in all but a couple of circumstances, installing pipe insulation offers energy savings and peace of mind—but does the benefit outweigh the cost? That might depend on whether or not you hire a contractor. Doing the job yourself—it’s usually not hard to tackle—tips the balance sheet in your favor, while depending on where you live, it may or may not be worth it to hire help.
Know the Law!
In many freeze-prone regions of the country, pipe insulation is not only a good idea, it’s mandated by the municipal building codes. If you have an older house and are planning to upgrade your plumbing, be sure to check the local specifications to find out what’s required—and what’s not.
This post has been brought to you by Supply House. Its facts and opinions are those of BobVila.com.
The post The Little-Known Benefits of Pipe Insulation appeared first on Bob Vila.
]]>The post How Much Snow Can a Roof Hold? appeared first on Bob Vila.
]]>How much snow a roof can hold depends on the type of snow, roofline, and material, among other considerations.
These questions aren’t quite so easy to answer, because there are several variables at play. At the top of the list are the following:
- The weight of the snow. Wet snow can be nearly three times heavier than dry, fluffy snow. So, while a cubic foot of fresh powder might weigh in at 7 pounds, that same amount of wet, packed snow could be more like 20 pounds.
- Your roof’s structural design. Generally speaking, steep and smooth roofs shed snow more easily than flat or only slightly pitched roofs.
- The roof material. Choose a strong, durable set of shingles like asphalt or slate. While both do well to support the weight of snow, asphalt shingles are a more affordable option and easier to replace if necessary.
Ultimately, what amounts to a dangerous accumulation of snow on one roof would be just fine on another roof down the block. If you’ve had a new roof installed during your time of ownership, consult the supplier and/or roofing contractors who did the work to get a professional opinion. If not, you may wish to schedule a roof inspection to ascertain more detail on the condition of your roof.
Look for the warning signs of a weak roof.
While you can draw some conclusions by looking at your roof from the curb, it’s indoors where you’ll find the most instructive clues to a potential problem. Head up to the attic and examine the rafters for any noticeable bends or cracks. If you find anything that gives you pause, bear in mind that it’s not necessarily (and most likely isn’t) a sign of impending roof collapse. There are many possible explanations for damaged rafters—for example, termites. And even if snow is to blame, you may be looking at damage from a previous winter. In any case, ask a licensed structural engineer to evaluate the problem promptly.
RELATED: 7 Signs You Need a New Roof
Elsewhere—particularly on the upper floors, toward the middle of the house—keep an eye out for new cracks in the drywall or plaster surrounding interior door frames. If those doors are suddenly sticking when they used to open and shut with ease, this could be an indication that the frame of your house has shifted due to a structural issue. Again, wall cracks and sticking doors are not causes for panic; rather, they are reasons to seek out the advice of a licensed professional.

Removing snow periodically is optional and should only be attempted with extreme caution.
Some experts maintain that it’s unnecessary to remove snow from the roof, because any home built to the standards of the local building codes should be structurally equipped to handle virtually any snow load. Still, many homeowners wish to take every available precautionary step and shovel snow off of the roofline before it piles up. Not only will this prevent a large load on your roof, but it will also minimize risk of ice dams. These blocks of ice occur when the warm air inside an attic transfers through the roof and melts the layer of snow, which runs to the edge of the roof and refreezes in the gutters and at the eaves.
If you wish to follow suit, be aware that climbing up on the roof is precarious in any weather. In snow, it’s almost definitely not a wise course of action unless you absolutely know what you’re doing. For everyone else, the safest path is to hire an insured pro, someone who has not only the proper equipment but also the right experience for the job.
You can access the roof of a single-story house while keeping your feet firmly planted on the ground by using a roof rake. These effective, user-friendly tools for clearing excess snow are readily available online (see this best-selling option from Garant on Amazon that expands to about 15 feet long) and in most brick-and-mortar home improvement stores, and you might also follow the lead of some clever DIYers and make your own version.
Before you start raking away, take heed of these important points:
- Don’t try to remove all the snow. In doing so, you could damage the roofing material, which would leave the roof vulnerable to leaks. To prevent this from happening, some roof rakes are fitted with rollers that keep the edge of the rake safely away from the shingles.
- Pay attention to where the snow pulled off the roof is likely to wind up. You’ll want to pick a landing spot other than your head or the heads of bystanders!
The post How Much Snow Can a Roof Hold? appeared first on Bob Vila.
]]>The post The Best Way to Heat a Home with High Ceilings appeared first on Bob Vila.
]]>When you still have to bundle up before walking across your home’s icy floors or need to curl up with a blanket to work comfortably, you may wonder, What am I paying so much each month to heat?
The answer is, you’re probably paying most to heat the ceiling and second floor rather than your primary living space. Settling for uneven temperatures or a heating system that underperforms isn’t the only option. Instead, consider a more direct, dependable, and energy-efficient alternative: radiant heat.

Radiant-heating systems aren’t new. In fact, ancient Korea used controlled fires to heat air chambers under floors and behind walls. Fast-forward a few thousand years, and the highly evolved innovative materials and designs behind today’s modern systems are capable of providing efficient, uniform heat that offers numerous advantages over traditional HVAC systems.
Their silent, dust-free operation eliminates allergy problems often associated with heating ducts while distributing even heat underfoot. And, on top of all these benefits, radiant heating built into your home’s flooring aims to keep the living space comfortable—no matter how tall the ceiling.
Why Forced Air Falls Short
If you currently rely on forced-air heat and are fed up with its less-than-stellar performance, don’t be too quick to put all the blame on your heating system. The way your home is designed plays a part in how efficiently (or inefficiently) the rooms warm up. Think back to your elementary school science lessons, and remember: Hot air rises. When your forced-air heating system pushes heat out of its vents, the heat naturally rises toward the ceiling. Your rooms become cozily warm at the top, but remain chilly down below, where you do your actual living.
To cope, shivering homeowners may move closer to the nearest vent or resort to cranking up the thermostat to achieve a comfortable temperature at ground level, producing more heat than actually necessary and ultimately costing more money to do so. For rooms with standard 9-foot ceilings, this law of science is simply an inconvenience; but in the case of high ceilings, upwards of 12 feet, it can be costly. In a two-story house, the result is too much heat upstairs, and the only solution is to open some windows to let the heat (the heat that you’ve just paid for) escape the house. What’s a homeowner to do?
Concentrating Heat Where You Need It Most
While forced-air systems push heat into a room in cycles, unaffected surrounding surfaces can remain cool to the touch and actually steal warmth from your body, leaving you chilly despite the fact that your heating system is working overtime. Radiant floor heating systems, on the other hand, are designed to deliver even heat throughout your rooms by radiating constant warmth from beneath your flooring. The process warms the cooler areas it encounters first—the floor, the furniture, and the people occupying the living space. Because radiant heat warms objects in the room as well as people, you won’t be giving up body heat to, say, that favorite chair of yours. It, too, will emit a welcoming warmth when you sit down, rather than cause you to reach for the nearest woolen blanket.
Choosing the Most Efficient Radiant System
Before committing to an upgraded heating setup, be it in that one lofty room or your whole house, working knowledge of the systems can help you optimize your energy savings with this already highly efficient system. Radiant floor heating travels through flexible hydronic tubes or electric coils installed either inside or adjacent to panels laid beneath your flooring material of choice. The system’s energy source and materials do vary from manufacturer to manufacturer and considerably impact the energy efficiency of this heating system.
Hydronic radiant floor systems lower fuel bills by utilizing a boiler to heat water within a network of tubes beneath your home flooring to relatively low temperatures. Because the whole floor receives even heat, the water doesn’t have to be as hot as what might run through a conventional radiator.
For best possible heat transfer, panels should be made with a very conductive material—aluminum is the most common. Depending on the specific alloy, aluminum can conduct heat 232 times more efficiently than lightweight gypsum concrete, a standard alternative. Put simply, a material that offers better heat transfer means you’ll get more heat, more quickly, and for less energy (and less money). The thin, highly conductive panels produced by industry leader Warmboard require the least energy to operate of any radiant-heating system, providing the same comfort as competing systems while the water in the hydronic tubes can be more than 30 degrees lower than the others. That alone translates into a 10 to 20 percent savings in your monthly energy bills compared to other radiant options!
Whether you are building a brand-new home with a bold design or already live with the luxury of high ceilings, you can ensure affordable everyday comfort by opting for radiant floor heating. Even if the ceiling heights in your home extend only slightly above average, there are enough compelling reasons to choose radiant heat—its ease on allergies, quiet operation, and seasonal energy savings—that the system shines in lofty areas and smaller home additions alike. Install a state-of-the-art radiant-heating system, and you and your family will enjoy its benefits for years to come.
This post has been brought to you by Warmboard. Its facts and opinions are those of BobVila.com.
The post The Best Way to Heat a Home with High Ceilings appeared first on Bob Vila.
]]>The post Why Is My Dryer Not Heating? Solved! appeared first on Bob Vila.
]]>RELATED: This is How Long Each of Your Major Appliances Should Last
1. Check the lint filter.
The filter is the first line of defense against fabric lint, dust, and hair. Sure, you’ve heard this before, but you really do need to empty the dryer’s lint filter after every load.
Some types of clothing—socks, especially—shed more than others. But no matter the load, getting into the habit of wiping the filter out after every wash and dry will put you ahead of the game in both routine appliance maintenance and fire prevention.
Indeed, failure to clean the dryer is the leading cause of dryer fires, according to the U.S. Fire Administration.
2. Inspect where the dryer vent exits the house.
When the dryer’s running, there should be a steady, unhindered stream of warm air passing through the vent exit. If you have mesh screening stretched across it, you’d do well to remove the mesh, which can catch lint and obstruct airflow and prevent your clothes from drying completely.
Instead, install a proper louvered door that opens only when the dryer’s running. You can purchase one at your local home center or have it delivered from Amazon.
3. Clean the inner reaches of the vent.
If the lint filter and the exit of the vent are clear, you probably need to clean the inner reaches of the vent. This cleaning job isn’t that big a chore, especially if you use one of the brush kits made for this express purpose (like this one from Amazon).
4. If possible, shorten the exit.
Keep in mind that the exit vent on your dryer should be as straight and as short as possible. If the air exiting the dryer has to be pushed too far or make its way around kinks or sags in the hose, drying times can significantly lengthen.
That’s not only a nuisance, but it’s also a waste of energy (and money). If you can, consider moving your dryer to a position that allows for a shorter hose.
5. Tape all joints in the dryer vent.
Sealing the interior and exterior joints will prevent air leaks as well as keep lint from catching at these locations. (While screws and rivets usually make good fasteners, they’re sure to snag lint if they’re holding together joints in dryer vents—when used, they should be covered.) Do keep in mind that duct tape can and will melt when exposed to heat, which could cause the piece of tape to peel back enough so that it becomes a lint magnet. Heat-resistant aluminum tape, however, won’t falter and is, therefore, better for the job.
An important word of caution: If you’re using one of those exit hoses that look like a Slinky covered with vinyl, replace it. Now. The U.S. Consumer Product Safety Commission recommends choosing an aluminum semi-rigid duct, because a flexible plastic or foil tube can more easily trap lint, and that buildup can lead to overheating.
While problems with exit vents aren’t the only factors that can lead to a dryer not drying well, they’re by far the most common. Scope out these issues before you ring the repair folks, and you might just save yourself the price of an expensive service call.
6. Call a professional to check the power source.
The dryer’s power, whether it’s gas or electric, could be to blame for the lack of heat.
If the gas is off, a gas clothes dryer will not dry the load. Meanwhile, an electric dryer plugs into a 240-volt electric outlet, often with two circuit breakers installed to control power to it. If one flips and the machine only gets a partial voltage of 120 volts, the dryer will spin but not heat up.
Check the circuit breaker to see if anything was tripped, and call in a professional if there seems to be a larger electrical problem at play.
The post Why Is My Dryer Not Heating? Solved! appeared first on Bob Vila.
]]>